_GOTOBOTTOM
Rotary Wing
Discuss helicopters and other rotary wing aircraft from any era.
WIP: 1/35 UH-60A MedEvac build
HeavyArty
_VISITCOMMUNITY
Florida, United States
Joined: May 16, 2002
KitMaker: 17,694 posts
AeroScale: 1,728 posts
Posted: Sunday, September 25, 2011 - 03:15 AM UTC
My latest project is a 1/35 UH-60A MedEvac. I have wanted to build one for a long time, but wasn't brave enough to try to scratch the litter carousel and other MedEvac-specific parts. Now that there is a conversion set and decals for them from Werner's Wings, I decided to tackle it. I haven't decided which aircraft I will do off the WW decal set yet. I think it will be the 3 ID one, but I am also considering the USFK helo with external tanks and the yellow stripes. I'll decide on markings later. On to the build...

I am using the Academy UH-60A/L kit as a base. To it, I am adding the Werner's Wings UH-60 MedEvac Interior conversion, Eduard Interior and Exterior PE sets, parts of Cobra Company's UH-60L Correction and Deatail set (rear wall and gunner's bulkheads w/ A/C outlets), and parts from Cobra Company's UH-60 Detail Set. I will be using Werner's Wings Black Hawk Decal set as well.

Here are some of the above items.

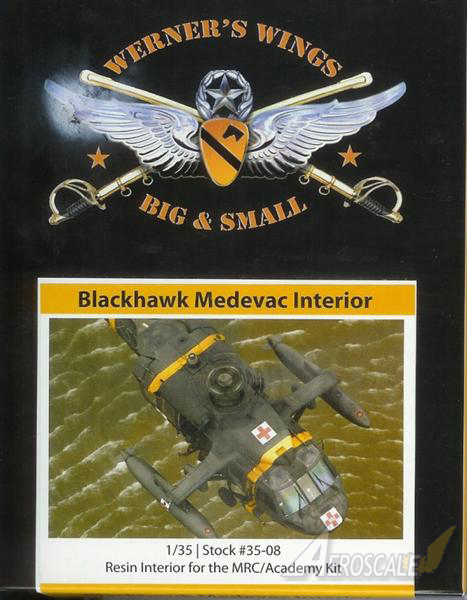
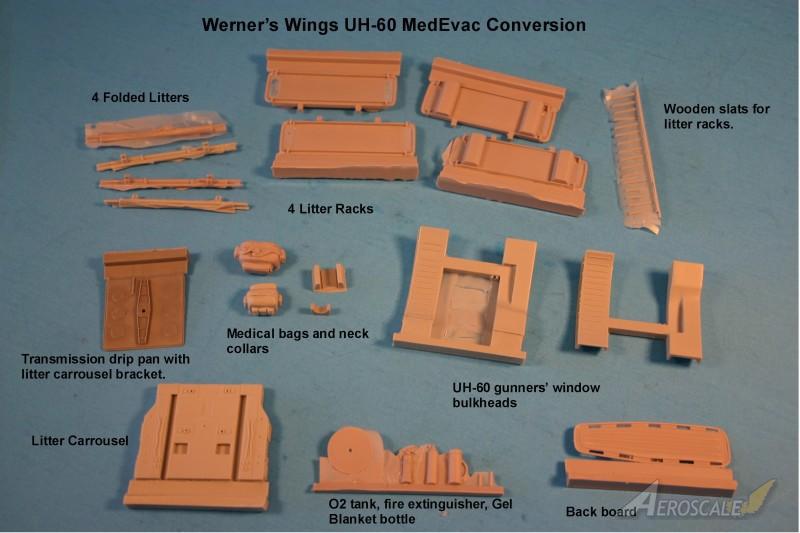
WW Black Hawk MedEvac Interior:


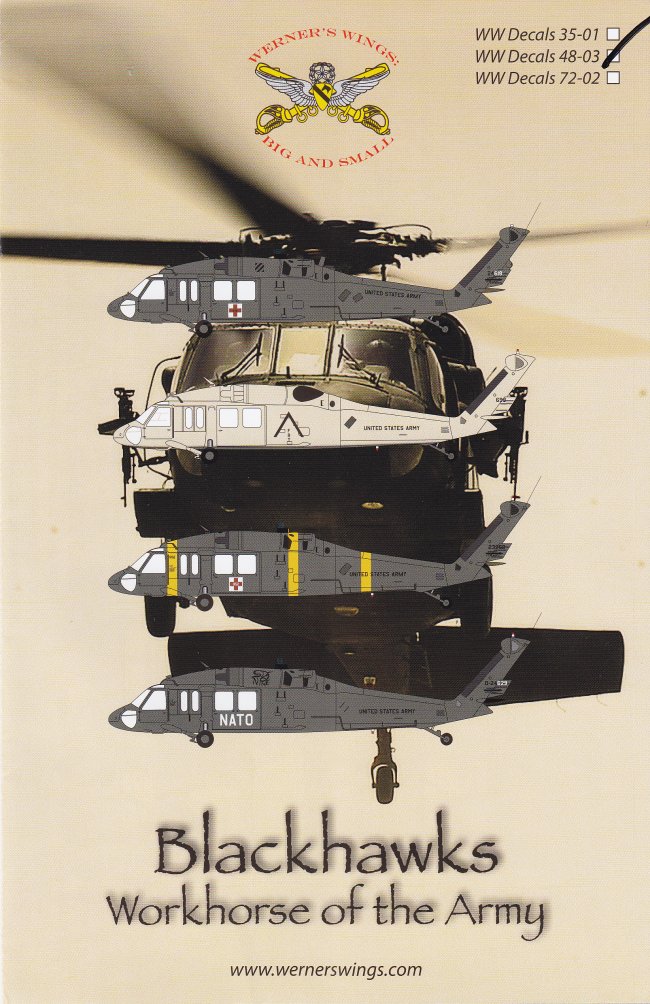
WW Black Hawk Decals:


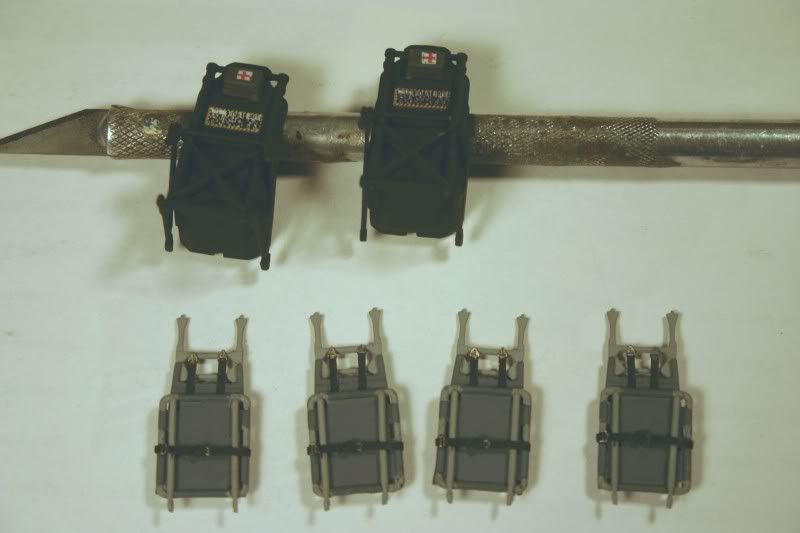
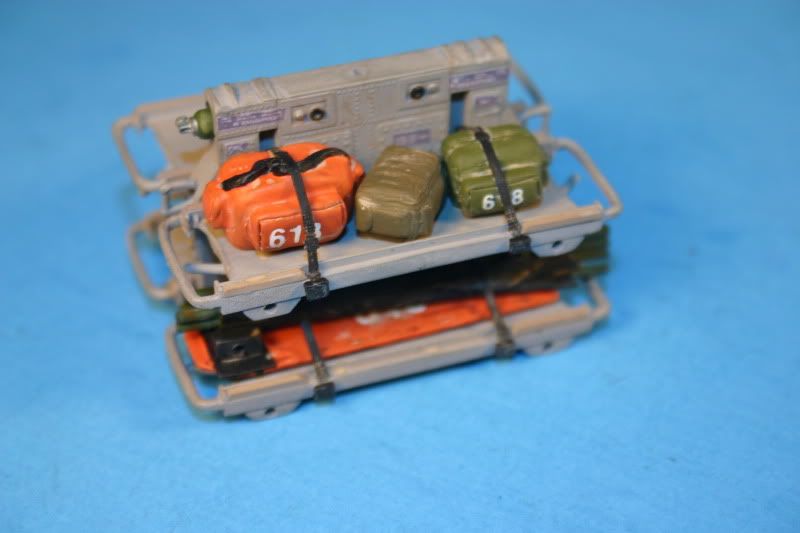
So far, I have been working on the MedEvac parts and the interior. I have built the WW litter carousel with a few additions. After looking over my UH-60A MedEvac pics at Prime Portal, I notices a few missing details.

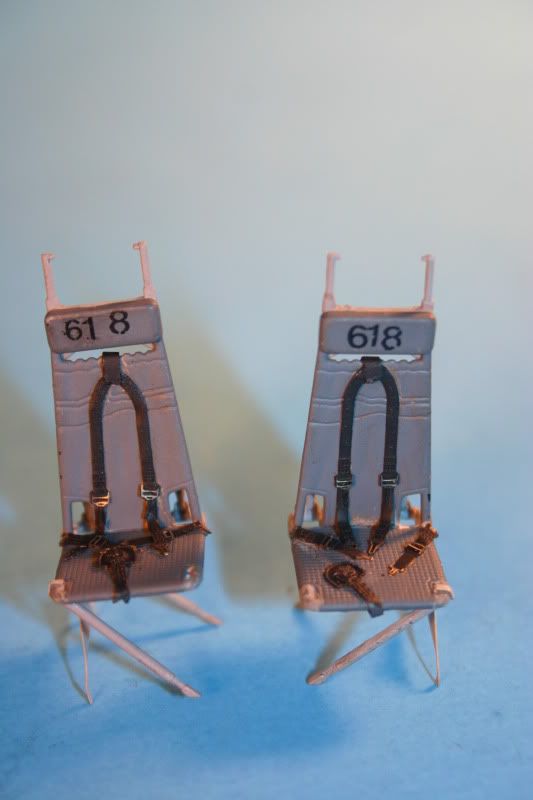
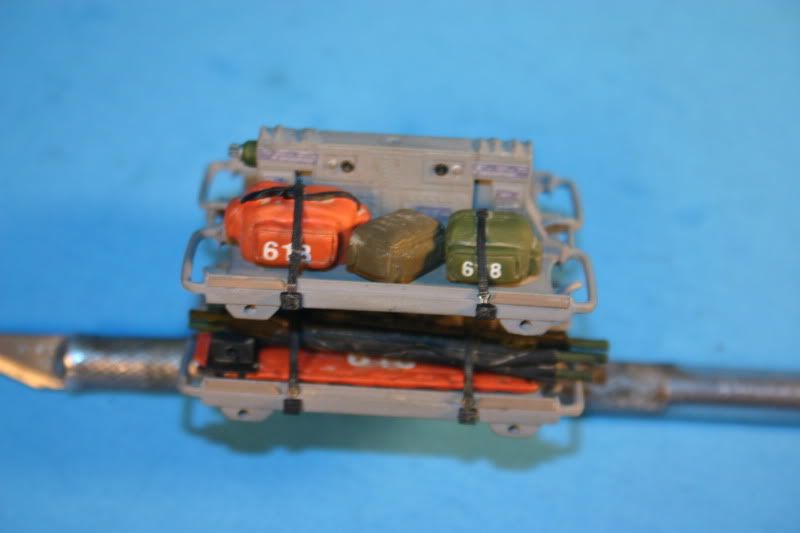
Mainly, these were the two D-shaped handles on the ends that lock it in place and allow the carousel to rotate. Also missing are the seat belts to hold the litters on and the buckles on the outside rails of the litter trays. I added these items, using shovel handles for the lock handles, and Eduard seat belts from the interior set for the belts. I also added a lever on each end of the litter tray that locks it in place onto the carousel.


I also printed up some of the more prominent stencils on computer decal paper to add some more details.

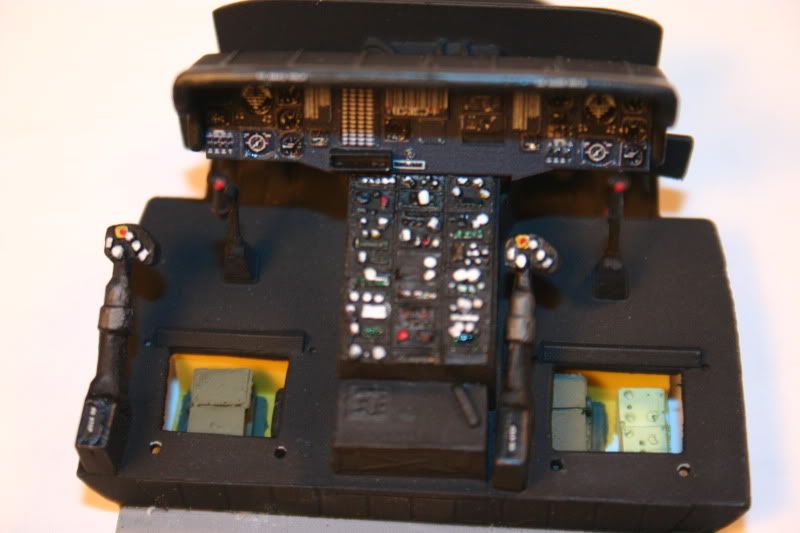
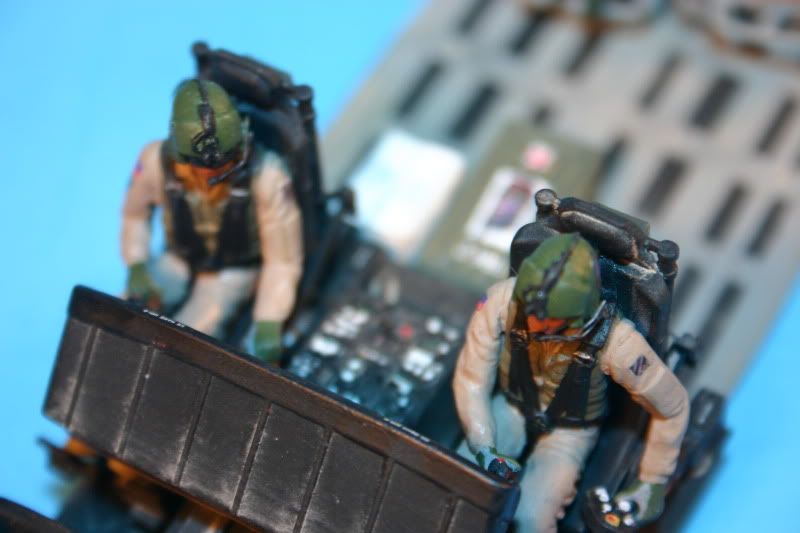
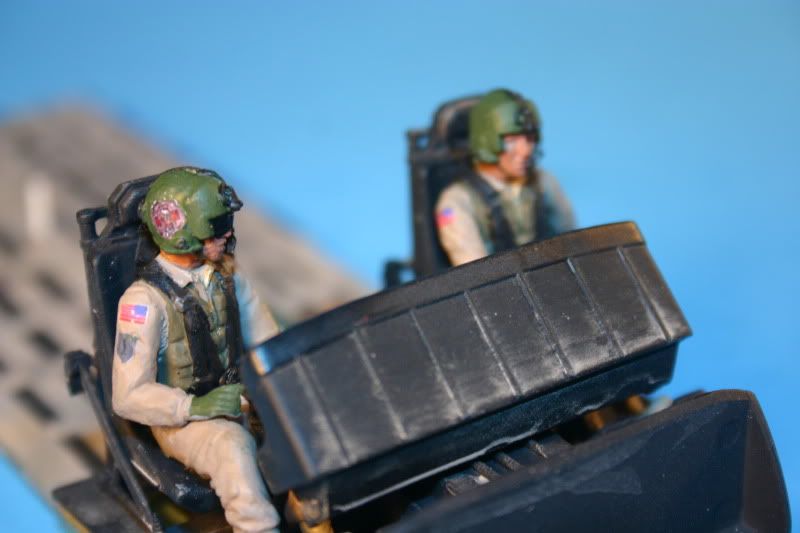
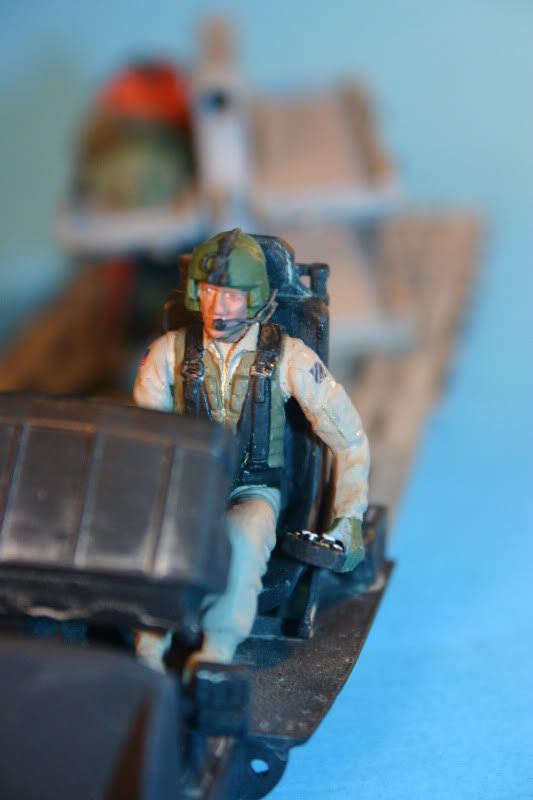
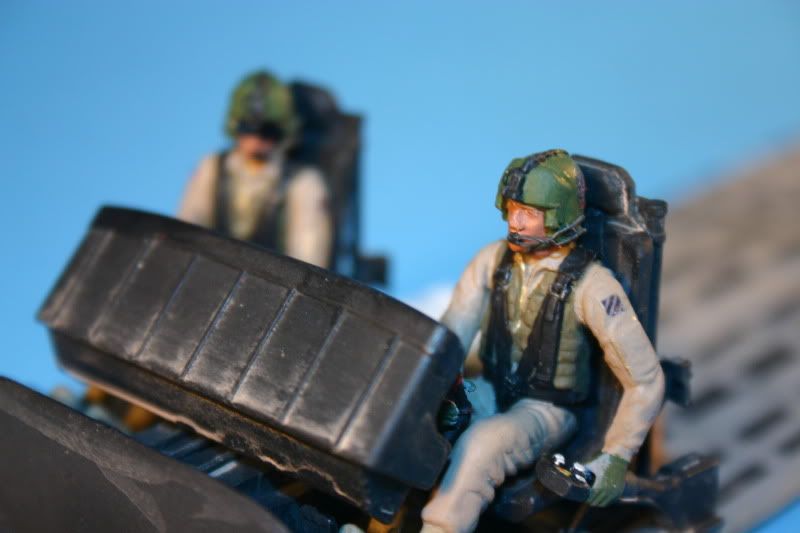
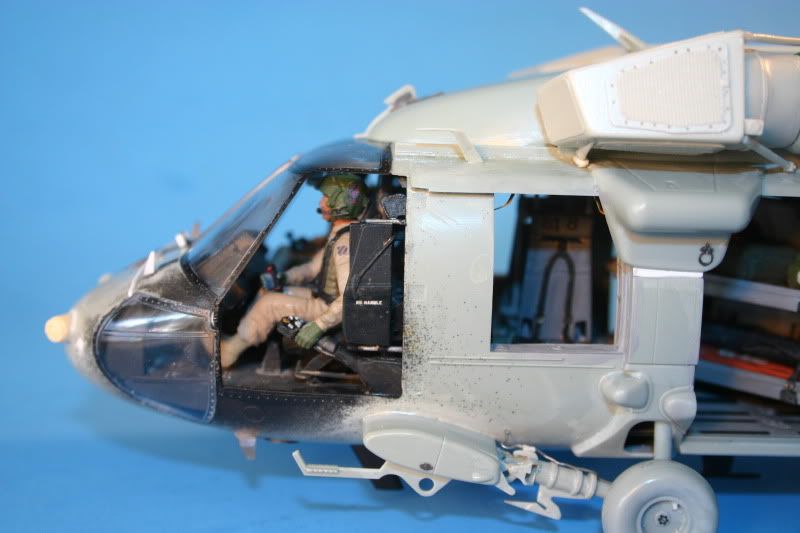
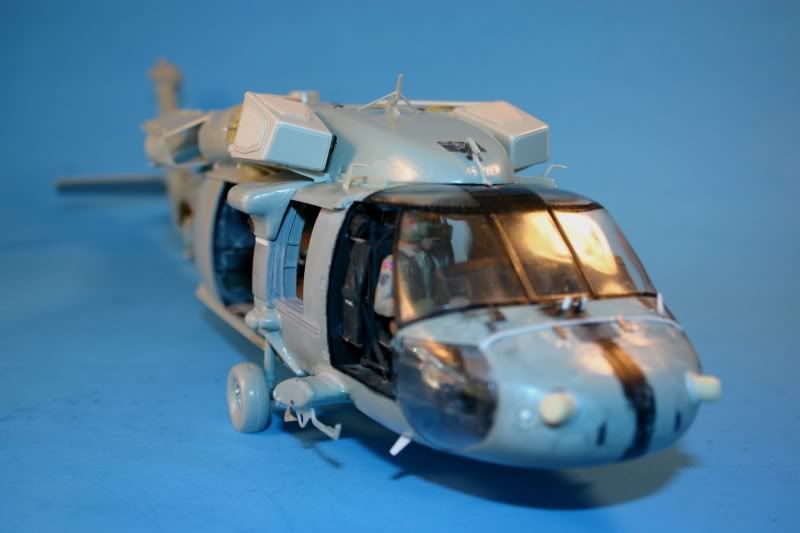
I worked on the cockpit using Cobra Company's center console, collectives, and a few other bits. I also used the Eduard pre-painted IP, which is the first time I have used them. I like how it went together and how it looks. I think it came out pretty nicely.


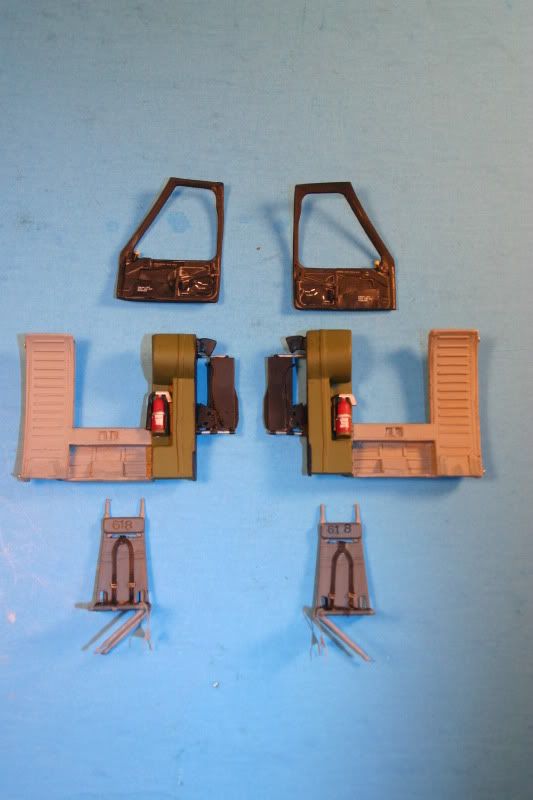
I used the gunners' bulkheads from CC's UH-60L Corrections and Detail set as opposed to the ones that come in the WW MedEvac set. I think CC's looks better and are more detailed. I am also a little biased since I mastered CC's as well. Some say they are too big in the upper, rounded portion. They are the exact size and shape as ones I measured in Black Hawks. The issue seems to be seat placement. If you angle the pilots' seats back too far, they will interfere with the bulkheads. If placed correctly, they fit perfectly. Here they are.


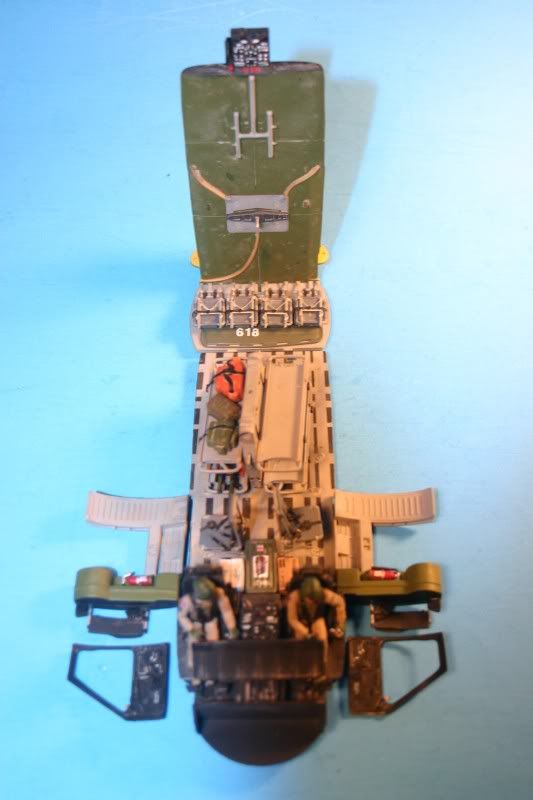
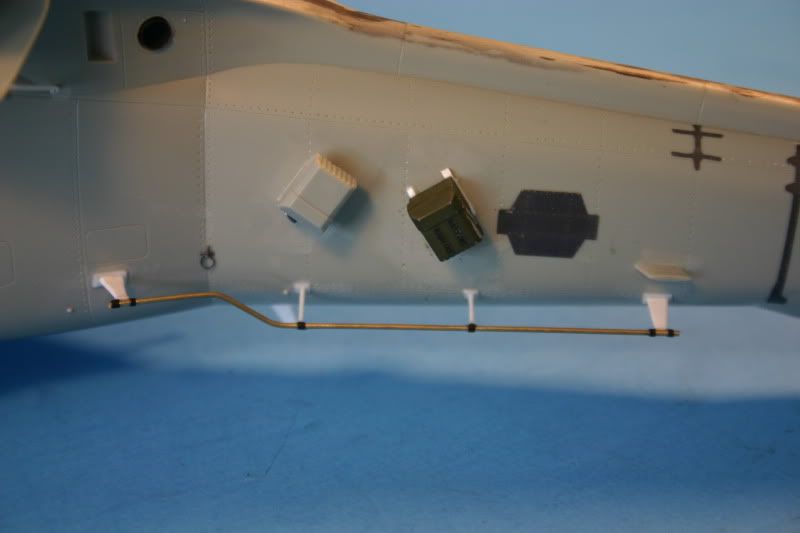
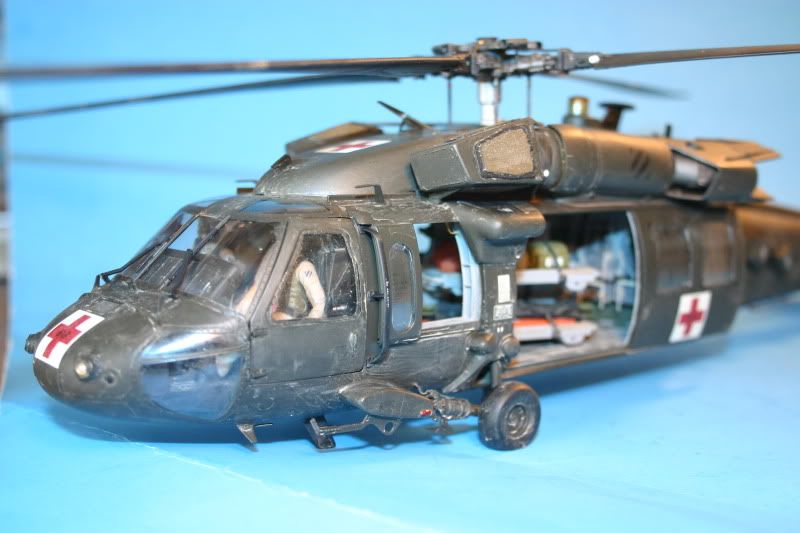
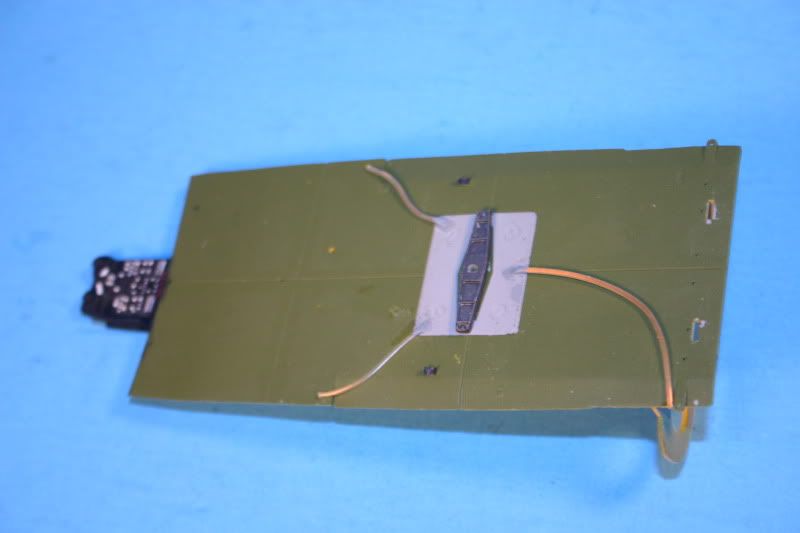
Lastly, I have detailed the cabin ceiling with the transmission drip pan from Eduard's PE set, again, it is better detailed than the one in WW's set. I cut off the carousel bracket from the WW interior set and added it to the Eduard piece. I also added the drain lines from wires. I also added the mounting brackets for the central seat support rod, which of course is not used with the MedEvac interior.


That is all so far. I will post more as I get further along.

Thanks for looking and as always, all comments are welcomed.
staybolt
_VISITCOMMUNITY
Wisconsin, United States
Joined: September 21, 2011
KitMaker: 20 posts
AeroScale: 4 posts
Posted: Sunday, September 25, 2011 - 04:27 AM UTC
WOW! Fantastic work from you as usual, that is some pretty fine detail. Can't wait to see it all come together. I'll be watching this one! All the best.

Pat.
HeavyArty
_VISITCOMMUNITY
Florida, United States
Joined: May 16, 2002
KitMaker: 17,694 posts
AeroScale: 1,728 posts
Posted: Sunday, September 25, 2011 - 02:11 PM UTC
Thanks Pat. I'm continuing to plug away at it. Keep an eye for an update later in the week.
Anirudharun
_VISITCOMMUNITY
England - West Midlands, United Kingdom
Joined: February 16, 2008
KitMaker: 597 posts
AeroScale: 30 posts
Posted: Sunday, September 25, 2011 - 08:42 PM UTC
Looking very good so far Gino, I can't wait to see how this turns out! I've always wanted to build a 1/35th Blackhawk and maybe your build will be the inspiration I need.

Are you planning on having any crew in it? Actually are there even any appropriate crew figures for this?

Keep up the good work
Anirudh
HeavyArty
_VISITCOMMUNITY
Florida, United States
Joined: May 16, 2002
KitMaker: 17,694 posts
AeroScale: 1,728 posts
Posted: Monday, September 26, 2011 - 12:06 AM UTC
Thanks Anirudh. I hope I do inspire you to build one as well. It is a great kit and can be super detailed to look awsome.

I do plan on adding a crew. There are a few options that will work for them. Check out this thread for options.

I have the Nemrod set and a few of the OH-58D pilots that I may use, not sure which yet.
HeavyArty
_VISITCOMMUNITY
Florida, United States
Joined: May 16, 2002
KitMaker: 17,694 posts
AeroScale: 1,728 posts
Posted: Sunday, October 02, 2011 - 02:39 PM UTC
Progress continues on my MedEvac helo. Not much of an update this week.

I have added a few decals to the interior. The Werner's Wings stencils have a few unique ones. They include NO HAND HOLD decals for the IP hood, NO STEP markings for the tops of the collective boxes, and the door inner stenciling. They are all very small and in perfect register, very nice. They are hard to see in the pics, but trust me, they look great, much better than the kit versions. I also added a few avionics boxes under the seats.


Here are the doors and the pilots' armor panels. I used the Eduard door PE and handles for the armor, along with some thin solder for the cables.


I also built the rear seats that will be folded up along the rear bulkhead. I used the kit parts and folded them up, then added Eduard seat belts to hold them in place. I also added the kit decal for the back of the seat and a couple red crosses for the First Aid kits.


This will probably be the last update for a while. I have ankle surgery tomorrow and will be laid up for a while. Wish me luck.
staybolt
_VISITCOMMUNITY
Wisconsin, United States
Joined: September 21, 2011
KitMaker: 20 posts
AeroScale: 4 posts
Posted: Wednesday, October 05, 2011 - 09:59 AM UTC
OUCH! Sounds painful. Hope you have a speedy recovery. Maybe some additional bench time will come out of this? All the best.

Pat.
HeavyArty
_VISITCOMMUNITY
Florida, United States
Joined: May 16, 2002
KitMaker: 17,694 posts
AeroScale: 1,728 posts
Posted: Wednesday, October 05, 2011 - 11:10 AM UTC
Thanks Pat. Surgery went well. Now I have to sit on the couch for a while before I can get back to the bench. Oh joy...
HeavyArty
_VISITCOMMUNITY
Florida, United States
Joined: May 16, 2002
KitMaker: 17,694 posts
AeroScale: 1,728 posts
Posted: Wednesday, October 12, 2011 - 03:15 AM UTC
My recovery from ankle surgery is going well. I am able o sit at the bench for while now, so I have made some progress.

I have pretty much completed the interior. I added the folded seats to the rear wall, along with the back board out of the Werner's Wings MedEvac set. I added the seat retainer wires from the Eduard PE, and used dry transfer numbers to label the backboard w/the aircraft's tail code.


I also completed the crew chiefs' seats with Eduard PE belts and retaining wires, and dry transfers again.


I added gear to the litter carousel. The orange and dark green bags are from the WW set. The OD medic bag is from the Dragon US Special Forces set. I also added another backboard from Pro Arts' DUMVEE set, and the litters from the WW set.


On the doors, I added the emergency release handle (yellow knobs). Everything was also weathered with a dirty-brown/sandy wash.


Lastly, I put a flight crew in it. The pilots are from Academy's OH-58D kit. They are the best modern(ish) pilots in plastic. They come molded with the seat belts on them, which is a nice feature. All I added to them are the circular belt releases and the belts from their shoulders to the seats. A also added home-printed shoulder and helmet patches. I changed out the heads for ones with current HGU-56P helmets with NVG mounts that I got from a fellow modeler. I love the helmets.


I thought this pic would be interesting, an exploded interior view.


As usual, all comments welcomed and thanks for looking.
Wisham
_VISITCOMMUNITY
Alaska, United States
Joined: September 05, 2007
KitMaker: 133 posts
AeroScale: 3 posts
Posted: Wednesday, October 12, 2011 - 12:43 PM UTC
Nice pics, I like the final pose, it brings it all together. You have great attention to detail. Have fun, warren
HeavyArty
_VISITCOMMUNITY
Florida, United States
Joined: May 16, 2002
KitMaker: 17,694 posts
AeroScale: 1,728 posts
Posted: Wednesday, October 12, 2011 - 12:48 PM UTC
Thanks Warren. I like the exploded view as well.
fhvn4d
#159
_VISITCOMMUNITY
Massachusetts, United States
Joined: April 07, 2008
KitMaker: 803 posts
AeroScale: 42 posts
Posted: Wednesday, October 12, 2011 - 02:46 PM UTC
Gino it looks FANTASTIC.
HeavyArty
_VISITCOMMUNITY
Florida, United States
Joined: May 16, 2002
KitMaker: 17,694 posts
AeroScale: 1,728 posts
Posted: Thursday, October 13, 2011 - 12:05 AM UTC
Thanks Brian. I am having fun with this one.
staybolt
_VISITCOMMUNITY
Wisconsin, United States
Joined: September 21, 2011
KitMaker: 20 posts
AeroScale: 4 posts
Posted: Friday, October 14, 2011 - 08:05 PM UTC
Absolutely beautiful work! The 'pit and figs look great and the detail for the rear compartment is amazing. Love what you're doing with this. All the best.

Pat.
HeavyArty
_VISITCOMMUNITY
Florida, United States
Joined: May 16, 2002
KitMaker: 17,694 posts
AeroScale: 1,728 posts
Posted: Saturday, October 15, 2011 - 01:29 AM UTC
Thanks Pat.
HeavyArty
_VISITCOMMUNITY
Florida, United States
Joined: May 16, 2002
KitMaker: 17,694 posts
AeroScale: 1,728 posts
Posted: Sunday, October 23, 2011 - 08:00 AM UTC
I have been continuing the MedEvac build. I have finished the basic construction and am ready to lay down some paint. So here goes as I walk you through it.

First, I used two new products by Cobra Company. They are their latest sets; the Engine Inlet Barrier Filters and the UH-60 Easy Egress Windows. They both look great.

Here are the filters. They went on easily and look awesome. I Think they give it a really mean look.


On the pilots' windows, I added the interior pull straps that allow the windows to be pulled out for egress in the event of a crash or water ditching. The windows are crystal clear and look great.


I also added the CMWS (Counter-Missile Warning System) receptors on the nose and tail, using modified Cobra Company parts. Along with APR-139 receivers on the tail using plastic rod.


I constructed the antenna on the left side of the fuselage using 0.020 brass rod and plastic rod and sheet, along with small pieces of wire coverings.


I used most of the Eduard Exterior PE set, some of the pieces are rediculously small and I didn't use them with my big hands.


I also added PE and the de-icing lines on the rotor head.


And the PE parts on the tail rotor.


I also added the yellow grab handles in the gunner/CEs' window openings.


A couple overall pics.


That's it for this update. I hope to get some paint on it soon.
HeavyArty
_VISITCOMMUNITY
Florida, United States
Joined: May 16, 2002
KitMaker: 17,694 posts
AeroScale: 1,728 posts
Posted: Thursday, October 27, 2011 - 07:35 AM UTC
I have finally finished the UH-60A MedEvac build.

I painted it with Testors Model Master Acrylic Helo Drab.

I used Werner's Wings Blackhawk decals for markings. I also used the WW Blackhawk stencils on it as well.

I marked it as "Medic 618" from C Co (Charlie Med), 2 Bn 3rd Aviation Regiment, 3rd ID. It will represent a bird from a deployment in the mid 2000's, around '05, before ACUs.

I weathered it with washes with a couple sandy and dirty brown acrylic colors.

Here she is.


I shortened up the CMWS receivers on the nose and relocated the APR-39 receivers on the tail to under the stabilator.


More photos here.

Next up is the Crew Chief and Flight Medic on the ground, some grunts and wounded, and a dio base of it on an Iraqi road.

As always, all comments welcomed.

WOOTY
_VISITCOMMUNITY
Queensland, Australia
Joined: August 10, 2004
KitMaker: 65 posts
AeroScale: 31 posts
Posted: Friday, March 02, 2012 - 05:44 PM UTC
Gino
Very Nice
I am starting one very soon still getting all the pieces together.
As always very tidy accruate job on the kit.
How did you find the WW resin to work with?
Cheers
Rob
HeavyArty
_VISITCOMMUNITY
Florida, United States
Joined: May 16, 2002
KitMaker: 17,694 posts
AeroScale: 1,728 posts
Posted: Saturday, March 03, 2012 - 02:35 PM UTC
Thanks Rob. The WW resin set was great. Perfectly cast resin and small attachment points with almost no flash. Just a little clean-up and you are ready to go.

Good luck on yours.
HeavyArty
_VISITCOMMUNITY
Florida, United States
Joined: May 16, 2002
KitMaker: 17,694 posts
AeroScale: 1,728 posts
Posted: Monday, May 14, 2012 - 01:54 AM UTC
Since I am moving in a couple of weeks, I didn't want to start a new model, so I took out a couple figures that I had started and never finished for this project. The figures are the two crewmen; the Crew Chief and Flight Medic, for the UH-60A MedEvac.

Here are both of them.


The Crew Chief in sand flight suit is a heavily converted Verlinden 1/32 Cobra Pilot. I shortened his torso and legs a bit to make him 1/35. I swapped out his arms with a couple from the Coree UH-60 crew set (with the Barbie pilot), and used a head with HGU-56 helmet from the Nemrod UH-60 Crew that I cast up. I then added the maxillofacial shield from A&B putty.


The Flight Medic is from the Trumpeter CH-47D Crew Set. I added the leg pockets with A & B putty and used a cast of the Nemrod helmet. The Trumpeter figures are really short in stature, but that happens in real life too, so no issues.


All of the decals; unit patches, flags, helmet patches, etc. were made by me on my home computer/printer with computer decal paper as well.

I really like the look of the Crew Chief with the maxillofacial shield. I am playing with different skull images for the shield decal. We'll see how that comes out.
HeavyArty
_VISITCOMMUNITY
Florida, United States
Joined: May 16, 2002
KitMaker: 17,694 posts
AeroScale: 1,728 posts
Posted: Monday, May 14, 2012 - 09:15 AM UTC
I added a lower skull (mandible and nasal bone) to the shield. What do you think?


It was inspired by this:
mojo72
_VISITCOMMUNITY
Kuala Lumpur, Malaysia
Joined: September 05, 2010
KitMaker: 160 posts
AeroScale: 15 posts
Posted: Monday, May 14, 2012 - 10:07 AM UTC
Nicely done on the interior. Also, the design on the crew chief helmet definitely gets my vote, excellent

Regards
HeavyArty
_VISITCOMMUNITY
Florida, United States
Joined: May 16, 2002
KitMaker: 17,694 posts
AeroScale: 1,728 posts
Posted: Monday, May 14, 2012 - 12:22 PM UTC
Thanks Muhammad. I really like how the Crew Chief's shield came out as well.
redleg12
_VISITCOMMUNITY
New Jersey, United States
Joined: March 11, 2007
KitMaker: 872 posts
AeroScale: 22 posts
Posted: Monday, May 14, 2012 - 10:01 PM UTC
Very nice figures....love the crew chief....reminds me of some I knew!!

Rounds Complete!!
HeavyArty
_VISITCOMMUNITY
Florida, United States
Joined: May 16, 2002
KitMaker: 17,694 posts
AeroScale: 1,728 posts
Posted: Monday, May 14, 2012 - 11:30 PM UTC
Thanks Mike. I have known a few guys like that too...
 _GOTOTOP