_GOTOBOTTOM
Modern (1975-today): USA
Modern aircraft of the United States.
Kinetic 1/48 C-2A Greyhound build
Red4
_VISITCOMMUNITY
California, United States
Joined: April 01, 2002
KitMaker: 4,287 posts
AeroScale: 1,164 posts
Posted: Thursday, October 27, 2011 - 03:53 AM UTC
Recently received this as a review item and since the inbox review is complete, it's time to start putting this bad boy together.
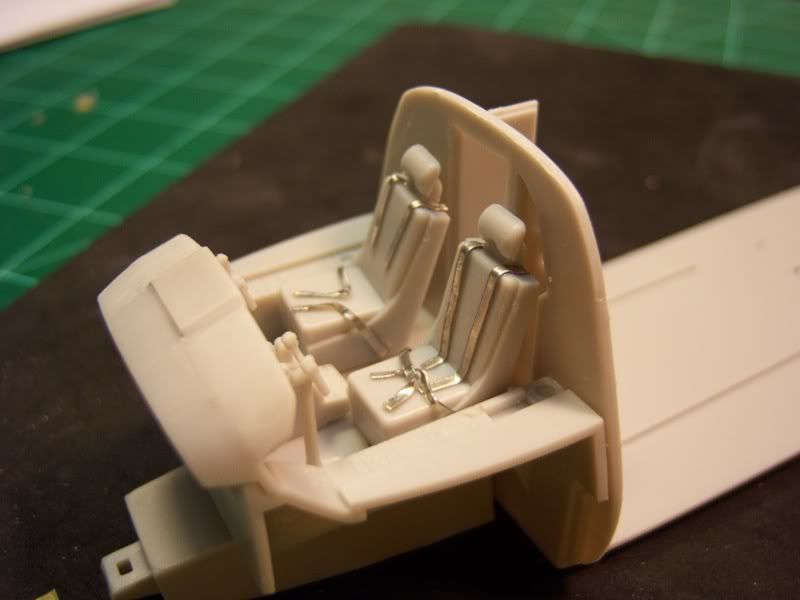
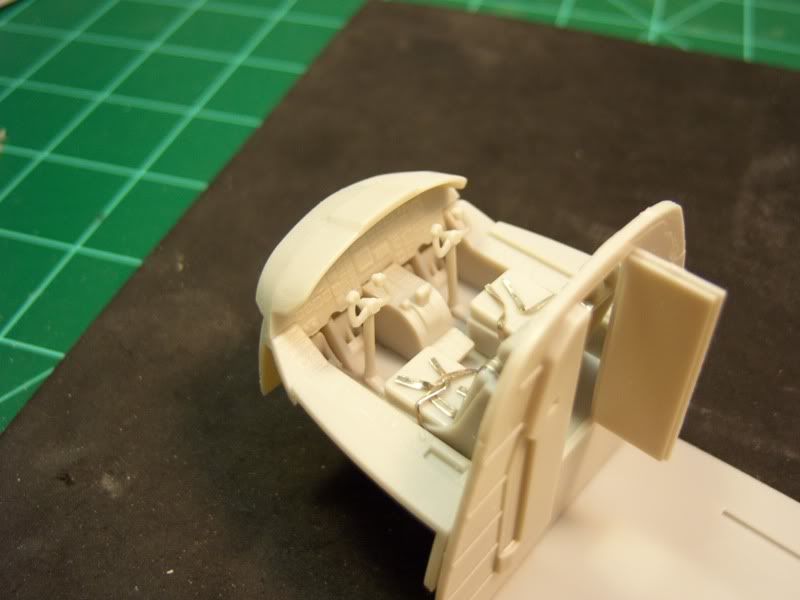
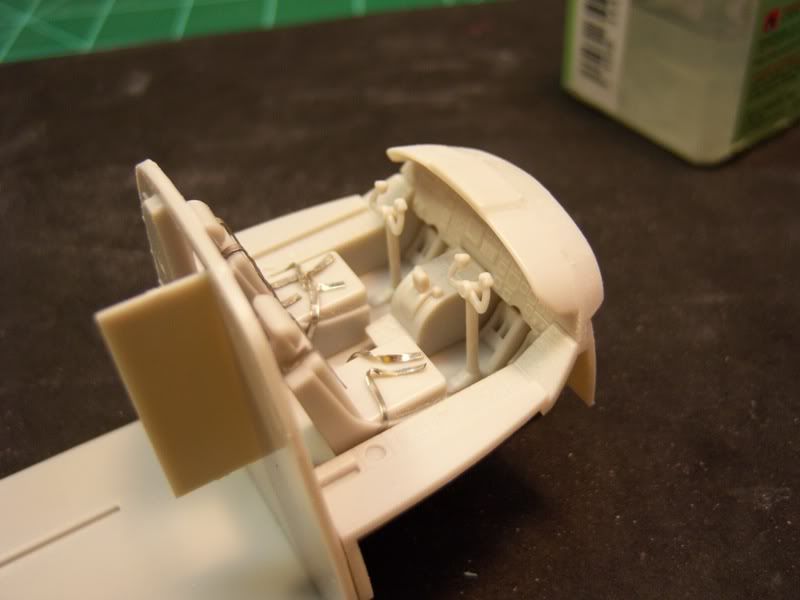
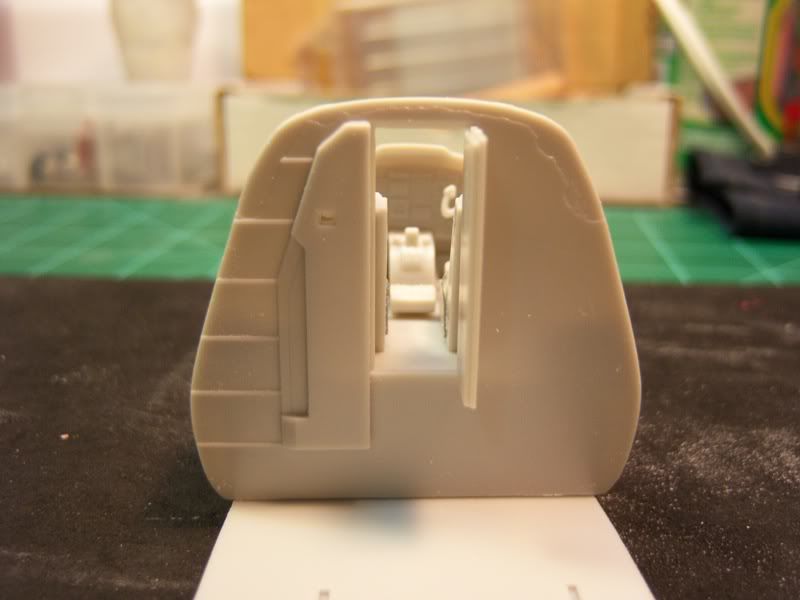
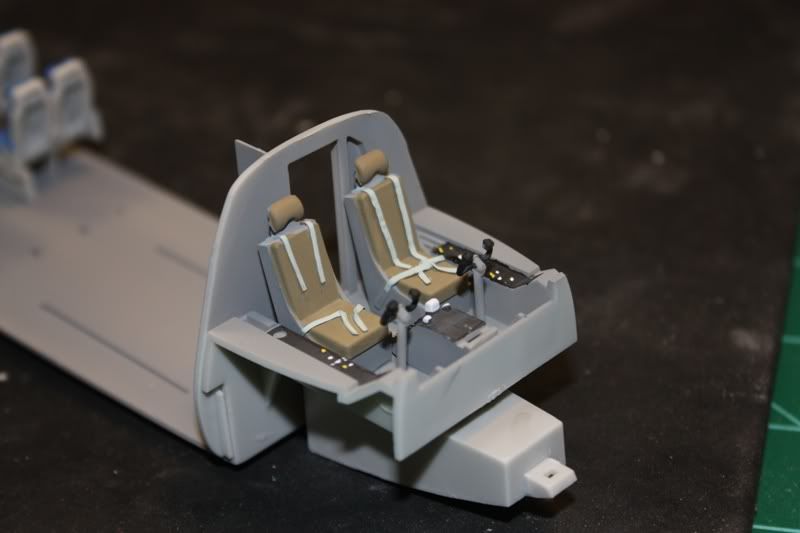
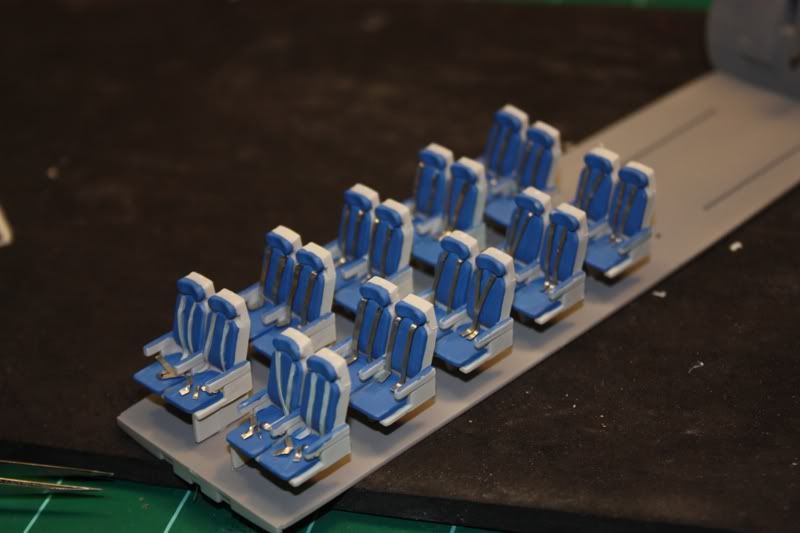
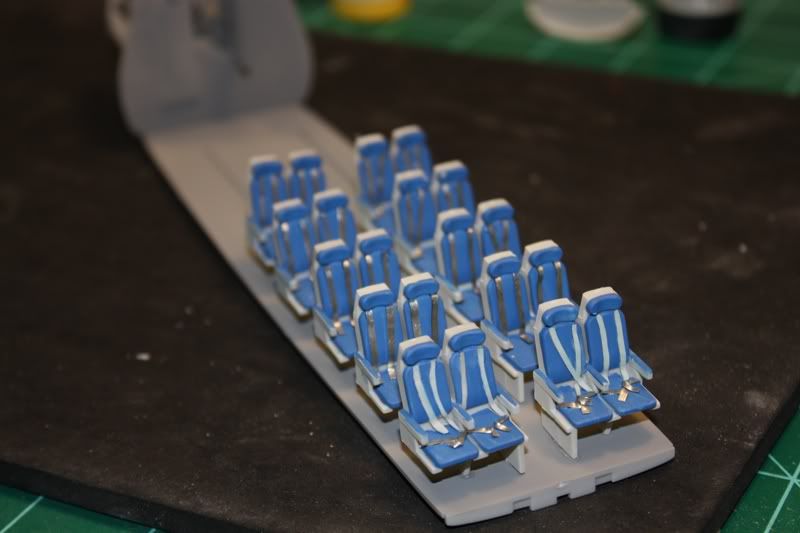
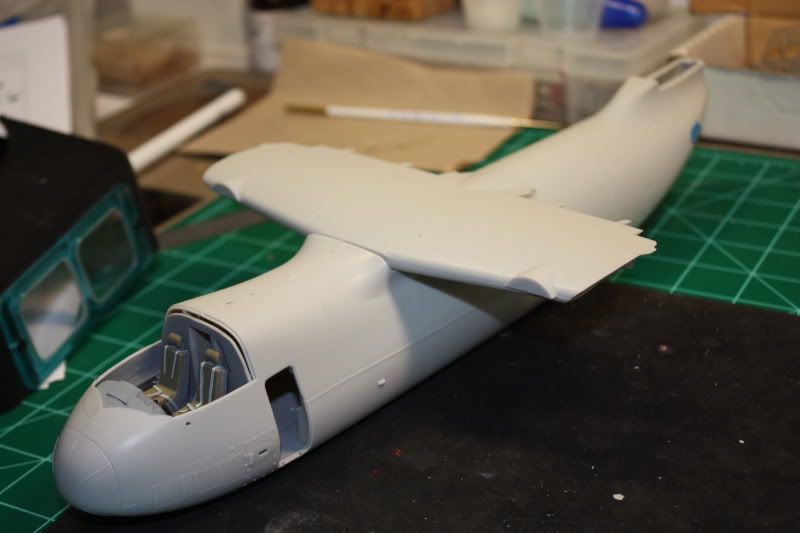
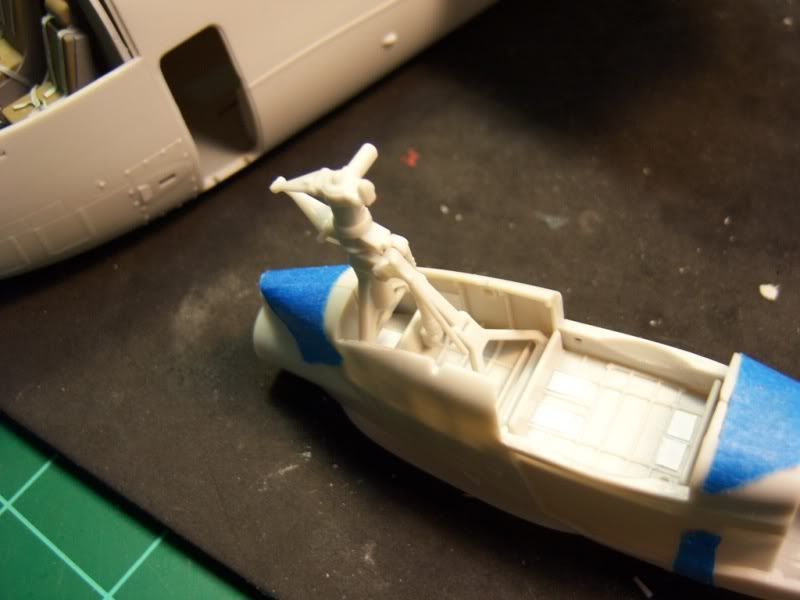
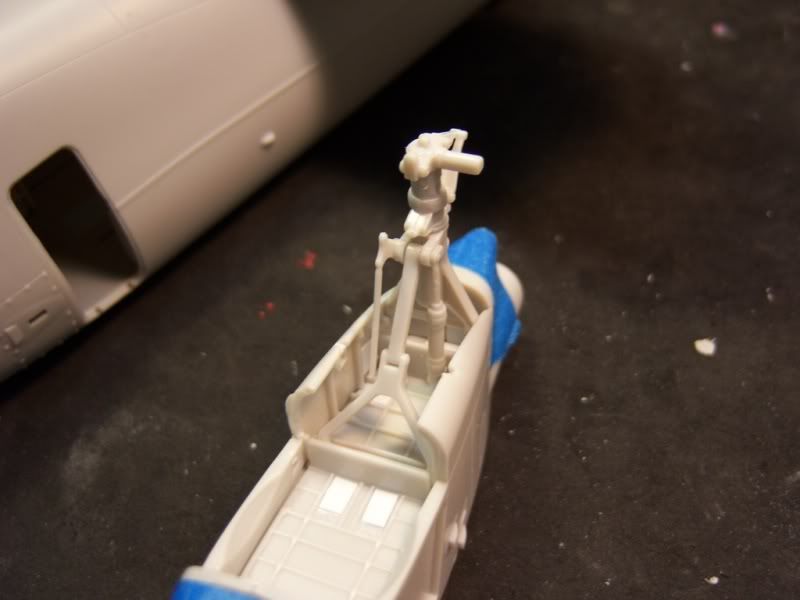
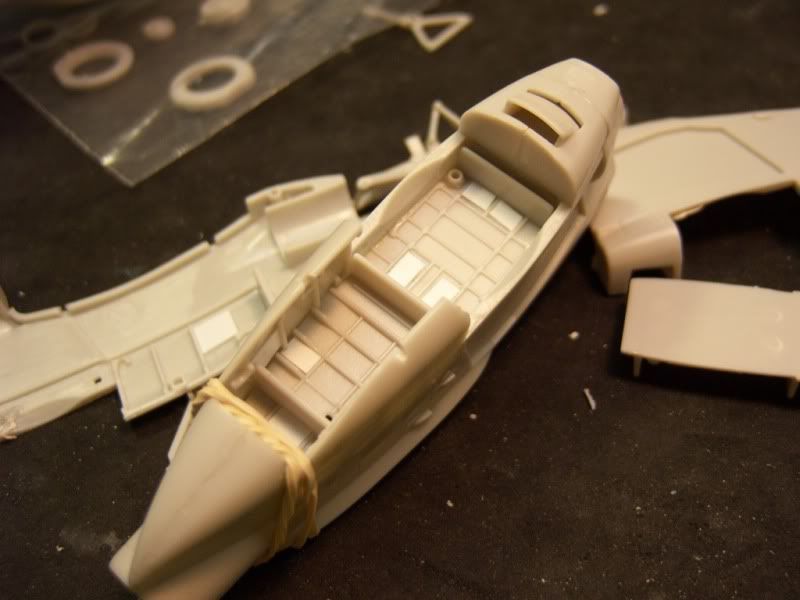
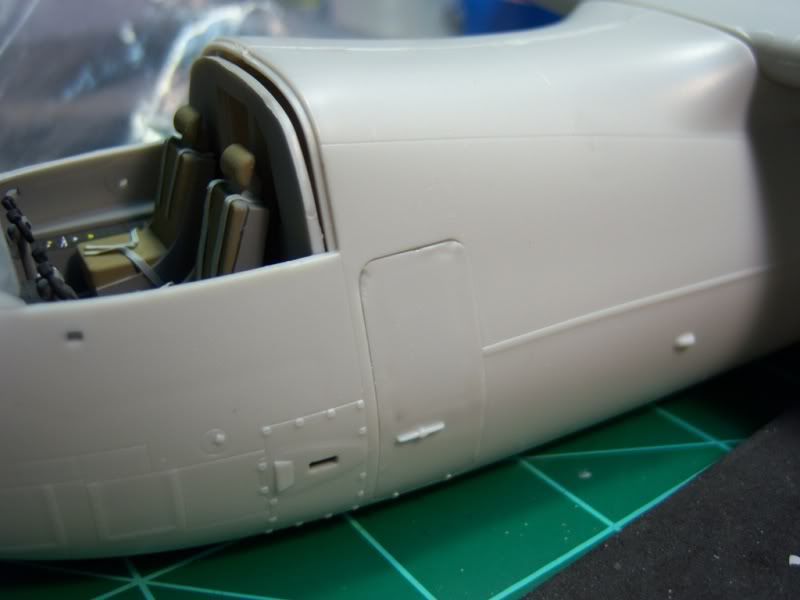
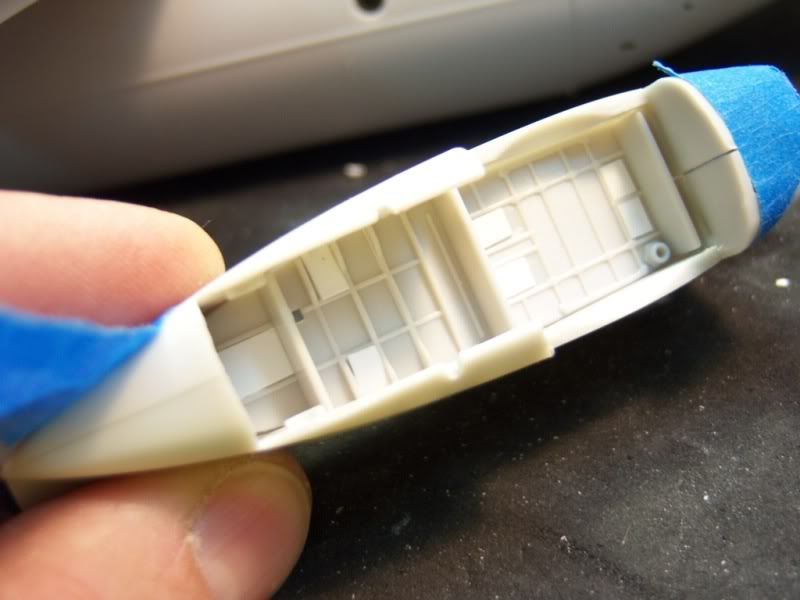
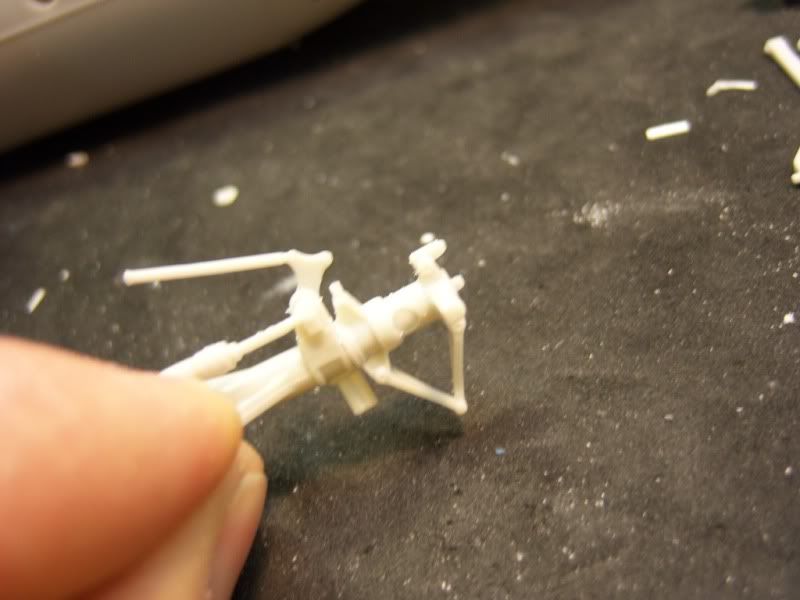
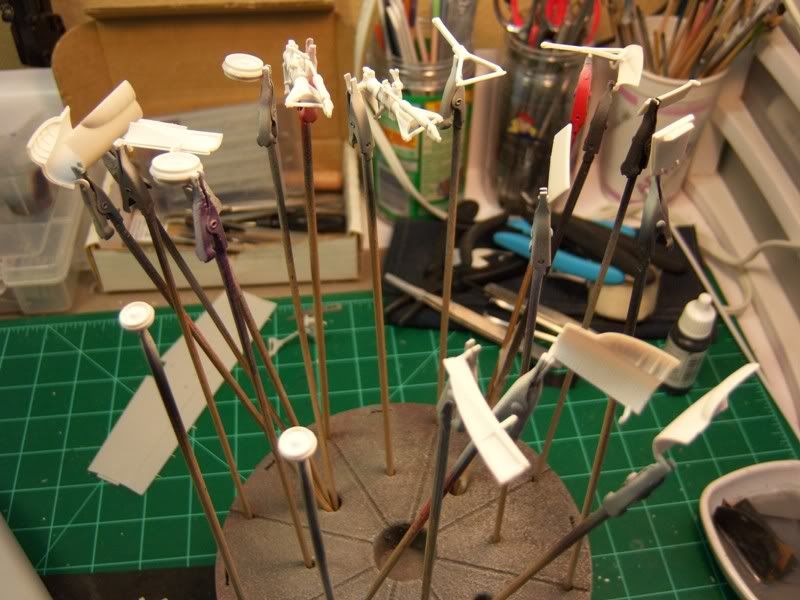
Thus far I have the cockpit and part of the rear cabin parts ready for paint and assembly. Simple belts were added to the cockpit seats to add a little more interest here. Will probably do the same to a few of the rear most seats as they are pretty plain as is. More to follow. Thanks for looking, "Q"


Red4
_VISITCOMMUNITY
California, United States
Joined: April 01, 2002
KitMaker: 4,287 posts
AeroScale: 1,164 posts
Posted: Friday, October 28, 2011 - 08:19 AM UTC
Made some progress on the big Greyhound this morning. Cockpit is about 90% painted. Still need to paint and install the IP. Rear seats are in and painted. I need to paint the remaining belts though. I figured I would add all of them as they can all be seen if one looks at an angle down the center line of the model. Only added lap belts to the first set as the remainder can't be seen. So far so good. I had some broken parts I needed for the next assembly step, but will bypass that while I await an answer to a question I submitted regarding this. More to follow soon.
Thanks for looking. "Q"


russamotto
_VISITCOMMUNITY
Utah, United States
Joined: December 14, 2007
KitMaker: 3,389 posts
AeroScale: 375 posts
Posted: Friday, October 28, 2011 - 12:13 PM UTC
Looks very good. I'll keep watching.
Red4
_VISITCOMMUNITY
California, United States
Joined: April 01, 2002
KitMaker: 4,287 posts
AeroScale: 1,164 posts
Posted: Tuesday, November 08, 2011 - 05:21 AM UTC
Sorry for the lengthy delay in updating my post. Finally got back to my bench to get the Greyhound sealed up. I tackled the problem of getting the rear ramp closed up as well. It wasn't as hard as I thought it was going to be. For a kit that is designed to be built with the ramp down, the parts fit extremely well in the closed position. Things like this usually have some pretty good gaps etc when you try it. I was happy that things went as smooth as they did. I had to do some minor surgery to the forward edge of the ramp along with removing all the locking hooks from the mating surfaces. All told it took about 10 minutes of cutting, sanding and test fitting to get the ramp in place. Not bad The other three pieces dropped into place just as easy. I added a piece of .020 sheet/strip to give the large inner opening door some more gluing surface. The side wing pieces were added last, being held in place with some small pieces of tape until the glue sets. I will fill the small gaps with some stretched sprue, add a little filler, sand everything to shape....and we should be good to go. Hoping to keep my updates moving regularly too....again, sorry for the delay. "Q"

ps. Due to the broken interior parts, I decided to seal this pig up. Would have liked to have the interior viewable, but the broken pieces are what would be visible and make up a major part of said interior.... Maybe next time


Red4
_VISITCOMMUNITY
California, United States
Joined: April 01, 2002
KitMaker: 4,287 posts
AeroScale: 1,164 posts
Posted: Tuesday, November 08, 2011 - 06:28 AM UTC
A little more progress before heading off to school. I got the center wing sections assembled and began working on the engines. I read Brett Greens review of this kit and noted that there were some pretty decent ejector pin marks in the main wheel wells. Yep, they are there...somehow I missed that in my review, but they aren't show stoppers by any means. I cot some small pieces of .010 strip and glued them over the pin marks. Once painted they will look like access panels or something similar. The wheel wells are nicely detailed and will look great under some paint. I just need to let everything dry, and I can get them assembled and painted. More to follow. "Q"


Red4
_VISITCOMMUNITY
California, United States
Joined: April 01, 2002
KitMaker: 4,287 posts
AeroScale: 1,164 posts
Posted: Saturday, November 12, 2011 - 02:43 PM UTC
Continuing on with the build...I started in on the complex landing gear assemblies. These are going to require a good amount of clean up as there are some sizable knock out marks on the main gear legs....putty and sanding awaits. Didn't get a whole lot done, but you can see they are very busy looking. Lots of room for adding hoses etc to make them even more busy. The wheel assemblies are a multi-piece affair with the main wheels fitting rather well. Not so much for the nose wheels. I can't seem to get them to close completely around the center section. Will have to look at this area closer. I have homework to complete so it will have to wait awhile yet. Thanks for looking. "Q"


Red4
_VISITCOMMUNITY
California, United States
Joined: April 01, 2002
KitMaker: 4,287 posts
AeroScale: 1,164 posts
Posted: Thursday, November 24, 2011 - 07:45 AM UTC
Continuing with this build up...I have one engine nacelle assembled and ready for paint. Keep in mind that the nacelles can be assembled backwards...they are sided. Ask me how I know this.. Also got the crew door installed. I had to bevel the inside edges of it as it is designed to be in the open position. I boogered up a small corner on it, visible in the pics, but should be able to smooth things over with some fine putty or Mr. Surfacer. Also discovered there was a one piece upper rear ramp part I could have used instead of piecing together the three separate pieces I did. I was hiding under one of the corner flaps in the box top.... Oh well, my efforts look alright.
I applied some putty to some pretty sizable sink marks on the landing gear legs. Once these are dealt with, I'll be able to get some more paint on this bad boy. The center wing section has also been installed at this point and has some minor gaps to fill, but nothing that will stop the show.
I did manage to lose one of the engine faces with compressor blades on it. These are readily visible when looking down the intake. I searched and searched, but no joy. I decided that I will make FOD covers instead. Using my handy dandy punch set, I was able to create my covers. I'll add some handles and stenciling and they should do the job.
Sorry for the delay in updates, this thing called life has gotten in the way here recently. Luckily I have 5 days off from school to work on this.... More to follow.....thanks for looking. "Q"


Red4
_VISITCOMMUNITY
California, United States
Joined: April 01, 2002
KitMaker: 4,287 posts
AeroScale: 1,164 posts
Posted: Thursday, November 24, 2011 - 02:58 PM UTC
I made a little more progress on this beast after my turkey and mandatory nap
Engines are together and drying. Tail section is assembled and drying. I plan on leaving the parts separated until after painting to ease in adding the decals.
At this point the engines and tail was dry fitted....she's a biggun alright. I puttied up what seams I had and will be able to attack these in the morning once dry. Hoping to have her in the paint shop soon. Thanks for looking, more to follow soon. "Q"

mother
_VISITCOMMUNITY
New York, United States
Joined: January 29, 2004
KitMaker: 3,836 posts
AeroScale: 1,036 posts
Posted: Thursday, November 24, 2011 - 04:30 PM UTC
Looking great Matt, like to cargo seats. Sorry you lost a part, here is a link that may/could help. It's a fast and way of making simple molds & parts using clay.

Cheap, Fast and Easy molds using clay.

Happy Modeling,
Joe
Littorio
_VISITCOMMUNITY
England - South East, United Kingdom
Joined: September 15, 2004
KitMaker: 4,728 posts
AeroScale: 1,351 posts
Posted: Thursday, November 24, 2011 - 04:37 PM UTC
Great build as always Matthew, a joy to follow along and see how you get around any problems that you encounter along the way.
Red4
_VISITCOMMUNITY
California, United States
Joined: April 01, 2002
KitMaker: 4,287 posts
AeroScale: 1,164 posts
Posted: Friday, November 25, 2011 - 08:53 AM UTC
Thanks for the link Joe. Unfortunately the nacelles are already closed up and getting the compressor blades/trunking installed isn't possible. The FOD covers will work. Will definitely be more careful with my E-2C when the time comes.
Thanks for the Kudos Luciano. Glad you like it. "Q"
Red4
_VISITCOMMUNITY
California, United States
Joined: April 01, 2002
KitMaker: 4,287 posts
AeroScale: 1,164 posts
Posted: Friday, November 25, 2011 - 01:21 PM UTC
Ok....have you ever had one of those Dumb A** moments? Well I had one today, but luckily I was able to get around the problem. I "thought" I was missing one of my engine faces/compressor blades for an engine. Soooo I made my decision to close up the intakes with FOD covers and didn't install the intake trunking or exhaust as they wouldn't seen once the plugs were in place. While clipping other parts off of the sprue to clean up and ready for painting what should I find? The other engine face! I could have sworn I cut it free as I went over all the sprues in the box and didn't see it. Checked the box itself and it wasn't there either.
Well, with the nacelles assembled and the seams already dressed, there was no way I was going to pop those things apart and install the trunking. However, the 3 watt light inside my head lit up and I decided I could cut off the locating pins on the trunking and slide them in from behind and work them into place. As luck would have it, they were a snug enough fit and fit well enough that it worked. I can add the compressor blades/engine face piece after they are painted. Whew...disaster averted. More to follow soon. "Q"
Keeperofsouls2099
_VISITCOMMUNITY
Florida, United States
Joined: January 14, 2009
KitMaker: 2,798 posts
AeroScale: 2,443 posts
Posted: Friday, November 25, 2011 - 02:04 PM UTC
Lol you just made me remember a few of those moments myself. Looking good
Red4
_VISITCOMMUNITY
California, United States
Joined: April 01, 2002
KitMaker: 4,287 posts
AeroScale: 1,164 posts
Posted: Friday, November 25, 2011 - 02:48 PM UTC
Last update for the day. I got all by just a few pieces painted. Mostly the wheel wells and landing gear pieces. I missed a couple, but will get them soon enough. I will go back and gloss coat everything as needed for washes/weathering. I got the sanding completed on the fuselage seams and found a couple low spots I had to hit with some more filler. Nothing major. Will post more as I make progress. Hoping to have her in the paint booth soon. Thanks for looking, "Q"


Keeperofsouls2099
_VISITCOMMUNITY
Florida, United States
Joined: January 14, 2009
KitMaker: 2,798 posts
AeroScale: 2,443 posts
Posted: Friday, November 25, 2011 - 03:33 PM UTC
What kind of filler are you using Q?
Red4
_VISITCOMMUNITY
California, United States
Joined: April 01, 2002
KitMaker: 4,287 posts
AeroScale: 1,164 posts
Posted: Friday, November 25, 2011 - 03:40 PM UTC
Tamiya basic. Sort of a metallic gray in color. Dries fast and no noticeable shrinkage.
Keeperofsouls2099
_VISITCOMMUNITY
Florida, United States
Joined: January 14, 2009
KitMaker: 2,798 posts
AeroScale: 2,443 posts
Posted: Friday, November 25, 2011 - 04:39 PM UTC
Thanks
Red4
_VISITCOMMUNITY
California, United States
Joined: April 01, 2002
KitMaker: 4,287 posts
AeroScale: 1,164 posts
Posted: Thursday, December 01, 2011 - 05:32 AM UTC
A small update on the Greyhound...
I sanded down the high areas where I had to add some more putty,...everything looks good. Added filler to the starboard wing leading edge as I noticed a small seam I missed earlier. Also rescribed some panel lines I lost from sanding. Got the flaps and ailerons assembled and dry fit. I cut off the static dischargers on one wing (the other one will follow) as I will replace them with smaller diameter material once the build and paint are complete. Not a lot but it's moving forward.
Thanks, "Q"

JClapp
#259
_VISITCOMMUNITY
Massachusetts, United States
Joined: October 23, 2011
KitMaker: 2,265 posts
AeroScale: 1,715 posts
Posted: Thursday, December 01, 2011 - 05:50 AM UTC
nice project, lots to look at.
I like the Greyhound design, Im very much enjoying seeing you build this one.
Red4
_VISITCOMMUNITY
California, United States
Joined: April 01, 2002
KitMaker: 4,287 posts
AeroScale: 1,164 posts
Posted: Thursday, December 01, 2011 - 11:15 AM UTC
Thanks. Glad you are liking it. Still lots to do yet. "Q"
Keeperofsouls2099
_VISITCOMMUNITY
Florida, United States
Joined: January 14, 2009
KitMaker: 2,798 posts
AeroScale: 2,443 posts
Posted: Friday, December 02, 2011 - 12:07 AM UTC
Good work so far Q though I expect nothing less from.cant wait to see the end result
Red4
_VISITCOMMUNITY
California, United States
Joined: April 01, 2002
KitMaker: 4,287 posts
AeroScale: 1,164 posts
Posted: Friday, December 02, 2011 - 01:48 AM UTC
Thanks Justin. Much appreciated. "Q"
Red4
_VISITCOMMUNITY
California, United States
Joined: April 01, 2002
KitMaker: 4,287 posts
AeroScale: 1,164 posts
Posted: Saturday, December 10, 2011 - 10:34 AM UTC
Taking a little break from the Greyhound as I need to get some things in order around the house. Back at it soon. "Q"
JPTRR
Staff MemberManaging Editor
RAILROAD MODELING
#051
_VISITCOMMUNITY
Tennessee, United States
Joined: December 21, 2002
KitMaker: 7,772 posts
AeroScale: 3,175 posts
Posted: Sunday, December 11, 2011 - 02:59 PM UTC
Hi Matt,

I look forward to more of the C-2. Looking good!
Aussie747
_VISITCOMMUNITY
Australian Capital Territory, Australia
Joined: April 26, 2004
KitMaker: 16 posts
AeroScale: 11 posts
Posted: Sunday, April 29, 2012 - 05:51 PM UTC
Nice work so far Matt, I like the way you detailed to seats, is that lead foil you used? Pity you closed up the cargo hold after doing all that work in the back end! Looking forward to seeing this one finshed! (I am taking notes as I have one as well )
 _GOTOTOP