_GOTOBOTTOM
Cold War (1950-1974)
Discuss the aircraft modeling subjects during the Cold War period.
Hosted by Tim Hatton
North Korean MiG-15
vertigo
_VISITCOMMUNITY
Dublin, Ireland
Joined: November 11, 2004
KitMaker: 388 posts
AeroScale: 225 posts
Posted: Monday, December 05, 2011 - 07:23 PM UTC
I haven't done a build log on Aeroscale before but I'm doing one on the IPMS Ireland Forums for the Airfix MiG-15 kit I'm currently building so I thought I'd bring it over here as well.

I'm a little ahead on the IPMS forums so I'll split my progress in to two posts, one today and one tomorrow.

Alright then, earlier in the month I finished a P-51D Mustang in the markings of the Chinese Nationalist Air Force, which you can see here. I was quite happy with how easy a metallic coat can be applied brushing by hand so I decided to have another go and bought the Airfix MiG-15.


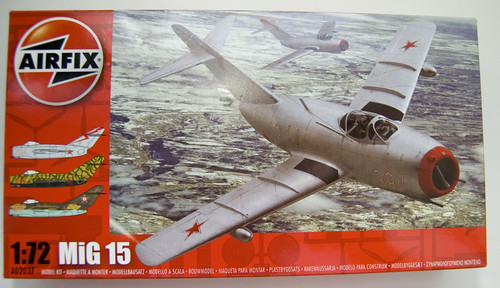
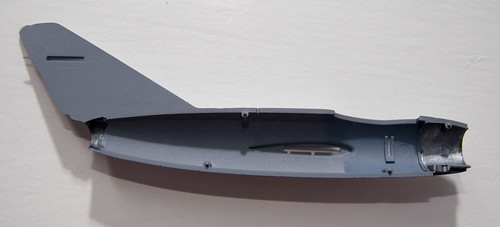
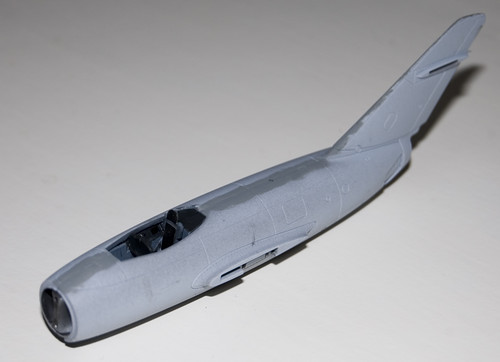
Nice looking kit this one and I'm not bothered by the deep panels lines as they show up nicely under a wash. I've heard the kit has inaccuracies, possibly with the wing sweep, but it looks like a MiG-15 to me so I'm happy. I'll just need to get a MiG-17 and MiG-19 to keep it company one of these days.

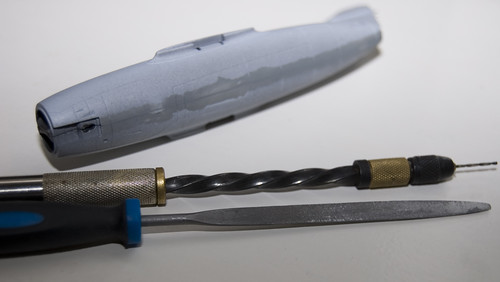
I do have a few small gripes with the kit though. Firstly I think the sprue tabs are a little thick and badly placed; when removing the fuselage halves the thin tail sections are prone to twisting.

Secondly there are some terribly placed ejector pin markings on this kit.


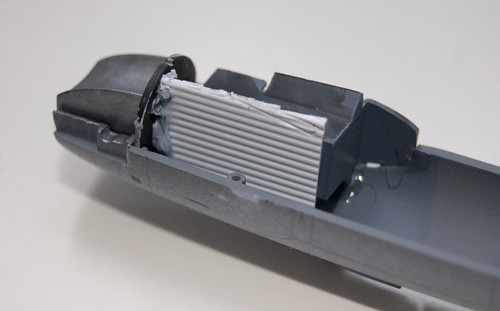
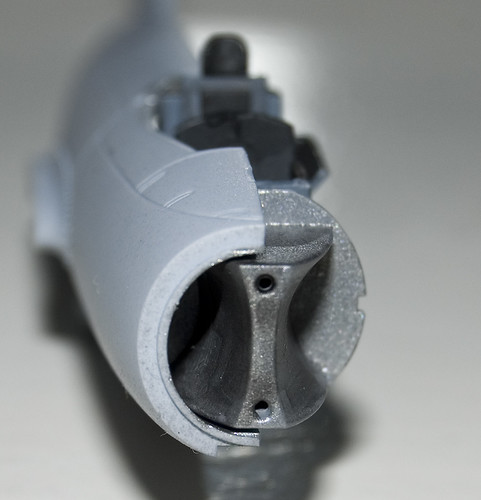
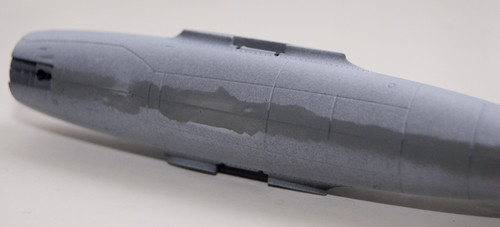
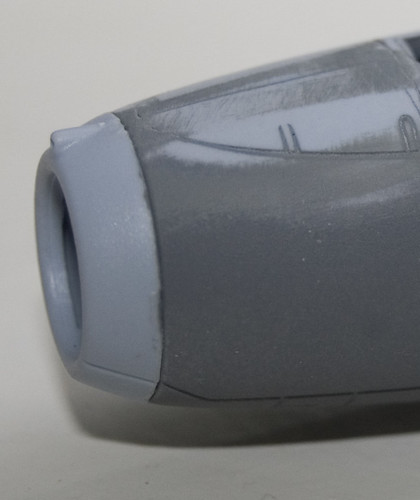
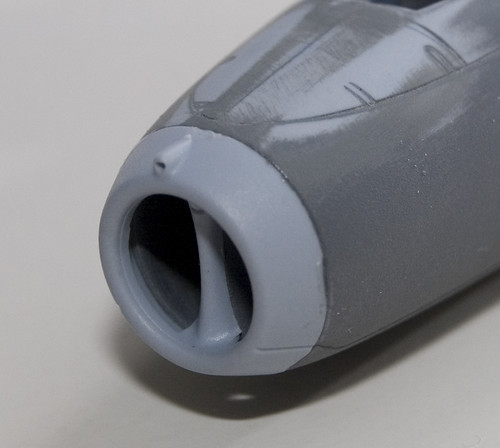
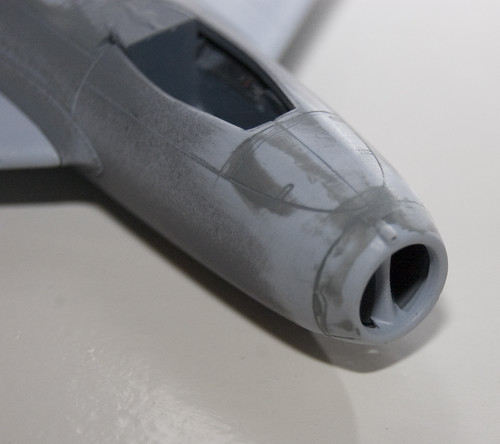
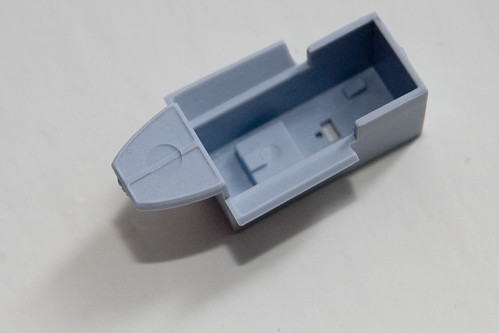
We have a rather annoying one here on the intake trunk. This is present on both sides of the fuselage and annoying considering the large intake is a prominent feature of the MiG-15.


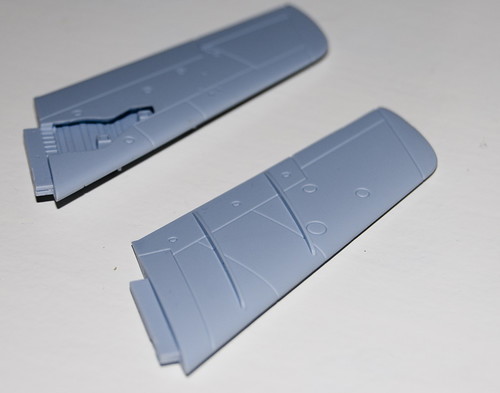
There is another nasty ejector pin mark inside both wheel wells. Now I ask you, why go to the bother of providing some ribbed detail to the wheel well if you're going to have that mark there? Thankfully I'll be posing this MiG in-flight so the wheel wells will be closed up.


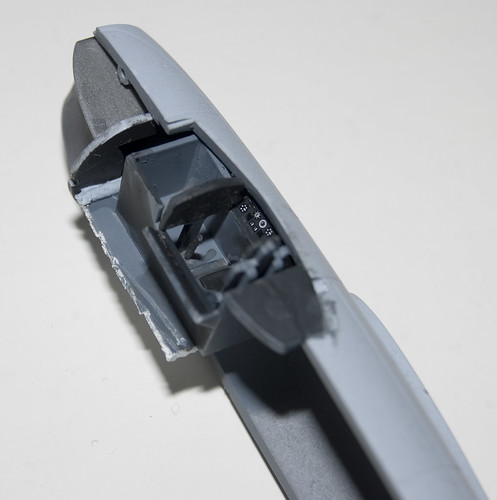
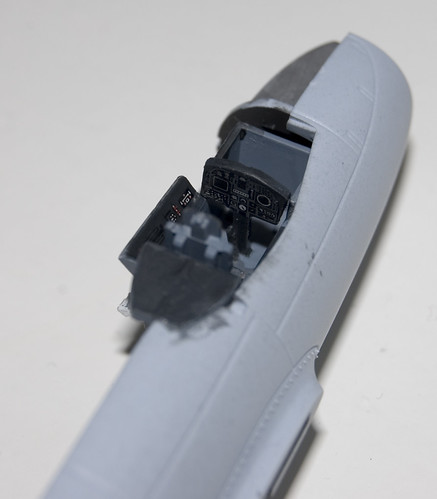
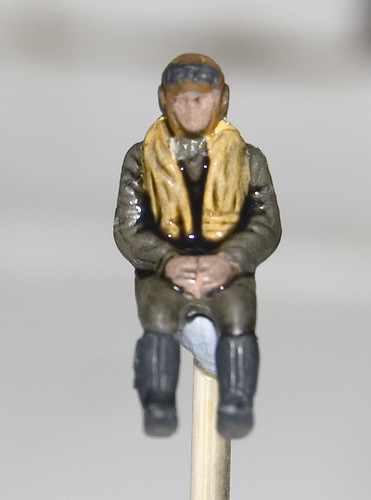
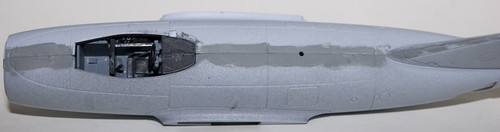
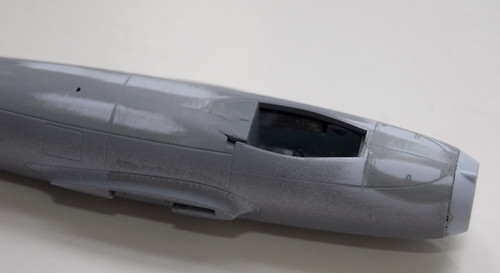
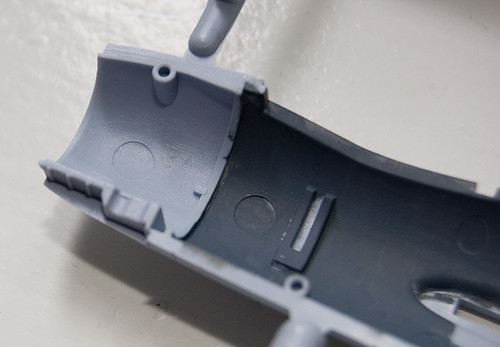
Here's another on the back of the cockpit tub sitting right in the middle of that ribbed strip. I can't profess to know anything about the injection moulding process but I wonder, could they have hidden that mark underneath the tub where it would never be seen?


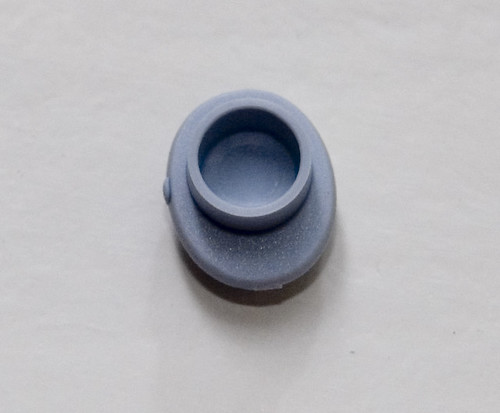
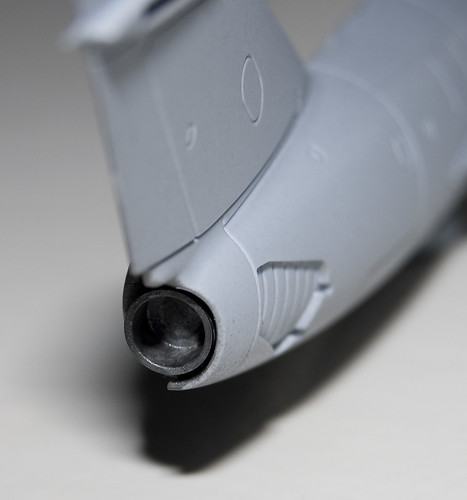
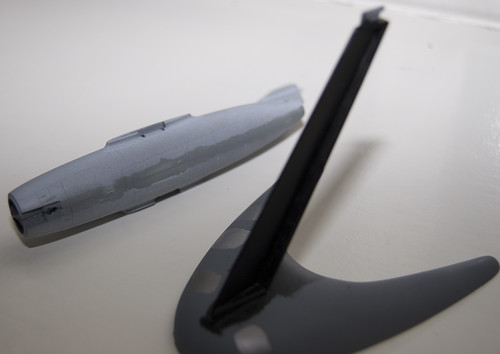
Finally, there's another ejector pin marking inside the exhaust tube which sadly features no other detail. Again, could that not of been hidden on the opposite side of the piece?

Now it might seem as if I'm already hating the kit what with all the griping I've done so far but all in all I still think this looks like a great little kit and I'm happy to be working on it.

The Airfix kit comes with decals for the Soviet Air Force, the Hungarian Air Force and the North Korean Air Force. I've decided to use the North Korean decals but on a red-tailed MiG.


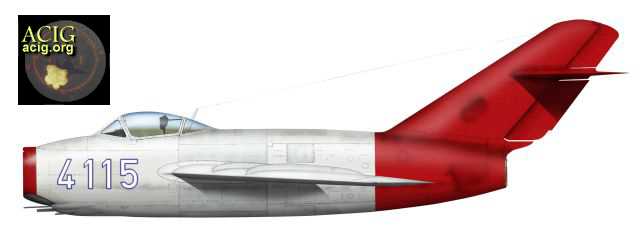
I spotted this imagine, which belongs to Acig.org, online and I was more than interested in the scheme. You'll notice this image doesn't include any national markings and the caption that goes with it states "Reportedly spotted over Korea in 1951".

We've had a long discussion on IPMS Ireland about the MiG and it's probable owner and agreed it was either North Korean or Chinese. As December is expensive enough I don't want to be buying PLAAF decals so North Korean it is.
vertigo
_VISITCOMMUNITY
Dublin, Ireland
Joined: November 11, 2004
KitMaker: 388 posts
AeroScale: 225 posts
Posted: Tuesday, December 06, 2011 - 09:04 PM UTC
This update should get me level with the build log on IPMS Ireland and I haven't done with much with the MiG since the following set of pictures.

So, let me preface this update by saying that Airfix don't do cockpits terribly well in my experience. A while back I was working on their BAe Systems Hawk and I had a lot of trouble getting the consoles to fit properly. In fact one of the consoles had to be removed to fit an anti-glare hood, very messy in the end.


In the picture above you'll see a curved slot which is a mounting point for the cockpit tub. The idea is you fit the main console over the cockpit tub and its two curved arms slide into the those slots. The first problem I encountered was that the main console wouldn't fit over the cockpit tub, it kept leaning back at an awkward angle that threw off the entire fit. To make matters worse the curved arms wouldn't fit into those slots either. A solution was needed...


The solution was to clip off the arms of the main console and then fit it into the tub, that eliminate the bad fit and lean. In order to fit the tub to fuselage I took a piece of Evergreen clapboard and with obvious precision and total care I shaped it to fit into the fuselage and mounted the tub upon it. Problem solved.


The kit called out for Humbrol 65 (Aircraft Blue) for the cockpit and I used Vallejo Intermediate Blue as an alternative. It looks a bit dark to me but it was applied over Halfords Grey. I did check out a pictures online and it looks like the MiG-15 had a darker cockpit to the usual bright blue common with Soviet Aircraft. All of the blacks are Vallejo Black Grey.


Here's another view of the cockpit. Airfix provide decals for the consoles and I was dreading putting them on as I've never had much luck with cockpit decals. As expected when fitting the decal for the main console it took it upon itself to fold up several times and suddenly, and mysteriously, it crumpled up into a ball and launched itself across the room.

I've replaced that decal with one from a Revell Harrier GR. 5 kit and it doesn't look to out of place. It probably won't be visible when the cockpit is closed up anyway.


Here's the jet exhaust which I'm still not entirely with due to the lack of detail... besides that ejector pin mark I'm trying to ignore. I've painted it with Vallejo Gunmetal Grey and given it a wash with Citadel Babab Black. After I decal the MiG I'll attack this area with a Tamiya Weathering Kit.


And here is the large engine intake, now I was worried the intake wouldn't fit into the fuselage halves properly and cause all sorts of problems but I was pleasantly surprised to find it fitted perfectly. It's painted in Vallejo Natural Steel which is lighter than Gunmetal Grey. I wanted the intake to appear lighter and cleaner than the exhaust.


Finally, here's our RAF... er... North Korean pilot, in fact he could be a Soviet pilot speaking pigeon Korean in a disguised MiG. There's a mixture of Citadel, Revell and Vallejo paints on him and, as you can see, he's still wet from a Badab Black wash

That's all for now; what with Christmas fast approaching and temperatures in Ireland hovering just above 0 I'm not doing as much as I could but it's getting there.
litespeed
Staff MemberNews Reporter
AEROSCALE
_VISITCOMMUNITY
England - North West, United Kingdom
Joined: October 15, 2009
KitMaker: 1,976 posts
AeroScale: 1,789 posts
Posted: Wednesday, December 07, 2011 - 01:38 AM UTC
Looking good, those ejector pin marks are a bit of a pain. That red tailed MiG is a very good choice. Keep up the good work and keep us updated.
All the best.
tim
vertigo
_VISITCOMMUNITY
Dublin, Ireland
Joined: November 11, 2004
KitMaker: 388 posts
AeroScale: 225 posts
Posted: Wednesday, December 07, 2011 - 02:00 AM UTC
I should have a couple more pictures tomorrow as I've joined up the fuselage halves. Thankfully there aren't too many seams... just one large wrap around one.

The joys of modelling, eh?
zveroboy
_VISITCOMMUNITY
Moldova
Joined: May 24, 2009
KitMaker: 24 posts
AeroScale: 8 posts
Posted: Wednesday, December 07, 2011 - 04:39 PM UTC
Good idea, go on with this project .
vertigo
_VISITCOMMUNITY
Dublin, Ireland
Joined: November 11, 2004
KitMaker: 388 posts
AeroScale: 225 posts
Posted: Wednesday, December 07, 2011 - 08:33 PM UTC
Another update with pictures.


The wing halves went together without many problems, just had to make sure the panel lines matched up on each side. I wrapped them with elastic bands to hold them tightly together while the glue set. There are a few small gaps that will need a touch of filler but nothing much.


I've also joined the fuselage halves and the first thing that struck me was the interesting shape of the fuselage. The second thing that struck me was the seam running from nose to tail and then from tail to nose on the underside.


Here's a better view of the seam along the spine of the MiG, it goes right up the tail. I'm going to have a fun time sanding all that down. I spent ages sanding down the seams on the Mustang and there was still one I couldn't get rid of besides all that work.


Here's a view of the seam on the underside of the MiG. Usually when I join the fuselage halves together I'll take my pot of Revell Medium Grey and with a wet brush paint the grey along the seam lines in order to highlight them better. It really helps especially when you think you've eliminated the seam as in most cases, in my experience, a little paint shows it back up again.


The flight stand is from Airfix and came with their old S-3A Viking kit. The Viking is partially built but back in the stash as it's much larger than my current display capabilities. The flight stand started out clear acrylic with the Airfix name on it and a date, 1986 or some such, but I didn't much like the look of it. So I primed it in Halfords Grey and I'm currently working on painting it gloss black. Those little silver strips are just test swatches for the MiG, they'll be painted over.


So before I begin the laborious effort of sanding those seams I need to make a slot for the flight stand. I intend to fit it midpoint between the wings so I'll first mark out a little rectangle and drill two or three holes in the rectangle with the pin vise in the picture. It has, I think, a 0.5mm drill bit in it.

After the holes are drilled I'll begin to join and widen them with a few files into the flight stand fits in tightly. I think a bright silver MiG will look good over a gloss black flight stand.
vertigo
_VISITCOMMUNITY
Dublin, Ireland
Joined: November 11, 2004
KitMaker: 388 posts
AeroScale: 225 posts
Posted: Friday, December 09, 2011 - 04:38 AM UTC
I've cut the slot out for the flight stand. It was a bit touch and go though as I hadn't released how thick the plastic is around the midpoint of the MiG. The fuselage split along the join as I was filing so I've had to fix that back up. Now it's just the seams to work with.

By the way, anyone interested in the last project I worked on, a P-51D of the Chinese Nationalist Air Force, can click the banner for my blog in my signature. I've just finished recounting the build experience and it's jam packed with pictures.
vertigo
_VISITCOMMUNITY
Dublin, Ireland
Joined: November 11, 2004
KitMaker: 388 posts
AeroScale: 225 posts
Posted: Sunday, December 11, 2011 - 02:49 AM UTC
Is it just me or is seam sanding the low point of a modelling project? It's tedious, mind-numbingly boring and a pain in the...

When I'm working on seams I'm always worried about altering the shape of the fuselage as well.
vertigo
_VISITCOMMUNITY
Dublin, Ireland
Joined: November 11, 2004
KitMaker: 388 posts
AeroScale: 225 posts
Posted: Thursday, December 15, 2011 - 03:14 AM UTC
I've got another picture update ready but just a small one.


I've been working hard on the seams but I've caused a problem there. The MiG-15 could be described as barrel shaped or maybe cigar shaped and as such I've lost the shape along the spine and belly. That's what I get for using emery boards which don't bend. Those two sanded strips along the spine in the picture are an attempt by myself to sand out the step that's formed and try to return a little curvature to the fuselage.


In other news I've attached the nose plate to the front of the MiG and the result is less than satisfactory. It looks like I've got more filling and sanding ahead of me.


It's a very awkward area to work around because I need to keep the round shape together. It'll be a long road before this MiG gets anywhere near painting, I'll have to attach the wings and fill the wing roots. Then I need to fit the gear doors which will be messy and I also need to shore up the fit of the MiG to the flight stand.
JClapp
#259
_VISITCOMMUNITY
Massachusetts, United States
Joined: October 23, 2011
KitMaker: 2,265 posts
AeroScale: 1,715 posts
Posted: Thursday, December 15, 2011 - 11:26 AM UTC
that Mig is coming along nicely. thanks for all the details and commentary.

I agree about seam sanding, it is simultaneously the most tedious and the most rewarding modeling task. I lose patience and never finish properly, so everything I build has join evidence here and there.

The invisible joins are the part of the model I admire the most when looking over the expert work in these forums.
vertigo
_VISITCOMMUNITY
Dublin, Ireland
Joined: November 11, 2004
KitMaker: 388 posts
AeroScale: 225 posts
Posted: Friday, December 16, 2011 - 12:29 AM UTC
I'm glad the updates are appreciated. It's fun doing a build log, it makes the hobby less solitary and more involved.

I was hoping that since the MiG-15 is a new tool kit that I wouldn't have many issues with seams but I guess not. it wouldn't be so much of a problem if it wasn't for the barrel shape of the MiG.


I recently finished this P-51D and I had to sand a seam on the nose and spine. I did it with a set of emery boards, which are made for women's nails, but they work just as well on plastic. Unfortunately they're very stiff and unable to bend to a curve.
vertigo
_VISITCOMMUNITY
Dublin, Ireland
Joined: November 11, 2004
KitMaker: 388 posts
AeroScale: 225 posts
Posted: Monday, December 19, 2011 - 11:01 PM UTC
The MiG-15 hasn't progressed much further than the last set of pictures and I've pretty much wound down for the Christmas holidays.

I'm hoping to order an airbrush & compressor after Christmas so the MiG might be the first to be painted it with it.
vertigo
_VISITCOMMUNITY
Dublin, Ireland
Joined: November 11, 2004
KitMaker: 388 posts
AeroScale: 225 posts
Posted: Friday, February 03, 2012 - 06:36 AM UTC
Well I haven't forgotten about the MiG-15, I've just working on it, on and off, for a while now. I've changed tact with it as well by filling the notch for the flight stand; I've recently become very interested in the stance of an aircraft wheels down and with so I'll make a display base to go along with it.

What I've been working on since December is the fit of the nose plate to the fuselage, which was pretty bad I have to say.


It looks better in person than in that picture to be honest. I'm still not sure about the line running along the nose, I'd like to eliminate it completely but I'm afraid of losing the fuselage shape completely. MiG's are awkward.


I've also attached the wings, they slot into place without any issues with just a tiny gap running along the root that needs filled. I quite like the sweep of the wings, it adds a certain attractive quality to the plane. Of course it's been said that Airfix bungled the sweep but I'm content.


I'm going to continue taking this slowly as a side project as over the next couple of months I'll participating in group builds and it's always nice to have something to break away too.
 _GOTOTOP