_GOTOBOTTOM
Pre-Flight Check
Constructive critique of your finished or in-progress photos.
Ta-152C, HobbyBoss 1/48, ready
Dimitar
_VISITCOMMUNITY
Sofiya, Bulgaria
Joined: November 08, 2011
KitMaker: 414 posts
AeroScale: 126 posts
Posted: Monday, March 12, 2012 - 04:33 AM UTC
First finished aircraft model for 2012. Let's hope it's not going to be the last one, as I have a long history of "almost done" models.
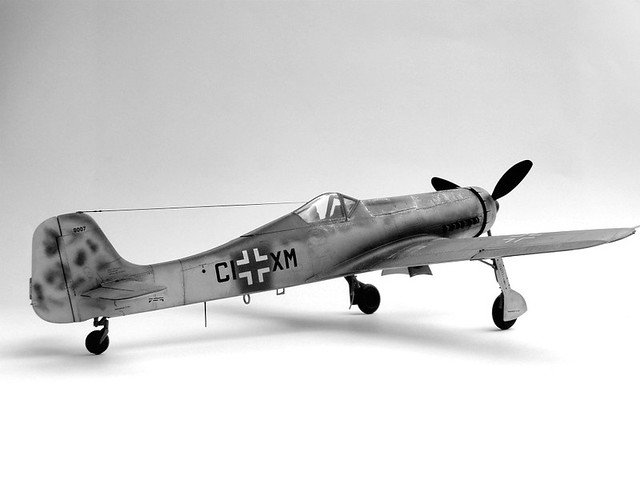
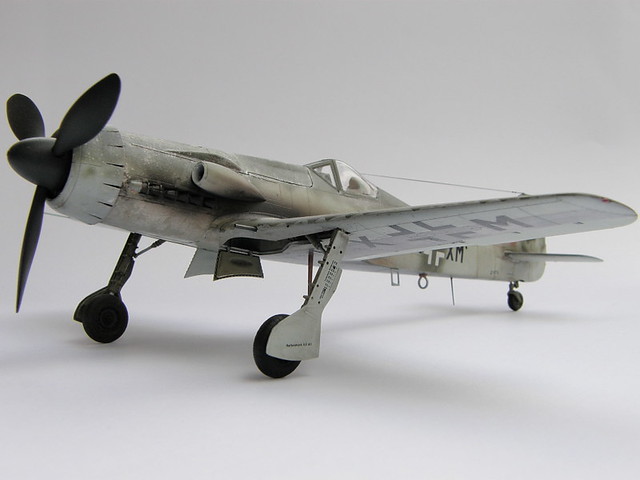
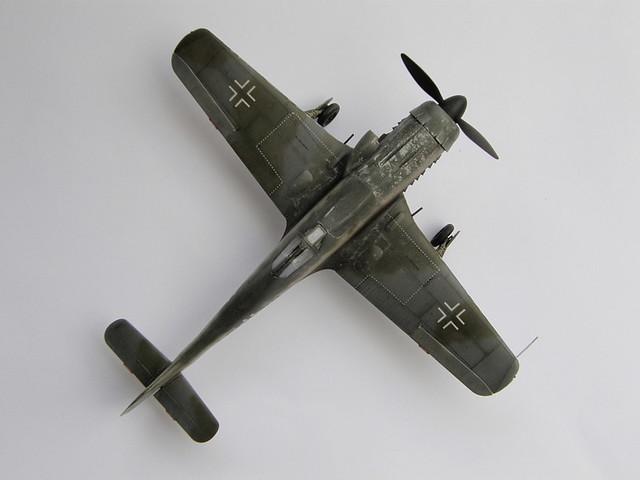
This one is from HB range and it's a nice one if planned as a weekend model. It has it's flaws, I made some errors but anyway I like the final result. It was a nice training for going up to 1/48 from 72 and a very useful rehearsal for Eduard's FW 190D-9/11/13 series.
Model is primed with Alclad White base, than Alclad Gloss black base. Paints from LifeColor (wings and upper fuselage) and Agama (propeller) range. Natural metal zones - Alclad. Wheathering - AK Interavtive + MIG Productions oils, washes, pigments. Exhaust stains are done with LifeColor Tenzocrome products.
Thanks for stopping by, any questions and comments welcomed.


P3122282

P3122283

P3122284

P3122285

P3122286

P3122287

P3122288

P3122289

P3122290
CanDid
_VISITCOMMUNITY
Stockholm, Sweden
Joined: May 03, 2010
KitMaker: 123 posts
AeroScale: 98 posts
Posted: Monday, March 12, 2012 - 09:06 AM UTC
That is a very nice paint and weathering job for sure.

It would be interesting to know how you worked your way through the AK and MiG weathering steps.

Speaking of kits, you have not considered the Zokei-Mura SWS Kit in 1/32? It looks nice and I really think you could make it justice.

Cheers
/Fred
Dimitar
_VISITCOMMUNITY
Sofiya, Bulgaria
Joined: November 08, 2011
KitMaker: 414 posts
AeroScale: 126 posts
Posted: Wednesday, March 14, 2012 - 12:10 AM UTC

Ta_152_V7__2_

P31222841

Hi, Fred, and thanks for your comment. I did considered ZM Ta 152 in 1/32 but it's huge for my limited space + I have lots of bombers in 1/72, so this one I'll pass. But if they down scale the 1/32 to 1/48 as they did with Shinden I'm up for one.
About the weathering process it's nothing different than what you see on How to DVDs from both MIG and AK.
First step after painting was a diluted brown filter to give a little old feeling to the paint. Wheel wells received AK Dark mud effect together with some random brown pigments. Next step was to seal everything with gloss varnish and after it dried I applied MIG Brown wash to selected panel lines and than the rest of the model was totally covered with dark wash. After it dried I just swept the excess with a paper towel soaked with a little white spirit. 24 hours later the whole thing was airbrushed with mat varnish and that's that.
I hope to be able to show my next project in a detailed SBS build.

Cheers,
Dimitar
 _GOTOTOP