_GOTOBOTTOM
World War II
Discuss WWII and the era directly before and after the war from 1935-1949.
Hosted by Rowan Baylis
Hasegawa 1/32 Focke Wulf Fw190A-5
wespe66
_VISITCOMMUNITY
Frederiksborg, Denmark
Joined: June 27, 2011
KitMaker: 122 posts
AeroScale: 121 posts
Posted: Saturday, March 24, 2012 - 11:16 PM UTC
Hi,

This is my entry for the Focke Wulf Campaign.

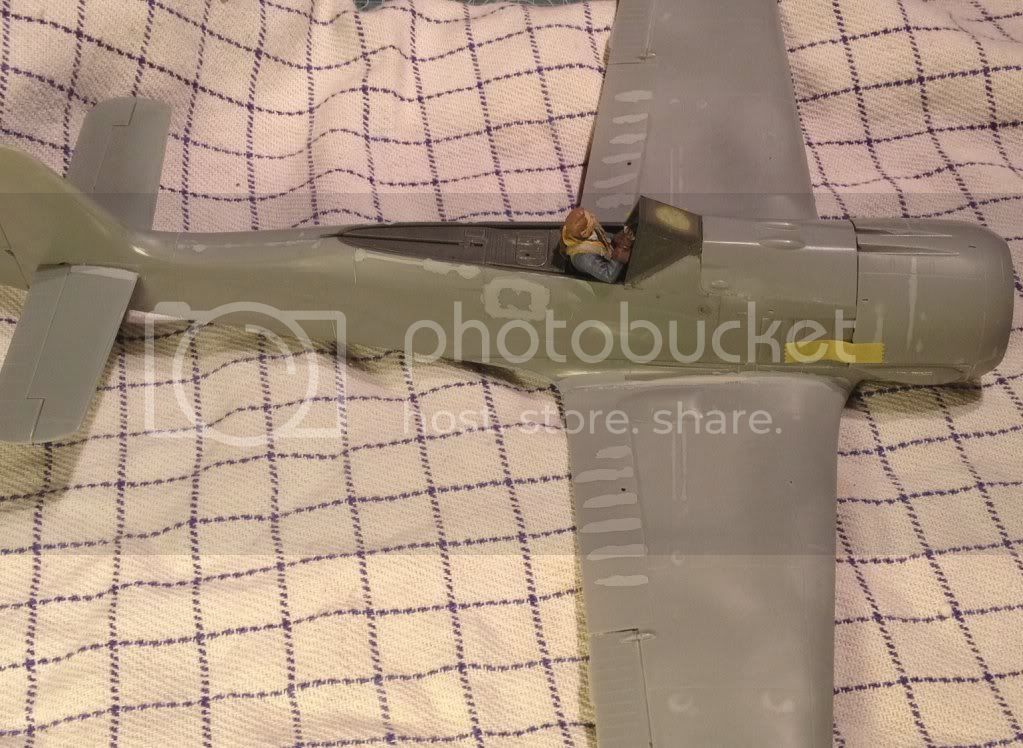
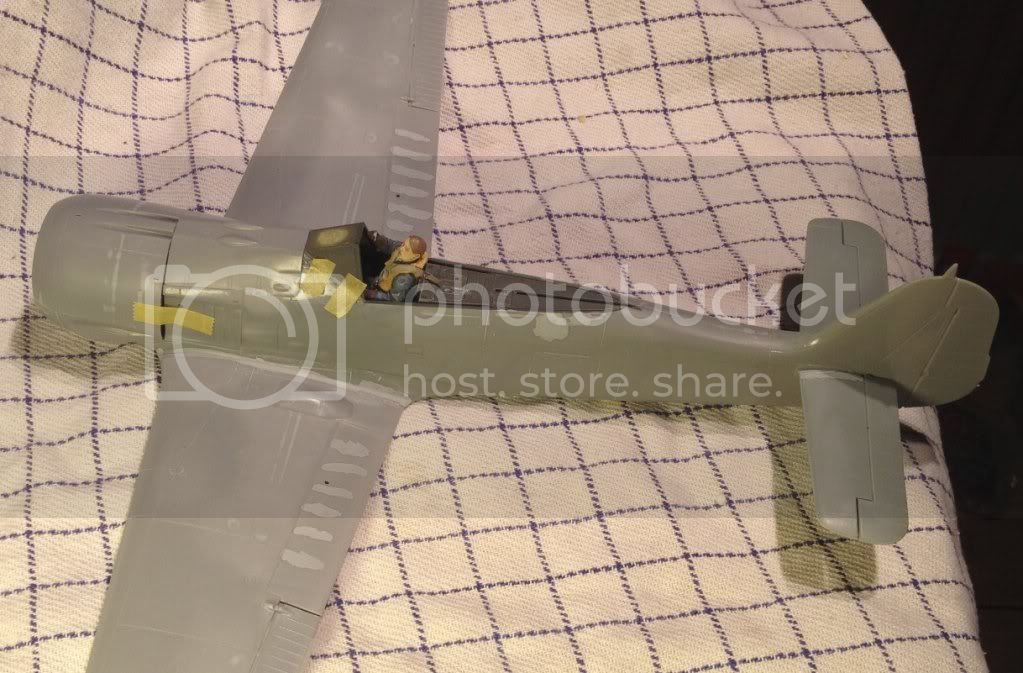
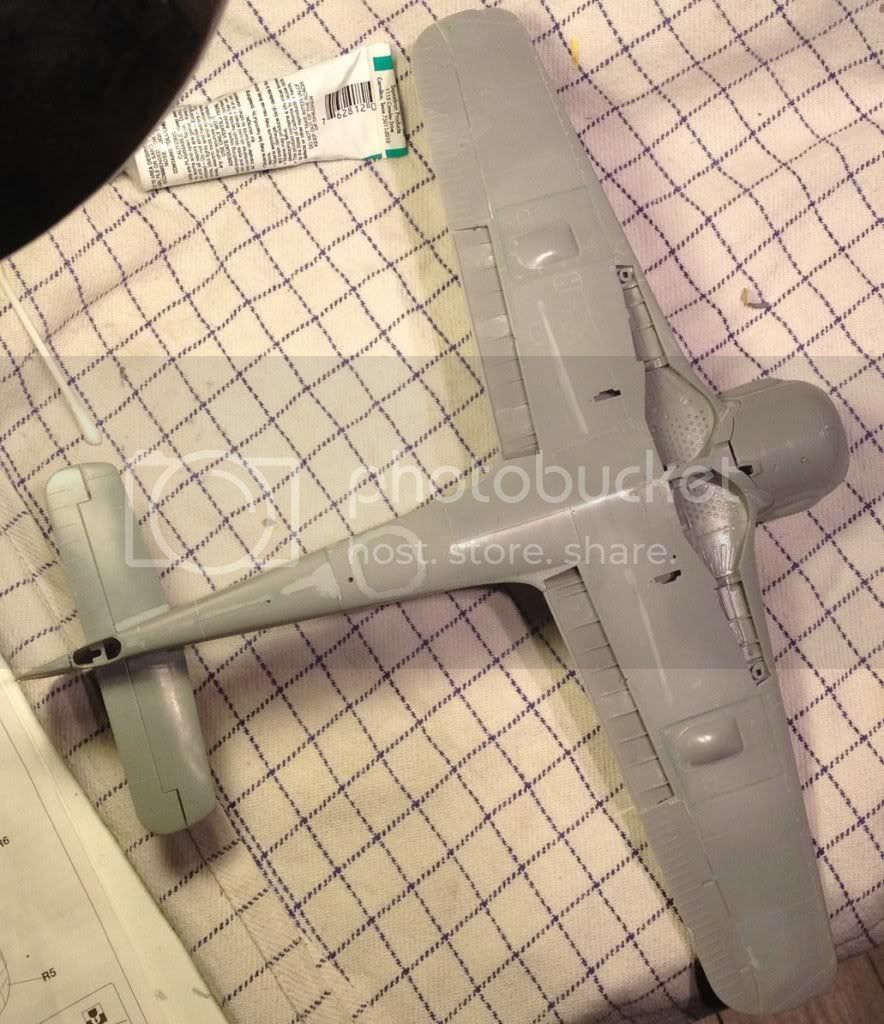
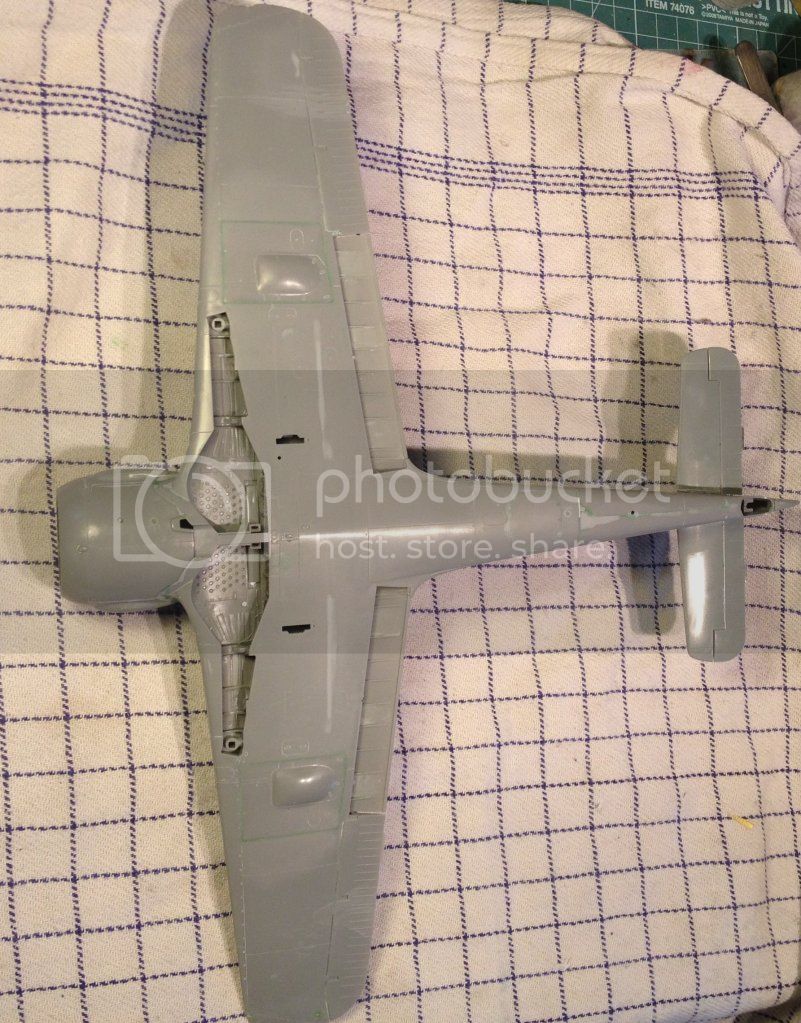
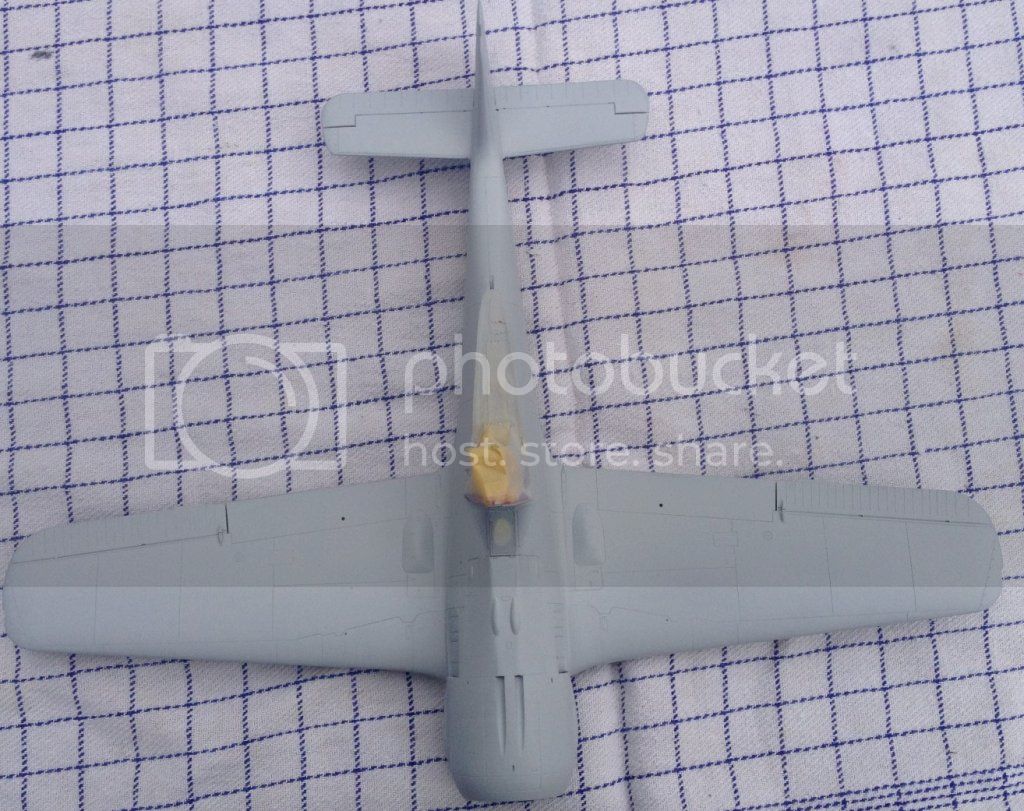
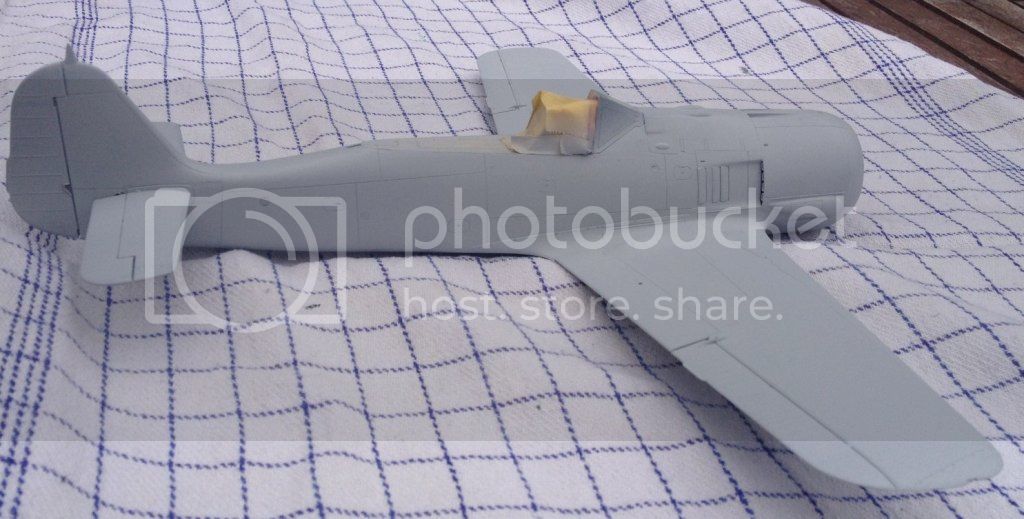
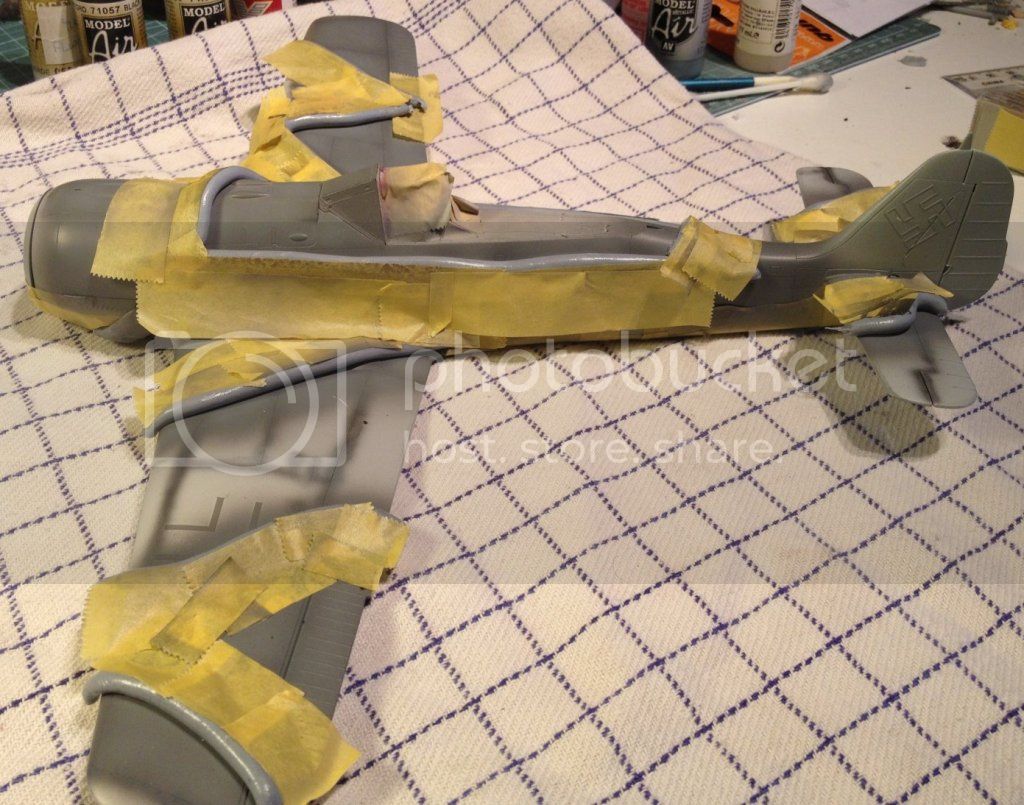
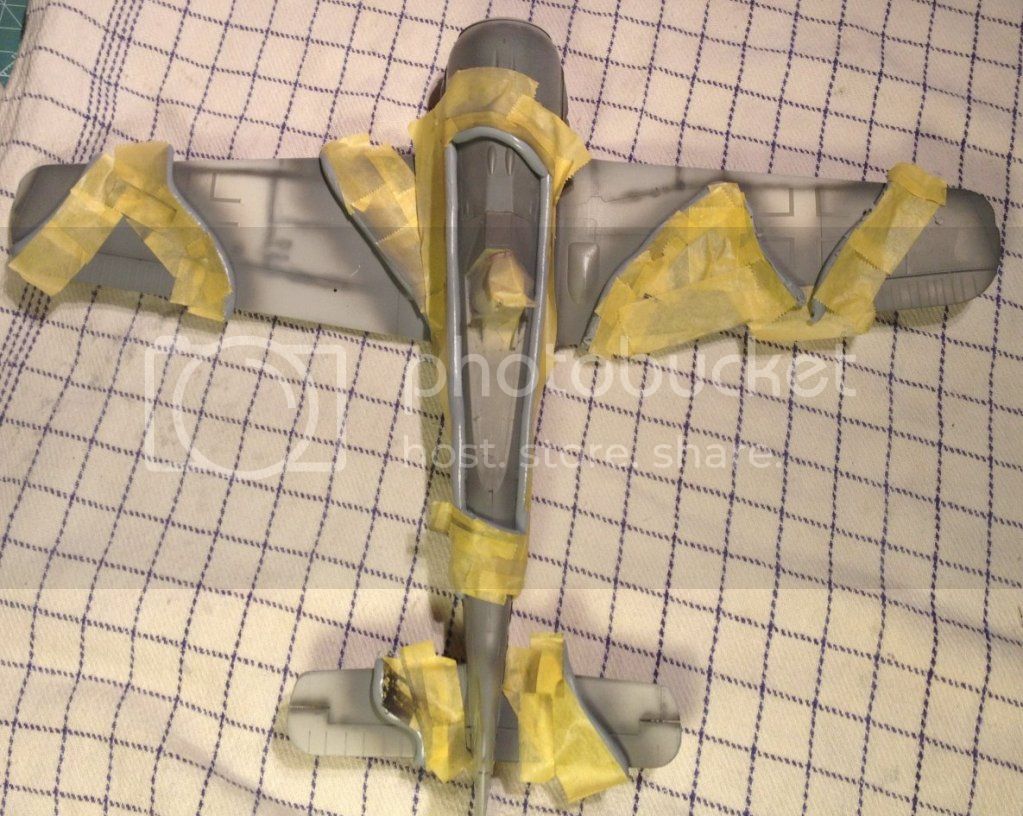
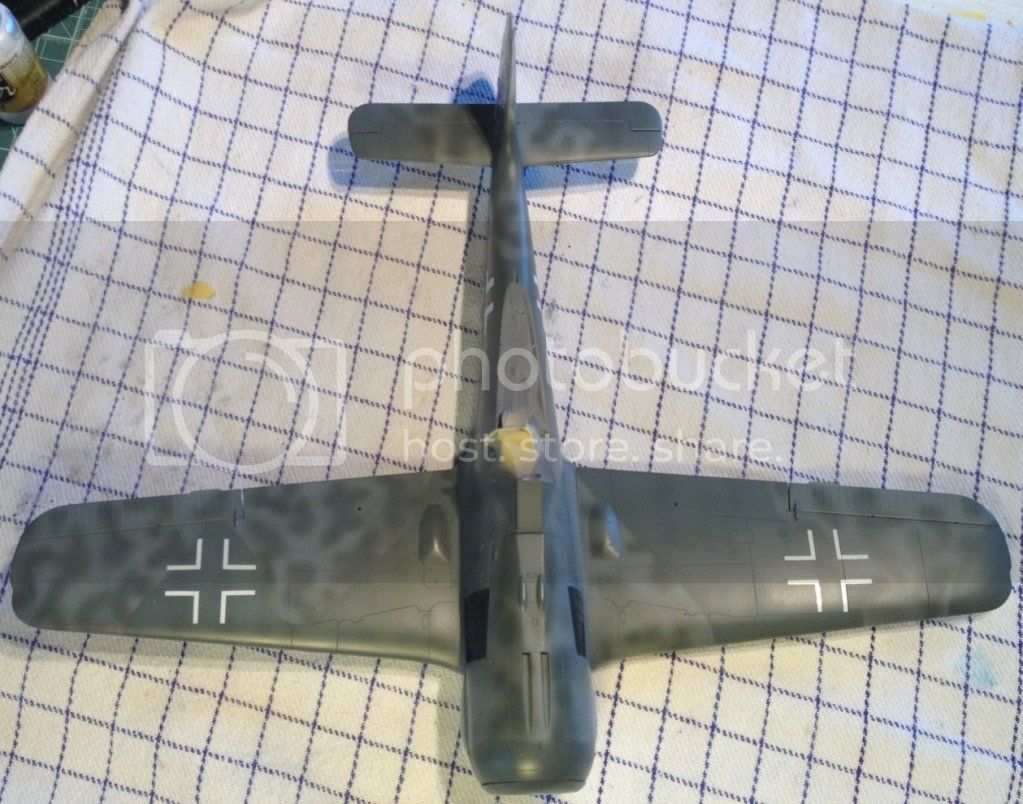
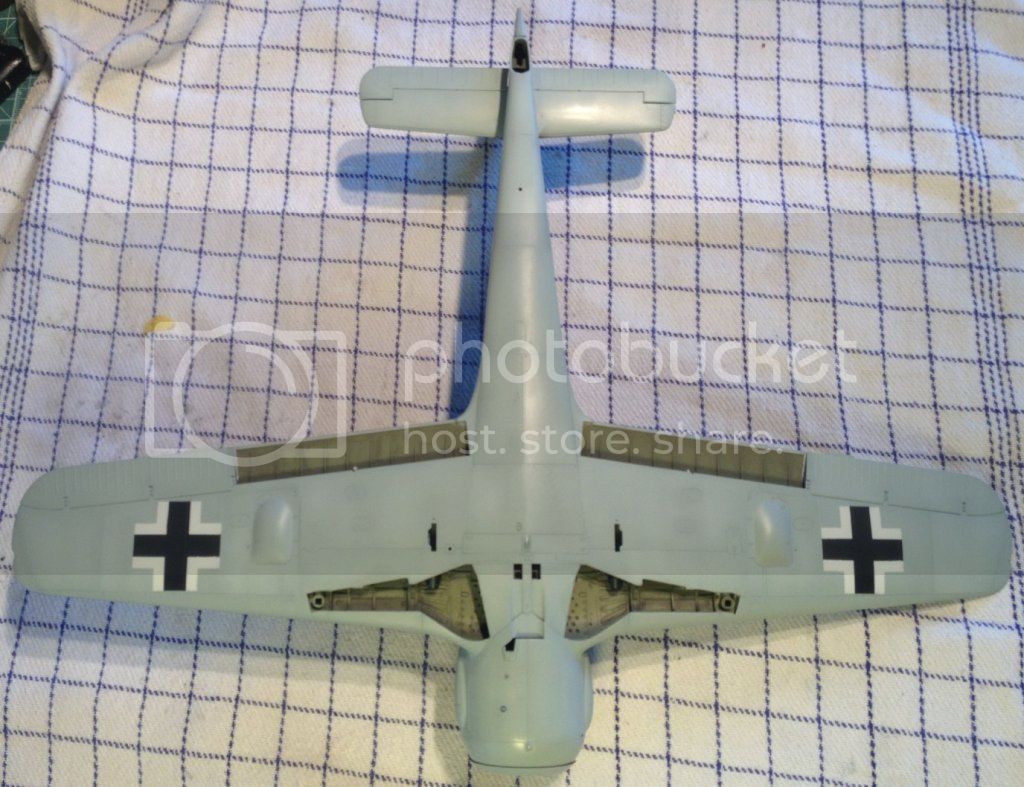
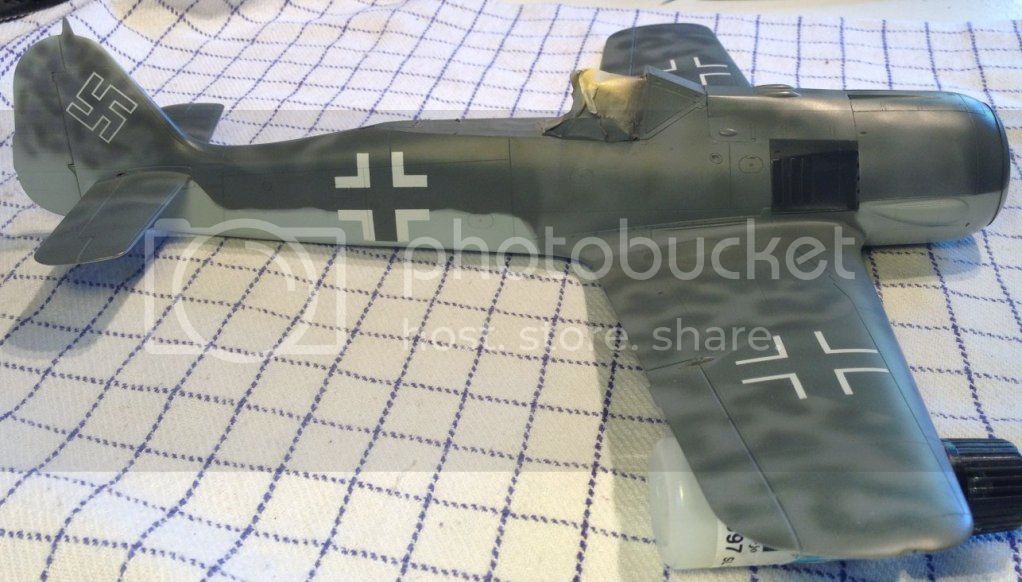
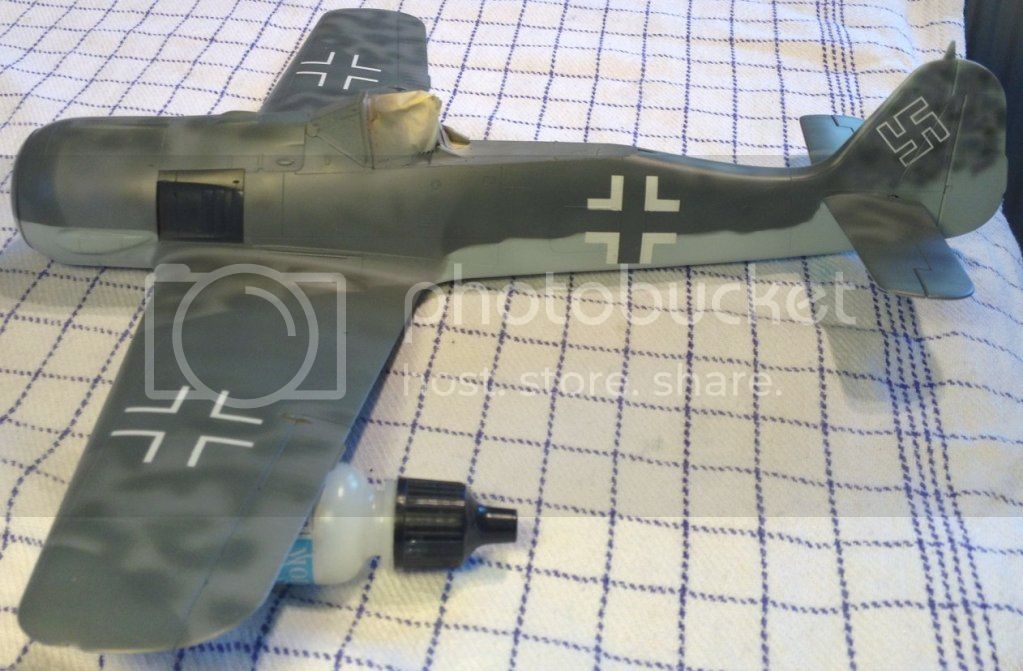
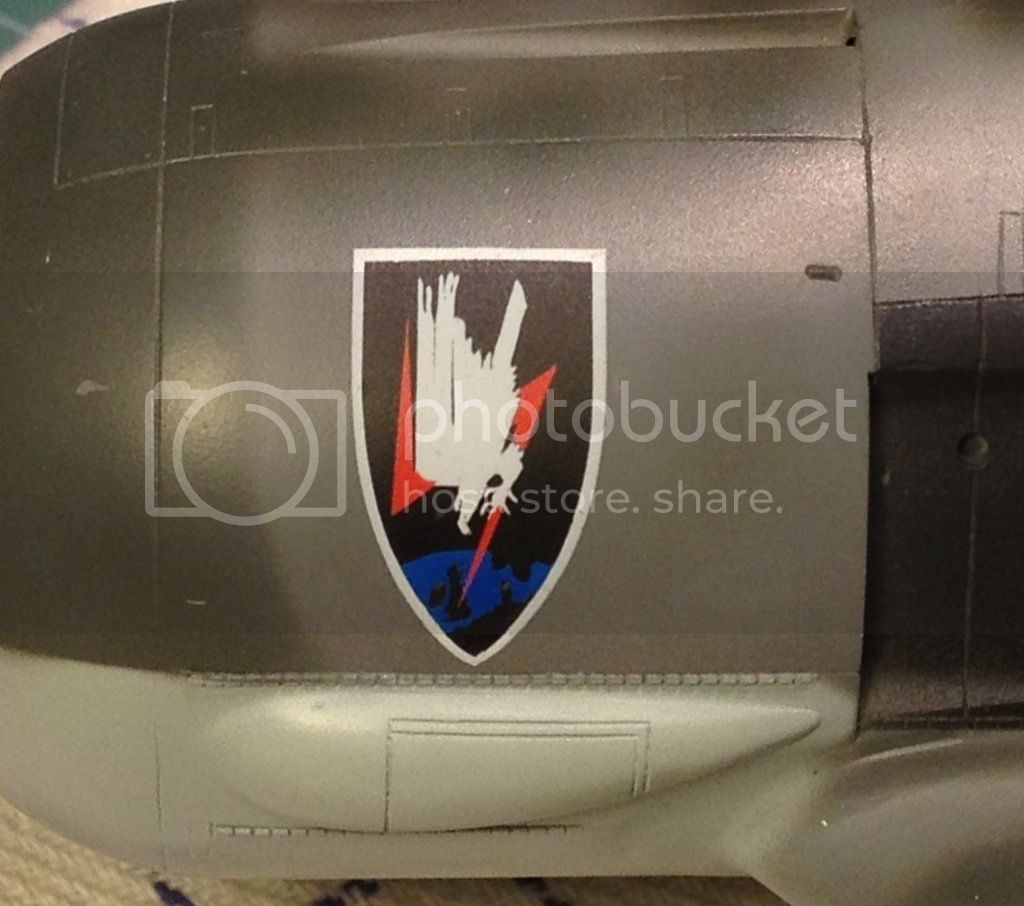
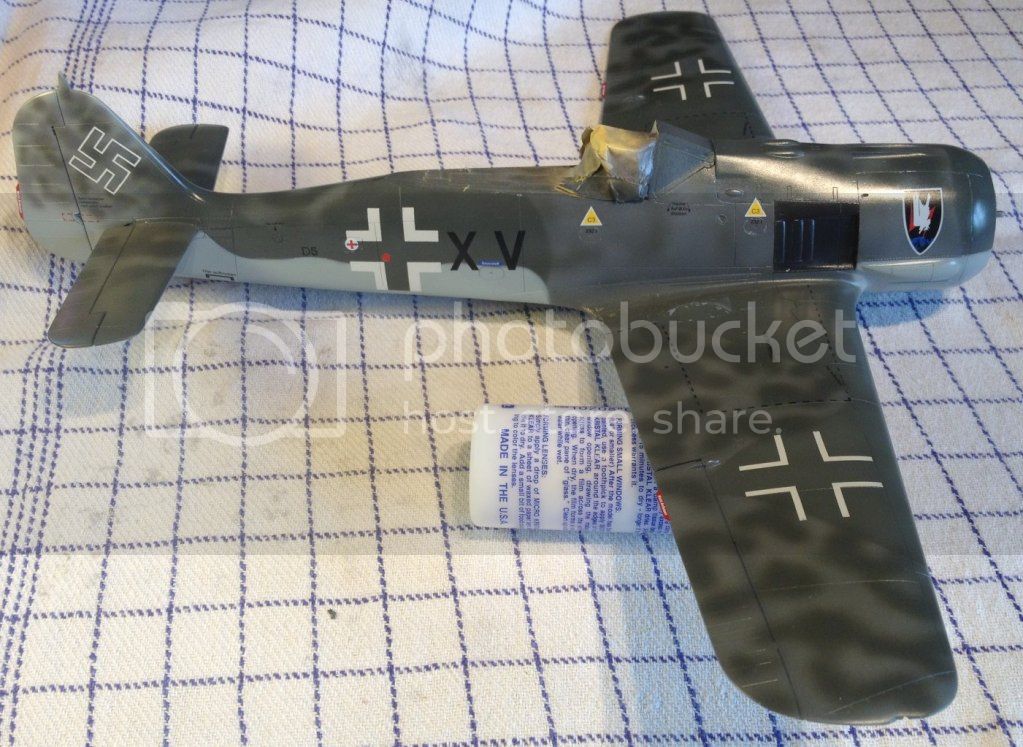
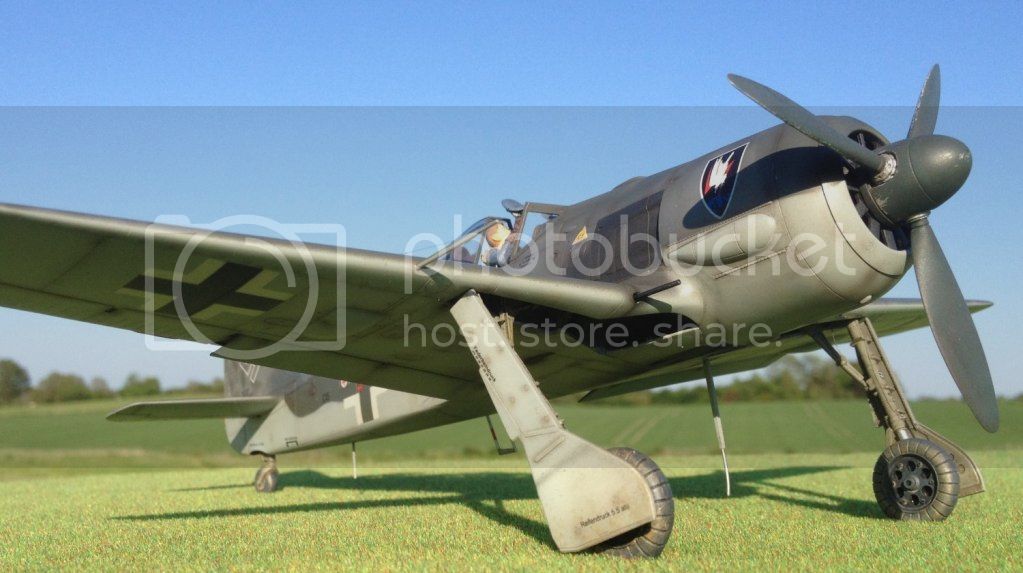
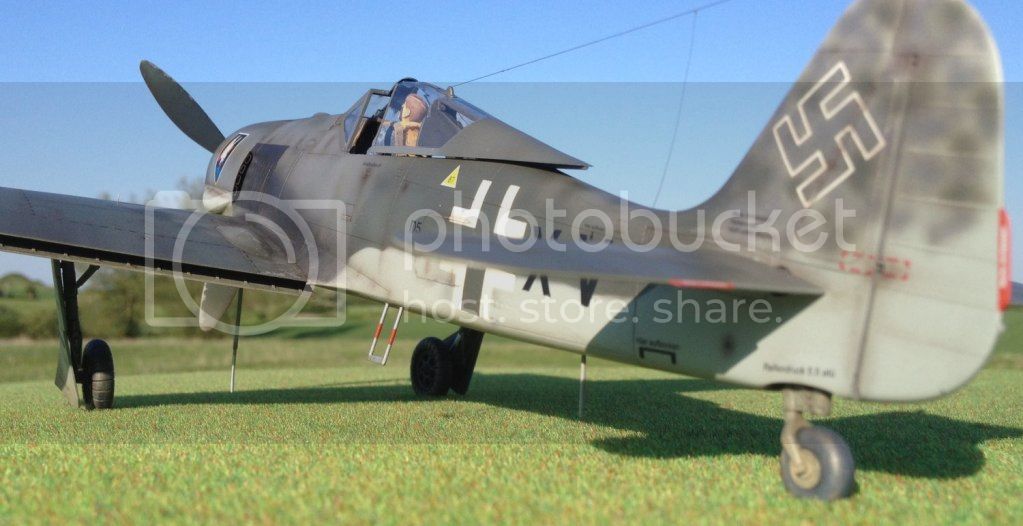
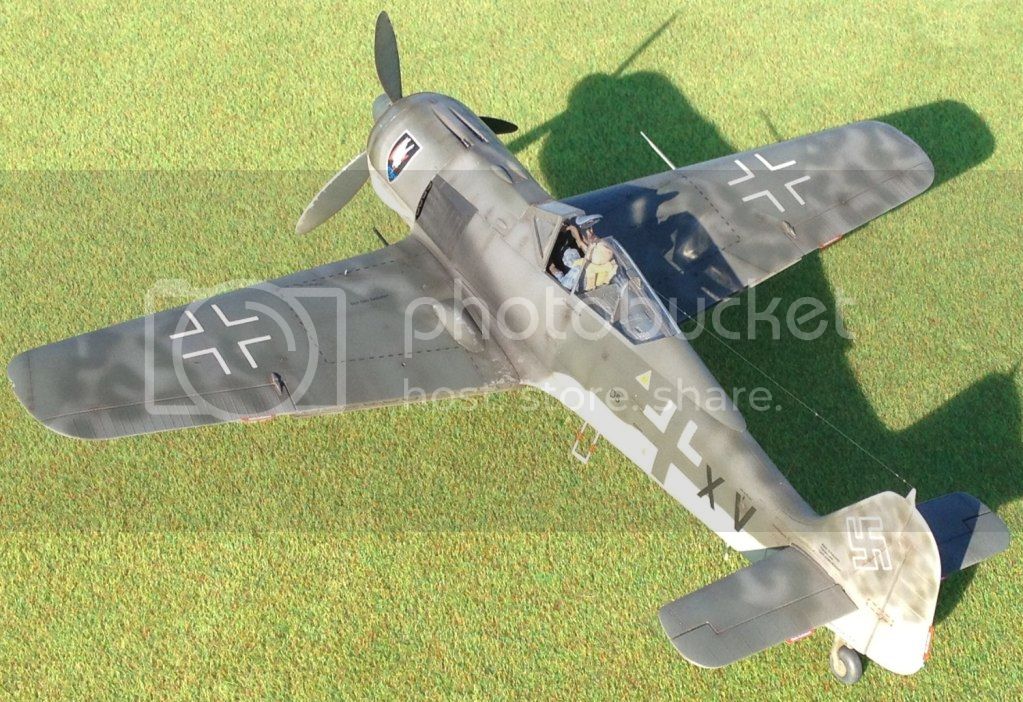
I will build Hasegawas Focke Wulf Fw190A-5 in 1/32 scale. I will use the markings of D5-XV, which was a standard A-5 used for hunting RAF Mosquitos at night by 10./NJG3, Nachtjagdkommando 190, Aalborg-West, Denmark, in the winter of 1944. The aircraft had standard A-5 armament and equipment. The only change was a darkening of the upper surfaces by applications of RLM74.
This is the only picture I have of the real aircraft. If anyone knows of other pictures, please let me know...


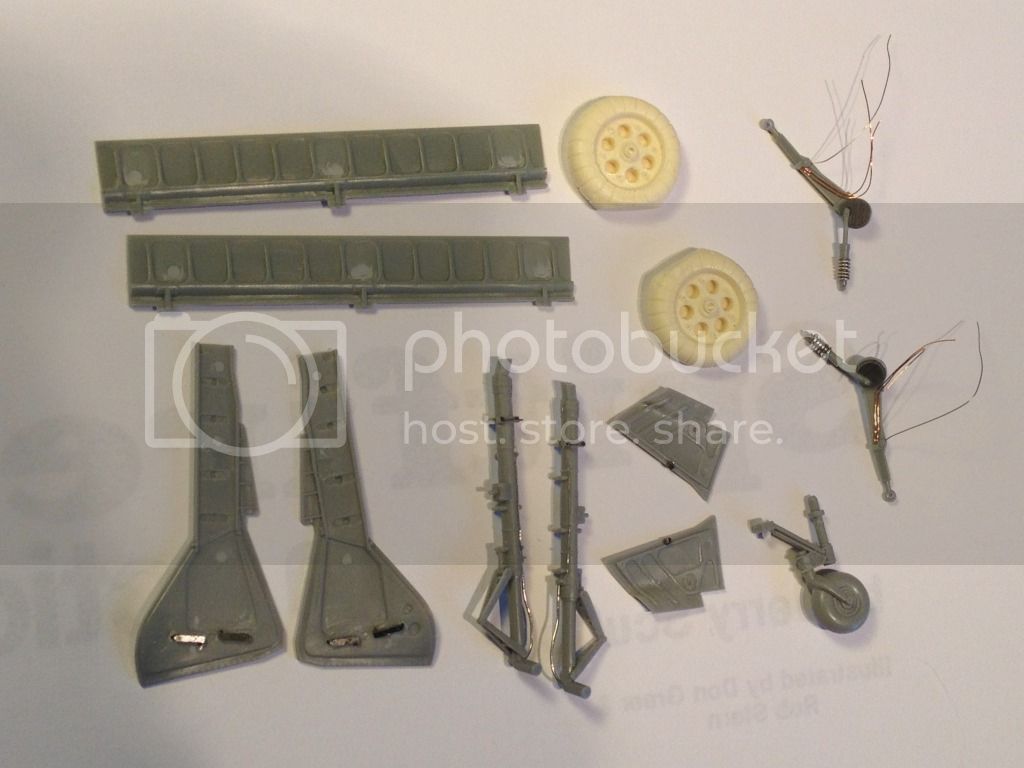
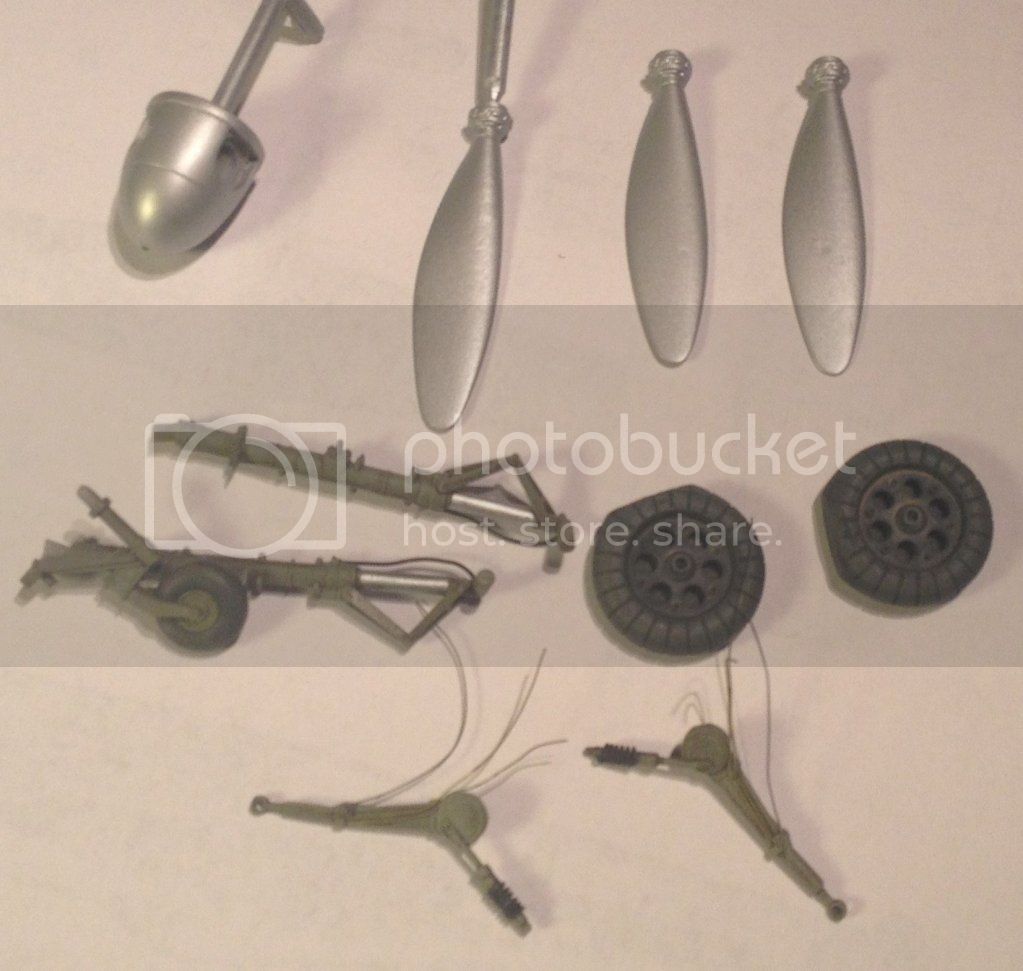
Here is the kit and the little extras I plan to use:
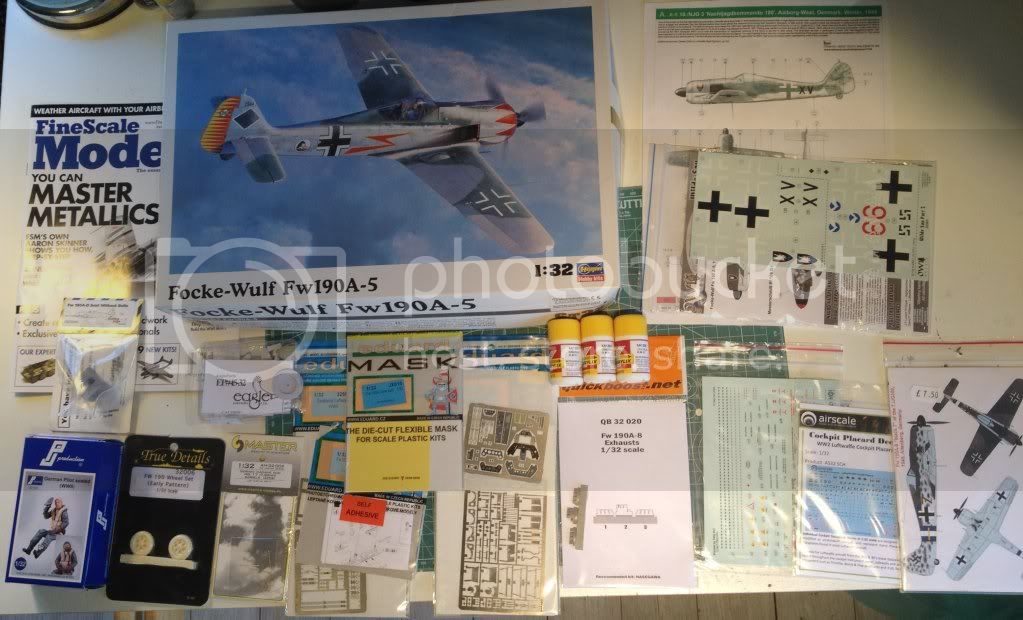

The extras are:

OWL decals "Wilde Sau Part 2"
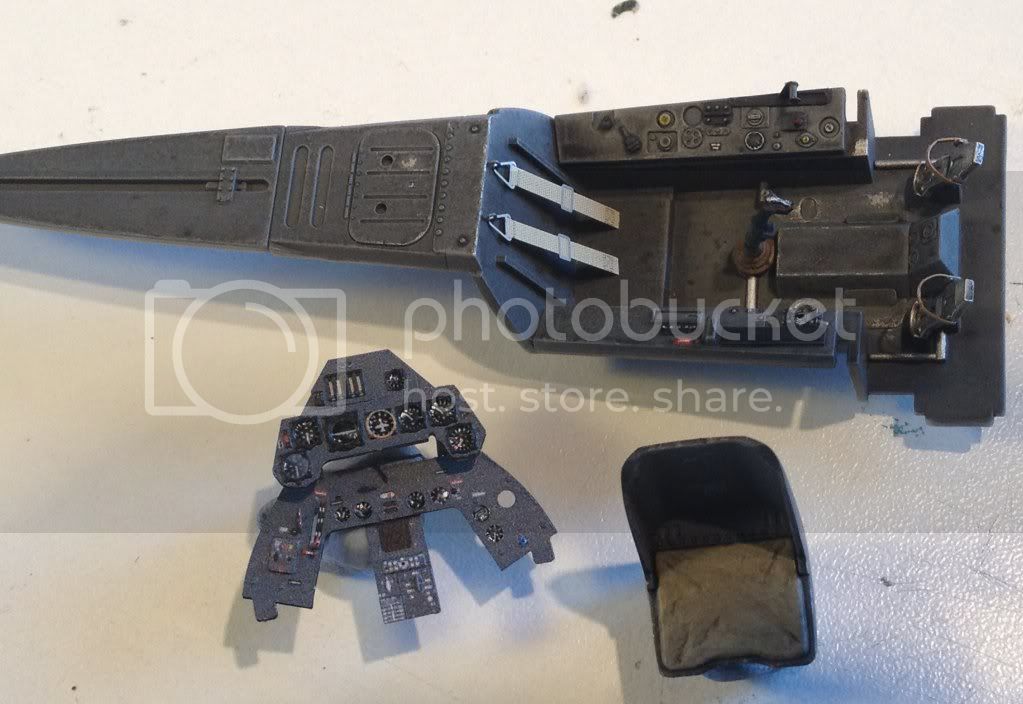
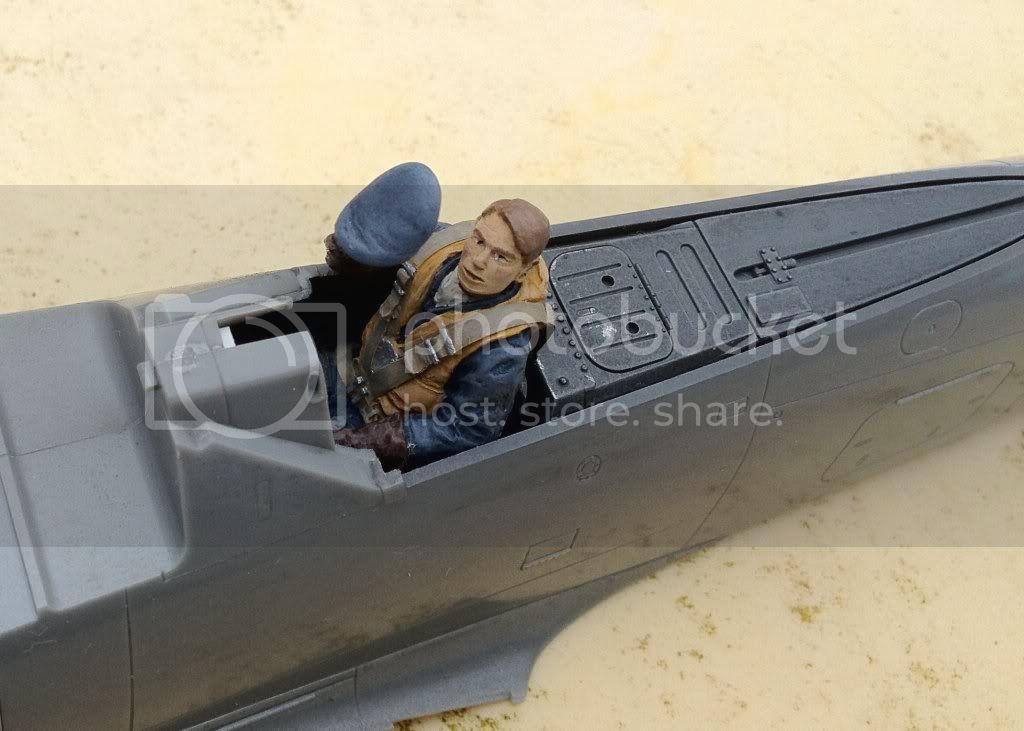
Cutting Edge resin seat without belts. Maybe I will use the kit seat, because the CE seat does not contain a parachute.
True Details resin wheels (FW 190 Wheel Set Early Pattern).
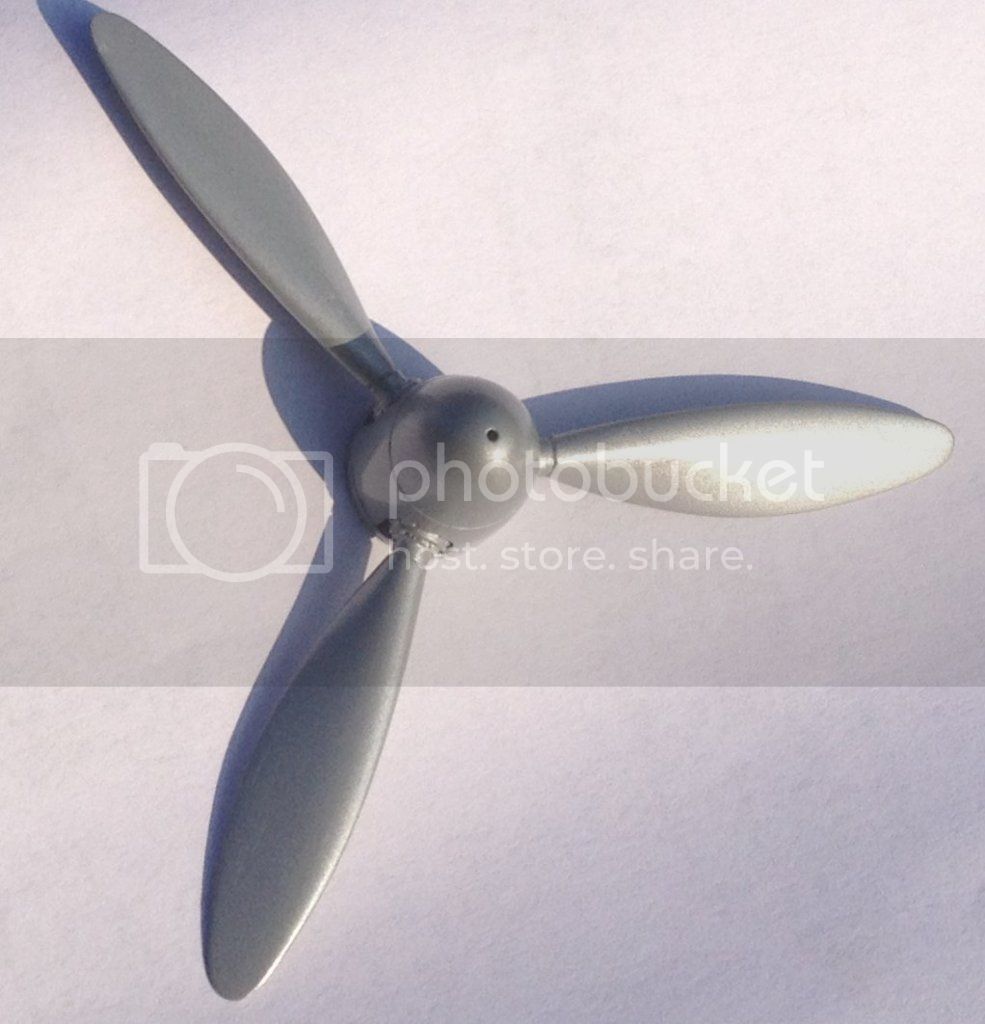
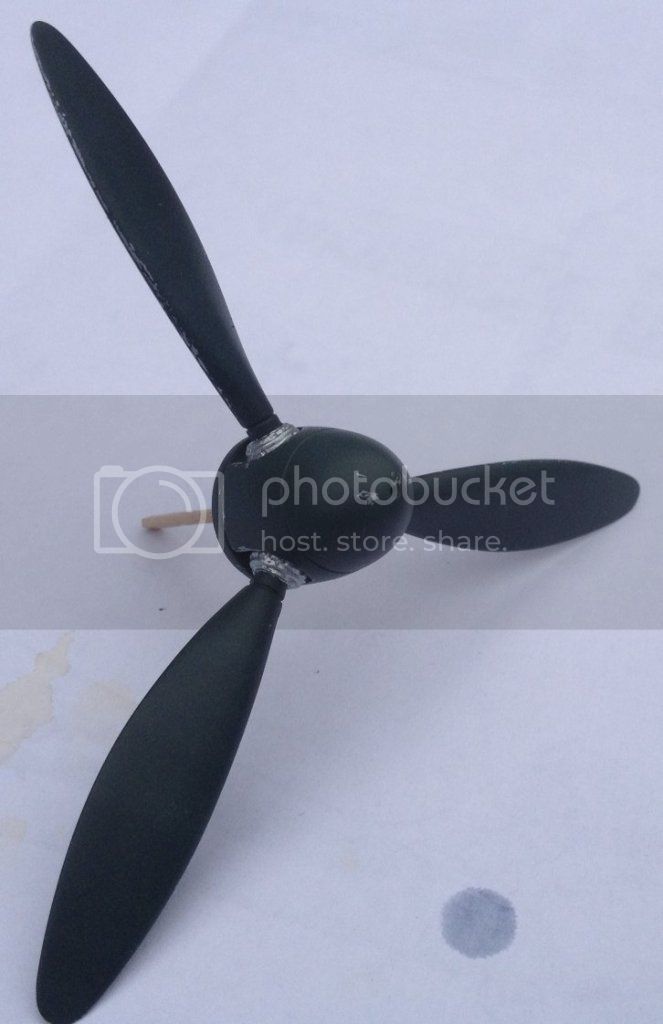
Eagle Editions resin spinner and blades. A minor improvement compared to the kit parts.
QuickBoost hollowed resin exhausts.
Master MG 17 machine gun barrels (beauties).
Eduard PE Zoom interior. I will propably only use the instrument panel.
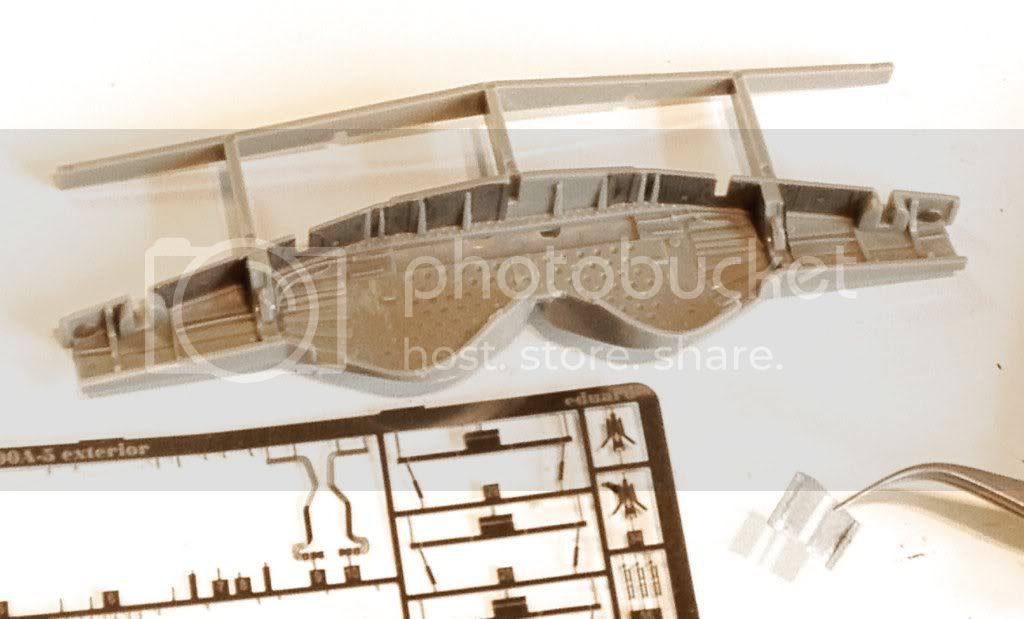
Eduard PE exterior.
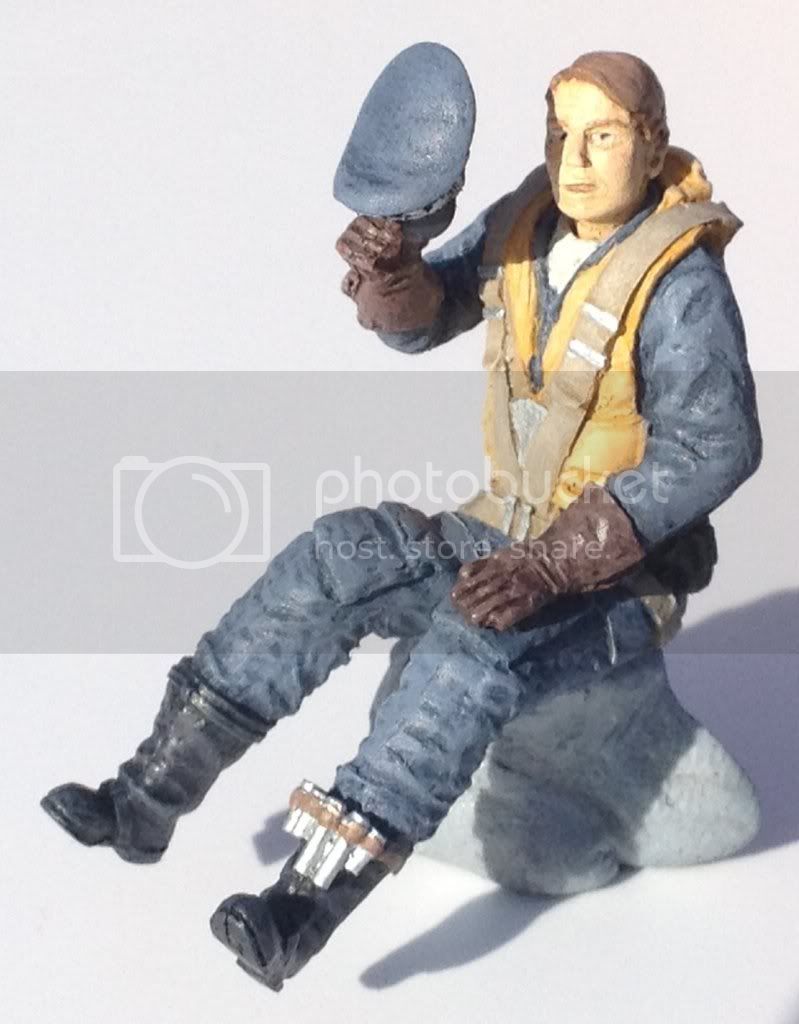
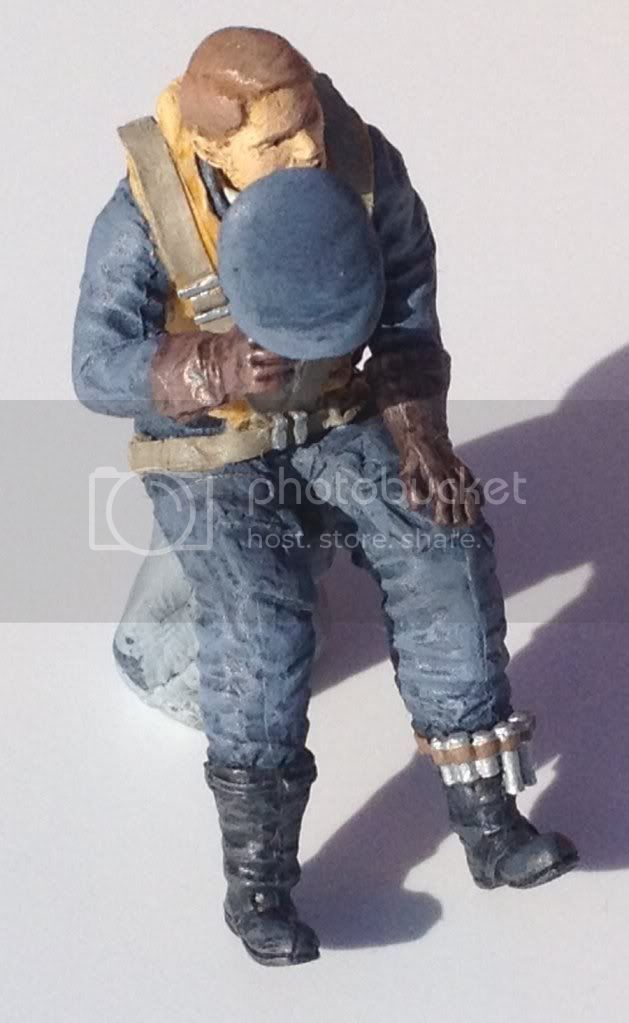
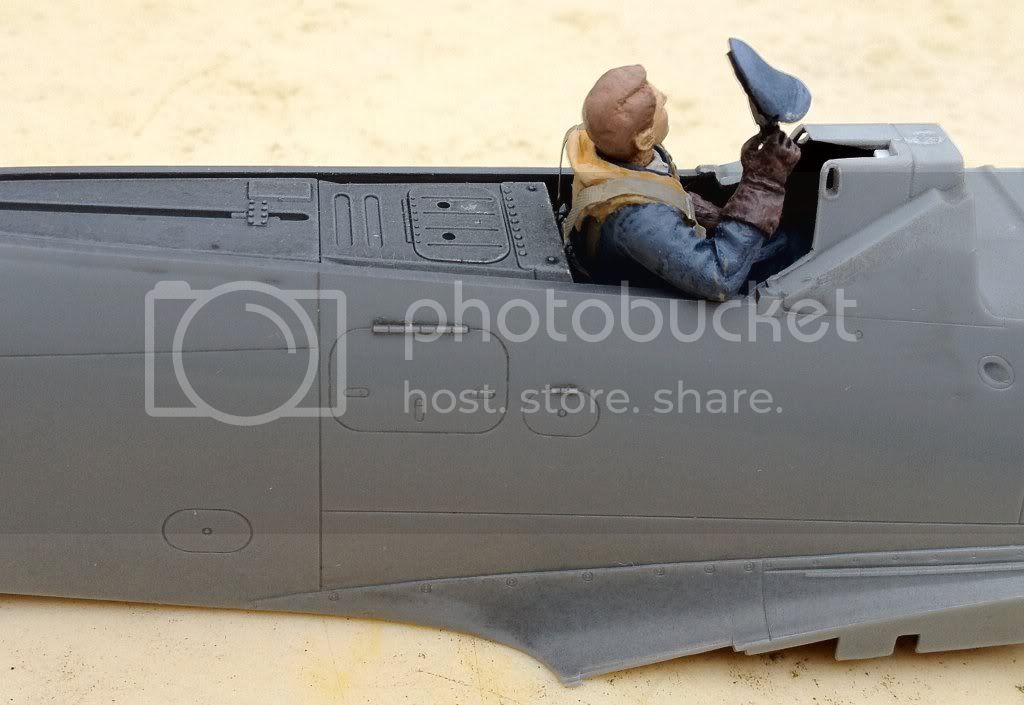
PJ Productions "German Pilot seated".
Eduard paintmask (for canopy).
Airscale Cockpit Placard Decals.
Tally Ho stencils.
Montex mask (for painting balkenkreuz, but I think I will save the montex set and cut the masks myself).
3 tins of Xtracrylic paint (RLM74 Graugrün, RLM75 Grauviolett and RLM76 Lichtblau).

The profile drawings are from a 1/48 scale Eduard kit.

Well, that's it. Wish me luck :-)

Cheers
DougN1
_VISITCOMMUNITY
Georgia, United States
Joined: August 08, 2011
KitMaker: 410 posts
AeroScale: 409 posts
Posted: Monday, March 26, 2012 - 07:01 AM UTC
Looks like you've got everything one could want for the kit

I've got the 1/32 190A-6 kit to do for my entry, so I'll be watching with interest!

Doug
wespe66
_VISITCOMMUNITY
Frederiksborg, Denmark
Joined: June 27, 2011
KitMaker: 122 posts
AeroScale: 121 posts
Posted: Sunday, April 01, 2012 - 02:46 AM UTC
Update: Cockpit, instrument panel and pilot is assembled and painted.

The cockpit was painted RLM66 (Vallejo Model Air 055 Grey Green) and shaded with a lighter version of the same color. Then dry-brushed with an even lighter shade. Then a coat of future and a black wash (Promodeller Black Wash). Last a matt coat (Xtracrylics Flat Varnish).


The pilot was brushpainted with different Model Air colors. A lot of dry-bush. Then a matt coat (Vallejo Model Air Matt Varnish - the mattest matt varnish I know of). Last his boots and gloves where given a coat of satin varnish to make them shine a bit.


Instrument panel is Eduard PE given a coat of satin varnish. Then a drop of Micro Kristal Klear for each instrument to simulate the glass.


After mounting the pilot in his cockpit his harness was extended with Eduard PE. You can also see how I try to fix a Hasegawa error by moving the gun sight 2mm forward. I am going to replace the coaming with solder wire.


It would have been easier to add the pilot after paiting was done, but it was not possible. I will probably break off his hat, arm and head many times before painting is done, we will see

Problem: The pilots right arm and hat collides with the windscreen. Don't know how to fix that yet

Thanks for watching!
Kenneth
wespe66
_VISITCOMMUNITY
Frederiksborg, Denmark
Joined: June 27, 2011
KitMaker: 122 posts
AeroScale: 121 posts
Posted: Friday, April 06, 2012 - 12:15 AM UTC
A small update:

The plastic coaming has been cut off and replaced with solder wire (it looks better in real life :-)


Here it is painted and the gun sight mounted:


The engine is painted and weathered. Also added a few stencils to spice it up. Didn't care to add ignition wires etc. - not much will be visible after assembly.


Eduard PE is being added to the wheel wells:


And here the wheel well has been glued into the lower wing part. I think it will look good when painted and weathered:


Thanks for watching.
Kenneth
wespe66
_VISITCOMMUNITY
Frederiksborg, Denmark
Joined: June 27, 2011
KitMaker: 122 posts
AeroScale: 121 posts
Posted: Tuesday, April 10, 2012 - 09:20 AM UTC
This weeks progress:

I had a lot of struggle mounting the pilot in the cockpit - it sounds easy, but it wasn't. Somehow he is a bit too big for this pit. But after gluing and swearing for hours I was finally happy.

Then it happent. Yes - I dropped the model on the floor. The cockpit broke out of the fuselage, the pilot broke off the seat, his legs, hat plus a few other things also broke off. I was paralyzed for a few minutes or maybe 10, I don't know. Time simply stopped.
When time slowly started moving again, I was very VERY close to dump everything in the bin. And I mean everything - plastic, paint, glue, tools, all of it!
After pulling myself together it took about 2 hours to glue everything in place again. I don't think any permanent damage has happened - in fact I managed to move the pilot a bit further back in the seat, which I had wanted to do for some time. The only thing that needs fixing now is a few scratches on his arms. I'll fix that after the model has been painted.

The wing halfs have been assembled and glued to the fuselage. The right wing root was a perfect fit, but I think I wasn't too lucky with the right one. There is a prominent step between fuselage and wing. I decided to try to hide it with some putty.

The engine cowling is just dry-fitted, but I am not too proud of the fit of this either. Both the top and the bottom shows a 0.5mm gap. I'm not shure if I should try to eliminate this gap before gluing the cowling, or if I should just fill it after gluing. I will think about it until tomorrow...

As I write this I am removing the last few sink marks and erronous hatches. Hopefully it will be ready for paint in the weekend...


Until next time,
Cheers
DougN1
_VISITCOMMUNITY
Georgia, United States
Joined: August 08, 2011
KitMaker: 410 posts
AeroScale: 409 posts
Posted: Wednesday, April 11, 2012 - 05:58 AM UTC
Looks like you've recovered nicely from the "accident"! I usually have one of those happen for each kit I build. I have come to expect it and appreciate the additional challenge it provides

Looking forward to your next installment!

Doug
wespe66
_VISITCOMMUNITY
Frederiksborg, Denmark
Joined: June 27, 2011
KitMaker: 122 posts
AeroScale: 121 posts
Posted: Friday, April 13, 2012 - 06:16 AM UTC
Thanks for cheering me up, Doug
Real life has caught up with me again, so not much progress yet. But lets see the next few days...
doubtingthomas
_VISITCOMMUNITY
Wisconsin, United States
Joined: March 17, 2009
KitMaker: 156 posts
AeroScale: 153 posts
Posted: Sunday, April 15, 2012 - 01:15 AM UTC
Looks good, Kenneth! Nice recovery. I REALLY like the pilot figure, and it gives a great impression of just how tight of quarters it was in the "office."

Regards-
Tom
wespe66
_VISITCOMMUNITY
Frederiksborg, Denmark
Joined: June 27, 2011
KitMaker: 122 posts
AeroScale: 121 posts
Posted: Friday, April 20, 2012 - 08:36 AM UTC
Thanks Tom. Yes, there is not much space for the pilots elbows

The last few days progress (yes, I'm a slow builder. I have small children :-)

All major parts are assembled, puttied and sanded:


The wheel whells have been painted, dry-brushed and weathered - also the inside of the inner doors, which of course will be invisible after final assembly (I have not yet weathered the flap areas, because I want to wait until the lower parts of the flaps are ready for weathering):


A few small parts before and after paint and weathering. The gear legs have been equipped with various wires and a few stancils (not visible on the photo), and the holes in the scissors have been drilled:


The spinner and blades have been painted silver as a basis for creating scratches and wear later. I just noticed some shallow recesses in the blades - have to fix that tomorrow...

Cheers

wespe66
_VISITCOMMUNITY
Frederiksborg, Denmark
Joined: June 27, 2011
KitMaker: 122 posts
AeroScale: 121 posts
Posted: Tuesday, April 24, 2012 - 09:25 AM UTC
A small but relevant update: Model has been primed and is ready for paint.

First all relevant areas have been masked off. Again the pilot gave me a bit of trouble, but I think he will be OK:


Then all seams and puttied areas got a couple of iterations of of Mr Surfacer 1200 with a paintbrush and sanding.
Then Mr Surfacer 1200 was airbrushed on the same areas and sanded smooth, I think maybe 5-6 times, until all traces of seams, hatches and sink marks were gone. A few panel lines needed rescribing.
Finally a good coat of Vallejo Grey Primer, which was buffed with grit 1200 wet sanding paper.


Next, the crosses will be painted and masked.

Thanks for following.
AussieReg
Staff MemberAssociate Editor
AUTOMODELER
#007
_VISITCOMMUNITY
Victoria, Australia
Joined: June 09, 2009
KitMaker: 8,156 posts
AeroScale: 3,756 posts
Posted: Tuesday, April 24, 2012 - 12:01 PM UTC
Lovely work Kenneth, the extra effort that you are putting in is really paying off.

Looking forward to seeing some colour go on now.

Cheers, D
wespe66
_VISITCOMMUNITY
Frederiksborg, Denmark
Joined: June 27, 2011
KitMaker: 122 posts
AeroScale: 121 posts
Posted: Friday, April 27, 2012 - 10:58 PM UTC
Thanks Damian. I think I'm looking even more foreward to the colors than you are!

First the propeller and spinner. All visible imperfections are removed with Mr Surfacer 1200. Then it is painted aluminium (toned down with light grey) and had a coat of Future to protect it:


Then it is painted RLM70 and scratched with a toothpick, had a coat of flat varnish and details painted silver:


I originally decided to paint crosses before camoflage, because the masks tends to leave visible marks om the camo. As a last minute decision, I decided to paint the camo first, then protect it with Future (or rather the danish equivalent Sterling Selvblankende Gulvpolish) in the hope that the masks would not destroy the finish. So I started preshading:


Then - as a last second decision - I decided to paint crosses first after all, because the fuselage crosses would be quite fiddly to paint after camo. So I gave it a coat of white under the crosses, placed the masks and preshaded again. Hey, it's never too late to change your mind!


Cheers
wespe66
_VISITCOMMUNITY
Frederiksborg, Denmark
Joined: June 27, 2011
KitMaker: 122 posts
AeroScale: 121 posts
Posted: Thursday, May 03, 2012 - 09:35 AM UTC
Update: We're moving fast foreward now

Model has been painted RLM76 on the underside. I forgot to take pictures before masking, so you will have to wait to see that.

Then faded RLM75 on top (yes, bad picture, I know):


Then masking with sausages of blu-tack to prepare for RLM74. The sausages provides for relatively soft - but not too soft - demarcation lines between colors:


Then faded RLM74 on top. Here after the sausages have been removed:


Unfortunately the blu-tack lifted off a bit of paint that will have to be fixed (not visible on the photos) It is no big deal, but annoying anyways. The liftet paint was exactly over a puttied sink mark, so I guess the primer sticks less well to putty.

This is more or less the factory camouflage finished. I guess the aircraft was 1-2 years old in winter '44, hence the faded colors. Next I will paint the field-applied blotches of RLM74 all over the factory RLM75. This will be done in a slightly darker, fresher color.

Then I can only wait for Mal (Miracle Masks) to provide me with masks for the England Blitz emblem and the codes (do you feel the pressure, Mal? )

Thanks for watching!
wespe66
_VISITCOMMUNITY
Frederiksborg, Denmark
Joined: June 27, 2011
KitMaker: 122 posts
AeroScale: 121 posts
Posted: Monday, May 07, 2012 - 04:29 AM UTC
OK, so basic painting is done and masks removed.
There is still a bit of touch-up to - some of the crosses became a bit jagged - and then there is the codes and the emblem to be painted.

Top and bottom views:


Right and left sides:


And close-up of some of the crosses:


Cheers
DougN1
_VISITCOMMUNITY
Georgia, United States
Joined: August 08, 2011
KitMaker: 410 posts
AeroScale: 409 posts
Posted: Monday, May 07, 2012 - 05:00 AM UTC
Looks good Kenneth! Great job on the unusual camo scheme

Doug
doubtingthomas
_VISITCOMMUNITY
Wisconsin, United States
Joined: March 17, 2009
KitMaker: 156 posts
AeroScale: 153 posts
Posted: Monday, May 07, 2012 - 06:50 AM UTC
Hi Kenneth - the paint looks really good. This will be one very distinctive Fw190 - can't say that I've ever seen the scheme before. I love it because I have a soft spot for nachtjaegers!

Regards-
Tom
wespe66
_VISITCOMMUNITY
Frederiksborg, Denmark
Joined: June 27, 2011
KitMaker: 122 posts
AeroScale: 121 posts
Posted: Monday, May 07, 2012 - 07:47 AM UTC
Thanks guys.
I have never seen this camo-scheme before either, but I believe that it was a standard RLM74/75/76 day-fighter that was darkened for nachtjagd with RLM74 by the ground crew.

Cheers
Holdfast
Staff MemberPresident
IPMS-UK KITMAKER BRANCH
#056
_VISITCOMMUNITY
England - South West, United Kingdom
Joined: September 30, 2002
KitMaker: 8,581 posts
AeroScale: 4,913 posts
Posted: Friday, May 11, 2012 - 06:06 PM UTC
Hi Kenneth,
No pressure, have you received the masks yet? your model is looking good and should look stunning when completed
wespe66
_VISITCOMMUNITY
Frederiksborg, Denmark
Joined: June 27, 2011
KitMaker: 122 posts
AeroScale: 121 posts
Posted: Saturday, May 12, 2012 - 04:11 AM UTC
Mal, I received the masks with the mail today.
They look beautiful, and I'm very eager to start the painting. I will practice on my mule with the redundant mask before screwing up the model :-)

Thanks again, I'll be back soon with some pictures.
wespe66
_VISITCOMMUNITY
Frederiksborg, Denmark
Joined: June 27, 2011
KitMaker: 122 posts
AeroScale: 121 posts
Posted: Saturday, May 19, 2012 - 04:42 AM UTC
A quick update:
The Englandblitz emblem, codes and walk-ways have been painted.
Funny how high-resolution close-up pictures always makes small mistake look bigger than they are

It was a bit late when I painted this, so I forgot to take pictures of a few stages. Sorry about that.


I must say that I am very impressed with the paintmasks. They are much better quality than my usual brand. They are not as tacky (which is GOOD), they don't leave residue on the paintwork, and they are better aligned on the backing sheet. All thumps up!

Here the model has been futured and stecilled:


The weathering process is now ongoing - see you soon with a finished Würger!
wespe66
_VISITCOMMUNITY
Frederiksborg, Denmark
Joined: June 27, 2011
KitMaker: 122 posts
AeroScale: 121 posts
Posted: Friday, May 25, 2012 - 06:29 AM UTC
Finally I can call this one finished.

The weathering process consisted of my usual steps:
A coat of future on top of the stencils.
A soft layer of Flory Dark Wash airbrushed overall.
Dark Wash partially removed with a dry cloth and a cotton swap.
More future.
Oil streaks with artist oils streaked with a paintbrush with turpentine.
A coat of Xtracrylix Flat Varnish.
Dirt airbrushed along panel lines and hinges with alcohol tinted with Tamiya acrylics.
Finally gun stains in black and exhaust stains in dark grey and white.

The exhaust and gun streaks went a bit overboard - I wish I had stopped a few moments earlier! But then again, exhaust stains are also quite heavy on the original picture, so somehow I think it is OK. This aircraft was meant to be dirty from the beginning.

The antenna is made of invisible mending thread and isolators build up of Revell Contacta Clear painted dark grey.
Finally rear trim flaps were made of a scrap piece of PE (I'm not telling you how I lost the original trim flaps - too embarassing Landing gear indicators were made of small pieces of wire.

By the way, the scratches near the wing roots where made by painting the area silver, then protected with future, then camo. Then scratches were scratched using a blade, a tooth pick and whatever suitable.

It is not the perfect error-free build - I have not made a such yet (maybe in a later life) - but overall I'm very satisfied with it. It is of course not as colorful as normally seen, but I think it looks dark and evil, which is good! (obviously it wouldn't be good if it was one of my children, but in case of a Luftwaffe aircraft it is just fine

Feel free to comment - I will use constructive critics as a basis for doing the next one better.


P.S.
Sorry about the pictures. I know it should be winter, but weather is not really with me for the moment. It's 25-27 deg.C and sunny, everything is light green with flowers and birds and bees everywhere - there is absolutely no hope for snow or rain or mud or just a cloud anytime soon :-(

More pictures here
DougN1
_VISITCOMMUNITY
Georgia, United States
Joined: August 08, 2011
KitMaker: 410 posts
AeroScale: 409 posts
Posted: Friday, May 25, 2012 - 07:28 AM UTC
Congrats on getting the model finished Kenneth! Looks great, should be a fine addition to your collection

Doug
Merlin
Staff MemberSenior Editor
AEROSCALE
#017
_VISITCOMMUNITY
United Kingdom
Joined: June 11, 2003
KitMaker: 17,582 posts
AeroScale: 12,795 posts
Posted: Saturday, May 26, 2012 - 08:52 AM UTC
Hi Kenneth

Very nice indeed! I think you should consider submitting this as a Frontpage Feature...

All the best

Rowan
doubtingthomas
_VISITCOMMUNITY
Wisconsin, United States
Joined: March 17, 2009
KitMaker: 156 posts
AeroScale: 153 posts
Posted: Saturday, May 26, 2012 - 05:16 PM UTC
Great-looking Fw190, Kenneth!

You obviously did a lot of work between the "clean" painted shots and the last shot. The weathering looks spot on!

Regards- (and trying to get my Fw190 to look that good in 1:48!).

Tom
wespe66
_VISITCOMMUNITY
Frederiksborg, Denmark
Joined: June 27, 2011
KitMaker: 122 posts
AeroScale: 121 posts
Posted: Saturday, May 26, 2012 - 08:59 PM UTC
Thanks alot for your comments. Really appreciate it!
 _GOTOTOP