_GOTOBOTTOM
Early Aviation
Discuss World War I and the early years of aviation thru 1934.
Macchi1:48 M5 diorama
Louis
_VISITCOMMUNITY
Bas-Rhin, France
Joined: May 21, 2006
KitMaker: 472 posts
AeroScale: 471 posts
Posted: Sunday, April 08, 2012 - 07:30 PM UTC
Hello,


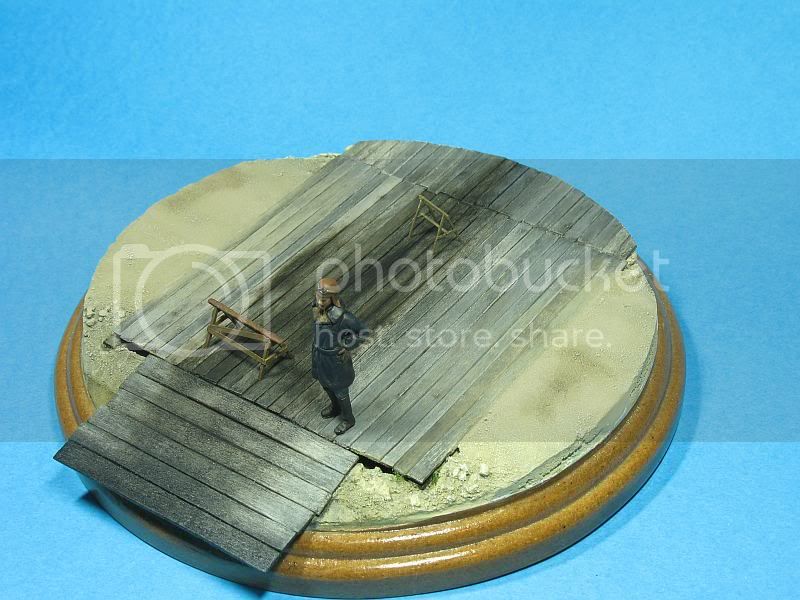
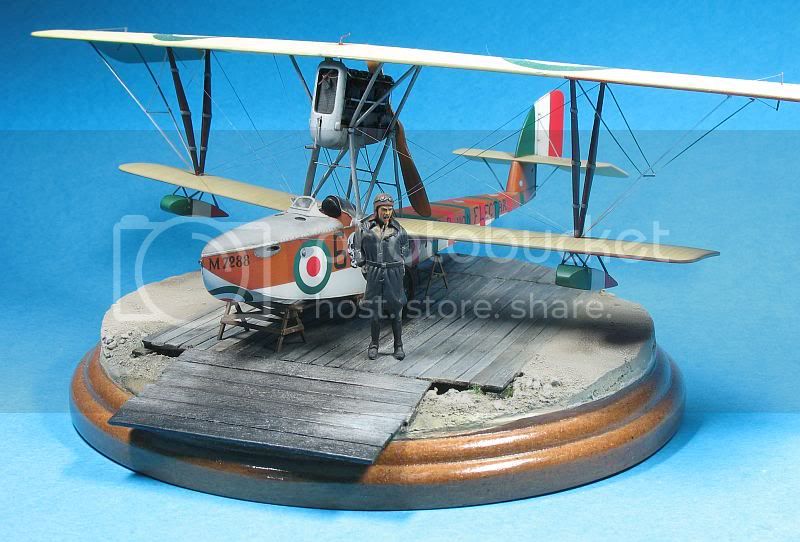
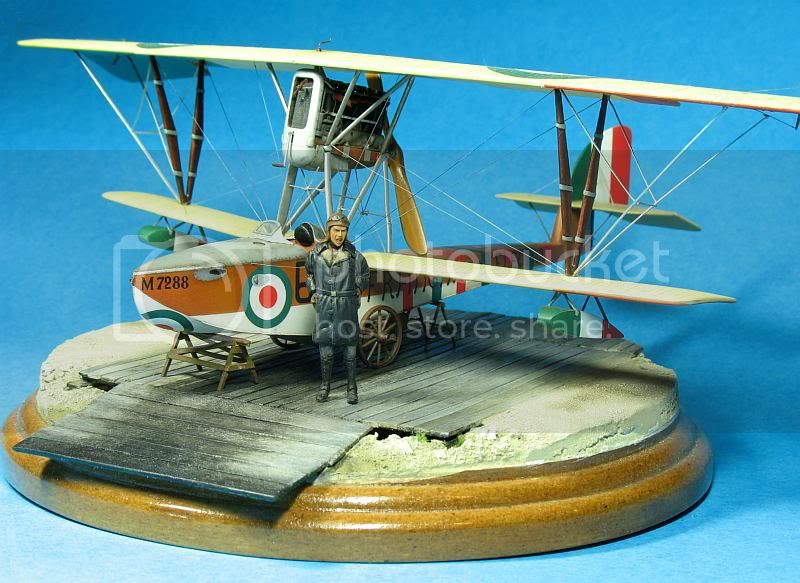
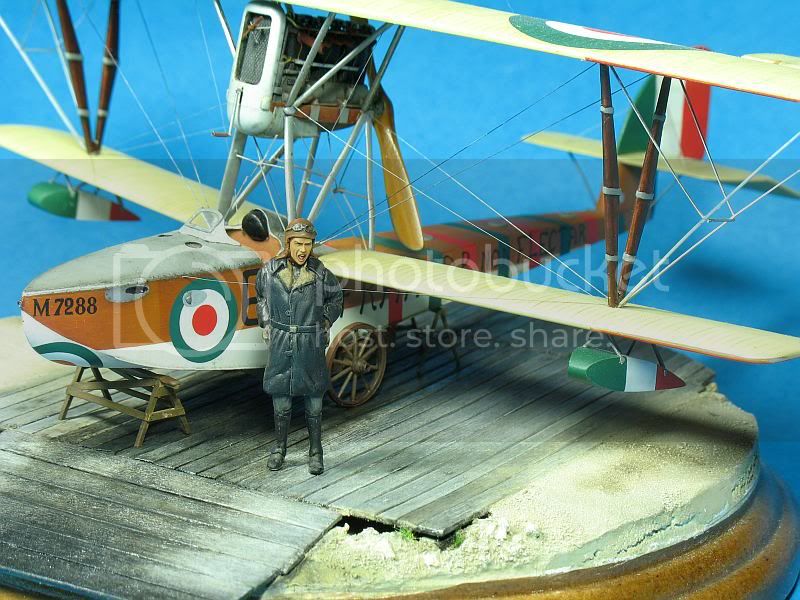
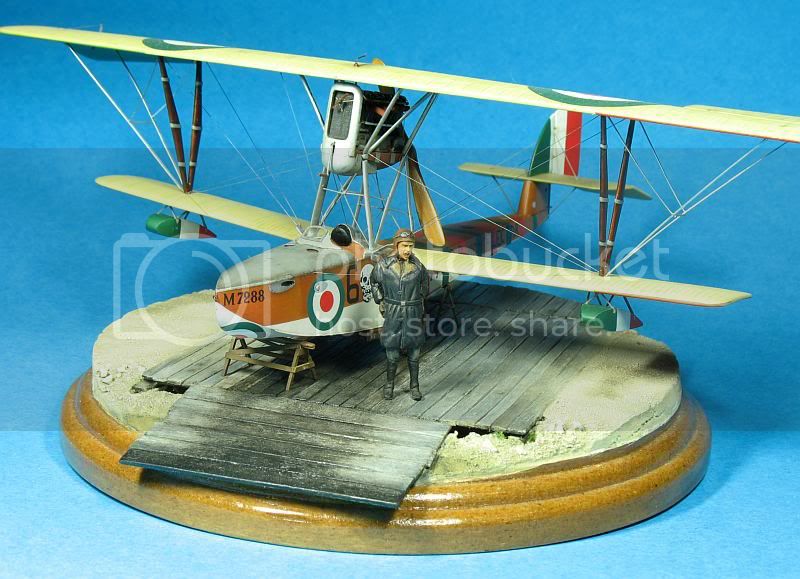
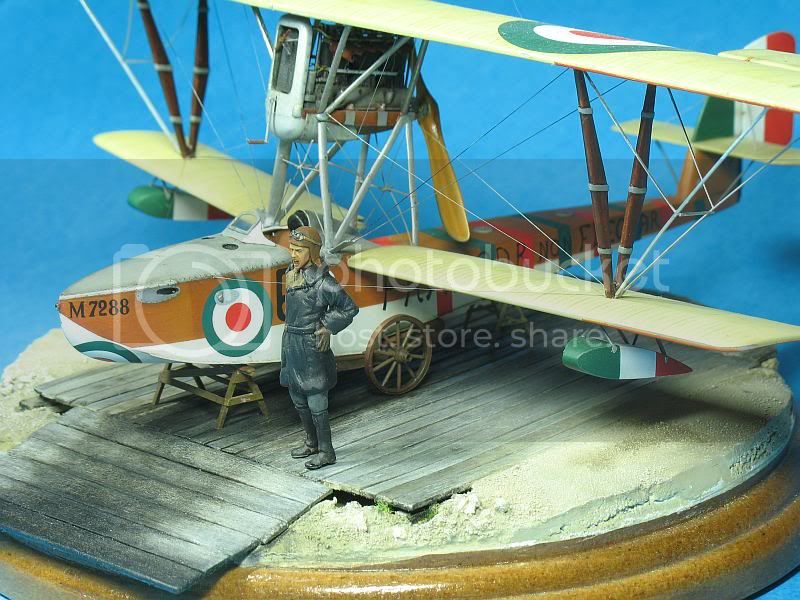
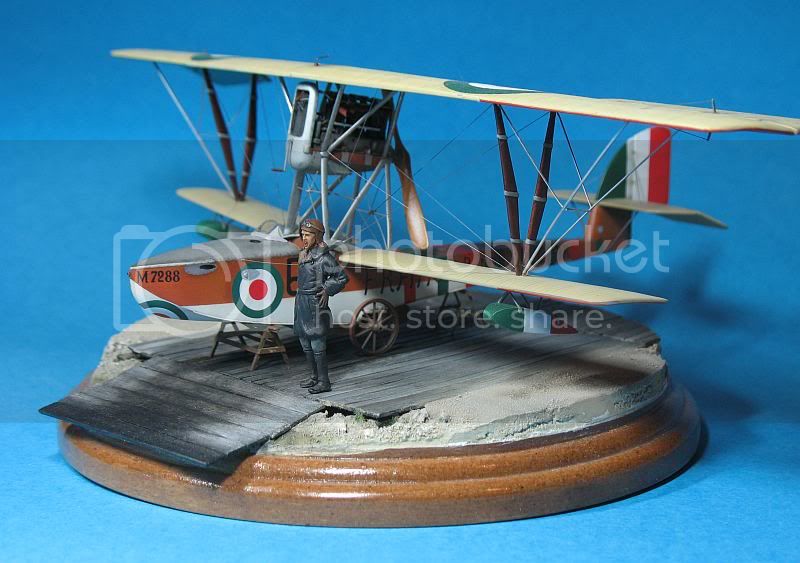
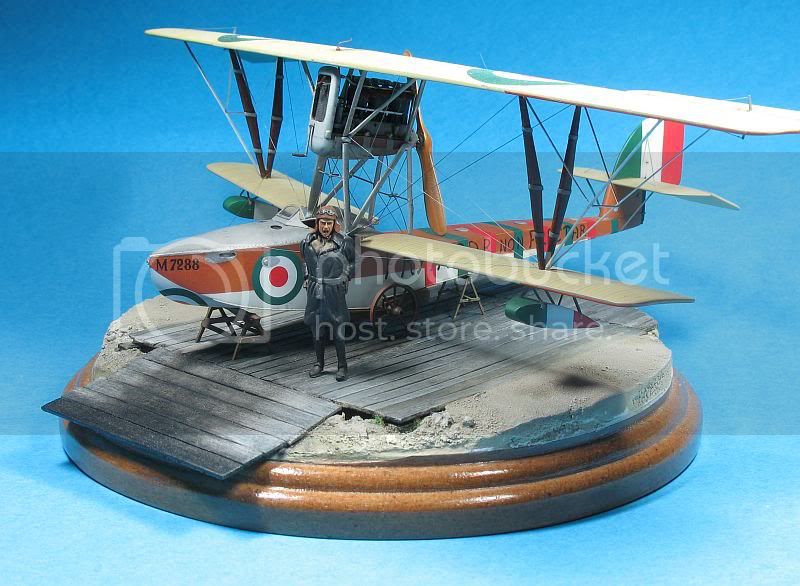
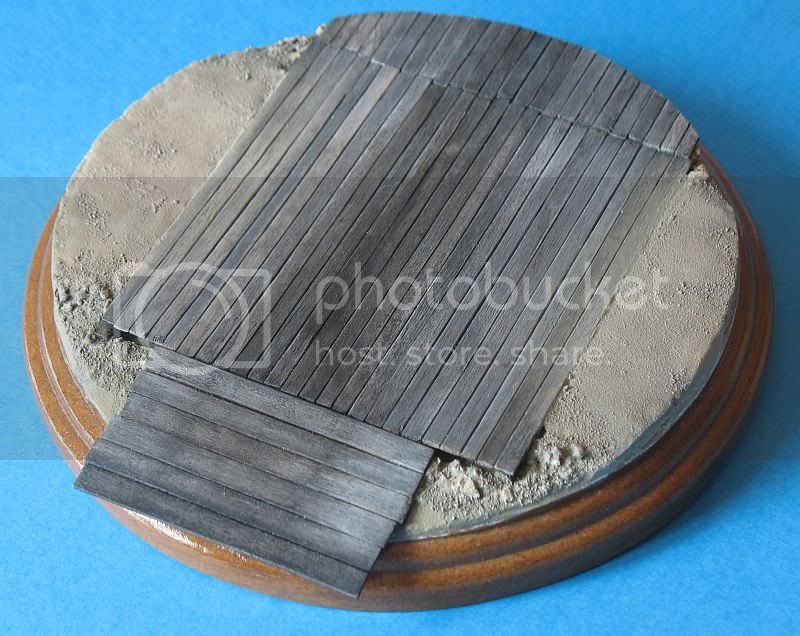
I just finished the base and the pontoon to make a small diorama.

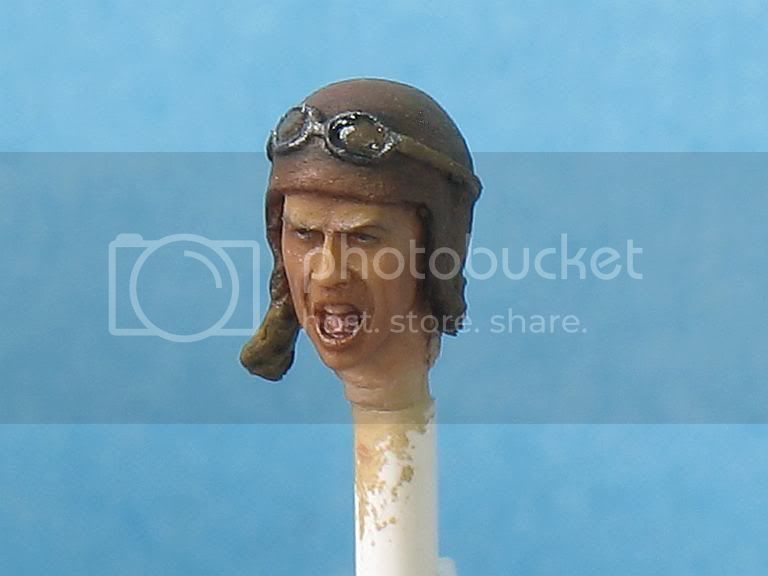
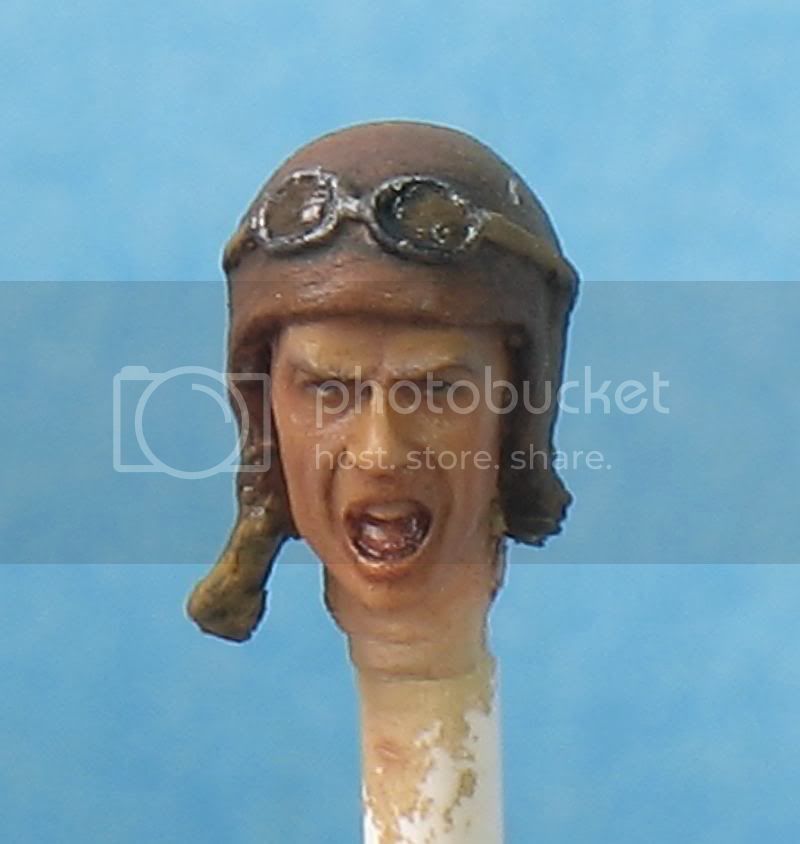
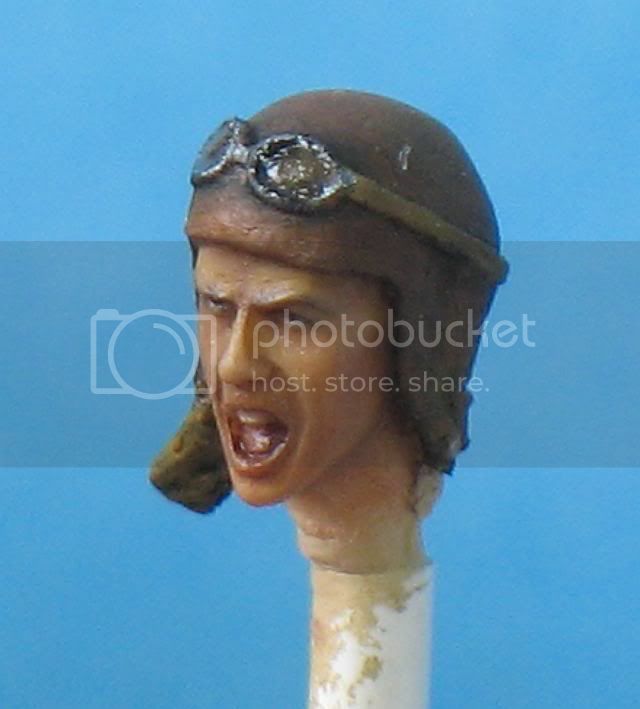
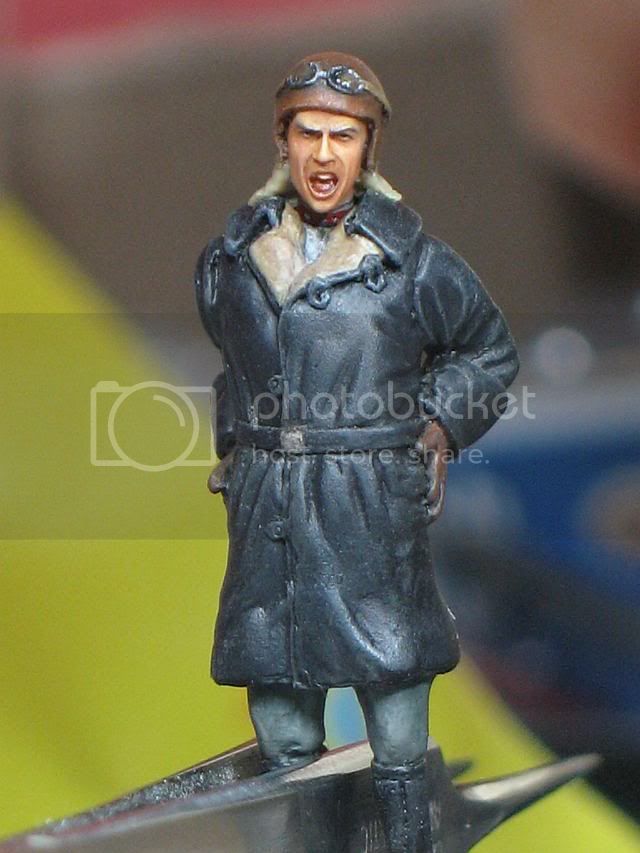
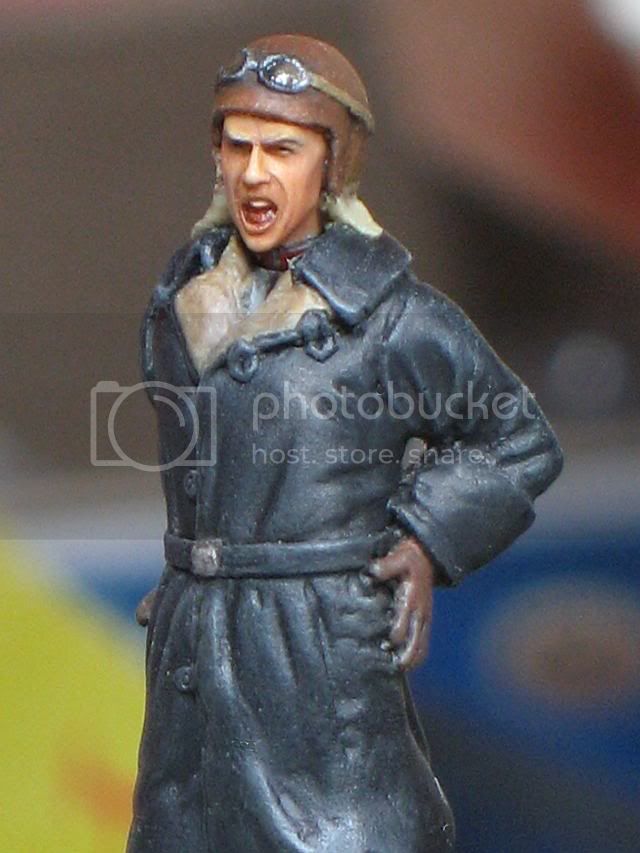
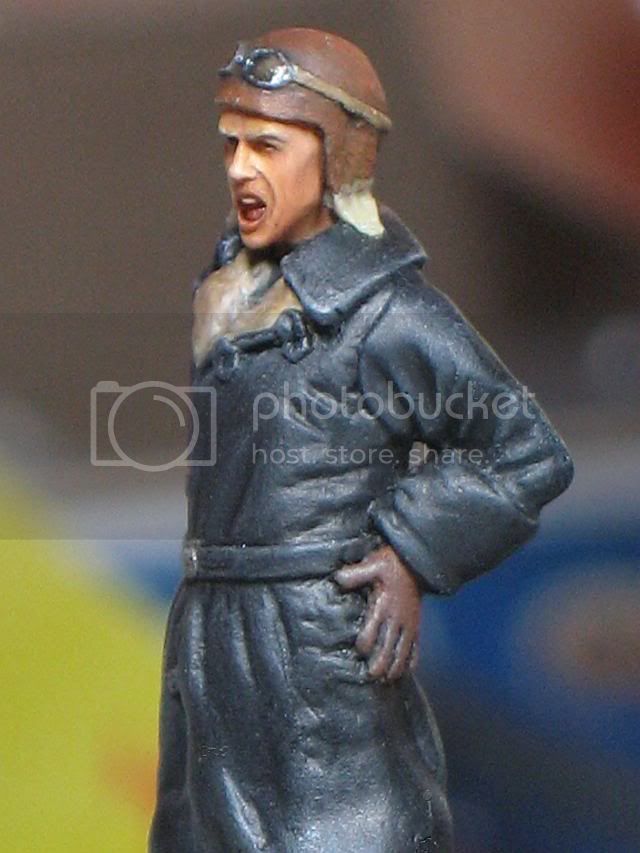
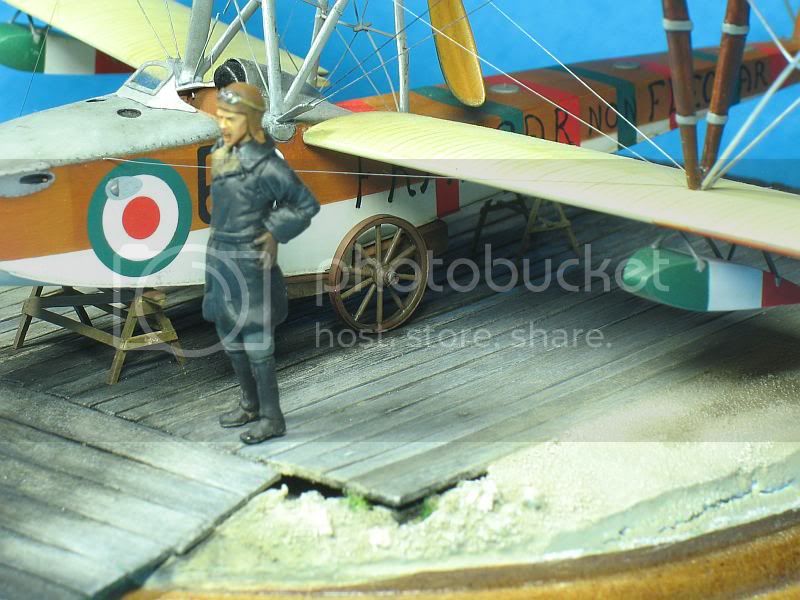
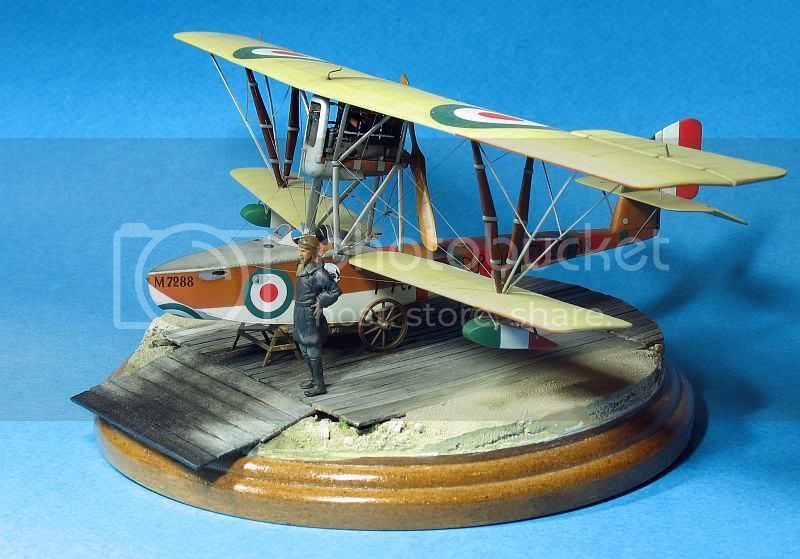
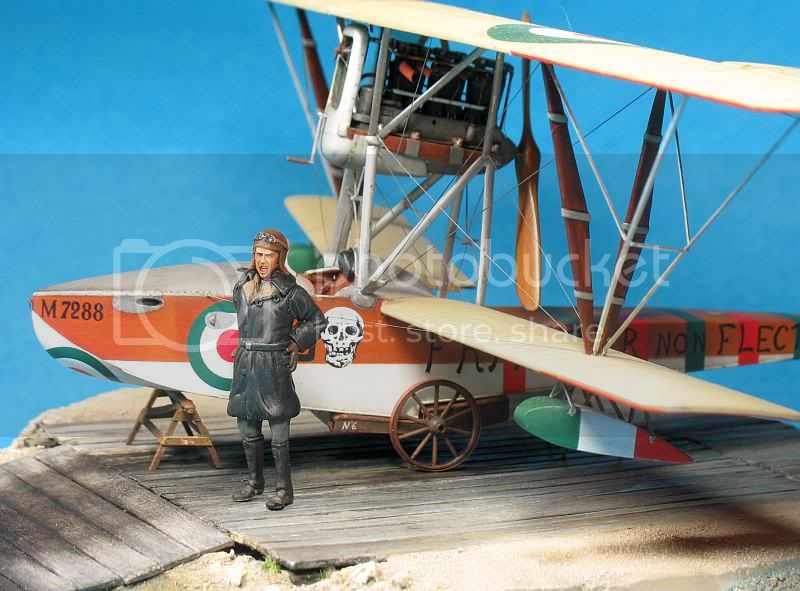
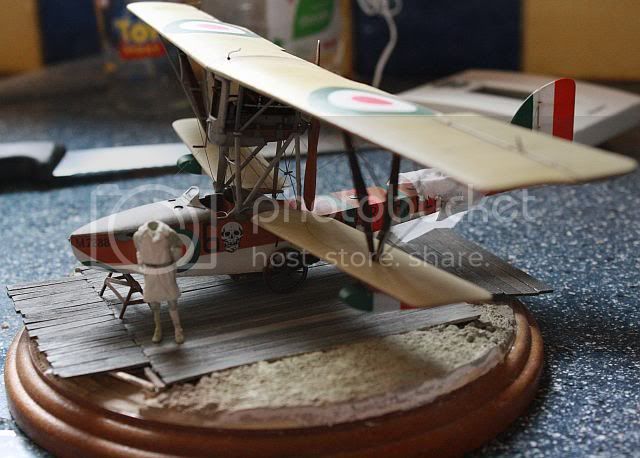
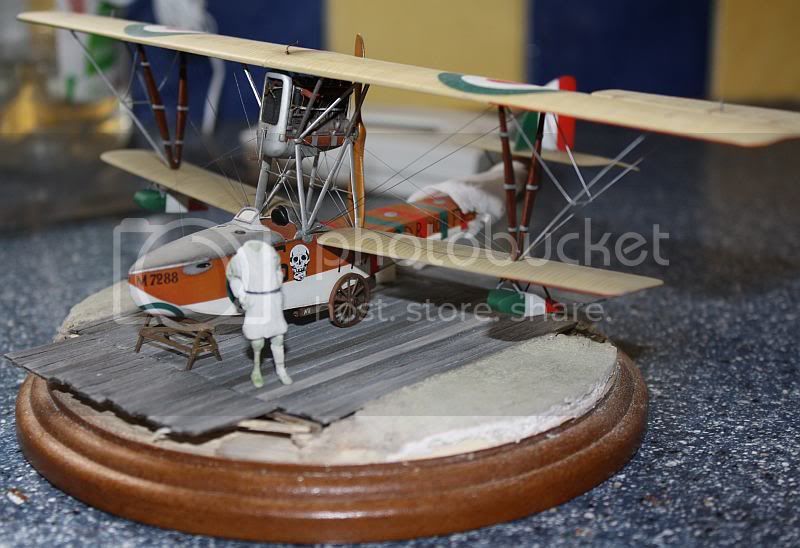
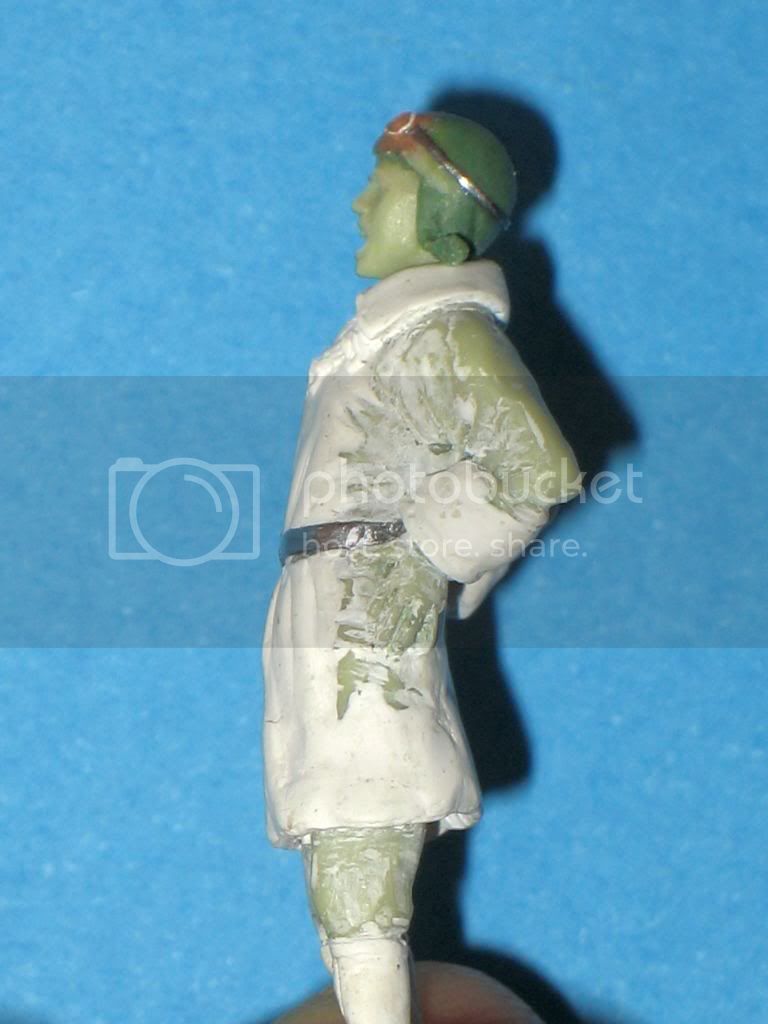
The aircraft has just been out of the water and the pilot comes out exhausted.


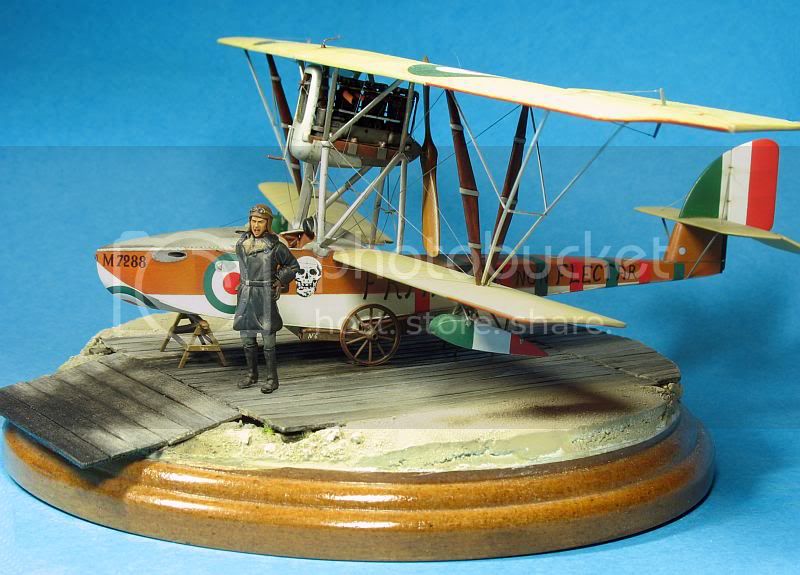
The plane will be the other way, the tail to the slope is not aesthetical.

The pontoon is made of wood salvaged from a food box.
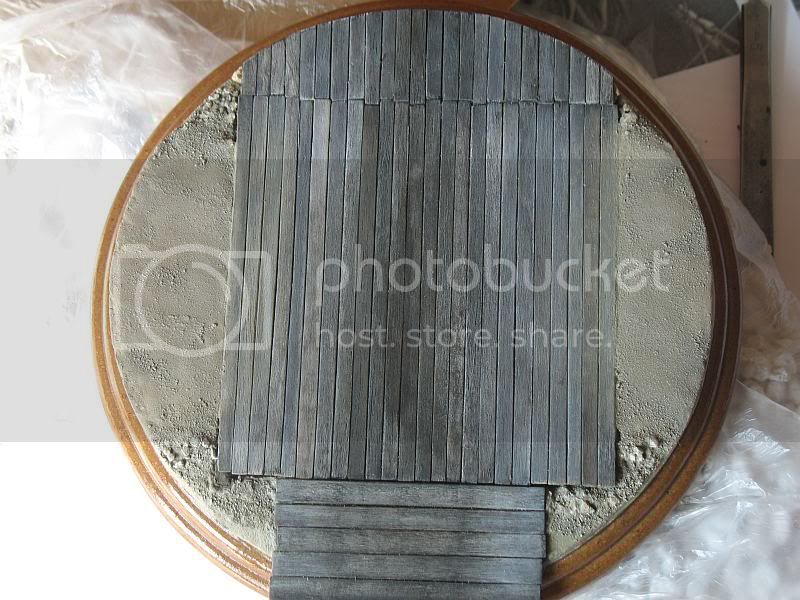
The wood is scraped with a wire brush to make grooves. It's sanded. First try, I use brown paint with grey dry brush. The color was too dark.


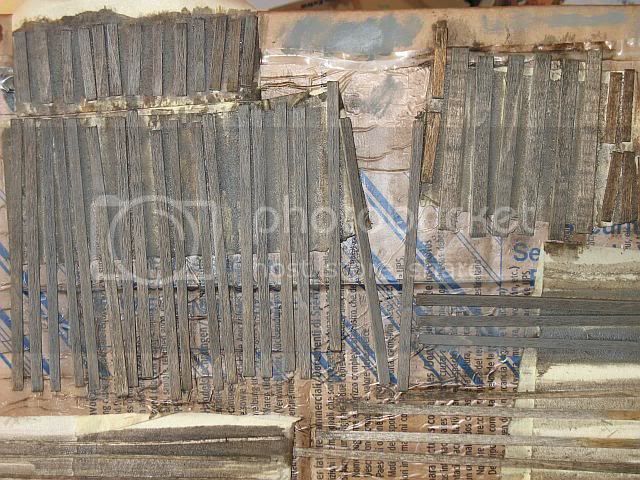
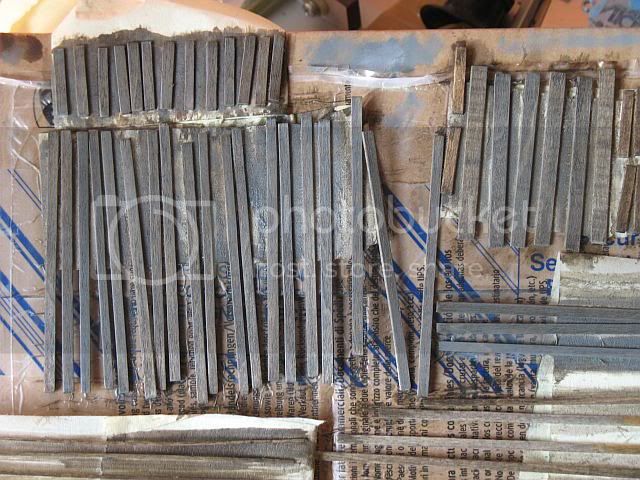
The wood is painted with acrylic white paint. Washes with black and gray oil paint very dilute.
I wanted a badly worn wood color (by the sun) so we can see water stains easily.


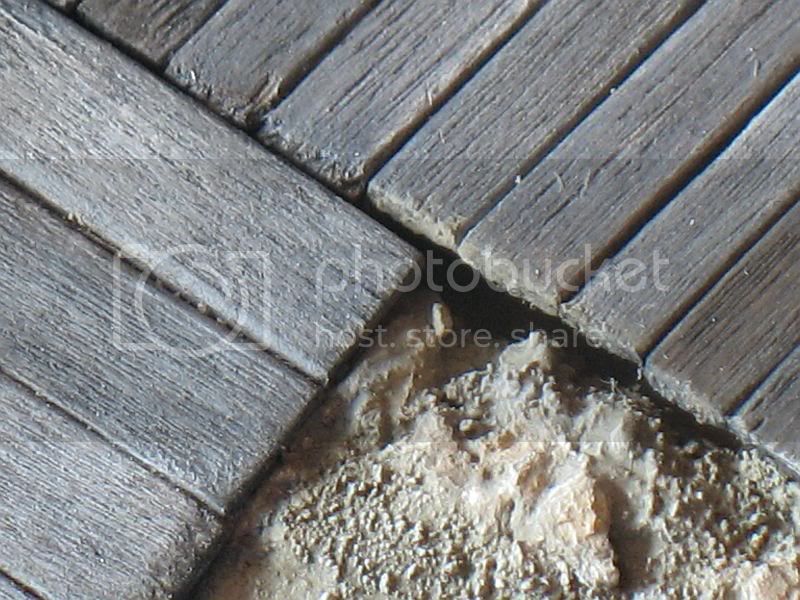
I used polystyrene coated with miliput on each side.
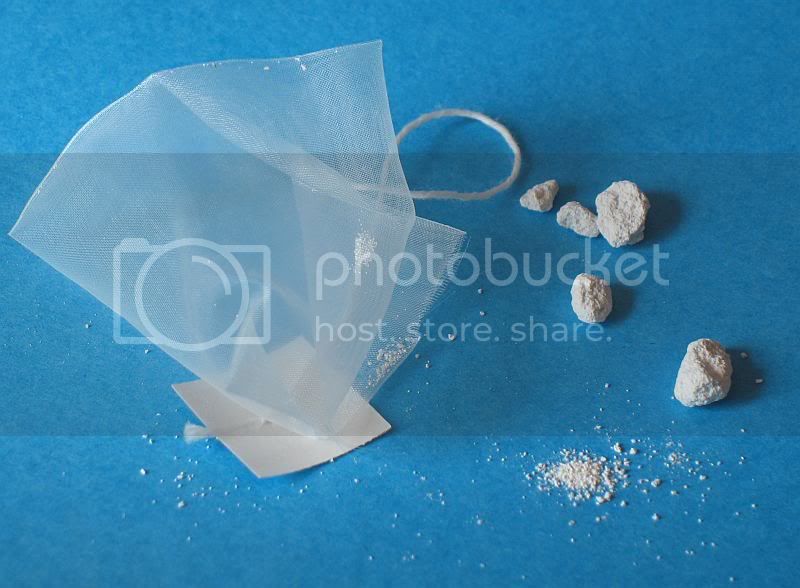
The pebbles are made ​​with kitty litter. Smaller stones are sorted with a screen made ​​with a teabag. They cover the edges of the road.


Everything is painted with Buff XF57 (and desert yellow XF60) with white dry brush.


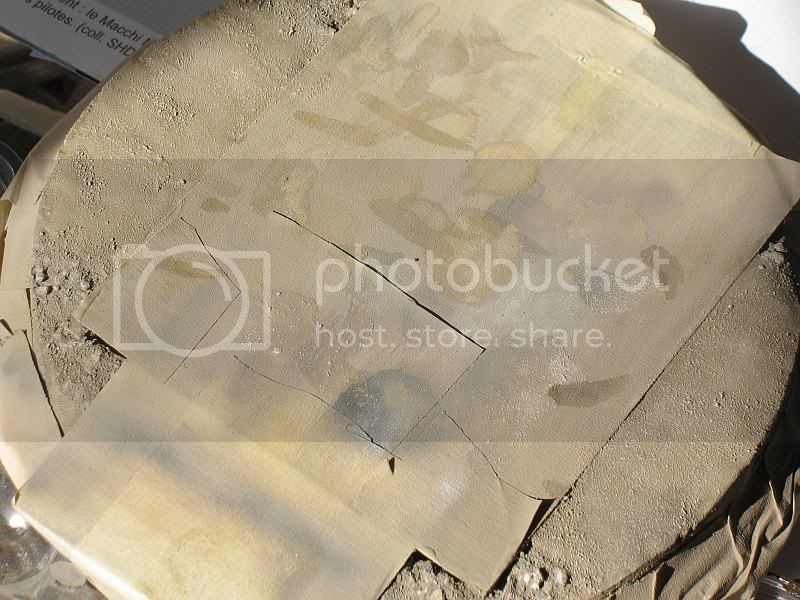
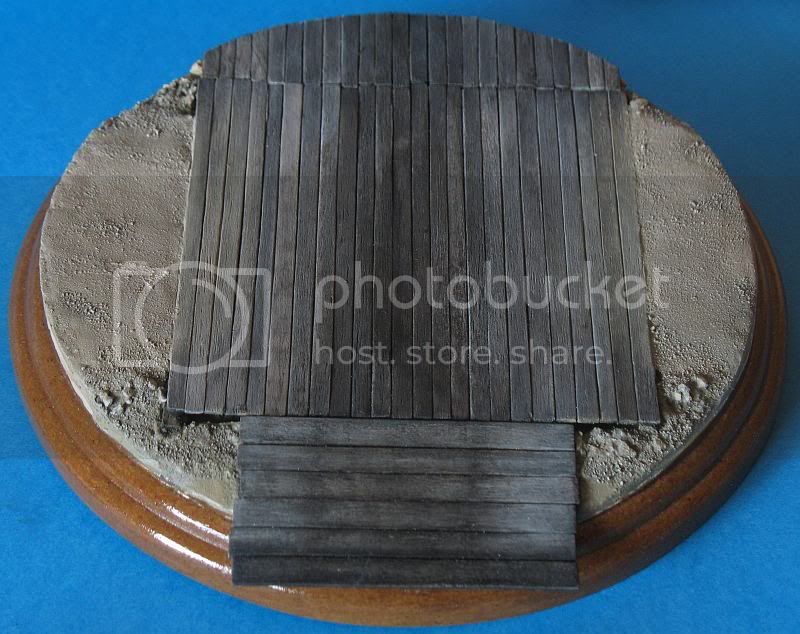
Mig pigment is deposited at the entrances of the pontoon
Water stains are made ​​with black and brown paint and varnished.
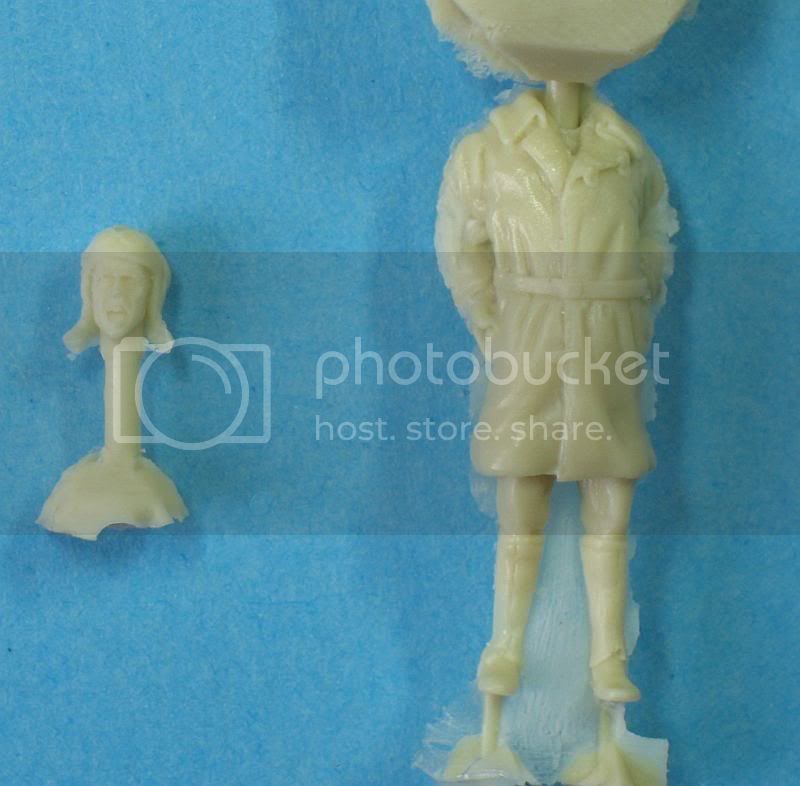
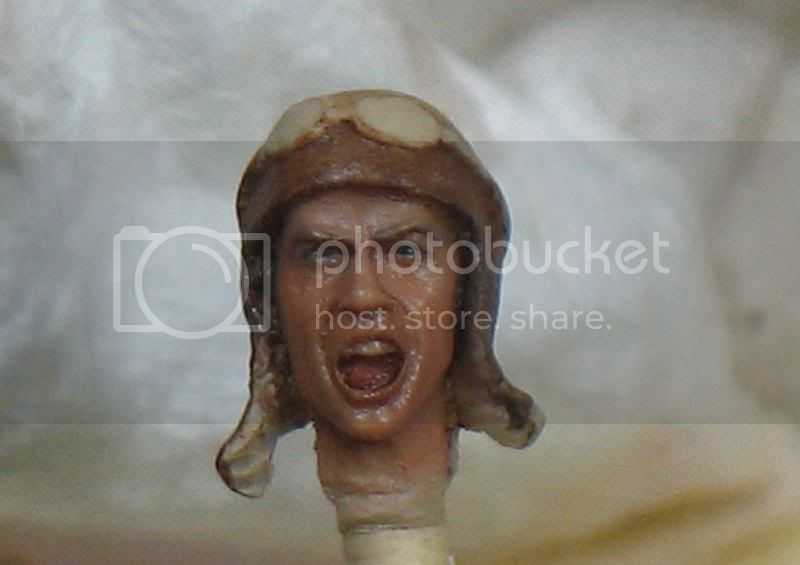
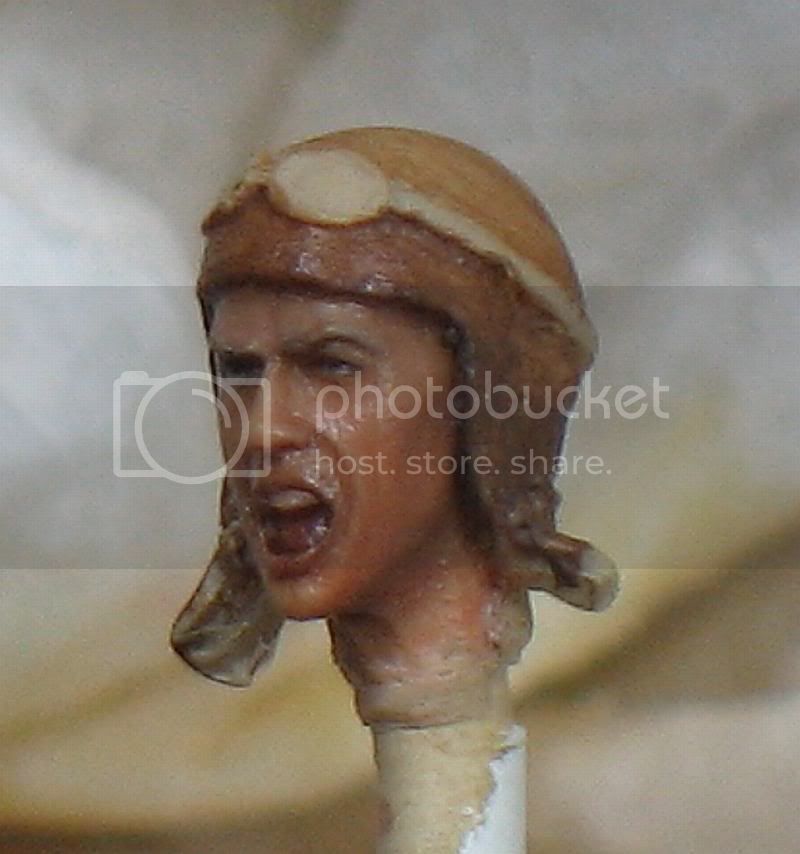
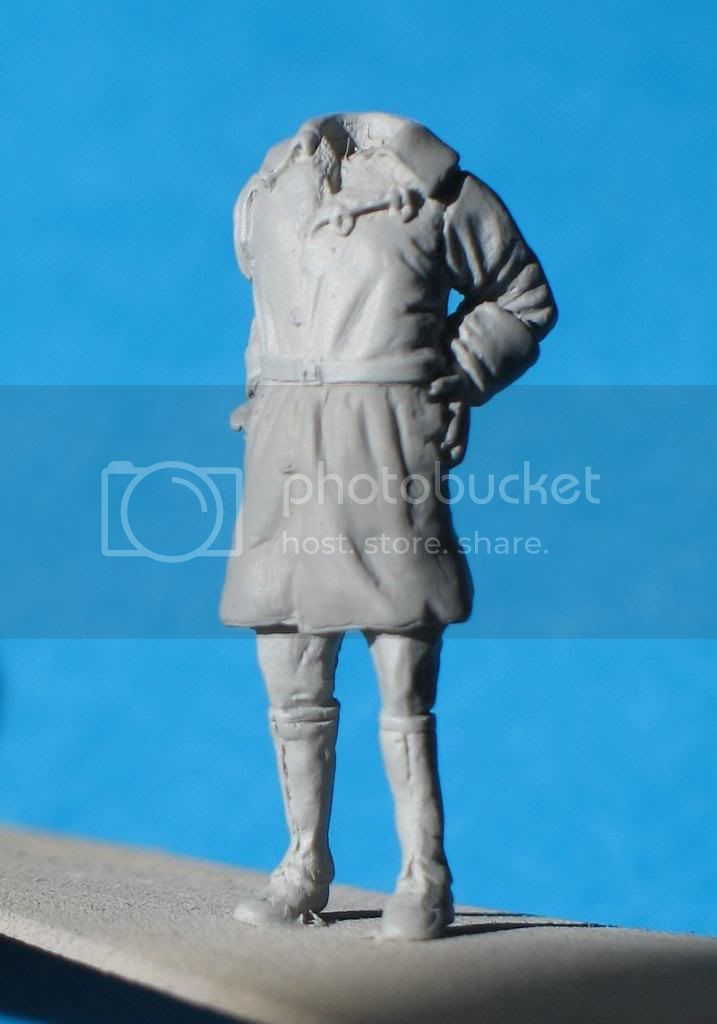
The pilot is made ​​from a model made ​​for the train. He stands his back after a long flight.
It will look something like this:


Regards.
gajouette
_VISITCOMMUNITY
Texas, United States
Joined: February 01, 2007
KitMaker: 365 posts
AeroScale: 356 posts
Posted: Monday, April 09, 2012 - 12:54 AM UTC
Louis,
I'm looking forward to following this thread my friend.Especially the figure conversion.
Highest Regards,
Gregory Jouette
JackFlash
_VISITCOMMUNITY
Colorado, United States
Joined: January 25, 2004
KitMaker: 11,669 posts
AeroScale: 11,011 posts
Posted: Monday, April 09, 2012 - 02:12 PM UTC
Louis you never cease to keep things interesting and fun!
edoardo
_VISITCOMMUNITY
Milano, Italy
Joined: November 30, 2007
KitMaker: 642 posts
AeroScale: 382 posts
Posted: Tuesday, April 10, 2012 - 09:29 AM UTC
Hi Louis!
I like the wood colour.... Very well done!
Ciao
Edo
thegirl
_VISITCOMMUNITY
Alberta, Canada
Joined: January 19, 2008
KitMaker: 6,743 posts
AeroScale: 6,151 posts
Posted: Tuesday, April 10, 2012 - 12:48 PM UTC
Coooool !
raypalmer
_VISITCOMMUNITY
Ontario, Canada
Joined: March 29, 2010
KitMaker: 1,151 posts
AeroScale: 985 posts
Posted: Wednesday, April 11, 2012 - 07:02 AM UTC
Breathtaking.

What kit is that??
Louis
_VISITCOMMUNITY
Bas-Rhin, France
Joined: May 21, 2006
KitMaker: 472 posts
AeroScale: 471 posts
Posted: Wednesday, April 11, 2012 - 08:14 AM UTC
Thank you everybody.


Quoted Text

Breathtaking.

What kit is that??


Scratch, bluemax wings, pheon decals.

https://aeroscale.kitmaker.net/forums/155319&page=1

Regards.
dolly15
_VISITCOMMUNITY
Quebec, Canada
Joined: May 20, 2004
KitMaker: 8,227 posts
AeroScale: 3,915 posts
Posted: Friday, April 13, 2012 - 05:00 AM UTC
Great vignette !
Louis
_VISITCOMMUNITY
Bas-Rhin, France
Joined: May 21, 2006
KitMaker: 472 posts
AeroScale: 471 posts
Posted: Monday, April 16, 2012 - 09:53 AM UTC
The master is too fragile. So I made a mold and manufacture a resin figure.


The face is painted light cream (or pink). The shadows are made with brown paint. Buff Tamiya and oil paint.
It's pretty easy when the face very well engraved.


Then I cleared the protruding areas with a little pink paint. I finished the eyes and mouth.


Regards.
Louis
_VISITCOMMUNITY
Bas-Rhin, France
Joined: May 21, 2006
KitMaker: 472 posts
AeroScale: 471 posts
Posted: Thursday, May 03, 2012 - 10:47 AM UTC
Hello.

The base comes from:

[u] http://soclakit86.jimdo.com/ [/ u]

For those who do not know what is MDF. It is working with a cutter blade smoothly if it is necessary because it is tender enough.


As I suggested Mark, I tried to clear with a touch of white (oil) the "bridge" of the nose and the two reliefs that leave from the nose


He dried warm (oven or wood stove pipe for me). The painting becomes duller.

The collar of the shirt is red with two silver stars (or gold):


Regards.
guitarlute101
_VISITCOMMUNITY
West Virginia, United States
Joined: December 18, 2006
KitMaker: 1,121 posts
AeroScale: 1,063 posts
Posted: Thursday, May 03, 2012 - 11:48 AM UTC


Very, very nice work Louis!

Mark
JackFlash
_VISITCOMMUNITY
Colorado, United States
Joined: January 25, 2004
KitMaker: 11,669 posts
AeroScale: 11,011 posts
Posted: Thursday, May 03, 2012 - 02:51 PM UTC
Wow! It just keeps getting better!
Kornbeef
_VISITCOMMUNITY
England - South East, United Kingdom
Joined: November 06, 2005
KitMaker: 1,667 posts
AeroScale: 1,551 posts
Posted: Thursday, May 03, 2012 - 06:11 PM UTC
Really beautiful work Loius

Impressive

Keith
Louis
_VISITCOMMUNITY
Bas-Rhin, France
Joined: May 21, 2006
KitMaker: 472 posts
AeroScale: 471 posts
Posted: Monday, May 07, 2012 - 09:39 AM UTC
Thank you very much.


I finished!!!

Water stains are made with the oil painting very dark brown and black very diluted. Some are covered with satin varnish. I tried "mig wet effect" but it is too bright and it seemed to have a thick layer. I do try it again to learn how to use it properly...


Under the floats I have dark sand color with a dark brown juice.


I have not dared to put the gloss for a wet hull.

The wheel base is varnished.


Thank you for all you words and your help.

Regards.

Louis

JackFlash
_VISITCOMMUNITY
Colorado, United States
Joined: January 25, 2004
KitMaker: 11,669 posts
AeroScale: 11,011 posts
Posted: Monday, May 07, 2012 - 07:56 PM UTC
Most impressive!
 _GOTOTOP