First off, I received the Aires Cockpit set that I ordered from Sprue Brothers in just a couple days, And being that the aircraft models directions usually start you off there first, I decided I would just start the Aires cockpit. The model (ordered from scale hobbyist) is scheduled to be here tomorrow. This will be, not only, my first time building with the use of aftermarket parts, but also my first time building a kit that is provided by a company other than revell/monogram, so I'm quite excited. I have the cockpit 2/3rds of the way finished, and so I've included some photos below. I will be continuing to post pictures to this thread throughout the build so if you are interested in this project, check back regularly for progress reports and new photos.
I was pleasantly surprised with the aires cockpit set, and with the delivery time on the kit by sprue brothers.. The kit arrived at my house only 3 days after placing the order online.. The Cockpit set is loaded with magnificent details in both P.E. and resin, and was actually a bit intimidating at first, but once i got going I found it to be very pleasant, and easy to construct and apply paint to. I'm really amazed at some of the details seen in the cockpit. Seems a shame that some won't even be terribly visible once the cockpit is built into the kit... lol, what can you do though??
*Anyhow, enough blabbering and lets get to the pictures!!
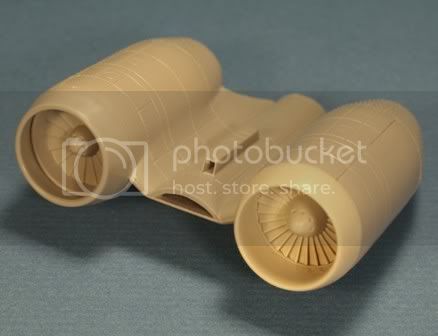
Ok, so about a week or 2 ago, I asked for some advice on purchasing an A-10 Thunderbolt kit to build. Most advised me to go with the Hobbyboss kit, but It was a bit out of my budget, so I went ahead and ordered the Italeri 1:48 Thunderbolt II kit.. I wanted to be able to give aftermarket parts a shot this time, and by purchasing the cheaper Italeri kit, I was able to do so. I ordered the Aires cockpit set consisting of both resin and photoetch parts. I also ordered the Eduard Exterior set, which consists of 3 sprues of photoetch for enhancing many exterior portions of the aircraft.. I'm Going to order more parts as the project progresses, but we will cross that bridge when we get there.
First off, I received the Aires Cockpit set that I ordered from Sprue Brothers in just a couple days, And being that the aircraft models directions usually start you off there first, I decided I would just start the Aires cockpit. The model (ordered from scale hobbyist) is scheduled to be here tomorrow. This will be, not only, my first time building with the use of aftermarket parts, but also my first time building a kit that is provided by a company other than revell/monogram, so I'm quite excited. I have the cockpit 2/3rds of the way finished, and so I've included some photos below. I will be continuing to post pictures to this thread throughout the build so if you are interested in this project, check back regularly for progress reports and new photos.
I was pleasantly surprised with the aires cockpit set, and with the delivery time on the kit by sprue brothers.. The kit arrived at my house only 3 days after placing the order online.. The Cockpit set is loaded with magnificent details in both P.E. and resin, and was actually a bit intimidating at first, but once i got going I found it to be very pleasant, and easy to construct and apply paint to. I'm really amazed at some of the details seen in the cockpit. Seems a shame that some won't even be terribly visible once the cockpit is built into the kit... lol, what can you do though??
*Anyhow, enough blabbering and lets get to the pictures!!
free image hosting
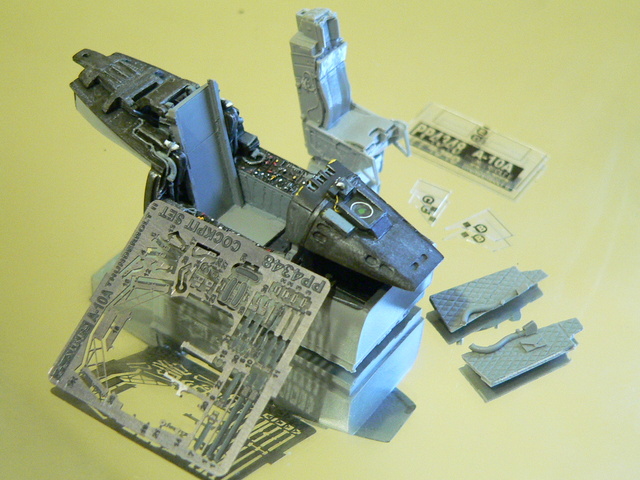
Here is the contents of the aires cockpit kit, some already assembled...
The ejection handles on the Aces II seat were broken off when i got it, so I figure that i will likely borrow the ones off of the seat in the Italeri kit tomorrow... I'm hoping.
free picture hosting
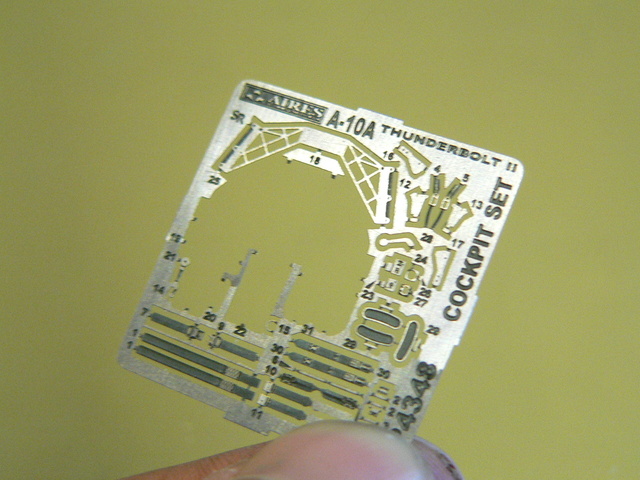
Here is the Photoetch parts that I have left to install. Some of the details included amaze me.. The cannon sights are going to look great, and the very intricate belts and harnesses are going to be stellar as well.
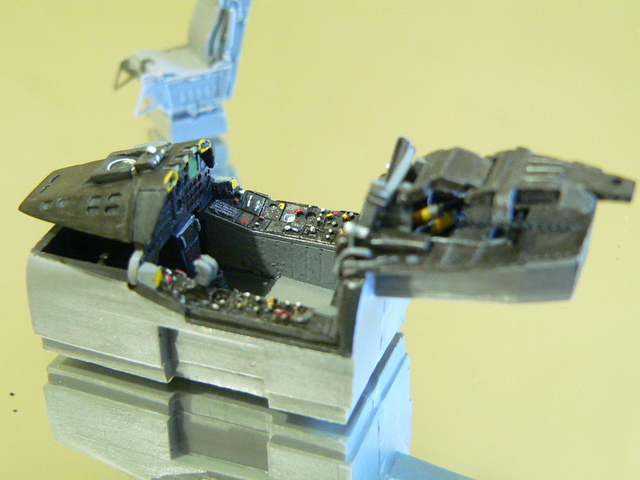
image upload
Left side view
upload images
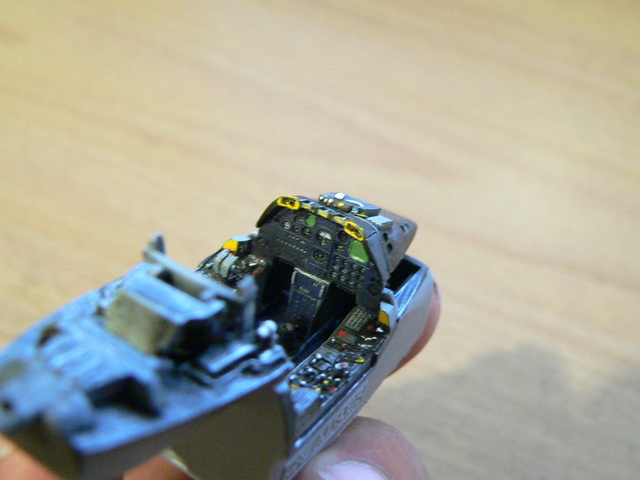
From the rear side
jpg upload
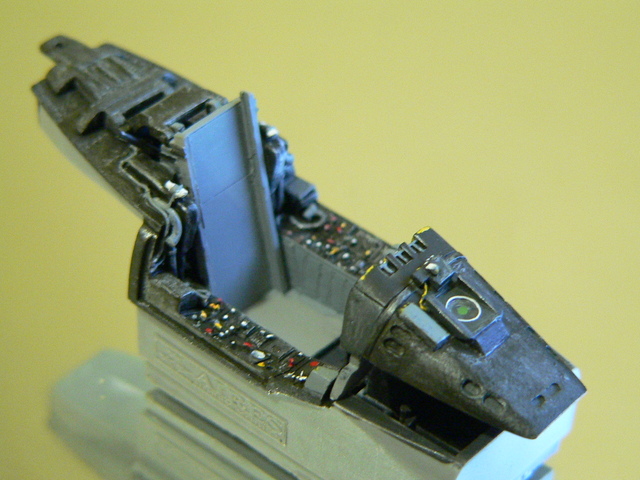
The instrument panel itself was 3 P.E. panels, with a clear film to be installed behind.. Looks very nice, and I'm happy with it.
free picture hosting
Another detail that I really liked was the pedals. These may not be very visible once the build is finished, but I think the just look great and very accurate to the actual ones in the thundebolt II.
jpg upload
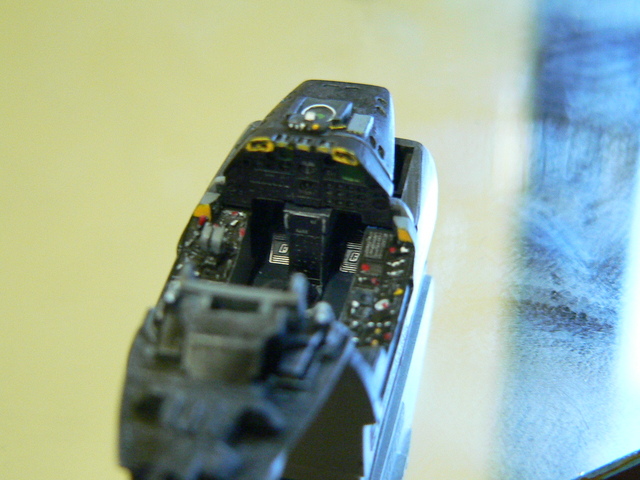
The right side
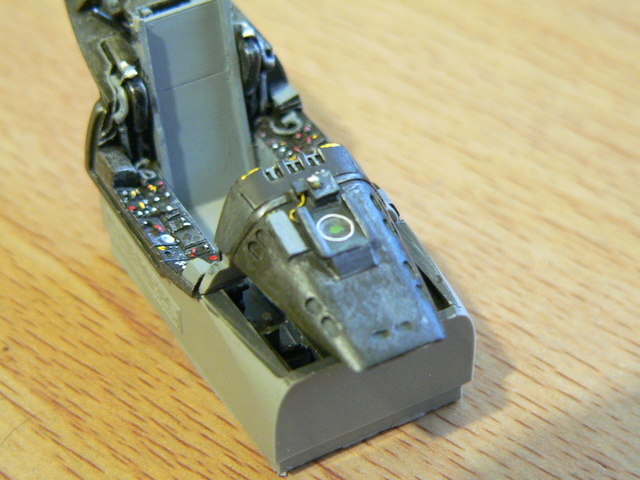
image hosting
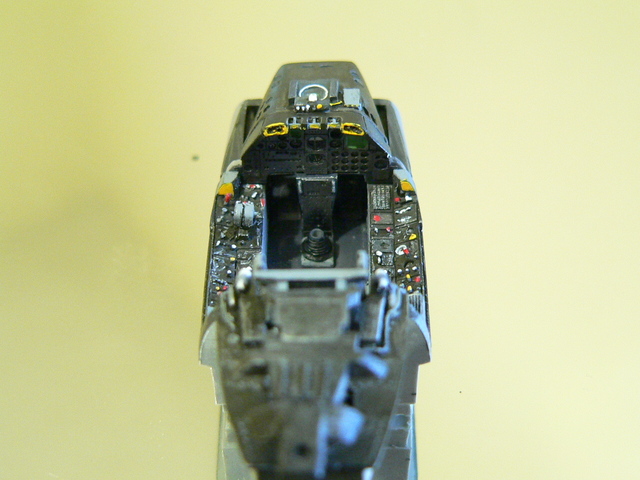
The front.. Things like the little yellow wire coming out of the sighting system, are things that I never thought i could paint, but I think Im starting to get the hang of this stuff..
In the close-up photos, everything tends to look a bit sloppy...lol To the naked eye it looks a lot better I swear...

** Feel free to give me any constructive criticism. Be gentle though. I've been an artist my whole life, but I am just starting out with the super-detailing thing lol. This is really only my first/second time at building a really detailed model, paying serious attention to finer detail. Let me know what you think though.