England - South West, United Kingdom
Joined: January 06, 2007
KitMaker: 3,661 posts
AeroScale: 369 posts
Posted: Sunday, July 15, 2012 - 09:19 AM UTC
Support Our Troops! Hit the Yes button If you find reviews or features helpful.
British Columbia, Canada
Joined: September 03, 2009
KitMaker: 6,965 posts
AeroScale: 6,247 posts
Posted: Sunday, July 15, 2012 - 10:14 AM UTC
I used Tamiya's RLM02 (which is darker than other incarnations of RLM02) in mine.
When once you have tasted flight you will walk the Earth with your eyes turned skyward.
For there you have been, and there you will always long to return.
-Leonardo Da Vinci
England - South West, United Kingdom
Joined: January 06, 2007
KitMaker: 3,661 posts
AeroScale: 369 posts
Posted: Sunday, July 15, 2012 - 10:18 AM UTC
Thanks Jessica, I think I have a pot of xf22 lying around somewhere.!
Support Our Troops! Hit the Yes button If you find reviews or features helpful.
England - South West, United Kingdom
Joined: January 06, 2007
KitMaker: 3,661 posts
AeroScale: 369 posts
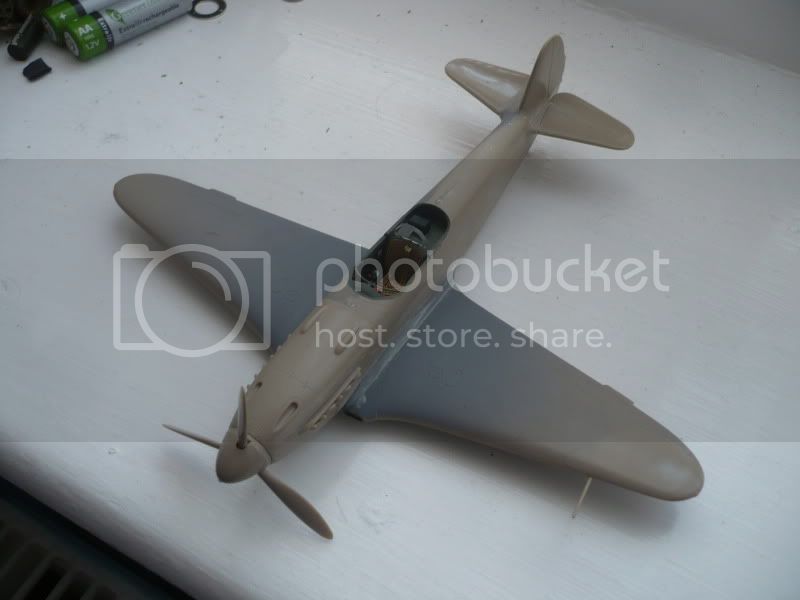
Posted: Monday, July 16, 2012 - 03:08 AM UTC
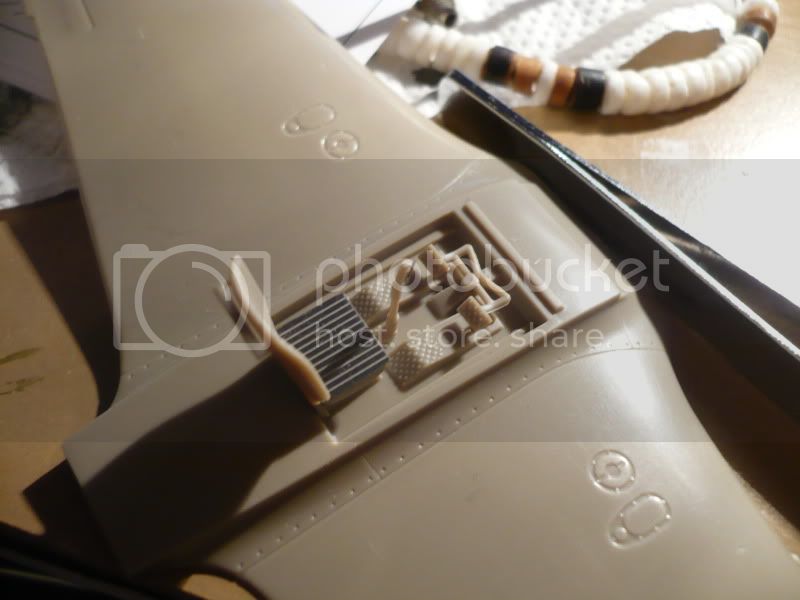
Im enjoying this one, the office is coming together nicely..
Support Our Troops! Hit the Yes button If you find reviews or features helpful.
British Columbia, Canada
Joined: September 03, 2009
KitMaker: 6,965 posts
AeroScale: 6,247 posts
Posted: Monday, July 16, 2012 - 03:53 AM UTC
It's a really wonderful build. I think the only thing "wrong" with it is that Eduard made the oleo struts extended as if it was flying rather than sitting on the ground. IIRC you need to shorten them by a couple mm to make it sit correctly.
When once you have tasted flight you will walk the Earth with your eyes turned skyward.
For there you have been, and there you will always long to return.
-Leonardo Da Vinci
England - South West, United Kingdom
Joined: January 06, 2007
KitMaker: 3,661 posts
AeroScale: 369 posts
Posted: Monday, July 16, 2012 - 04:40 AM UTC
hey Jessica, what are the oleo struts?? Ill be sure to fix it once i know what they are hehe!! J
Support Our Troops! Hit the Yes button If you find reviews or features helpful.
British Columbia, Canada
Joined: September 03, 2009
KitMaker: 6,965 posts
AeroScale: 6,247 posts
Posted: Monday, July 16, 2012 - 04:46 AM UTC
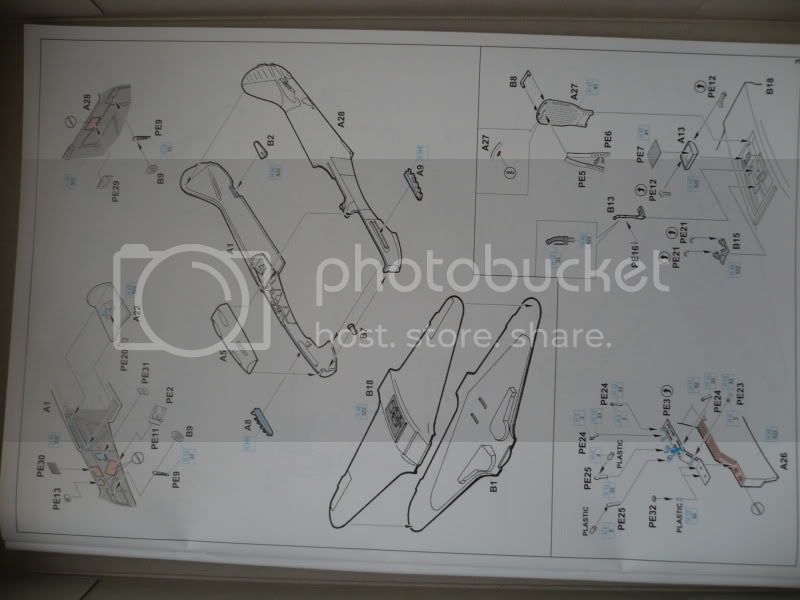
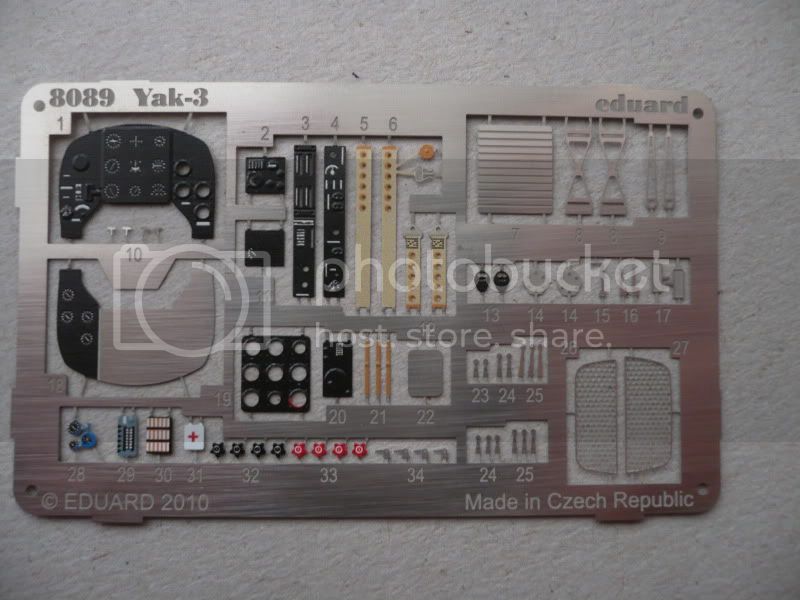
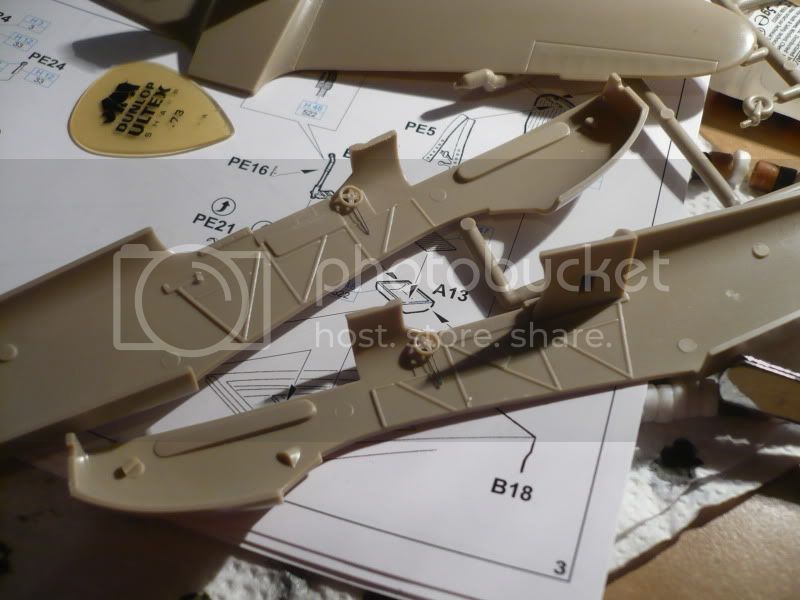
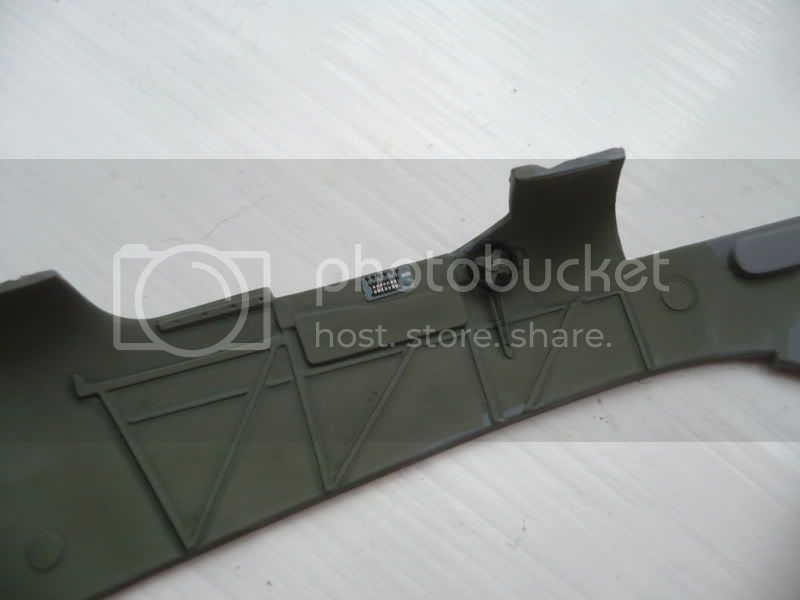
They're the
"shock absorber" part of the landing gear. Look at the silver parts of the struts in
this picture. The scissor linkages allow them to slide up and down without twisting. You'll see that Eduard has provided photo etch parts for the oleo scissors. If you look on the instructions where they go, you'll see where the oleo is on your model.
When once you have tasted flight you will walk the Earth with your eyes turned skyward.
For there you have been, and there you will always long to return.
-Leonardo Da Vinci
England - South West, United Kingdom
Joined: January 06, 2007
KitMaker: 3,661 posts
AeroScale: 369 posts
Posted: Tuesday, July 17, 2012 - 06:53 AM UTC
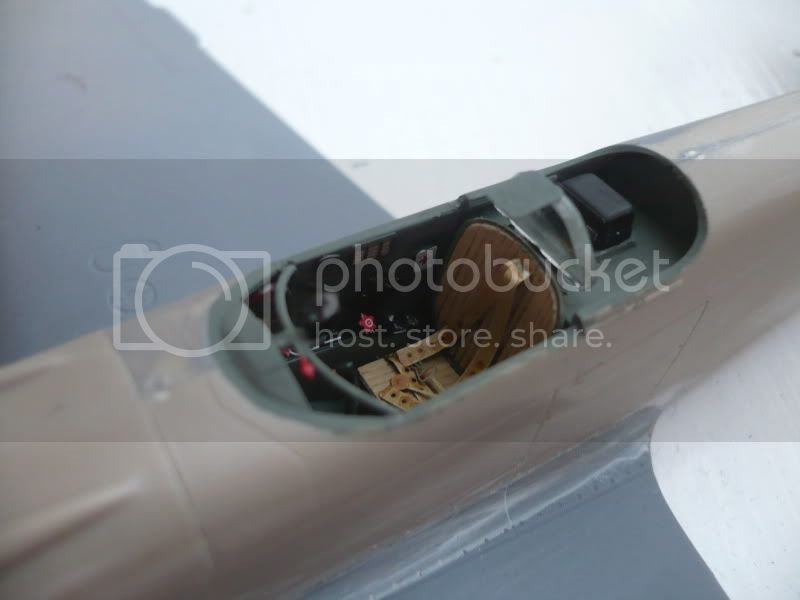
thanks, ill makes sure to shorten them a bit when i get that far

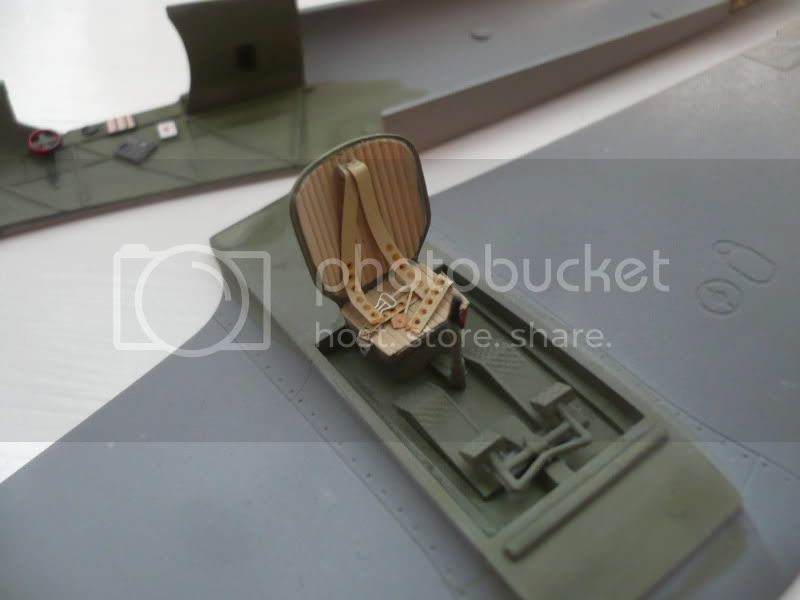
A small update, seatbelts, cushion done, and i glossed the ( trim wheel)
Support Our Troops! Hit the Yes button If you find reviews or features helpful.
Sofiya, Bulgaria
Joined: November 08, 2011
KitMaker: 414 posts
AeroScale: 126 posts
Posted: Thursday, July 19, 2012 - 04:12 AM UTC
Hello, James!
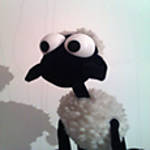
Very good work so far. Like the effect on the "red wheel" (sorry, don't the correct technical term). Could you share some details about pilot's seat cushion?
My modeling and news space:
https://redlinemodels.wordpress.com/
England - South West, United Kingdom
Joined: January 06, 2007
KitMaker: 3,661 posts
AeroScale: 369 posts
Posted: Thursday, July 19, 2012 - 06:51 AM UTC
Dimitar, Thankyou! I am not sure on the term either or what it's for!, i think it may be a trim wheel. ?? the seat top half is the kit plastic and the bottom half is the kit etch. Painted with Lifecolour ral8020 lightbraun and now washed with ochre. ! I hope that is the information you wanted!
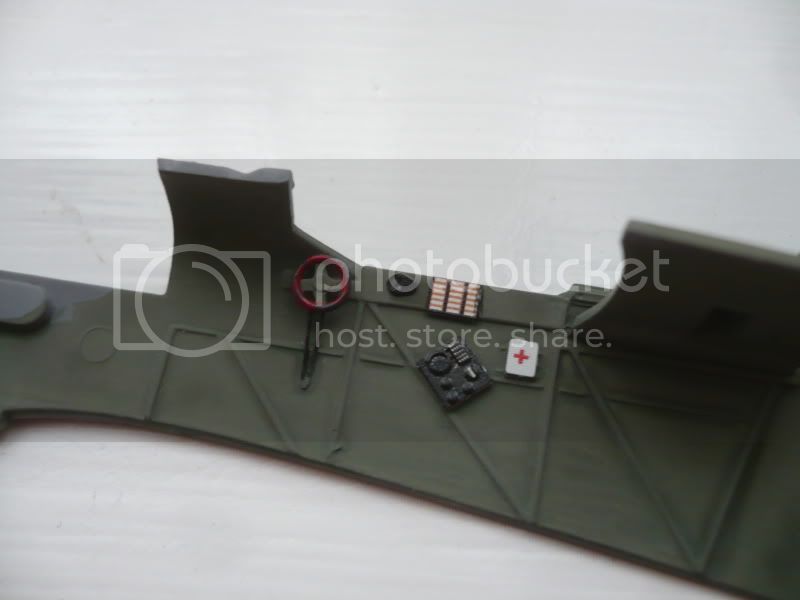
a small update here!!
Support Our Troops! Hit the Yes button If you find reviews or features helpful.
Sofiya, Bulgaria
Joined: November 08, 2011
KitMaker: 414 posts
AeroScale: 126 posts
Posted: Saturday, July 21, 2012 - 08:11 PM UTC
Absolutely helpful!
Thanks, James!
My modeling and news space:
https://redlinemodels.wordpress.com/
England - South West, United Kingdom
Joined: January 06, 2007
KitMaker: 3,661 posts
AeroScale: 369 posts
Posted: Sunday, July 22, 2012 - 06:11 AM UTC
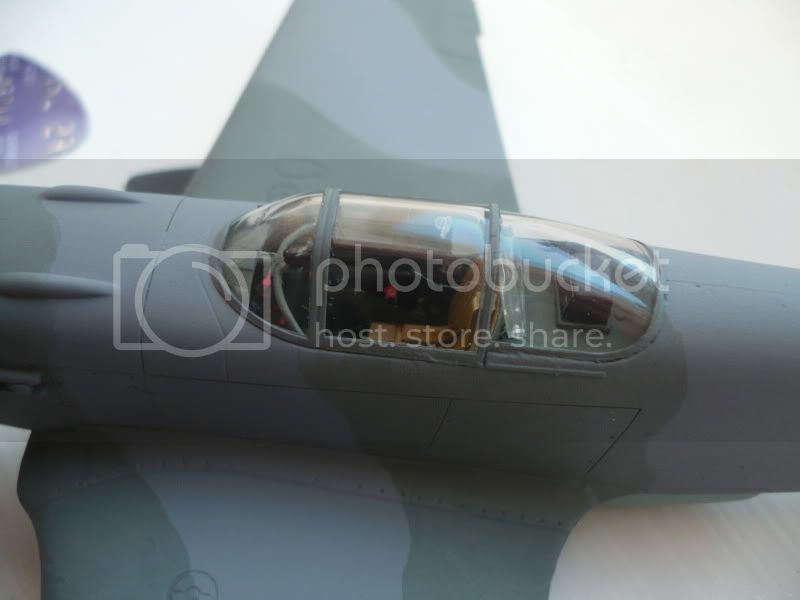
no problem mate!
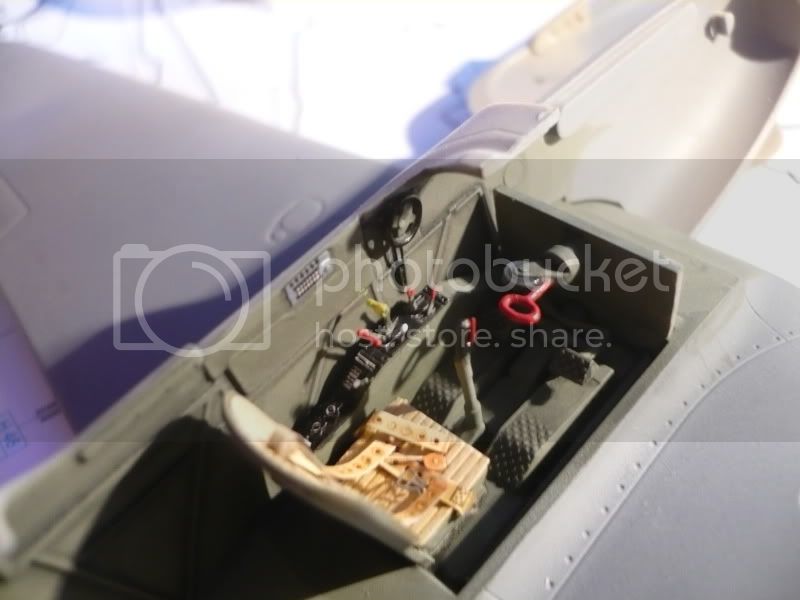
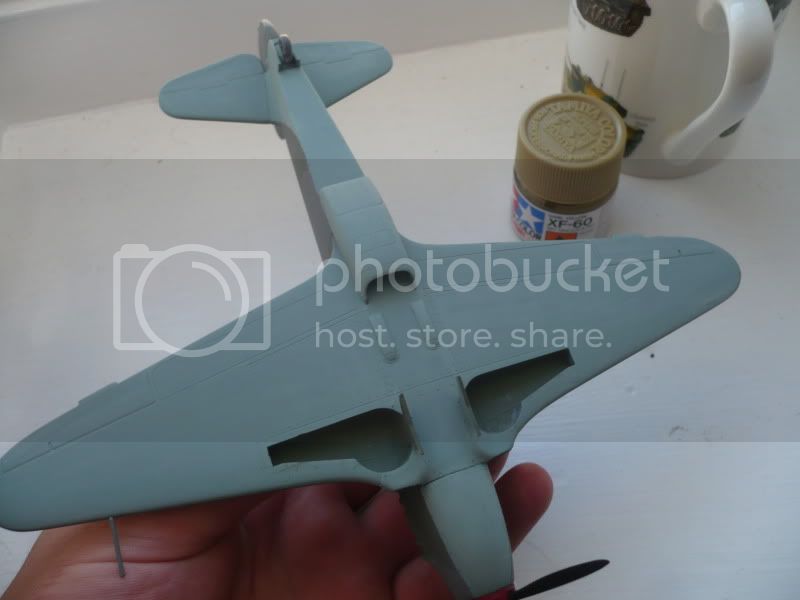
so its all sealed up now1
Support Our Troops! Hit the Yes button If you find reviews or features helpful.
Georgia, United States
Joined: August 08, 2011
KitMaker: 410 posts
AeroScale: 409 posts
Posted: Monday, July 23, 2012 - 07:29 AM UTC
England - South West, United Kingdom
Joined: January 06, 2007
KitMaker: 3,661 posts
AeroScale: 369 posts
Posted: Wednesday, July 25, 2012 - 04:07 AM UTC
thanks Doug, much appreicated..
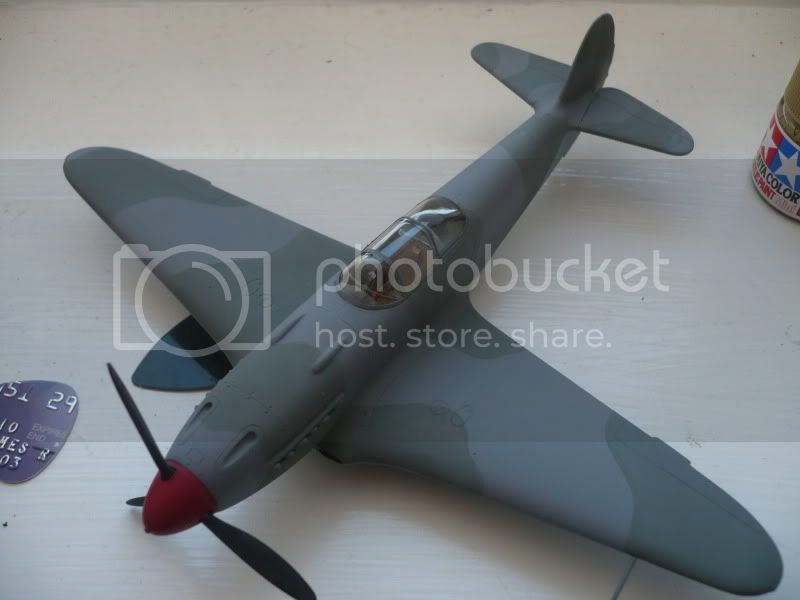
SOOO.... canopy on, masked perfect. sprayed it. and for some

reason there is a BLOB of something in there.....; not happy with that, BUT im happy with how its coming along.
Support Our Troops! Hit the Yes button If you find reviews or features helpful.
British Columbia, Canada
Joined: September 03, 2009
KitMaker: 6,965 posts
AeroScale: 6,247 posts
Posted: Wednesday, July 25, 2012 - 04:24 AM UTC
It's Gremlins. They infest models as well as real aircraft. Is it possible to carefully pop the canopy off and remove the blob?
That paint job looks fantastic. Which markings do you have in mind for it? I couldn't resist the red nose.
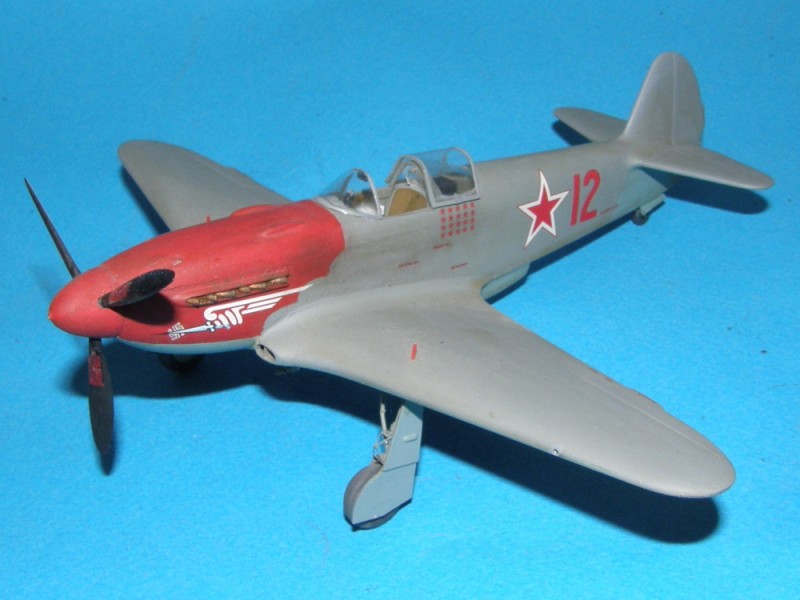
Note how mine sits too nose-up? That's those overly long oleo stuts. I found out about the problem too late

When once you have tasted flight you will walk the Earth with your eyes turned skyward.
For there you have been, and there you will always long to return.
-Leonardo Da Vinci
Virginia, United States
Joined: December 13, 2002
KitMaker: 1,434 posts
AeroScale: 403 posts
Posted: Wednesday, July 25, 2012 - 05:00 AM UTC
Looks good james that random blob looks like peice of adhesive from masking tape or maybe an errant drop of canopy cement. Don't know if you use the the testor's stuff or not. I my self use 3M Tacky Glue. Chuck recomended it for PE and found it works great for canopies and windows.
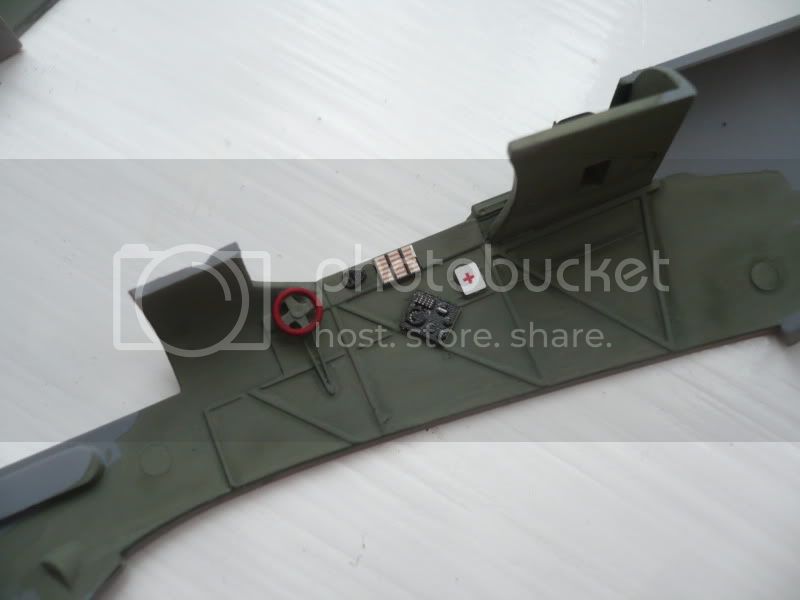
I am curious about the interior colour as I could have sworn russian had a light blue interior, but not an expert. The RLM 02 looks good though. The wheels on the sidewalls are trim wheels. They are used in flight to adjust the elevators and aerolons to adjust level flight characteristics of the aircraft. So if you're trying to fly straight and level and the nose keeps climbing up you adjust the trim tabs on the evelator with the wheel and and it should make the aircraft hold the pitch for level flight.
Steve Manchur
US Navy Damage Controlman 1st Class (DC1)
Proud Veteran
STRONG LIKE AXE, HUNG LIKE MAUL!
Fair winds and following seas.
TCS and DBF
New Hampshire, United States
Joined: November 09, 2008
KitMaker: 615 posts
AeroScale: 459 posts
Posted: Wednesday, July 25, 2012 - 07:02 AM UTC
Hi James, the build looks great. I am wondering if you had any fit issues with this particular kit. I just attempted my first Eduard kit and it was an unmitigated disaster.
That was their FW-190 A6 kit. Not one piece of the fuselage fit with any other, so I am wondering how this one did.

Meanwhile, you have done an excellent job with this MiG and I await to see the finished aircraft.
Later

P-61 Black Widows, the Group Build
Veni, Vidi, Velcro; I came, I saw, I stuck around
British Columbia, Canada
Joined: September 03, 2009
KitMaker: 6,965 posts
AeroScale: 6,247 posts
Posted: Wednesday, July 25, 2012 - 07:47 AM UTC
Hi Bruce,
The Yak is much easier to build than your Fw was; there's no fiddly interior bits to deal with. It's a very straightforward kit much like a Tamiya build. I'm sure you'd enjoy this one
When once you have tasted flight you will walk the Earth with your eyes turned skyward.
For there you have been, and there you will always long to return.
-Leonardo Da Vinci
England - South West, United Kingdom
Joined: January 06, 2007
KitMaker: 3,661 posts
AeroScale: 369 posts
Posted: Wednesday, July 25, 2012 - 09:59 AM UTC
Bruce, this flies together. the PE is easy, no fit issues, The fw190 is a lot more complex of a kit!.
I really reccomend their hellcat dual combo or on its own. those are awesome kits!!
Jessica, I have NO idea what markings i'm going to use. Haha.
I Really like the one with the star on the nose, but, unfortunately, thats too much masking, and to hard to brush for me!
I was thinking theme B with the yellow stripes and red spinner perhaps.
i sorted the struts, I hope they are level!!!
Steve, thanks! I knwo nothing of Russian Ac, so the RLM was better than the " clear yellow" the instructions suggested.!!!!
i never used to use canopy glue, but bout the revell stuff. as i get on with contacta quite well, although this seems a little blobby...
thanks everyone, hopeully this will be the first AC kit im realy pround of in 1.48.
Support Our Troops! Hit the Yes button If you find reviews or features helpful.
England - South West, United Kingdom
Joined: January 06, 2007
KitMaker: 3,661 posts
AeroScale: 369 posts
Posted: Thursday, July 26, 2012 - 08:20 AM UTC
the markings are almost complete... they need a lot of setting solution and i think my brush painted satin coat will not cover them up well
what colour should i use for chips? a darker grey?
also what sections werent metal!
J
Support Our Troops! Hit the Yes button If you find reviews or features helpful.
British Columbia, Canada
Joined: September 03, 2009
KitMaker: 6,965 posts
AeroScale: 6,247 posts
Posted: Thursday, July 26, 2012 - 11:15 AM UTC
The wings and engine cowling panels were metal. I'm pretty sure the rest of the fuselage was plywood.
When once you have tasted flight you will walk the Earth with your eyes turned skyward.
For there you have been, and there you will always long to return.
-Leonardo Da Vinci
Sofiya, Bulgaria
Joined: November 08, 2011
KitMaker: 414 posts
AeroScale: 126 posts
Posted: Friday, July 27, 2012 - 03:49 AM UTC
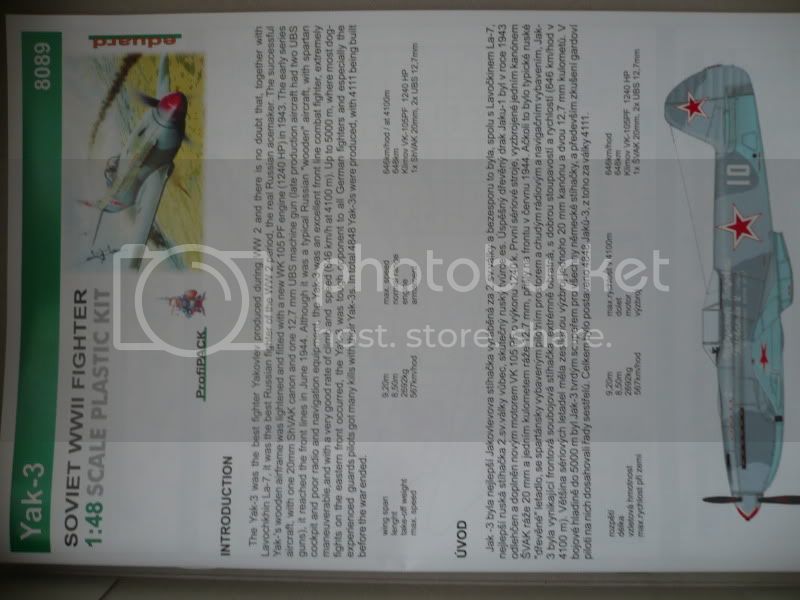
Quoted Text
The wings and engine cowling panels were metal...
Nope. It was s wooden wonder. The wartime Yak-3 is made of plywood except for engine cowling and the panels below the canopy. It was Yak-3 VK-107A with the metal wings. Even after the war has ended the remaining Yak-3 VK-105 kept their wooden wings, although changed every two years of service - and the service itself ended in 1952.
My modeling and news space:
https://redlinemodels.wordpress.com/
England - South West, United Kingdom
Joined: January 06, 2007
KitMaker: 3,661 posts
AeroScale: 369 posts
Posted: Friday, July 27, 2012 - 06:30 AM UTC
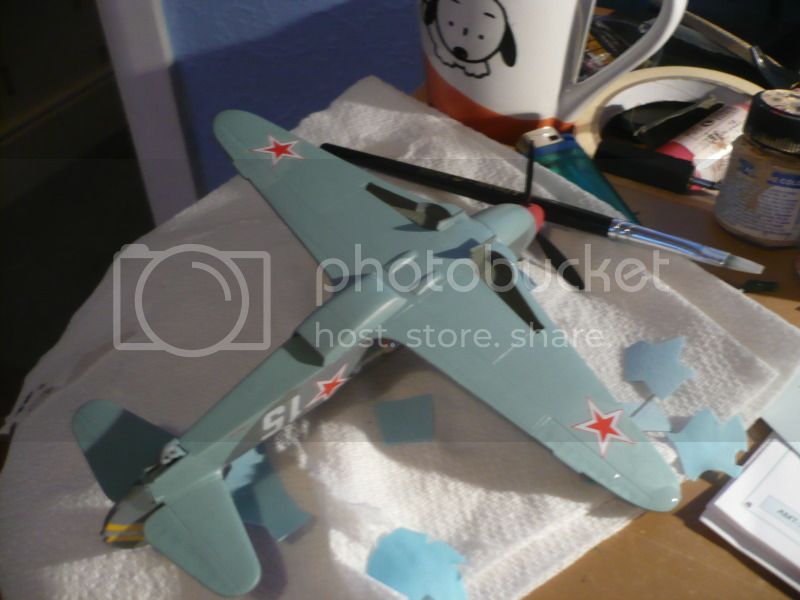
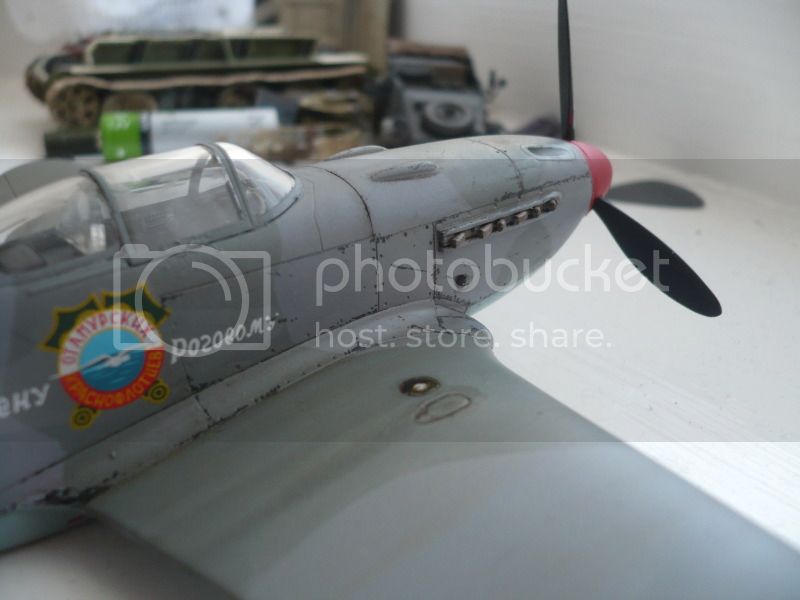
thanks for the info guys, i'll only chip items with rivets!!
weathrting WIP

Support Our Troops! Hit the Yes button If you find reviews or features helpful.
Sofiya, Bulgaria
Joined: November 08, 2011
KitMaker: 414 posts
AeroScale: 126 posts
Posted: Friday, July 27, 2012 - 07:15 AM UTC
You hit the right spots! Nice chipping, pretty aggressive, the way I like it! Looks like a well worn airplane.
My modeling and news space:
https://redlinemodels.wordpress.com/
England - South West, United Kingdom
Joined: January 06, 2007
KitMaker: 3,661 posts
AeroScale: 369 posts
Posted: Saturday, July 28, 2012 - 12:33 AM UTC
thanks Dimitar!!
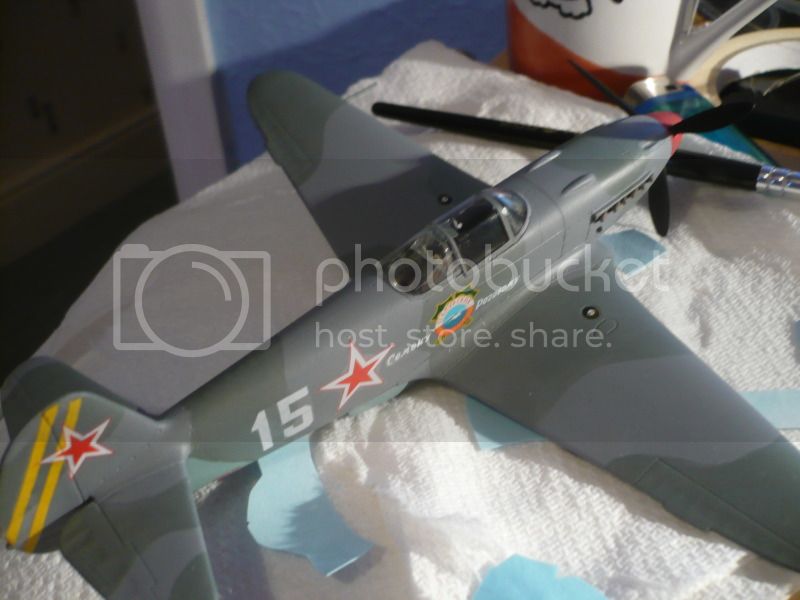
O>K I ran into a BIG Snag the yellow decal stripes bubbled up, and ruind the tail section, so i removed the paint and dacals and resprayed it with my primer.
Would a Star be adequate for the tailplane? or sould i sub another units markings?
J
Support Our Troops! Hit the Yes button If you find reviews or features helpful.