_GOTOBOTTOM
Modern (1975-today)
Discuss the modern aircraft age from 1975 thru today.
Your first airliner conversion, step by step.
Jessie_C
_VISITCOMMUNITY
British Columbia, Canada
Joined: September 03, 2009
KitMaker: 6,965 posts
AeroScale: 6,247 posts
Posted: Sunday, September 09, 2012 - 05:38 PM UTC
Doing surgery on airliners is often simpler than it may seem. A good candidate for surgery is Revell's 737-800.

Boeing produced 4 different models of the "Next Generation" 737s; the -600, -700, -800, and -900, distinguished by differing fuselage lengths. The -600, -700 and -800 were designed as replacements for the -500, -300 and -400 respectively, and were of similar length and passenger capacity. The -900 has no prior 737 analogue, and is closer in concept to the 757. Revell's -800 kit makes an excellent starting point for conversions to the other 3 versions.

Since the -900 is longer than the -800, there is no getting around the fact that you will need to add extra material to the fuselage. Some people use extender plugs and wrap them in plastic card, but I've found that using two kits can be made to work, since the second kit can be used to make a short fuselage, thus getting two different airplanes for the price of two identical ones. A bargain any way you cut it!

In this exercise, we'll be making a -600 and a -900 from two -800s. Let's call them kit A and kit B.
Cut kit A as follows:
Long nose, short centre section, long tail.
Cut kit B as follows:
Short nose, long centre section, short tail.
Now mix the components up:
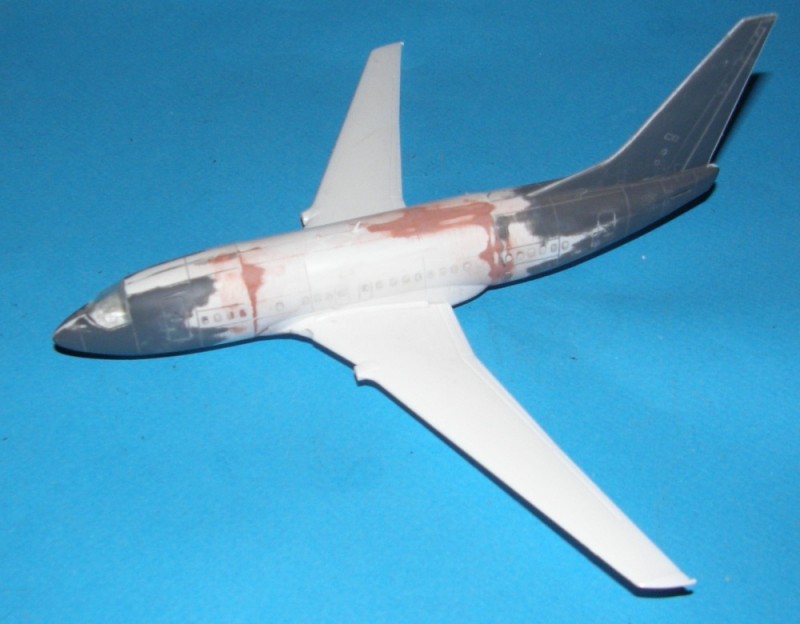
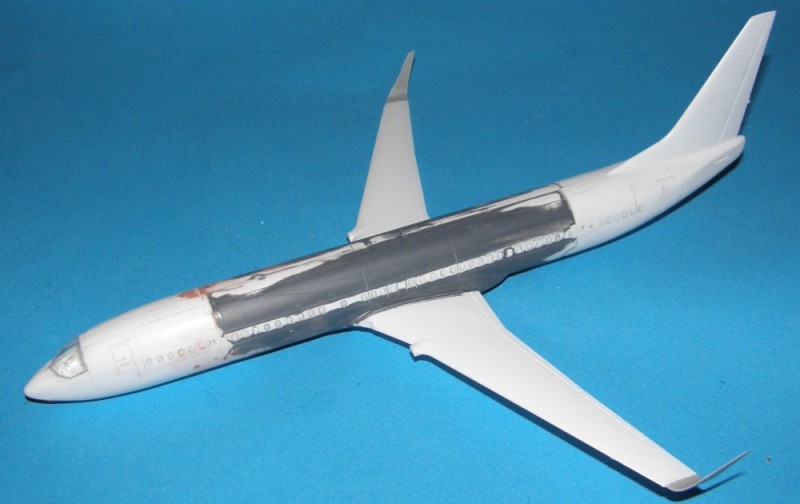
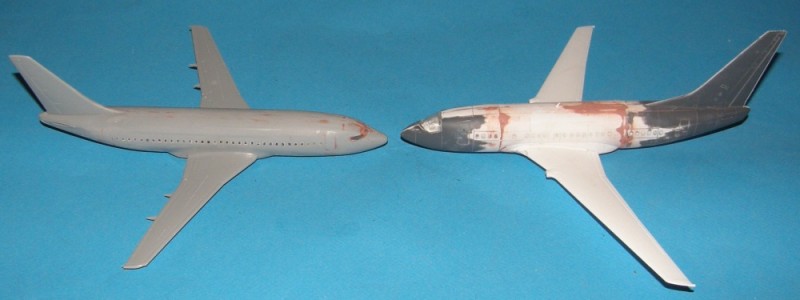
For the -900, use nose A, centre section B and tail A. Adjust the length to the proper -900 length by trimming the sections.
For the -600, use nose B, centre section A and tail B. Once again trim to adjust the correct length.
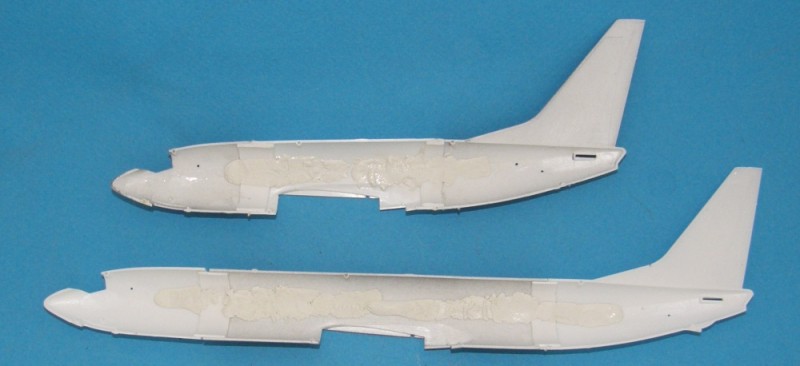
Use sections of the sprue as internal splints to keep the kit from going banana-shaped. The cuts have to be placed carefully to ensure that each kit has suffucient fuselage length available. Cutting templates for all versions of the 737 NG are available for download from the Draw Decal website.
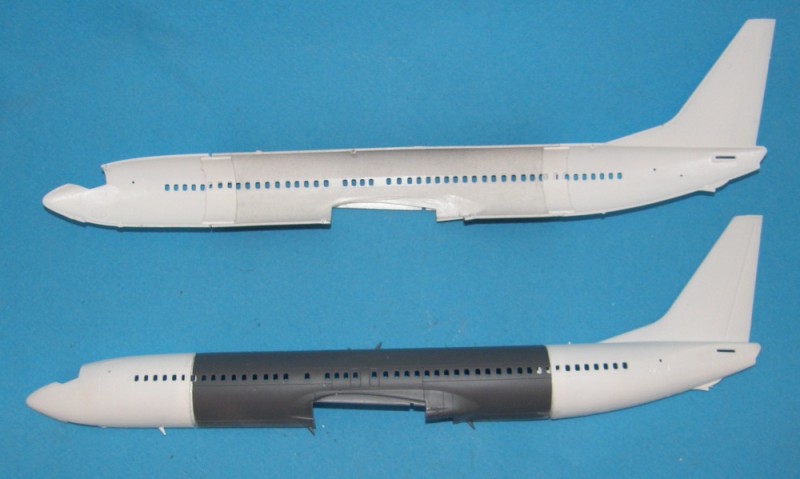
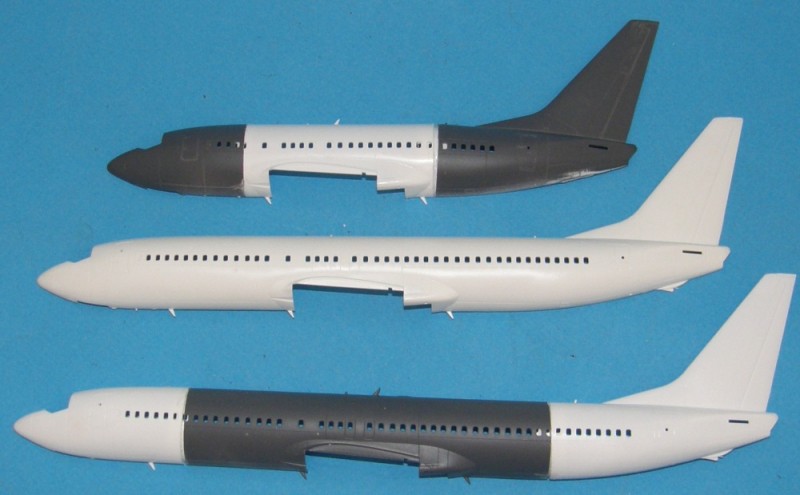
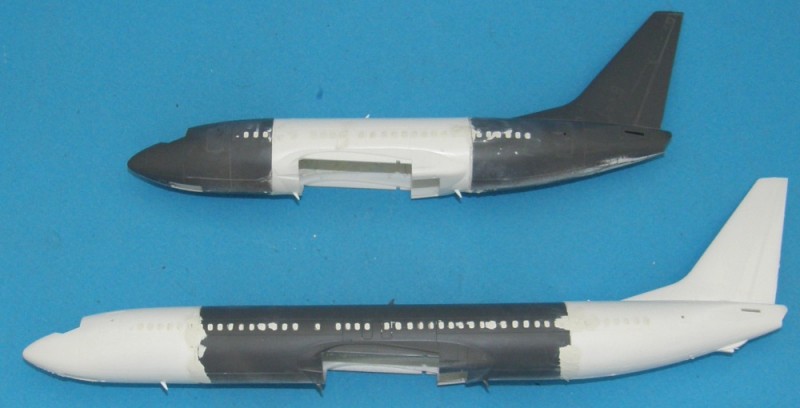
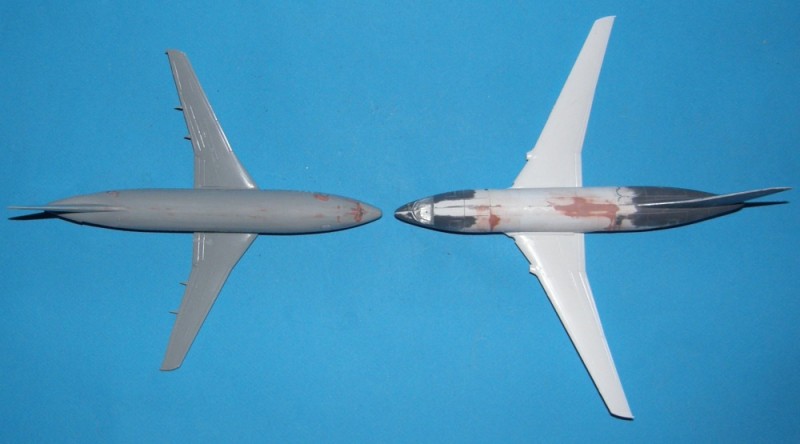
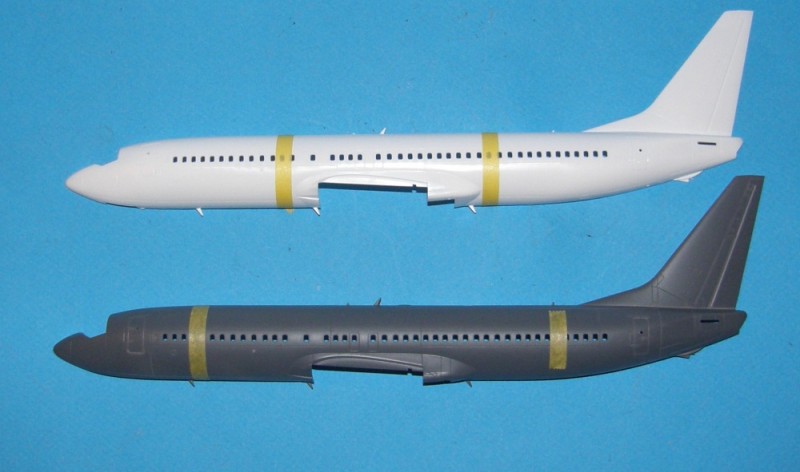
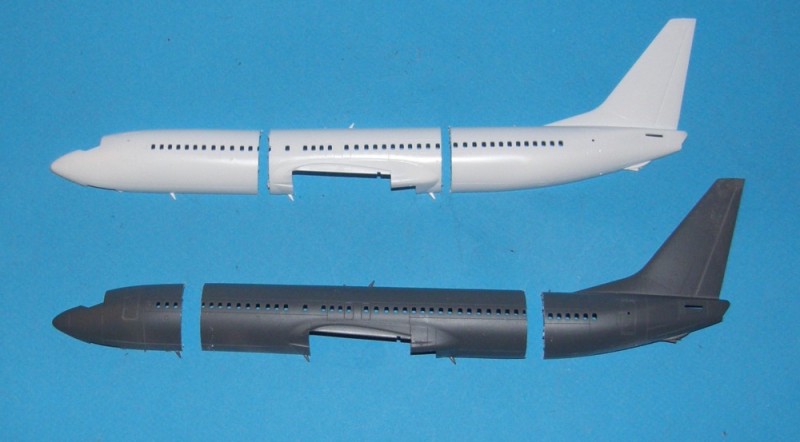
These pictures illustrate the process. Kit A is white and kit B is grey.

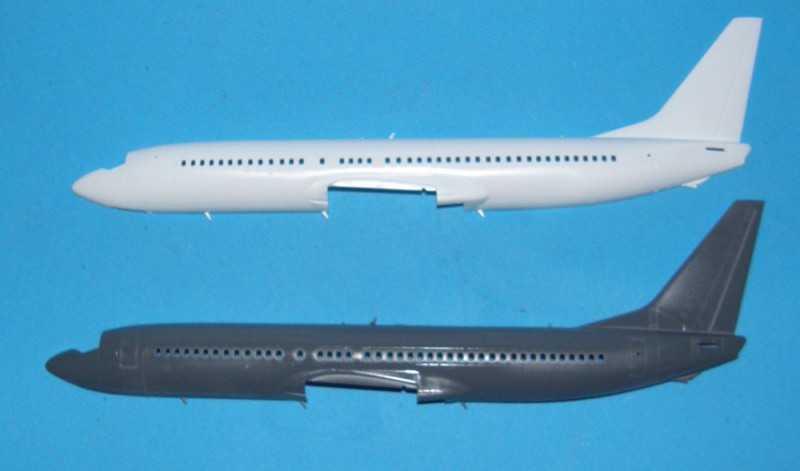
The cuts are marked with tape. In each case the cut will be made on the side of the tape nearest the wings
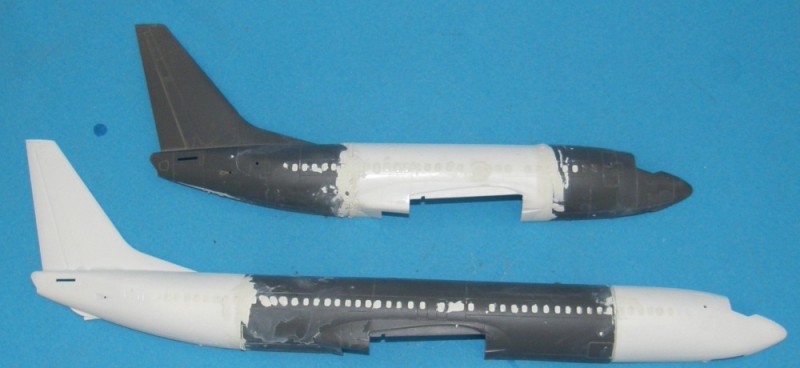
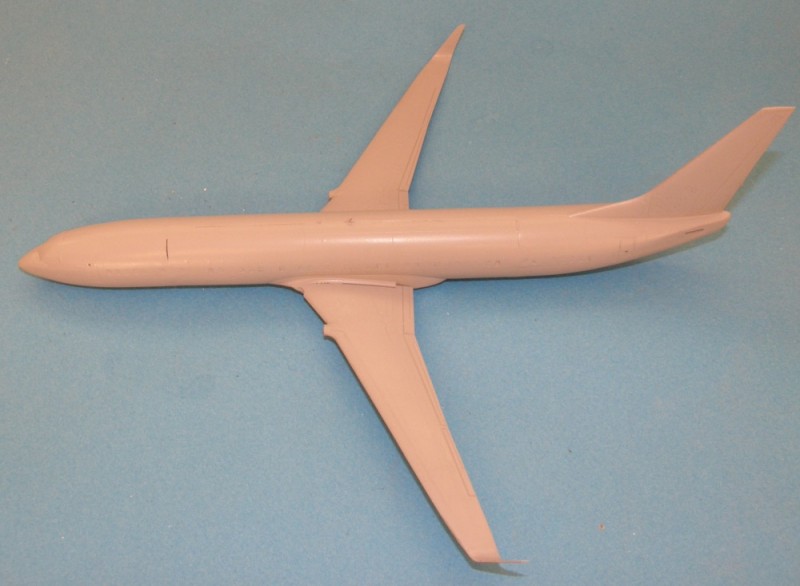
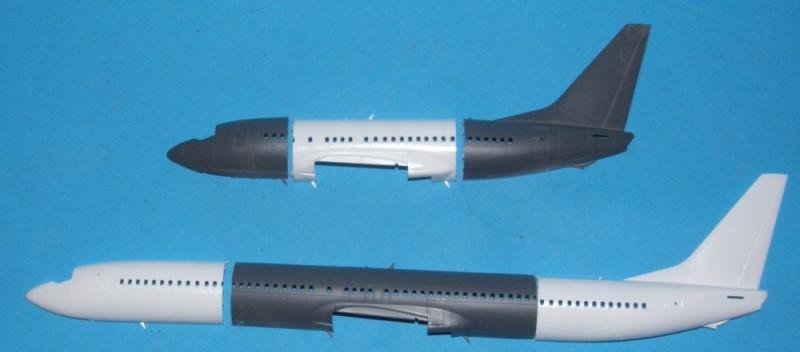
The cuts are made

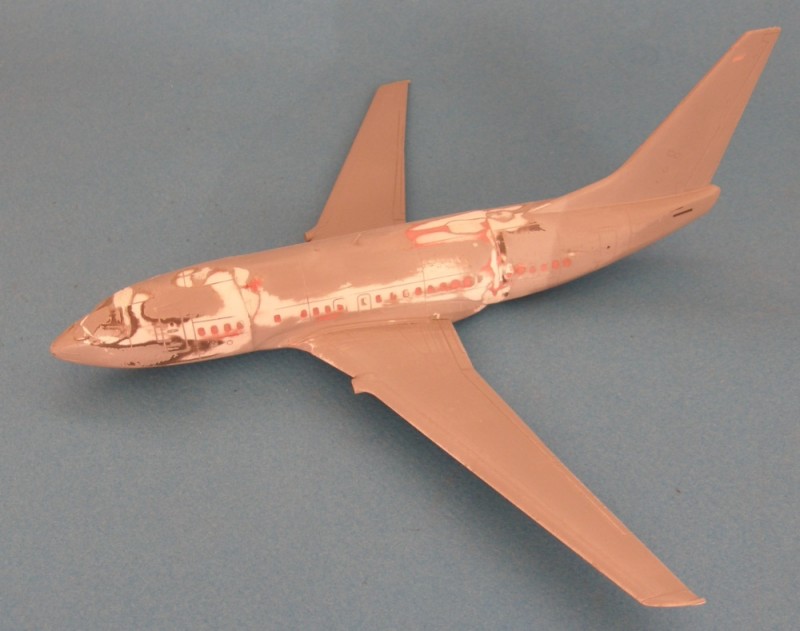
And the parts are swapped around.

Left as-is, the -900's fuselage will be too long, so the nose and tail parts must be trimmed shorter. The offcuts from the trimming may be used as tabs to strengthen the joins. The tail bumper on the -600 must be removed, and the forward emergency exit filled in.
Jessie_C
_VISITCOMMUNITY
British Columbia, Canada
Joined: September 03, 2009
KitMaker: 6,965 posts
AeroScale: 6,247 posts
Posted: Monday, September 10, 2012 - 10:00 AM UTC
Now comes the moment of truth which will make or break this conversion: Gluing the new fuselage halves together. If it's not done carefully, the fuselage will be bent, or worse, one half will end up longer than the other. Test fit and trim as necessary. Landmarks that must line up exactly are the nose, cockpit cutout, wing mount area and tail. Panel lines are not too critical, because they'll be obliterated during the filling and sanding to follow, and will be restored later.

The first step is the cut the nose and tail sections of the -900 down to the proper length. The -900 is roughly 3 window frames longer than the -800 on both the nose and tail, so the remaining sections need to be cut away to achieve the correct length. Exact measurements for the cuts are on the Draw Decals cutting instructions. The offcut sections may then cut be in half, to be used as splints to help join the cut fuselage sections together. They will need to be trimmed shorter top and bottom so they don't foul the other fuselage half when they're joined. I didn't use a mitre box, so my cuts are a trifle sloppy. I'm not worried, because the joins are going to get a nice wrapping with Miliput to strengthen them further, and cover up any irregularities.

The -600 fuselage halves, showing the splints

The -900 in exactly the same pose

And finally a family portrait. From the top: -600, -800, -900
Jessie_C
_VISITCOMMUNITY
British Columbia, Canada
Joined: September 03, 2009
KitMaker: 6,965 posts
AeroScale: 6,247 posts
Posted: Tuesday, September 11, 2012 - 09:22 AM UTC
Revell made the window line too low on the fuselage, and I prefer decal windows, so I solved both problems with a judicious application of Miliput. Roll up a snake of Miliput, and apply it to the inside of the fuselage over the windows. Push it so some squeezes out of each window opening, and then sculpt it to the shape of the fuselage contour with water.

The fuselage halves from the inside

And outside


Now at last we can join the fuselage halves together. Once the glue is dry, the seams and joins can be sanded down and cleaned up.
Jessie_C
_VISITCOMMUNITY
British Columbia, Canada
Joined: September 03, 2009
KitMaker: 6,965 posts
AeroScale: 6,247 posts
Posted: Wednesday, September 12, 2012 - 06:12 PM UTC
Basic filling and sanding are done and the wings are glued on. Time for a little more filling around the wing joins and then the primer coat.


The winglets were borrowed from a Daco kit that won't need them. It turns out that Daco winglets are too tall for the classic 737s, which makes them just about right for an NG except for the short chord. I'll need to fill in that missing piece of leading edge.

Now a little fun. Here's the -200 that I'm doing for the Airfix Campaign. Note how different the NG wing is when compared to the original. Apparently this wide wing makes the -600 a little more challenging to fly than its stablemates.

Jessie_C
_VISITCOMMUNITY
British Columbia, Canada
Joined: September 03, 2009
KitMaker: 6,965 posts
AeroScale: 6,247 posts
Posted: Thursday, September 13, 2012 - 01:37 PM UTC
The primer reveals where I need to do more filling and sanding.


They look a lot worse in person, but showing you what looks ugly still is what primer is for.
Jessie_C
_VISITCOMMUNITY
British Columbia, Canada
Joined: September 03, 2009
KitMaker: 6,965 posts
AeroScale: 6,247 posts
Posted: Tuesday, September 18, 2012 - 05:43 PM UTC
The next round of filling and sanding is done, priming to come.


And just for fun, the base -800 kit I'm building alongside these two.
 _GOTOTOP