Hello all! As you can tell by my profile I don't spend much time building things that don't get dirty. Or have tracks. Or big guns for that matter. However my first models were of aircraft, the old Monogram raised panel lines beasts of the 1980s. Occasionally I'd spring for a Hasegawa kit if I could afford it.
I still have a number of aircraft kits in my pile and just found out my five year old nephew has started to take an interest in old World War 2 aircraft, especially the "Tora Tora Tora ones" ( his words not mine). For his birthday in late October I'll be building the 1/48 Tamiya A6M5 (2008 release). From all I've read it is quite simply the new standard in Zero kits. Should be a fun build, and a nice change of pace from those grungy dirty armor builds.
Hosted by Rowan Baylis
1/48 Tamiya A6M5 Build
BigSmitty
Minnesota, United States
Joined: October 01, 2008
KitMaker: 597 posts
AeroScale: 10 posts
Joined: October 01, 2008
KitMaker: 597 posts
AeroScale: 10 posts
Posted: Tuesday, September 11, 2012 - 03:02 PM UTC
GastonMarty
Quebec, Canada
Joined: April 19, 2008
KitMaker: 595 posts
AeroScale: 507 posts
Joined: April 19, 2008
KitMaker: 595 posts
AeroScale: 507 posts
Posted: Tuesday, September 11, 2012 - 07:28 PM UTC
Great choice, and indeed stay away from the Hasegawa kit, which DOES have a four inch shorter tail...
Gaston
MrMtnMauler
Washington, United States
Joined: January 15, 2011
KitMaker: 224 posts
AeroScale: 223 posts
Joined: January 15, 2011
KitMaker: 224 posts
AeroScale: 223 posts
Posted: Wednesday, September 12, 2012 - 02:23 AM UTC
Yup, a point I'm sure his 5-YEAR OLD nephew will totally lament with you Gaston when he is old enough to reach the keyboard. Really Gaston???
Jim
Jim
james84
Roma, Italy
Joined: January 28, 2006
KitMaker: 1,368 posts
AeroScale: 377 posts
Joined: January 28, 2006
KitMaker: 1,368 posts
AeroScale: 377 posts
Posted: Wednesday, September 12, 2012 - 05:50 AM UTC
DO be careful and TEST FIT the wing gun inserts, it's the only weakness of this otherwise beautiful kit.
DougN1
Georgia, United States
Joined: August 08, 2011
KitMaker: 410 posts
AeroScale: 409 posts
Joined: August 08, 2011
KitMaker: 410 posts
AeroScale: 409 posts
Posted: Wednesday, September 12, 2012 - 07:20 AM UTC
Should be a fun build, be sure to post a build blog so we can all follow along!
Doug
Doug
BigSmitty
Minnesota, United States
Joined: October 01, 2008
KitMaker: 597 posts
AeroScale: 10 posts
Joined: October 01, 2008
KitMaker: 597 posts
AeroScale: 10 posts
Posted: Wednesday, September 12, 2012 - 08:21 AM UTC
I'll have the first photos up tonight. I planned on having them up last night but this thing called real life reared its ugly head.
BigSmitty
Minnesota, United States
Joined: October 01, 2008
KitMaker: 597 posts
AeroScale: 10 posts
Joined: October 01, 2008
KitMaker: 597 posts
AeroScale: 10 posts
Posted: Thursday, September 13, 2012 - 03:23 PM UTC
OK...so by "tonight" I of course meant tomorrow night, which is today, and I have some progress.
The kit is as advertised; flawless (mostly) Tamiya quality (I build quite a few of their 1/48 armor kits) and engineered like a dream.
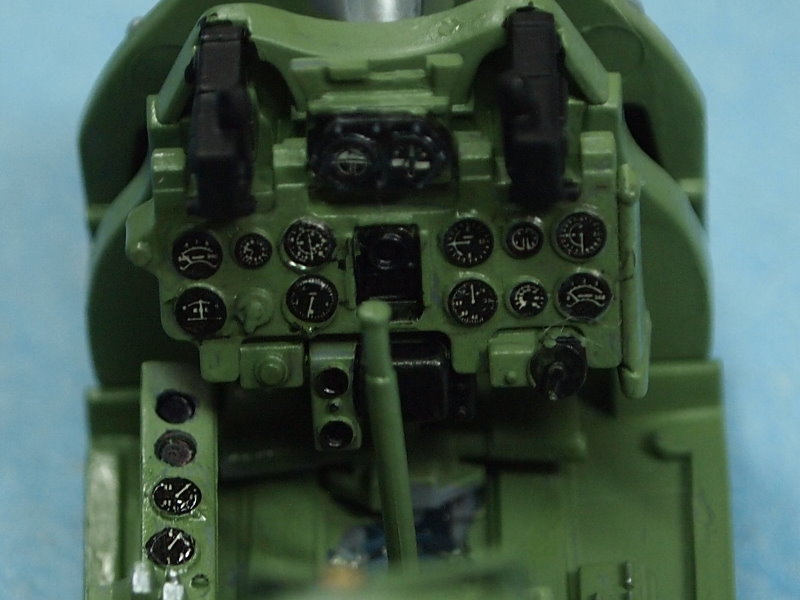
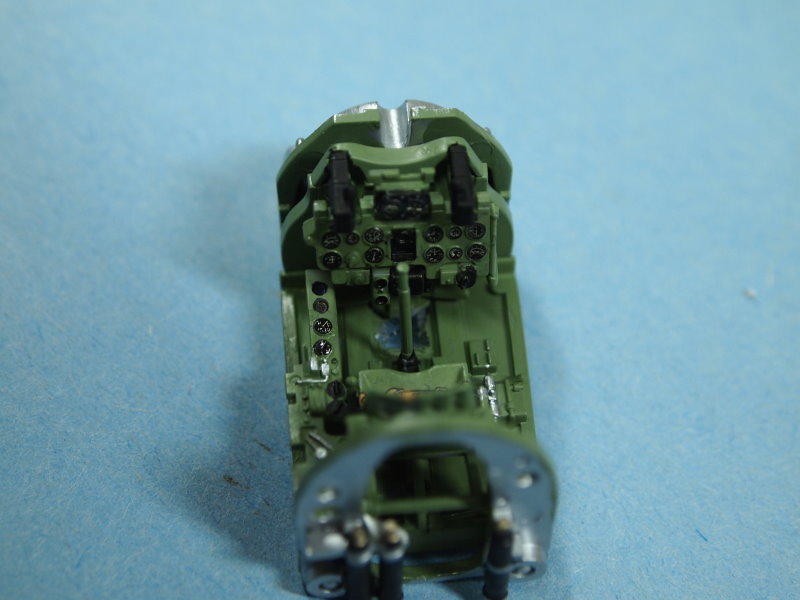
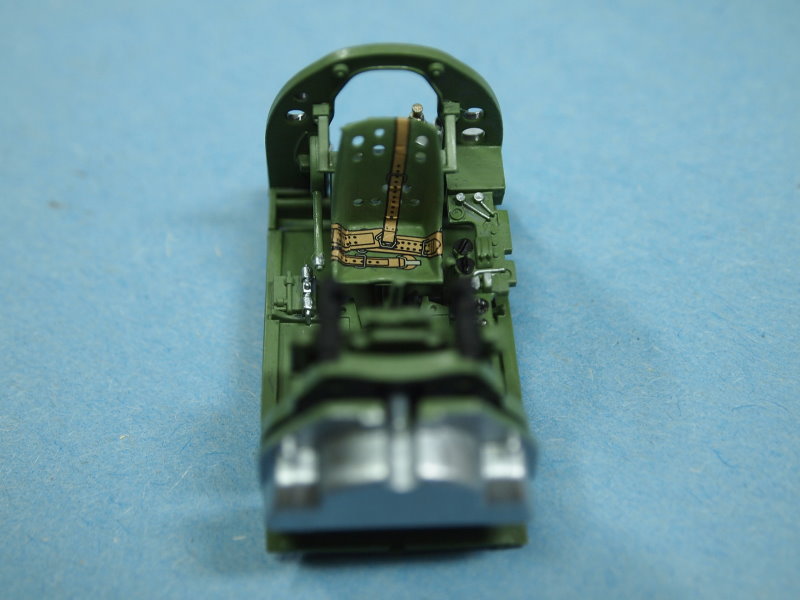
That being said, I've only made a small dent in the build; namely the first two steps involving the instrument panel and the cockpit. Here are some photos of my progress:
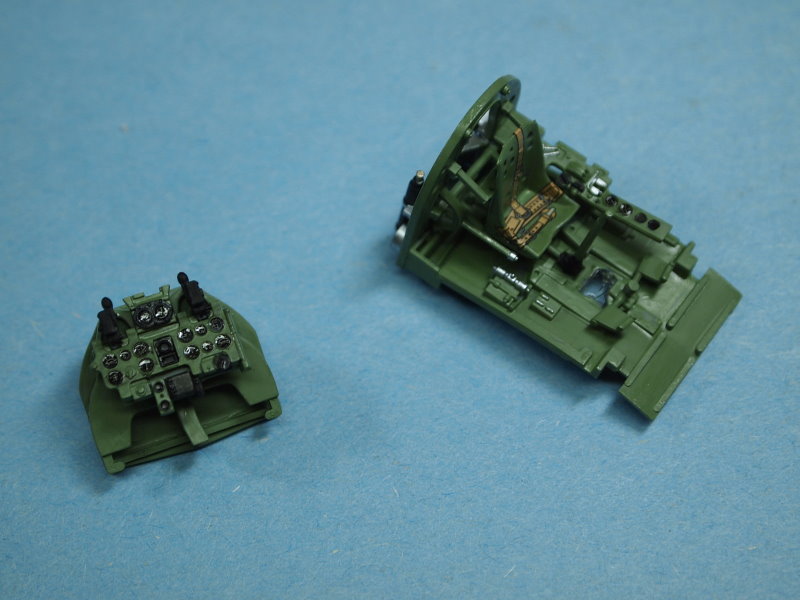
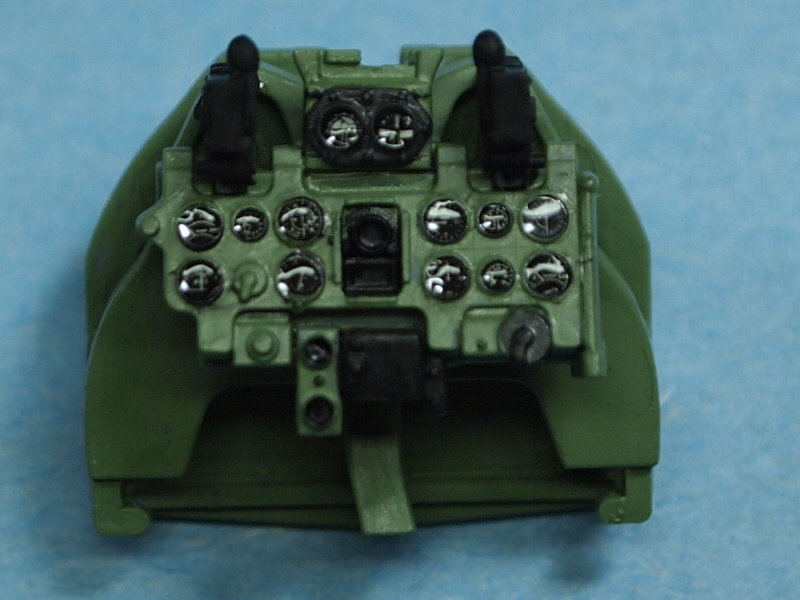
I became intimately "refamiliar" with Micro Set and Micro Sol when applying the instrument face decals and the seat belt (I'm planning on a pair of the included pilots standing outside the plane). After they were settled in, I went over them with some Model Master Acryl Flat to remove the slight traces of decal film, and then added a drop of Future Floor Wax (yeah, my bottle is so old it still says "Future" on the label) to the face of each instrument panel. Old technique, but MAN do I like the results.
Some more of the cockpit area. If anybody knows a good Model Air/Model Color mix for XF-71 Cockpit Green, I'd be happy to find out. For some reason, when I go to paint4models.com the online chart times out. Maybe it's not up to date with the latest Flash version; not sure.
**EDIT:: I found an updated reference source for conversions and have the correct Model Color and Model Air paints.**
That's the update for now. I'll be out of town for the weekend, but fully intend on getting this one finished by the first week in October, for my nephew's birthday on October 25.
The kit is as advertised; flawless (mostly) Tamiya quality (I build quite a few of their 1/48 armor kits) and engineered like a dream.
That being said, I've only made a small dent in the build; namely the first two steps involving the instrument panel and the cockpit. Here are some photos of my progress:
I became intimately "refamiliar" with Micro Set and Micro Sol when applying the instrument face decals and the seat belt (I'm planning on a pair of the included pilots standing outside the plane). After they were settled in, I went over them with some Model Master Acryl Flat to remove the slight traces of decal film, and then added a drop of Future Floor Wax (yeah, my bottle is so old it still says "Future" on the label) to the face of each instrument panel. Old technique, but MAN do I like the results.
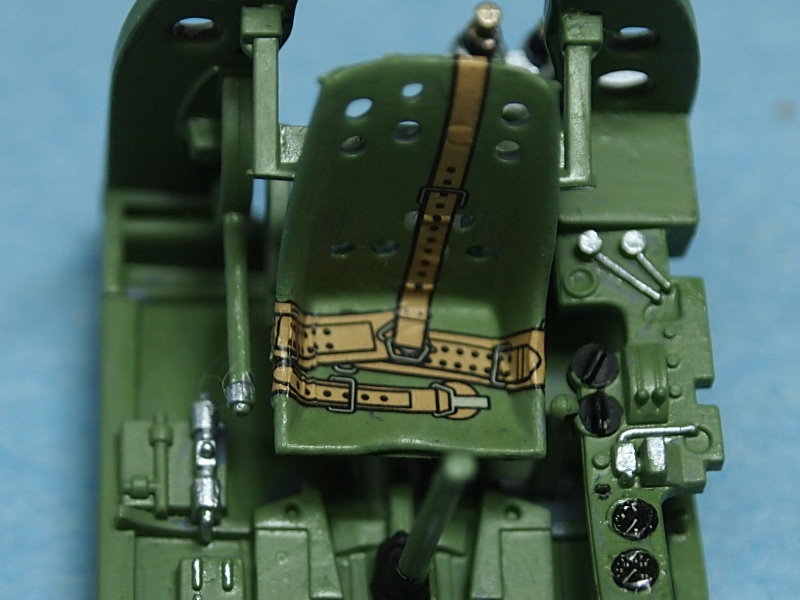
Some more of the cockpit area. If anybody knows a good Model Air/Model Color mix for XF-71 Cockpit Green, I'd be happy to find out. For some reason, when I go to paint4models.com the online chart times out. Maybe it's not up to date with the latest Flash version; not sure.
**EDIT:: I found an updated reference source for conversions and have the correct Model Color and Model Air paints.**
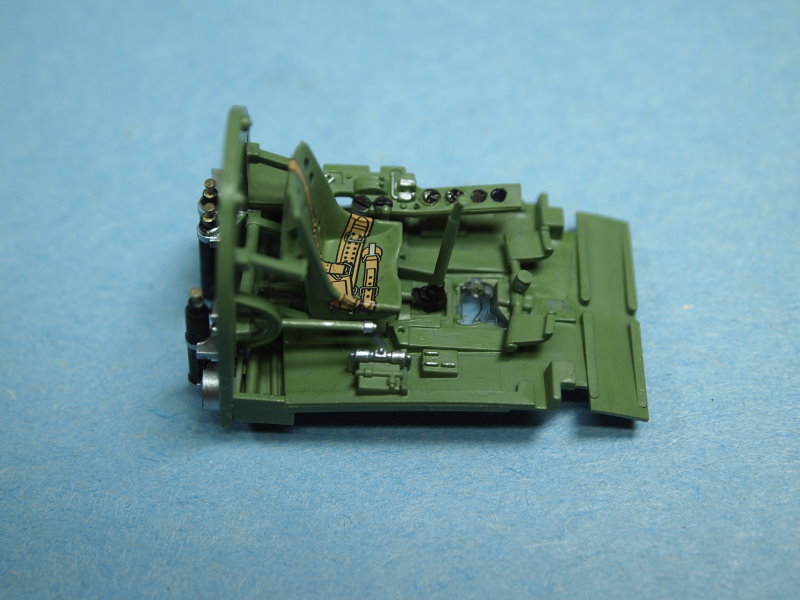
That's the update for now. I'll be out of town for the weekend, but fully intend on getting this one finished by the first week in October, for my nephew's birthday on October 25.