_GOTOBOTTOM
World War II: Germany
Aircraft of Germany in WWII.
Hosted by Rowan Baylis
Eduard Bf 110C/D review build!
magnusf
_VISITCOMMUNITY
Stockholm, Sweden
Joined: May 02, 2006
KitMaker: 1,953 posts
AeroScale: 1,902 posts
Posted: Sunday, December 23, 2012 - 10:17 AM UTC
I managed to get a coat of paint on it before Christmas!


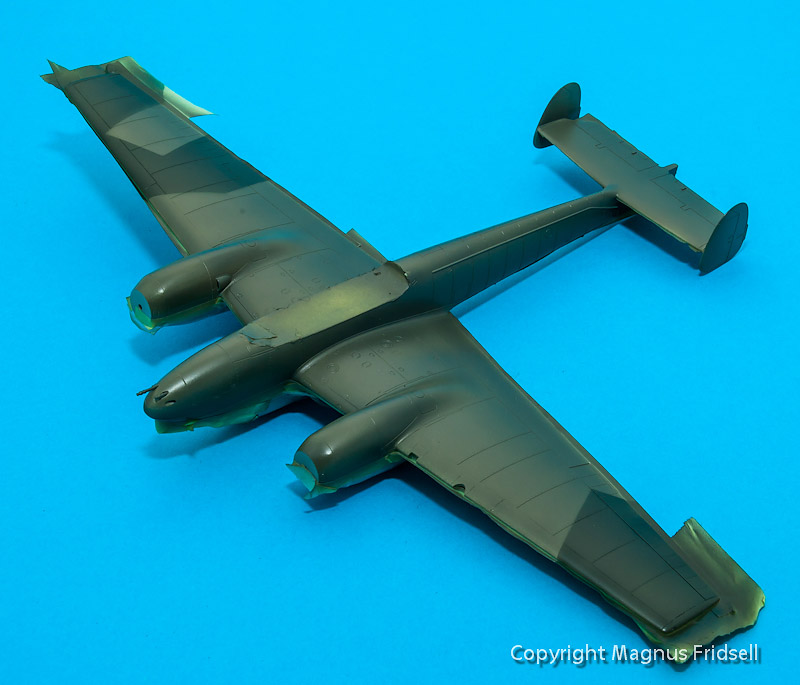
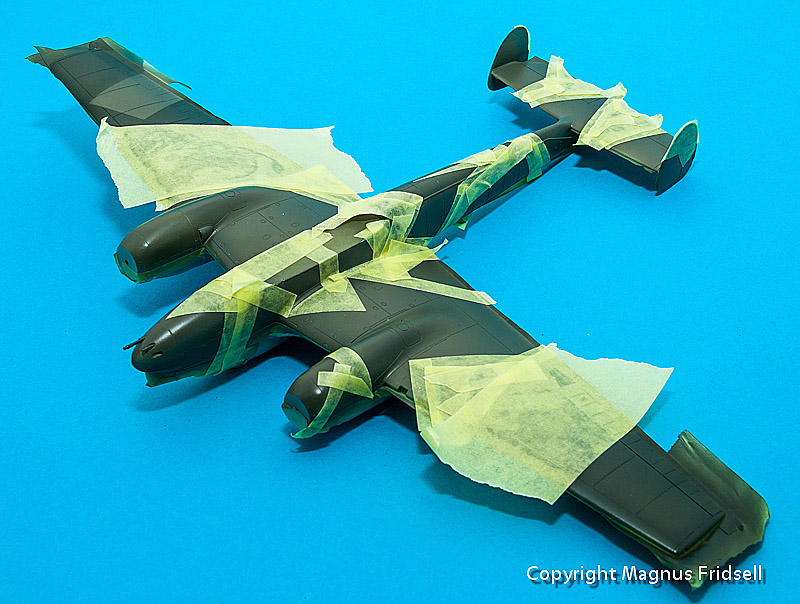
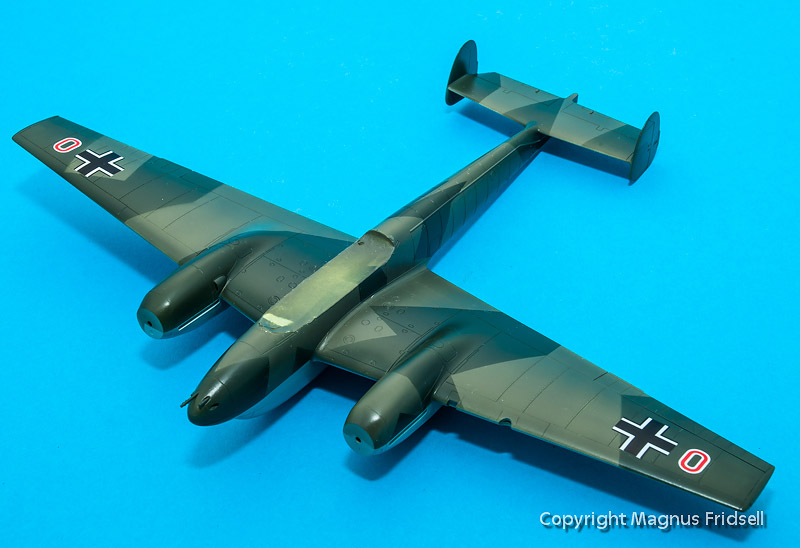
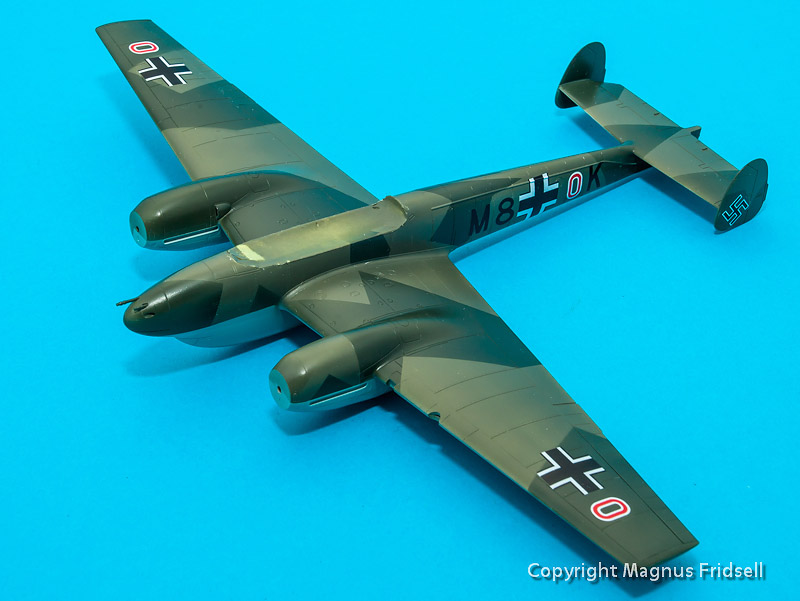
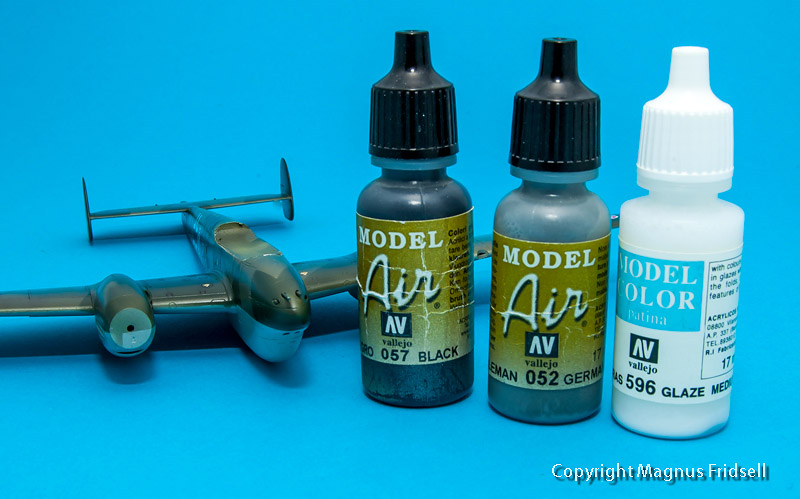
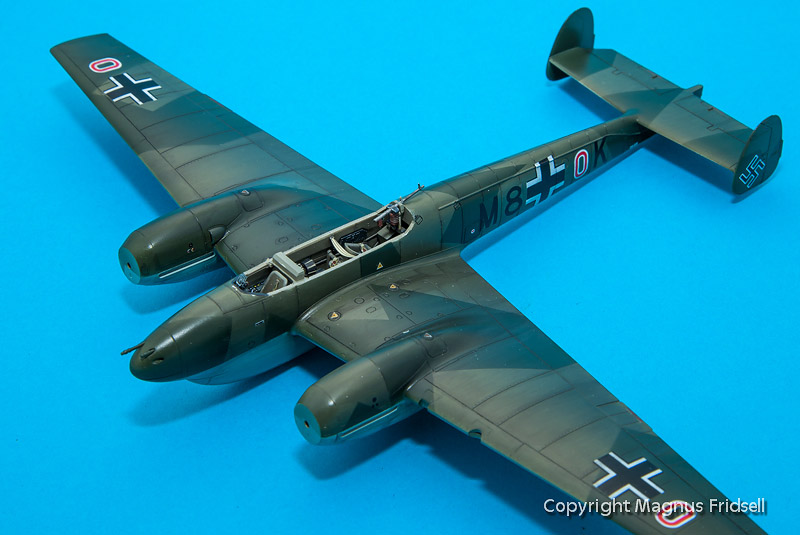
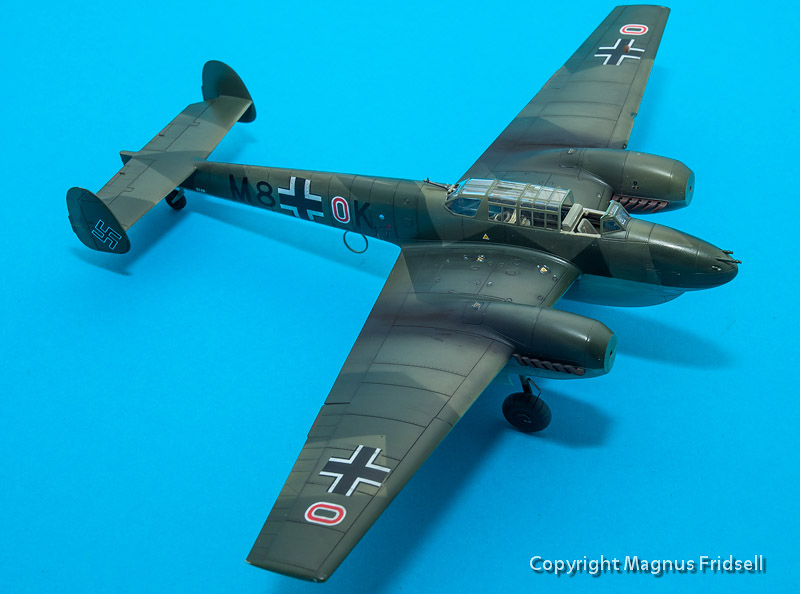
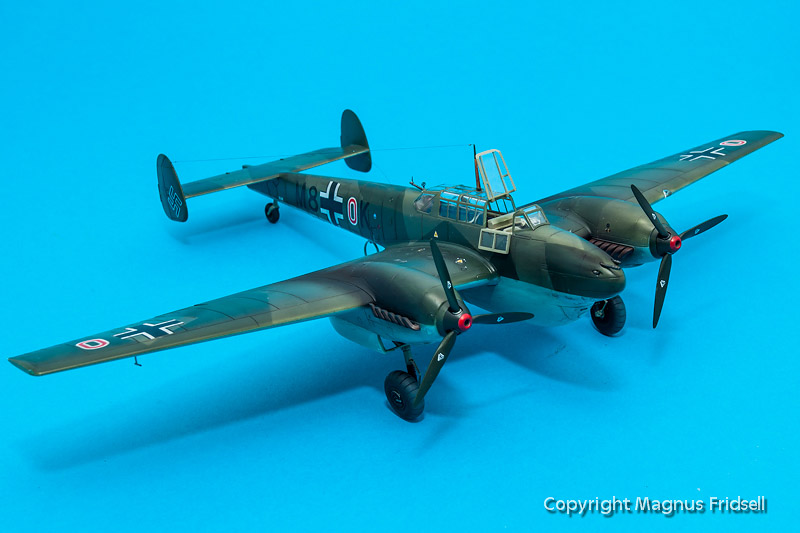
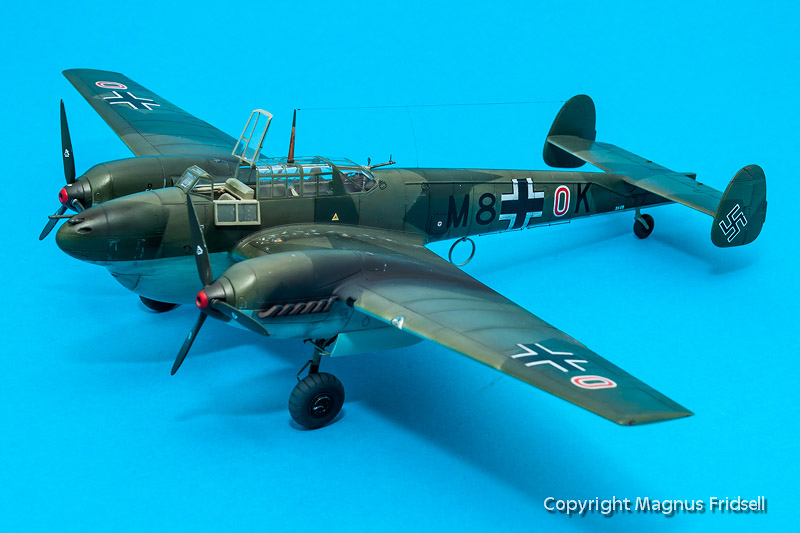
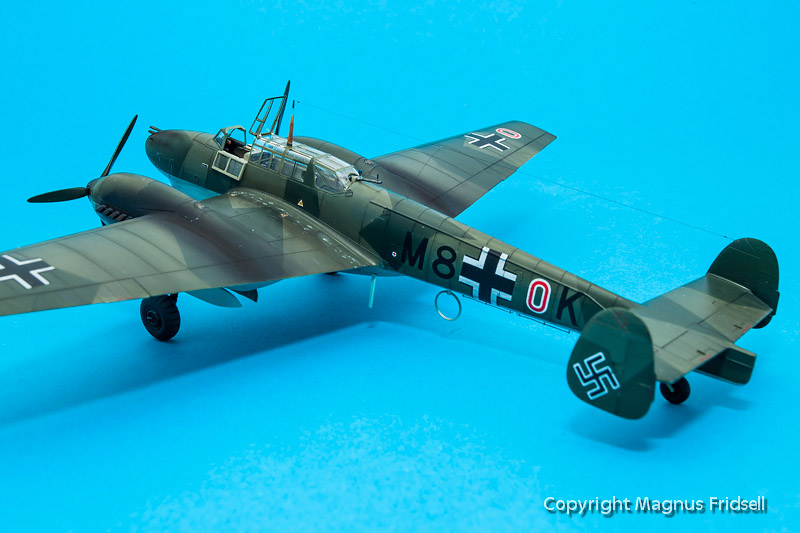
RLM70 dark green is Gunze H65 (RLM 70) with some H58 (interior green) added to make it lighter while still keeping it green (adding white rapidly turns the colour towards grey). RLM71 is Gunze H64 (RLM 71) with a bit of white in it.


Magnus
AussieReg
Staff MemberAssociate Editor
AUTOMODELER
#007
_VISITCOMMUNITY
Victoria, Australia
Joined: June 09, 2009
KitMaker: 8,156 posts
AeroScale: 3,756 posts
Posted: Sunday, December 23, 2012 - 01:02 PM UTC
Beautiful work Magnus, looking really nice !

Cheers, D
magnusf
_VISITCOMMUNITY
Stockholm, Sweden
Joined: May 02, 2006
KitMaker: 1,953 posts
AeroScale: 1,902 posts
Posted: Saturday, December 29, 2012 - 04:27 AM UTC
Damian! Thanks!


Lots of masking... Whenever I can possibly get away with it I go for freehand but this is not such a case...


Looking very German...


...I think! Contrast might be a bit too much but out of experience I know that my weathering has a tendency to even things out!

Interesting to see that I need to touch up the trailing edges, I didn't notice it before I saw it in the photos!


Magnus
Siderius
_VISITCOMMUNITY
Tennessee, United States
Joined: September 20, 2005
KitMaker: 1,747 posts
AeroScale: 1,673 posts
Posted: Saturday, December 29, 2012 - 05:29 AM UTC
Magnus, love it! What a good looking model. Looking forward to seeing the finished product. Russell
magnusf
_VISITCOMMUNITY
Stockholm, Sweden
Joined: May 02, 2006
KitMaker: 1,953 posts
AeroScale: 1,902 posts
Posted: Saturday, December 29, 2012 - 09:57 AM UTC
Russell! Thanks! Starting to see the end of it now!

And then there was some more entertainment to be had even if it is just a few hours since my last post...


The first of the decals! As excellent as the rest of the kit dare I say... Eduard are so good at what they do that they almost are annoying! The "Google" of the plastic model world


Magnus
chukw1
_VISITCOMMUNITY
California, United States
Joined: November 28, 2007
KitMaker: 817 posts
AeroScale: 729 posts
Posted: Saturday, December 29, 2012 - 12:19 PM UTC
A true thing of beauty, Magnus- cheers! It's hard to believe it's 1/72- but then again, you are a master of this scale.
magnusf
_VISITCOMMUNITY
Stockholm, Sweden
Joined: May 02, 2006
KitMaker: 1,953 posts
AeroScale: 1,902 posts
Posted: Sunday, December 30, 2012 - 10:00 AM UTC
Chuck! Thanks! Just the kind of words I wanted to hear !


All the major decals are on, just a bit of stencilling left to do. And now I have finally found something to complain about: the black and the white of the swastikas was mismatched! I had to substitute the kit ones with those from an old Microscale sheet.


Magnus
magnusf
_VISITCOMMUNITY
Stockholm, Sweden
Joined: May 02, 2006
KitMaker: 1,953 posts
AeroScale: 1,902 posts
Posted: Saturday, January 05, 2013 - 09:18 PM UTC
And the project moves on into A.D. 2013!

Weathering (or the part of it that is intended to break up the rather monochrome finish) has now started!


Starboard wing has been through most of the process while the port one has only gotten a greyish wash yet.


As I wrote earlier, the contrast between the upper surface greens is a bit on the heavy side, the wash will even it out. The panel lines look very dark in the photos, they are a lot more restrained in reality (has a lot to do with the way I handle my photos in Lightroom, I like this look a lot but it might not be that suitable for plastic models )!


Lower surfaces got a wash as well. Not as carefully administered though since I always spend most of the work where it can be seen and appreciated !


This is the stuff I use. I have been experimenting with all sorts of stuff for washes and filters, this is probably the best yet for my purposes!

Artist's oils work very well, the problem is that my favourite Gunze acrylic doesn't get along very well with it.

Ordinary watercolour is very safe but it tends to form puddles and it rubs off very easily when dry.

The above stuff seems to be a good combination of both: the "glaze" is probably nothing else than the stuff that the pigments swim in in ordinary paint, it can then be tinted with the colour of your choice and diluted with water to create whatever wash you like. It dries slowly and it doesn't bite into the underlying paint so it is easy to handle on the model and can be washed away by a brush dipped in water if you don't like the effect! Try it, you might like it!


Magnus
magnusf
_VISITCOMMUNITY
Stockholm, Sweden
Joined: May 02, 2006
KitMaker: 1,953 posts
AeroScale: 1,902 posts
Posted: Thursday, January 10, 2013 - 09:01 AM UTC
I've spent quite some time weathering the finish using the products seen in my previous post. As usual, it did get quite grimy... Can be toned down with the airbrush though!


I have also installed the last parts missing from the cockpit: gunsight (a Revi 12 from Quickboost!), navigator's instrument panel and rear firing gun.


Next step will be adding the clear parts!


Speaking of which, here are the clear panels for the cockpit. I carefully peeled off the masks from the outside and reattached them to the inside and painted the framing in RLM02. With an open cockpit, those will be mounted outside in!


Magnus
AussieReg
Staff MemberAssociate Editor
AUTOMODELER
#007
_VISITCOMMUNITY
Victoria, Australia
Joined: June 09, 2009
KitMaker: 8,156 posts
AeroScale: 3,756 posts
Posted: Thursday, January 10, 2013 - 10:38 AM UTC
Lovely work Magnus, really nice weathering effects. This thread will be bookmarked for a couple of future builds for me !

Cheers, D
magnusf
_VISITCOMMUNITY
Stockholm, Sweden
Joined: May 02, 2006
KitMaker: 1,953 posts
AeroScale: 1,902 posts
Posted: Thursday, January 10, 2013 - 06:54 PM UTC

Quoted Text

Lovely work Magnus, really nice weathering effects. This thread will be bookmarked for a couple of future builds for me !

Cheers, D


Damian! I feel honoured !


Magnus
magnusf
_VISITCOMMUNITY
Stockholm, Sweden
Joined: May 02, 2006
KitMaker: 1,953 posts
AeroScale: 1,902 posts
Posted: Wednesday, January 16, 2013 - 09:34 AM UTC
I am always fascinated when I get to this part of the project: there is a multitude of things to do and then suddenly all is done and the kit is just about finished!

I've done some more final assembly tonight, still to do are the mass balances, a small strut for the landing gear doors and the antenna. The model balances beautifully on the twin fins and the canopy greatly facilitating work on the lower surfaces. Another reason for saving the radio antenna for last!


Canopy fitted well (checked that beforehand...) and after attachment using diluted white glue there was some simple touch-up to do around the edges using the airbrush.


Magnus
ShawnM
_VISITCOMMUNITY
Missouri, United States
Joined: November 24, 2008
KitMaker: 564 posts
AeroScale: 510 posts
Posted: Wednesday, January 16, 2013 - 01:26 PM UTC
looks great!
Snorri23
_VISITCOMMUNITY
Ontario, Canada
Joined: March 25, 2010
KitMaker: 514 posts
AeroScale: 244 posts
Posted: Thursday, January 17, 2013 - 04:46 AM UTC
For easier application of your washes add a surfactant (soap) to the mixture. Allows for better flow and removal if needed.
magnusf
_VISITCOMMUNITY
Stockholm, Sweden
Joined: May 02, 2006
KitMaker: 1,953 posts
AeroScale: 1,902 posts
Posted: Saturday, January 26, 2013 - 06:25 AM UTC
Shawn! Thanks!

Trevor! I'll try that one in the future! Thanks!

On the subject of Messerschmitts: That's it! First one finished this year and it is still January. Magnus inpressed by himself, greatly ! Now I'll just have to sum this up and submit it as a build review to make everybody happy!

A few quick conclusions can be offered here though: I think this is one of the best kits I have ever built. Lots of detail but still an easy build that fits incredibly well. And then it is still quite a complex aircraft! If you would like to try to do the "perfect build", this might be a good starting point. At least for the time being!

I have however found a couple of things that could have been better: a locating peg wouldn't have hurt the radio mast. As it is now it is a butt-join against the canopy. A cunning modeller would have drilled both parts and inserted a thin wire. This modeller wasn't cunning enough ! Same goes for the mass balances with the added difficulty that those are so thin that there won't be room for a wire...

This is what it ended up like:


Model has been added to the collection. I'll spend some time now finishing a few kits that I have already started...


Magnus
chukw1
_VISITCOMMUNITY
California, United States
Joined: November 28, 2007
KitMaker: 817 posts
AeroScale: 729 posts
Posted: Saturday, January 26, 2013 - 07:00 AM UTC
Simply fantastic, Magnus- cheers! Delicate details, beautiful color accents and juuust the right amount of weathering. As far as those mass balances, just replace the whole arm with fine brass rod- drill in the streamlined "mass" and the wing to accept the wire. Problem solved!

All the best-
chuk
AussieReg
Staff MemberAssociate Editor
AUTOMODELER
#007
_VISITCOMMUNITY
Victoria, Australia
Joined: June 09, 2009
KitMaker: 8,156 posts
AeroScale: 3,756 posts
Posted: Saturday, January 26, 2013 - 08:43 AM UTC
Beautifully finished Magnus, as Chuck said the weathering is spot on. Congrats on your first completion for 2013 mate !

Cheers, D
Siderius
_VISITCOMMUNITY
Tennessee, United States
Joined: September 20, 2005
KitMaker: 1,747 posts
AeroScale: 1,673 posts
Posted: Saturday, January 26, 2013 - 03:27 PM UTC
I really wanted to convey to you how beautiful your model was!! A real work of art. I thoroughly enjoyed looking at it. Another work of art I am thinking of starting is an aircraft from the stable of your home country Magnus, SAAB. I just purchased a 1/72 scale Italeri Gripen and bought a decal sheet to go with it. The Gripen appears to be showing up in the two shades of grey camoflauge and the subdued markings. I was hoping for a decal sheet with more color, but haven't been able to find one. Anyway, I have always admired the aircraft of SAAB and am looking forward to this build, of this graceful machine. Take care, Russell
magnusf
_VISITCOMMUNITY
Stockholm, Sweden
Joined: May 02, 2006
KitMaker: 1,953 posts
AeroScale: 1,902 posts
Posted: Saturday, January 26, 2013 - 07:37 PM UTC
Chuck, Damian and Russell! Thanks! The weathering looks a lot more conspicuous in the photos than it does in real life (a bit on the heavy side for my taste...), it has more to do with how I process my photos than the weathering process ! I'm glad you like it the way you see it though!

Chuck! The mass balances are horribly tiny, and there is four of them... With hindsight I should have attempted your method anyway!

Russell! I'm sorry about the Gripens: they are a bit on the grey side. Grey paint, grey markings, grey - just about everything ! At least if you are going for a Swedish paint scheme, the other customers have occasionally managed to do something a bit more colourful!


Magnus
DougN1
_VISITCOMMUNITY
Georgia, United States
Joined: August 08, 2011
KitMaker: 410 posts
AeroScale: 409 posts
Posted: Sunday, January 27, 2013 - 03:38 AM UTC
Looks great Magnus! I really like the 70/71 splinter scheme on the 110.

Doug
magnusf
_VISITCOMMUNITY
Stockholm, Sweden
Joined: May 02, 2006
KitMaker: 1,953 posts
AeroScale: 1,902 posts
Posted: Sunday, January 27, 2013 - 06:31 PM UTC
Doug! Thanks! Took a bit of experimentation to get the contrast right. Or at least close to something I like !


Magnus
KrisMax
_VISITCOMMUNITY
Queensland, Australia
Joined: January 23, 2010
KitMaker: 156 posts
AeroScale: 139 posts
Posted: Friday, February 01, 2013 - 11:06 AM UTC
Magnus,

That is a very nicely finished 110. Your weathering technique is similar to mine, and your end result is the sort of thing I am aiming for. I will refer closely to these photos next time I am weathering and try to emulate the effect you have achieved.
Thanks for taking the time to post this build. Very interesting and useful.

Cheers

Simon
magnusf
_VISITCOMMUNITY
Stockholm, Sweden
Joined: May 02, 2006
KitMaker: 1,953 posts
AeroScale: 1,902 posts
Posted: Saturday, February 02, 2013 - 06:52 AM UTC
Simon! Good luck with your weathering!


Magnus
 _GOTOTOP