_GOTOBOTTOM
Early Aviation
Discuss World War I and the early years of aviation thru 1934.
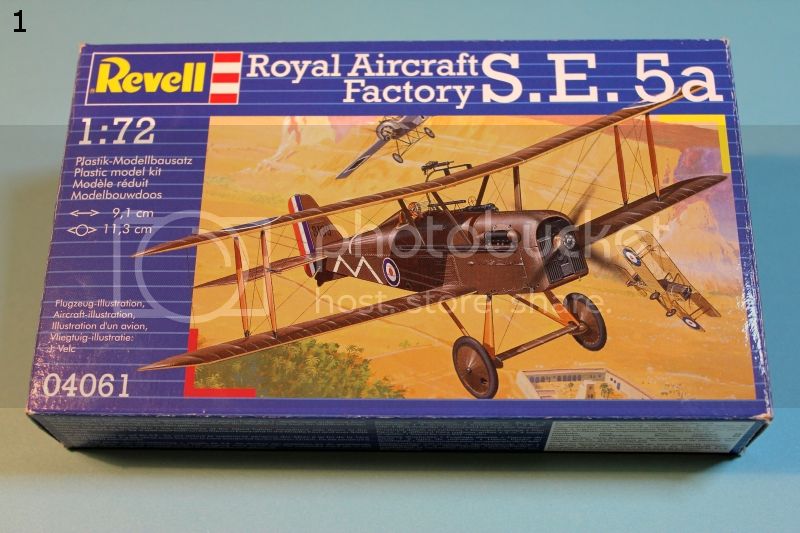
Revell 1:72 RAF Se 5a - Jose
Jose_Barbosa
_VISITCOMMUNITY
Porto, Portugal
Joined: November 17, 2012
KitMaker: 35 posts
AeroScale: 25 posts
Posted: Tuesday, November 27, 2012 - 07:27 AM UTC
Hello,

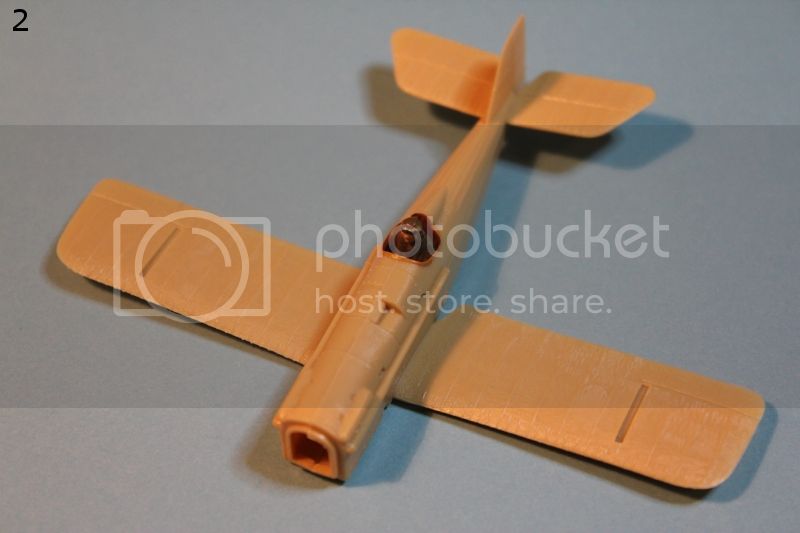
I decided to build this airplane.
I know, that others members(Stephen and Murdo) already have done it.
I will be very gratefull for your help and comments.


Thanks in advance.
Jose

Cheers
JackFlash
_VISITCOMMUNITY
Colorado, United States
Joined: January 25, 2004
KitMaker: 11,669 posts
AeroScale: 11,011 posts
Posted: Tuesday, November 27, 2012 - 08:13 AM UTC
Its good to see some more small scale builds!
Mgunns
_VISITCOMMUNITY
Arizona, United States
Joined: December 12, 2008
KitMaker: 1,423 posts
AeroScale: 1,319 posts
Posted: Thursday, November 29, 2012 - 06:52 AM UTC
Hello Jose:

I don't work in this scale but I always enjoy seeing the work that people do in this scale. I am looking forward to seeing you work with this one.

Best
Mark
Jose_Barbosa
_VISITCOMMUNITY
Porto, Portugal
Joined: November 17, 2012
KitMaker: 35 posts
AeroScale: 25 posts
Posted: Thursday, November 29, 2012 - 08:24 AM UTC
Hi Stephen,

I have been reading the fantastic info you provided me, when I posted a comment about the "Revell 1:72 SE 5a - Murdo".

You wrote : "for rigging an SE 5a search here".
"Search here" is the link to above mentioned info.
Can you tell me, how do you inserted the link="Search here"?

I already downloaded the PDF "Windsock data files", from
http://www.ebooks-share.net:)

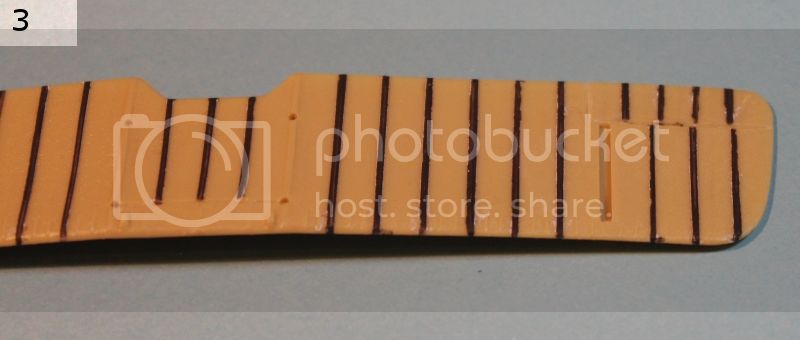
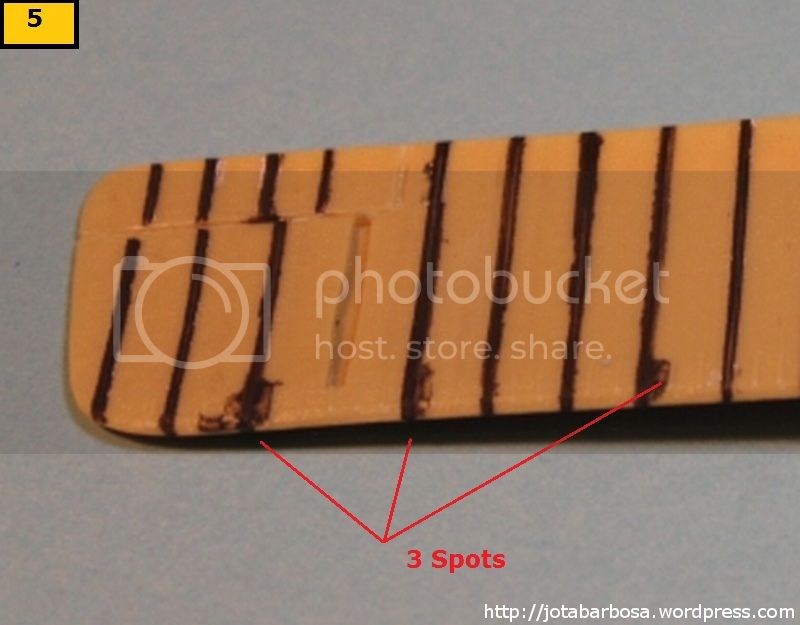
As you can see in a picture of my last post, I preshaded/brushed the lower surface of the the upper wing.

I cut 2mm width strips from Tamiya masking tape, to surround the ribs.


[b]However![/]
Everytime I brush a masked area, I get paint which flows between the tape and the styrene.
This issue seldom occurs when I airbrush.
The area of the painted ribs, is so little, that do not justify AB !
It will be a waste of the expensive Tamiya paint !

May you suggest me a solution for the problem not to happen when I paint with the brush ?

I think, I must prime the surface of the wing, before I preshade the ribs.
Do you agree ?

Thanks in advance
Cheers
Jose
Jose_Barbosa
_VISITCOMMUNITY
Porto, Portugal
Joined: November 17, 2012
KitMaker: 35 posts
AeroScale: 25 posts
Posted: Thursday, November 29, 2012 - 08:51 AM UTC
Hi Stephen,

I forgot to tell you !

I painted with Vallejo Model Color:
> Paint "German Cam. Black Brown, code 70822
> Thinner = Distilled water
> Mix 1:1

Greetings
Jose
Mgunns
_VISITCOMMUNITY
Arizona, United States
Joined: December 12, 2008
KitMaker: 1,423 posts
AeroScale: 1,319 posts
Posted: Friday, November 30, 2012 - 08:40 AM UTC
Hello Jose:

You may be thinning the paint too much. Maybe try sanding the surface of the plastic to provide something the paint can stick to. If there is a real glossy finish on the plastic, and the paint is thinned with water, it will probably just bead up instead of adhering to the plastic.

Good Luck

Mark
Jose_Barbosa
_VISITCOMMUNITY
Porto, Portugal
Joined: November 17, 2012
KitMaker: 35 posts
AeroScale: 25 posts
Posted: Friday, November 30, 2012 - 09:53 AM UTC
Hello Mark,

Thank you for the tip!

The surface of the wing has a texture of the skin of an orange (fruit), that I want to preserve. If I make the paint thicker, I will loose that texture.

Next step, I intend to prime the surface first, this way I will oblige the rib paint to bite the primer.

Just for information, I thinned the Vallejo Model Color with WINDEX > Airbrush, and indeed it washed me the paint very well !!
Sometime, I needed to try Windex! And I will try it again BUT, with a ratio Paint to Windex = 1 to 10, pressure 10 psi, distance AB to part=100mm.

I would like to hear your comments.

Thank you in advance !

Cheers
Jose
thegirl
_VISITCOMMUNITY
Alberta, Canada
Joined: January 19, 2008
KitMaker: 6,743 posts
AeroScale: 6,151 posts
Posted: Friday, November 30, 2012 - 05:06 PM UTC
The surface is not smooth so the tape will not lay down properly . To avoid this when you lay the tape down spray some clear gloss such as future of testors clear gloss over the tape . You just need a light coat . Once this has dried fully then you can paint the space inbetween .

If you plan on using tamiya paints they will brush paint nicely . You will need a small cap or dish with clean thinner . Drip the brush in the thinner first then the paint and draw you line in one motion . A liner brush works well for this .

When thing Vallejo paints water will work , tamiya thinner works well to as well as testors acrylic thinner . I don't like using water for it doesn't give the paint tooth to adhere to the surface very well .


Terri
modulla
_VISITCOMMUNITY
United Kingdom
Joined: July 13, 2008
KitMaker: 72 posts
AeroScale: 71 posts
Posted: Saturday, December 01, 2012 - 04:45 PM UTC
Hello Jose
I have found that, with brush or with spray-gun, building up using small amounts each time (rather than one thick layer), means there is nothing "spare" to bleed under the tape. Allow each layer to dry before proceeding.
Also, use your brush or gun vertically, not at an angle.

Try this out on some scrap plastic first, to see if it works for you.

Enjoy!

Clive
Rotebaron
_VISITCOMMUNITY
Jalisco, Mexico
Joined: August 10, 2010
KitMaker: 182 posts
AeroScale: 179 posts
Posted: Tuesday, December 04, 2012 - 02:12 PM UTC
Nice to see your thread, I like the details you make in wings colors.
Jessie_C
_VISITCOMMUNITY
British Columbia, Canada
Joined: September 03, 2009
KitMaker: 6,965 posts
AeroScale: 6,247 posts
Posted: Tuesday, December 04, 2012 - 03:09 PM UTC
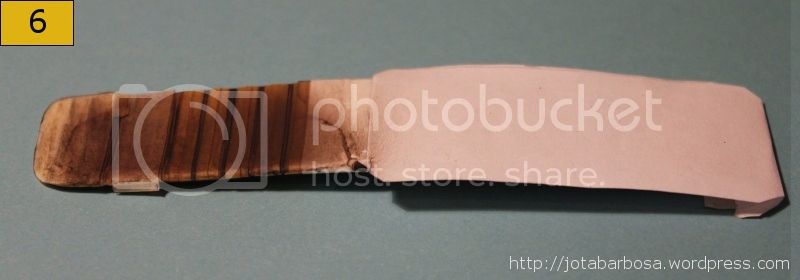
For textured wings, another trick you can try is decal trim film with a thickish coat of paint on it. Cut the film into little slivers and wrap it around the wings where the ribs are. When you do the final colour coat, the decal film will stand out just a trifle from the wing surface.
Jose_Barbosa
_VISITCOMMUNITY
Porto, Portugal
Joined: November 17, 2012
KitMaker: 35 posts
AeroScale: 25 posts
Posted: Friday, December 07, 2012 - 08:46 AM UTC
Hi Jessica,

Thanks to all the the hints I received from Clive and thegirl.
I will test these procedures.


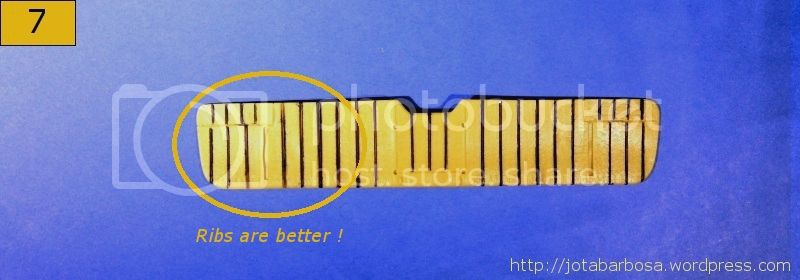
1)I airbrushed again the faulty ribs, using Vallejo Model Color+WINDEX.
Can you tell me where can I find decal trim film (Manufacturer + Part Number) ?
Usually I buy online from http://www.hannants.co.uk.
My Portuguese supplier has it for Laser printers, but I prefer to use my Photoprinter CANON PIXMA MG5150.


2) Meanwhile I started to draw the 3D model of this airplane.
More about this, soon !
Do you Know some website where I can find/download the 3D model of a WW1 airplane fighter pilot ?


Cheers
Jose
Jessie_C
_VISITCOMMUNITY
British Columbia, Canada
Joined: September 03, 2009
KitMaker: 6,965 posts
AeroScale: 6,247 posts
Posted: Friday, December 07, 2012 - 09:13 AM UTC
Hannants has Microscale clear trim film available, but I've also bought it from Fantasy Print Shop. That printer film should also be available in a version for laser printers. This style is available from Testors and there are several other brand names. Your hobby shop owner should be able to find them for you.
Removed by original poster on 12/21/12 - 15:51:13 (GMT).
Jose_Barbosa
_VISITCOMMUNITY
Porto, Portugal
Joined: November 17, 2012
KitMaker: 35 posts
AeroScale: 25 posts
Posted: Friday, December 21, 2012 - 03:55 AM UTC
Hi,

I wish a Happy Christmas to all of the members.
I'm improving the 3D model, and only when this is finished, build the real airplane.


Cheers
Jose
Mgunns
_VISITCOMMUNITY
Arizona, United States
Joined: December 12, 2008
KitMaker: 1,423 posts
AeroScale: 1,319 posts
Posted: Sunday, December 23, 2012 - 08:05 AM UTC
Hell Jose and have a Merry Christmas and a happy and prospersous as well.

I think you are approaching the pre-shading all wrong. Kornbeef had a great method for his 1/32nd SE5 that I use and it works great, very simple. 1. Paint the wing surfaces CDL. 2. Mask off the ribs and spars. 3. Paint the wing surfaces with a dark grey. 4. Peel the tape. 5. Paint the undersurfaces with light back and forth movements of the airbrush with CDL until you get the desired effect. 6. Do the same with the upper wings, but use your favorite shade of PC 10. This method has worked for me and I use it exculsively to good effect.
Good Luck Jose and be sure to show some pictures.

Best
Mark
Jose_Barbosa
_VISITCOMMUNITY
Porto, Portugal
Joined: November 17, 2012
KitMaker: 35 posts
AeroScale: 25 posts
Posted: Saturday, May 25, 2013 - 08:25 AM UTC
Hi Mark,

I have been out of the forum, because my wife is ill.

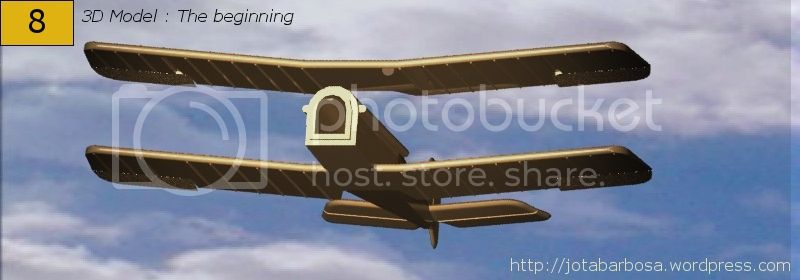
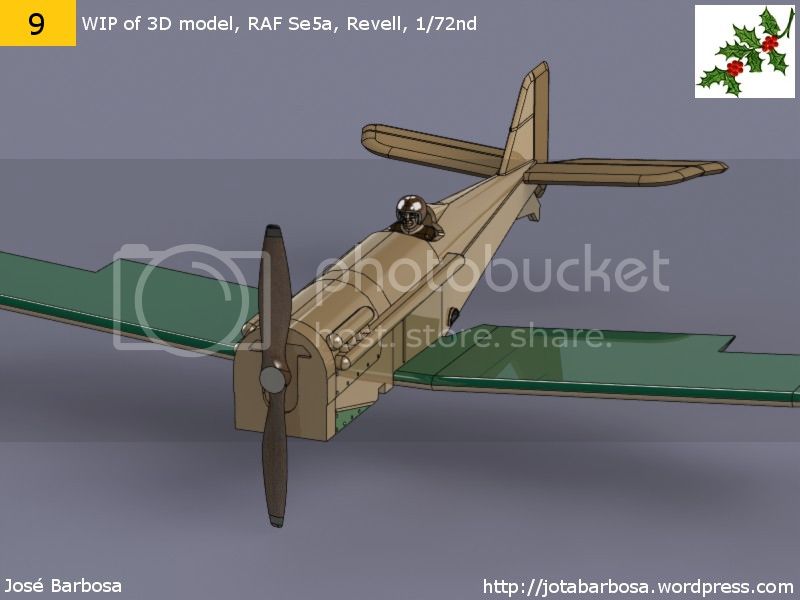
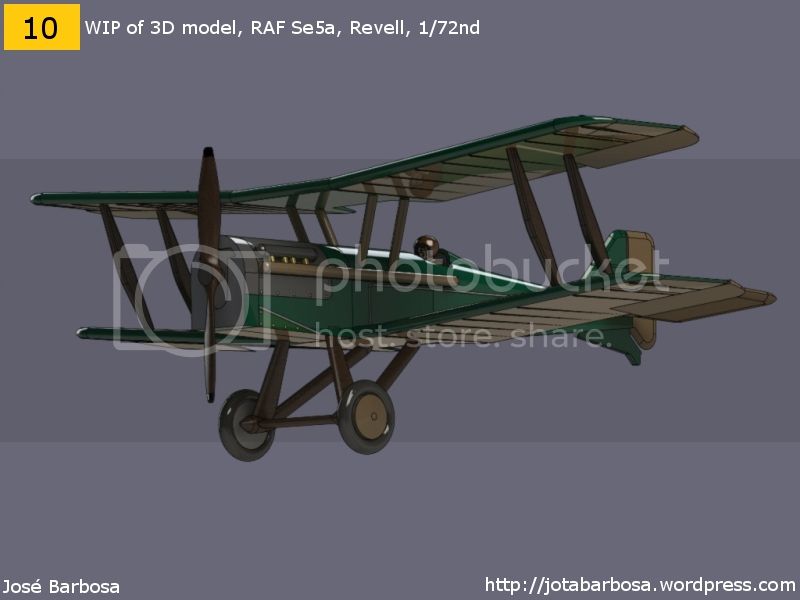
This image is the current status of my 3D model.

What do you mean by CDL and PC 10 ?

Cheers to all of my friends !

Regards
Jose


Jessie_C
_VISITCOMMUNITY
British Columbia, Canada
Joined: September 03, 2009
KitMaker: 6,965 posts
AeroScale: 6,247 posts
Posted: Saturday, May 25, 2013 - 10:48 AM UTC
CDL is Clear Doped Linen. The unpainted fabric was coated with clear protective dope with no pigment allowing the underlying fabric colour to show through. It could appear as any colour from almost white through to dirty yellow depending on the natural colour of the linen fabric. It was nearly always only applied on the underside of late war aircraft although earlier aircraft were often clear doped overall. As aircraft became more durable and lasted longer, it was discovered that Ultraviolet radiation damaged the fabric over time leading to the necessity for a Protective Coating.

PC10 is a mixed dope, which was an olive drab/brown drab colour most of the time (it varied greatly depending upon a large number of factors). It was applied to the upper surfaces of most British aircraft both to protect the fabric from UV damage and to serve as camouflage. It's the brownish colour on the boxtop of your model.
 _GOTOTOP