_GOTOBOTTOM
General Aircraft
This forum is for general aircraft modelling discussions.
Small Improvements
Mcleod
_VISITCOMMUNITY
Alberta, Canada
Joined: April 07, 2010
KitMaker: 1,028 posts
AeroScale: 939 posts
Posted: Sunday, January 06, 2013 - 09:56 AM UTC
I took it upon myself to build an aeroplane kit that dates from 1967. It happens to be a Hawk Westland Lysander Mk.II 1n 1/48, kit #563-130.


Now, these old kits can be quite buildable. The thing is, I believe they were originally mean't for some kid with tube glue who would tie a string around a wing and spin it over their head until the inevidable crash landing came about. Most of these kits are completely void of even any reasonable detailing, and go no further than looking like the intended subject. They are still buildable, though.

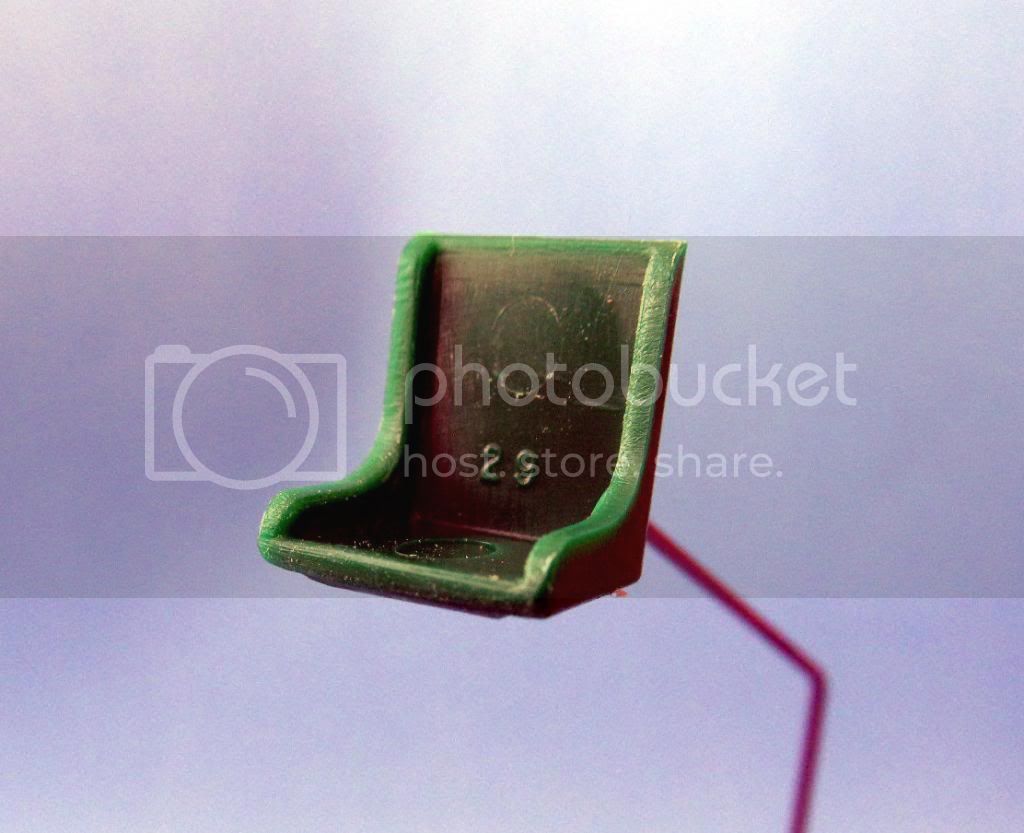
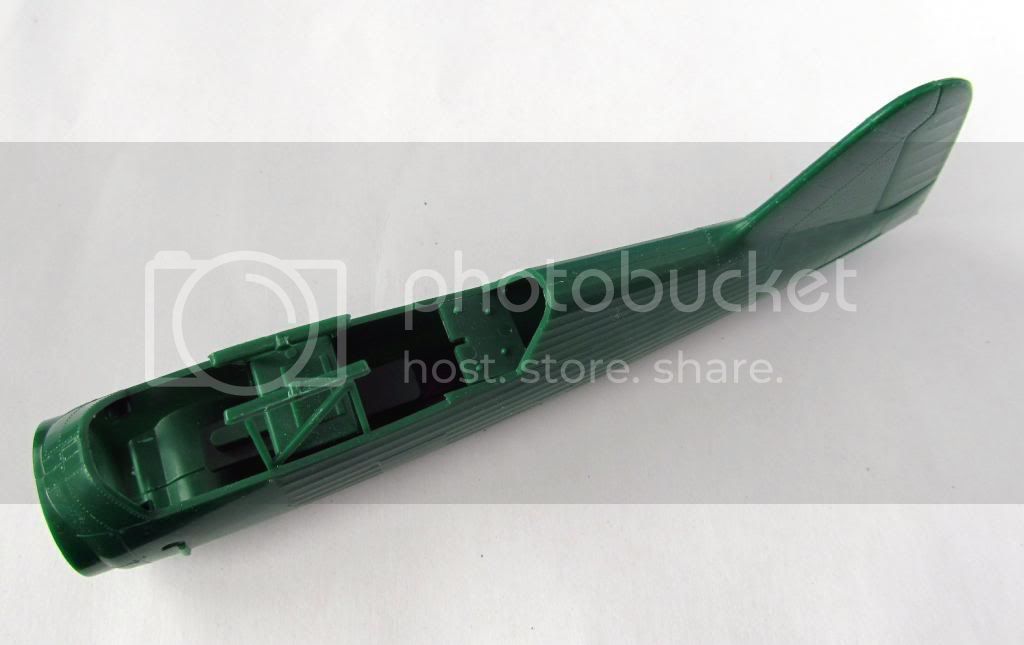
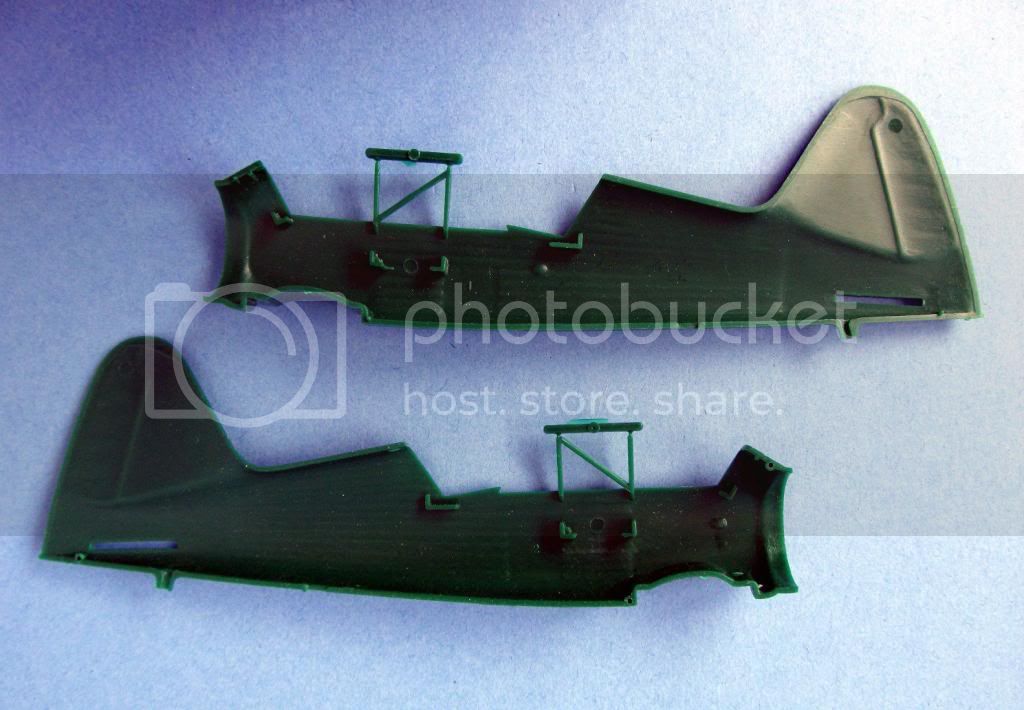
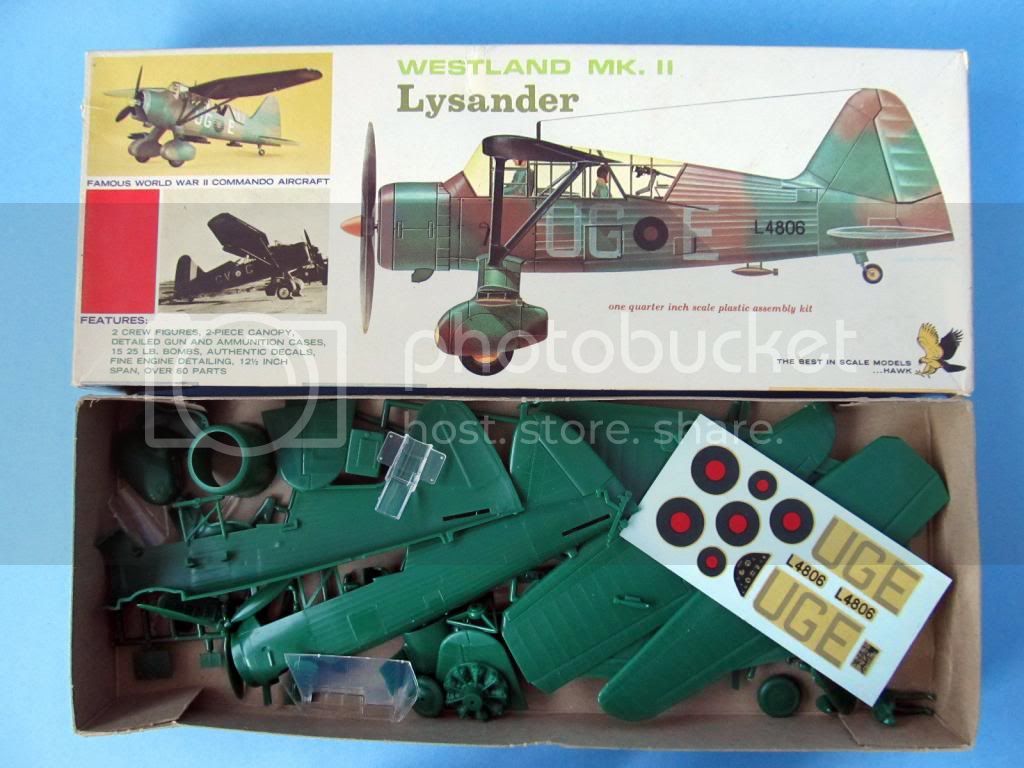
Which brings me to this thread. I had a problem in that the Lysander has a minimal, totally inaccurate cockpit interior. There are two very poor seats, a fuel tank in-between them, and a featureless cockpit panel where a fakey looking instrument decal was to be applied.

So I decided that with a little fun effort, I might be able to add some form of detail, and improve the model to a point where it was presentable.

Hence this thread. I'm going to show you how I'm solving detail issues, using minor scratch-building methods that I don't even know if they are right or wrong. You see, I don't have a whole lot of scratch-building experience.

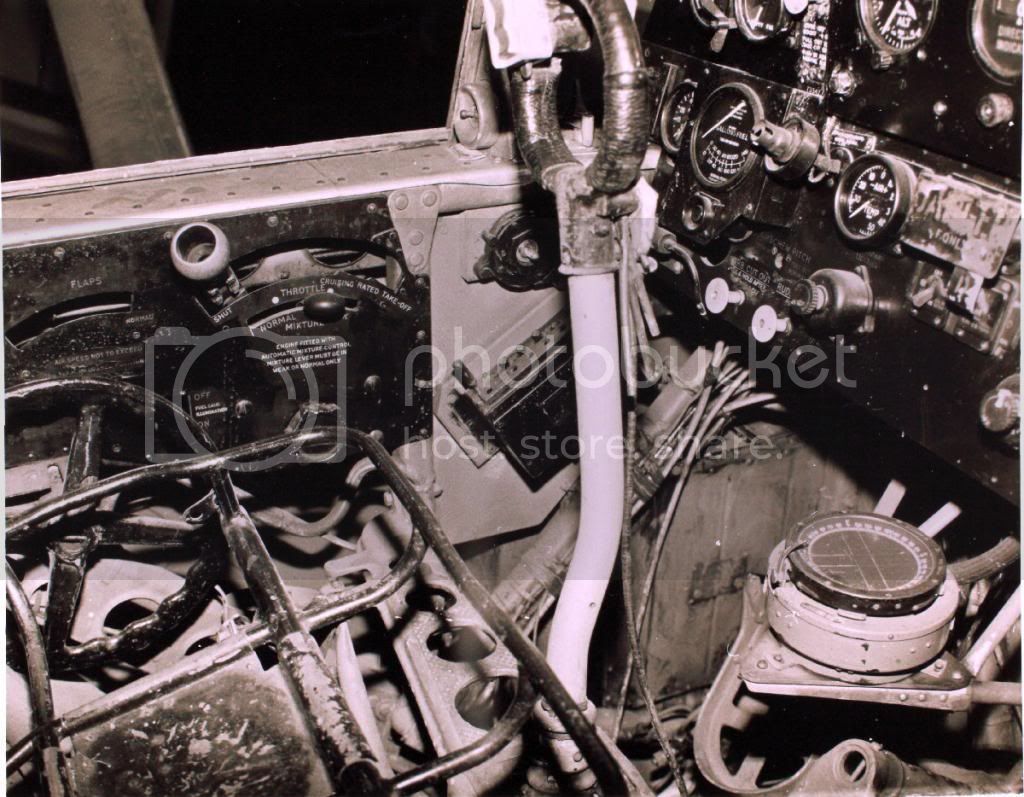
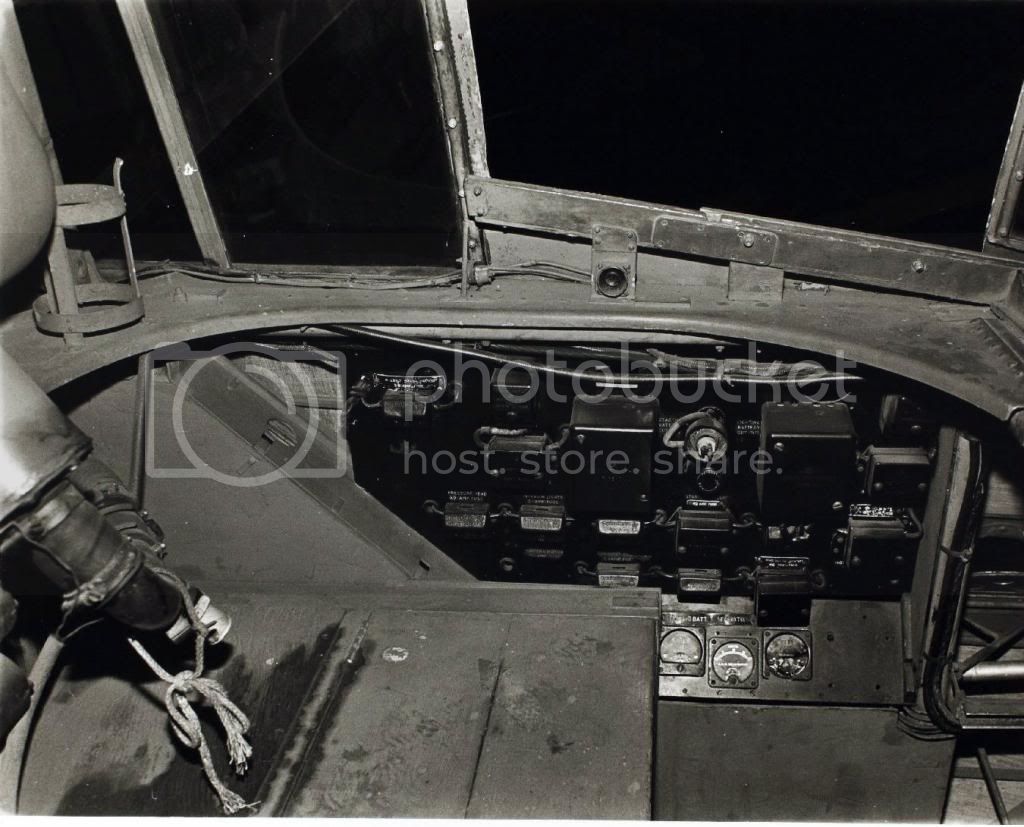
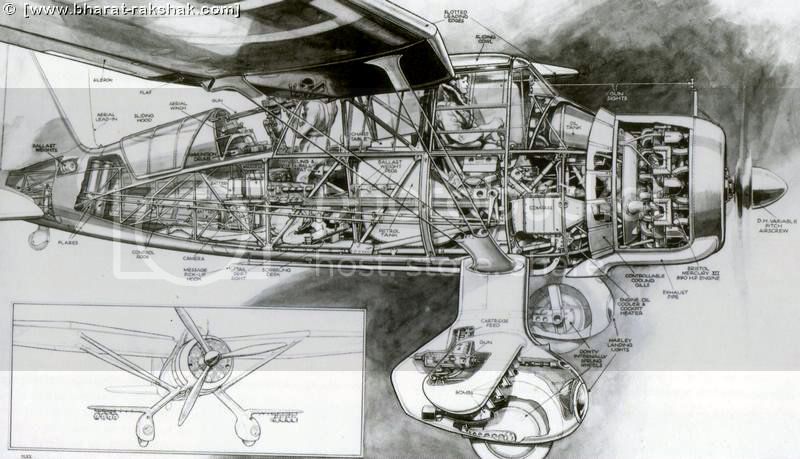
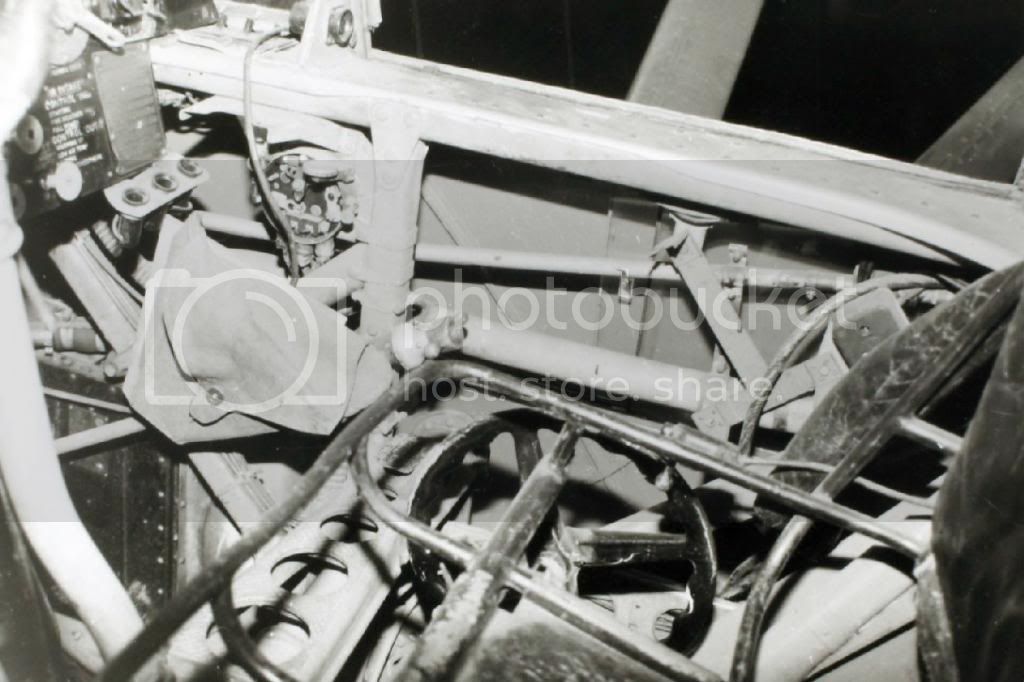
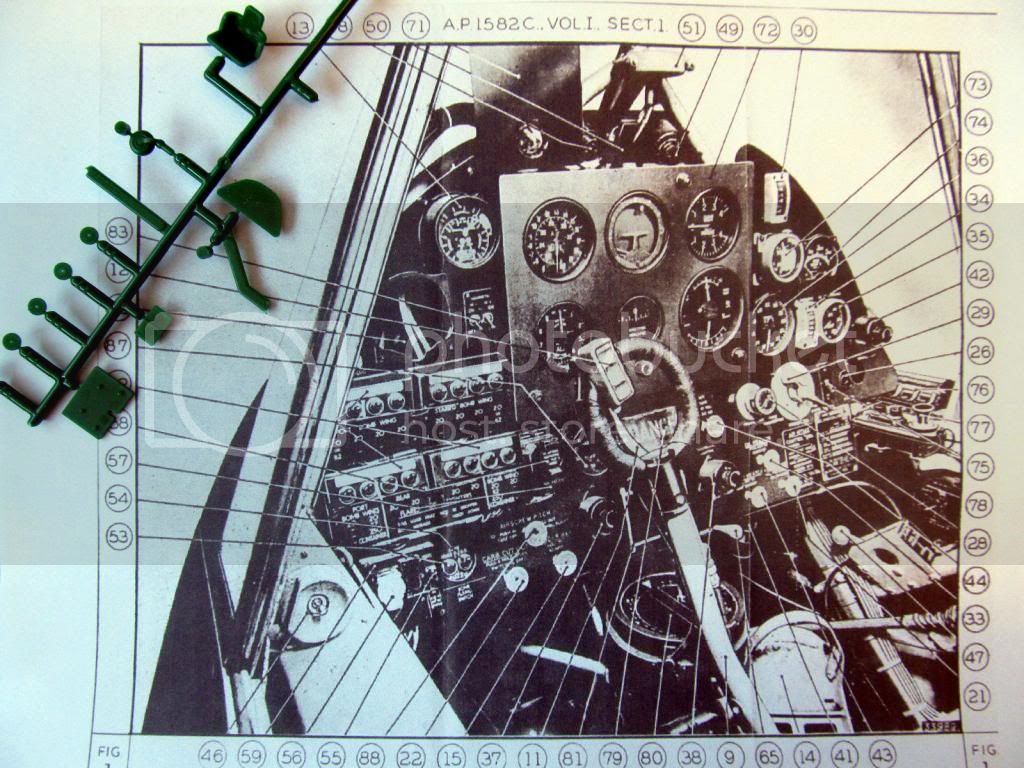
I'm starting with the cockpit and flying instrument panel. This is what the real one looks like:


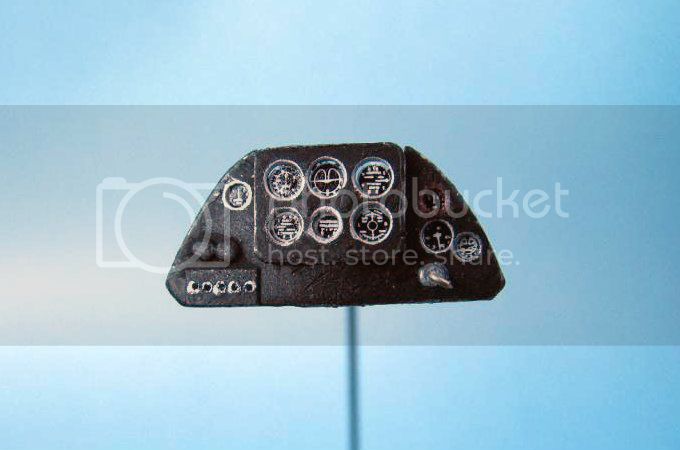
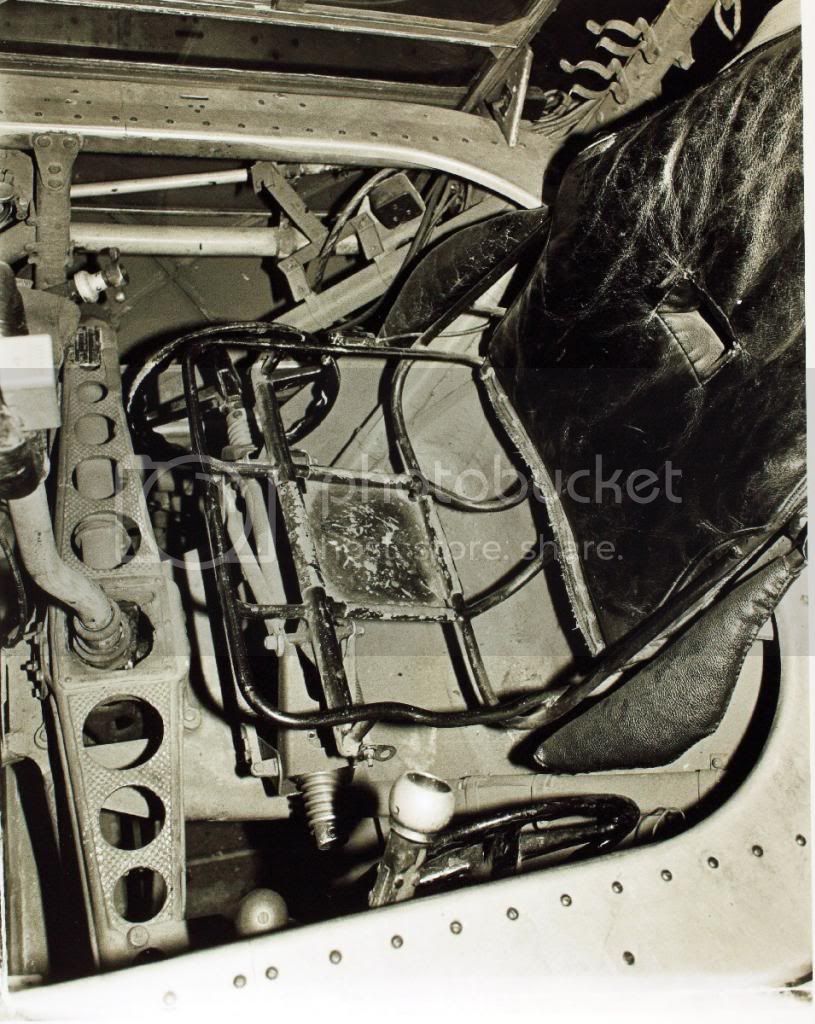
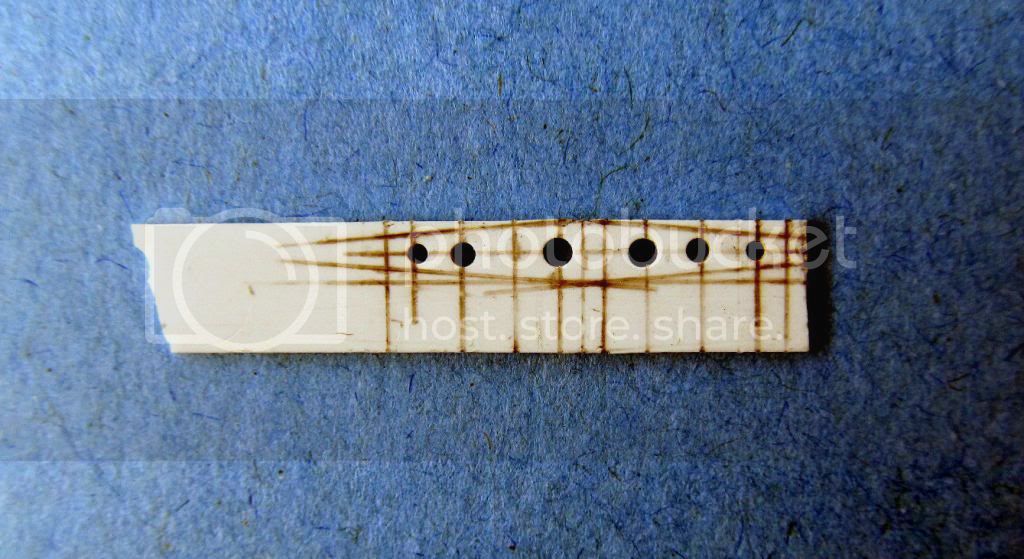
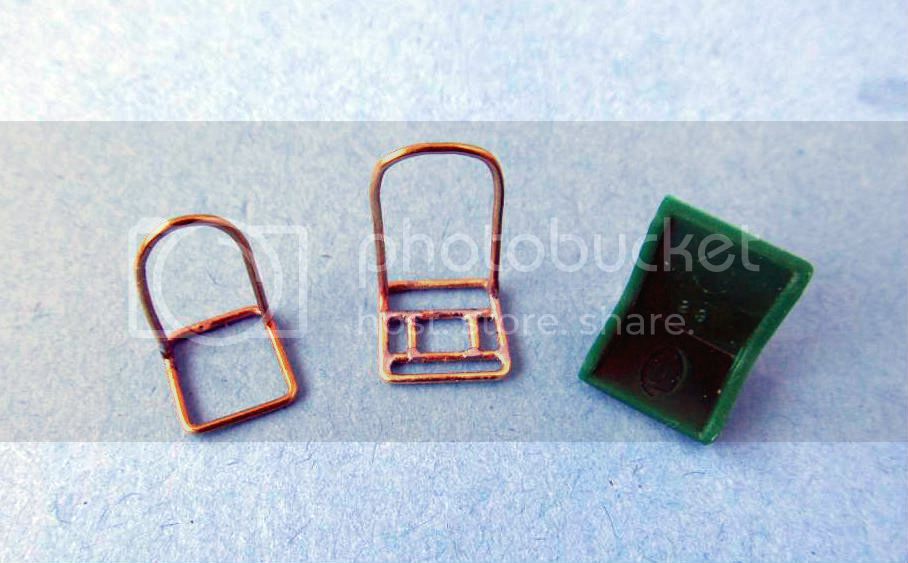
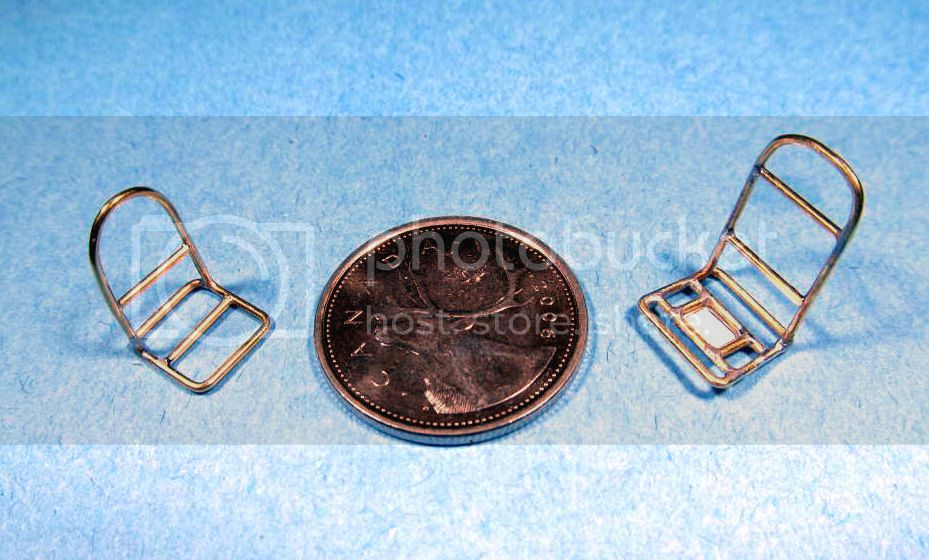
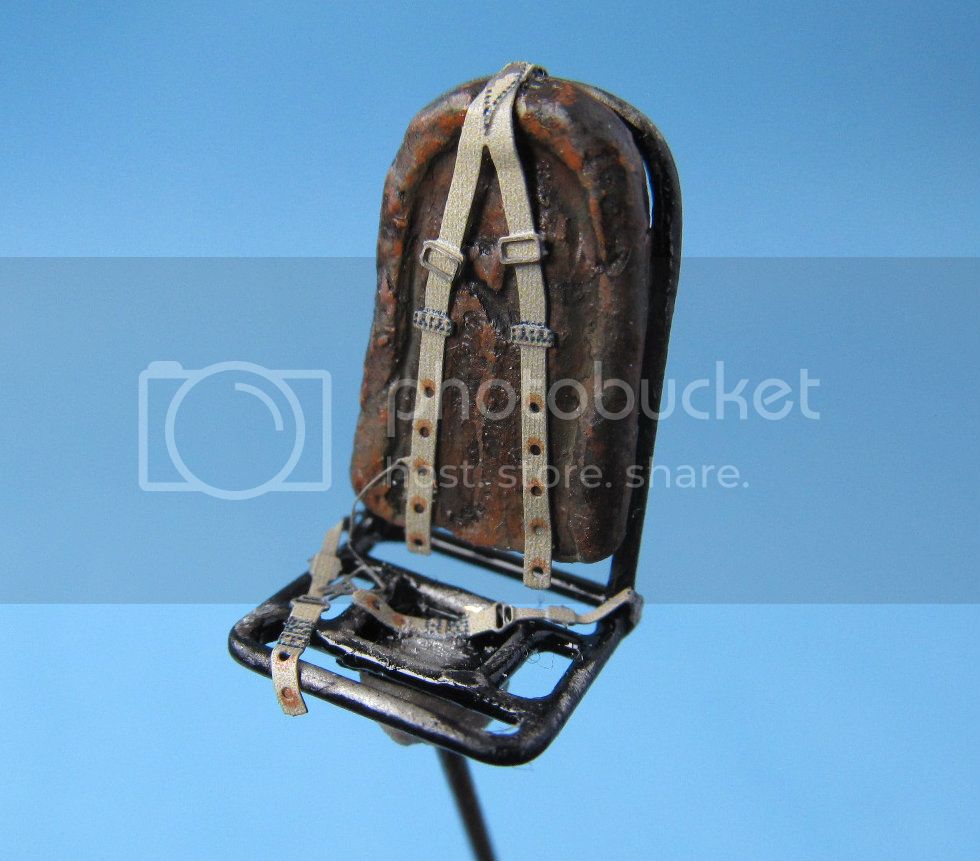
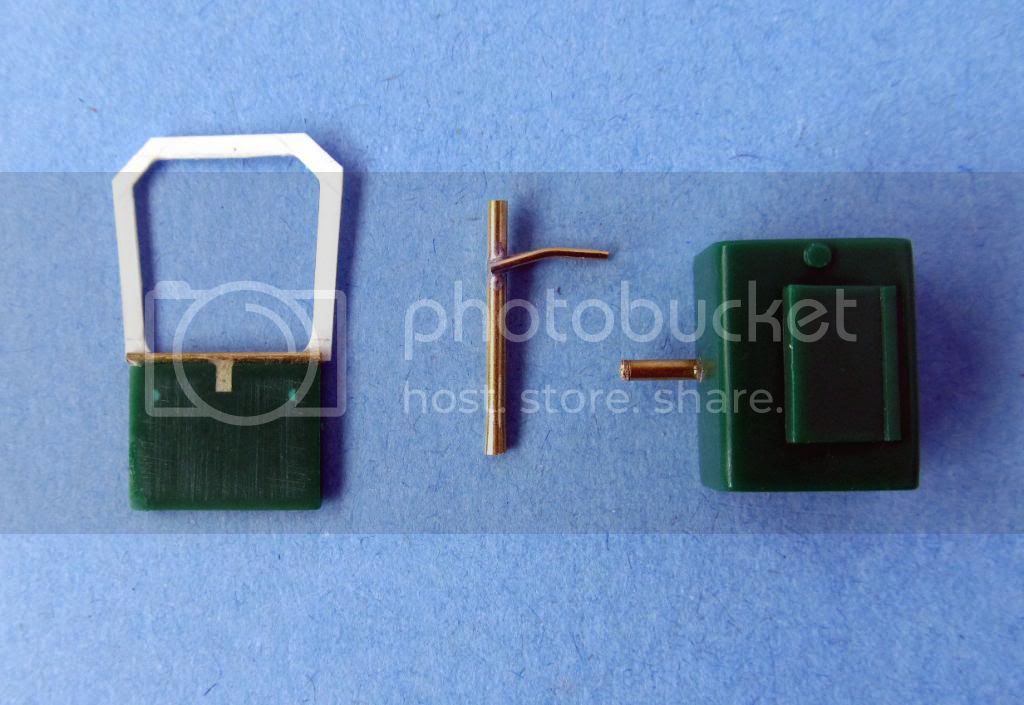
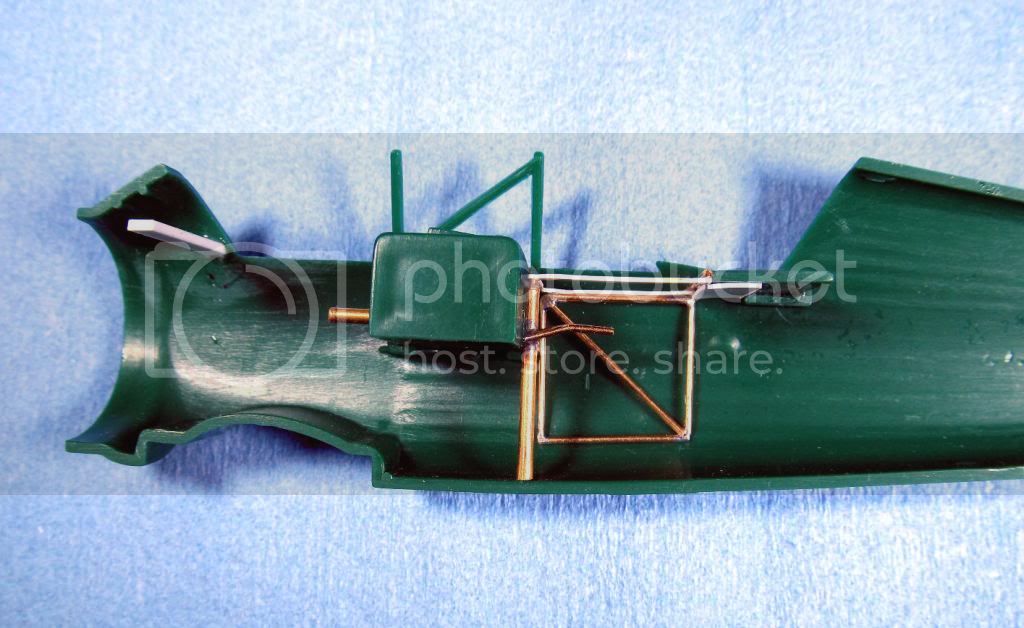
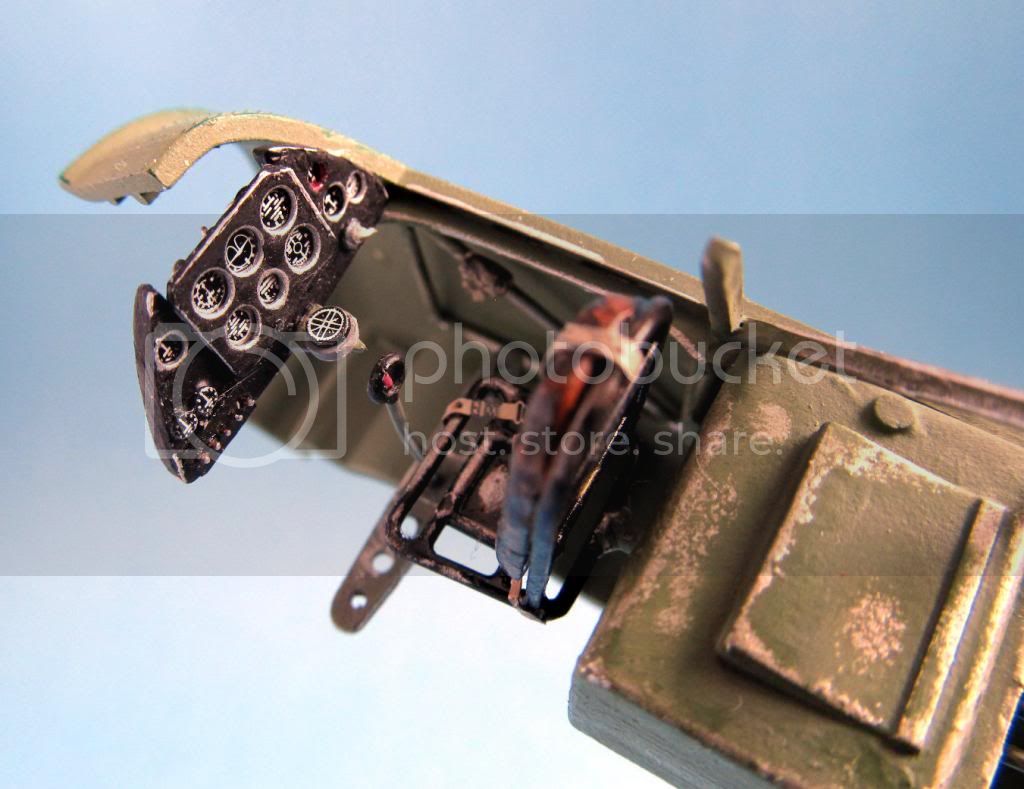
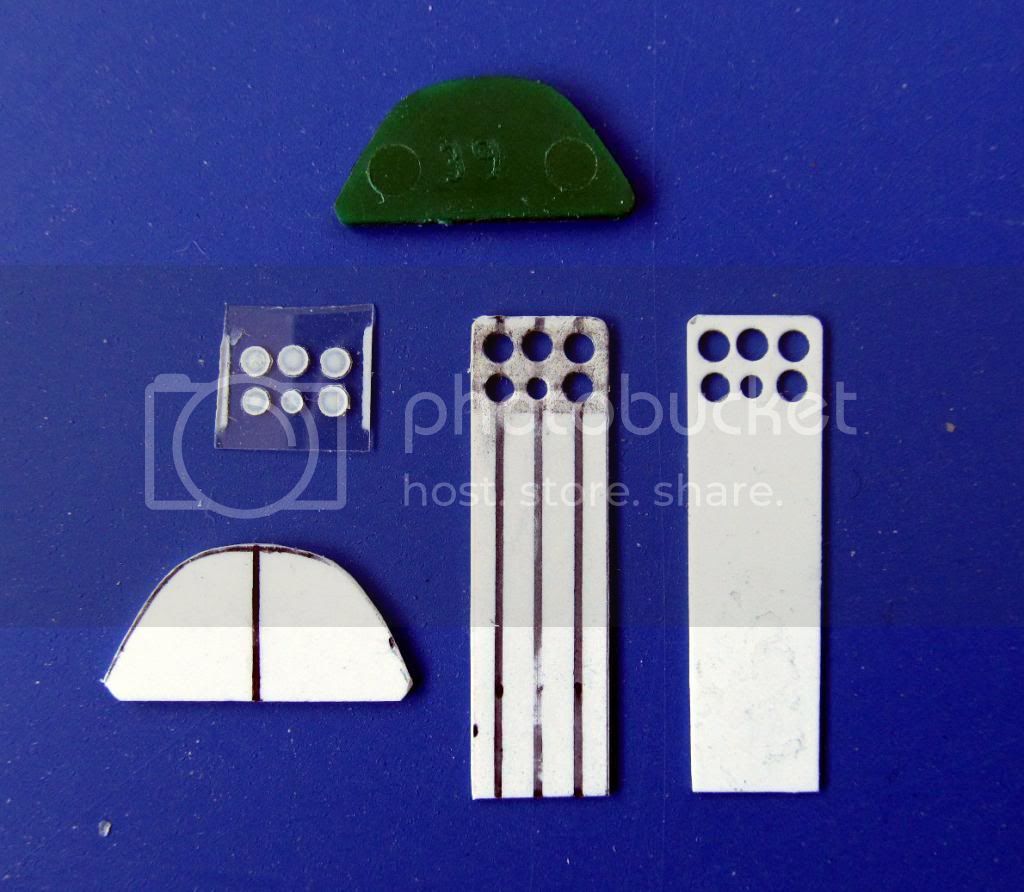
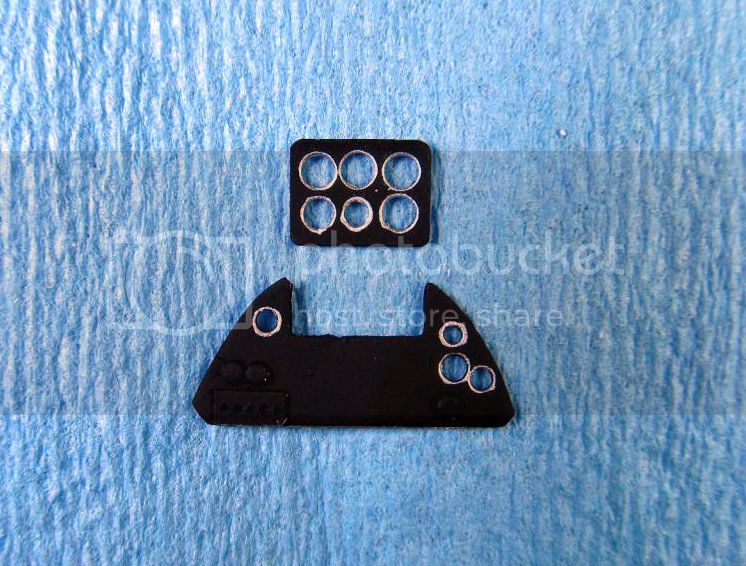
You can see in the second photo, the featureless instrument blank that was supplied. I needed to make a new one, and the third photograph shows the result of my effort. Definitely not accurate, but, I think it gives the general idea, and is an improvement.

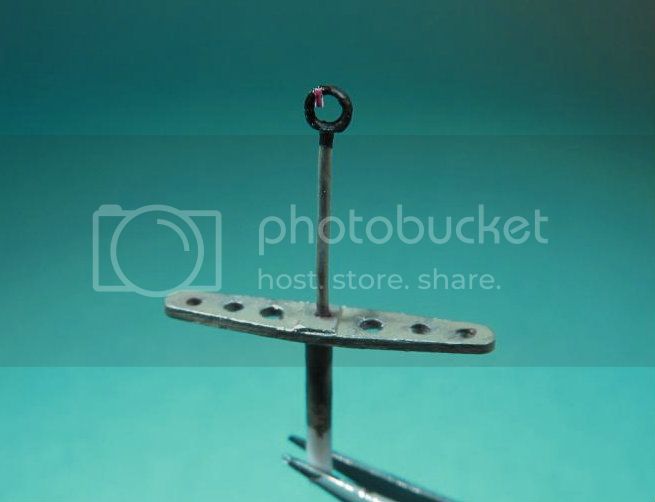
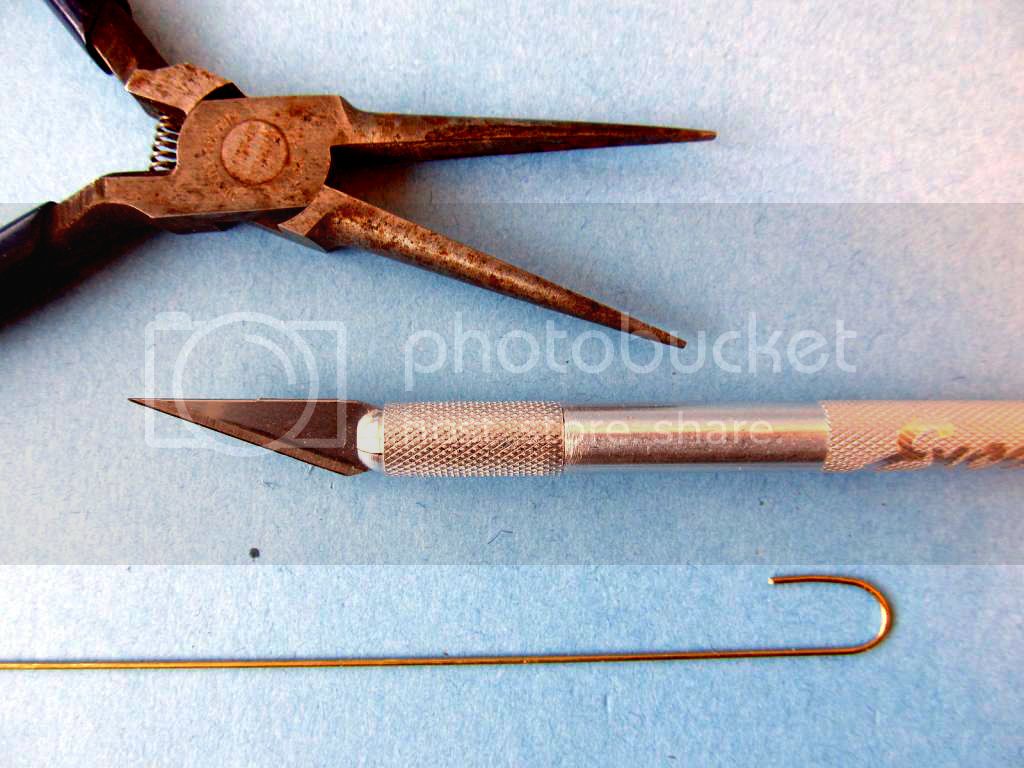
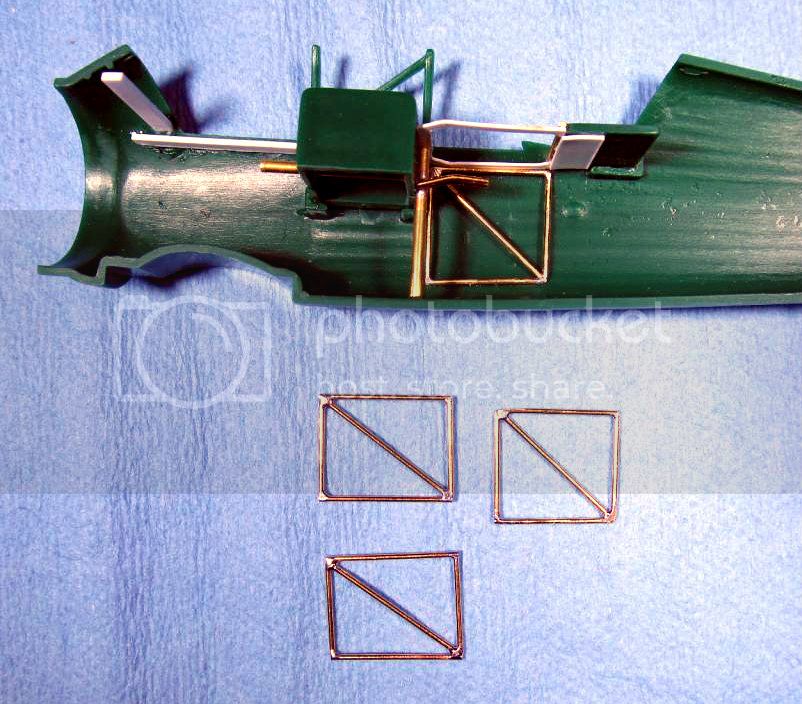
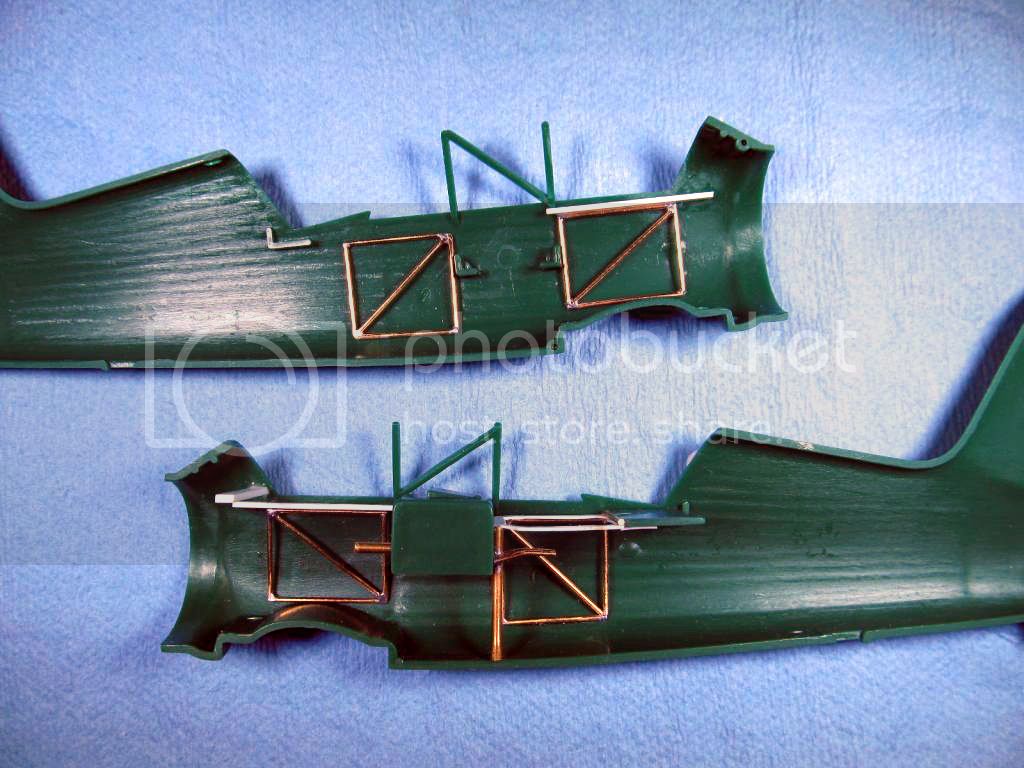
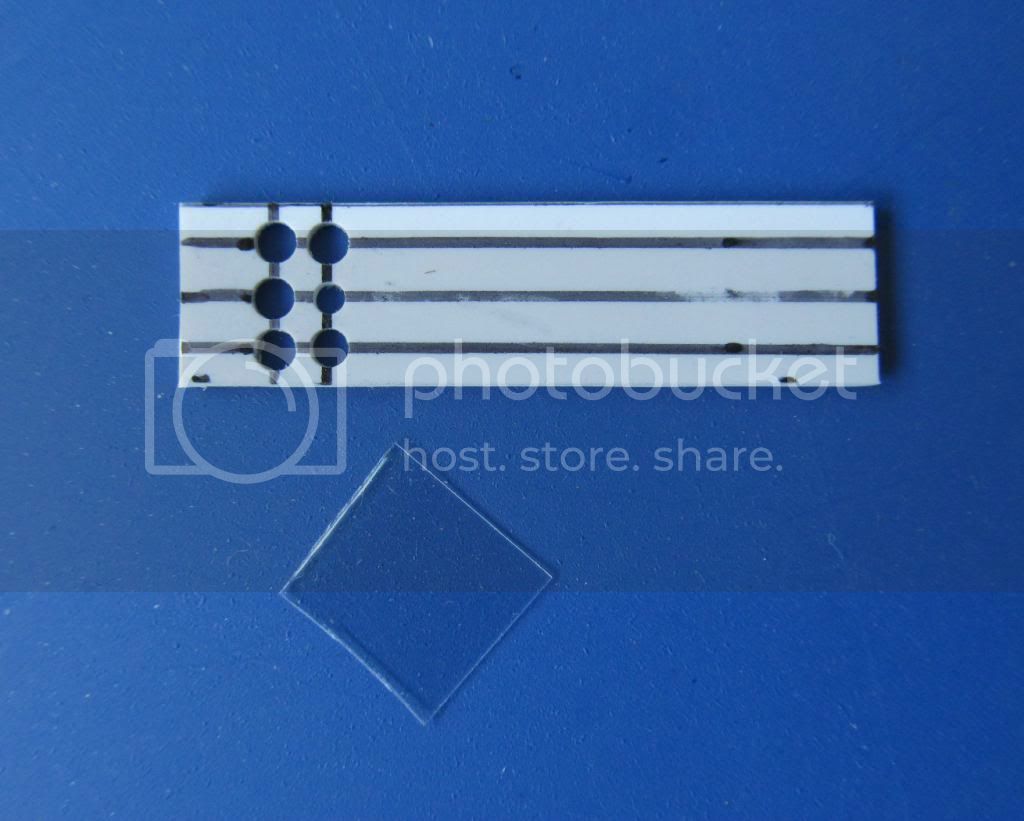
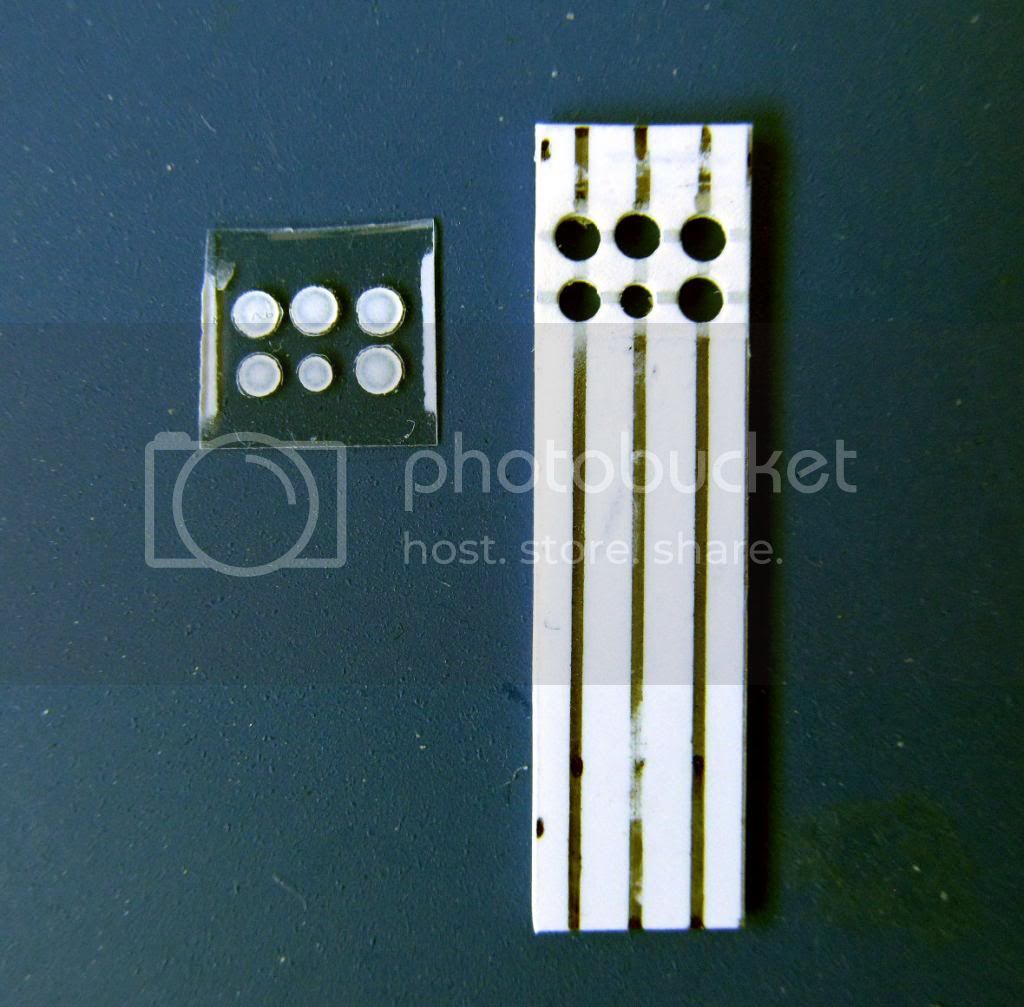
Now, here in pictures, is the story how I was able to achieve this small improvement:


The next adventure in this project, to to make a stick and foot pedals where none were supplied. The move on through the seats and sidewalls. The .303 in the back needs to be considered as well.

I'm reminded of a sentence someone told me once. If you want to make a good model, then treat each seperate part as a model within itself.

Happy modelling.


AussieReg
Staff MemberAssociate Editor
AUTOMODELER
#007
_VISITCOMMUNITY
Victoria, Australia
Joined: June 09, 2009
KitMaker: 8,156 posts
AeroScale: 3,756 posts
Posted: Sunday, January 06, 2013 - 10:33 AM UTC
Nicely done Ben, I'm looking forward to the next instalment.

Cheers, D
GhostHawk
_VISITCOMMUNITY
Cordoba, Argentina
Joined: January 27, 2011
KitMaker: 268 posts
AeroScale: 264 posts
Posted: Sunday, January 06, 2013 - 11:43 AM UTC
Hi,

Small Improvements...!!! But it's a big nice job...!!!!

Congrats...

I hope to see more...

Diego
Mcleod
_VISITCOMMUNITY
Alberta, Canada
Joined: April 07, 2010
KitMaker: 1,028 posts
AeroScale: 939 posts
Posted: Tuesday, January 08, 2013 - 05:30 AM UTC
Thanks, gentlemen, for your kind comments.

Bye the way, I should mention that any photos I'm using that are not mine, I found marked 'No known copyright - Released into the public domain'.

I've built another small part that was not included in this 45 year old Lysander kit, The Control Stick. I know its not much, but, every cockpit part has importance. These are the photos I based my design on.


And building this 'Small Improvement' was not without frustration. I carefully marked out a pattern on scrap .30 plastic, and then promptly punched out a hole on the wrong mark.


I persevered, though, and successfully completed the part on a second try.


Now, I turn my attention to the pilots seat. The kit supplied seat just will not do:


As you can see in the photos above, the real seat was a tubular frame adventure. So I'm going to try and figure something out, if I can.
Mcleod
_VISITCOMMUNITY
Alberta, Canada
Joined: April 07, 2010
KitMaker: 1,028 posts
AeroScale: 939 posts
Posted: Tuesday, January 08, 2013 - 03:11 PM UTC
Here's that pilot seat picture again. You can see it's constructed of tubular metal, with a bottom pan and a padded leather backrest:


So, I had to consider how to make something more or less similar. The only option I could see, was to solder-up a tubular metal seat.

I took a length of .32 solid brass rod, and using a hobby knife handle as a template, began bending the rod as well as I could. My trusty, rusty needlenose pliers lended itself to this adventure:


I bent away, and soldered with a 25watt solder pencil, until I had finally shaped a couple of seats. I feel the difference between the new seats and the kit effort is quite dramatic:


Continueing on, I installed some backing braces for the backrests and a scrap styrene bottom pan. Thought I would include a quarter for size comparison:


I painted the seats with Tamiya Titanium Silver, and will allow them to dry overnight:


I'll paint them gloss black tomorrow, and rub some black off before it sets to give a worn look. Hopefully.

chukw1
_VISITCOMMUNITY
California, United States
Joined: November 28, 2007
KitMaker: 817 posts
AeroScale: 729 posts
Posted: Wednesday, January 09, 2013 - 03:46 AM UTC
Ben, you are a true modeling hero! All is looking great- and those seats are fantastic- cheers!

chuk
Mcleod
_VISITCOMMUNITY
Alberta, Canada
Joined: April 07, 2010
KitMaker: 1,028 posts
AeroScale: 939 posts
Posted: Sunday, January 13, 2013 - 08:19 AM UTC
Gee Chuck, thankyou. Coming from you, I consider it a great compliment.

I have completed the pilots seat:


After studying Lysander photos, I've had to rethink the observers seat. This is more a stool type than an actual seat, and will be modelled as I'm working on the cockpit proper.
Like anything else thats fun, this will have to wait. The work week stands in the way.


Littorio
_VISITCOMMUNITY
England - South East, United Kingdom
Joined: September 15, 2004
KitMaker: 4,728 posts
AeroScale: 1,351 posts
Posted: Sunday, January 13, 2013 - 02:07 PM UTC
Ben really nice work so far, I'm following with interest
ShawnM
_VISITCOMMUNITY
Missouri, United States
Joined: November 24, 2008
KitMaker: 564 posts
AeroScale: 510 posts
Posted: Tuesday, January 15, 2013 - 06:34 AM UTC
Fantastic Scratch Building.
Mcleod
_VISITCOMMUNITY
Alberta, Canada
Joined: April 07, 2010
KitMaker: 1,028 posts
AeroScale: 939 posts
Posted: Saturday, January 19, 2013 - 12:22 PM UTC
Thankyou for your kind comments, guys.

Just thought I should like to show you what I'm doing to this project. It's moving along slowly, with work and other committments in the way.

You can see in this rear cockpit and the previously posted photos that there is a ledge affair. I've tried to simulate this:


Using plasticard, brass rod, and modified kit parts, I'm constructing the workings of a basic interior.


As you can see, there is quite-a-bit more to do. I'm sure, that it is somewhat more interesting than what was kit supplied:


As far as the new cockpit goes, here is a photo that made me want to add some extras, like a flare gun holster:


So I went ahead and tried to sculpt a couple of items out of miliput. A map case, flare gun holsters, and an observers seat pad:


Not the best job; they'll do though, in the closed canopy.

Until next time...


Mcleod
_VISITCOMMUNITY
Alberta, Canada
Joined: April 07, 2010
KitMaker: 1,028 posts
AeroScale: 939 posts
Posted: Monday, January 21, 2013 - 04:22 PM UTC
This may look like old news, but, its not entirely. I have limited time, and was only able to solder the rest of the fuselage frames I'll be using. I think the pictures will tell the short story:

The way it came


Soldered a few more frames


Only one is secured, with the others set in place for now


I know it looks like I'm quite confused in this action. There is a method to my madness, however, and hopefully the end will show some greater result.
Mcleod
_VISITCOMMUNITY
Alberta, Canada
Joined: April 07, 2010
KitMaker: 1,028 posts
AeroScale: 939 posts
Posted: Sunday, January 27, 2013 - 07:26 AM UTC
I'd like to show how the Lysander is coming along. Bye the way, this is for the 'Old Kits Campaign' under way over at Swanny's (plug,plug).

Humbrol Dull Aluminum was brushed on as a base and allowed to dry for 4 days. Then I sprayed Tamiya Titanium Silver. Soon, I'll apply the interior green and some darker colors; then the interior will be weather with alcohol on a Q-Tip. Its all abit strange looking now, but, it will come around. All entirely experimental at this point.


Mcleod
_VISITCOMMUNITY
Alberta, Canada
Joined: April 07, 2010
KitMaker: 1,028 posts
AeroScale: 939 posts
Posted: Thursday, January 31, 2013 - 09:27 AM UTC
I don't really like 1/2 an engine face molded onto a disc, though it is commonly seen, especially in smaller scales. In this case, I depended on paint to liven it up some. It was clear that once mounted into the cowling and with a prop attached, it would be quite busy enough.


The instrument panel was touched-up slightly. A compass was built and installed:


Now, I'm trying to put it all together, as can be seen in the following series of photos:


There's still more to do; detail paint, a wash, and sidewall panels (under construction). Then I move on to my favorite part of modelling , the canopy masking .

Anyway, with this thread, I tried to show how really easy it is to improve on a fine older kit that may be short on detail. Not rivit counting exactness. Just enough to make a model more interesting and busy.

I'm just hoping it kept you interested, and maybe will help some beginners to see.

My last post here. If I post after the fuselage is closed up, it will be in the WWII board.
 _GOTOTOP