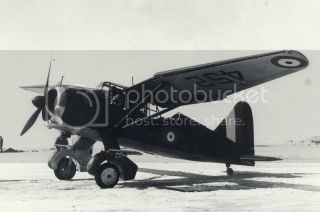
I had the beginning of this build posted in the 'General' section. The end of it will be posted here, in the proper WWII section, as I move it along.
This is the old Hawk Lysander II kit from the 1960's, in 1/48 scale. Here is how its going:
Just seeing if it all fits under the canopy:
And I don't believe I showed this photo of the engine:
I give this kit a solid thumbs-up rating. Except for the need to add cockpit detail in an otherwise void area, it is indeed a wonderful kit.
World War II
Discuss WWII and the era directly before and after the war from 1935-1949.
Hosted by Rowan Baylis
RCAF Lysander Mk.II
Mcleod
Alberta, Canada
Joined: April 07, 2010
KitMaker: 1,028 posts
AeroScale: 939 posts
Joined: April 07, 2010
KitMaker: 1,028 posts
AeroScale: 939 posts
Posted: Friday, February 15, 2013 - 07:19 AM UTC
raypalmer
Ontario, Canada
Joined: March 29, 2010
KitMaker: 1,151 posts
AeroScale: 985 posts
Joined: March 29, 2010
KitMaker: 1,151 posts
AeroScale: 985 posts
Posted: Friday, February 15, 2013 - 02:04 PM UTC
You make me feel an idiot for buying a forty dollar modern kit when you make such a peach of this dinosaur.
Jessie_C
British Columbia, Canada
Joined: September 03, 2009
KitMaker: 6,965 posts
AeroScale: 6,247 posts
Joined: September 03, 2009
KitMaker: 6,965 posts
AeroScale: 6,247 posts
Posted: Friday, February 15, 2013 - 02:18 PM UTC
This colour scheme, I hope?
Image © Canadian Warplane Heritage.
Mcleod
Alberta, Canada
Joined: April 07, 2010
KitMaker: 1,028 posts
AeroScale: 939 posts
Joined: April 07, 2010
KitMaker: 1,028 posts
AeroScale: 939 posts
Posted: Friday, February 15, 2013 - 02:28 PM UTC
Thankyou Richard, I feel good when I get a little support.
Sorry, Jessie. Thats a Mk.III. I'm doing a 1942 Mk.II example from either 111sqn., or 122sqn., both of which flew out of Patricia Bay. I do like that scheme, though.
Mcleod
Alberta, Canada
Joined: April 07, 2010
KitMaker: 1,028 posts
AeroScale: 939 posts
Joined: April 07, 2010
KitMaker: 1,028 posts
AeroScale: 939 posts
Posted: Saturday, August 17, 2013 - 10:29 AM UTC
Hawk 1/48 Lysander: Copyright 1967
I haven't worked on this Lysander project since February. Sooner or later, I always get back to my projects though. This one stalled mostly because it came time to mask up that greenhouse in preparation for filling, sanding, and painting. I suppose the idea of all that masking chased me away for abit. Its my 'favorite' part of the hobby.
Its been a long time, and the forums are summer vacation slow anyway, so I thought I wolud re-ignite this thread while I continue the build.
Where I left off, is at the top cockpit photo, with a touch of filling in. I also have the canopy about 1/4 masked (no photo).
I also thought I should repost some of the progress shots.
The scratchbuilt instrument panel
The scratchbuilt pilots seat
Front Cockpit
A near whole cockpit:
Just a dry fit to gauge what will be seen:
And thats about where it sits, except that now theres a little bit of canopy mask applied.
I also have the Lottery Campaign waiting in the wings, and these two well under way:
The MiniCraft for the Douglas campaign, and the Airfix Typhoon for the Canadian Forces gig.
Good thing I'm semi-retired!!
I haven't worked on this Lysander project since February. Sooner or later, I always get back to my projects though. This one stalled mostly because it came time to mask up that greenhouse in preparation for filling, sanding, and painting. I suppose the idea of all that masking chased me away for abit. Its my 'favorite' part of the hobby.
Its been a long time, and the forums are summer vacation slow anyway, so I thought I wolud re-ignite this thread while I continue the build.
Where I left off, is at the top cockpit photo, with a touch of filling in. I also have the canopy about 1/4 masked (no photo).
I also thought I should repost some of the progress shots.
The scratchbuilt instrument panel
The scratchbuilt pilots seat
Front Cockpit
A near whole cockpit:
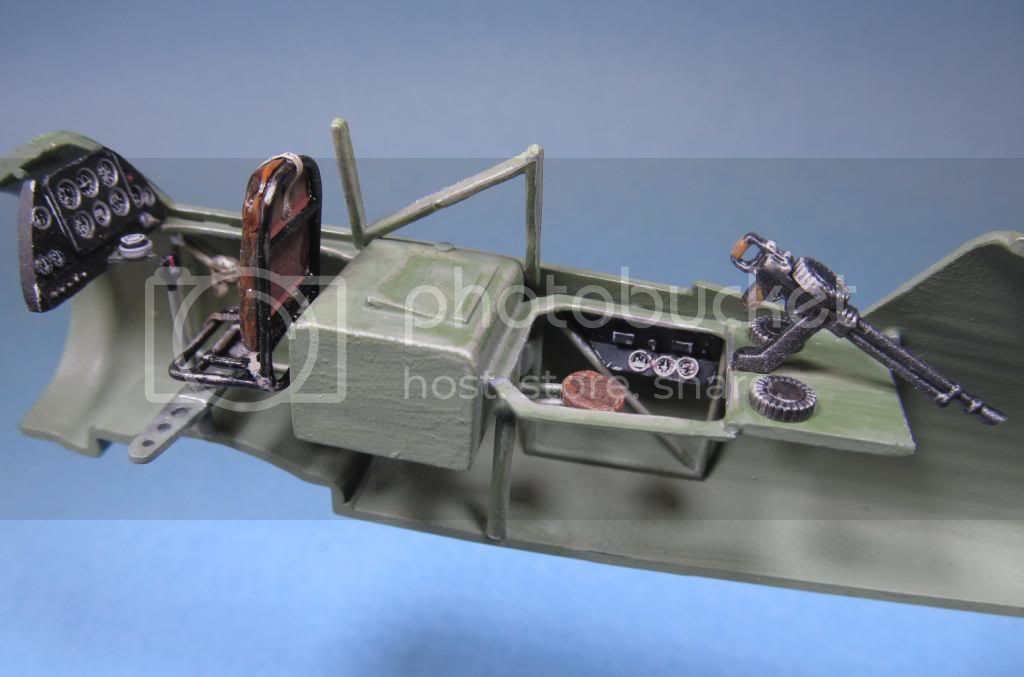
Just a dry fit to gauge what will be seen:
And thats about where it sits, except that now theres a little bit of canopy mask applied.
I also have the Lottery Campaign waiting in the wings, and these two well under way:
The MiniCraft for the Douglas campaign, and the Airfix Typhoon for the Canadian Forces gig.
Good thing I'm semi-retired!!
wychdoctor92394
California, United States
Joined: July 07, 2013
KitMaker: 219 posts
AeroScale: 136 posts
Joined: July 07, 2013
KitMaker: 219 posts
AeroScale: 136 posts
Posted: Saturday, August 17, 2013 - 12:01 PM UTC
I was thinkin' the same thing, Jess... CWH has a beautiful one on display.
raypalmer
Ontario, Canada
Joined: March 29, 2010
KitMaker: 1,151 posts
AeroScale: 985 posts
Joined: March 29, 2010
KitMaker: 1,151 posts
AeroScale: 985 posts
Posted: Saturday, August 17, 2013 - 12:10 PM UTC
I frequently admire it. Although last time I was there I -couldn't resist- pushing the slats of the Me262 in and out and was admonished. I must lay low for a bit I think.
wychdoctor92394
California, United States
Joined: July 07, 2013
KitMaker: 219 posts
AeroScale: 136 posts
Joined: July 07, 2013
KitMaker: 219 posts
AeroScale: 136 posts
Posted: Saturday, August 17, 2013 - 05:18 PM UTC
Yup.... they get a bit ladyy... do they still have the "Clunk" there?
Joel_W
Associate Editor
New York, United States
Joined: December 04, 2010
KitMaker: 11,666 posts
AeroScale: 7,410 posts
Joined: December 04, 2010
KitMaker: 11,666 posts
AeroScale: 7,410 posts
Posted: Sunday, August 18, 2013 - 12:47 AM UTC
Ben, simply an outstanding scatch build of the instrument panel and seat. Will be following your build for sure.
Joel
Joel
Mcleod
Alberta, Canada
Joined: April 07, 2010
KitMaker: 1,028 posts
AeroScale: 939 posts
Joined: April 07, 2010
KitMaker: 1,028 posts
AeroScale: 939 posts
Posted: Sunday, August 18, 2013 - 01:35 AM UTC
Joel_W
Associate Editor
New York, United States
Joined: December 04, 2010
KitMaker: 11,666 posts
AeroScale: 7,410 posts
Joined: December 04, 2010
KitMaker: 11,666 posts
AeroScale: 7,410 posts
Posted: Sunday, August 18, 2013 - 01:54 AM UTC
Ben, just take your time. Measure twice and cut once.
As for masking all that glass. I've given up on using a single piece of Tamiya tape, then cutting along the frame lines. Just too many screw ups for me. I cut thin strips of tape and lay them along the frame. Cut to size with a brand new #11 blade. Then fill in to cover the rest of the panel. Takes a lot more time, but I don't have as many screw ups. Curves actually work for me this way too. I just start with cutting a curved line, then bend it little by little to the final shape.
Looking forward to your next update.
Joel