

Hi,
I've had very little luck spraying future as a gloss coat. I've tried it neat, I've tried it thinned slightly with alcohol. Thin coats give me a pebbled finish, heavy coats creates runs and drips.
I'm planning to build my 1st plane and testing out techniques on a test mule. I usually build armour and any issues I run into with future can usually be hid by a scratch or stowage, but I don't think a duffel bag strapped to the wing is going to fool anyone.
I've heard of people brush painting future since theoretically the self levelling should eliminate brush strokes. Has anyone else had any success with that?
Thanks for your time,
Jeff
Hosted by Jim Starkweather
Brush painting Future.

thewrongguy

Joined: October 17, 2002
KitMaker: 448 posts
AeroScale: 34 posts

Posted: Friday, March 15, 2013 - 02:08 AM UTC

robot_

Joined: March 08, 2009
KitMaker: 719 posts
AeroScale: 691 posts
Posted: Friday, March 15, 2013 - 02:22 AM UTC
Mal wrote an article on this very subject: The Future is Klear
I've had an OK experience airbrushing, just the clean-up was a nightmare, it seems to like drying on the needle.
Brushing it does give a glossier finish, but don't be tempted to do thick coats, as it flows into detail when applied too heavily. 2 or 3 thin coats give a better finish. Maybe try changing brush stroke angles by 60 degrees between the coats so that the brush strokes don't add up. It dries hard enough to re-coat in 10 minutes, then I leave it 24 hours before decals or washes.

bzak

Joined: June 07, 2006
KitMaker: 264 posts
AeroScale: 87 posts
Posted: Friday, March 15, 2013 - 02:32 AM UTC
Howdy,
I've had excellent results brushing it on. Just be sure to use a clean brush. Use Windex to clean after brushing it on.
Brian Riedel
I've had excellent results brushing it on. Just be sure to use a clean brush. Use Windex to clean after brushing it on.
Brian Riedel
taildragger7AC
Joined: November 27, 2011
KitMaker: 10 posts
AeroScale: 3 posts
Posted: Friday, March 15, 2013 - 04:03 AM UTC
Hello,
I've spayed Future for about 10 years with great, reliable results. I dilute it about 20% with Model Master Acrylic thinner. When I shoot it, I crank the air pressure pretty high (~15 psi). I keep the airbrush ~6-8 inches away from the model and I apply multiple dry coats slowly. The idea is to have the Future partially dry before in hits the plastic. Build up the coat slowly!!!! It will first look like you're spraying a Matt finish, it will not look glossy. This is what you want. Keep the airbrush moving so you don'y spray it on wet. As the coat builds, the finish will go from a kinda of matt to a wet gloss. I usually let it dry overnight and start applying decals the next day. I've used either solvaset or Micro-set and -sol with no problems. I hope this helps.
Good Luck
Taildragger7AC

Jessie_C

Joined: September 03, 2009
KitMaker: 6,965 posts
AeroScale: 6,247 posts

Posted: Friday, March 15, 2013 - 04:12 AM UTC
I've brushed Future for years. The trick is to not let it get on too thick, or it'll run. Luckily Future is very forgiving, and even if you do get a run, you can catch it and clean it off if it's still wet. I like to use a nice big round brush.
darreng

Joined: January 21, 2006
KitMaker: 789 posts
AeroScale: 118 posts

Posted: Friday, March 15, 2013 - 05:24 AM UTC
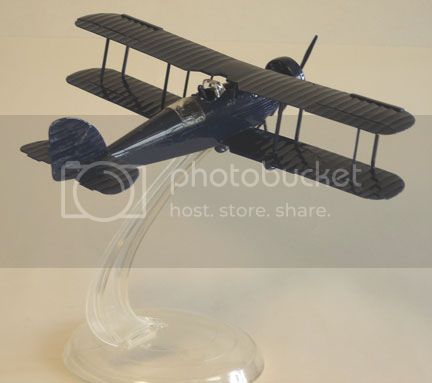
This was brush painted, and brush painted Klear over it.


So it can be done.
So it can be done.
thewrongguy
Joined: October 17, 2002
KitMaker: 448 posts
AeroScale: 34 posts
Posted: Friday, March 15, 2013 - 08:11 AM UTC
Thanks for all the answers, and the link to that step by step guide. Incredibly helpful. I hope to start my 1st aircraft model in two decades this weekend and honestly not I've been hesitant to start because of my issues with clear coats. I'm feeling more confident about it now.
Jeff
Jeff
Antoni

Joined: June 03, 2006
KitMaker: 574 posts
AeroScale: 573 posts
Posted: Friday, March 15, 2013 - 08:19 AM UTC
Future is an acrylic varnish designed for use as a floor polish that any klutz can use. Self leveling, i.e., extremely thin and runny, and quick drying to produce a surface that is sooth and high gloss. Therefore it is perfectly suitable for brush application. Like paint, the thing to avoid is over brushing which will leave marks as the Future begins to dry. Being very thin you may not realize the large quantity you have loaded on the brush. Always wipe the brush to remove the overload. Have a paper towel at hand, with the corners twisted into a point. If you find that you have flooded an area of the model with too much Future, before it begins to dry which can happen very quickly, use the corner of the paper towel to wick it off the surface. Because it very runny it has a habit of running over and under the leading and trailing edges of wings and tailplanes and accumulating there. If you find runs, drips and puddles that have begun to dry and cannot be removed by brushing or soaking up with a paper towel, then leave it to dry. You can then sand them away with 12000 grit wet and dry paper used with plenty of water. This will leave a dull spot. Application of a little Future will restore it and may show that a little more sanding is necessary.
Humbrol have just released their own version or equivalent of Future/Klear. It retails, IIRC, for £4.99 a bottle.
Humbrol have just released their own version or equivalent of Future/Klear. It retails, IIRC, for £4.99 a bottle.

spaarndammer

Joined: January 28, 2007
KitMaker: 1,945 posts
AeroScale: 388 posts
Posted: Friday, March 15, 2013 - 08:32 AM UTC
i agree, brush painting Future or Parket plus is possible. It levels it self out if I am correct.

Jelger
Jelger

pigsty
Joined: January 16, 2007
KitMaker: 1,226 posts
AeroScale: 640 posts
Posted: Friday, March 15, 2013 - 08:36 AM UTC
The other thing to watch for is bubbles. Future / Klear will foam at the slightest provocation. It's easy to fix - blowing on it usually does the trick - but you need to be quick, because for some reason the bubbles dry quicker than the rest.

Emeritus

Joined: March 30, 2004
KitMaker: 2,845 posts
AeroScale: 1,564 posts

Posted: Friday, March 15, 2013 - 10:38 AM UTC
Yep, the stuff levels out great, and I've actually got much better glossy coats by hand brushing it than airbrushing it on. At least from what I've heard, Future's possible to airbrush for smooth, glossy coats, but I've never succeeded at that as well as with a paint brush. Guess it's the much thinner coats you get with an airbrush.
Anyway, as already mentioned, it's best to avoid brushing it with too fast movements, as it foams and bubbles easily. I've noticed the bubbles tend to mostly disappear as it levels, but it's best to play it safe and avoid having them in the first place.
For brushing Future, I use a flat brush, size depending on the surface I'm working with.
Btw, has anyone tried that new Humbrol Clear? It sure does seem to handle like Future. While a 125ml bottle should last quite a while, and the price of £4.99 a bottle isn't that bad, I can't help but compare the prices. I paid around 5 for a 500ml bottle way back in 2005 (I think... Can't remember exactly) which I'm still using. There's still an inch or so left.
viper29_ca
Joined: October 18, 2002
KitMaker: 2,247 posts
AeroScale: 168 posts

Posted: Saturday, March 16, 2013 - 03:22 AM UTC
I have airbrushed it as well as hand brushing it.
Mind you I have only hand brushed it for something that just has a few decals and you need a smooth surface to put it on.
As far as airbrushing it, multiple thin coats is ideal. No need to thin it.
Here is something I did a few months back,
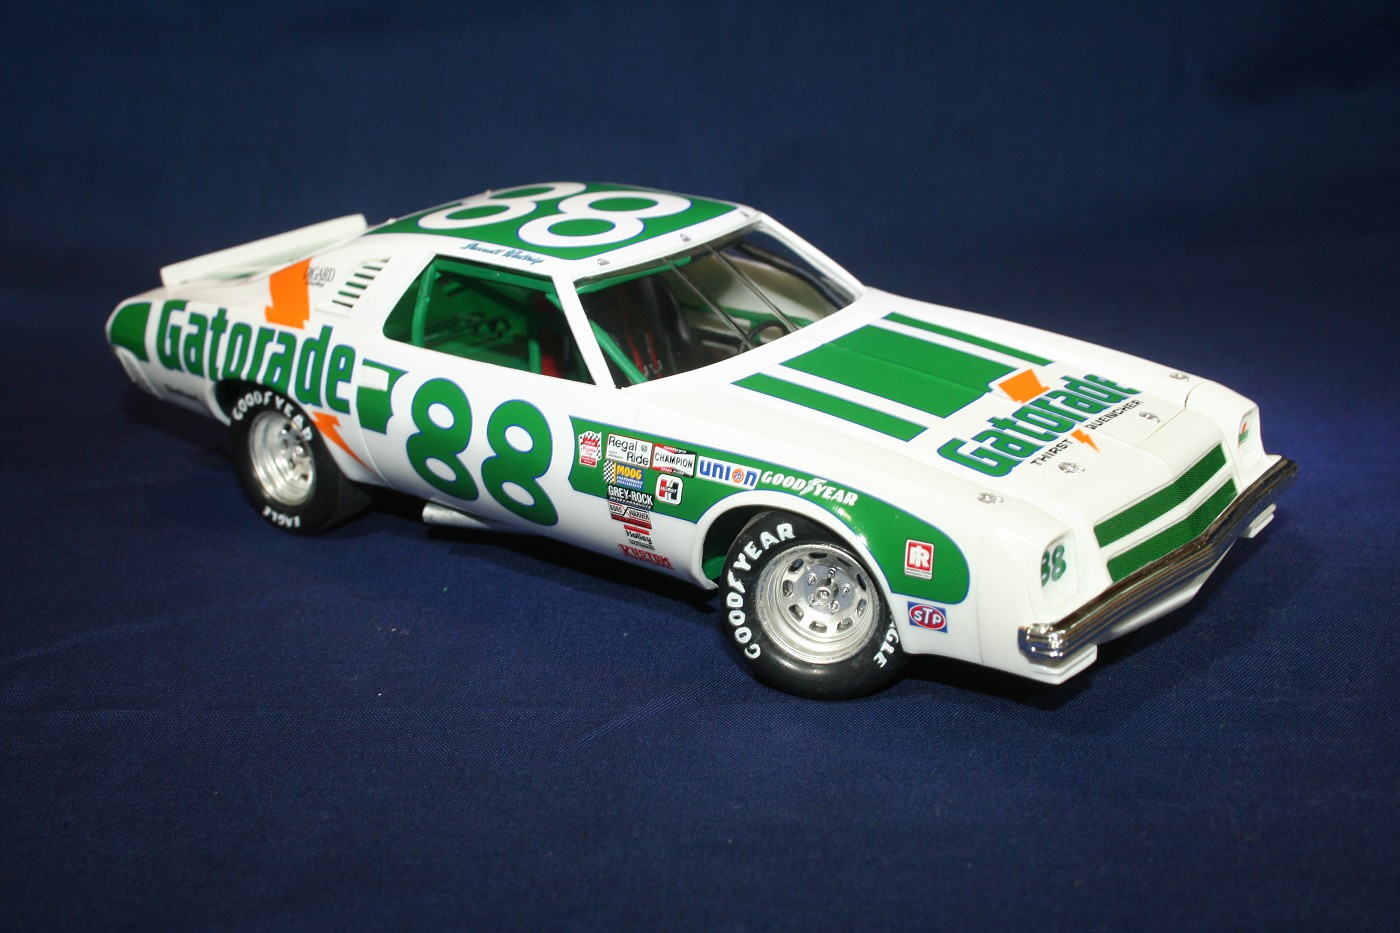
Hard to see the shine really, but is was basically painted with Vallejo White Primer, then 3-4 coats of Future, decals, and then 3-4 more coats of Future. The last coat I went a little heavy, and did get a run or 2, but just sat the body on some paper towel for a few mins, and it soaked in any runs. Body looks quite shiny when looking at it.
Mind you I have only hand brushed it for something that just has a few decals and you need a smooth surface to put it on.
As far as airbrushing it, multiple thin coats is ideal. No need to thin it.
Here is something I did a few months back,
Hard to see the shine really, but is was basically painted with Vallejo White Primer, then 3-4 coats of Future, decals, and then 3-4 more coats of Future. The last coat I went a little heavy, and did get a run or 2, but just sat the body on some paper towel for a few mins, and it soaked in any runs. Body looks quite shiny when looking at it.

 |

WEB HOSTING BY


Copyright ©2021 AeroScale and Kitmaker Network, a subsidiary of Silver Star Enterprises
All Rights Reserved. Please read our Conditions of Use and Privacy Policy.
All Rights Reserved. Please read our Conditions of Use and Privacy Policy.