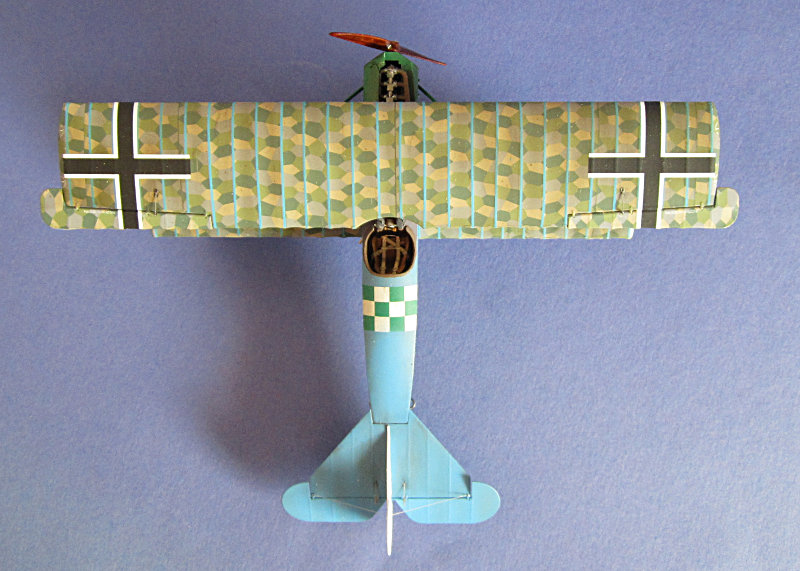
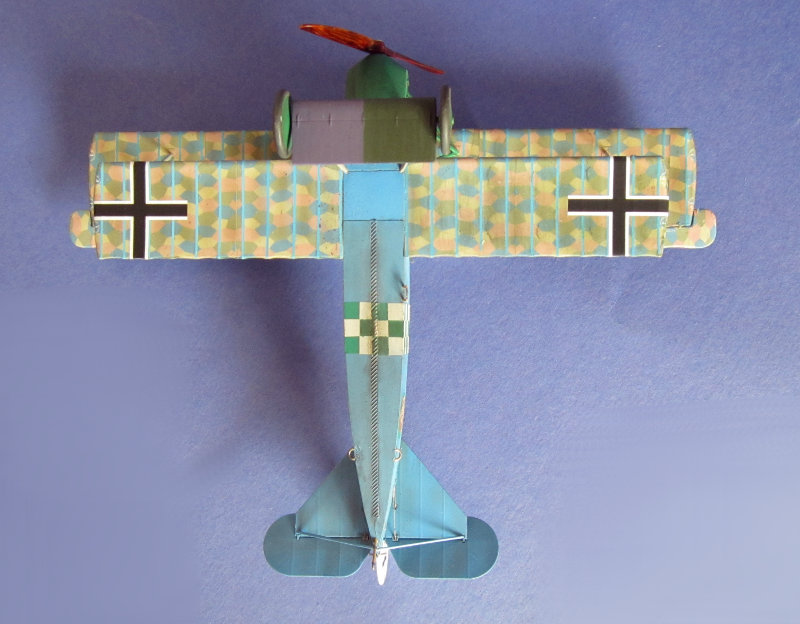
Hi all,
as I wrote in my thread on my KotS Fokker Dreidecker that project gave some motivation for a little more WW1 stuff. As I am not too much into k.u.k. aircraft at the moment I refrained from proceeding with my Aviatic rebuilding project .. yes I am a sissy. (even though I got another kit sans some part to finish that one).
Still I have sooo many kits in the stack, that it is easy to pull something different from it. This time it is Eduard's Fokker D.VII OAW as I like Büchner's markings. I also have the Lifelike set (which is a good addition if you want to build the kit) and I also printed the WNW instrucktions for some additional finetuning (e.g. u/c wing painting).
I am at this model for about a week adding some bits every evening. Thus there are already some pix.
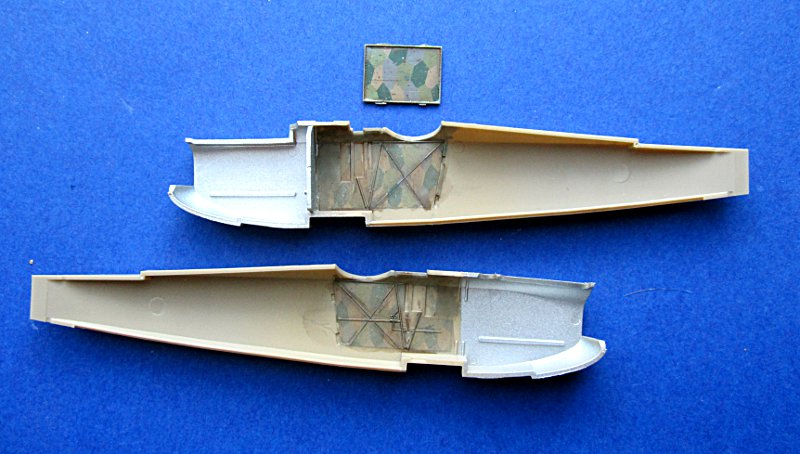
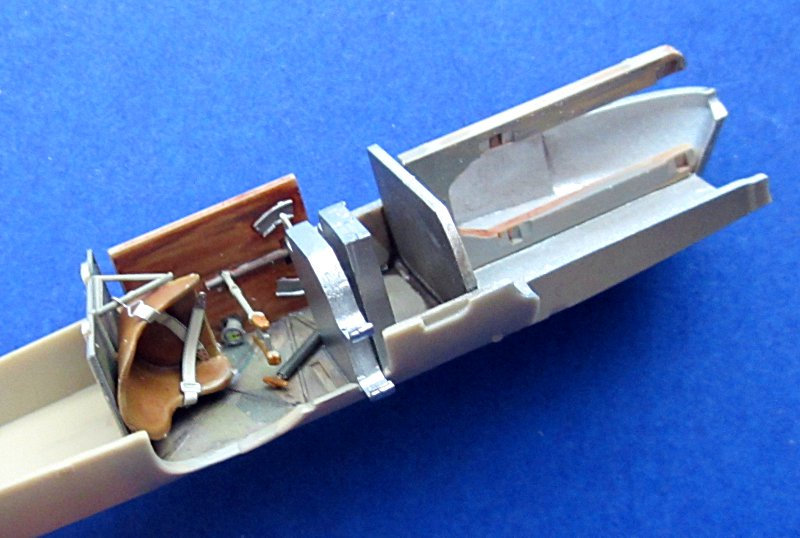
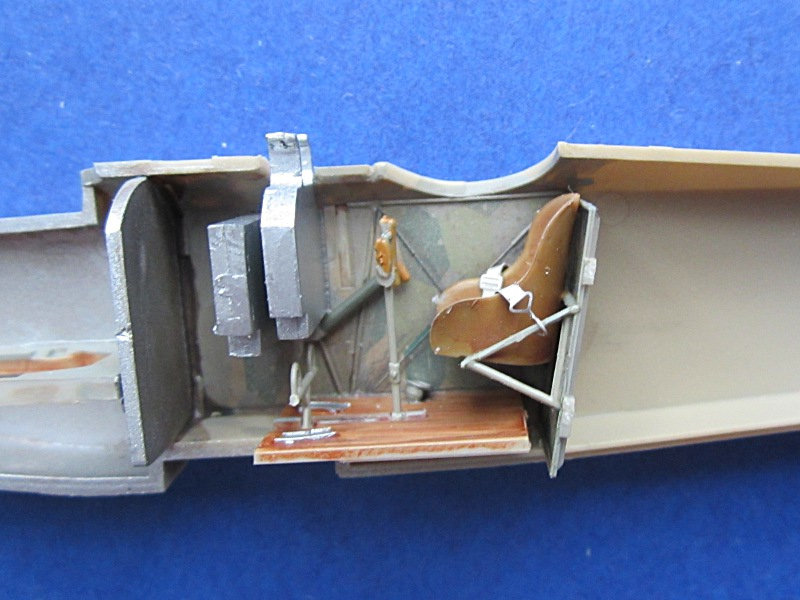
First I applied the Losenge decals on the inside surfaces. The fuselage halfs then got a Buff overspray to tone these down. Followed by a devlan mud was and some detail painting. I proceedet with the rest of the pit as per instructions.
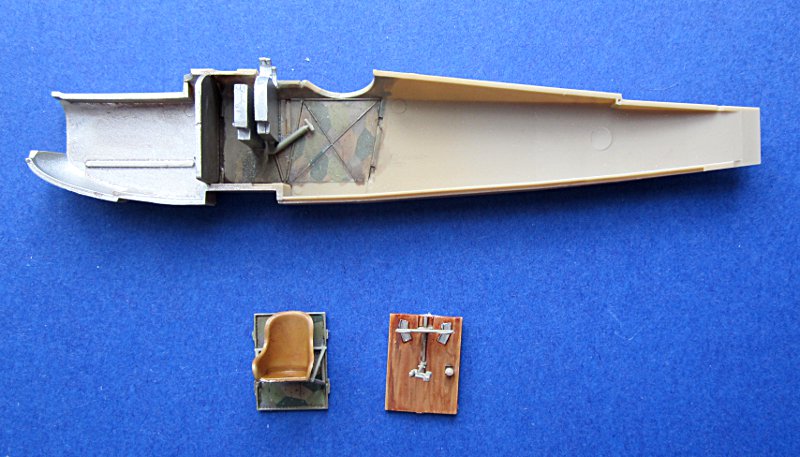
Nothing spectactular and always a horror for myself, but in the end there is not much to see.
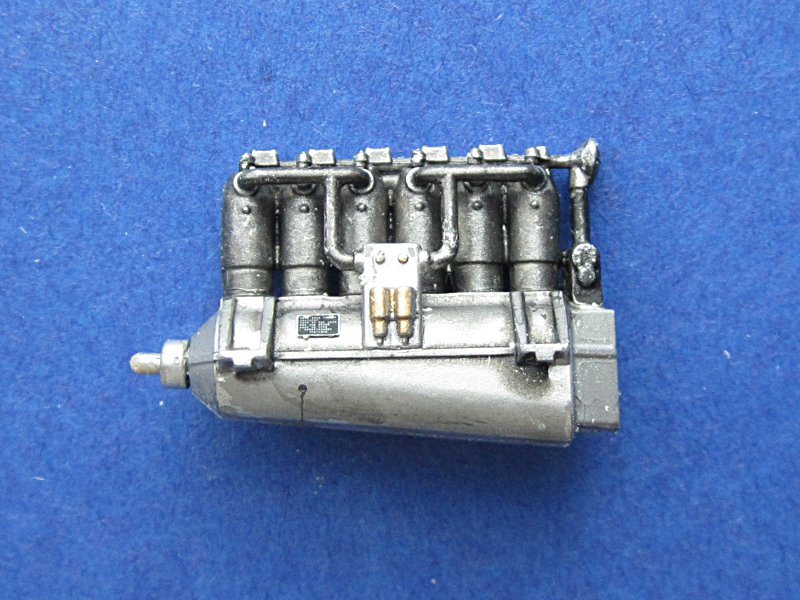
Same is true for the engine. Thus I just built it per instructions and painted it a bit.
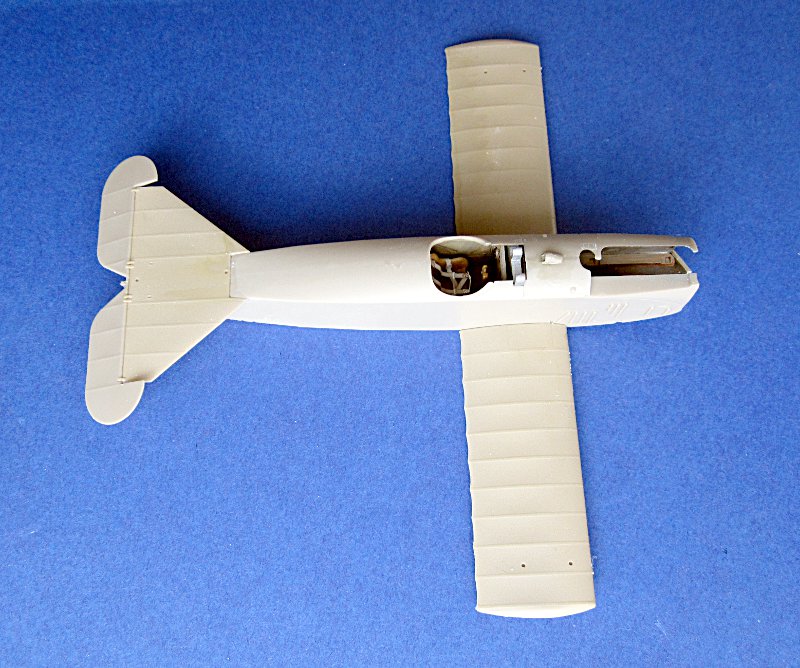
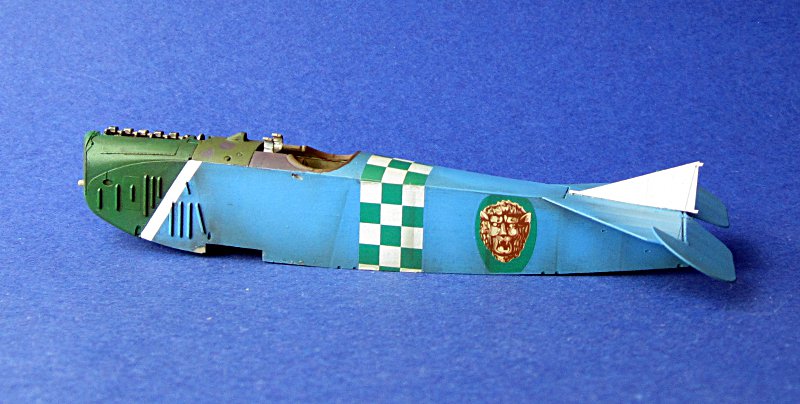
Luckily the engine can be maneuvered into the closed fuselage, which will ease painting the green and blue colors. I thought of altering the engin as per WNW instrunctions, but you can see nothing of it once the oil cooler is in place so I left the Daimler as it is.
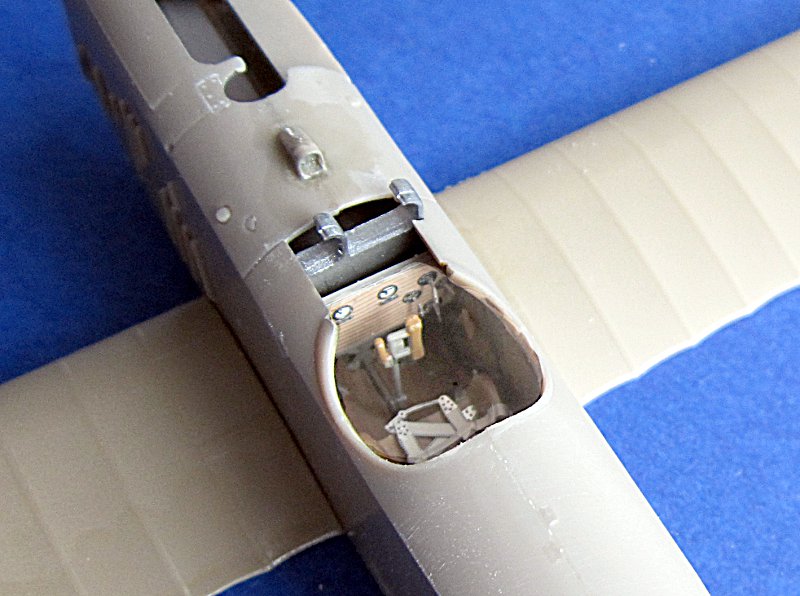
I attached the elevator as it will also be blue, but the wing is just clipped in. I will apply the kit Losenge although I know it has some changed/wrong colors ... only a few people will make that mistake out
all the best
Steffen
P.S. I noticed the Belt should be attached to the lower seat strut, but as no one will ever see that spot, I left it as it is.
Early Aviation
Discuss World War I and the early years of aviation thru 1934.
Hosted by Jim Starkweather
Eduard 1:48 Fokker D.VII (OAW)
Posted: Friday, April 12, 2013 - 08:42 PM UTC
Posted: Saturday, April 13, 2013 - 07:46 PM UTC
Hi again,
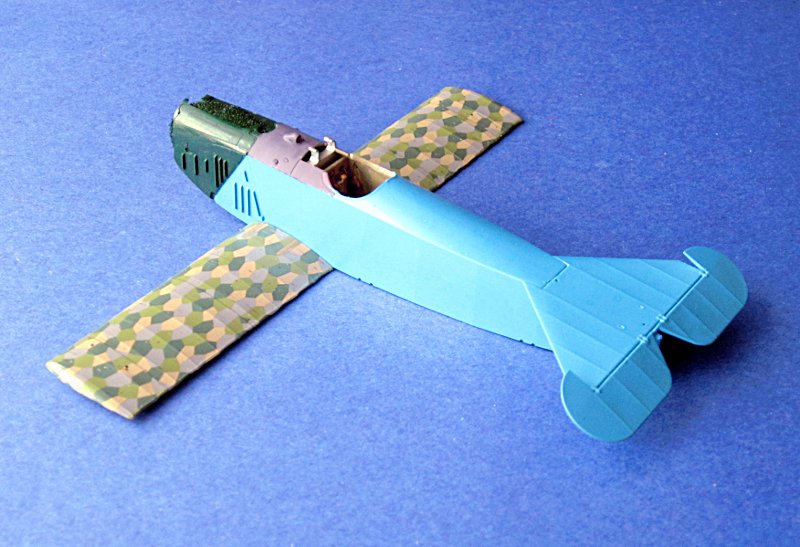
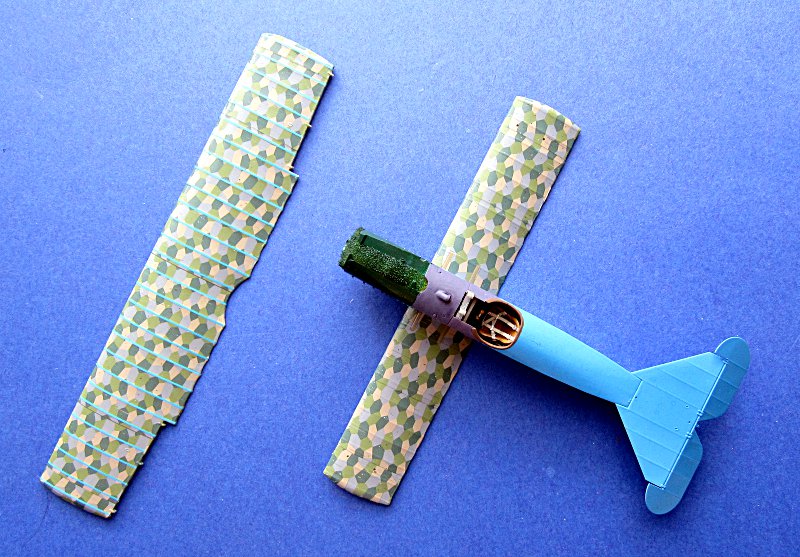
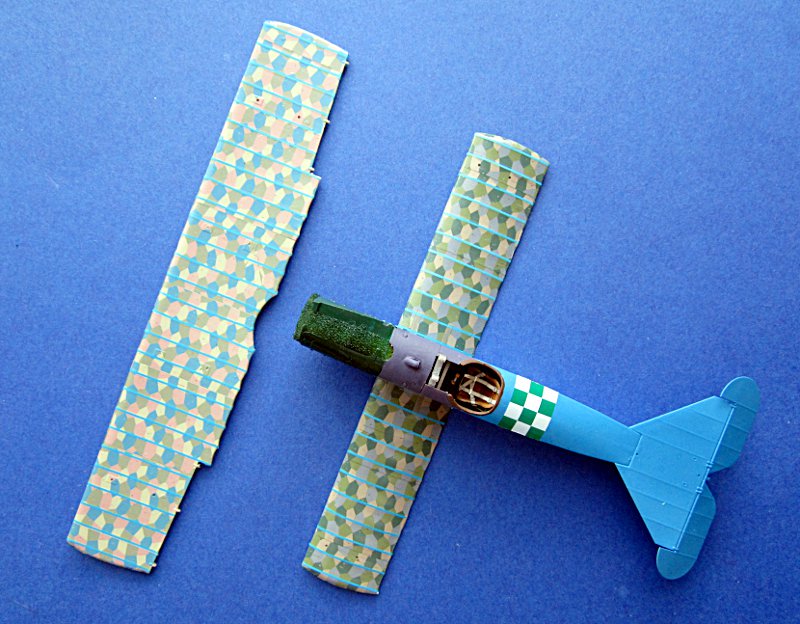
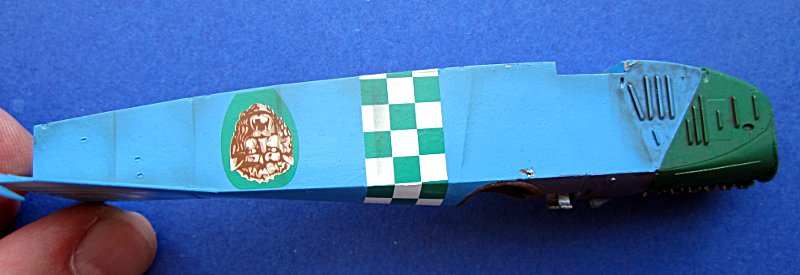
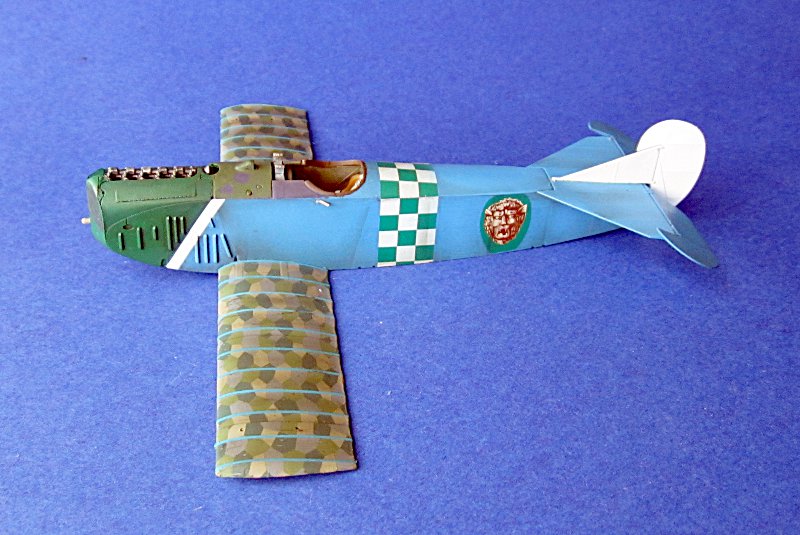
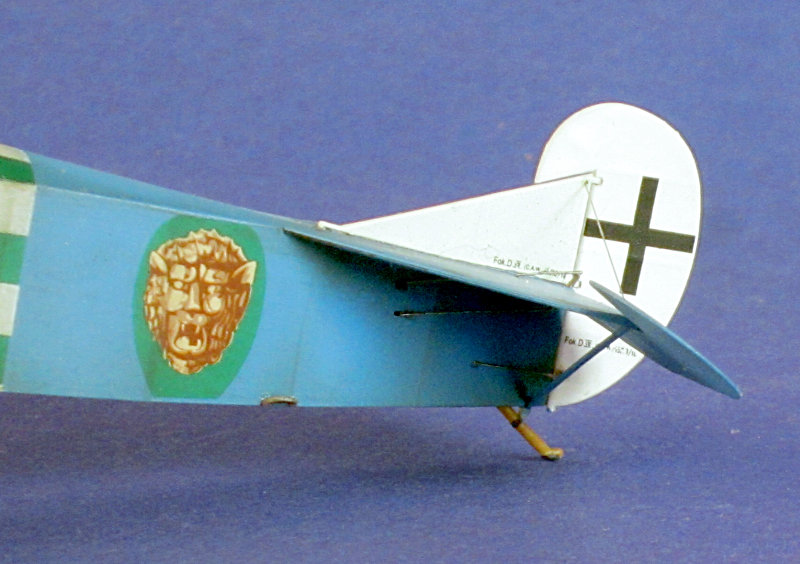
yesterday I airbrushed the fuselage. (Tamiya X5 and Revell Lichtblau R50 with some drops blue Gunze H15). Then I started decalling the wings. The rib tapes are a bit tedious though
all the best
Steffen
yesterday I airbrushed the fuselage. (Tamiya X5 and Revell Lichtblau R50 with some drops blue Gunze H15). Then I started decalling the wings. The rib tapes are a bit tedious though
all the best
Steffen
SHarjacek
Croatia Hrvatska
Joined: January 29, 2011
KitMaker: 977 posts
AeroScale: 263 posts
Joined: January 29, 2011
KitMaker: 977 posts
AeroScale: 263 posts
Posted: Saturday, April 13, 2013 - 08:36 PM UTC
Lovely work so far, I particularly like the Lozenge's
Kind regards.
Kind regards.
Posted: Monday, April 15, 2013 - 04:36 AM UTC
Thank you Sven!
Well, I got a flue on Saturday, which slows down the progress. I have added a few more strips but nothing worth photographing...
all the best
Steffen
Well, I got a flue on Saturday, which slows down the progress. I have added a few more strips but nothing worth photographing...
all the best
Steffen
JackFlash
Colorado, United States
Joined: January 25, 2004
KitMaker: 11,669 posts
AeroScale: 11,011 posts
Joined: January 25, 2004
KitMaker: 11,669 posts
AeroScale: 11,011 posts
Posted: Monday, April 15, 2013 - 07:31 AM UTC
Vitamin C & Zink. Lots of fluids.
Posted: Tuesday, April 16, 2013 - 05:44 AM UTC
Thanks Stephen, will do. For the moment the flu is at it's turning point. Today was still a hard day at work, but it did not get worse.
So no progress on the model. Hope I can do some more work tomorrow evening.
BTW I drilled the hole for the flare pistol port. Anyone know if it was just a steel tube or a whole flara gun?
all the best
Steffen
So no progress on the model. Hope I can do some more work tomorrow evening.
BTW I drilled the hole for the flare pistol port. Anyone know if it was just a steel tube or a whole flara gun?
all the best
Steffen
Posted: Thursday, April 18, 2013 - 05:19 AM UTC
O.K. back to work.
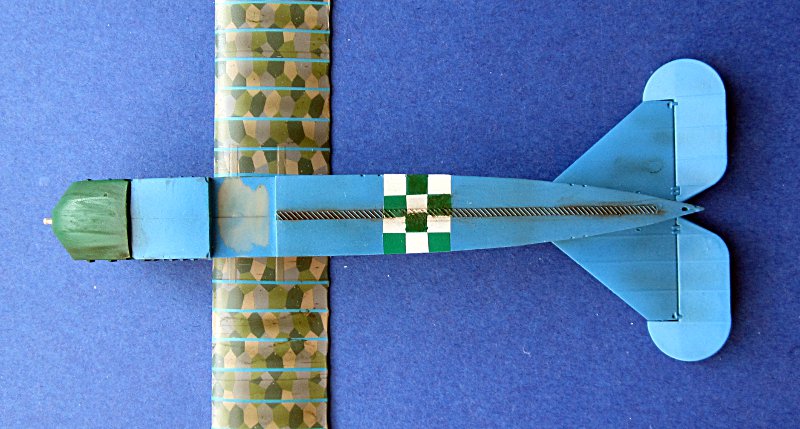
I have added more stripes and yesterday evening I tried to apply more contrast to the wings. As I was on it I also added a bit of shadows to the fuselage. It does not show very well on the pictures though and otoh it will be toned down in the further progress.
all the best
Steffen
I have added more stripes and yesterday evening I tried to apply more contrast to the wings. As I was on it I also added a bit of shadows to the fuselage. It does not show very well on the pictures though and otoh it will be toned down in the further progress.
all the best
Steffen
JackFlash
Colorado, United States
Joined: January 25, 2004
KitMaker: 11,669 posts
AeroScale: 11,011 posts
Joined: January 25, 2004
KitMaker: 11,669 posts
AeroScale: 11,011 posts
Posted: Thursday, April 18, 2013 - 05:36 AM UTC
Looking good!
Posted: Friday, April 19, 2013 - 01:59 AM UTC
Thank you Stephen!
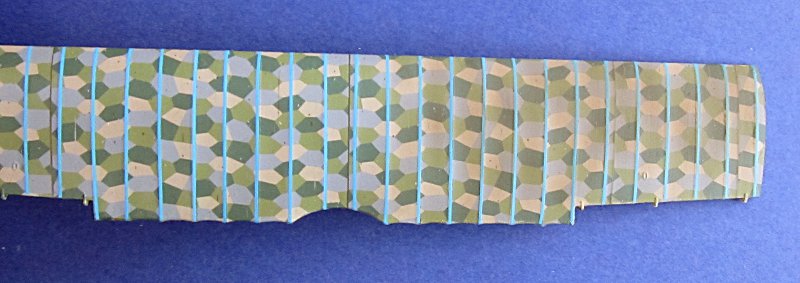
Sadly I am not able to put the whole change on the photos. The contrast on the fuselage is less strong and less defined on the pictures. Once the flat cote is on it will look like on the pictures but in those pictures the effect will be gone probably.
I tried to make this clearer when I worked on the upper wing:
but again you only see the brown hue but not the more defined texture/ structure of the wing. Too bad...
There is also some more progress on the fuselage: rudder fin with wire and whits stripe behind the engine added
all the best
Steffen
Posted: Friday, April 19, 2013 - 07:28 AM UTC
Hi Steffen
Nice one! The weathering on the fuselage is looking very effective.
I sympathise with you on your bout of flu - I've got a touch of the dreaded lurgy myself.
All the best
Rowan
Nice one! The weathering on the fuselage is looking very effective.
I sympathise with you on your bout of flu - I've got a touch of the dreaded lurgy myself.
All the best
Rowan
Posted: Friday, April 19, 2013 - 09:37 PM UTC
Thank you Rowan, for your kind words and your sympathy
little progress yesterday. I only attached the rudder, the lower wing and the pistol port
all the best
Steffen
little progress yesterday. I only attached the rudder, the lower wing and the pistol port
all the best
Steffen
Posted: Sunday, April 21, 2013 - 05:13 AM UTC
Very slow progress, but nonetheless it still goes forward:
all the best
Steffen
all the best
Steffen
Posted: Sunday, April 21, 2013 - 07:09 AM UTC
I'm very impressed by your paintwork. I love the shading and the weathering on the hull. Really nice work.
Posted: Monday, April 22, 2013 - 03:56 AM UTC
Thanks Robert!
sadly no progress today ... hopefully tomorrow. It is time for adding the last interior bits and MGs.
all the best
Steffen
sadly no progress today ... hopefully tomorrow. It is time for adding the last interior bits and MGs.
all the best
Steffen
Posted: Friday, May 03, 2013 - 04:53 AM UTC
Hi again,
well it has been a while, but I am still at this kit. Meanwhile I attached teh interwing struts, painted them and added the upper wing. I still need to touch the struts up with some paint, but finally it is looking like a Fokker D.VII.
all the best
Steffen
well it has been a while, but I am still at this kit. Meanwhile I attached teh interwing struts, painted them and added the upper wing. I still need to touch the struts up with some paint, but finally it is looking like a Fokker D.VII.
all the best
Steffen
Posted: Tuesday, July 09, 2013 - 06:18 AM UTC
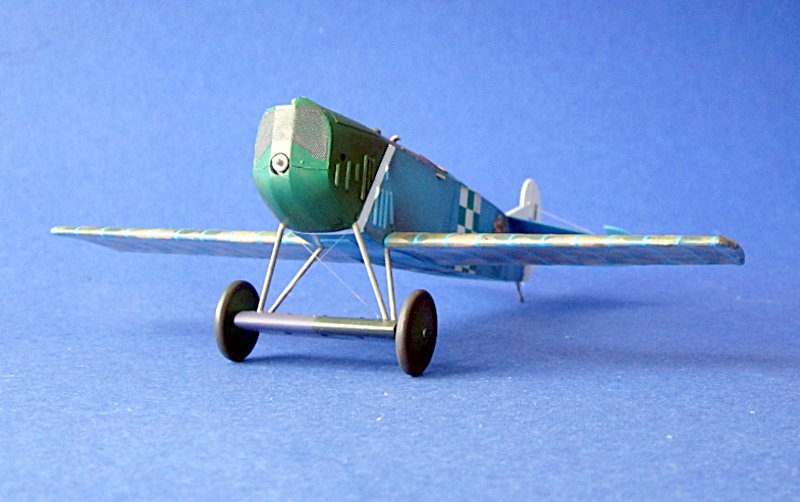
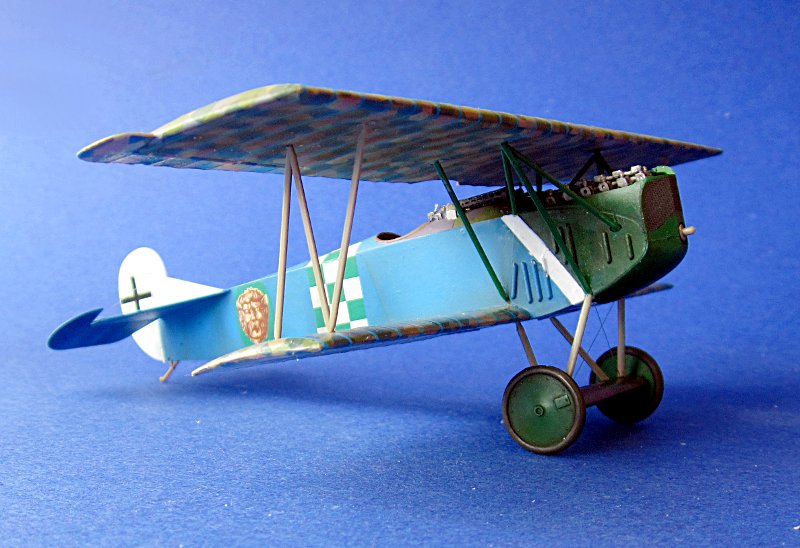
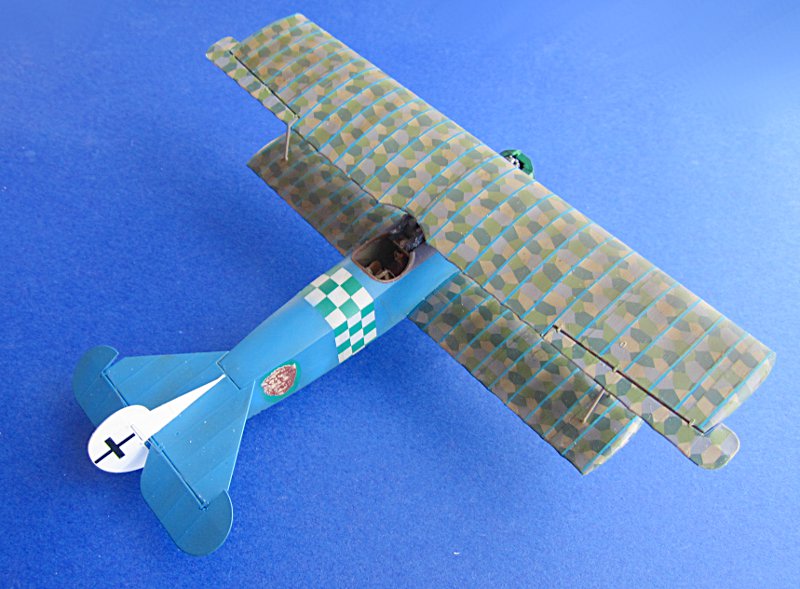
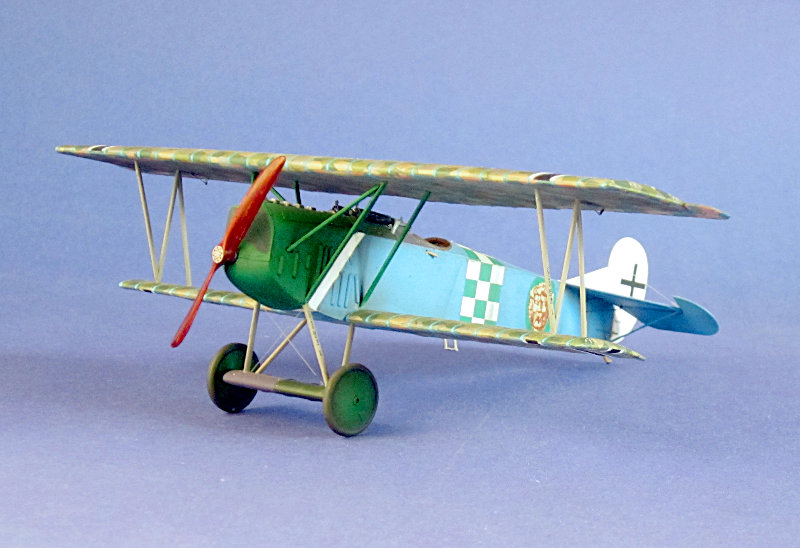
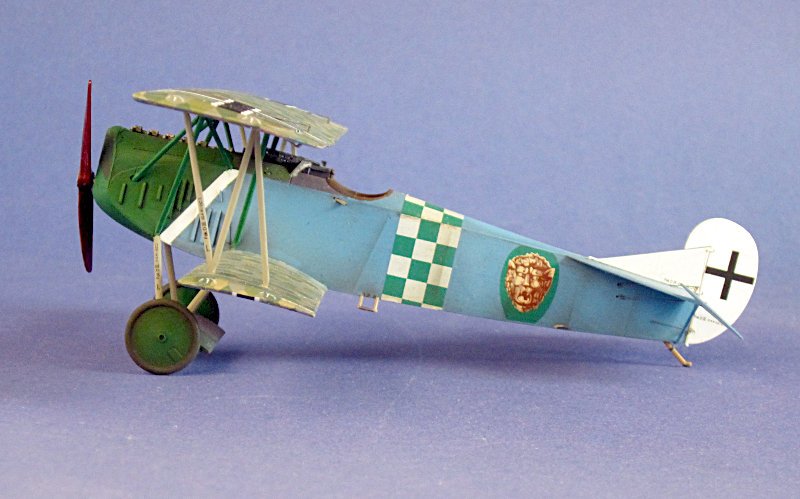
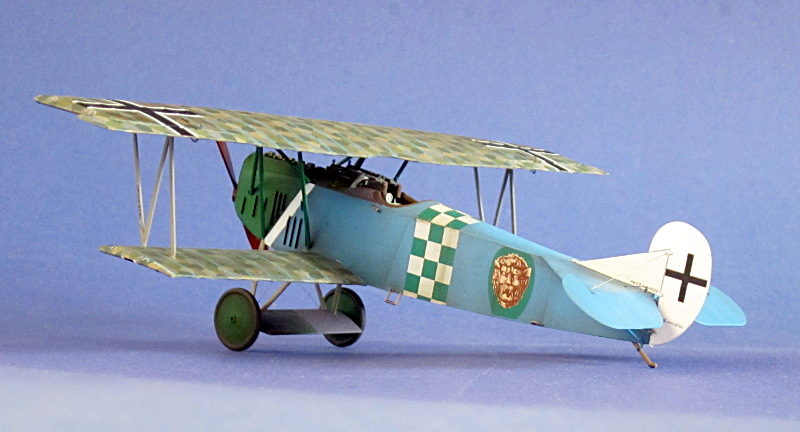
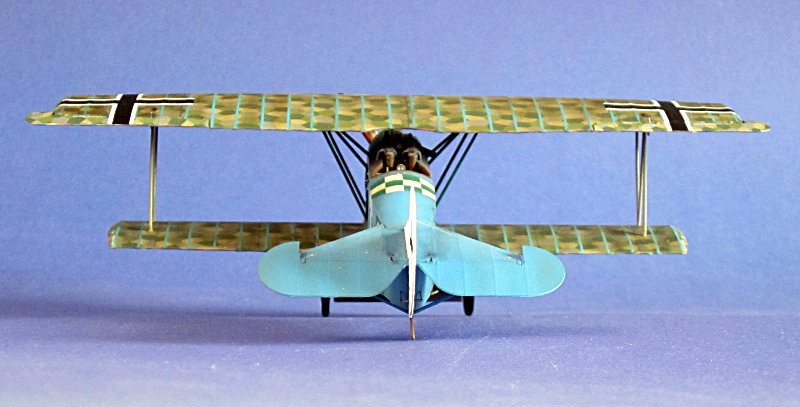
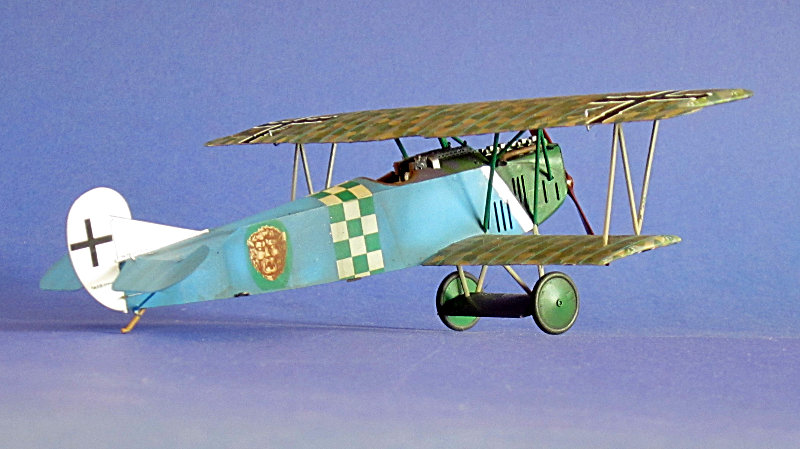
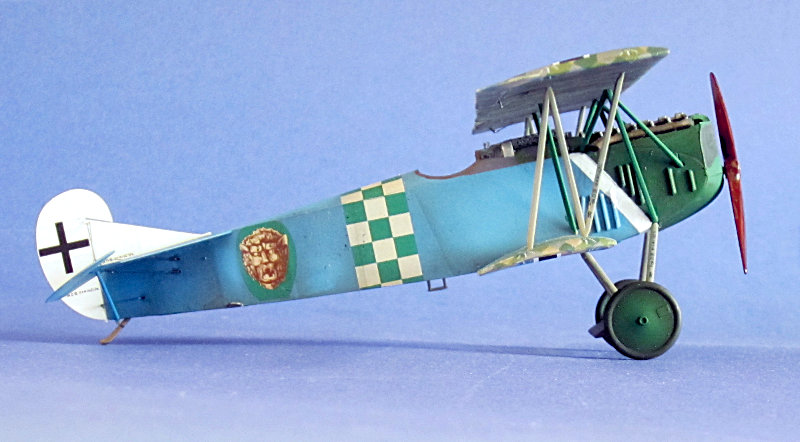
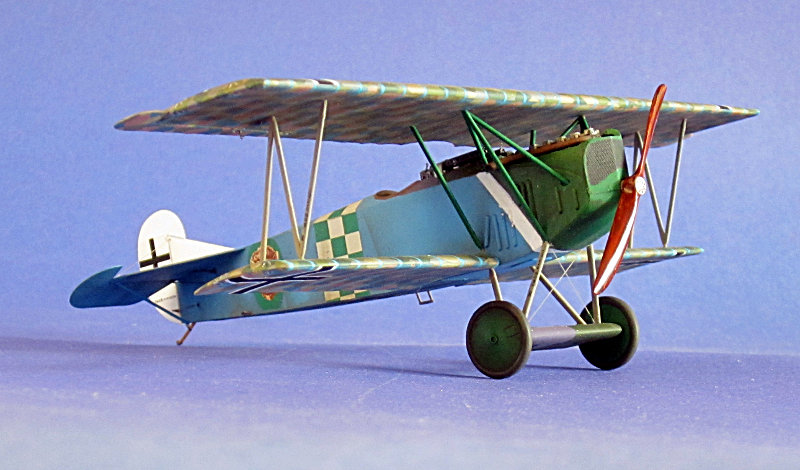
Well I finally managed to do the last few bits and take some photos. I noticed that I might have to add some bits of weathering (blue part of the lower wing) but for the main part the build is done.
Here is a pic of the control cables (streched sprue)
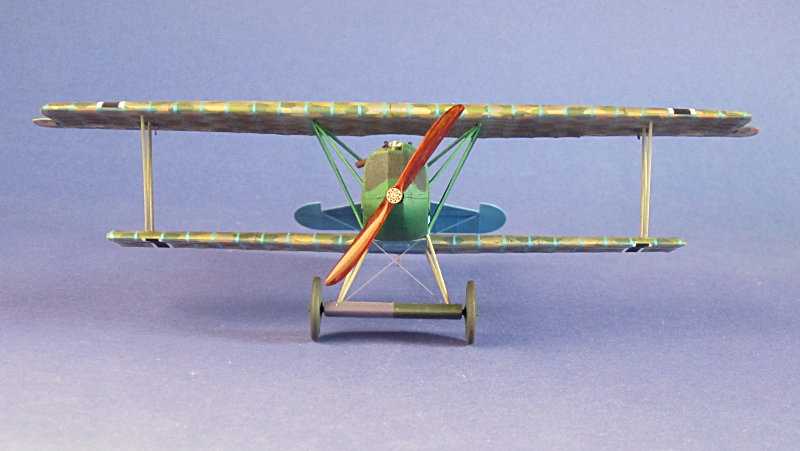
And here my usual 10 pic walk around
all the best
Steffen
Here is a pic of the control cables (streched sprue)
And here my usual 10 pic walk around
all the best
Steffen
JackFlash
Colorado, United States
Joined: January 25, 2004
KitMaker: 11,669 posts
AeroScale: 11,011 posts
Joined: January 25, 2004
KitMaker: 11,669 posts
AeroScale: 11,011 posts
Posted: Wednesday, July 10, 2013 - 02:14 AM UTC
Very decent build! The overall effect works well.
Posted: Thursday, July 11, 2013 - 07:17 AM UTC
Thank you, Stephen! It's much appreciated!
all the best
Steffen
all the best
Steffen
GhostHawk
Cordoba, Argentina
Joined: January 27, 2011
KitMaker: 268 posts
AeroScale: 264 posts
Joined: January 27, 2011
KitMaker: 268 posts
AeroScale: 264 posts
Posted: Thursday, July 11, 2013 - 11:01 AM UTC
Hi,
It's a Beauty...! Really nice...
Congrats & BTW...!
Diego
It's a Beauty...! Really nice...
Congrats & BTW...!
Diego
Posted: Friday, July 12, 2013 - 04:48 AM UTC
Many thanks Diego!