_GOTOBOTTOM
Cold War (1950-1974)
Discuss the aircraft modeling subjects during the Cold War period.
Hosted by Tim Hatton
F-4C and RF-4E double build!
magnusf
_VISITCOMMUNITY
Stockholm, Sweden
Joined: May 02, 2006
KitMaker: 1,953 posts
AeroScale: 1,902 posts
Posted: Sunday, May 19, 2013 - 02:48 AM UTC
Time for a new build, this time for the Phabulous Phantoms Campaign!

I'll do two Hasegawa 1/72 Phantoms, one is a USAF F-4C flown by Robin Olds in Vietnam, the other one will be an Israeli RF-4E.


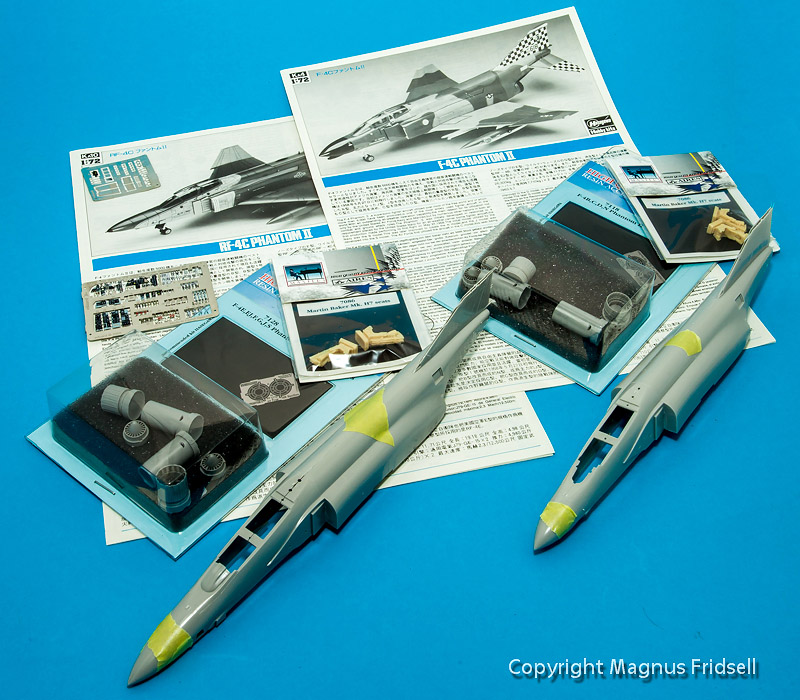
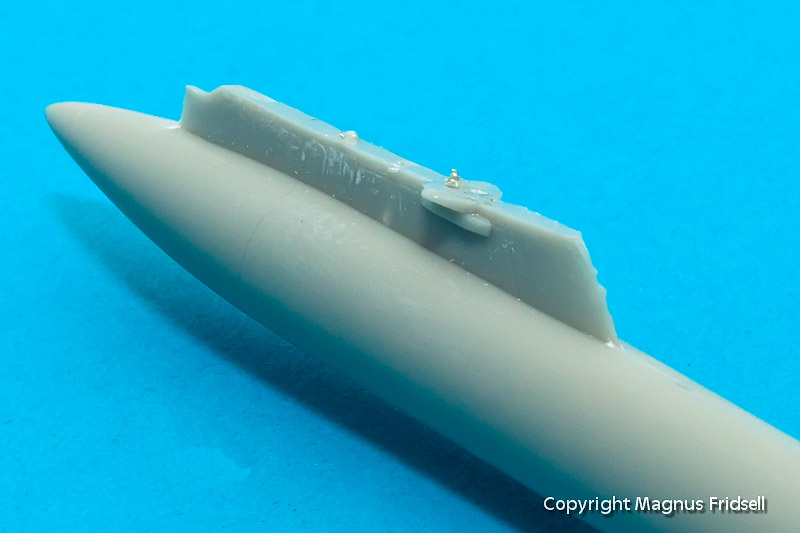
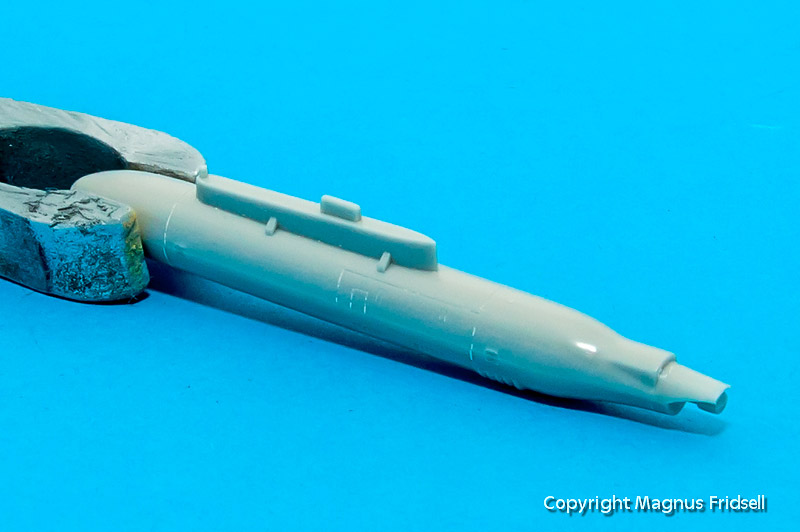
Those are the kits. The F-4C is spot-on for the purpose and the RF-4C seemed remarkably well suited for an Israeli RF-4E since they all seem to have had the "hard" wing (at least during the early seventies which is the era I go for) and un-slotted tails. The difference is in the longer engine exhausts for the E but that matters less since both types are included with all the Hasegawa Phantom kits. What I noticed later was that the RF-4C comes with pointy "navy-style" hardpoints so I had to go shopping for a dedicated RF-4E-boxing anyway since Hasegawa never puts more plastic than what is absolutely necessary in any boxing. Oooopssss...

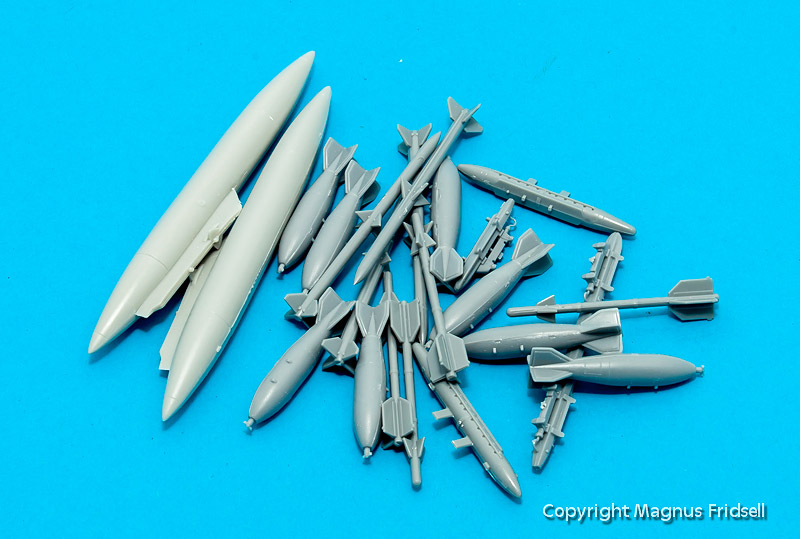
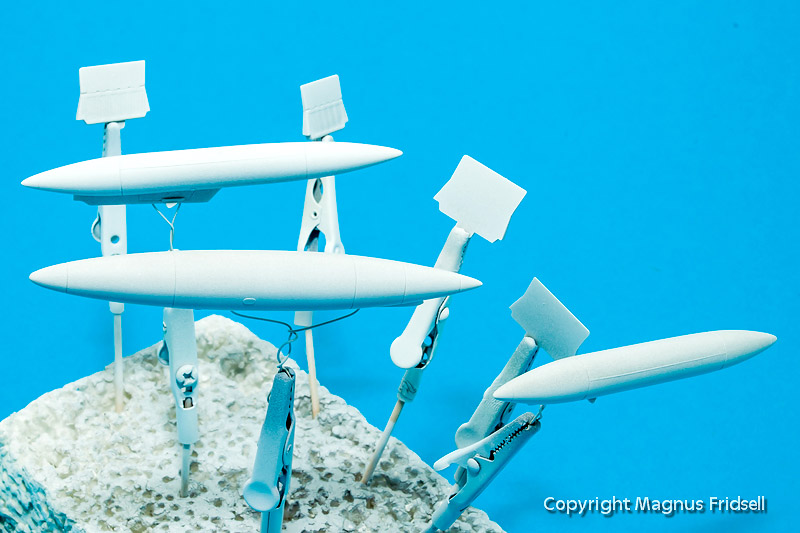
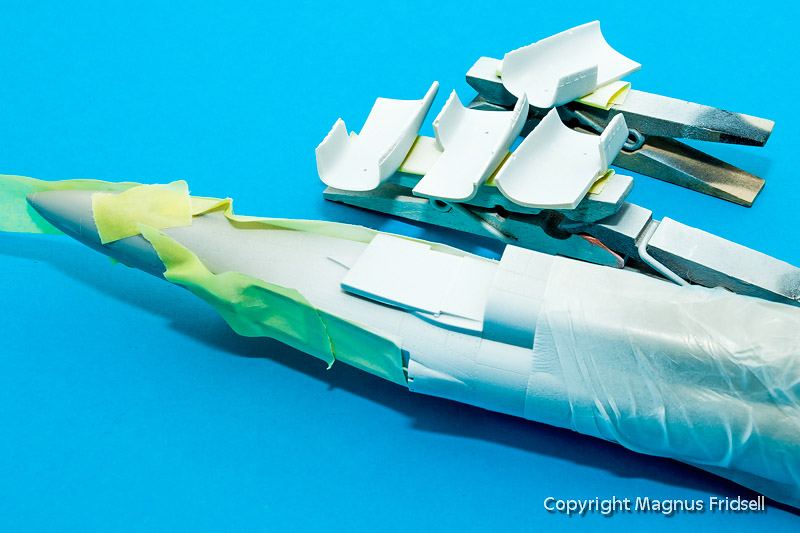
I got myself a bunch of after-market goodies (without going over-the-top...) in Moson a few weeks ago in the form of resin seats and engines and two sets of Eduard zoom etch. Pre-painted (partially at least)...


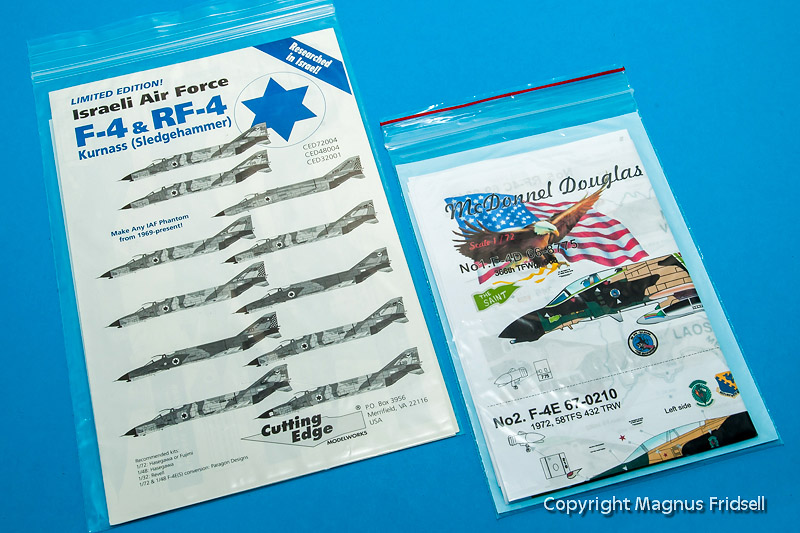
Decals are from PrintScale and Cutting Edge. I have also bought dedicated stencilling sheets from both PrintScale and IsraDecal.

I am not sure it was such a good idea to build both at the same time, no synergies yet! It seems as if I spend most of the time sorting through a multitude of sprues !


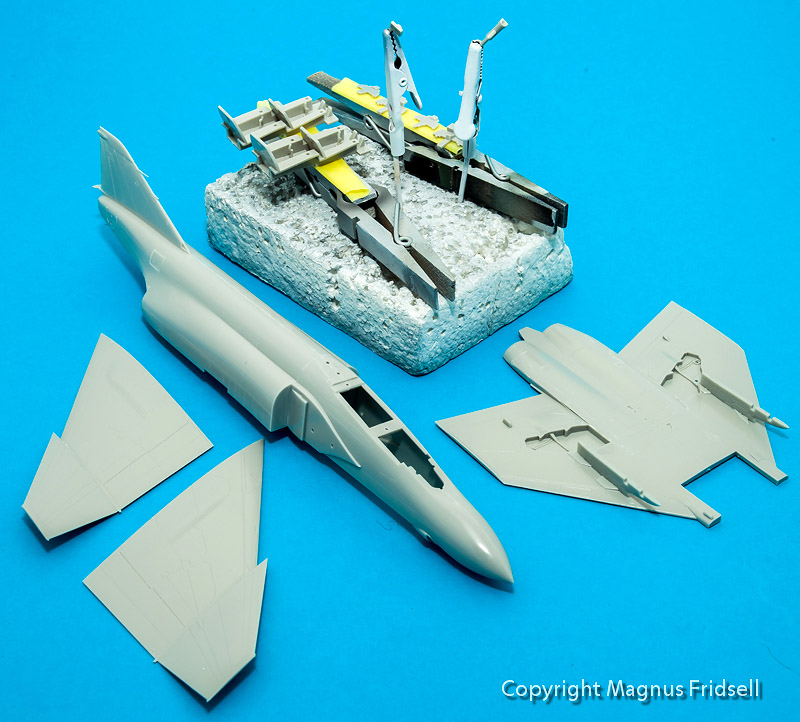
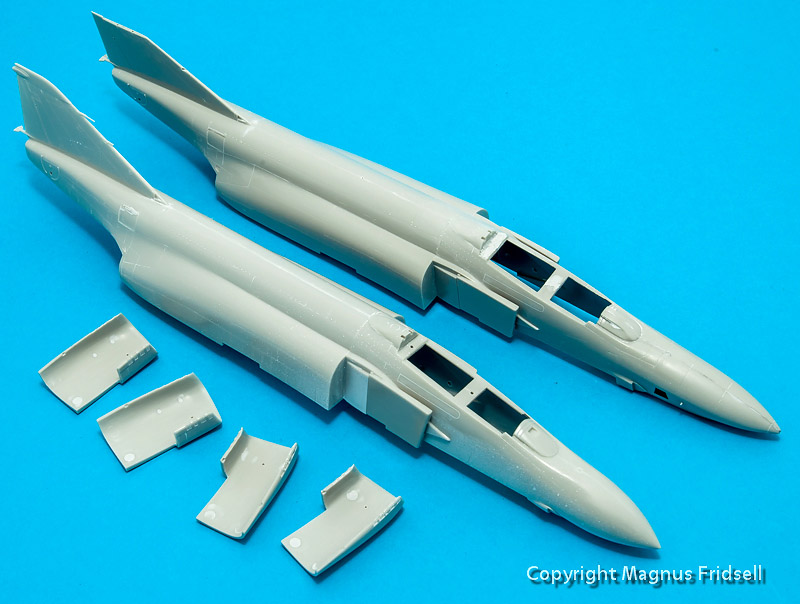
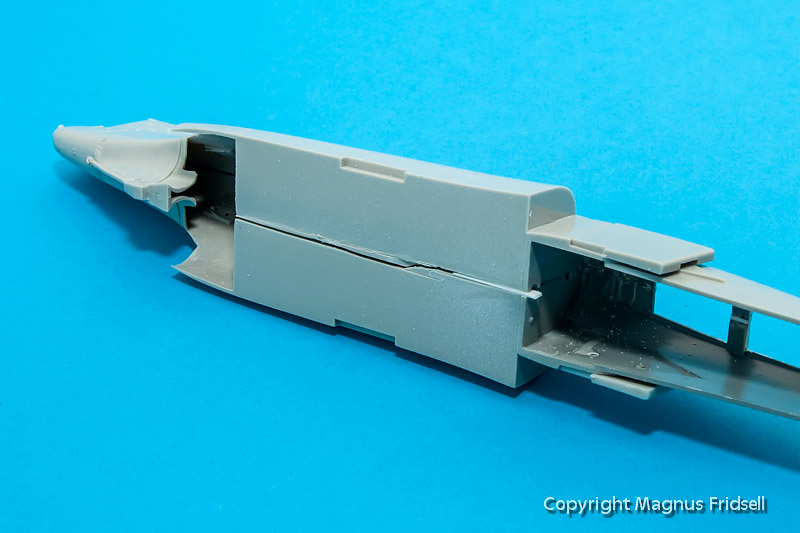
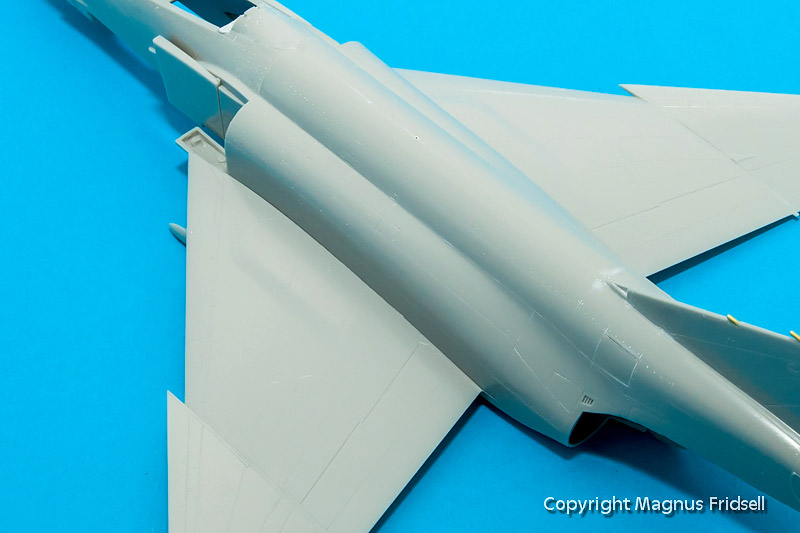
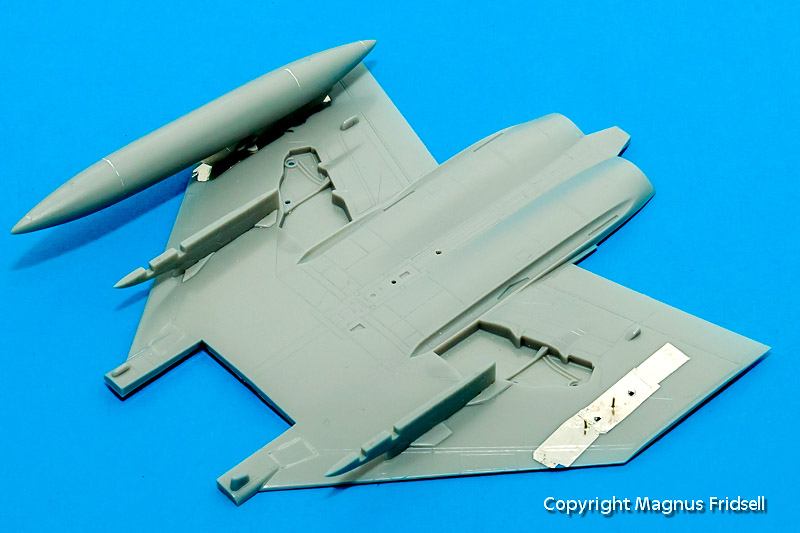
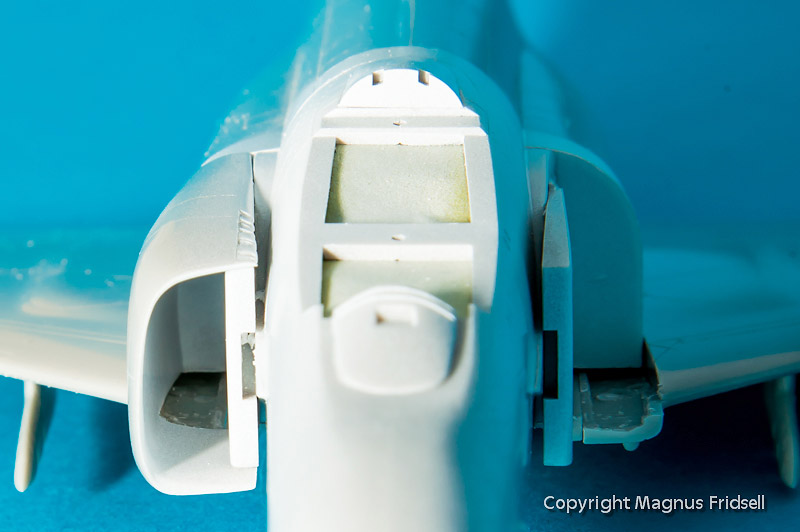
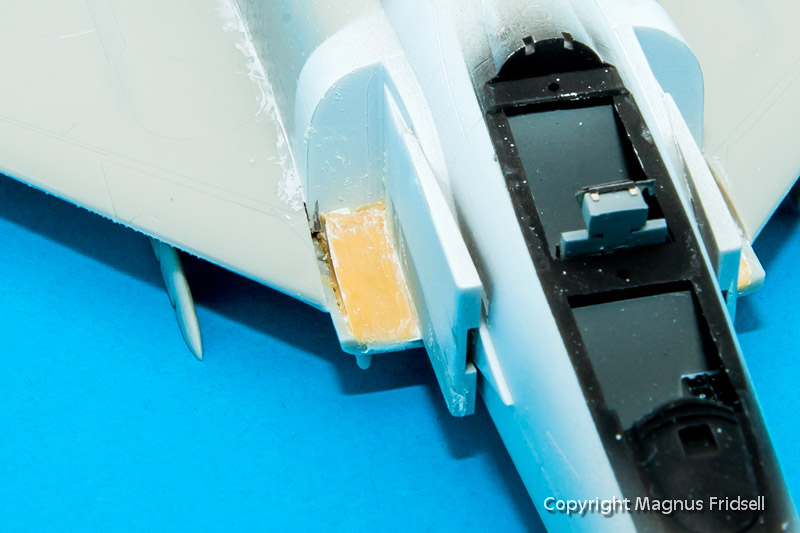
Interior parts ready for primer, a C-fuselage already closed up and a set of parts for the RF's wings.

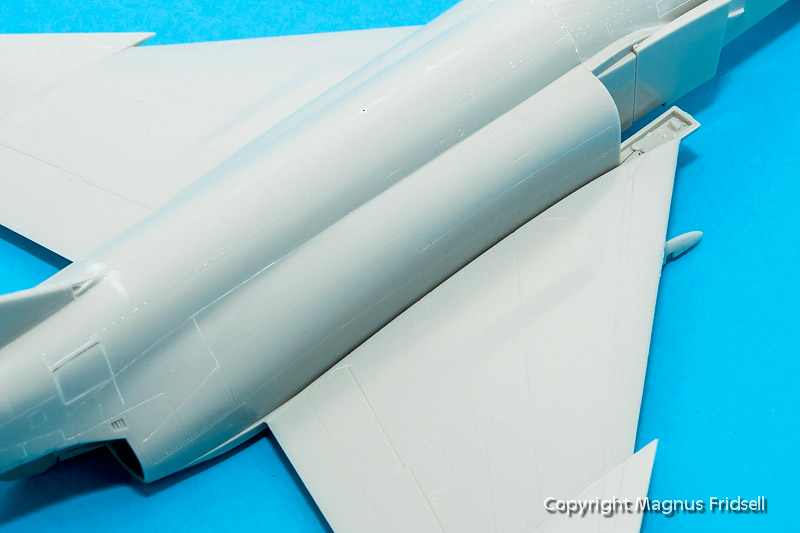
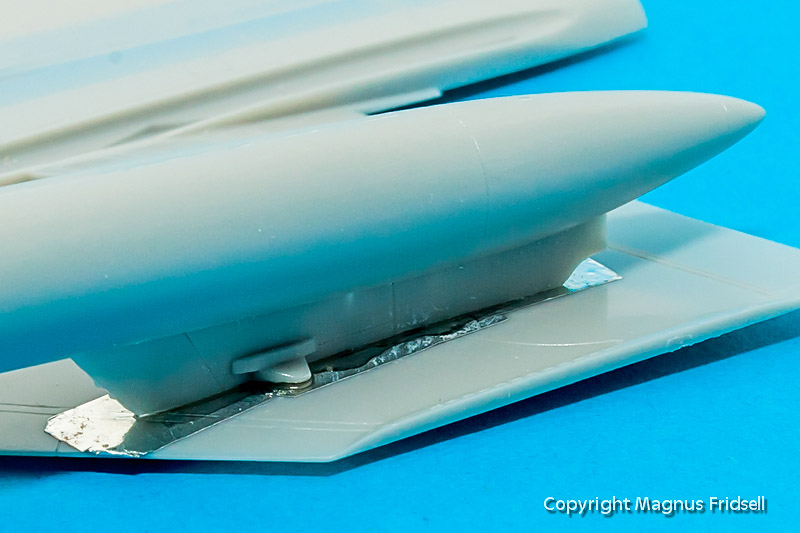
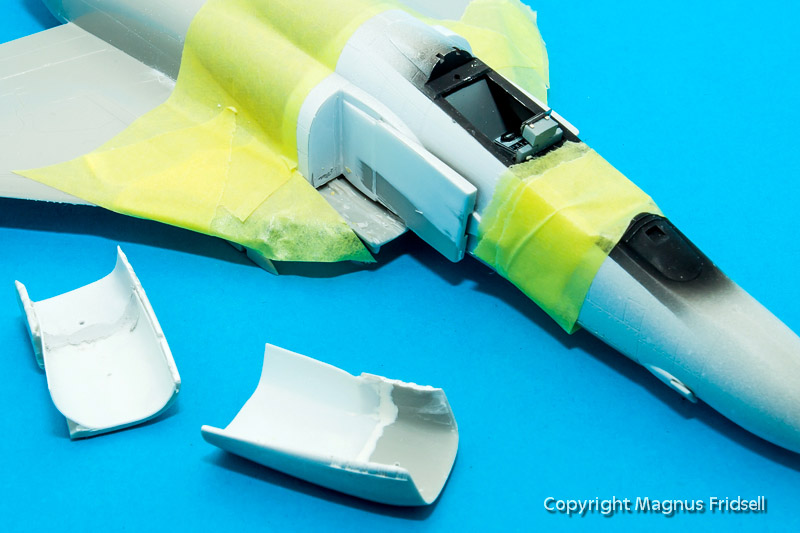
It pays to be careful when building these, with slight adjustments fit is almost perfect and with glue applied from below very little sanding is needed. And I don't feel like sanding that seam between the inner and outer wing!


Magnus
magnusf
_VISITCOMMUNITY
Stockholm, Sweden
Joined: May 02, 2006
KitMaker: 1,953 posts
AeroScale: 1,902 posts
Posted: Monday, May 20, 2013 - 08:39 AM UTC
Something of special interest arrived at the post office today:

I have only just leafed through them but they seem to be packed full of photos, interesting history and beautiful profile artwork!


Cockpits using Eduard's prepainted photo etch. Beautiful!


Magnus
goodn8
_VISITCOMMUNITY
Berlin, Germany
Joined: October 12, 2008
KitMaker: 709 posts
AeroScale: 651 posts
Posted: Monday, May 20, 2013 - 09:07 AM UTC
You are right! Cockpit PE-Parts look damn beautiful!
Have to manage mine for the Campaign with the Decals...
Sure this will not look as half as good as yours.


T.
Middle_Franconian
_VISITCOMMUNITY
Bayern, Germany
Joined: January 02, 2011
KitMaker: 279 posts
AeroScale: 239 posts
Posted: Friday, May 24, 2013 - 08:01 AM UTC
Hi Magnus,

well described and photographed as usual!

The cockpit(s) look great!

Regards,

Sebastian
magnusf
_VISITCOMMUNITY
Stockholm, Sweden
Joined: May 02, 2006
KitMaker: 1,953 posts
AeroScale: 1,902 posts
Posted: Sunday, May 26, 2013 - 07:56 AM UTC
Thomas! Prepainted photo-etch is borderline to cheating but it looks good ! On the other hand, with a steady hand and some patience you can get a long way with paint and decals as well!

Sebastian! Thanks!

It's been a while since I last built a Hasegawa kit from the eighties: these kits really consists of a horrendous lot of small bits of plastic (Yes, I know, it's the definition of a plastic model but it is still way over the top in this case !), which all need their rather substantial amount of filling, sanding and adjustment.


State of affairs right now, I installed the splitter plates last night. I've spent a lot of time on the small parts lately but they don't make any good photos !


Things to hang below the wings... They will need to be thinned, filled, sanded, primed, painted, masked (horror of horrors) and painted again... I'll be busy with those birds right through the summer!


Magnus
magnusf
_VISITCOMMUNITY
Stockholm, Sweden
Joined: May 02, 2006
KitMaker: 1,953 posts
AeroScale: 1,902 posts
Posted: Thursday, May 30, 2013 - 08:07 AM UTC
Slowly forward...


Wing-to-fuselage joint worried me a bit, it is tricky to fill and sand and I want it more or less press-fit to avoid it if possible. I had an idea that I could glue a plastic strip along the edge and then sand it flush before fitting the wing when my friend Rickard suggested attacking the fuselage instead!


I cut along the seam (roughly ) and pressed in a few shims of thin plastic until it was wide enough. A few drops of plastic cement and everything was fixed in place!


And now the wing fits! Magic!


Magnus
AussieReg
Staff MemberAssociate Editor
AUTOMODELER
#007
_VISITCOMMUNITY
Victoria, Australia
Joined: June 09, 2009
KitMaker: 8,156 posts
AeroScale: 3,756 posts
Posted: Thursday, May 30, 2013 - 08:20 AM UTC
Looking great so far Magnus, and the solution to the wing/fuse gaps is very simple and effective.

Cheers, D
RedwingNev
_VISITCOMMUNITY
England - East Midlands, United Kingdom
Joined: February 07, 2004
KitMaker: 911 posts
AeroScale: 415 posts
Posted: Friday, May 31, 2013 - 04:10 AM UTC
1) Pre-painted PE in 1/72 isn't cheating, its just a better way of doing it than decals 1/48 and above however...

2) Very sensible to start on all the ordnance now. A wise old modeller once taught me the 90% rule - ie the last 10% takes 90% of the time! He was the one who taught me to do weapons, landing gear etc first, and it works!

3) Great work, keep it up!
Joel_W
Staff MemberAssociate Editor
AUTOMODELER
_VISITCOMMUNITY
New York, United States
Joined: December 04, 2010
KitMaker: 11,666 posts
AeroScale: 7,410 posts
Posted: Tuesday, June 04, 2013 - 03:20 AM UTC
Magnus, just started to follow your duel build thread. Outstanding work so far. Both sets of instrument panels do look superb with the pre-painted PE. Definitely, the way to go in 1/72 scale. And your correction to the fuselage for a better wing fit is impressive. Saved yourself considerable effort and time. That's one "fix" that I'll surely need.
Joel
magnusf
_VISITCOMMUNITY
Stockholm, Sweden
Joined: May 02, 2006
KitMaker: 1,953 posts
AeroScale: 1,902 posts
Posted: Wednesday, June 05, 2013 - 07:37 AM UTC
Damian and Joel! Thanks! Regarding the wing fix, I didn't figure it out myself but I am an expert when it comes to collecting and implementing other people's ideas (and more on that below...) !

Neil! As an R&D engineer I am very aware of the 90/10 rule :-) ! Doing the small and fiddly stuff first is excellent advice!

Another thing that I have learnt the hard way is the importance of preparing the installation of external load so that it is easy and safe to attach it after painting. I've had a bad history when it comes to fuel tanks especially...


Holding tank and wing together, I drill two holes from the inside of the wing into the tank pylon. This way I get matching holes in the wing and the pylon. After this I bend a wire into an U-shape and insert it from the inside of the wing into the holes, securing it with super glue. Cut to length, these make ideal attachment points for the tank at the end of the project!

And now onto the subject of picking up ideas... This all started with a discussion on Tempests over at the IPMS Stockholm forums, one link led to a build by Californian dentist/master modeller Paul Budzik where he used this trick... The fit of the tank pylon to the wing surface could have been a lot better and it is tricky to get the shape right. Paul uses CA glue to fill out these kind of gaps with Bare Metal foil attached to the opposite surface to avoid the super glue to stick.


Preparing the wing with foil...


...filling with super glue...


...and a perfectly fitting tank that only needs a bit of sanding around the edges!

Finally, I need some advice! There is no separate centerline pylon in the Hasegawa kits even if there are two different tanks included for this station, both with their rather special looking integrated pylons. I plan to hang a MER with M-117 bombs on the centerline but in the Hasegawa weapon set from where I source both the M-117s and the MER there are no pylons either... Can anyone confirm that I can use the same kind of pylon as used for the Vulcan pod? I have a redundant pod from a Fujimi kit that I can use the pylon from... I know that Scat XXVII at the USAF Museum is loaded this way so if someone has photos I'm all smiles!


Last photo of the redundant pod. It has already succumbed to the razor saw...


Magnus
Joel_W
Staff MemberAssociate Editor
AUTOMODELER
_VISITCOMMUNITY
New York, United States
Joined: December 04, 2010
KitMaker: 11,666 posts
AeroScale: 7,410 posts
Posted: Thursday, June 06, 2013 - 01:54 AM UTC
I've followed Paul's work for years. He's a master builder of Aircraft, Ships, Armor, and 1/12 scale F1 cars. These two tips seem like the perfect solution to these problems which plagued me when I was last into aircraft modeling.
Joel
magnusf
_VISITCOMMUNITY
Stockholm, Sweden
Joined: May 02, 2006
KitMaker: 1,953 posts
AeroScale: 1,902 posts
Posted: Saturday, June 15, 2013 - 09:42 PM UTC
Joel! I remember Paul Budzik and his works of plastic art from my time as an FSM subscriber and that ought to be around 1990-1991. He has been around for some time !


I know that many of my fans are waiting for parts-on-sticks. This one is for you !


I've primed the intakes and the splitter plates...


...only to notice this! The short intake channels are a bit annoying but I think it is possible to paint them so as to get an acceptable illusion of depth. But that missing bottom section about 10 mm from the intake lip will be seen no matter how I paint. I'll have to figure out some way or another to fill it...


Magnus
AussieReg
Staff MemberAssociate Editor
AUTOMODELER
#007
_VISITCOMMUNITY
Victoria, Australia
Joined: June 09, 2009
KitMaker: 8,156 posts
AeroScale: 3,756 posts
Posted: Saturday, June 15, 2013 - 10:21 PM UTC
Parts-kebab a-la Fridsell, always love that part of your build Magnus.

Cheers, D
magnusf
_VISITCOMMUNITY
Stockholm, Sweden
Joined: May 02, 2006
KitMaker: 1,953 posts
AeroScale: 1,902 posts
Posted: Sunday, July 14, 2013 - 08:33 AM UTC
Damian! A late answer but I am happy you're enjoying it :-) !

Apart from being away on holiday, I've also managed to fill in the ugly holes at the bottom of the intakes.


This isn't ideal but I can't figure out something else right now. Maybe if the model was built in a different sequence but that is too late now... Better than before I hope though!


Magnus
drabslab
_VISITCOMMUNITY
European Union
Joined: September 28, 2004
KitMaker: 2,186 posts
AeroScale: 1,587 posts
Posted: Sunday, July 14, 2013 - 09:30 AM UTC
Thank you for sharing the Budzik trick, I will remember that one
Jessie_C
_VISITCOMMUNITY
British Columbia, Canada
Joined: September 03, 2009
KitMaker: 6,965 posts
AeroScale: 6,247 posts
Posted: Monday, July 15, 2013 - 05:19 AM UTC

Quoted Text

This isn't ideal but I can't figure out something else right now.


What about a small piece of thin plastic card grafted onto the end of the intake where it's too short?
magnusf
_VISITCOMMUNITY
Stockholm, Sweden
Joined: May 02, 2006
KitMaker: 1,953 posts
AeroScale: 1,902 posts
Posted: Friday, July 19, 2013 - 09:01 AM UTC
Jessica! I pondered upon that one to start with but threw it overboard as being too obvious ! But since the good-idea-brigade (in the shape of you and my friend Anders) has been so hard at work (and since my solution generally sucked...) I've decided to go for your solution!

It also had the added advantage that I got the immense pleasure to chisel away the Tamiya putty from the bottom of the intakes...


Anders sent this photo of his F-4F project through the mail...


...and I copied it! Next time it would be a simple operation to hack away the blanking plates from the fuselage halves and let the plasticard walls stretch a bit further into the fuselage. Next time...


Magnus
spaarndammer
_VISITCOMMUNITY
Noord-Holland, Netherlands
Joined: January 28, 2007
KitMaker: 1,945 posts
AeroScale: 388 posts
Posted: Tuesday, October 01, 2013 - 09:09 PM UTC
I only see this topic now (via your P-38 build). Great efforts on the Phantoms and a great idea for the fuel tanks. I am currently building a Jolly Rogers F-4b (Hasegawa) and dealing with the fueltanks. Exactly the same problem with the pylon to wing fit, but I will try the alu foil trick.

Why is this build stalled?


Jelger
Mecenas
Joined: December 23, 2007
KitMaker: 1,596 posts
AeroScale: 1,275 posts
Posted: Tuesday, October 01, 2013 - 09:20 PM UTC
In my MiG-21 I used a trick presented by Magnus with fitting pylons to the wing surface. It's very easy and quite quick. Most of the time it takes is waiting for the CA to dry. Thanks a lot!
magnusf
_VISITCOMMUNITY
Stockholm, Sweden
Joined: May 02, 2006
KitMaker: 1,953 posts
AeroScale: 1,902 posts
Posted: Tuesday, October 01, 2013 - 11:21 PM UTC
Jelger! I think I can answer your question with one word: the intakes (counting the "the" it actually sums up to TWO words but anyway...)... I am sure it will get restarted sometime soon though!

Michal and Jelger! I'm glad that more than I found the CA-trick useful. Send an extra thought of appreciation to that legendary Californian dentist!


Magnus
spaarndammer
_VISITCOMMUNITY
Noord-Holland, Netherlands
Joined: January 28, 2007
KitMaker: 1,945 posts
AeroScale: 388 posts
Posted: Wednesday, October 02, 2013 - 03:24 AM UTC

Quoted Text

Jelger! I think I can answer your question with one word: the intakes (counting the "the" it actually sums up to TWO words but anyway...)... I am sure it will get restarted sometime soon though!


I use Eduard FOD covers to hide that deafening emptiness in the intakes. Maybe a consideration for you as well?
Joel_W
Staff MemberAssociate Editor
AUTOMODELER
_VISITCOMMUNITY
New York, United States
Joined: December 04, 2010
KitMaker: 11,666 posts
AeroScale: 7,410 posts
Posted: Wednesday, October 02, 2013 - 04:00 AM UTC

Quoted Text


Quoted Text

Jelger! I think I can answer your question with one word: the intakes (counting the "the" it actually sums up to TWO words but anyway...)... I am sure it will get restarted sometime soon though!


I use Eduard FOD covers to hide that deafening emptiness in the intakes. Maybe a consideration for you as well?


Been following the build thread right from the start. Jaarndammer, what a simple, yet totally effective solution to the whole issue.

Joel
magnusf
_VISITCOMMUNITY
Stockholm, Sweden
Joined: May 02, 2006
KitMaker: 1,953 posts
AeroScale: 1,902 posts
Posted: Thursday, October 03, 2013 - 02:21 AM UTC
I am almost sure I have a set of FOD covers from Eduard somewhere...


Magnus
 _GOTOTOP