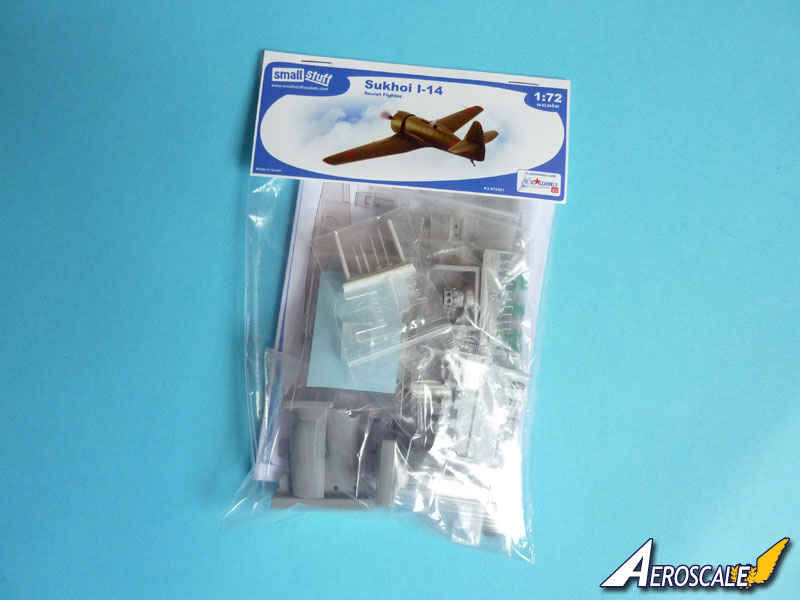
This is a build log for the Small Stuff's Sukhoi I-14 full resin kit that I recently reviewed here.
All the best,
Entoni
Early Aviation
Discuss World War I and the early years of aviation thru 1934.
Hosted by Jim Starkweather
Small Stuff 1:72 Sukhoi I-14
eseperic
Croatia Hrvatska
Joined: November 06, 2009
KitMaker: 624 posts
AeroScale: 609 posts
Joined: November 06, 2009
KitMaker: 624 posts
AeroScale: 609 posts
Posted: Monday, May 27, 2013 - 08:38 PM UTC
eseperic
Croatia Hrvatska
Joined: November 06, 2009
KitMaker: 624 posts
AeroScale: 609 posts
Joined: November 06, 2009
KitMaker: 624 posts
AeroScale: 609 posts
Posted: Tuesday, May 28, 2013 - 08:58 AM UTC
Hi everybody,
I didn't have much time this evening, but as I pointed out in the review, I was contemplating to open the doors in order to make cockpit more open and visible. This was done with the utmost care and using the Radu's wonderful ultra fine saw. I also added smaller details to the doors, i.e. diagonal bar and handles... out of pure imagination. I also removed the fuselage parts from casting blocks and cleaned it with the finest grits. Only two photos for the moment.
All the best,
Entoni
eseperic
Croatia Hrvatska
Joined: November 06, 2009
KitMaker: 624 posts
AeroScale: 609 posts
Joined: November 06, 2009
KitMaker: 624 posts
AeroScale: 609 posts
Posted: Wednesday, May 29, 2013 - 06:22 AM UTC
Hi everybody,
I continued adding minor modifications today. It won't be extensive, because the kit really needs no interventions at all. Yesterday I cut opened the cockpit doors, which leaves some room for improvements behind the seat. I just added some life by scratching (purely fictional) fuselage former out of plastic. In my opinion, it adds some life to the model. It is made out of evergreen plastic and secured in place with CA.
Comments welcome,
Entoni
JackFlash
Colorado, United States
Joined: January 25, 2004
KitMaker: 11,669 posts
AeroScale: 11,011 posts
Joined: January 25, 2004
KitMaker: 11,669 posts
AeroScale: 11,011 posts
Posted: Wednesday, May 29, 2013 - 07:27 AM UTC
Nice work, nice kit!
eseperic
Croatia Hrvatska
Joined: November 06, 2009
KitMaker: 624 posts
AeroScale: 609 posts
Joined: November 06, 2009
KitMaker: 624 posts
AeroScale: 609 posts
Posted: Monday, June 03, 2013 - 08:34 AM UTC
Hi everybody,
I was away for the weekend, and now I returned to the bench. It’s a bit unconventional to start a build with engine, but I decided to do so. I already hinted in the review that the engine assembly will require some time due to number of parts involved and complexity of design. Now I am aware that I had to accept some of its negatives to make the most of its positives… and there are many! The engine is simply beautiful, and the detail pop up under a coat of color. For the engine I used Akan colors (grey and black), and then I rubbed the cylinder heads with dark steel pigment. There's just so much to like about the engine that it could practically double the word count listing it all right here. So far I noticed that you get an extra cylinder head, which is good to know if you lose one during the assembly. However, the instruction on the engine detailing is not “newbie-friendly”, and you will have to rely on other resources to do it properly. So, here are some pictures…
All the best,
Entoni
JackFlash
Colorado, United States
Joined: January 25, 2004
KitMaker: 11,669 posts
AeroScale: 11,011 posts
Joined: January 25, 2004
KitMaker: 11,669 posts
AeroScale: 11,011 posts
Posted: Monday, June 03, 2013 - 08:48 AM UTC
Very nice casting. Model on!
eseperic
Croatia Hrvatska
Joined: November 06, 2009
KitMaker: 624 posts
AeroScale: 609 posts
Joined: November 06, 2009
KitMaker: 624 posts
AeroScale: 609 posts
Posted: Friday, June 07, 2013 - 05:00 AM UTC
Hi everybody,
I had very intense days... I will just post a photo without detailed explanation. I just dressed up the engine with valve rods and ignition wires. Some engine grime and minor weathering. The engine is really small, and the cast is simply beautiful.
All the best,
Entoni
I had very intense days... I will just post a photo without detailed explanation. I just dressed up the engine with valve rods and ignition wires. Some engine grime and minor weathering. The engine is really small, and the cast is simply beautiful.
All the best,
Entoni
eseperic
Croatia Hrvatska
Joined: November 06, 2009
KitMaker: 624 posts
AeroScale: 609 posts
Joined: November 06, 2009
KitMaker: 624 posts
AeroScale: 609 posts
Posted: Sunday, June 09, 2013 - 08:13 PM UTC
Hi everybody,
I had high hopes for this weekend... Unfortunately, I had accident with my right wrist. I was stung by some insect, and it actually escalated into a painful blain and it needs medical attention and care. I can hardly type (mostly using my left hand and my right index finger, which is funny to watch), but I will get back to my project soon...
All the best,
Entoni
eseperic
Croatia Hrvatska
Joined: November 06, 2009
KitMaker: 624 posts
AeroScale: 609 posts
Joined: November 06, 2009
KitMaker: 624 posts
AeroScale: 609 posts
Posted: Sunday, June 16, 2013 - 10:31 AM UTC
Hi everybody,
I am working simultaneously on two models. I also made some progress with the I-14, and I will probably join the fuselage and the wings tomorrow. I hope for some modeling since my wife is away with our kids for few days I finished almost entire cockpit interior, and I will leave the paint overnight to dry. I also finished the instrument panel, and just when I wanted to take the photo of it the tiny insect got in between the match and the panel, thus adding to the size comparison... that is actually one of the funniest photos of any of my models, I must say. The kit is very, very small (as you can see), but I am still bewildered with the quality of this kit! It just falls together without a problem! It's definitely one of the nicest models I've ever handled.
All the best,
Entoni
eseperic
Croatia Hrvatska
Joined: November 06, 2009
KitMaker: 624 posts
AeroScale: 609 posts
Joined: November 06, 2009
KitMaker: 624 posts
AeroScale: 609 posts
Posted: Wednesday, June 19, 2013 - 09:11 AM UTC
Hi everybody,
The overall geometry of this rather small and sturdy airplane is just magnificent! However, I made smaller mistake (which can be visible on the photos) while matting the fuselage with the wings. Unfortunately, I was not paying due attention to gluing, and it misaligned a bit. I must stress that the dry fit of the kit is just perfect, and it is possible to get it together without any filler or putty. I've just coated it with a layer of alclad primer, and will proceed with painting the camo.
All the best,
Entoni
eseperic
Croatia Hrvatska
Joined: November 06, 2009
KitMaker: 624 posts
AeroScale: 609 posts
Joined: November 06, 2009
KitMaker: 624 posts
AeroScale: 609 posts
Posted: Wednesday, June 26, 2013 - 03:09 AM UTC
Hi everybody,
Unfortunately, this thread didn't attract a lot of interest. I still want to believe that it is due to my unattractive style of presentation, rather than the kit, because the kit really deserves your attention! I finished it today, and I will post only one photo of the finished kit here. The rest you will find in the upcoming photo feature. It is most definitely one of the nicest kits that I've handled so far!
All the best,
Entoni
JackFlash
Colorado, United States
Joined: January 25, 2004
KitMaker: 11,669 posts
AeroScale: 11,011 posts
Joined: January 25, 2004
KitMaker: 11,669 posts
AeroScale: 11,011 posts
Posted: Wednesday, June 26, 2013 - 03:24 AM UTC
I like it. Thanks for bringing it to our attention!
Posted: Tuesday, October 22, 2013 - 01:13 PM UTC
Entoni,
I just found this post. I'm sorry it took so long as this is an incredible model! Your assembly is, as usual, expert!
Siderius
Tennessee, United States
Joined: September 20, 2005
KitMaker: 1,747 posts
AeroScale: 1,673 posts
Joined: September 20, 2005
KitMaker: 1,747 posts
AeroScale: 1,673 posts
Posted: Tuesday, October 22, 2013 - 01:31 PM UTC
Hi there, your model looks great!! Wanted you to know that. Russell
eseperic
Croatia Hrvatska
Joined: November 06, 2009
KitMaker: 624 posts
AeroScale: 609 posts
Joined: November 06, 2009
KitMaker: 624 posts
AeroScale: 609 posts
Posted: Tuesday, October 22, 2013 - 07:32 PM UTC
Thank you, Russell and Frederick! The kit is a gem, and I would wholeheartedly recommend it! There wasn't much to do, really - it somehow falls together easily, and you are just required to paint it properly!
Thanks, again!
All the best,
Entoni
Thanks, again!
All the best,
Entoni
CaptnTommy
Connecticut, United States
Joined: October 26, 2009
KitMaker: 424 posts
AeroScale: 389 posts
Joined: October 26, 2009
KitMaker: 424 posts
AeroScale: 389 posts
Posted: Wednesday, October 23, 2013 - 01:51 AM UTC
that Instrument panel is amazing! With this detail and your work it is a shame such art is almost invisible.
Captn Tommy
Captn Tommy
cliffnetherlands
Zuid-Holland, Netherlands
Joined: September 25, 2013
KitMaker: 86 posts
AeroScale: 83 posts
Joined: September 25, 2013
KitMaker: 86 posts
AeroScale: 83 posts
Posted: Wednesday, October 23, 2013 - 03:08 AM UTC
What a mouthwatering build. It*s impressive how much detail there is in this kit. It*s also a treat to see how you make the most of all that detail. I love the work you did on the motor and the cockpit. For me always the nicest bits on a airplane build. Impressive stuff.
greetz Cliff
greetz Cliff