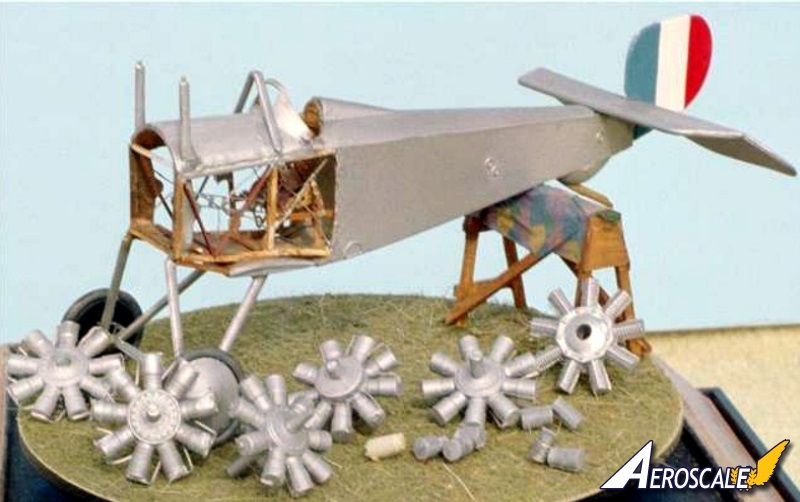
First off I will mention this is my first stringbag since I was a little boy.
The kit is the Eduard quarterscale Ni 17 profi. Normally I'm a pretty strict 'shake'n'baker' but since this is KotS I figure I'll try something more.
There won't be any aftermarket parts (I think). The profipack is ample and comes with exactly the markings I want. The - perfect - markings in fact.
Really I couldn't want for more. The Tricolore on the undersides, the (disputed) french cockades visible faintly through silver dope on the upper wings, and yes. That tasty death's head on the fuselage. It is a gorgeous kite. Not to mention its pilot was an interesting historical figure.
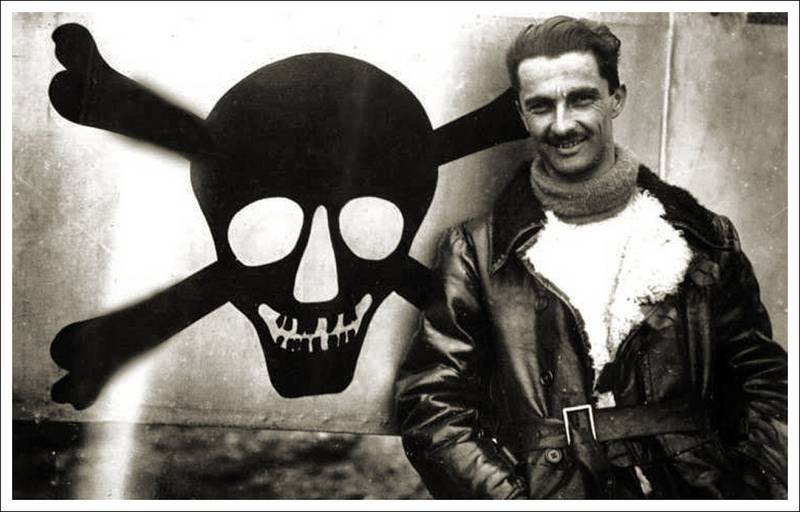
But I'll save him for another post.
Paint will be Vallejo with a small amount of Tamiya for incidentals. I plan on using my new EZ line for rigging, I have 100' of it so worst comes to worst it's enough for me to hang myself with.
So far I've opened up the breech of the Vickers gun and drilled open its barrel. Drilled out holes for control cables in the fuselage and begun the cockpit.
Folding the PE seat was arduous. I have discovered I need to find a hobby appropriate solder flux... Of the two apparently aluminium vertical members forward of the pilot I destroyed one and replaced it with styrene. Realising I hate styrene I immediately switched to cedar to build up the structure inside the cockpit. I feel that it will give a good result.
The Ez line is working out so far. I need to think of a way to dress up the spots where it's glued on though. I don't think I can manage quarterscale turnbuckles with these fists of ham.
Please tell me what to do everyone.
Early Aviation
Discuss World War I and the early years of aviation thru 1934.
Hosted by Jim Starkweather
KotS GB Nieuport 17
raypalmer
Ontario, Canada
Joined: March 29, 2010
KitMaker: 1,151 posts
AeroScale: 985 posts
Joined: March 29, 2010
KitMaker: 1,151 posts
AeroScale: 985 posts
Posted: Monday, August 12, 2013 - 03:20 PM UTC
modulla
United Kingdom
Joined: July 13, 2008
KitMaker: 72 posts
AeroScale: 71 posts
Joined: July 13, 2008
KitMaker: 72 posts
AeroScale: 71 posts
Posted: Monday, August 12, 2013 - 08:14 PM UTC
Well Richard you are looking excellent so far. On a Nieuport at this scale, you may find a narrow blob of brass paint is enough for turnbuckles inside the fuselage. Why not try it on some scrap?
When using EZ line, making sure it doesn't twist makes for better realism.
Lots of luck
Clive
When using EZ line, making sure it doesn't twist makes for better realism.
Lots of luck
Clive
Joel_W
Associate Editor
New York, United States
Joined: December 04, 2010
KitMaker: 11,666 posts
AeroScale: 7,410 posts
Joined: December 04, 2010
KitMaker: 11,666 posts
AeroScale: 7,410 posts
Posted: Wednesday, August 14, 2013 - 04:56 AM UTC
Richard, nice start to your 1st "Stringbag" kit. At least you're brave enough to try it. I'm still procrastinating about my starting one. So I think I'll just subscribe to your build blog, and follow along.
1st question, why do you dislike strene so much? I love the stuff.
Joel
1st question, why do you dislike strene so much? I love the stuff.
Joel
raypalmer
Ontario, Canada
Joined: March 29, 2010
KitMaker: 1,151 posts
AeroScale: 985 posts
Joined: March 29, 2010
KitMaker: 1,151 posts
AeroScale: 985 posts
Posted: Thursday, August 15, 2013 - 02:01 PM UTC
Styrene and I don't see eye to eye. I can never bend it to my will.
So I'm going to continue mucking about with the cockpit. I'm going to cut off the control stick and replace it with with wee brass.
I can't really tell if the tyres on this aircraft were black or white, anyone have any insight into the rubber?
Oh and I've accidentally assembled the LeRhône back to front. So... I am aware I did that.
Jessie_C
British Columbia, Canada
Joined: September 03, 2009
KitMaker: 6,965 posts
AeroScale: 6,247 posts
Joined: September 03, 2009
KitMaker: 6,965 posts
AeroScale: 6,247 posts
Posted: Thursday, August 15, 2013 - 02:15 PM UTC
Quoted Text
I can't really tell if the tyres on this aircraft were black or white, anyone have any insight into the rubber?
I don't think that you could go far wrong making them muddy light grey.
Joel_W
Associate Editor
New York, United States
Joined: December 04, 2010
KitMaker: 11,666 posts
AeroScale: 7,410 posts
Joined: December 04, 2010
KitMaker: 11,666 posts
AeroScale: 7,410 posts
Posted: Friday, August 16, 2013 - 03:03 AM UTC
Plastic styrene is very easy to bend if you're not talking too thick or too wide. The real issue is that it likes to relax after being bent. I like to dunk the styrene in very warm water then bend it, and hold it in position for a min or two. The piece will now hold it's shape. Might relax a tad, but is easy to correct when gluing.
Joel
Joel
raypalmer
Ontario, Canada
Joined: March 29, 2010
KitMaker: 1,151 posts
AeroScale: 985 posts
Joined: March 29, 2010
KitMaker: 1,151 posts
AeroScale: 985 posts
Posted: Wednesday, August 28, 2013 - 01:52 PM UTC
So an update. Things slowed right up because I cut oil paint with linseed oil and it took forever to dry.
My first attempt at wood finish is disappointing... but what can ya do. I'm proud of the scratch built elements.
Obviously I lost the rudder controls... Seeing the brass replacement I now know I must replace the stick as well. Fortunately the genuine articles were quite bare metal tubes.
The engine is the wrong engine, it certainly appears to be a 9C. I don't know why they put it in the kit but it tricked me and I built it. Now I'm attached to it, it stays. Damn the torpedoes!
Frankly I'm busting to get the fuselage closed up, can't wait to try out BMF using vallejo!
JackFlash
Colorado, United States
Joined: January 25, 2004
KitMaker: 11,669 posts
AeroScale: 11,011 posts
Joined: January 25, 2004
KitMaker: 11,669 posts
AeroScale: 11,011 posts
Posted: Wednesday, August 28, 2013 - 04:29 PM UTC
I have a few extra 1:48 Eduard 110hp LeRhône rotaries to spare for trade. (Left overs from my Nieuport 21 diorama).
AAR Issoudon 1918
AAR Issoudon 1918
Joel_W
Associate Editor
New York, United States
Joined: December 04, 2010
KitMaker: 11,666 posts
AeroScale: 7,410 posts
Joined: December 04, 2010
KitMaker: 11,666 posts
AeroScale: 7,410 posts
Posted: Thursday, August 29, 2013 - 03:01 AM UTC
Richard,
1st off, it's look'in real good. Guess you learned a valuable lesson about Linseed oil. When I use tube oils for weathering, I place the dab of paint on a piece of cardboard, and give it a few min to draw off as much of the Linseed oil as possible. It's what gives the paint such a long working life. I cut it with plain old Mineral Spirits.
You wood looks good, maybe a tad too dark on my screen. Engine is looking real good, just a dark oily wash to finish it up.
Joel