Hi All.
This will be my Blog build for the "Lottery Campaign #16":-
"Fleet Air Arm Flops and Failures" "Build any FAA Aircraft that was rubbish".
26 aircraft on lend/lease went to the Royal Navy, due to the poor handling of the aircraft both the British Royal Navy and the Royal Australian Air Force cancelled substantial orders.
The aircraft never saw active service with the RN.
Kit photos:-
The decals will be FAA after market.
I hope this blog will push me to improve my skills.
Hosted by Rowan Baylis
The Lottery #16
Posted: Sunday, August 25, 2013 - 12:37 AM UTC
Joel_W
Associate Editor
New York, United States
Joined: December 04, 2010
KitMaker: 11,666 posts
AeroScale: 7,410 posts
Joined: December 04, 2010
KitMaker: 11,666 posts
AeroScale: 7,410 posts
Posted: Sunday, August 25, 2013 - 02:00 AM UTC
Richard, will be following your build of the Helldiver, as my main aviation interest is WW11 PTO.
Joel
Joel
Posted: Sunday, August 25, 2013 - 02:20 AM UTC
Welcome Joel
Kit gets a good review,clean molding.
Washed parts so build about to start soon.
Kit gets a good review,clean molding.
Washed parts so build about to start soon.
Posted: Wednesday, September 25, 2013 - 01:48 PM UTC
Here is an update.
After installing cockpit parts I masked off the edges I then spray painted the inside flat black,
When paint was dry I painted on Micro-Mask on all instruments and boxes.
Next I sprayed cockpit area green and when dry peeled of the Micro-Mask to expose the black parts.
Here are the decals that I ordered for this build.
Joel_W
Associate Editor
New York, United States
Joined: December 04, 2010
KitMaker: 11,666 posts
AeroScale: 7,410 posts
Joined: December 04, 2010
KitMaker: 11,666 posts
AeroScale: 7,410 posts
Posted: Thursday, September 26, 2013 - 12:12 AM UTC
Richard, Interesting way to paint the interior. Like most, I build and paint it as a separate sub assembly, then glue it to one half of the fuselage. Nice looking AM decal sheet. Looking forward to your next update.
Joel
Joel
windysean
Wisconsin, United States
Joined: September 11, 2009
KitMaker: 1,917 posts
AeroScale: 563 posts
Joined: September 11, 2009
KitMaker: 1,917 posts
AeroScale: 563 posts
Posted: Thursday, September 26, 2013 - 12:21 AM UTC
Yes, I always painted it straightforward, but your method of black first really helps darken the corners and crevices in the cockpit. I like that effect!
-Sean H.
-Sean H.
Joel_W
Associate Editor
New York, United States
Joined: December 04, 2010
KitMaker: 11,666 posts
AeroScale: 7,410 posts
Joined: December 04, 2010
KitMaker: 11,666 posts
AeroScale: 7,410 posts
Posted: Thursday, September 26, 2013 - 12:57 AM UTC
Quoted Text
Yes, I always painted it straightforward, but your method of black first really helps darken the corners and crevices in the cockpit. I like that effect!
-Sean H.
Sean, I'm starting to become of believer in priming with black, especially interiors, wheel wells, insides of cowl, and engines. As you said, it certainly helps with color modulation, and creating shadows in the corners.
I'm not a big fan of pre-shading the surfaces, as many times it just seems too much, and over done. When done correctly, it more then accomplishes the weathering effect, and color modulation from lighter surfaces to darker panel lines. A dark undercoating does seem to have merit in toning down the lighter and brighter colors to a more scale like appearance.
Joel
cliffnetherlands
Zuid-Holland, Netherlands
Joined: September 25, 2013
KitMaker: 86 posts
AeroScale: 83 posts
Joined: September 25, 2013
KitMaker: 86 posts
AeroScale: 83 posts
Posted: Thursday, September 26, 2013 - 01:32 AM UTC
So that is the thought behind it. I already figured there would be more to the black start then just a quick way of doing all the instruments. I need to try thta once. See wat i think of it.
Joel_W
Associate Editor
New York, United States
Joined: December 04, 2010
KitMaker: 11,666 posts
AeroScale: 7,410 posts
Joined: December 04, 2010
KitMaker: 11,666 posts
AeroScale: 7,410 posts
Posted: Thursday, September 26, 2013 - 03:30 AM UTC
Quoted Text
So that is the thought behind it. I already figured there would be more to the black start then just a quick way of doing all the instruments. I need to try thta once. See wat i think of it.
Cliff, pre-shading with black or a very dark color, usually is done for panel lines, separation of flying surfaces, and areas that would naturally be in shadows (this really applies to armor subjects). If you take a good look at many pre-shaded aircraft, you can see that the pre-shading after the base color is applied is still to pronounced. That's my main concern and objection. When you completely prime with flat black, and apply thin, light color coats, the base black becomes less and less visible but it's a very smooth transition, and something that you can control and vary. At some point where you feel the shading is right, I stop, and lighten the color a few shades, thin even more, reduce the psi, then work from the centers out for further color modulation.
Joel
cliffnetherlands
Zuid-Holland, Netherlands
Joined: September 25, 2013
KitMaker: 86 posts
AeroScale: 83 posts
Joined: September 25, 2013
KitMaker: 86 posts
AeroScale: 83 posts
Posted: Thursday, September 26, 2013 - 03:57 AM UTC
I agree with you Joel that pre shading, when done wrong is to overpowering. Especially when somebody then also starts adding to much of a panelwash. You end up with cartoon airplanes.
I saw a build log where somebody used "dark sand brown" under grey as a preshade. And it already looked a lot better.
to use blackprimer to tone down lighter colours is new to me. So i was suprised to see what Tinbanger was doing. Your explanation does make sense. I'm already intrested to try it out.
Would you only use it in interiors or also outside? on the skin i mean...And would you then also use a lighter primer to tone down a dark colour?
cheers Cliff
Posted: Thursday, September 26, 2013 - 04:07 AM UTC
Thank you all!
I came up with the idea of useing Micro-Mask as a test for another project I am working on, one thing i would do is apply a thicker coat.
For colour modulation check ttps://aeroscale.kitmaker.net//features/86&page=3
Mike Still lightens colours in proportion to scale.
I came up with the idea of useing Micro-Mask as a test for another project I am working on, one thing i would do is apply a thicker coat.
For colour modulation check ttps://aeroscale.kitmaker.net//features/86&page=3
Mike Still lightens colours in proportion to scale.
Joel_W
Associate Editor
New York, United States
Joined: December 04, 2010
KitMaker: 11,666 posts
AeroScale: 7,410 posts
Joined: December 04, 2010
KitMaker: 11,666 posts
AeroScale: 7,410 posts
Posted: Thursday, September 26, 2013 - 04:21 AM UTC
Quoted Text
I agree with you Joel that pre shading, when done wrong is to overpowering. Especially when somebody then also starts adding to much of a panelwash. You end up with cartoon airplanes.
I saw a build log where somebody used "dark sand brown" under grey as a preshade. And it already looked a lot better.
to use blackprimer to tone down lighter colours is new to me. So i was suprised to see what Tinbanger was doing. Your explanation does make sense. I'm already intrested to try it out.
Would you only use it in interiors or also outside? on the skin i mean...And would you then also use a lighter primer to tone down a dark colour?
cheers Cliff
Cliff, I'm going to use flat black pre-shading/primer on my A-20G build. I've used it on several armor builds, and the results were exactly what I wanted.
And no, I can't see any value in using a lighter primer under a darker color, since it would have the exact opposite effect if any, as what I'm trying to accomplish with the flat black primer. Primer is by default neutral gray, and has little to no effect on mid tones and darker colors, but would tone down bright, lite colors. That's why a white primer is often used with car paint colors like white, red, yellow, bright green, etc.
The primary use for primer is to give paint a good surface to bite into. The glossier the color, the harder it has in getting a bite on the surface it's applied to.
Joel
cliffnetherlands
Zuid-Holland, Netherlands
Joined: September 25, 2013
KitMaker: 86 posts
AeroScale: 83 posts
Joined: September 25, 2013
KitMaker: 86 posts
AeroScale: 83 posts
Posted: Thursday, September 26, 2013 - 06:38 AM UTC
:-) Don't worry. I know what the primery job for a primer is.
It's more like this. The dutch forum where i am on is really nice. But i did notice that there is a established way of building an airplane. Nothing wrong with that. But by reading foreign modelmagazines i already noticed there are more ways of achieving things.
The reason why i became a member here, is because i was hoping to find more different ways of achieving results. And i promised myself to be open minded and to really the most of those new techniques. So that's where i was coming from with my questions. Thanks for explaining. I really appriciate it
cliff
windysean
Wisconsin, United States
Joined: September 11, 2009
KitMaker: 1,917 posts
AeroScale: 563 posts
Joined: September 11, 2009
KitMaker: 1,917 posts
AeroScale: 563 posts
Posted: Thursday, September 26, 2013 - 07:38 AM UTC
Quoted Text
:-) Don't worry. I know what the primery job for a primer is.
It's more like this. The dutch forum where i am on is really nice. But i did notice that there is a established way of building an airplane. Nothing wrong with that. But by reading foreign modelmagazines i already noticed there are more ways of achieving things.
The reason why i became a member here, is because i was hoping to find more different ways of achieving results. And i promised myself to be open minded and to really the most of those new techniques. So that's where i was coming from with my questions. Thanks for explaining. I really appriciate it
cliff
Cliff, that's a good way of thinking. The problem I have is that I read all these good ideas here and in magazines, and then I go to my workbench and build exactly as I always have. Go figure, the results never change.
Maybe better planning and less rushing. Regardless, I'll keep watching how it's done here.
thanks, everyone!
-Sean H.
Posted: Tuesday, October 08, 2013 - 11:05 AM UTC
Hi.
Here is an update, fuselage together with engine and wings.
Joel_W
Associate Editor
New York, United States
Joined: December 04, 2010
KitMaker: 11,666 posts
AeroScale: 7,410 posts
Joined: December 04, 2010
KitMaker: 11,666 posts
AeroScale: 7,410 posts
Posted: Wednesday, October 09, 2013 - 01:27 AM UTC
Richard, nice progress. Looking forward to some paint and even some weathering.
Joel
Joel
Posted: Wednesday, November 13, 2013 - 02:32 PM UTC
Some paint on the motor.
Posted: Saturday, November 23, 2013 - 08:13 AM UTC
Primed and Sky is now airbrushed on underside.
Posted: Saturday, November 30, 2013 - 07:20 AM UTC
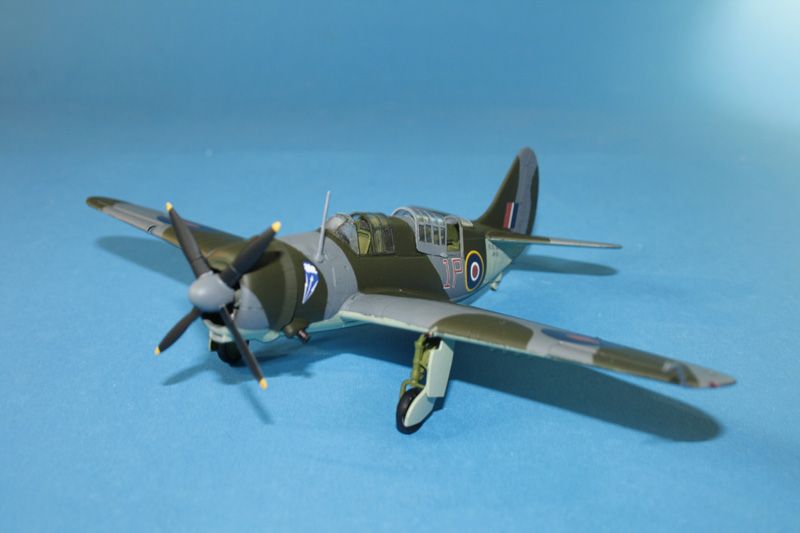
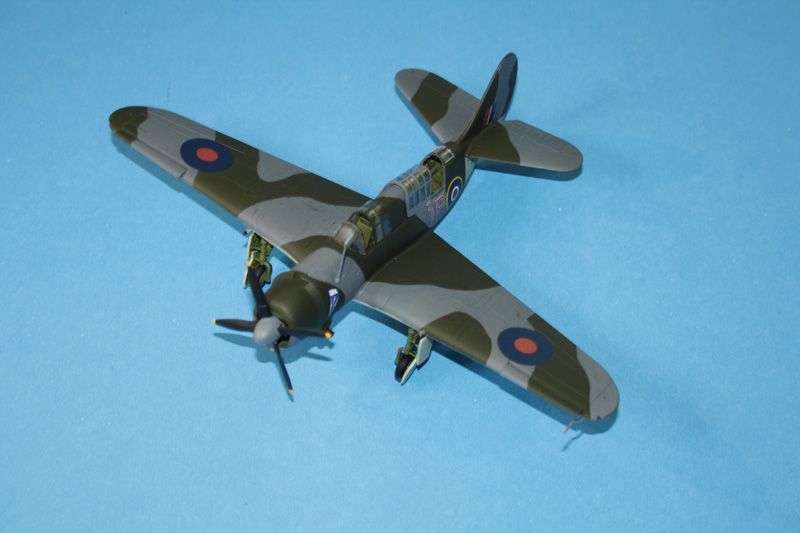
Finished on the last day of the campaign!
Thank you for looking in!
Jessie_C
British Columbia, Canada
Joined: September 03, 2009
KitMaker: 6,965 posts
AeroScale: 6,247 posts
Joined: September 03, 2009
KitMaker: 6,965 posts
AeroScale: 6,247 posts
Posted: Saturday, November 30, 2013 - 07:42 AM UTC
That's a beast of a different colour!
Posted: Saturday, November 30, 2013 - 07:58 AM UTC
Quoted Text
That's a beast of a different colour!
Thank you Jessica I used the Xtradecal colour guide and the decal quality was very good.