_GOTOBOTTOM
World War II
Discuss WWII and the era directly before and after the war from 1935-1949.
Hosted by Rowan Baylis
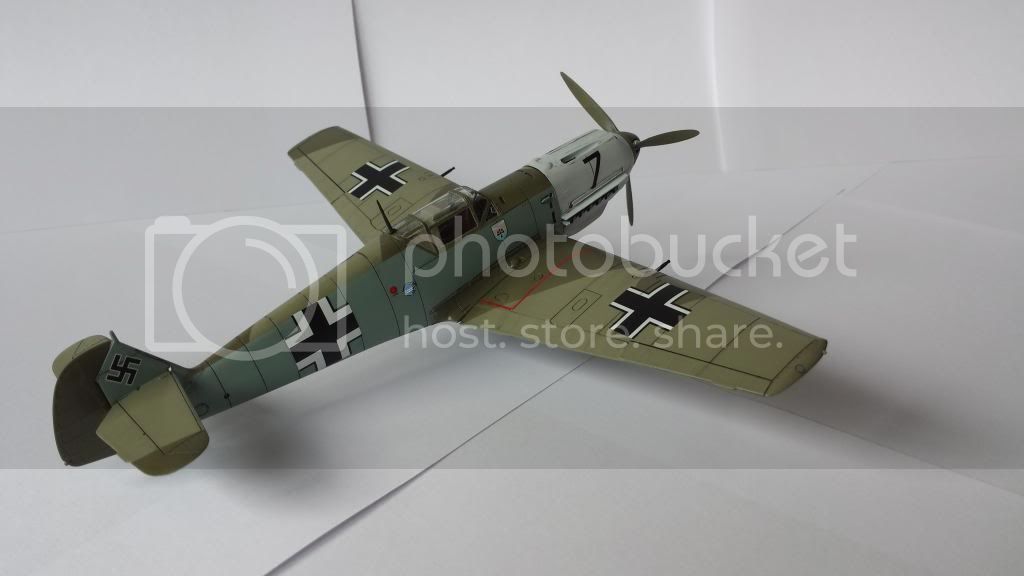
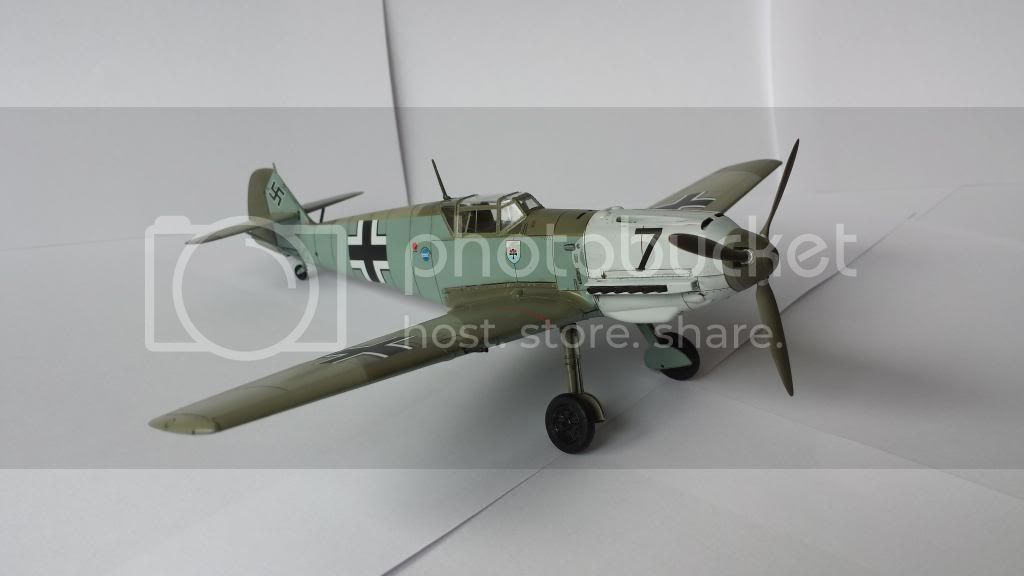
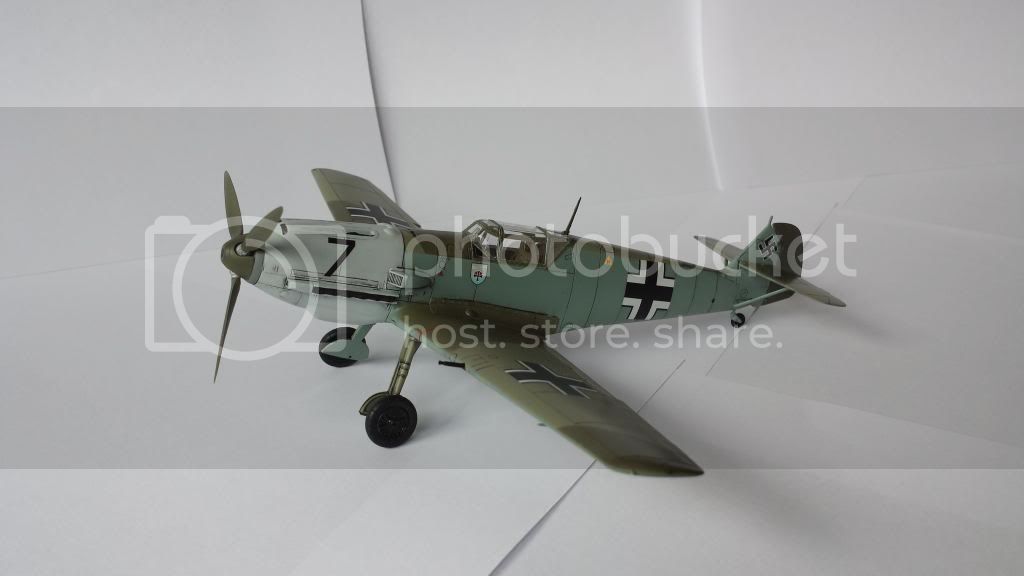
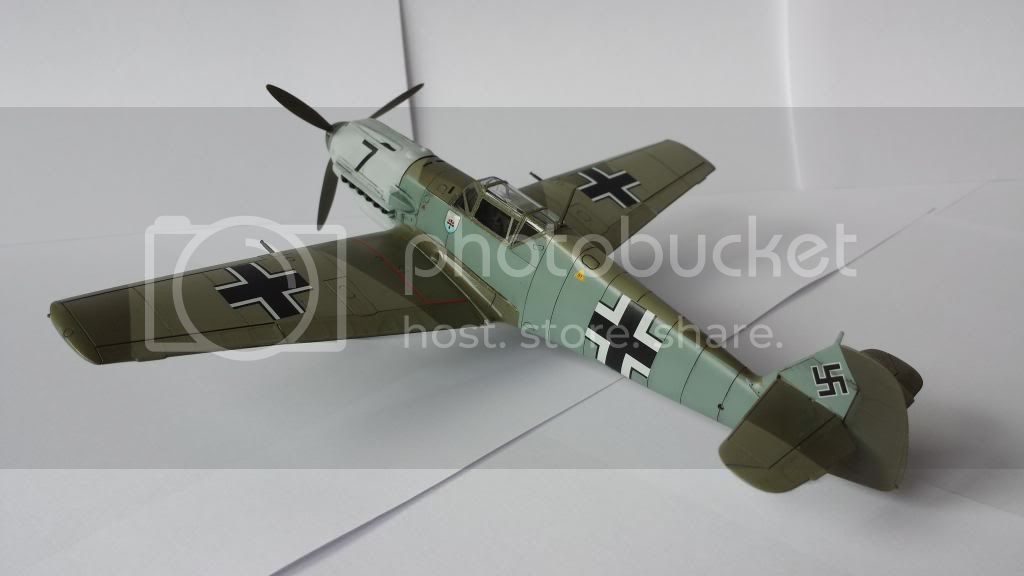
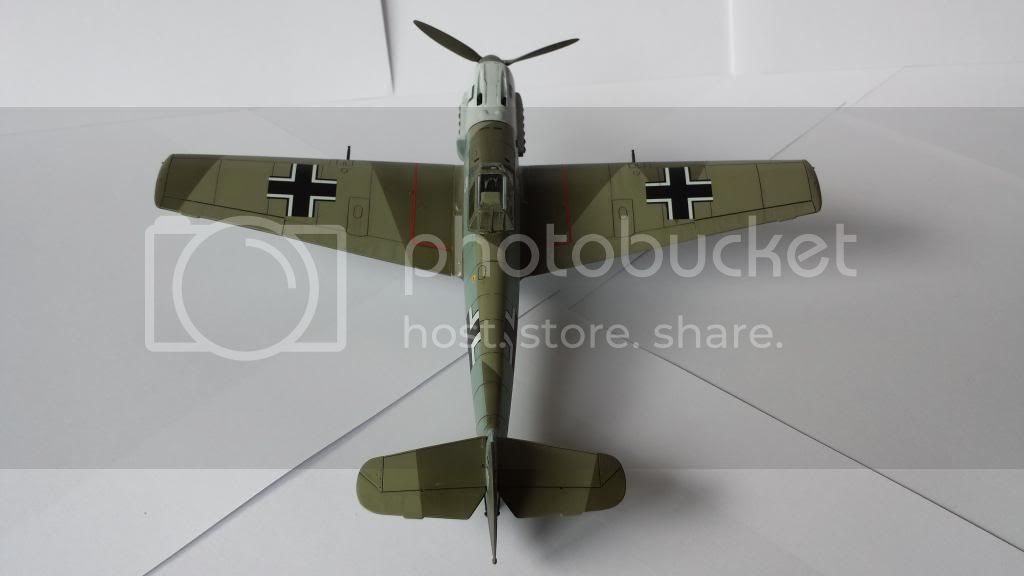
Tamiya 1/48 Bf 109 E-3 finished
Antoon3103
_VISITCOMMUNITY
Antwerpen, Belgium
Joined: March 31, 2012
KitMaker: 224 posts
AeroScale: 146 posts
Posted: Sunday, September 08, 2013 - 10:49 PM UTC
Hello,

Today i finished my Bf 109 from Tamiya. The kit is an easy build, i think it just took me 1 day for the building stage.
The kit is build out of the box.

As for markings, i choose one from Aeromasters Battle of Britain schemes, namely this one.


And this is the result.


Comment and critique welcome.

Tony
GhostHawk
_VISITCOMMUNITY
Cordoba, Argentina
Joined: January 27, 2011
KitMaker: 268 posts
AeroScale: 264 posts
Posted: Sunday, September 08, 2013 - 11:30 PM UTC
Hello:

I like it...!!!

Very clean Indeed...! it looks like new... But very real..!

Congrats & BTW

Diego
chrism
_VISITCOMMUNITY
United States
Joined: January 05, 2012
KitMaker: 160 posts
AeroScale: 156 posts
Posted: Monday, September 09, 2013 - 01:49 AM UTC
Nice work, it looks great!
Joel_W
Staff MemberAssociate Editor
AUTOMODELER
_VISITCOMMUNITY
New York, United States
Joined: December 04, 2010
KitMaker: 11,666 posts
AeroScale: 7,410 posts
Posted: Monday, September 09, 2013 - 04:09 AM UTC
Tony, really looks like a solid OOB build straight from the factory. Your paint camo scheme and decaling came out perfect. Well done.
Joel
Antoon3103
_VISITCOMMUNITY
Antwerpen, Belgium
Joined: March 31, 2012
KitMaker: 224 posts
AeroScale: 146 posts
Posted: Monday, September 09, 2013 - 08:10 AM UTC
Guys,

Thanks for taking the time to put up some comment.
On my next build i try to weather a bit more.

Tony
Joel_W
Staff MemberAssociate Editor
AUTOMODELER
_VISITCOMMUNITY
New York, United States
Joined: December 04, 2010
KitMaker: 11,666 posts
AeroScale: 7,410 posts
Posted: Monday, September 09, 2013 - 09:07 AM UTC
Tony, to weather or not to weather is entirely up to you. Every aircraft looked new right after painting.
Joel
GhostHawk
_VISITCOMMUNITY
Cordoba, Argentina
Joined: January 27, 2011
KitMaker: 268 posts
AeroScale: 264 posts
Posted: Monday, September 09, 2013 - 09:15 AM UTC
I Agree with Joel...

It's matter of what you want to represent...

Thanks for Share..!

Diego
Merlin
Staff MemberSenior Editor
AEROSCALE
#017
_VISITCOMMUNITY
United Kingdom
Joined: June 11, 2003
KitMaker: 17,582 posts
AeroScale: 12,795 posts
Posted: Monday, September 09, 2013 - 09:16 AM UTC

Quoted Text

Guys,

Thanks for taking the time to put up some comment.
On my next build i try to weather a bit more.

Tony


Hi Tony

Really nice build! Maybe I'd try some exhaust staining, but I wouldn't go overboard - a lot of weathering you see on models is frankly overdone.

One thing that would be worth adding though is the radio aerial. It's little details like (call it "one step beyond the box") that really bring a model to life for me.

Keep 'em coming! - and all the best

Rowan
Antoon3103
_VISITCOMMUNITY
Antwerpen, Belgium
Joined: March 31, 2012
KitMaker: 224 posts
AeroScale: 146 posts
Posted: Monday, September 09, 2013 - 04:44 PM UTC
Hi Rowan,

I really want to try for the aerial.
Can U point me in the way as on how to do it, and what material best to use?

Thanx in advance

Tony
Jessie_C
_VISITCOMMUNITY
British Columbia, Canada
Joined: September 03, 2009
KitMaker: 6,965 posts
AeroScale: 6,247 posts
Posted: Monday, September 09, 2013 - 05:13 PM UTC
You can use invisible mending thread or stretched sprue. I like the invisible thread to do my antennas but I've used sprue as well. When I did my JAL DC-7 I used sprue. I drilled the leading edge of the tail and superglued in the antenna line after the model was painted.

Once I was certain that the glue was solidly set, I used a pair of hemostats as a weight, clipped them to the antenna line and hung the model nose down. I applied a drop of superglue to the antenna mast on top of the nose, let the weight of the hemostat draw the sprue tight and held the model so the antenna line contacted the drop of glue on the antenna mast. Then I let the glue dry (with a little help from some accelerator) and clipped the excess off.


The Bf 109 has a little mast on the tip of the vertical stabiliser. You can file a tiny notch in the tip of it for the sprue to sit, or you can replace it with a section of microtube. If you use the microtube, you need to cut off the mast and drill a hole for the tube to seat into. Then feed the antenna line into it and glue it securely. Attach the antenna to the mast behind the cockpit using the same dangling method I described above. There's a lead-in antenna which goes from the side of the fuselage as shown in this drawing. To fit it, drill a tiny hole in the fuselage, securely glue in your antenna line, hold the model upside down and let the hemostats pull it tightly against the longer antenna. Glue it with a drop of superglue and trim the excess when it's dry. Antenna lines are pretty much the last thing you do with the build. The whole process takes longer to explain than to do
Antoon3103
_VISITCOMMUNITY
Antwerpen, Belgium
Joined: March 31, 2012
KitMaker: 224 posts
AeroScale: 146 posts
Posted: Tuesday, September 10, 2013 - 12:28 AM UTC
Jessica,

Thanks for the step by step answer.
I will try it on the Bf 109 and let u know the result.

Many thanks

Tony
Joel_W
Staff MemberAssociate Editor
AUTOMODELER
_VISITCOMMUNITY
New York, United States
Joined: December 04, 2010
KitMaker: 11,666 posts
AeroScale: 7,410 posts
Posted: Tuesday, September 10, 2013 - 03:49 AM UTC
Tony, I personally like using stretched sprue for antennas over fishing line, etc. as you can vary the thickness of it by how you stretch the heated sprue. I use a different method then Jessica. I glue the sprue to each attachment point with CCA glue and leave it just a little slack. Once the glue has dried in a few min. I pass a cigarette between the sprue and the top of the airplane fuselage, moving the cigarette slowly. The sprue will just pop tight. Takes a little practice, but I've been doing it this way for 40 years. And no I don't smoke, I just ask my wife to light up and use her cigarette. Takes less then a min for the whole deal.

Rowan, you hit the "nail" right on the head. Way too many models are weathered to the point that the aircraft looks like it would never get off the ground. I personally like to use what I call the "Used but not Abused" look. Especially for USA/USN aircraft of WW11. Best way to handle weathering is to find pictures of the real deal.

Joel
Antoon3103
_VISITCOMMUNITY
Antwerpen, Belgium
Joined: March 31, 2012
KitMaker: 224 posts
AeroScale: 146 posts
Posted: Tuesday, September 10, 2013 - 04:43 AM UTC
Joel,

Thanks for the tip. I give that a try also.
However where a non smoking family here, so i have to find a substitude for the cigarette....

Tony
Jessie_C
_VISITCOMMUNITY
British Columbia, Canada
Joined: September 03, 2009
KitMaker: 6,965 posts
AeroScale: 6,247 posts
Posted: Tuesday, September 10, 2013 - 04:52 AM UTC
Incense sticks work well for that, plus they smell nice
Joel_W
Staff MemberAssociate Editor
AUTOMODELER
_VISITCOMMUNITY
New York, United States
Joined: December 04, 2010
KitMaker: 11,666 posts
AeroScale: 7,410 posts
Posted: Tuesday, September 10, 2013 - 05:39 AM UTC

Quoted Text

Incense sticks work well for that, plus they smell nice


Thanks Jessica for the option. Thought about a birthday candle, but the open flame would just pop the sprue.

Joel
golfermd
_VISITCOMMUNITY
Maryland, United States
Joined: March 01, 2013
KitMaker: 152 posts
AeroScale: 98 posts
Posted: Sunday, September 15, 2013 - 05:27 AM UTC
Nice work Tony!
Antoon3103
_VISITCOMMUNITY
Antwerpen, Belgium
Joined: March 31, 2012
KitMaker: 224 posts
AeroScale: 146 posts
Posted: Sunday, September 15, 2013 - 05:43 PM UTC
Thanks Dan

Tony
 _GOTOTOP