_GOTOBOTTOM
World War II: USA
Aircraft of the United States in WWII.
Hosted by Rowan Baylis
Build Log P-51D Build Log
golfermd
_VISITCOMMUNITY
Maryland, United States
Joined: March 01, 2013
KitMaker: 152 posts
AeroScale: 98 posts
Posted: Wednesday, September 18, 2013 - 07:13 AM UTC
Finally able to upload some photos to photobucket. I've completed the cockpit and installed it. Here's where it stands right now:


Jessie_C
_VISITCOMMUNITY
British Columbia, Canada
Joined: September 03, 2009
KitMaker: 6,965 posts
AeroScale: 6,247 posts
Posted: Wednesday, September 18, 2013 - 07:25 AM UTC
That kit goes together so well that I got to the same point so quickly I wondered what I had left undone
golfermd
_VISITCOMMUNITY
Maryland, United States
Joined: March 01, 2013
KitMaker: 152 posts
AeroScale: 98 posts
Posted: Sunday, September 22, 2013 - 01:43 PM UTC
One piece that doesn't fit so well, Jessica, is the canopy collar. It's going to require some putty to fill the large space. It's not cemented in place yet. I wanted to see how it fit first. Obviously, some work to do on it.

Joel_W
Staff MemberAssociate Editor
AUTOMODELER
_VISITCOMMUNITY
New York, United States
Joined: December 04, 2010
KitMaker: 11,666 posts
AeroScale: 7,410 posts
Posted: Monday, September 23, 2013 - 05:22 AM UTC
Dan, the canopy collar slides. Most canopies are shown in the open position on the finished model. How are you going to display it on your build? If in the open position, check the actual fit for that. With less common surface area between the collar and the fuselage, the fit should be that much better, if not perfect. Certainly will take less work to bring it up to standards.

Here's a picture of my Brother's finished build that shows how his collar fit straight out of the box.
Joel

GastonMarty
_VISITCOMMUNITY
Quebec, Canada
Joined: April 19, 2008
KitMaker: 595 posts
AeroScale: 507 posts
Posted: Tuesday, September 24, 2013 - 09:13 AM UTC

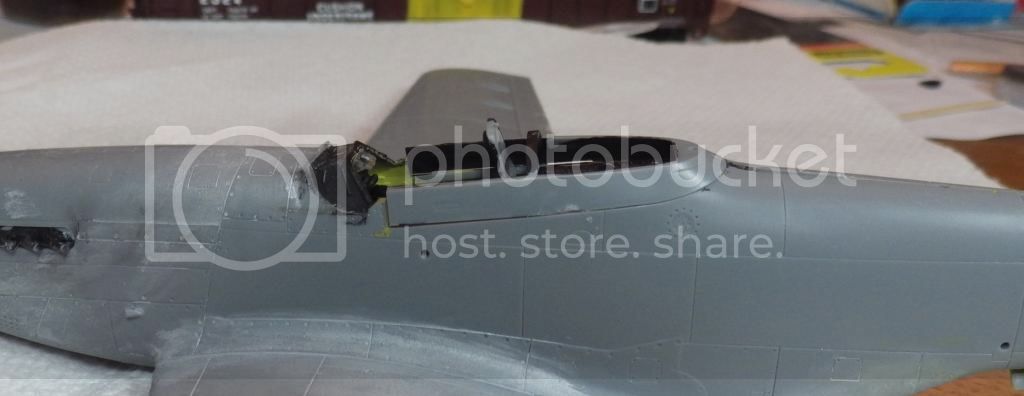
The "collar" fits poorly in the closed position, I can confirm that, but it is not so bad that it can't be done. It is quite tiresome though...

I recommend getting the Squadron/Falcon canopy, as it can help in both the accuracy of the windshield dimensions (slightly smaller and exactly correct on the Falcon part) and the sit of the sliding hood when open. Maybe even when closed. It also elliminates the issue of the joint of the "collar" to the clear plastic, the sliding hood being one piece...

Getting the "sit" of the canopy right when open could be another matter, as it tends to be depicted too "loose" at the rear edge...

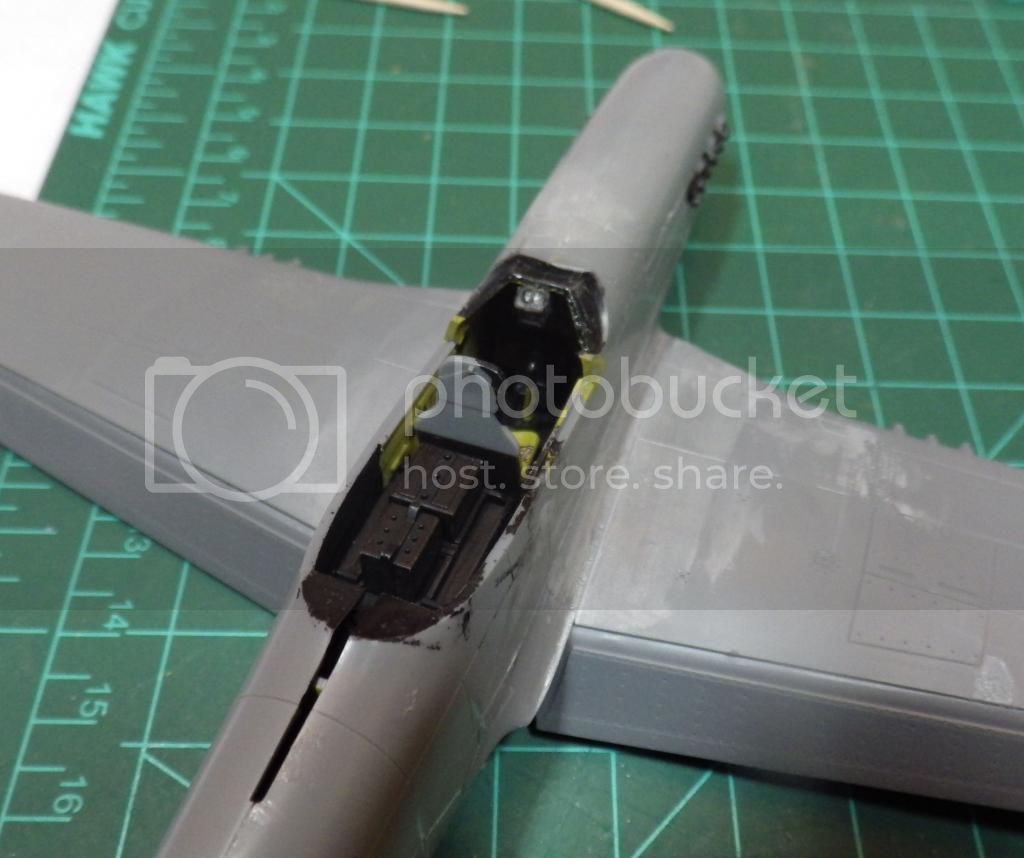
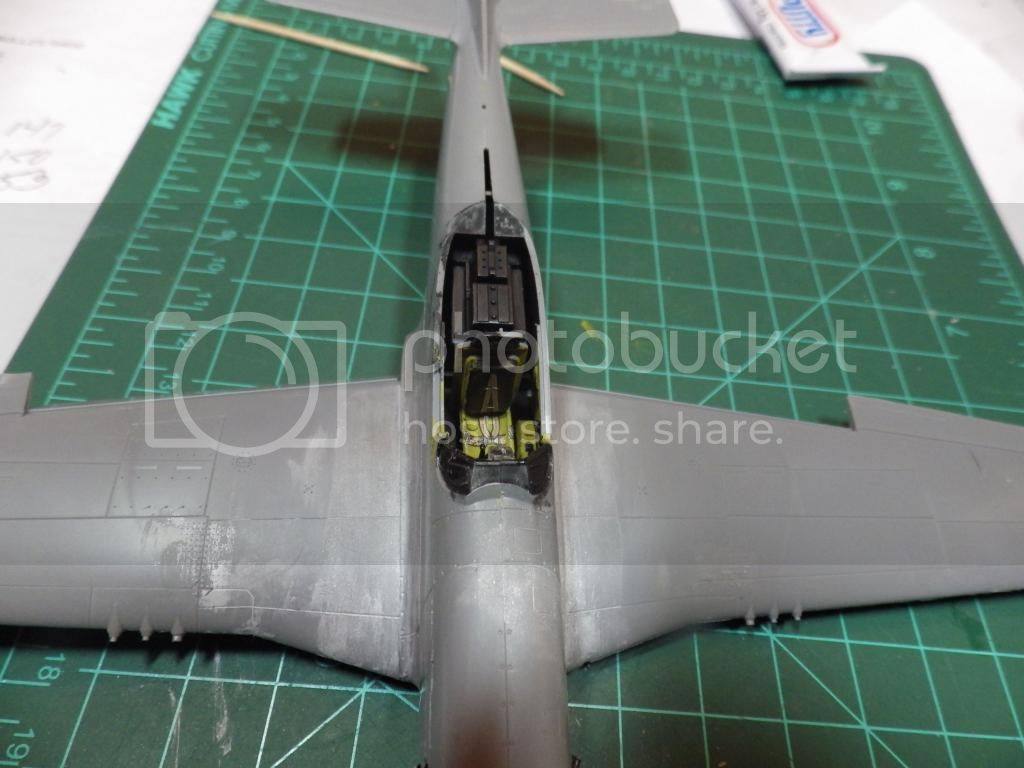
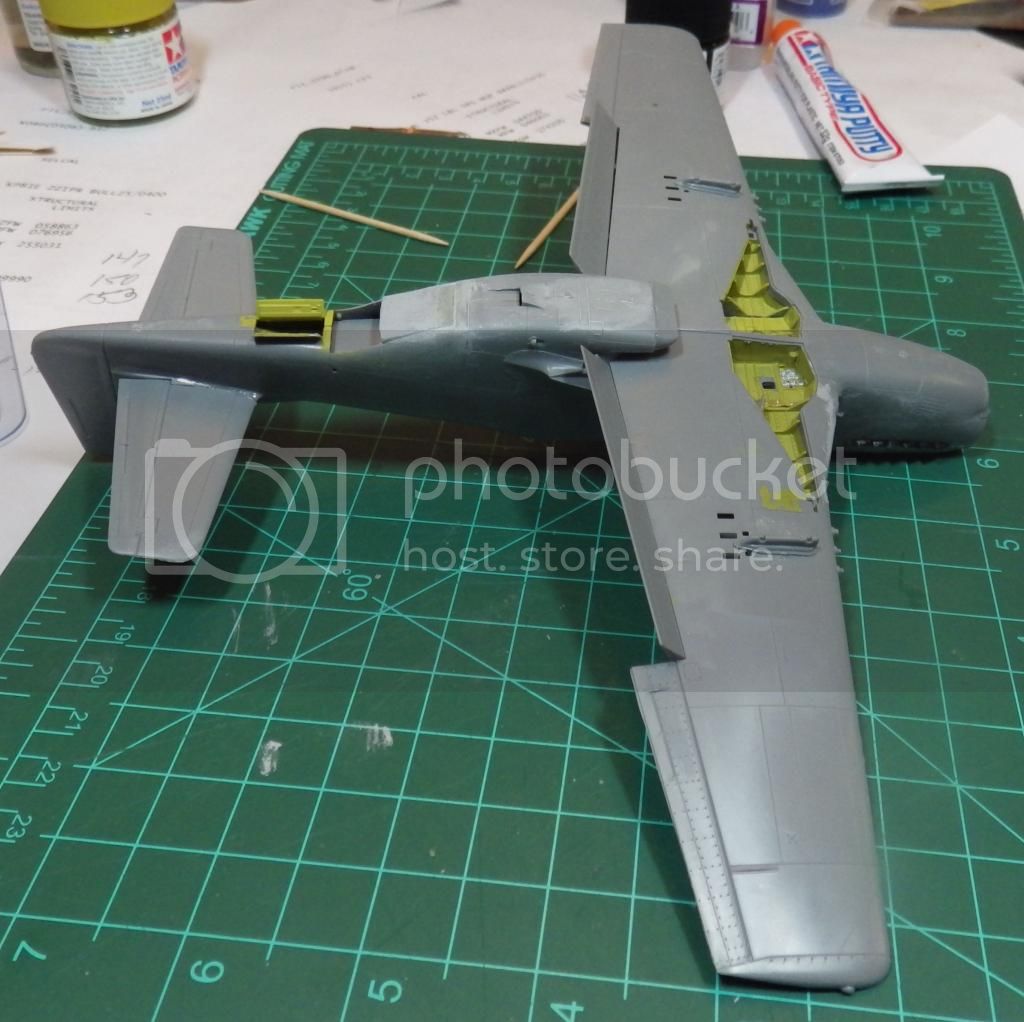
One other thing to watch out for on this kit is the dihedral, which looks ok when dry-fitting the fuselage empty, but the presence of the cockpit floor actually "fattens" the fuselage so that on final assembly the wingroot fit still looks perfect, but the wings are now actually pushed into usually a much too flat dihedral... Even if assembled, if the problem is there, a bit of judicious bending could still improve things, as the fuselage will not cave in to bending if you are careful...

Gaston


golfermd
_VISITCOMMUNITY
Maryland, United States
Joined: March 01, 2013
KitMaker: 152 posts
AeroScale: 98 posts
Posted: Thursday, October 03, 2013 - 06:46 AM UTC
Joel, I had originally thought of displaying it in the closed position. But, I'm beginning to rethink that. And thanks for the recommendations Gaston. Definitely food for thought. Right now I'm on hold because I had to send my Badger 360 to Badger because the air valve was stuck in the open position. I talked with a repair tech on the phone, but we couldn't get the plunger out. Rather than breaking it I decided it was worth the time to send it to someone who has the proper tools and knowledge to get it fixed. Badger has great customer service, basically I pay for shipping both ways, and if a part is more than $5 you get it at 60% off.
golfermd
_VISITCOMMUNITY
Maryland, United States
Joined: March 01, 2013
KitMaker: 152 posts
AeroScale: 98 posts
Posted: Thursday, October 17, 2013 - 11:42 AM UTC
Still in my holding pattern awaiting the return of the airbrush.
Joel_W
Staff MemberAssociate Editor
AUTOMODELER
_VISITCOMMUNITY
New York, United States
Joined: December 04, 2010
KitMaker: 11,666 posts
AeroScale: 7,410 posts
Posted: Friday, October 18, 2013 - 03:56 AM UTC

Quoted Text

Still in my holding pattern awaiting the return of the airbrush.


Dan, Did they give you any idea as to the time frame for repair and turn around?

Joel
golfermd
_VISITCOMMUNITY
Maryland, United States
Joined: March 01, 2013
KitMaker: 152 posts
AeroScale: 98 posts
Posted: Wednesday, October 30, 2013 - 05:44 AM UTC
Hurray! Airbrush is back. I decided to paint the tail with Model Masters Acrylic Insignia Red. Should this be used straight from the bottle or thinned? I thinned it 4:1 paint to thinner but still got some splotches. I won't be able to post new pictures for 2 weeks.
golfermd
_VISITCOMMUNITY
Maryland, United States
Joined: March 01, 2013
KitMaker: 152 posts
AeroScale: 98 posts
Posted: Friday, November 01, 2013 - 02:21 AM UTC
The tail area has been painted. Pretty pleased with the Model Masters Insignia Red. I ended up using it straight from the bottle as a 4:1 ratio still proved to leave splotchy areas. Now masking so that I can paint the aluminum color parts of fuselage. Still about 10 days before I can take pictures.
golfermd
_VISITCOMMUNITY
Maryland, United States
Joined: March 01, 2013
KitMaker: 152 posts
AeroScale: 98 posts
Posted: Thursday, November 14, 2013 - 02:13 PM UTC
Added nose top color.

 _GOTOTOP