

Hey guys I'm working on my first 1/35 scale helicopter, as the title says, it is the academy pave hawk, I got the cock pit and everything all assembled and have the interior halves painted, and when I went to assemble them tonight, I can't anything to really line up, and fit correctly, also the Academy instructions are really vague and not very good, but in order to get the upper dash and instrument panel to fit, I had to take one of the center counsel's out.
Also the floor, where the pilots feet are, is above where you install the lower nose glass, it's not level with the bottom of the glass, if that makes any sense
Rotary Wing
Discuss helicopters and other rotary wing aircraft from any era.
Discuss helicopters and other rotary wing aircraft from any era.
Hosted by Gino P. Quintiliani
1/35 Academy Pavehawk assembly trouble

andromeda673

Joined: July 30, 2013
KitMaker: 584 posts
AeroScale: 22 posts
Posted: Saturday, October 05, 2013 - 12:02 PM UTC
grubbyfingers

Joined: September 07, 2007
KitMaker: 404 posts
AeroScale: 339 posts

Posted: Saturday, October 05, 2013 - 12:52 PM UTC
Hi G.
I can't comment on the fit of of the internal bits as I haven't built one of these yet, but as far as the pilot's feet go, I think they should be at floor level, which is well above the bottom of the chin windows and level with the bottom of the cockpit doors.
I you post some pics, we might be able to see where things have gone wrong.
Grubby.


HeavyArty

Joined: May 16, 2002
KitMaker: 17,694 posts
AeroScale: 1,728 posts
Posted: Saturday, October 05, 2013 - 02:20 PM UTC
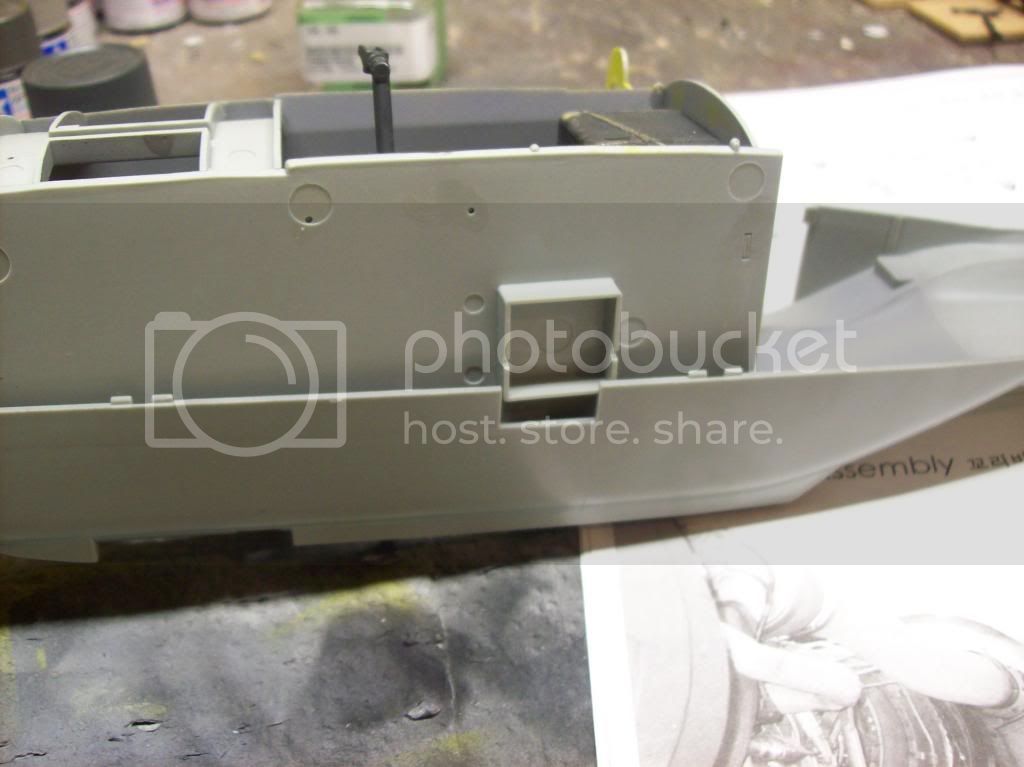
The main problem with the inner floor is the height of enclosure for the hoist hook underneath. It needs to be reduced by about 2mm.
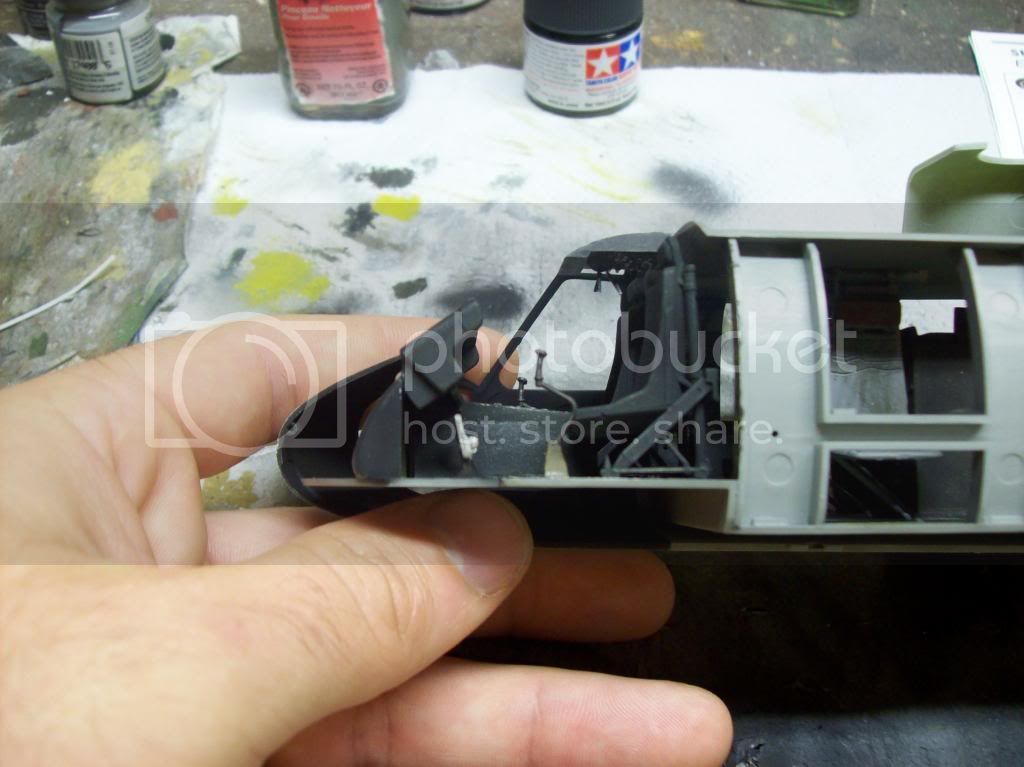
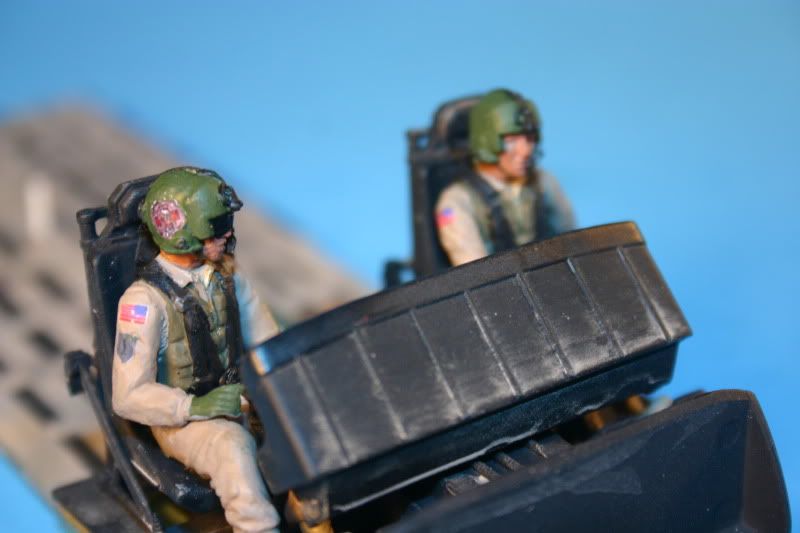
The instrument panel should fit fine. It sits behind and above the window opening and leans at about a 40 degree angle, see below.
On the floor in front of the pilots' area, it splits the front windows at the level of the door bottoms. If you want to make it look right, build a little wall on the two inner sides of the floor to blank off the open space under the floor. The rear piece should have a lightening hole in the middle of it, and a seam line on the side piece. You can see what I mean below.
Hope that helps.
andromeda673
Joined: July 30, 2013
KitMaker: 584 posts
AeroScale: 22 posts
Posted: Saturday, October 05, 2013 - 03:34 PM UTC
what a huge help a few pictures make, looks like I did assemble mine right, although I have a extra center counsel that I can't use, and didn't use cause when I assembled everything by the instructions and tried to put the halves together, the top of the instrument panel sat WAY above the and forward of where the canopy glass goes.
I have since taken it all apart and re-assembled it, minus the one center counsel, and it seems to look like yours now.
I have since taken it all apart and re-assembled it, minus the one center counsel, and it seems to look like yours now.
andromeda673
Joined: July 30, 2013
KitMaker: 584 posts
AeroScale: 22 posts
Posted: Sunday, October 06, 2013 - 03:06 AM UTC
here are some pics of where I'm at, and I'm assuming I have assembled something totally wrong, because the top of the instrument panel goes way under the nose, and I can't get the cockpit assemblt to go forward all the way in the fuselage halves. Also the square opening doesn't line up at all, and simply does not fit at all in the halves.

I don't know what happened with the cock pit assembly, but it's not even close to fitting. And like I said with the other center counsel assembly in, the instrument panel now sits way too high and way too far forward.


I don't know what happened with the cock pit assembly, but it's not even close to fitting. And like I said with the other center counsel assembly in, the instrument panel now sits way too high and way too far forward.
HeavyArty
Joined: May 16, 2002
KitMaker: 17,694 posts
AeroScale: 1,728 posts
Posted: Sunday, October 06, 2013 - 03:25 AM UTC
This pic...
Is what I am talking about here...
"The main problem with the inner floor is the height of enclosure for the hoist hook underneath. It needs to be reduced by about 2mm."
Sand or cut down the box under the floor about 2mm.
On the IP/center console, it looks as though your center console is too far forward. The center console should come farther back between the seats, almost to the step down in the floor.
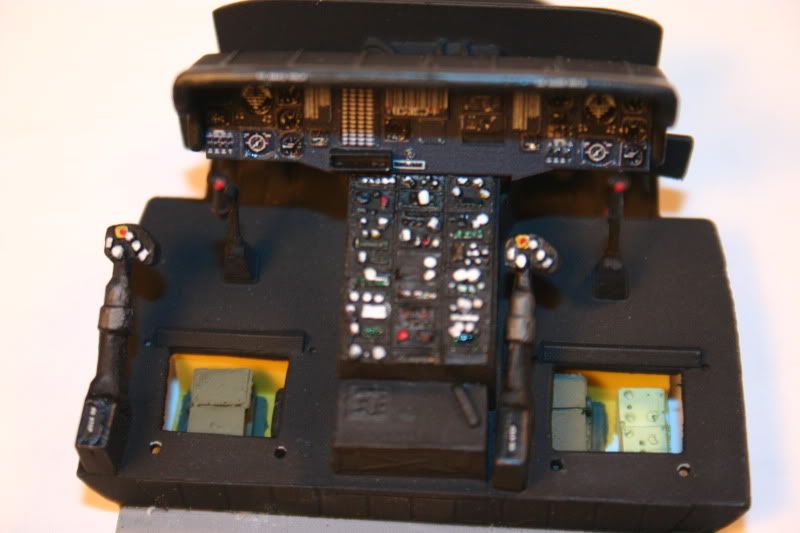
There should also be a gap between the back of the IP and the front wall attached to the floor.
Hope that explains it better.
Is what I am talking about here...
"The main problem with the inner floor is the height of enclosure for the hoist hook underneath. It needs to be reduced by about 2mm."
Sand or cut down the box under the floor about 2mm.
On the IP/center console, it looks as though your center console is too far forward. The center console should come farther back between the seats, almost to the step down in the floor.
There should also be a gap between the back of the IP and the front wall attached to the floor.
Hope that explains it better.
andromeda673
Joined: July 30, 2013
KitMaker: 584 posts
AeroScale: 22 posts
Posted: Sunday, October 06, 2013 - 06:36 AM UTC
ok that helps some, I appreciate it, what about the other piece of the console, the instructions show two pieces.
HeavyArty
Joined: May 16, 2002
KitMaker: 17,694 posts
AeroScale: 1,728 posts
Posted: Sunday, October 06, 2013 - 07:17 AM UTC
If you are talking about parts G18 and G20, they attach to the aft end of the lower console, part G19, and hangs back, over the edge into the rear part of the cabin. The lower rear edge of part G18 & G20 should be on the edge of where the cabin floor steps down.
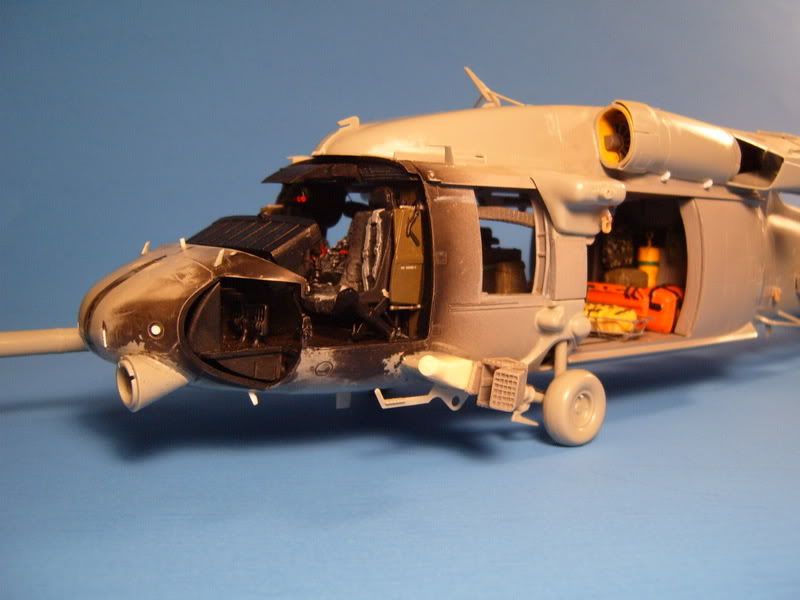
Not the same exact part (Cobra Company's resin HH-60G interior), but you get the idea.
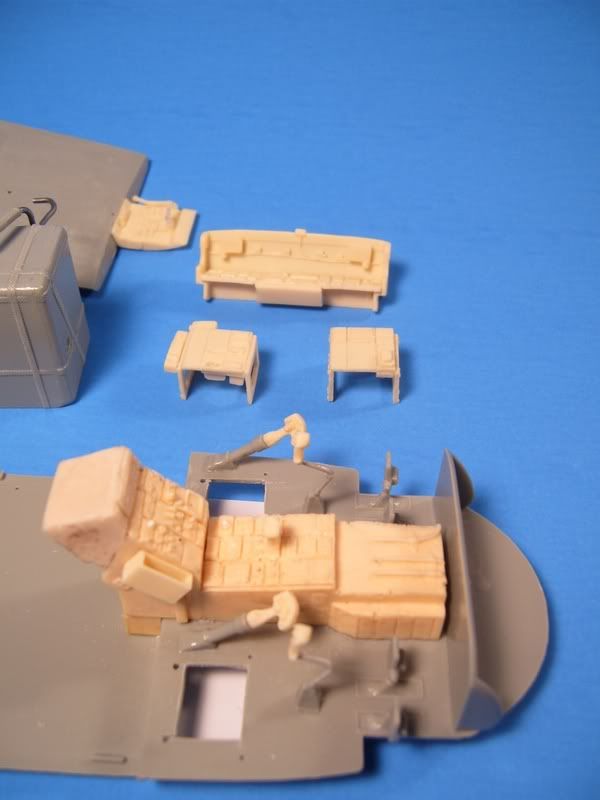
Not the same exact part (Cobra Company's resin HH-60G interior), but you get the idea.
andromeda673
Joined: July 30, 2013
KitMaker: 584 posts
AeroScale: 22 posts
Posted: Sunday, October 06, 2013 - 08:45 AM UTC
ok I totally get it now, thank you!
I had assumed that everything needed to fit flush, I didn't realize that the last part of the counsel sits at that angle, and hangs over, thank you very much, I think I get it now.
I will try assembly again on the counsel and see what happens.
I had assumed that everything needed to fit flush, I didn't realize that the last part of the counsel sits at that angle, and hangs over, thank you very much, I think I get it now.
I will try assembly again on the counsel and see what happens.
 |

WEB HOSTING BY


Copyright ©2021 AeroScale and Kitmaker Network, a subsidiary of Silver Star Enterprises
All Rights Reserved. Please read our Conditions of Use and Privacy Policy.
All Rights Reserved. Please read our Conditions of Use and Privacy Policy.