

I have Revell's 1/48 He 111H kit sitting in the closet, and I really want to tackle that monster. The problem is, I bought it when I was maybe 15 years old, and I completed a large portion of it, then didn't touch it for close to ten years.
The end result: horribly glommed-on paint job done by hand, and Grand Canyon-sized seams all over the place. I am an infinitely better modeler now than I was back then, and I would really like to start this beast from scratch. I have soaked miniatures and smaller kits in Castrol Super Cleaner in the past, but I kind of feel like soaking the whole kit is out of the question, because, well, it's enormous. I'd probably require a gallon or more of the stuff to adequately soak it. Are there any possible alternatives? I've heard that one can simply spray on oven cleaner or the Castrol stuff rather than soak it, but I'd rather get some opinions before I try that. I know for a fact that I painted it with enamels, I think I used mostly Humbrol paints when I first did the kit.
Thanks in advance!
General Aircraft
This forum is for general aircraft modelling discussions.
This forum is for general aircraft modelling discussions.
Hosted by Jim Starkweather
Stripping Enamel Paint off of a Monster

FinneganBojangles

Joined: May 01, 2013
KitMaker: 60 posts
AeroScale: 56 posts
Posted: Wednesday, November 20, 2013 - 09:16 AM UTC

Merlin

#017


Joined: June 11, 2003
KitMaker: 17,582 posts
AeroScale: 12,795 posts

Posted: Wednesday, November 20, 2013 - 09:38 AM UTC
Hi Kevin
When you say you want to start this kit from scratch, do you mean you want to dis-assemble it, or just repaint the exterior?
Oven cleaner will get the enamel paint off - as will soaking in really strong detergent - but soaking will definitely also attack the interior finish. However, oven cleaner can also (but not always) loosen parts. So, depending on how "deep" you want to go, a mix of both methods could be appropriate...
All the best
Rowan


Jessie_C

Joined: September 03, 2009
KitMaker: 6,965 posts
AeroScale: 6,247 posts
Posted: Wednesday, November 20, 2013 - 09:41 AM UTC
Rather than using "gallons" of oven cleaner, try spraying it into a large plastic bag with the model inside. Make sure that the bag doesn't have any holes before you do though 
FinneganBojangles
Joined: May 01, 2013
KitMaker: 60 posts
AeroScale: 56 posts
Posted: Wednesday, November 20, 2013 - 10:45 AM UTC
Quoted Text
Hi Kevin
When you say you want to start this kit from scratch, do you mean you want to dis-assemble it, or just repaint the exterior?
Oven cleaner will get the enamel paint off - as will soaking in really strong detergent - but soaking will definitely also attack the interior finish. However, oven cleaner can also (but not always) loosen parts. So, depending on how "deep" you want to go, a mix of both methods could be appropriate...
All the best
Rowan
I'm going to try and disassemble as much of it as I can. Eduard makes a pretty comprehensive PE package for this kit that I'm hoping Santa will bring for me.

Quoted Text
Rather than using "gallons" of oven cleaner, try spraying it into a large plastic bag with the model inside. Make sure that the bag doesn't have any holes before you do though
We'll be talking about a pretty big bag here. Like... full-size kitchen garbage bag. The wingspan on this sucker is close to 16". Is that a normal thing to do? Just... stuff the kit in a huge bag and spray the oven cleaner into it?
Grauwolf
#084
Joined: September 14, 2005
KitMaker: 2,485 posts
AeroScale: 95 posts

Posted: Wednesday, November 20, 2013 - 11:20 AM UTC
For the amount of time and quantity of oven cleaner and all
the scrubbing involved, my suggestion is to buy a new kit.
It is a Revell, so the cost is not that bad.
Cheers,
Joe
the scrubbing involved, my suggestion is to buy a new kit.
It is a Revell, so the cost is not that bad.
Cheers,
Joe
Robbd01

#323
Joined: February 13, 2013
KitMaker: 791 posts
AeroScale: 213 posts

Posted: Wednesday, November 20, 2013 - 11:20 AM UTC
Not sure if this stuff is still around but I heard it rox. Here's the link: http://modelingmadness.com/scott/accessories/sak.htm
Cheers

Cheers

FinneganBojangles
Joined: May 01, 2013
KitMaker: 60 posts
AeroScale: 56 posts
Posted: Wednesday, November 20, 2013 - 01:25 PM UTC
Quoted Text
For the amount of time and quantity of oven cleaner and all
the scrubbing involved, my suggestion is to buy a new kit.
It is a Revell, so the cost is not that bad.
Cheers,
Joe
Would if I could, but it seems to be long out of production.
 I've seen it pop up here and there online for a reasonable amount, though I'm a bit cash-strapped at the moment.
Quoted Text
Not sure if this stuff is still around but I heard it rox. Here's the link: http://modelingmadness.com/scott/accessories/sak.htm
Cheers
Thanks, I'll definitely look into that.
Upon fiddling around with the kit a bit, turns out not only were my painting kills very sub-par back then, but my gluing skills were too. The wings detached neatly with just a little bit of pressure. Looks like I'll be able to take care of it in much more manageable sub-assemblies.

md72
#439
Joined: November 05, 2005
KitMaker: 4,950 posts
AeroScale: 3,192 posts

Posted: Wednesday, November 20, 2013 - 01:31 PM UTC
Looks like Testors is still selling Easy Lift Off but it's kinda spendy..

Heatnzl
#435

Joined: February 14, 2013
KitMaker: 480 posts
AeroScale: 478 posts

Posted: Wednesday, November 20, 2013 - 02:28 PM UTC
Quoted Text
Rather than using "gallons" of oven cleaner, try spraying it into a large plastic bag with the model inside. Make sure that the bag doesn't have any holes before you do though
That is the method that I have found best even on ancient Airfix kits. It will slow you down so you will avoid losing small parts.
Cutting small parts from sprues inside a clear plastic bag is a great way way to foil the Carpet Monster as the "click of invisibility" as you cut can only exist within the confines of the bag.
md72
#439
Joined: November 05, 2005
KitMaker: 4,950 posts
AeroScale: 3,192 posts
Posted: Saturday, December 14, 2013 - 09:27 PM UTC
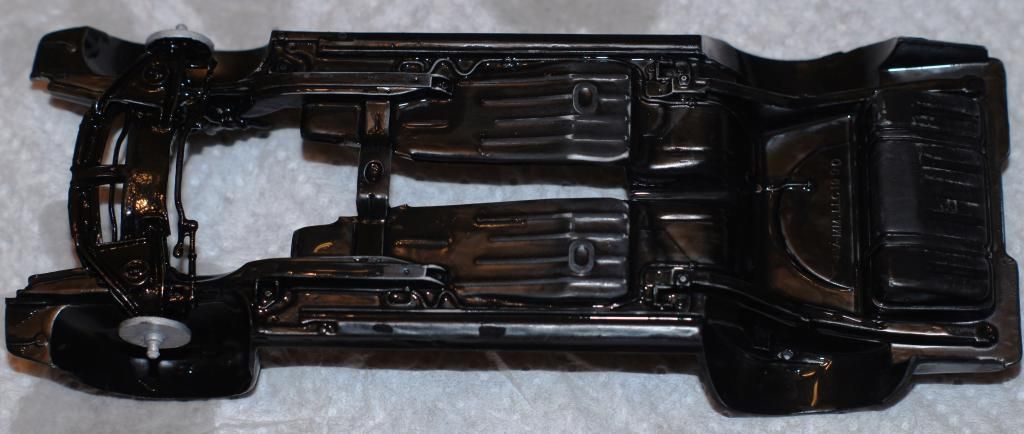
Well, I'm gonna give it a try:
A hand painted '69 Camaro chassis:
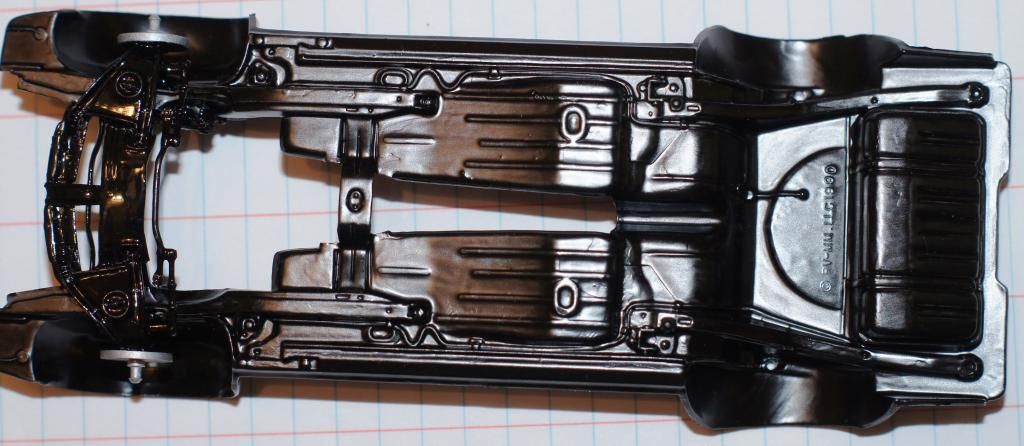
In a quart baggie with dollar store oven cleaner:
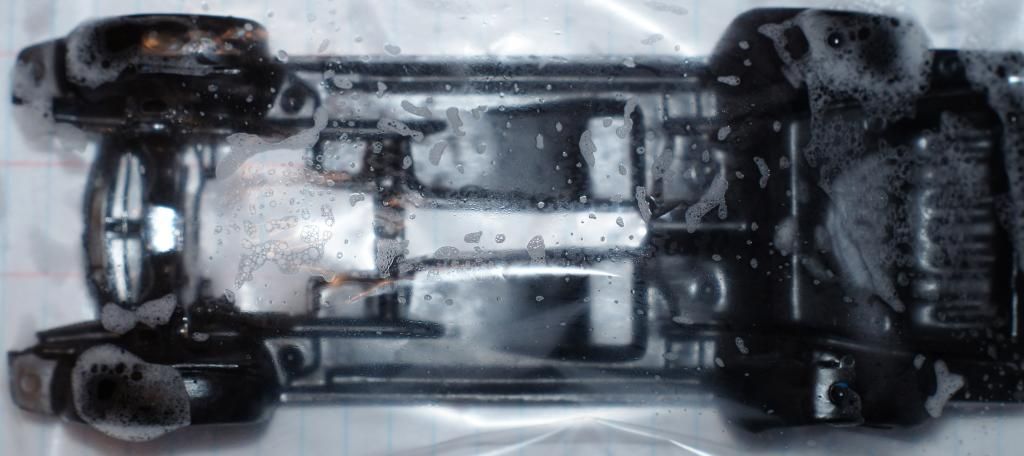
Going to let it sit overnight.
A hand painted '69 Camaro chassis:

In a quart baggie with dollar store oven cleaner:

Going to let it sit overnight.
md72
#439
Joined: November 05, 2005
KitMaker: 4,950 posts
AeroScale: 3,192 posts
Posted: Sunday, December 15, 2013 - 06:20 PM UTC
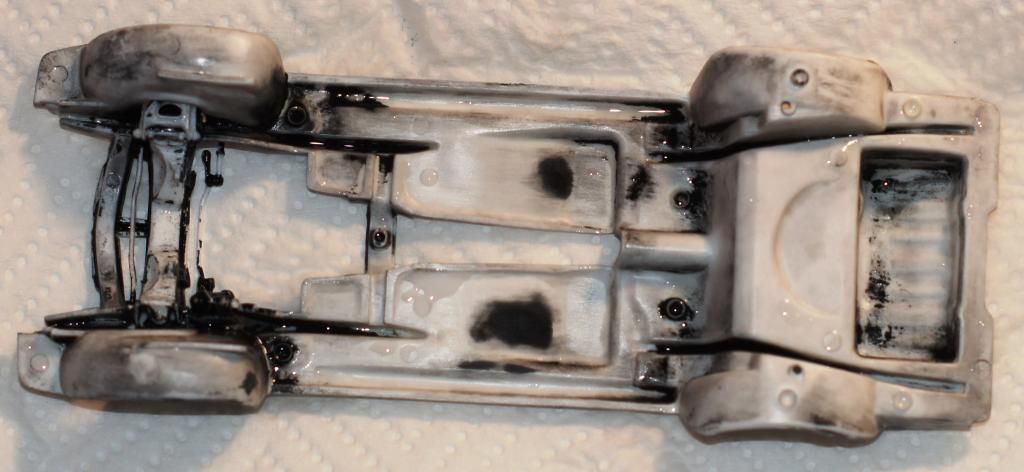
Well at 20 hours in, I'm not sure if the problem is cheap oven cleaner of a flaw in the theory. With scrubbing, I managed to get a little paint on corners of details to brush off.
I'll give it another go overnight

I'll give it another go overnight

DougN1
Joined: August 08, 2011
KitMaker: 410 posts
AeroScale: 409 posts

Posted: Monday, December 16, 2013 - 01:11 AM UTC
Mr Color thinner will remove any paint, and doesn't attack the plastic at all. It's so safe you can use it to remove paint from clear parts and the clear parts will look just like new without any polishing.
However, it's not cheap, so it may not be the ideal solution for OP, but it's the best paint removing solution I've used/seen.
Doug
However, it's not cheap, so it may not be the ideal solution for OP, but it's the best paint removing solution I've used/seen.
Doug
Joel_W
Joined: December 04, 2010
KitMaker: 11,666 posts
AeroScale: 7,410 posts
Posted: Monday, December 16, 2013 - 03:30 AM UTC
Kevin,
I did a quick check on ebay, and the kit is currently going for $40-$50 plus shipping. The one current auction is from China! Kits come and go, so check it out every so often. I've found some real bargains on kits I've wanted from time to time.
Ten years of old enamel paint won't be easy to remove, and will take application after application. The size of the model also presents issues. Honestly, try disassembling the kit 1st, if you can get it to a workable condition, then start striping the individual parts. Honestly, for a project like this, I'd use a rubber tub, a Qt. or two of Mineral Spirits from a Home Improvement Center, and several cheap toothbrushes. Soak, scrub, soak, scrub, and eventually the paint will start to come off. The Mineral Spirits shouldn't effect the plastic, and hopefully will attack the tube glue you used. Keep in mind that the glue dissolved the plastic at the joint in a fusing process. Just not sure how that will work out.
Also buy some of those rubber dishwashing gloves to wear during this process, as I'm sure it will do a number of bare skin.
Honestly, you'd be better off just taking your losses, saving your money till you can afford to enter a few auctions. Eventually, you'll win one. Starting off with a new kit will make it worth while. The only other issue you might have is the decals. Age just dries them out. So be prepared to buy some after Market ones.
Joel

md72
#439
Joined: November 05, 2005
KitMaker: 4,950 posts
AeroScale: 3,192 posts
Posted: Sunday, December 22, 2013 - 06:53 PM UTC
Well, it isn't instantaneous and it takes a bit of scrubbing with a stiff brush. But you can get the old paint off.


Joel_W
Joined: December 04, 2010
KitMaker: 11,666 posts
AeroScale: 7,410 posts
Posted: Monday, December 23, 2013 - 02:33 AM UTC
Kevin, eventually nearly all the enamel paint will come off, but recesses, and tiny details will be nearly impossible to clean effectively.
A car chassis is one thing, but you're looking at a large aircraft model with an interior to deal with, if you can even get to it. That seems to be the major issue.
Not sure how the clear parts will react to mineral spirits. Hopefully, a soak in Future will cure any issues.
Joel
A car chassis is one thing, but you're looking at a large aircraft model with an interior to deal with, if you can even get to it. That seems to be the major issue.
Not sure how the clear parts will react to mineral spirits. Hopefully, a soak in Future will cure any issues.
Joel

2002hummer
#257
Joined: October 11, 2011
KitMaker: 812 posts
AeroScale: 458 posts

Posted: Monday, December 23, 2013 - 04:18 AM UTC
Hello Kevin,
I used oven cleaner to take spray can enamel off the hull of my 1/72 scale Revell Schnellboote. I wrapped it kitchen plastic wrap and let it sit for a couple of days. A quick scrub took the paint off easily. The difference is that my paint job was only weeks old, not years. Oven cleaner should work if given time for it to soak. A finger nail brush may help as well.
PS I used a no name brand from the local grocery store.
md72
#439
Joined: November 05, 2005
KitMaker: 4,950 posts
AeroScale: 3,192 posts
Posted: Monday, December 23, 2013 - 04:43 AM UTC
I'm not sure that Kevin has been here for over a month now. I'm dealing with the chassis that I got in a started kit that I thought I might salvage, mostly for the challenge.
I just found this thread, learned from it and decided to follow thru and add my experiences. Clearly I'm not the first guy to get to this spot...
Only 1 part has come unglued in the process, I was hoping the whole steering and front suspension might fall out so I could start it all over again. I'm using dollar store cleaner, it smell like the real thing, and just letting it sit in a zip lock bag. I tried using an old tooth brush, but ti was too soft. I found a small stiff nylon brush for auto detailing that seems to work pretty good.
Joel_W
Joined: December 04, 2010
KitMaker: 11,666 posts
AeroScale: 7,410 posts
Posted: Monday, December 23, 2013 - 05:54 AM UTC
Sorry Mark, I just assumed you started this thread and was finally updating it. So far your efforts seem to be paying off. Just wondering if it's financially worth it compared to just buying a new kit.
Joel
Joel
md72
#439
Joined: November 05, 2005
KitMaker: 4,950 posts
AeroScale: 3,192 posts
Posted: Monday, December 23, 2013 - 06:17 AM UTC
Quoted Text
Just wondering if it's financially worth it
Probably not. I'm in around U$5 between the kit and the oven spray. Revell's MSRP is $22, I'm sure it could be found on a vendor's table for a lot less.


Armando

Joined: September 18, 2005
KitMaker: 20 posts
AeroScale: 20 posts
Posted: Monday, December 23, 2013 - 06:32 AM UTC
Gentlemen,
Years ago I had a similar problem restoring old kits that were hand painted years before. At the time I use car brake fluid painted over the models with a cheap flat brush brought in one of those DIY shops. It worked! The amount of fluid used was not that astronomic, so you dont have to use gallons of it. I remember that those days the product was not that cheap either, but I still have a tiny little bit somewhere in the garage I let the stuff work for a day or two, seated over a pile of old newspapers, away from children and pets, and the paint got out fairly easily (the best bet is to examine it from time to time). If it does not work totally on firstly, try again, and again Advantages: do not need breath devices, 2 thick gloves and a NBC suit At the end, when youll be happy with the results, the model can be washed with kitchen detergent, an old toothbrush and a handful of toothpicks to clear the engraving. Another advantage (if you consider start you model all over again) is that most of the glue got away and you will end up with all parts separated. So, to be on the safe side, wash it inside a large bowl or basin. And please give a try on another model that you do not consider recuperate, just in case
Good luck!
Armando
md72
#439
Joined: November 05, 2005
KitMaker: 4,950 posts
AeroScale: 3,192 posts
Posted: Wednesday, December 25, 2013 - 05:46 AM UTC
Thanks for all the suggestions and support. I'm going to keep at this after the break.
But it occurs to me I'm answering the wrong question. This isn't about saving a few bucks on a kit. It's learning a skill that can be used to salvage a damaged kit back on the display shelf. I have a P-51 that I messed up the spinner on, a mouse gnawed the paint off of it as well. I also messed up the masking on a battleship deck. If I can clean these two up, it a chance to salvage the effort and get 2 more models on display.
But it occurs to me I'm answering the wrong question. This isn't about saving a few bucks on a kit. It's learning a skill that can be used to salvage a damaged kit back on the display shelf. I have a P-51 that I messed up the spinner on, a mouse gnawed the paint off of it as well. I also messed up the masking on a battleship deck. If I can clean these two up, it a chance to salvage the effort and get 2 more models on display.
Joel_W
Joined: December 04, 2010
KitMaker: 11,666 posts
AeroScale: 7,410 posts
Posted: Thursday, December 26, 2013 - 02:29 AM UTC
Mark, repainting a spinner, or stripping the parts off of a deck to repaint is a whole different ballgame then trying to strip the paint off a huge aircraft model. I've stripped and repainted parts many a time without any major issues.
For small parts like spinners, Props, etc. I just use lacquer thinner applied with a Q-tip.
Joel
For small parts like spinners, Props, etc. I just use lacquer thinner applied with a Q-tip.
Joel
Antoni

Joined: June 03, 2006
KitMaker: 574 posts
AeroScale: 573 posts
Posted: Thursday, December 26, 2013 - 11:44 PM UTC
If you are going to carry out a lot of paint stripping, then the buy a large (32 fl oz) bottle of Aztek Concentrated Airbrush Cleaner (ethylene glycol monobutyl ether). It's the best paint stripper around for both acrylic and enamel paint. Water soluble and non-corrosive it is a lot less messy than NaOH and oven cleaners. Soak for 24 hours and most of the paint will wash off under a cold water tap. The rest will come off with a scrubbing with a soft brush. If the should be any stubborn patches a second soaking will take care of them. Use a cocktail stick to scrape any paint out in corners or panel lines. Best of all you can keep using it indefinitely, just pour it back into the bottle when you're done.
md72
#439
Joined: November 05, 2005
KitMaker: 4,950 posts
AeroScale: 3,192 posts
Posted: Monday, January 13, 2014 - 05:55 PM UTC
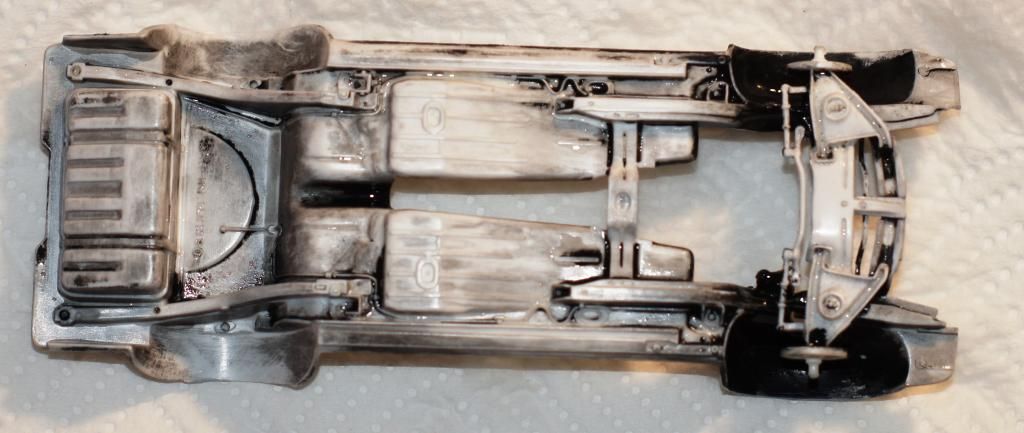
Lacquer thinner and I don't have a happy history with plastic. I did try Brake fluid on this, it got more paint off than the oven cleaner. But still not a magic bullet.
After brake fluid:
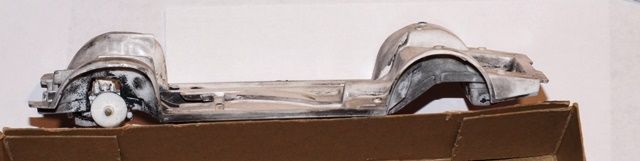
The brake fluid did get the paint out of the front wheel well that the oven cleaner had missed.
After brake fluid:

The brake fluid did get the paint out of the front wheel well that the oven cleaner had missed.
 |

WEB HOSTING BY


Copyright ©2021 AeroScale and Kitmaker Network, a subsidiary of Silver Star Enterprises
All Rights Reserved. Please read our Conditions of Use and Privacy Policy.
All Rights Reserved. Please read our Conditions of Use and Privacy Policy.