_GOTOBOTTOM
World War II
Discuss WWII and the era directly before and after the war from 1935-1949.
Hosted by Rowan Baylis
Zoukei Moura 1/48 Kyushu J7W1 Shinden
Shanghaied
_VISITCOMMUNITY
Schleswig-Holstein, Germany
Joined: June 30, 2011
KitMaker: 189 posts
AeroScale: 82 posts
Posted: Friday, December 27, 2013 - 04:12 AM UTC
Hi Mal,

Just watched the video. Unbelievably what you can find now in the internet of an esoteric japanese prototype.
The Do-335 had btw the same problems with propeller or tailfin striking the ground.

Greetigns from Shanghai
JPTRR
Staff MemberManaging Editor
RAILROAD MODELING
#051
_VISITCOMMUNITY
Tennessee, United States
Joined: December 21, 2002
KitMaker: 7,772 posts
AeroScale: 3,175 posts
Posted: Friday, December 27, 2013 - 04:20 AM UTC
Tom,

That's a great start! I am very impressed with the look of the parts and the way they appear when painted.

Where is the ejector pin in the aft cockpit? Today I find a well-fitting model just as important as a highly detailed one.

Shanghaied
_VISITCOMMUNITY
Schleswig-Holstein, Germany
Joined: June 30, 2011
KitMaker: 189 posts
AeroScale: 82 posts
Posted: Friday, December 27, 2013 - 04:51 PM UTC
Thanks Frederick,

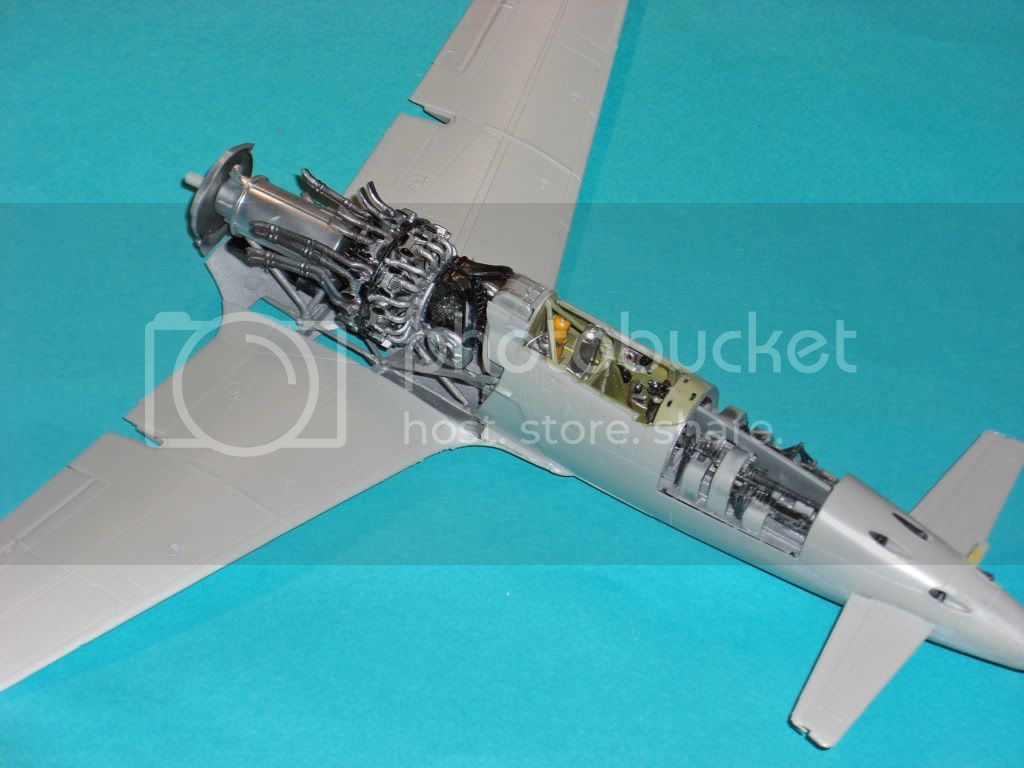
the only really visible ejector mark is in the aft cockpit, but disappears behind oxygen bottles and radio. Others are in the front gear bay, but nothing really bad.

Greetings from Shanghai
thegirl
_VISITCOMMUNITY
Alberta, Canada
Joined: January 19, 2008
KitMaker: 6,743 posts
AeroScale: 6,151 posts
Posted: Saturday, December 28, 2013 - 01:15 AM UTC
Very interesting subject and a beautiful start !


Terri
Shanghaied
_VISITCOMMUNITY
Schleswig-Holstein, Germany
Joined: June 30, 2011
KitMaker: 189 posts
AeroScale: 82 posts
Posted: Saturday, December 28, 2013 - 01:40 AM UTC
Thanks Terri!

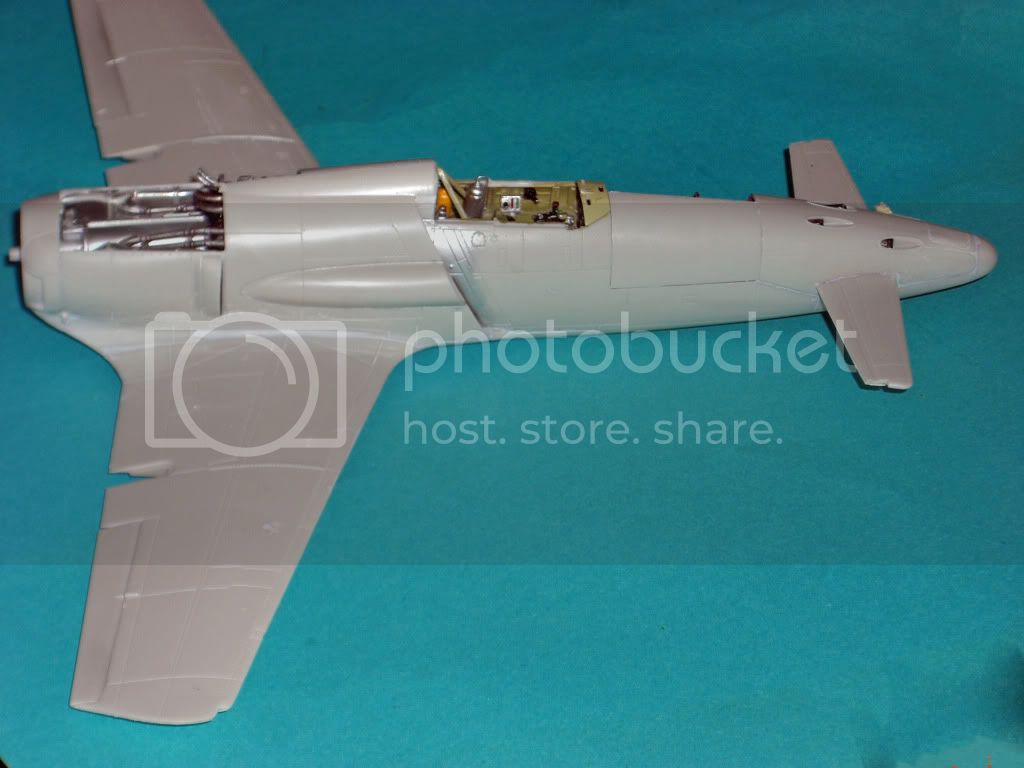
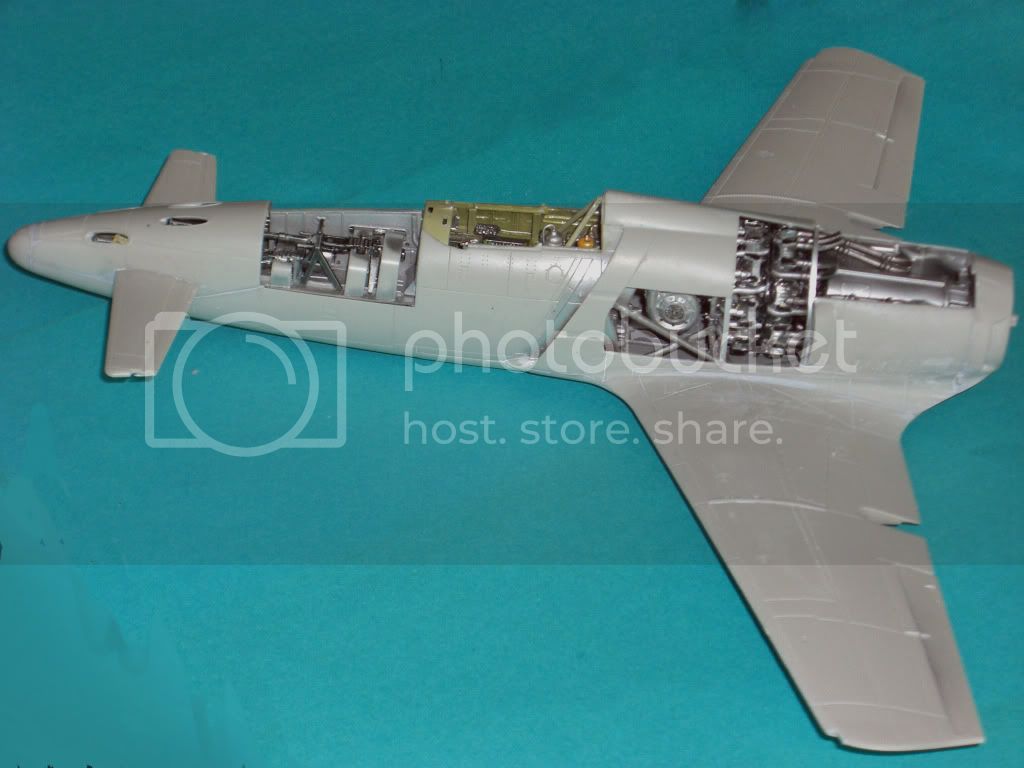
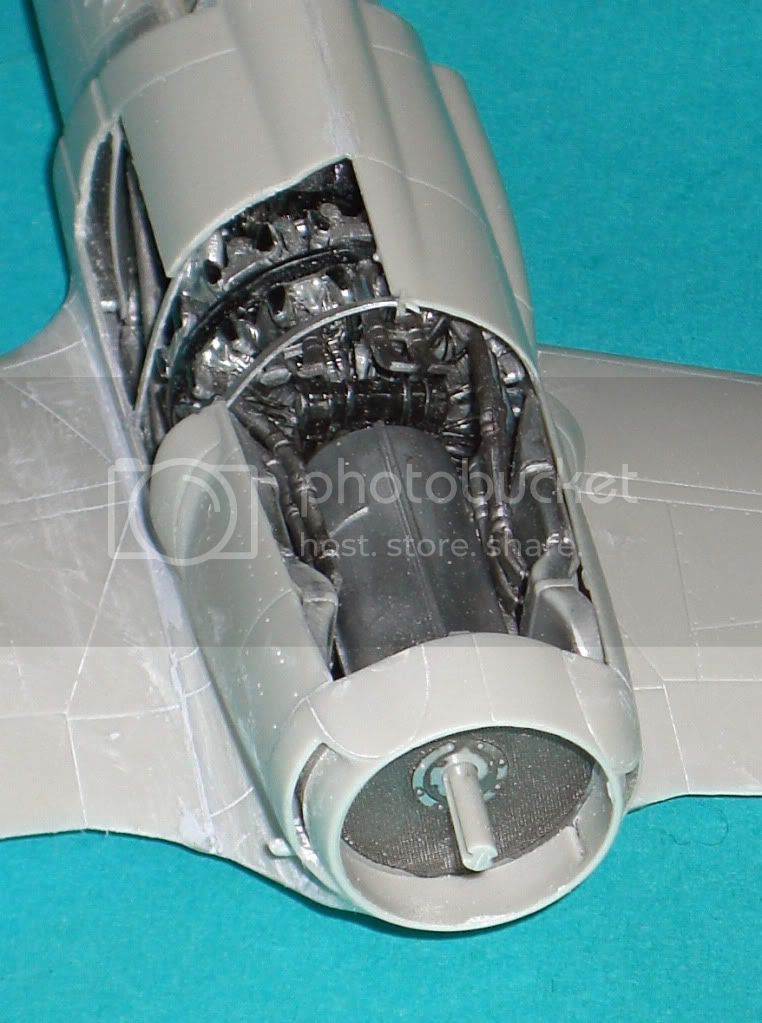
And another update, finished the wings. Now need to decide which engine panels I leave open. Normally I like to have one side of the plane buttoned up and one side showing the internals.


Greetings from Shanghai
Joel_W
Staff MemberAssociate Editor
AUTOMODELER
_VISITCOMMUNITY
New York, United States
Joined: December 04, 2010
KitMaker: 11,666 posts
AeroScale: 7,410 posts
Posted: Saturday, December 28, 2013 - 11:53 AM UTC
Tom, The Shinden is really coming along nicely now. Like your idea of closing off one side of the panels and the opposite side left open. You might want to consider alternating sides as you work your way down the fuselage. That would offer a sense of balance, and increase the viewers interest. Having the panels open only on one side would have the viewers just skimping a quick look at the closed up side. At least that's how I would view your Shiden.

Joel
thegirl
_VISITCOMMUNITY
Alberta, Canada
Joined: January 19, 2008
KitMaker: 6,743 posts
AeroScale: 6,151 posts
Posted: Saturday, December 28, 2013 - 01:27 PM UTC
Joel , I do favor your idea as well on differing up the panels . However , viewing one side close off and the other open I like as well . For me though AMS would sit in and with that much space in view just cry's for super detailing .


Terri
Shanghaied
_VISITCOMMUNITY
Schleswig-Holstein, Germany
Joined: June 30, 2011
KitMaker: 189 posts
AeroScale: 82 posts
Posted: Sunday, December 29, 2013 - 02:08 AM UTC
Hi Joel and Terri,

The panel opening on alternate sides is a real good idea. I will definitely do it once but I will try to put the Shinden in a small scene with a few mechanics and a truck. That way the strange dimensions of the plane will be shown even more. Got the idea from Mal's movie. But then it makes more sens for me to open only one side.
I do not really know how to put more details in, the pic's I found showing nothing internal and the existing one is dismantled so not much hint for cables and pipe.


One hint for construction: I installed the rear bulkhead (with the grille) on the engine as per instruction. Don't do it. It has a flat underside and when assembling the engine you probably will not get it perfectly aligned.
Install the grille, fan wheel and center cone in the tail cone and then glue it to the plane. Then it will fit easily. Also take care, that the side exhaust channels do not extend the side panels.
Ask me how I know this all

Greetings from Shanghai
Joel_W
Staff MemberAssociate Editor
AUTOMODELER
_VISITCOMMUNITY
New York, United States
Joined: December 04, 2010
KitMaker: 11,666 posts
AeroScale: 7,410 posts
Posted: Sunday, December 29, 2013 - 03:00 AM UTC
Tom, I like the number of panels left open, and where you left them open. Looks more natural then just all on one side.

Terri, as far as added details, the engine & gun compartments are already detailed enough for my tastes in 1/48 scale. Where I would add details is in the cockpit. Generic wiring, cables, linkages, etc. Just enough to busy it up.

Joel
Shanghaied
_VISITCOMMUNITY
Schleswig-Holstein, Germany
Joined: June 30, 2011
KitMaker: 189 posts
AeroScale: 82 posts
Posted: Sunday, December 29, 2013 - 03:32 AM UTC
Hi Joel,

I added some hoses to the pressure bottles behind the cockpit and put some cabling behind the instrument panel (can't see much of that).
For detailing the guns and the engine I simply lack info.
If anybody has something I would be more than happy

Greetings from Shanghai
Shanghaied
_VISITCOMMUNITY
Schleswig-Holstein, Germany
Joined: June 30, 2011
KitMaker: 189 posts
AeroScale: 82 posts
Posted: Monday, January 06, 2014 - 01:56 AM UTC
short update:

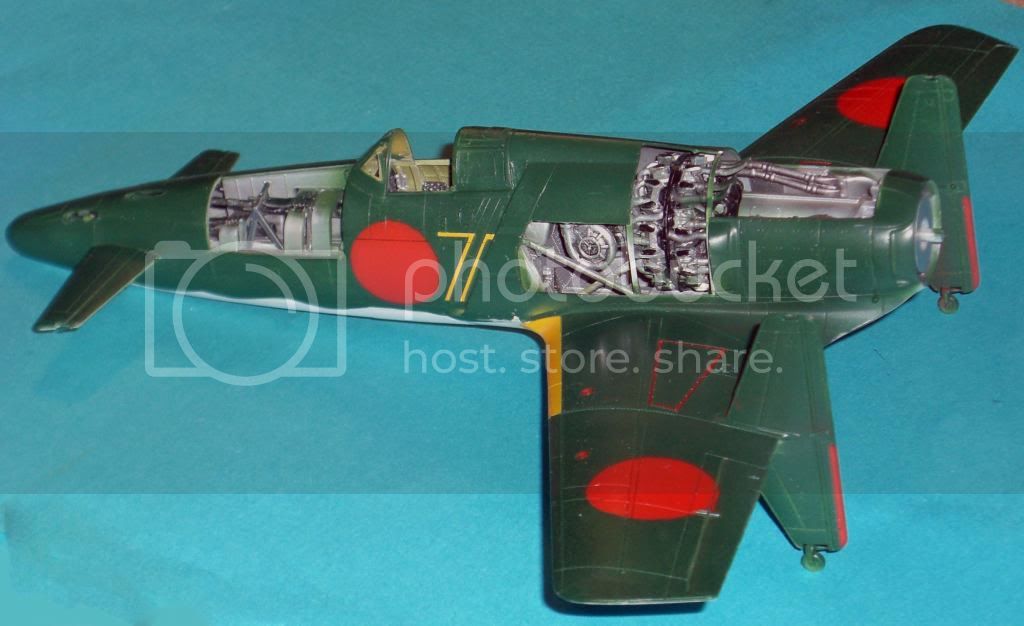
Painted the Shinden finally. For some reason I have always problem with the wavy lines between green and gray, had to redo twice. Colors are my guess, only one prototype which had been repainted and is now very dirty
All markings are painted, too. The only decal yet is the instrument panel.
Need to repair some bugs and overspray, then start with undercarriage.


Greetings from Shanghai
Merlin
Staff MemberSenior Editor
AEROSCALE
#017
_VISITCOMMUNITY
United Kingdom
Joined: June 11, 2003
KitMaker: 17,582 posts
AeroScale: 12,795 posts
Posted: Monday, January 06, 2014 - 09:50 AM UTC
Hi Tom

Really nice! I'm still waiting to see the kit - if I do half as good a job on it as you, I'll be very happy!

All the best

Rowan
Holdfast
Staff MemberPresident
IPMS-UK KITMAKER BRANCH
#056
_VISITCOMMUNITY
England - South West, United Kingdom
Joined: September 30, 2002
KitMaker: 8,581 posts
AeroScale: 4,913 posts
Posted: Monday, January 06, 2014 - 07:33 PM UTC
That is looking good Tom, especially as you have painted on the markings I wonder if the masks that I cut for the Japanese script on my 1/32 scale example will cut in 1/48 scale? I'll give it a go and get back to you if they do; it's unlikely but its surprising what I can cut
Shanghaied
_VISITCOMMUNITY
Schleswig-Holstein, Germany
Joined: June 30, 2011
KitMaker: 189 posts
AeroScale: 82 posts
Posted: Tuesday, January 07, 2014 - 12:26 AM UTC
Thanks Rowan and Mal!

I can cut simple geometrical shapes and lines of course. I use Tamiya (Kabuki) tape, not very expensive here. However even with a new knife I feel the corners are never perfectly sharp. But the effect is soo much better than a decal! And as an additional bonus: I can keep the nice satin finish of the Gunze enamels without several layers of future and then trying to restore the finish. The recessed details pop out even more under a thin layer of paint.
The only difficult thing with masking for me is the placement.
And of course cannot do letters or complicate shapes.
In the moment I have no real idea how to make the japanese "no step - no touch" signs. Would be curious if you could to them in 1/48, Mal

Greetings from Shanghai
thegirl
_VISITCOMMUNITY
Alberta, Canada
Joined: January 19, 2008
KitMaker: 6,743 posts
AeroScale: 6,151 posts
Posted: Tuesday, January 07, 2014 - 01:07 AM UTC
Hi Tom , Wow you are making excellent progress ! Like Joel , I like the panels you have chosen to leave off . Will draw the eyes in more to the detail all around the aircraft .


Terri
Shanghaied
_VISITCOMMUNITY
Schleswig-Holstein, Germany
Joined: June 30, 2011
KitMaker: 189 posts
AeroScale: 82 posts
Posted: Tuesday, January 07, 2014 - 02:37 AM UTC
Thanks Terri!

I plan to make a small dio during maintenance or refuelling as a reason to show of the engine.

Greetings from Shanghai
Holdfast
Staff MemberPresident
IPMS-UK KITMAKER BRANCH
#056
_VISITCOMMUNITY
England - South West, United Kingdom
Joined: September 30, 2002
KitMaker: 8,581 posts
AeroScale: 4,913 posts
Posted: Tuesday, January 07, 2014 - 08:33 PM UTC

Quoted Text

Thanks Rowan and Mal!

I can cut simple geometrical shapes and lines of course. I use Tamiya (Kabuki) tape, not very expensive here. However even with a new knife I feel the corners are never perfectly sharp. But the effect is soo much better than a decal! And as an additional bonus: I can keep the nice satin finish of the Gunze enamels without several layers of future and then trying to restore the finish. The recessed details pop out even more under a thin layer of paint.
The only difficult thing with masking for me is the placement.
And of course cannot do letters or complicate shapes.
In the moment I have no real idea how to make the japanese "no step - no touch" signs. Would be curious if you could to them in 1/48, Mal

Greetings from Shanghai


I will give it a go and let you know and if it works I will send you a set. They are tiny even in 1/32 so it is unlikely but as there are no centres to the shapes then it might just work. I forgot to do this yesterday as I was getting 6 sets of masks ready to post and working on a few more, so if I don't come back on here in a couple of days to let you know how it goes PM me a reminder please?

Yes positioning is difficult when using the likes of Tamiya tape, but you have done a good job
Shanghaied
_VISITCOMMUNITY
Schleswig-Holstein, Germany
Joined: June 30, 2011
KitMaker: 189 posts
AeroScale: 82 posts
Posted: Wednesday, January 15, 2014 - 06:07 PM UTC
Thanks Mal,

(sorry, saw your post only now)

In the moment I have just left off the small writing. Based on the prototype and with guns it is for me just a later prototype version. Who know how the production model would have really looked.
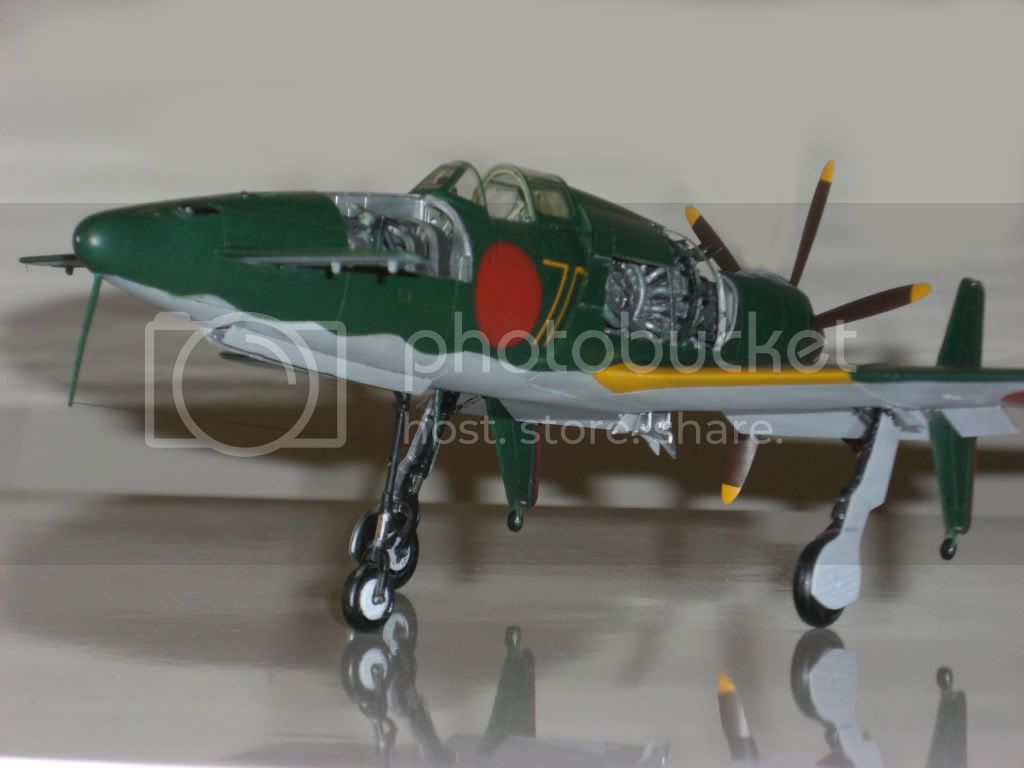
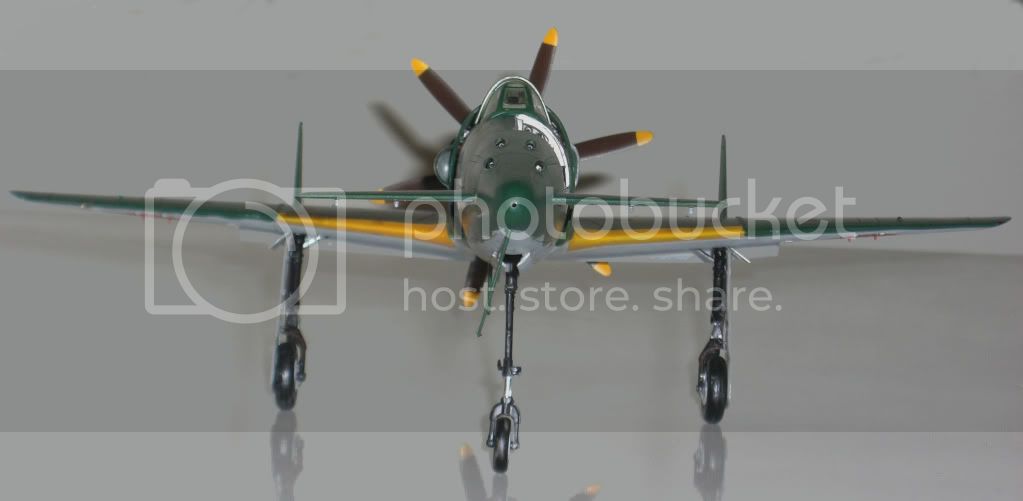
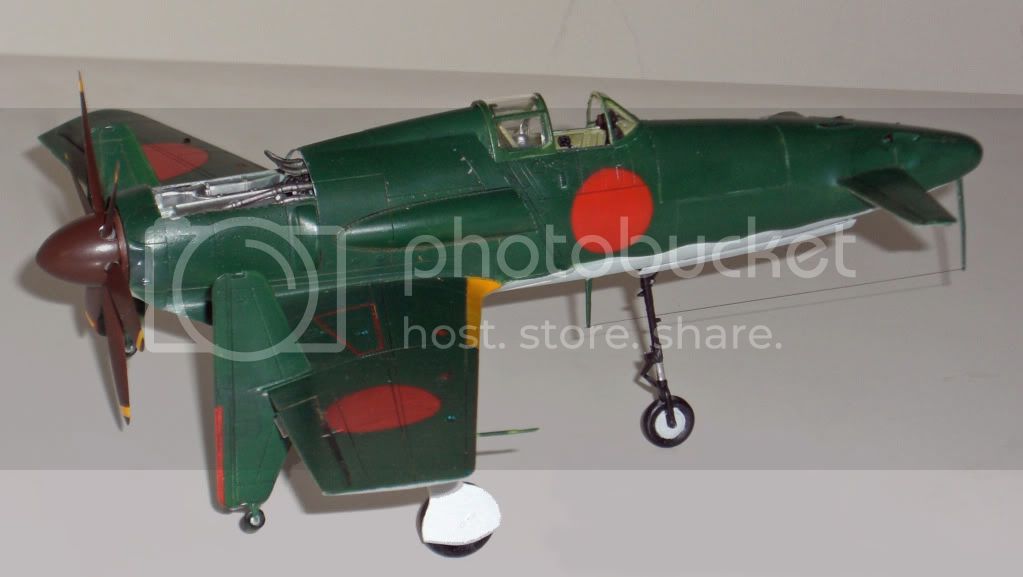
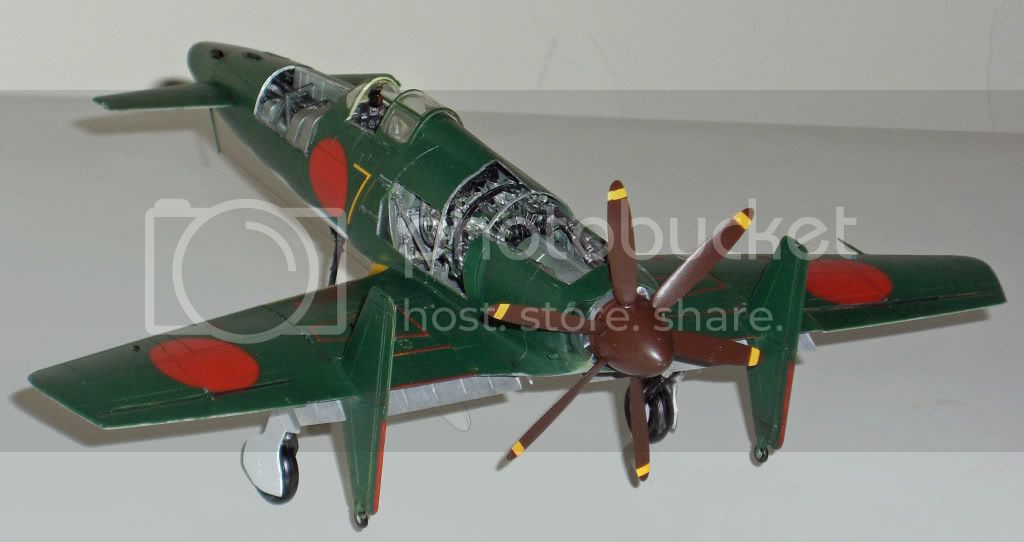
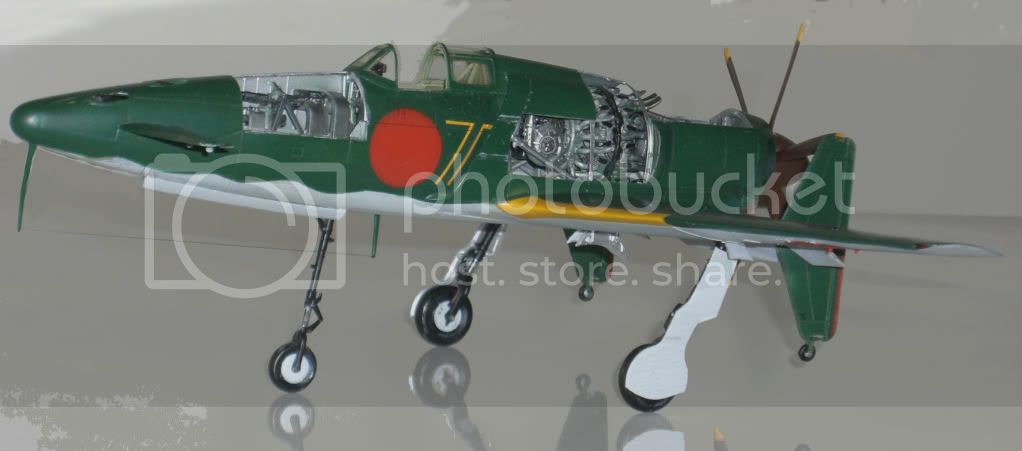
I wasn't lazy, but a bit busy with other things. The Shinden is now 99% finished.

The landing gear is as flimsy as it looks, but not difficult to install. The plane needs no additional weight, standing perfectly on its 3 wheels. The only thing I did not like at all were the wheels. They had no rim and on one side a shape which made masking very difficult. There were a real pita to paint.

I did very little weathering and recess "blacking" with the Tamiya black stuff.

With the installed antenna and the flimsy landing gear I barely dare to touch the model, that's why I will make a small refueling scene on a base.

Hope you like the pics


Greetings from Shanghai
Joel_W
Staff MemberAssociate Editor
AUTOMODELER
_VISITCOMMUNITY
New York, United States
Joined: December 04, 2010
KitMaker: 11,666 posts
AeroScale: 7,410 posts
Posted: Thursday, January 16, 2014 - 03:30 AM UTC
Tom, the Shinden looks great with it's paint on. The gear does indeed look flimsy at those weird angles. I ran into the same wheel issues with my GWH Devastator build. Mal came to the rescue with masks, and they worked perfectly.

Joel

Shanghaied
_VISITCOMMUNITY
Schleswig-Holstein, Germany
Joined: June 30, 2011
KitMaker: 189 posts
AeroScale: 82 posts
Posted: Thursday, January 16, 2014 - 05:13 PM UTC
Hi Joel,

Thanks, got the wheels fixed, was just more work than necessary. Just saw on the pics that I have to flatten down the rubber paint a bit.
Now constructing the truck. Quite funny contrast in construction with the plane.

Greetings from Shanghai
 _GOTOTOP