_GOTOBOTTOM
World War II: Germany
Aircraft of Germany in WWII.
Hosted by Rowan Baylis
A fast Salamander
rochaped
_VISITCOMMUNITY
Lisboa, Portugal
Joined: August 27, 2010
KitMaker: 679 posts
AeroScale: 669 posts
Posted: Sunday, December 22, 2013 - 11:31 PM UTC
Hi everyone,

Between finishing another Hangar queen and waiting for another campaign to start, I decided to grab something out of the stash.

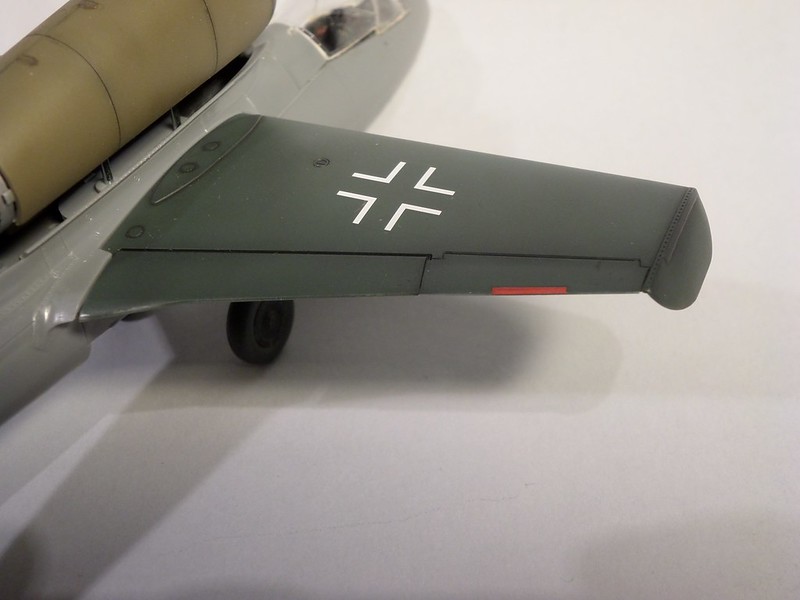
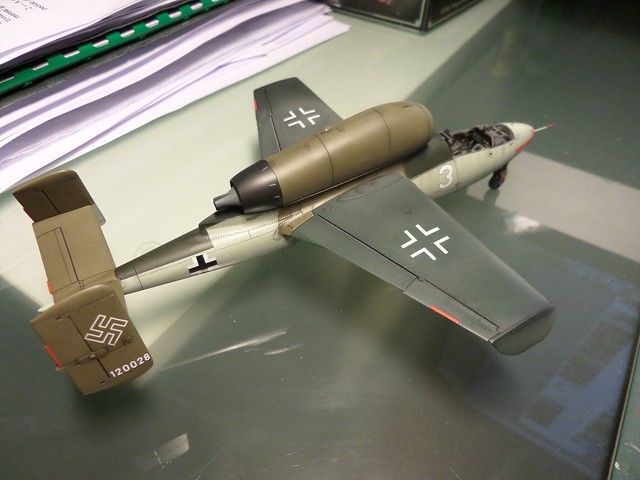
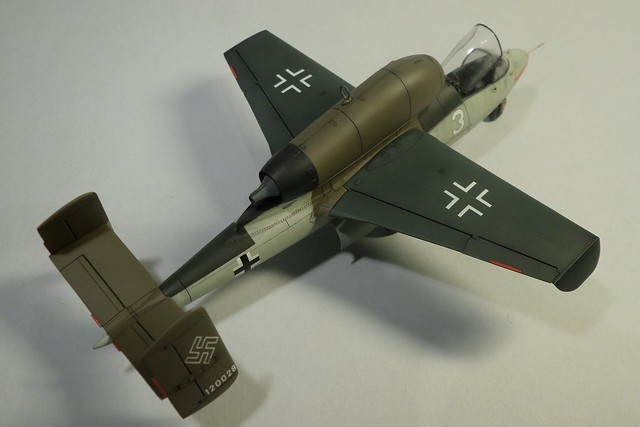
Tamiya's Heinkel 162 sounded the perfect fast track fun project I'm looking for.
Small size, low parts count and a new book/decal sheet from Kagero focusing Luftwaffe jets all made it a irresistible.

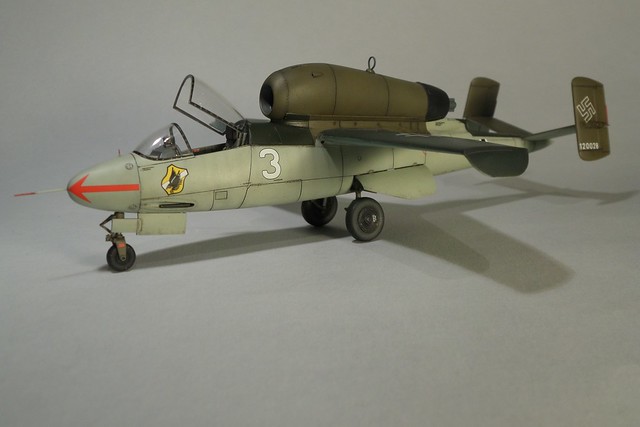
So with 2 weeks work done so far, this is how it's going…


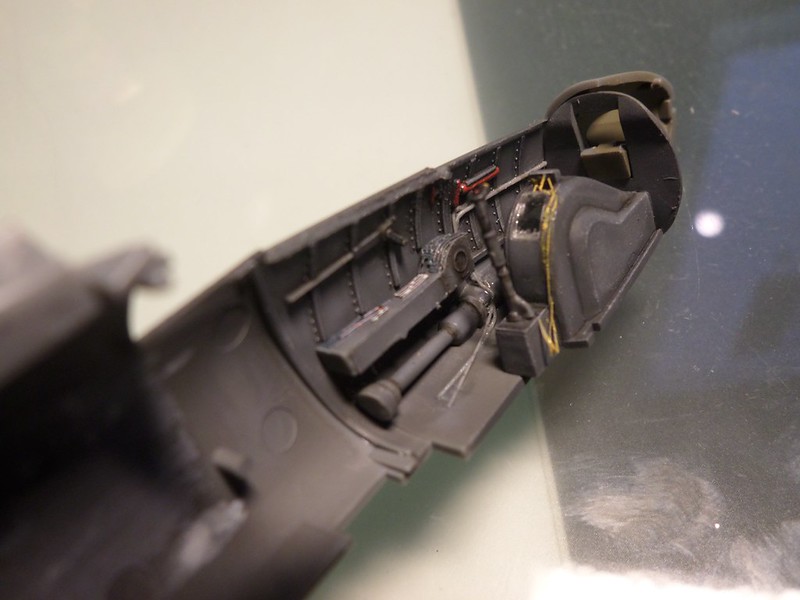
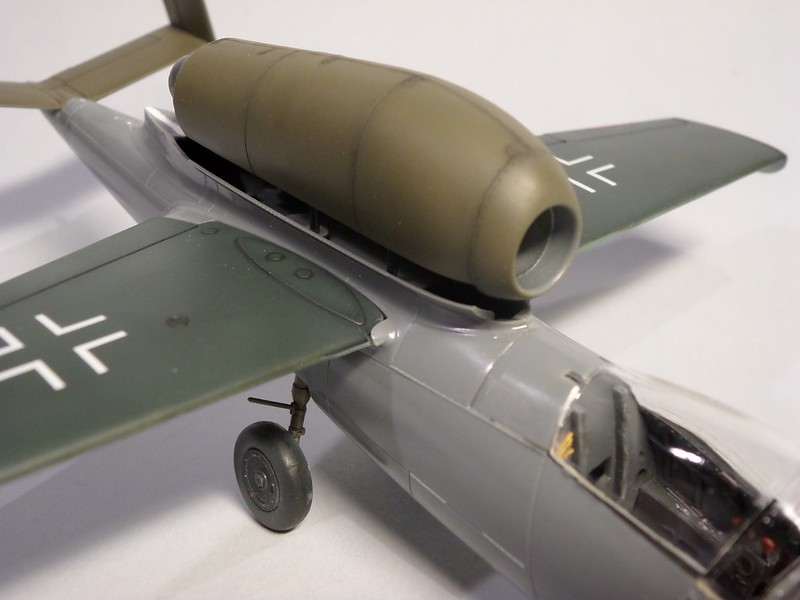
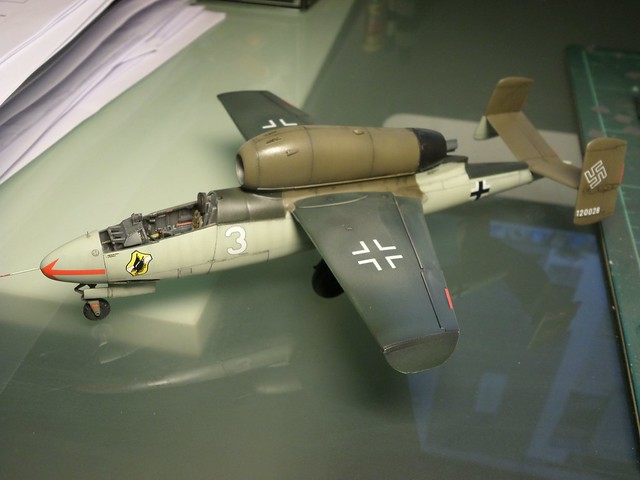
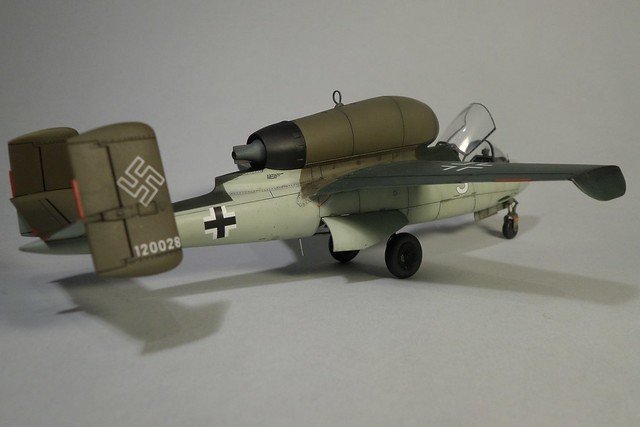
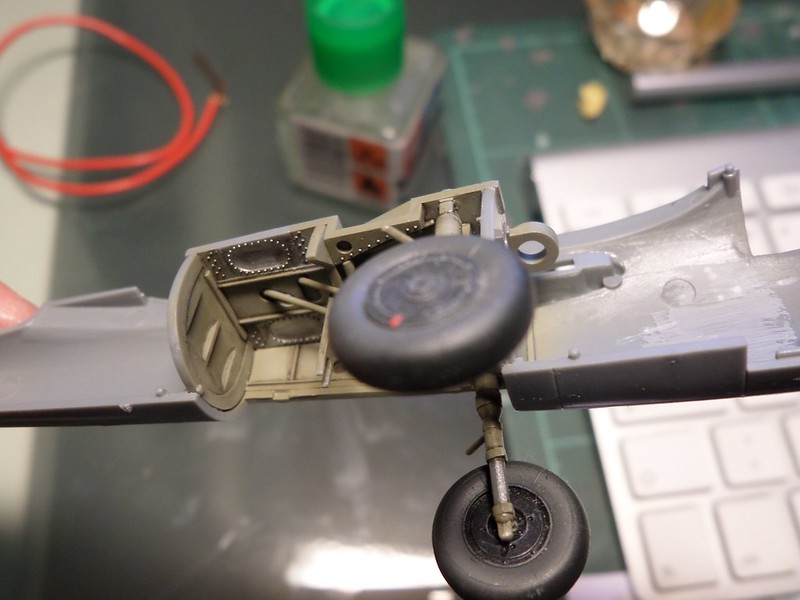
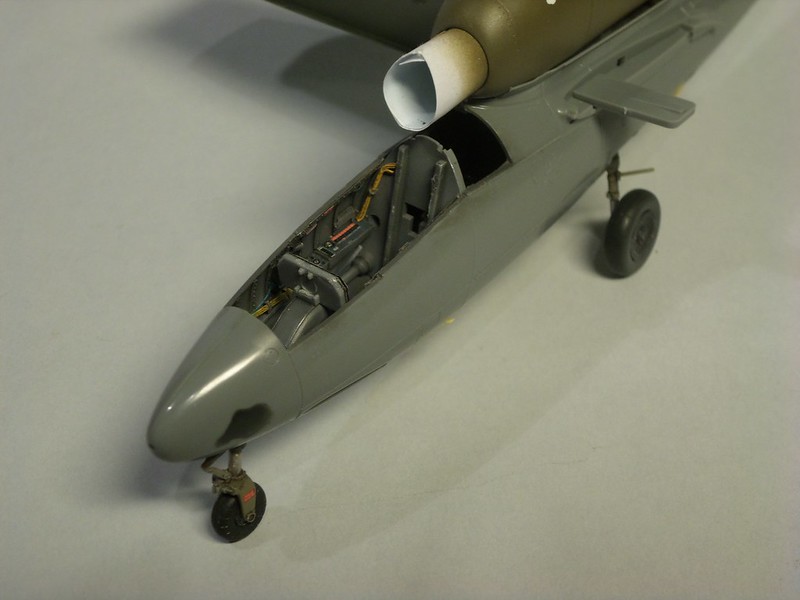
added some minor details missing from a otherwise very decent tub, and also made wheel well sides, a feature absent from the kit


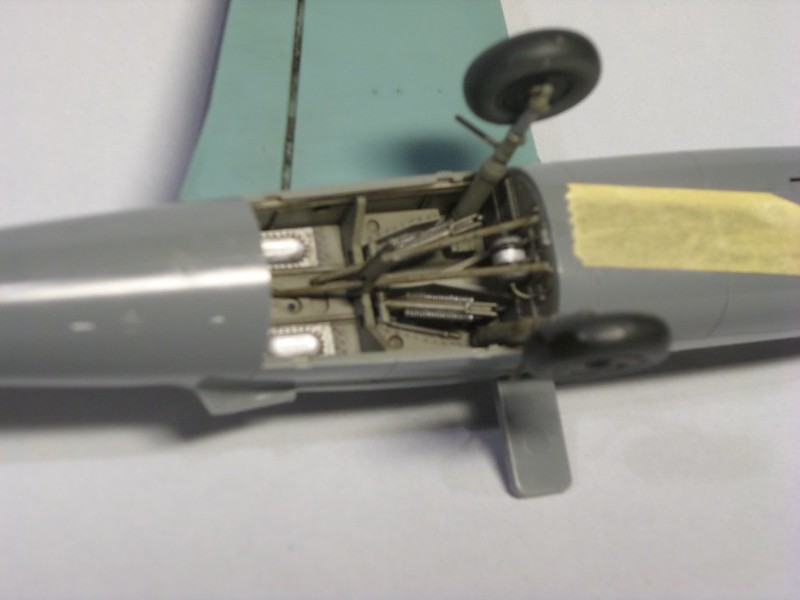
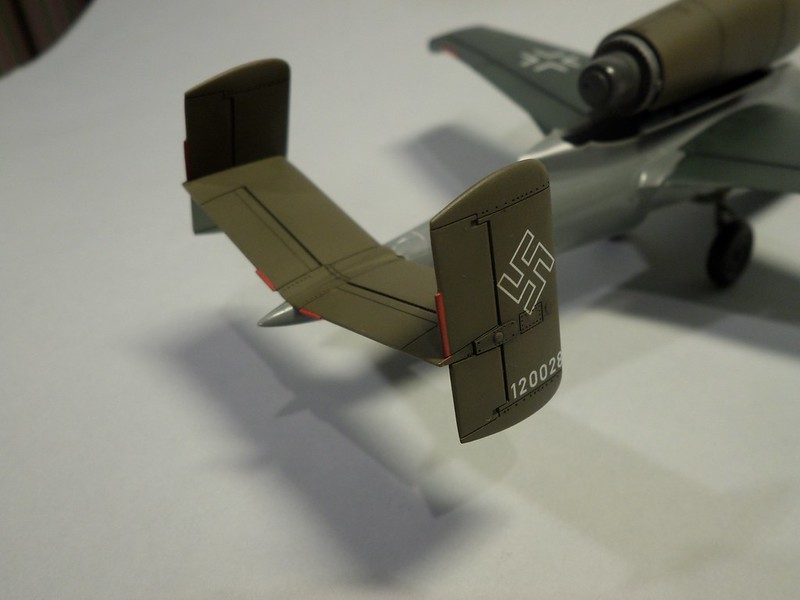
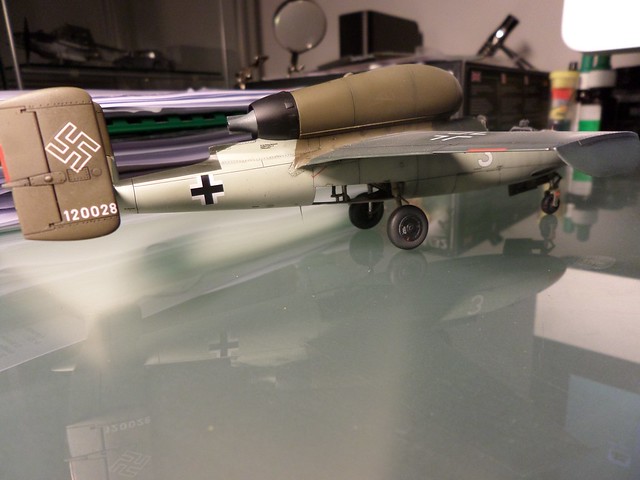
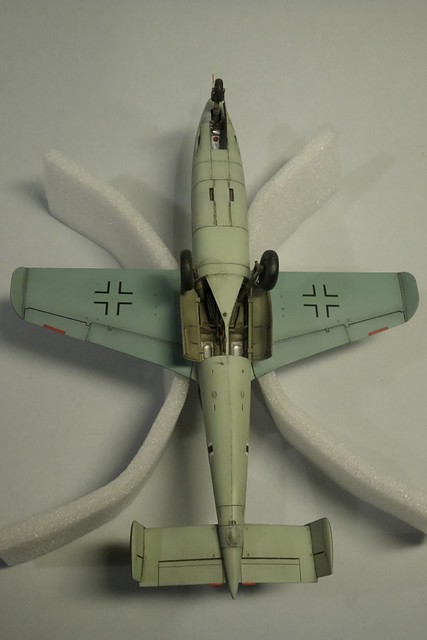
Sorry about the poor quality of this pic

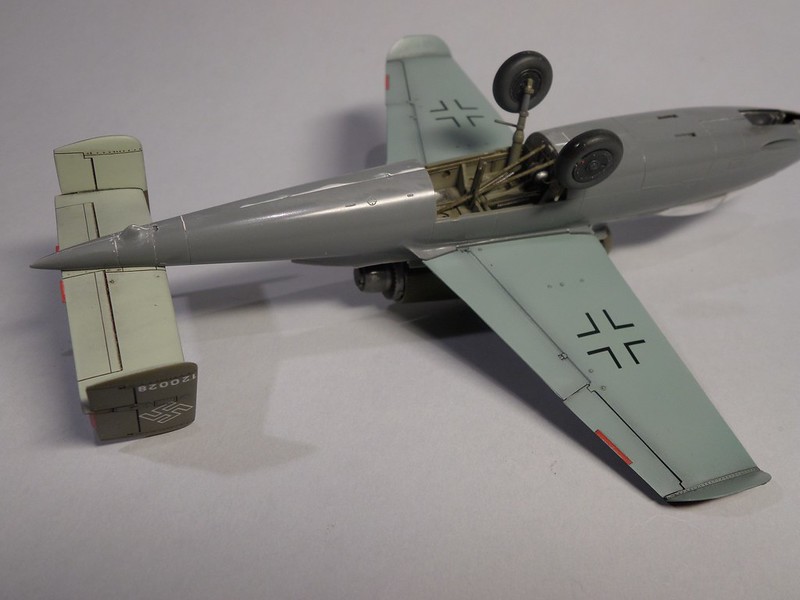
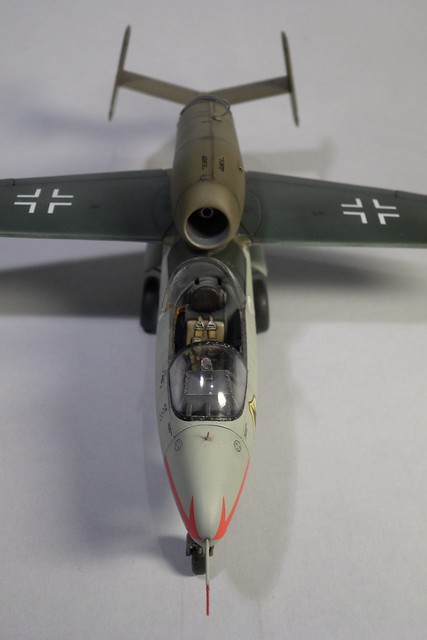
Fuselage halves already glued with most detail completed


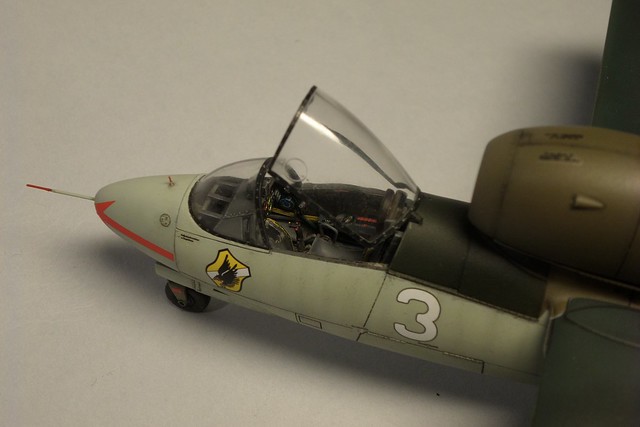
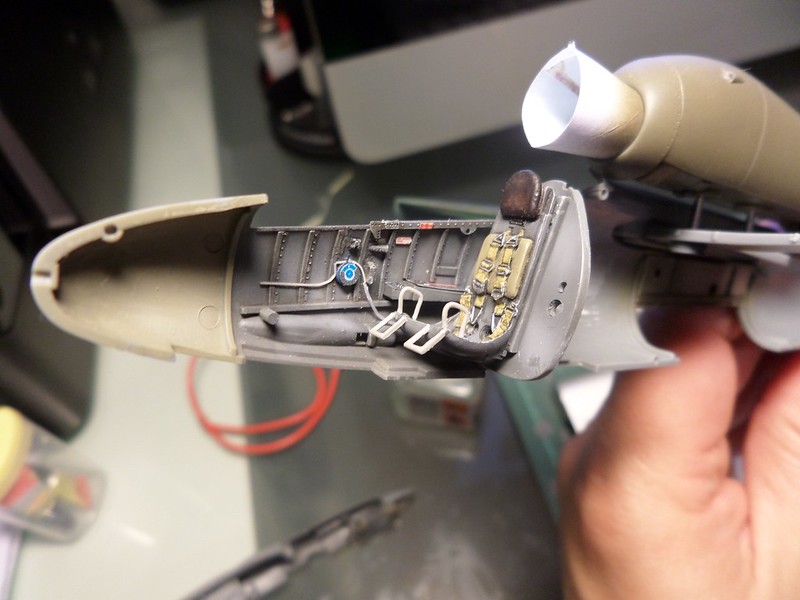
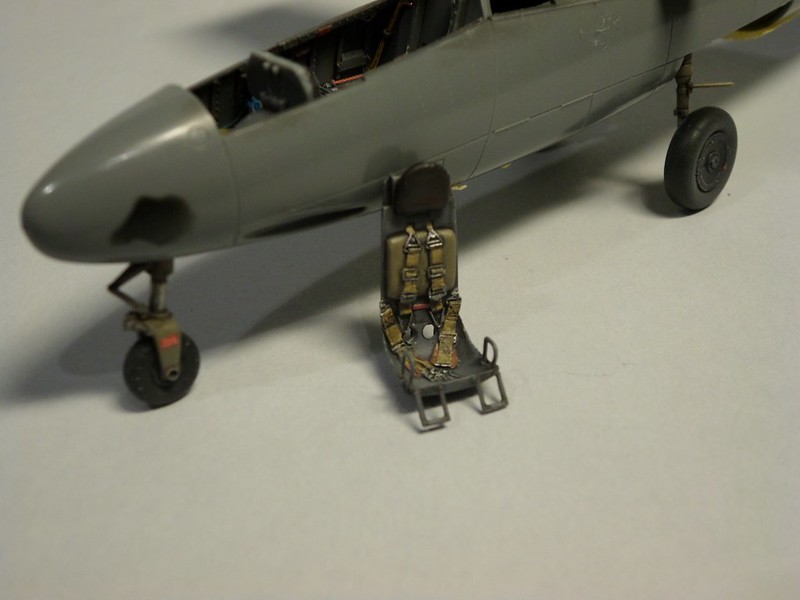
Using a Quickboost seat as replacement for the kit's own. Even if it has seat belts sculpted, it still is a easy going replacement


Appreciate all comments

Merry Xmas everybody!
Pedro
Antoon3103
_VISITCOMMUNITY
Antwerpen, Belgium
Joined: March 31, 2012
KitMaker: 224 posts
AeroScale: 146 posts
Posted: Monday, December 23, 2013 - 02:00 AM UTC
Pedro,

Looking very good so far.
Specially the seat looks really good.
I will follow this one closely as i have the same kit and booklet in the stash.
Keep the pics coming.

Tony
nico37
_VISITCOMMUNITY
Indre-et-Loire, France
Joined: May 23, 2011
KitMaker: 651 posts
AeroScale: 181 posts
Posted: Monday, December 23, 2013 - 02:32 AM UTC
Hi,

very good paint work ! I really like the weathering

cheers
nico
Joel_W
Staff MemberAssociate Editor
AUTOMODELER
_VISITCOMMUNITY
New York, United States
Joined: December 04, 2010
KitMaker: 11,666 posts
AeroScale: 7,410 posts
Posted: Monday, December 23, 2013 - 02:59 AM UTC
Pedro, your cockpit looks fantastic with just the right amount of weathering. Personally, the seat looks great with the molded on belts.

Joel
rochaped
_VISITCOMMUNITY
Lisboa, Portugal
Joined: August 27, 2010
KitMaker: 679 posts
AeroScale: 669 posts
Posted: Saturday, December 28, 2013 - 08:12 AM UTC
Hi again,

time for a small update of what's ohm the workbench

@ Tony- The kit is both simple as it is cleaver, Tamiya's usual stuff as you know, the Kagero book goes the same route, offering some stunning profiles not only for the 162 but also for the Me 262, which I hope to do sometime 2014, with quality decals for them.

@Nico and Joel- Thanks for the words. I will try to do a minimal weathering on the exterior airframe, given the fact that the real thing would be fairly new by the time WW2 ended, so keeping it the best way I know to a realistic form


The camouflage scheme composes of RLM70 on the upper wings and RLM81 on other upper surfaces (plus a small strip of RLM82 after the engine).
More interesting are the lower colors, RLM65 wings, and the odd RLM76 referred as RLM84 on some sources for all the remaining lower surfaces


I've used Gunze RLM70 as first option but decided to overspray it with Vallejo colour which helps breaking it a bit…
Have a feeling that engine pod won't fit tight

Cheers
Pedro
rochaped
_VISITCOMMUNITY
Lisboa, Portugal
Joined: August 27, 2010
KitMaker: 679 posts
AeroScale: 669 posts
Posted: Wednesday, February 05, 2014 - 10:25 AM UTC
Hello,

Wow, it's been several weeks since I last posted something about this project...and this is a fast track build just proves why I take several months to finish whatever project, going up to a full year span depending on the size/details I'm facing up.

So the lil Heinkel is almost finished, just a few drops of glue for the wheel well doors, canopy and antena on top of the engine and semi gloss coat to seal it up.

Despite a positive dry assembly of the AM seat earlier, now it just doesn't fit that good. In fact it "sits" a bit high and the canopy can't be fully closed.
This means an open display so I still need to scratch build a canopy lock handle that is absent from the sprues. Other than this all went fairly well as expected from this maker.

Hope you enjoy, feedback always welcome


Cheers
Pedro
GhostHawk
_VISITCOMMUNITY
Cordoba, Argentina
Joined: January 27, 2011
KitMaker: 268 posts
AeroScale: 264 posts
Posted: Wednesday, February 05, 2014 - 01:03 PM UTC
Hi:

Really Nice Pedro...!

Congratulations...!

Diego
Antoon3103
_VISITCOMMUNITY
Antwerpen, Belgium
Joined: March 31, 2012
KitMaker: 224 posts
AeroScale: 146 posts
Posted: Thursday, February 06, 2014 - 01:11 AM UTC
Pedro,

Really nice painting job.
One question, did u have to use any noseweight?

Tony
Joel_W
Staff MemberAssociate Editor
AUTOMODELER
_VISITCOMMUNITY
New York, United States
Joined: December 04, 2010
KitMaker: 11,666 posts
AeroScale: 7,410 posts
Posted: Thursday, February 06, 2014 - 05:07 AM UTC
Pedro, I'm really impressed. For such a small, simple aircraft, the camo paint scheme is really complicated. You did an excellent job with it. Looks great.
Joel
rochaped
_VISITCOMMUNITY
Lisboa, Portugal
Joined: August 27, 2010
KitMaker: 679 posts
AeroScale: 669 posts
Posted: Thursday, February 06, 2014 - 06:40 AM UTC
Thanks for your kind words guys

@ Tony- the kit supplies a steel sphere to be placed just after the cockpit, below the wing roots. This bears the weight center forward and avoids a tail sitter. Anyway the front wheel leg is a white metal replacement of the kit's own part, courtesy of my dog but not because of gravity issues.

I am surprised no one mentioned the odd dust-like effect over the left wing, seen on the middle photo... Anyone guess what caused it?

Cheers
Pedro
Antoon3103
_VISITCOMMUNITY
Antwerpen, Belgium
Joined: March 31, 2012
KitMaker: 224 posts
AeroScale: 146 posts
Posted: Thursday, February 06, 2014 - 07:19 AM UTC

Quoted Text

@ Tony- the kit supplies a steel sphere


Pedro,

I took me while but i located it in my kit also.

Thanks

Tony
Holdfast
Staff MemberPresident
IPMS-UK KITMAKER BRANCH
#056
_VISITCOMMUNITY
England - South West, United Kingdom
Joined: September 30, 2002
KitMaker: 8,581 posts
AeroScale: 4,913 posts
Posted: Thursday, February 06, 2014 - 07:42 PM UTC
A very nice build Pedro and painted very well too I am currently building one of these in 1/32 scale and I hope that it turns out as good as this I 'm aiming to do a scheme with the same unit badge as you have on this and I will be hoping to be able to produce the emblem a s a paint mask, along with all the other markings
rochaped
_VISITCOMMUNITY
Lisboa, Portugal
Joined: August 27, 2010
KitMaker: 679 posts
AeroScale: 669 posts
Posted: Thursday, February 06, 2014 - 09:36 PM UTC
Thanks Mal

I'm quite sure yours will be better than this one, judging by that 1/32 Spit you made.
Oh, and masks would have been terrific on my build. Tamiya's decals are good but a bit thick, no doubt using some painted insignias would enhance the finish a bit more.
If you're considering doing some at 1/48 let me know will you?

Cheers
Pedro
rochaped
_VISITCOMMUNITY
Lisboa, Portugal
Joined: August 27, 2010
KitMaker: 679 posts
AeroScale: 669 posts
Posted: Wednesday, February 12, 2014 - 08:56 AM UTC
Hi everyone,

So this project is 99% finished.
I've tried to take the best photos my feeble skills allow so apologies for not being the sharpest around.

All that's left to assemble are some tiny PE pieces on the lower part of the movable canopy plus the locking mechanism, this to be made from scratch.

Found the kit very simple, the only criticism being the rather thick decal carrier that is very noticeable on those tiny stencils.
Should I ever build another Salamander I won't forget to glue the metal sphere and not trust the pins that hold it on their own.
Almost 3 months to complete, must be a record breaker for me


Cheers
Pedro
officer_crabtree
_VISITCOMMUNITY
Scotland, United Kingdom
Joined: February 11, 2014
KitMaker: 27 posts
AeroScale: 20 posts
Posted: Wednesday, February 12, 2014 - 09:01 AM UTC
hi pedro,

a very nice kit you've made there!

I really like the cockit details and the very subtle weathering the most for sure!

lovely job,

james.
AirLedge
_VISITCOMMUNITY
Cork, Ireland
Joined: July 26, 2007
KitMaker: 292 posts
AeroScale: 265 posts
Posted: Wednesday, February 12, 2014 - 10:18 AM UTC
Excellent stuff Pedro, well done.
Antoon3103
_VISITCOMMUNITY
Antwerpen, Belgium
Joined: March 31, 2012
KitMaker: 224 posts
AeroScale: 146 posts
Posted: Wednesday, February 12, 2014 - 06:23 PM UTC
Outstanding work Pedro, love it.

Tony
rochaped
_VISITCOMMUNITY
Lisboa, Portugal
Joined: August 27, 2010
KitMaker: 679 posts
AeroScale: 669 posts
Posted: Thursday, February 13, 2014 - 02:57 AM UTC
Thank you all for your the positive comments

Cheers
Pedro
 _GOTOTOP