_GOTOBOTTOM
Cold War (1950-1974)
Discuss the aircraft modeling subjects during the Cold War period.
Hosted by Tim Hatton
Italieri 1/32 F-104G
WoodshedWings
_VISITCOMMUNITY
Ontario, Canada
Joined: October 11, 2012
KitMaker: 141 posts
AeroScale: 139 posts
Posted: Wednesday, March 26, 2014 - 01:49 AM UTC
I thought I would start this build with a quick preview of the kit. Jim Starkweather has already posted his video review of the plastic in the box here. I taped together the main fuselage components to check fit and get an idea of the size of the thing. As you can see, it's big!(well, long).


On first inspection, the detail on the port fuselage half seems softer than on the starboard. Hopefully, this is a 'one off' mold imperfection and should even out under paint. The decal sheets look fantastic and are in register. G-Factor are developing a set of metal landing gear for the kit and I should be receiving those shortly. In the mean time there is plenty to be getting on with so expect an update soon.
Joel_W
Staff MemberAssociate Editor
AUTOMODELER
_VISITCOMMUNITY
New York, United States
Joined: December 04, 2010
KitMaker: 11,666 posts
AeroScale: 7,410 posts
Posted: Thursday, March 27, 2014 - 02:03 AM UTC
Mike,
I'm already signing on to follow your build. The F104 is one of my favorite jets. Already noticed the huge size of the kit as you're using double mats, which my workbench wouldn't accommodate.

Surprised about your observation of the difference in detail between the two fuselage halves.
Joel
WoodshedWings
_VISITCOMMUNITY
Ontario, Canada
Joined: October 11, 2012
KitMaker: 141 posts
AeroScale: 139 posts
Posted: Thursday, March 27, 2014 - 02:26 AM UTC
I was also surprised Joel. One half is definitely molded more crisply than the other. I will try to photograph the difference and post it up.
Merlin
Staff MemberSenior Editor
AEROSCALE
#017
_VISITCOMMUNITY
United Kingdom
Joined: June 11, 2003
KitMaker: 17,582 posts
AeroScale: 12,795 posts
Posted: Thursday, March 27, 2014 - 10:56 PM UTC
Hi Mike

That is bizarre as they're on the same sprue. I had a look at some of the close-up stills Jim posted with his video, and the details around the wing root look quite soft - I expected a razor-sharp edge for the wing joint.

All the best

Rowan
WoodshedWings
_VISITCOMMUNITY
Ontario, Canada
Joined: October 11, 2012
KitMaker: 141 posts
AeroScale: 139 posts
Posted: Thursday, April 03, 2014 - 09:06 AM UTC
Managed to get some (not great) pictures of the detail on the port fuselage. There is a mold seam which runs vertically from the intake attachment point up to the spine, which seems to be mis-aligned. The detail to the front of this is OK but that behind, is soft.


You can see where the panel lines are skewed. The offending seam will have to be sanded flat and detail restored, I expect. I'm hoping the surface detail won't look too bad under paint.
I did some work on the interior, building the cockpit tub and bang seat. The cockpit tub went together well and I will probably cut out the cockpit floor as this area was open on the real thing, a legacy of the downward firing ejector seat initially installed. Detail on the instrument panels looks great and will paint up nicely. There are photo etched alternatives supplied, which seem pointless to me, as the detail is flat and one-dimensional. These will not be used.


I found the construction of the bang seat to be fiddly and awkward to align due to poor engineering. It will look OK after the molded on detail has been dry brushed and painted up. For now, I just have the base colour on. I have left the backrest off and will paint this seperately before installing. This will also hide the ejector pin mark which is visible in the photo.


There are two large but not too deep ejector pin marks on the cockpit sidewalls which have been filled with the un-mixed goo from the bottom of a bottle of Mr. surfacer. Just need to sand these down and then it's on with the interior grey. Till next time,
Mike.
JPTRR
Staff MemberManaging Editor
RAILROAD MODELING
#051
_VISITCOMMUNITY
Tennessee, United States
Joined: December 21, 2002
KitMaker: 7,772 posts
AeroScale: 3,175 posts
Posted: Thursday, April 03, 2014 - 09:49 AM UTC
Mike,

I'm locked-on to this thread. The Zipper - just look at those lines.

Curious about the softer panels detail. It seems to be along tight convex areas. Perhaps they needed to use slide-mold technology? But left v right halves? Curious.
WoodshedWings
_VISITCOMMUNITY
Ontario, Canada
Joined: October 11, 2012
KitMaker: 141 posts
AeroScale: 139 posts
Posted: Tuesday, April 29, 2014 - 03:06 PM UTC
Work is proceeding at a glacial pace on the Starfighter. I have more or less got the cockpit done and some more progress has been made on the ejector seat. The interior was base coated with XF19, sky grey, then the various instrument panels and bezels were picked out in black.


I used Xtracolour enamel RLM 02 to dry brush the panels and the ejector seat.


Then glossed ready for decals. I began by cutting off the six to the far right of the panel. I realised while applying these, that the dials do not line up with their corresponding raised bezels. The decal, though printed exceptionally well (the numbers can be read on the dials), fits poorly with some dials being too big or out of position. I decided therefore, to punch out the remaining dials and apply them individually. The overall effect is quite nice. I used placards from Airscale to dress up the panels. These are 1/48 scale in fact, but look OK in this context.


I painted the pull cords on the bang seat in a bright yellow then carefully painted the black stripes.


The oxygen bottle was painted bright green.


Still have more detail painting and seat belts to do on the seat.
Joel_W
Staff MemberAssociate Editor
AUTOMODELER
_VISITCOMMUNITY
New York, United States
Joined: December 04, 2010
KitMaker: 11,666 posts
AeroScale: 7,410 posts
Posted: Wednesday, April 30, 2014 - 02:08 AM UTC
Mike, speed doesn't count, only the final results. Your cockpit looks great. I especially like the IP. You decision to punch out the individual gauges sure looks like the right way to go, especially in 1/32 scale.
Joel
WoodshedWings
_VISITCOMMUNITY
Ontario, Canada
Joined: October 11, 2012
KitMaker: 141 posts
AeroScale: 139 posts
Posted: Tuesday, May 20, 2014 - 07:27 AM UTC
Finished off the belts and detail painting on the F-104 seat so thought I'd take a couple of quick cellphone photos.


I added some straps from lead foil, and an oxygen hose from wire, just to busy it up a bit. It doesn't look at all bad.
berndm
_VISITCOMMUNITY
Niedersachsen, Germany
Joined: March 26, 2014
KitMaker: 844 posts
AeroScale: 630 posts
Posted: Tuesday, May 20, 2014 - 04:37 PM UTC
Hello Mike
Your Cockpit looks great, i will follow your built with interest
This is a expensive kit, is it worth the money ?

Bernd
WoodshedWings
_VISITCOMMUNITY
Ontario, Canada
Joined: October 11, 2012
KitMaker: 141 posts
AeroScale: 139 posts
Posted: Wednesday, May 21, 2014 - 02:05 AM UTC
Hi Bernd, thanks for the positive comment.
Is this kit worth the money? This is always going to be dependent on how badly you want a new tool F-104. See my comments and photos above, regarding some of the surface detail. The photo etch provided for the instrument panels is rubbish, but the plastic parts paint up nicely. The decals are fantastic but the instrument panel, though very nicely printed, does not line up with the plastic detail, so I would suggest punching the individual dials out and adding them seperately. The cockpit floor is wrong but little of it will be seen. You do get a full engine (I am going to close mine up to show off the sleek lines of the Starfighter), if that is important for you and a pilots access ladder and stands for the engine and tail. Some of the detail is soft but does open the door to scratchbuilding your own, again, if you feel so inclined. The avionics bay aft of the cockpit and the M61 Vulcan cannon bay can be posed open. So, it's not without its' vices but it certainly looks as if it will go together OK on test fitting the parts and will definitely look like a Starfighter when done.
berndm
_VISITCOMMUNITY
Niedersachsen, Germany
Joined: March 26, 2014
KitMaker: 844 posts
AeroScale: 630 posts
Posted: Thursday, May 22, 2014 - 02:55 AM UTC
Hi Mike
The last F-104, i have done in this scale was the Revell one, with raised panel lines.This was 20 years ago ! Time for a new one.
Today i do aircrafts mainly in 1/48, but i will follow your built closely. It looks very nice.
Bernd
Joel_W
Staff MemberAssociate Editor
AUTOMODELER
_VISITCOMMUNITY
New York, United States
Joined: December 04, 2010
KitMaker: 11,666 posts
AeroScale: 7,410 posts
Posted: Thursday, May 22, 2014 - 05:18 AM UTC
Mike,
Well done with the seat. The added details really stand out.
Joel
WoodshedWings
_VISITCOMMUNITY
Ontario, Canada
Joined: October 11, 2012
KitMaker: 141 posts
AeroScale: 139 posts
Posted: Saturday, June 21, 2014 - 02:03 AM UTC
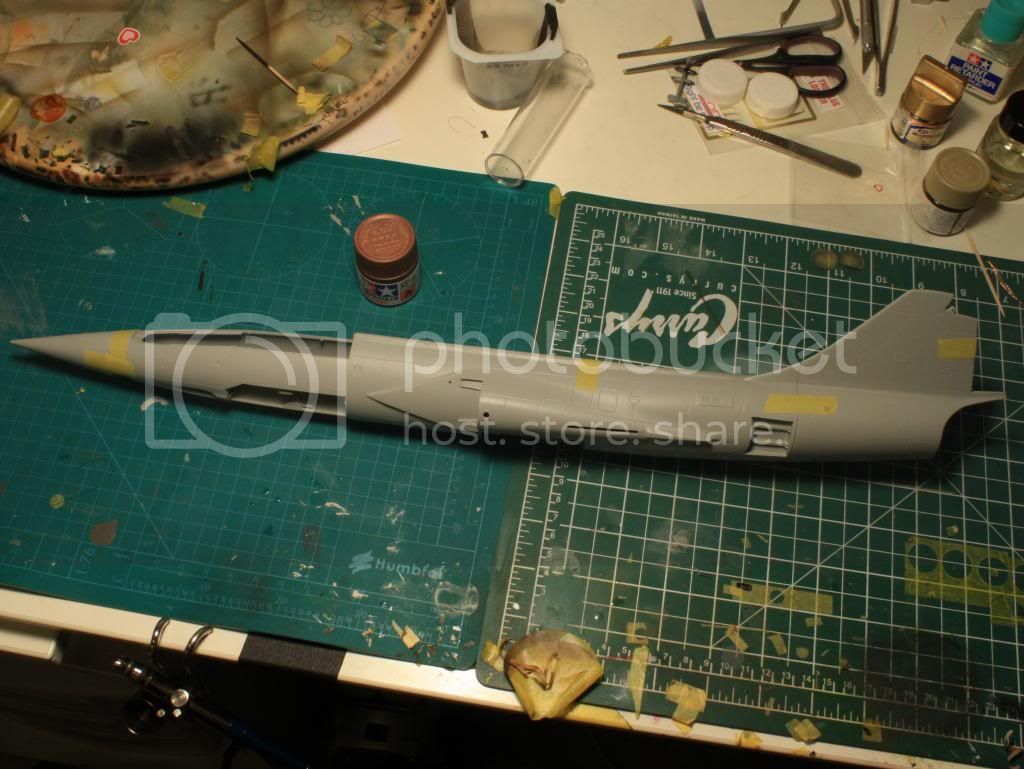
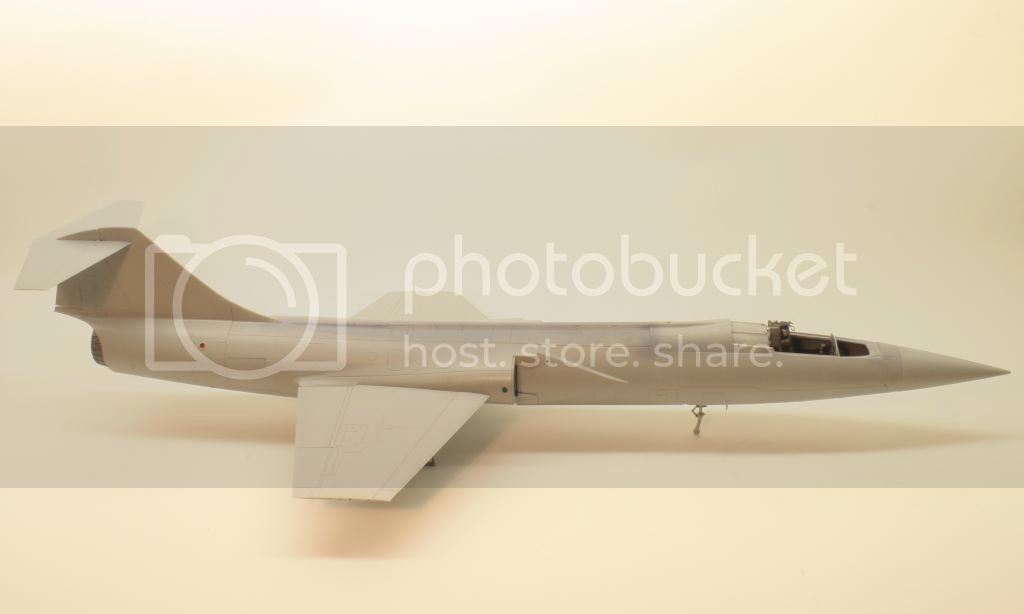
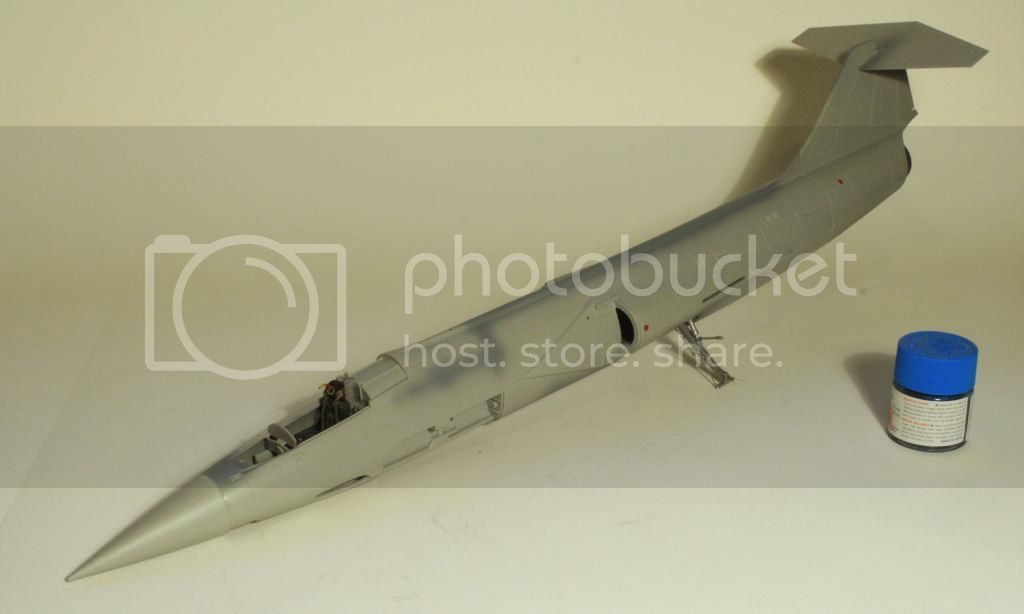
Apologies for the lack of an update. This doesn't mean I have been idle though, it's just that most of the work that has been done on the kit recently, has been about dealing with seams, rescribing detail and sanding and polishing, not the most riveting (pardon the pun) subjects for most modellers. The fuselage is together and it has been nice to get an idea of the size and sleek lines of the model.


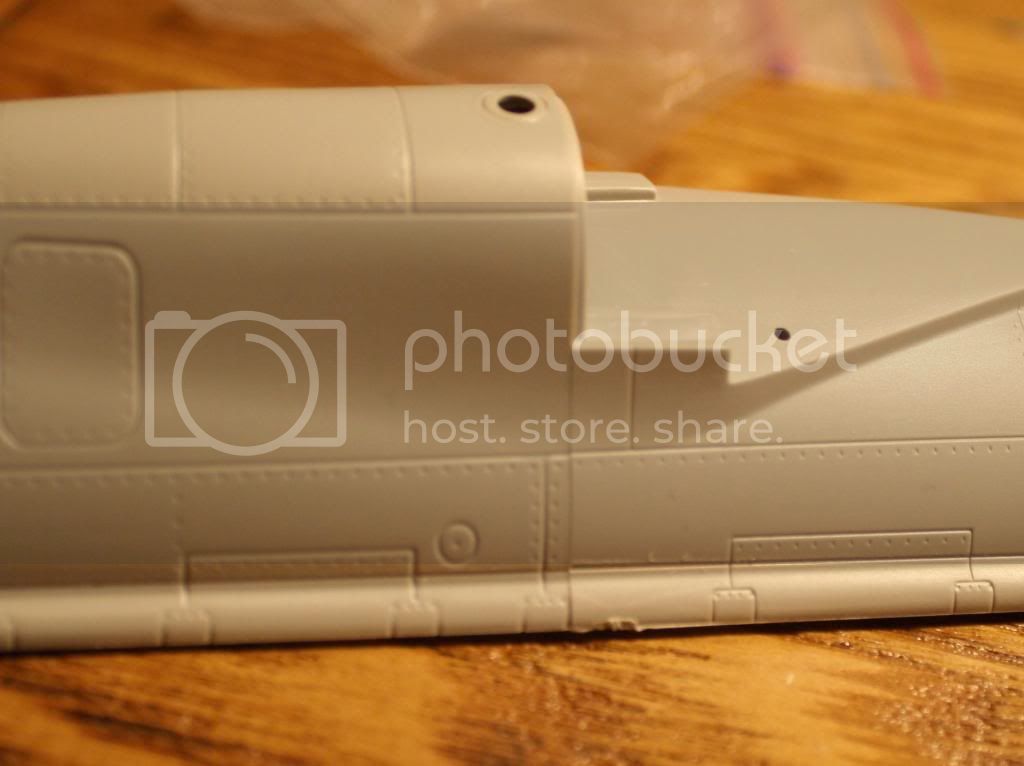
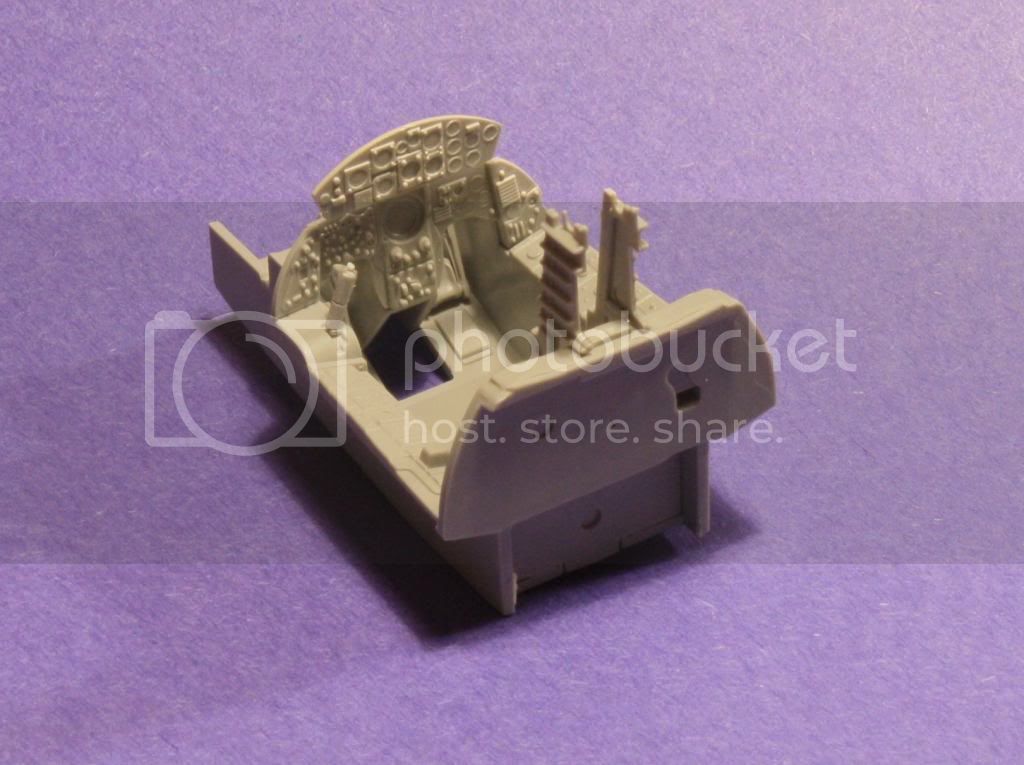
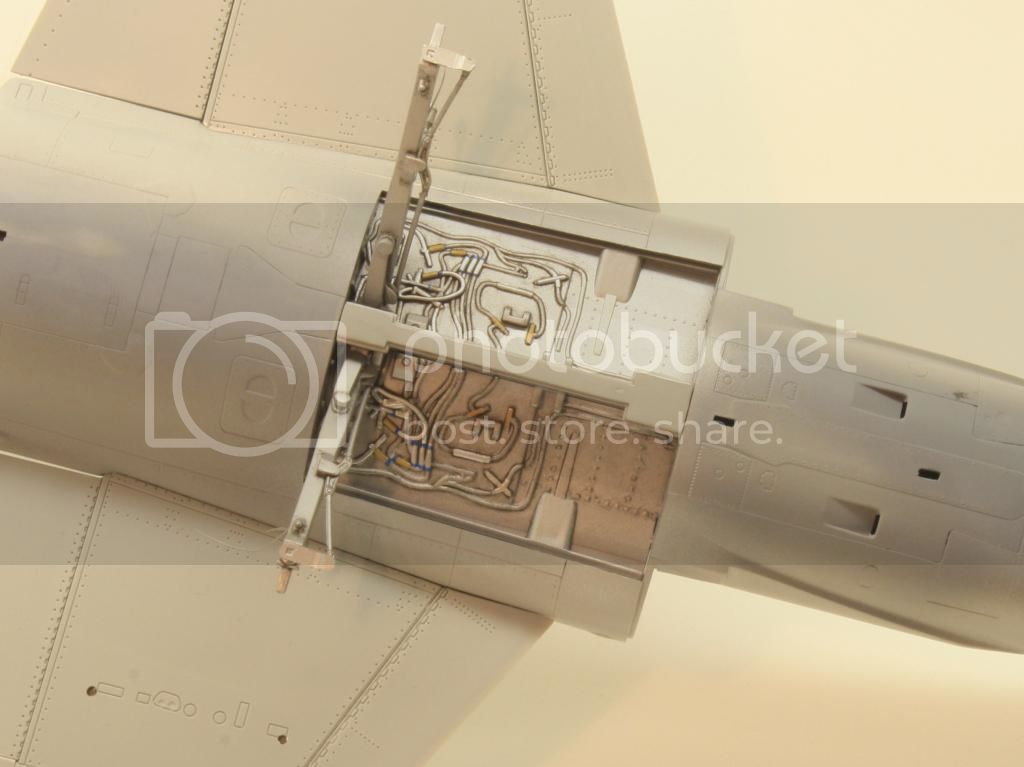
What hasn't been nice has been the work needed to get the surface detail a bit more consistent. The detail on this kit really is a mixed bag, exquisitely sharp in some areas but soft and mushy in others. I already spoke about the mismatch between fuselage halves and this is very apparent when you marry the two together. The F104 has an abundance of small inspection panels on the spine, which straddle the centre line seam. These all had to be rescribed on the port side, to match the consistency of the starboard side. In places, the detail disappeared altogether. I used a pin chucked in (what else!) a pin vice to replace rivets and my trusty UMM scriber to do the initial pass followed up by the RB productions tool. After polishing the seam, I brushed a little Tamiya extra thin into each rescribed line and shot some primer along its length to check for discrepencies. I made the decision to close up the avionics bays and speed brakes as more detail is required here and I don't have the references to do it justice. I will open up the cannon bay though as I have a couple of fairly good photos of this area.

As the engine is not going to be displayed, the only part of it which needed painting, was the nozzle. This was sprayed with Gunze Burnt Iron and dry brushed with silver enamel. A Mig Productions Dark Wash was then applied before attaching it and the tail section to the main fuselage.


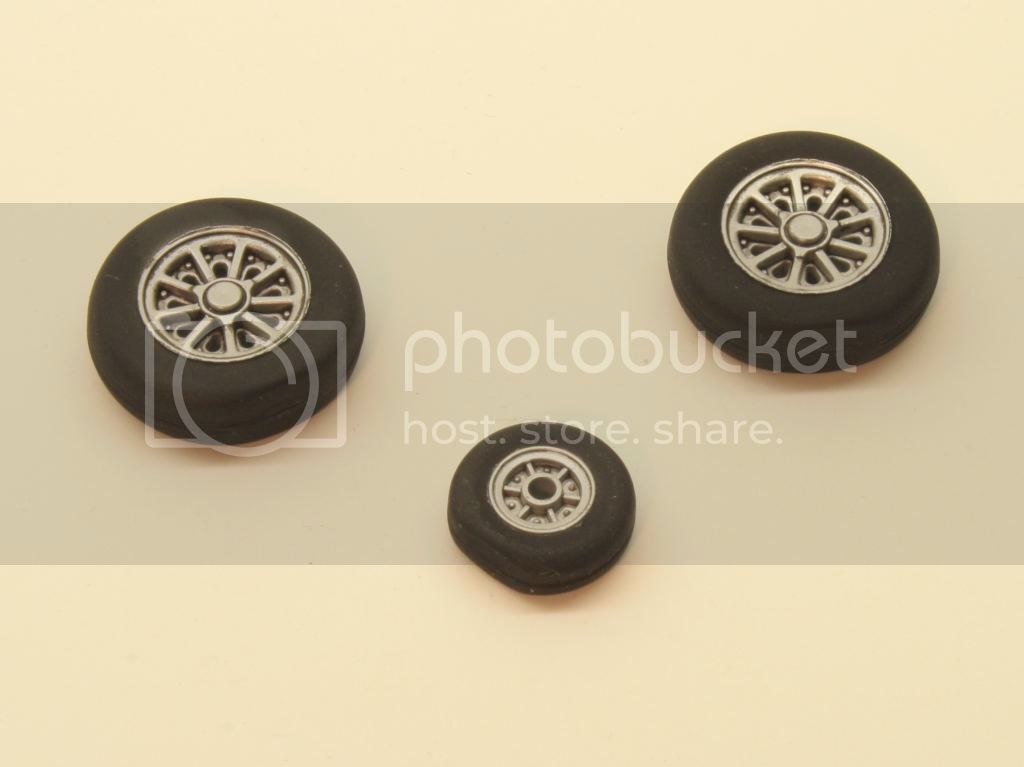
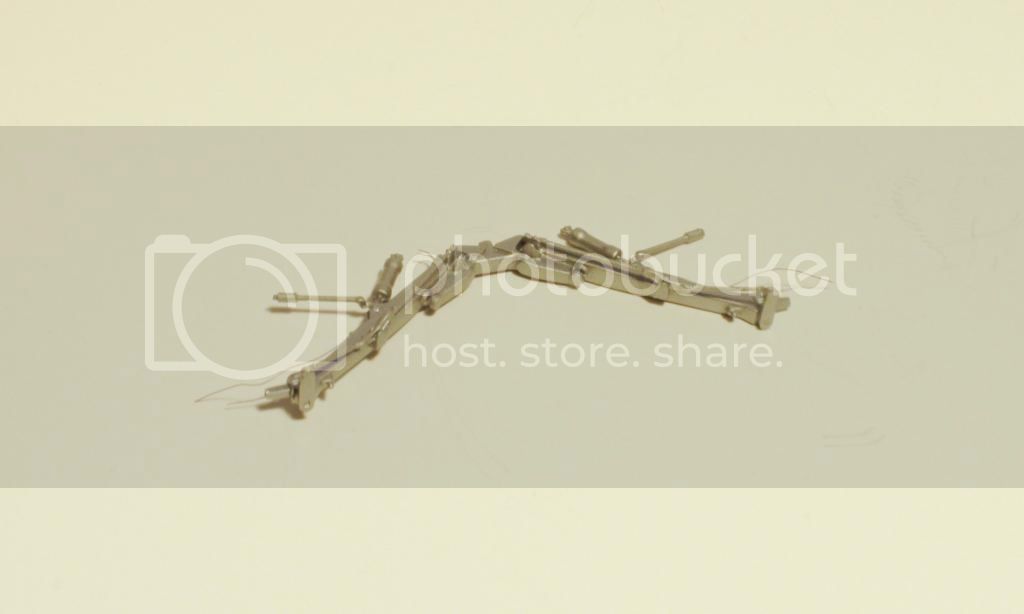
I recently received the gear legs back from Ernie Gee who is in the process of developing some brass replacements and assembled and test fitted these after adding some hydraulic lines from fuse wire and painting with Alclad.


Balancing the model on the main gear proved that this would be a tail sitter, so ballast was added to the nose cone by means of fishing weights epoxied in place.


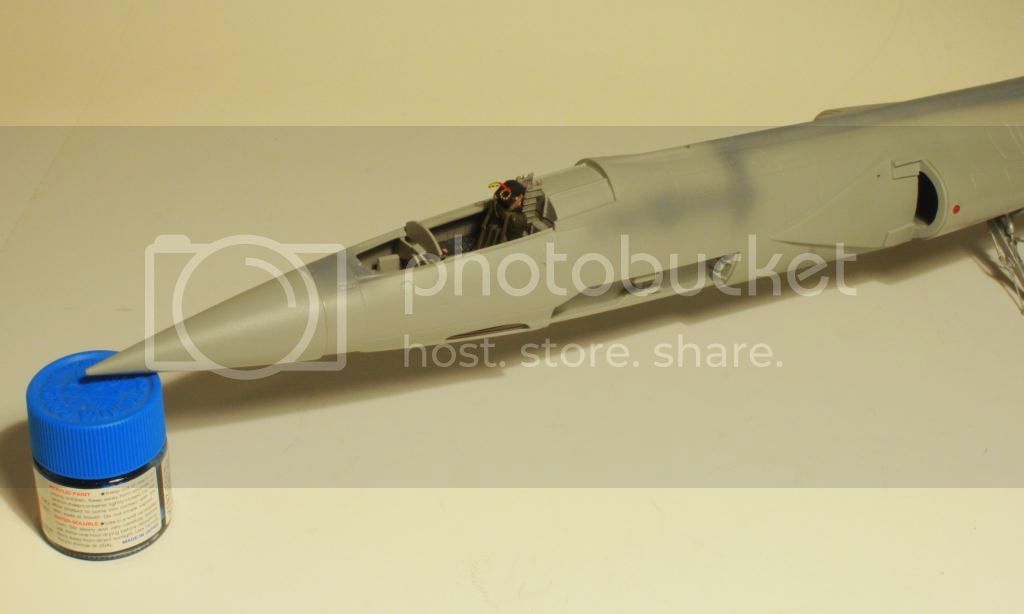
Despite my grumblings about the kit, it's begining to look very much the part and I am looking forward to getting some war paint on very soon.

Joel_W
Staff MemberAssociate Editor
AUTOMODELER
_VISITCOMMUNITY
New York, United States
Joined: December 04, 2010
KitMaker: 11,666 posts
AeroScale: 7,410 posts
Posted: Saturday, June 21, 2014 - 09:35 AM UTC
Mike,
I went back a really took a good look at the detail issue, and as you alluded to there is a vast difference between the fore and aft side of that vertical mold seam line. Seems that the two molds were machined to completely different standards. Sure sounds like you did a 1st rate job of correcting all those soft detail issues. Just don't get it how with today's computer aided machining programs, they could have gotten it so wrong.

Also will be taking a look at the UMM site for those rescribing tools. I've struggled time and time again with the Tamiya scriber, and just can't get comfortable with it.

Ernie Gee's main landing gear really looks quite nice. Your added detailing of hydraulic lines adds just that little extra, as does the Alcad finish.

Joel
chris1
_VISITCOMMUNITY
Auckland, New Zealand
Joined: October 25, 2005
KitMaker: 949 posts
AeroScale: 493 posts
Posted: Saturday, June 21, 2014 - 05:20 PM UTC
Hi Mike
Following this one closely.
I wonder how difficult it would be to convert it to a NF 104 as flown by Chuck Yeager in his altitude attempt as portrayed in the Right Stuff.(this is mainly thinking outloud)

Cheers

Chris

Jessie_C
_VISITCOMMUNITY
British Columbia, Canada
Joined: September 03, 2009
KitMaker: 6,965 posts
AeroScale: 6,247 posts
Posted: Saturday, June 21, 2014 - 05:44 PM UTC
There was an article on that in FSM Magazine back in the '90s. You need to extend the wingtips and shock cones, then add the rocket tube to the base of the fin. It's a relatively simple oval cross-section. In the article it was built up from layers of plastic card and then sanded and puttied to shape. Edwards AFB badge decals are available from Hypersonic Models. The FSM build used a home-made badge.
WoodshedWings
_VISITCOMMUNITY
Ontario, Canada
Joined: October 11, 2012
KitMaker: 141 posts
AeroScale: 139 posts
Posted: Sunday, June 22, 2014 - 12:28 AM UTC

Quoted Text


Also will be taking a look at the UMM site for those rescribing tools. I've struggled time and time again with the Tamiya scriber, and just can't get comfortable with it.

Ernie Gee's main landing gear really looks quite nice. Your added detailing of hydraulic lines adds just that little extra, as does the Alcad finish.

Joel


Hi Joel,

The link to the UMM Scriber product page is here
I don't enjoy scribing and like you I struggled for ages to find a tool that worked for me. The UMM tool is by far the best I have tried as it can be used in a number of ways and is good for applying the initial lines. Another good tool is the RB productions etched tool, which I typically use to finish off and neaten up but could work for you as your main scriber of choice.
The landing gear is actually the kits own plastic parts. These look OK but test fitting reveals that it may be a bear to get the actuators to line up with their respective attachment points. Oh well, I'll cross that bridge when I get to it.
All the best,
Mike
Joel_W
Staff MemberAssociate Editor
AUTOMODELER
_VISITCOMMUNITY
New York, United States
Joined: December 04, 2010
KitMaker: 11,666 posts
AeroScale: 7,410 posts
Posted: Sunday, June 22, 2014 - 03:48 AM UTC

Quoted Text


Quoted Text


Also will be taking a look at the UMM site for those rescribing tools. I've struggled time and time again with the Tamiya scriber, and just can't get comfortable with it.

Ernie Gee's main landing gear really looks quite nice. Your added detailing of hydraulic lines adds just that little extra, as does the Alcad finish.

Joel


Hi Joel,

The link to the UMM Scriber product page is here
I don't enjoy scribing and like you I struggled for ages to find a tool that worked for me. The UMM tool is by far the best I have tried as it can be used in a number of ways and is good for applying the initial lines. Another good tool is the RB productions etched tool, which I typically use to finish off and neaten up but could work for you as your main scriber of choice.
The landing gear is actually the kits own plastic parts. These look OK but test fitting reveals that it may be a bear to get the actuators to line up with their respective attachment points. Oh well, I'll cross that bridge when I get to it.
All the best,
Mike


Mike,
thanks for the links. I'll be ordering the UMM this afternoon. the RB products will likely cost more for international shipping then the unit costs.

BTW, any idea how long the UMM unit lasts?

Joel
WoodshedWings
_VISITCOMMUNITY
Ontario, Canada
Joined: October 11, 2012
KitMaker: 141 posts
AeroScale: 139 posts
Posted: Thursday, July 17, 2014 - 11:04 AM UTC
Haven't had much progress to show lately as most of my (very little) free time has been taken up with other things. My excuse is, the time of year, school is out, work is busying up before the summer break and all sorts of other things getting in the way of modelling. Much of my modelling time has been spent polishing seams on the fuselage in preparation for the NMF which is to be applied on the underside of the model. This does not make for a very enthralling update so I have waited until I had something slightly more interesting to report.

I have attached the wings and control surfaces (these being offered as seperate parts).


The wing joint is a good fit and the correct dihedral is assured by large, angled locating tabs, which slot firmly into the fuselage.
I painted the wheelhubs in Alclad alluminium, then cut masks using an Olfa circle cutter for the main gear. As the circle cutters minimum diameter is too large for the nose wheel, I place tape over the hub then cut round it carefully using a fresh blade to form the mask. The tyres were then sprayed matt black before removing the masks. These will be weathered further with pigments.


With the gear doors in place, not much of the innards of the wheel wells will be visible so I decided to just paint the moulded on detail. After painting the interior of the well in Alclad alluminium, I used a dark wash to accentuate the detail and then picked out some of the pipework in silver enamel. I used brass to paint the couplings and joints and blue to represent the seals on these couplings. The nose wheel well was given the same treatment.


I am going to have the canopy closed up but I am still undecided whether to keep the cannon bay open or not. With some additional scratch building, this area should come up good and the Vulcan cannon is well represented in the kit. But I love the stilleto lines of the Starfighter and may try and preserve this in the model.
berndm
_VISITCOMMUNITY
Niedersachsen, Germany
Joined: March 26, 2014
KitMaker: 844 posts
AeroScale: 630 posts
Posted: Thursday, July 17, 2014 - 03:52 PM UTC
Hi Mike, it is good to see, your Starfighter is coming together
Your wheels are looking good, i paint my wheels mostly without
masking and it shows sometimes: - (
May i didn t see it, but which markings will your F-104 have ?

Bernd
WoodshedWings
_VISITCOMMUNITY
Ontario, Canada
Joined: October 11, 2012
KitMaker: 141 posts
AeroScale: 139 posts
Posted: Friday, July 18, 2014 - 12:37 AM UTC
Hi Bernd
I am doing an Italian bird, 154 Gruppo CB, 6 Stormo, the mount of Captain Alberto Bosi. I like the grey and green camo and the large white code numbers just aft of the cockpit. The camo offers a lot of weathering possibilities.
berndm
_VISITCOMMUNITY
Niedersachsen, Germany
Joined: March 26, 2014
KitMaker: 844 posts
AeroScale: 630 posts
Posted: Friday, July 18, 2014 - 02:00 AM UTC
Hi Mike
a good choice, italian birds look very nice, in every decade.
I wish you some more time for this built, it deserves it
This big 104 is very tasty !

All the Best
Bernd
Joel_W
Staff MemberAssociate Editor
AUTOMODELER
_VISITCOMMUNITY
New York, United States
Joined: December 04, 2010
KitMaker: 11,666 posts
AeroScale: 7,410 posts
Posted: Friday, July 18, 2014 - 08:16 AM UTC
Mike,
Progress is progress, and like you said, not all translates well to a update with pictures. Such is the life cycle of a build.

One suggestion for future builds is not using flat black to paint your tires, as rubber tires in real life aren't black, new they're a very dark gray, and from there vary quite a bit. I never much cared for plain old flat black as it just never looked right. For a long time have been experimenting with dark grays and grays/black. Now I'm really partial to Nato Black with a few drops of a Dark Gray.

Joel
WoodshedWings
_VISITCOMMUNITY
Ontario, Canada
Joined: October 11, 2012
KitMaker: 141 posts
AeroScale: 139 posts
Posted: Friday, July 18, 2014 - 09:46 AM UTC
Hi Joel, thanks for the suggestion.
I still need to dust the tyres down with some light grey pigment to give that dusty worn look and the black is a good base for that weathering, also contrasting nicely with the metal rims. I realise they do look a bit stark at the moment.
I do use different shades of grey for various tyres, especially if the rims are black, as in many Luftwaffe subjects.
 _GOTOTOP