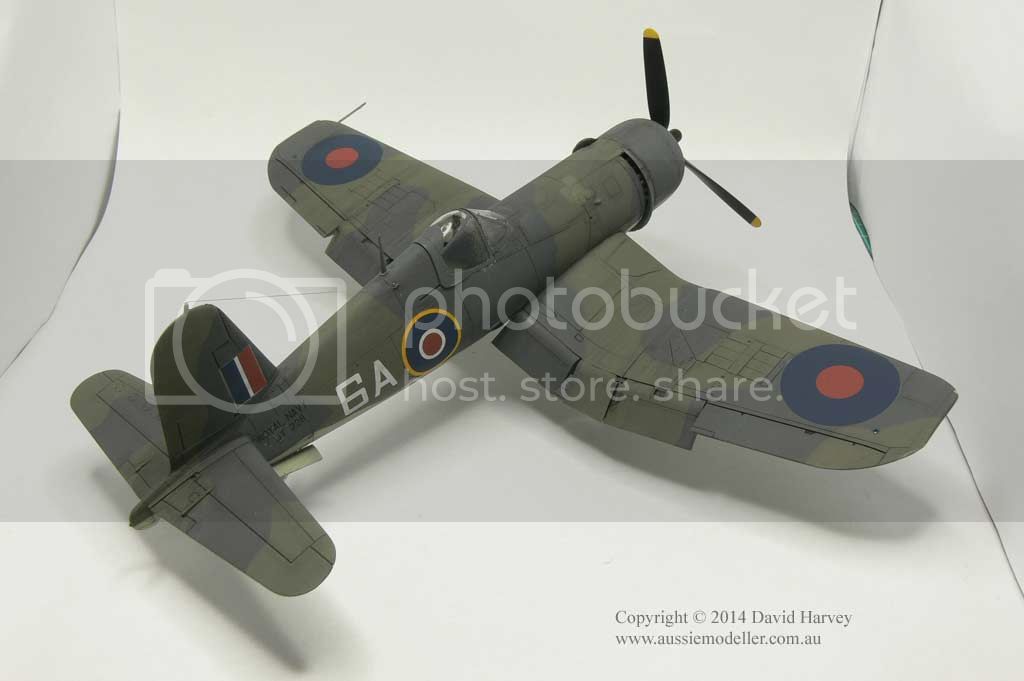
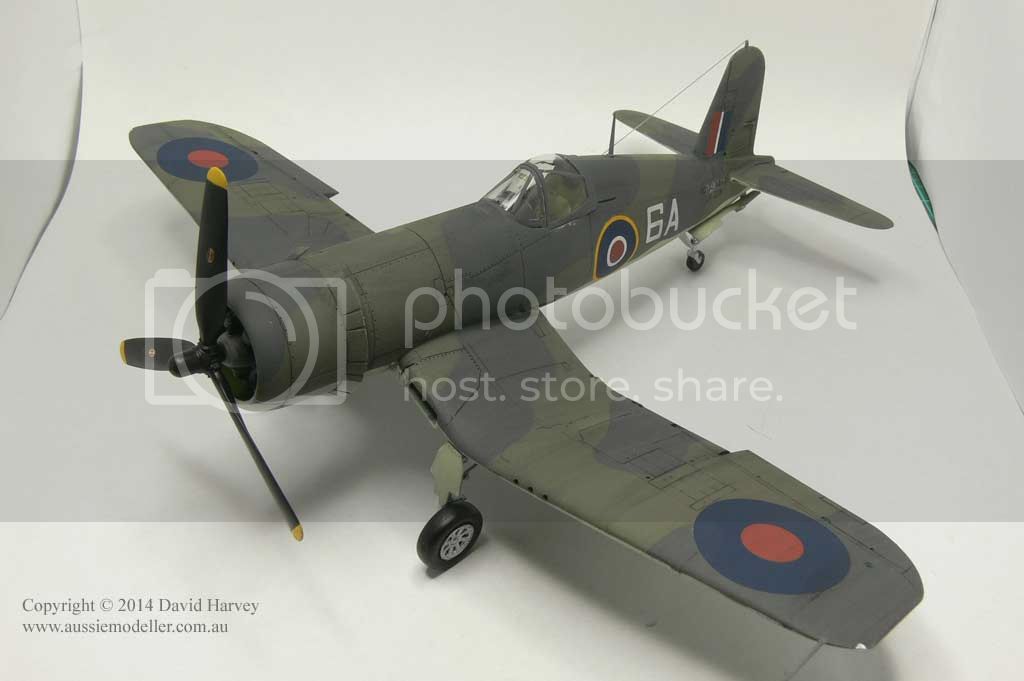
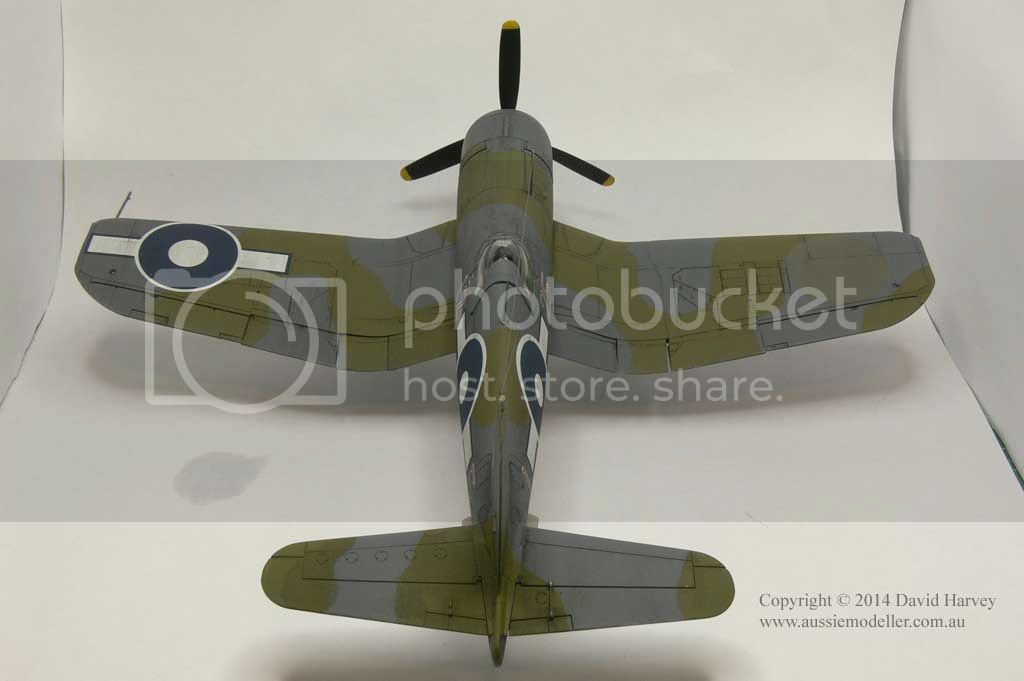
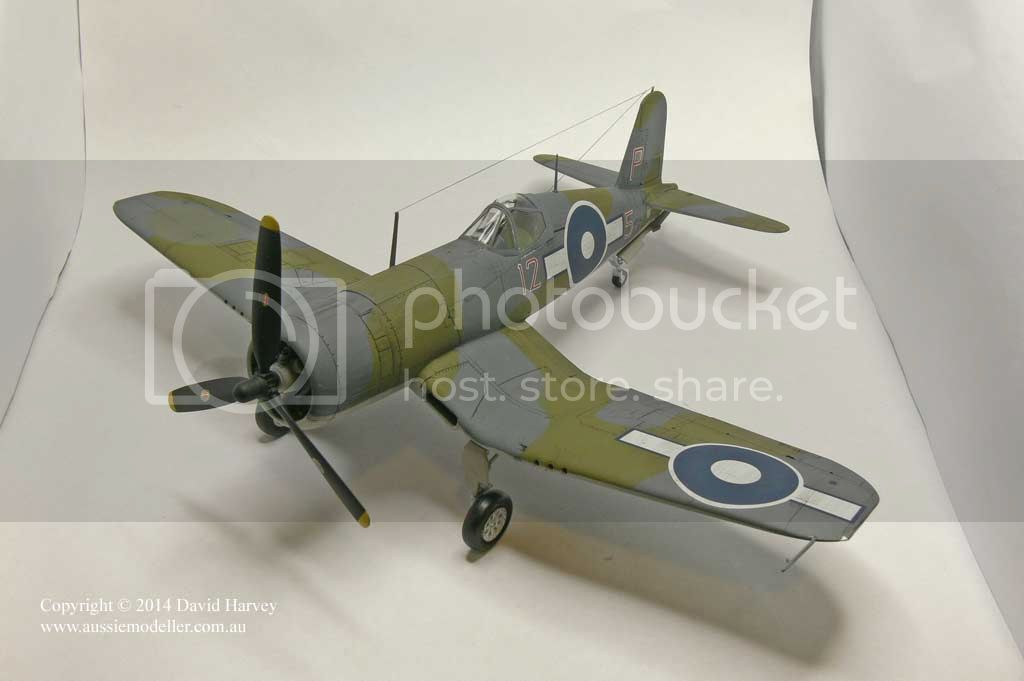
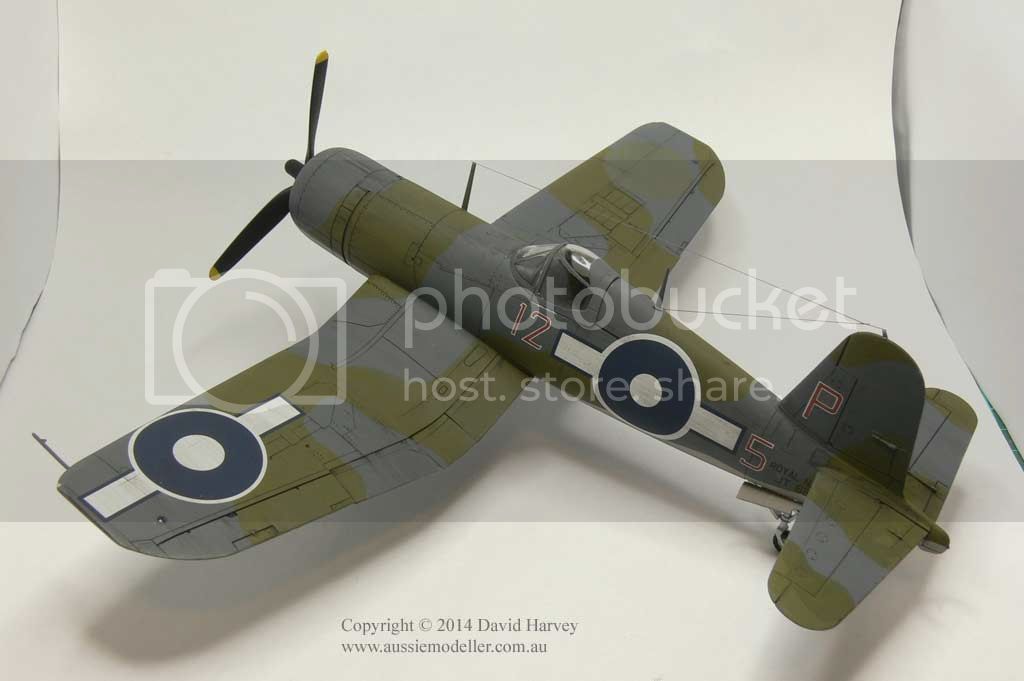
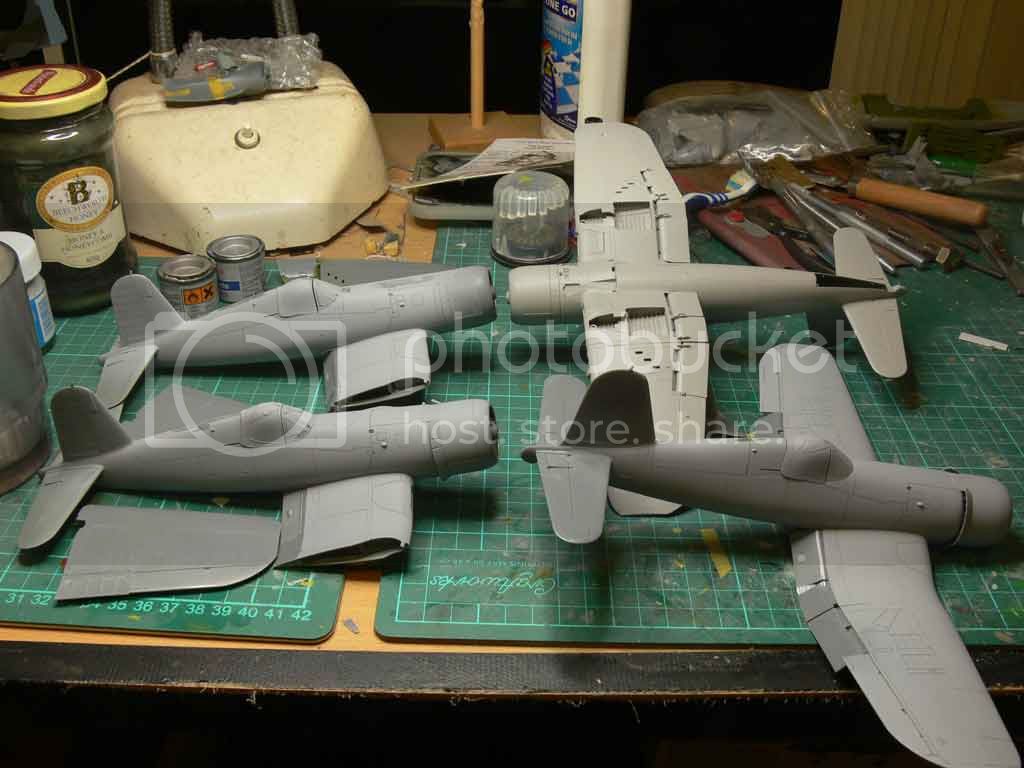
Whilst battling the AZ Models Firefly Mk 1 I thought I might knock together something a bit easier so I started the four Tamiya 1/48 Corsair F4U-1D's that I had sitting in the cupboard. All four are going to be FAA Corsairs using a variety of AM decals I have and are pretty much OOB. I have trimmed the wing tips and just given the interiors and engines a basic paint job as I am more interested in the exterior paint job as I did with my last FAA Corsair.
I just love the Tamiya Corsairs as they are well engineered, easy and quick to build. You can also go to town on detailing them if you wish. Apart from airbrushing the interiors I only started these last night and have done a fair amount of work on them.
At some stage I have to get more of them as I want to do two RNZAF Corsairs and maybe an FAA Corsair Mk IV at some stage.
I have done work today in between mowing the lawn, walking the dogs and the other usual home stuff. I have given them an undercoat of Mr Surfacer and added the flaps. The kit flaps are really not made to put on up so I have sent off for some Aftermarket Flaps that are deigned to be up for the next Corsairs I do.
I have painted the model below with Humbrol Hu 129 to represent the ANA 602, thoughts? I think it MAY be a touch more brown in the image than in real life but I have seen it mentioned several times as a representative of 602.
I am painting the undercarriage flat aluminium as I have seen it mentioned that it was this colour originally then faded/oxidized to a greyish colour that looks like Sky.
Hosted by Rowan Baylis
1/48 Flight of FAA Corsairs
Harvs73
Queensland, Australia
Joined: January 23, 2012
KitMaker: 66 posts
AeroScale: 47 posts
Joined: January 23, 2012
KitMaker: 66 posts
AeroScale: 47 posts
Posted: Friday, April 04, 2014 - 09:24 PM UTC
Joel_W
Associate Editor
New York, United States
Joined: December 04, 2010
KitMaker: 11,666 posts
AeroScale: 7,410 posts
Joined: December 04, 2010
KitMaker: 11,666 posts
AeroScale: 7,410 posts
Posted: Sunday, April 06, 2014 - 01:34 AM UTC
Nice collection you've got going. The Corsair is one of my favorite WW11 aircraft.
As far as ANA 602, it is indeed a slightly lighter gray then the standard Gray used by the US Navy circa 42-43 which is FS36440, so your choice of HU129 is fine.
Also keep in mind that since none of us are using a color calibrated monitor, the odds of us all seeing the actual color you're seeing is quite small. And then depending on how your camera's sensor captures the actual color could also alter the image color.
I never get hung up on exact shades even when viewing a model in real life. Just too many variables to be concerned with.
Joel
thegirl
Alberta, Canada
Joined: January 19, 2008
KitMaker: 6,743 posts
AeroScale: 6,151 posts
Joined: January 19, 2008
KitMaker: 6,743 posts
AeroScale: 6,151 posts
Posted: Sunday, April 06, 2014 - 01:48 AM UTC
Been following your progress on Hyperscale over the past while , nice work so far
Terri
Terri
Harvs73
Queensland, Australia
Joined: January 23, 2012
KitMaker: 66 posts
AeroScale: 47 posts
Joined: January 23, 2012
KitMaker: 66 posts
AeroScale: 47 posts
Posted: Tuesday, April 08, 2014 - 09:02 PM UTC
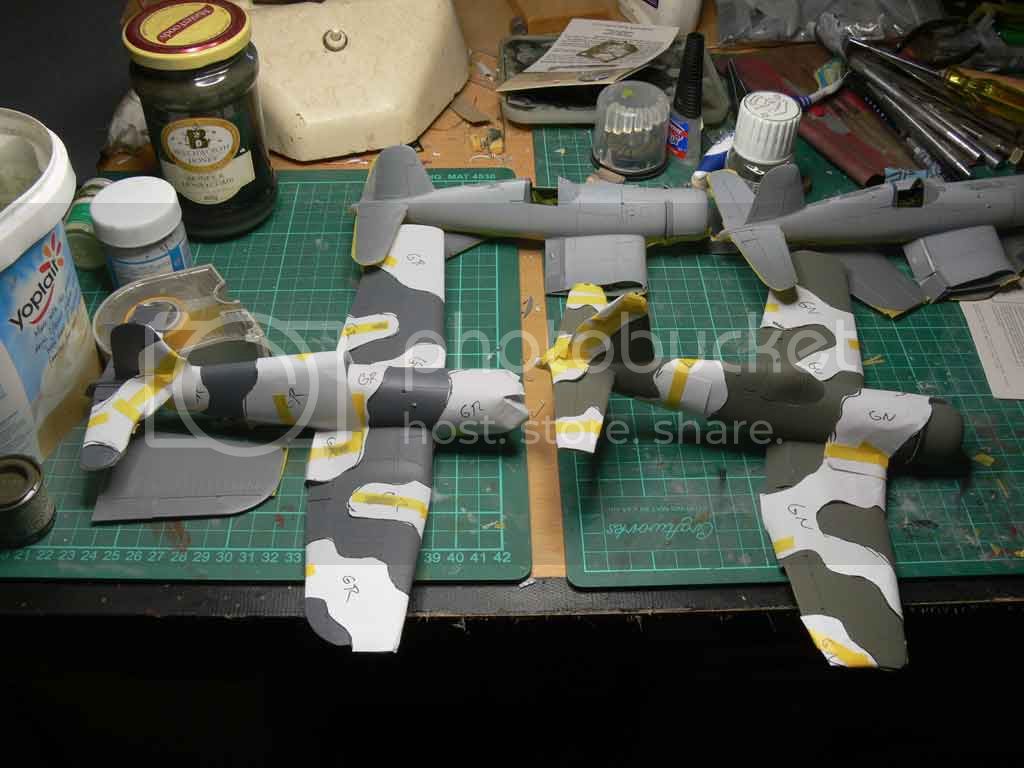
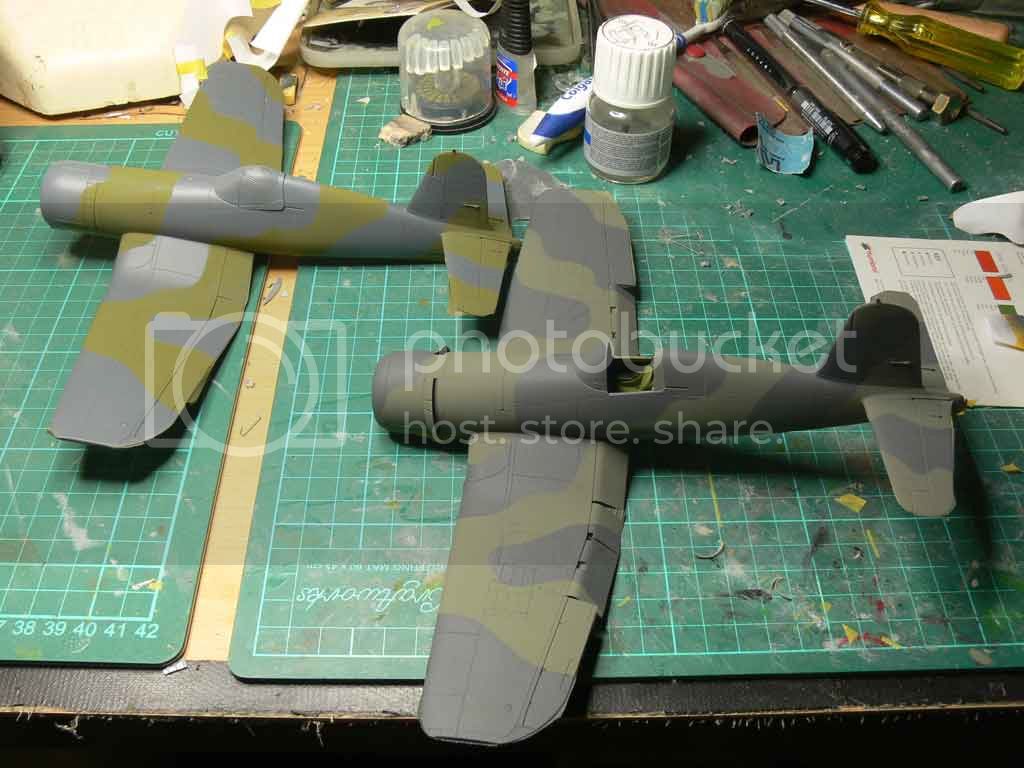
I have started painting the aircraft now. I have done one of them in FAA colours and so far one in US paints. I masked the aircraft with paper masks and made use of my painting the base colour one as gray and the other the green. This enabled me to make one mask as such but use the 'waste' on the other kit. The other two Corsairs have just had a base colour of Olive Drab Hu159. The front model on the bottom photo is in US colours of Hu125 and Hu 159 and the rear aircraft is in British colours of Hu224 and Hu123.
Joel_W
Associate Editor
New York, United States
Joined: December 04, 2010
KitMaker: 11,666 posts
AeroScale: 7,410 posts
Joined: December 04, 2010
KitMaker: 11,666 posts
AeroScale: 7,410 posts
Posted: Wednesday, April 09, 2014 - 01:25 AM UTC
David,
Looking real good so far.
I've never used masks before, as all USAAF WW11 aircraft camo schemes had soft edges, while the British seems to be more hard edges. Your masking seems to leave a edge somewhere in the middle, which I really like, as least that's the way it looks to me. Am I right, or is it just the pictures giving that impression?
Joel
drabslab
European Union
Joined: September 28, 2004
KitMaker: 2,186 posts
AeroScale: 1,587 posts
Joined: September 28, 2004
KitMaker: 2,186 posts
AeroScale: 1,587 posts
Posted: Wednesday, April 09, 2014 - 03:12 AM UTC
Quoted Text
I masked the aircraft with paper masks and made use of my painting the base colour one as gray and the other the green. This enabled me to make one mask as such but use the 'waste' on the other kit.
Clever idea!
Harvs73
Queensland, Australia
Joined: January 23, 2012
KitMaker: 66 posts
AeroScale: 47 posts
Joined: January 23, 2012
KitMaker: 66 posts
AeroScale: 47 posts
Posted: Thursday, April 10, 2014 - 06:39 PM UTC
Joel, you are correct that it gives a tighter demarcation. To me if the demarcation is that obvious in 1/48 the spray painter in real life must have had no pride in his/her work it deliberately painted it that way as you can get a tight line whilst spray painting 1/1 scale.
Harvs73
Queensland, Australia
Joined: January 23, 2012
KitMaker: 66 posts
AeroScale: 47 posts
Joined: January 23, 2012
KitMaker: 66 posts
AeroScale: 47 posts
Posted: Friday, April 18, 2014 - 06:39 PM UTC
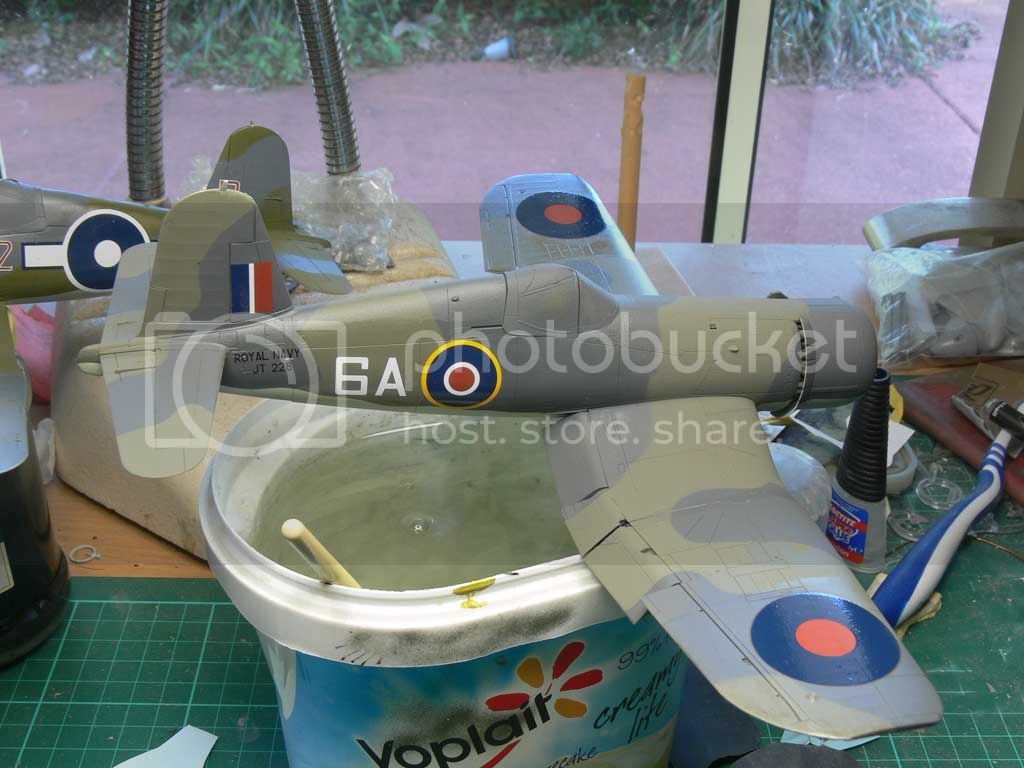
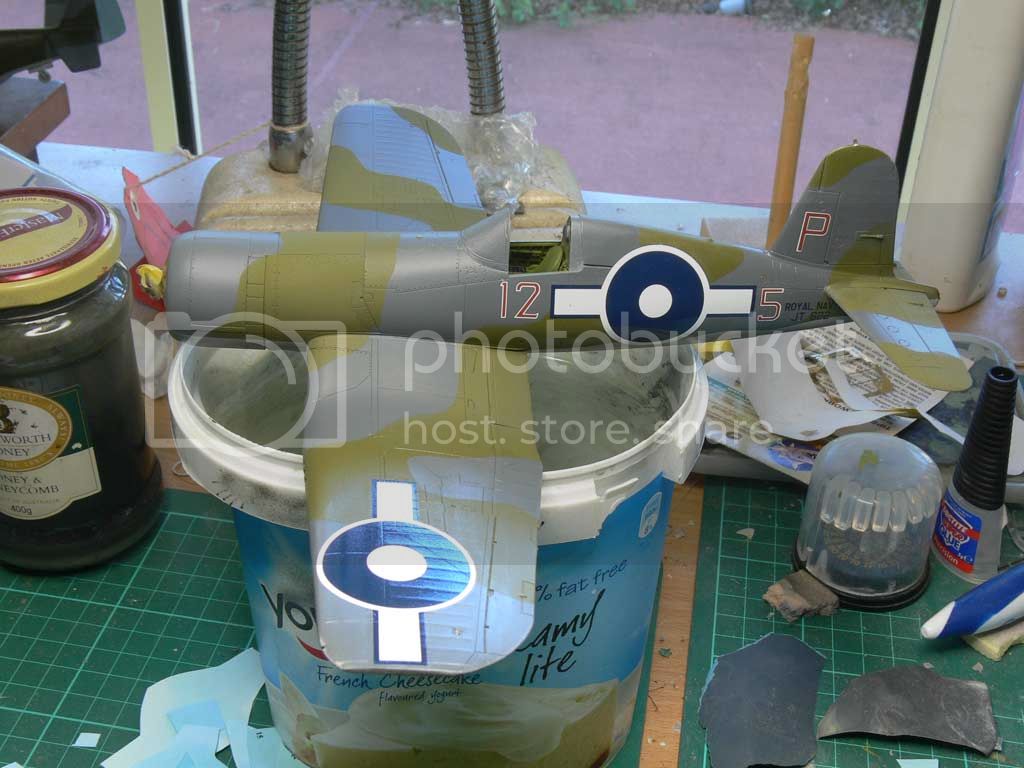
Two of the four are now decalled with the other two yet to be masked and cam painted.
Joel_W
Associate Editor
New York, United States
Joined: December 04, 2010
KitMaker: 11,666 posts
AeroScale: 7,410 posts
Joined: December 04, 2010
KitMaker: 11,666 posts
AeroScale: 7,410 posts
Posted: Saturday, April 19, 2014 - 10:38 AM UTC
Two decaled, two to go. No silvering anywhere that I can see. Nicely done.
Are you going to weather the decals some, or just a coat of matt varnish to dull that bright shinny look?
Joel
Are you going to weather the decals some, or just a coat of matt varnish to dull that bright shinny look?
Joel
Harvs73
Queensland, Australia
Joined: January 23, 2012
KitMaker: 66 posts
AeroScale: 47 posts
Joined: January 23, 2012
KitMaker: 66 posts
AeroScale: 47 posts
Posted: Saturday, April 19, 2014 - 11:25 PM UTC
Joel, I plan to do a variety of things to finish them including minor weathering on some and more on others. I will end up putting a wash on all of them to highlight the panel lines then hit them with a matt coat after all weathering is completed.
Joel_W
Associate Editor
New York, United States
Joined: December 04, 2010
KitMaker: 11,666 posts
AeroScale: 7,410 posts
Joined: December 04, 2010
KitMaker: 11,666 posts
AeroScale: 7,410 posts
Posted: Sunday, April 20, 2014 - 02:29 AM UTC
Quoted Text
Joel, I plan to do a variety of things to finish them including minor weathering on some and more on others. I will end up putting a wash on all of them to highlight the panel lines then hit them with a matt coat after all weathering is completed.
David,
that's the same procedure that I use.
Joel
jimb
New York, United States
Joined: August 25, 2006
KitMaker: 2,539 posts
AeroScale: 231 posts
Joined: August 25, 2006
KitMaker: 2,539 posts
AeroScale: 231 posts
Posted: Sunday, April 20, 2014 - 02:42 AM UTC
Some nice looking Corsairs you have going there. I've always liked this aircraft as well.
Jim
Jim
Harvs73
Queensland, Australia
Joined: January 23, 2012
KitMaker: 66 posts
AeroScale: 47 posts
Joined: January 23, 2012
KitMaker: 66 posts
AeroScale: 47 posts
Posted: Friday, May 23, 2014 - 11:33 AM UTC
Posted: Saturday, May 24, 2014 - 11:36 AM UTC
Great work Harvs, this will be a very nice display when you get them all done!
Cheers, D
Cheers, D
Joel_W
Associate Editor
New York, United States
Joined: December 04, 2010
KitMaker: 11,666 posts
AeroScale: 7,410 posts
Joined: December 04, 2010
KitMaker: 11,666 posts
AeroScale: 7,410 posts
Posted: Saturday, May 24, 2014 - 11:46 AM UTC
David,
I really like the overall weathering effect on both Corsairs. They certainly have that used but not abused look to them. Looking forward to seeing the next pair with paint on them.
Joel
I really like the overall weathering effect on both Corsairs. They certainly have that used but not abused look to them. Looking forward to seeing the next pair with paint on them.
Joel
Harvs73
Queensland, Australia
Joined: January 23, 2012
KitMaker: 66 posts
AeroScale: 47 posts
Joined: January 23, 2012
KitMaker: 66 posts
AeroScale: 47 posts
Posted: Sunday, June 01, 2014 - 12:58 AM UTC
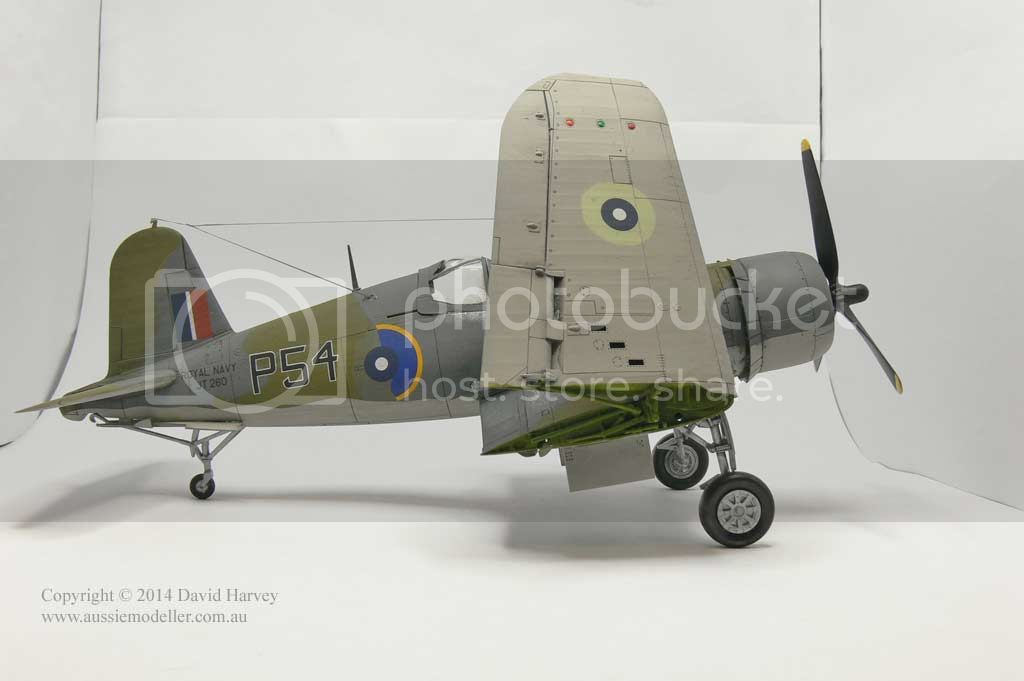
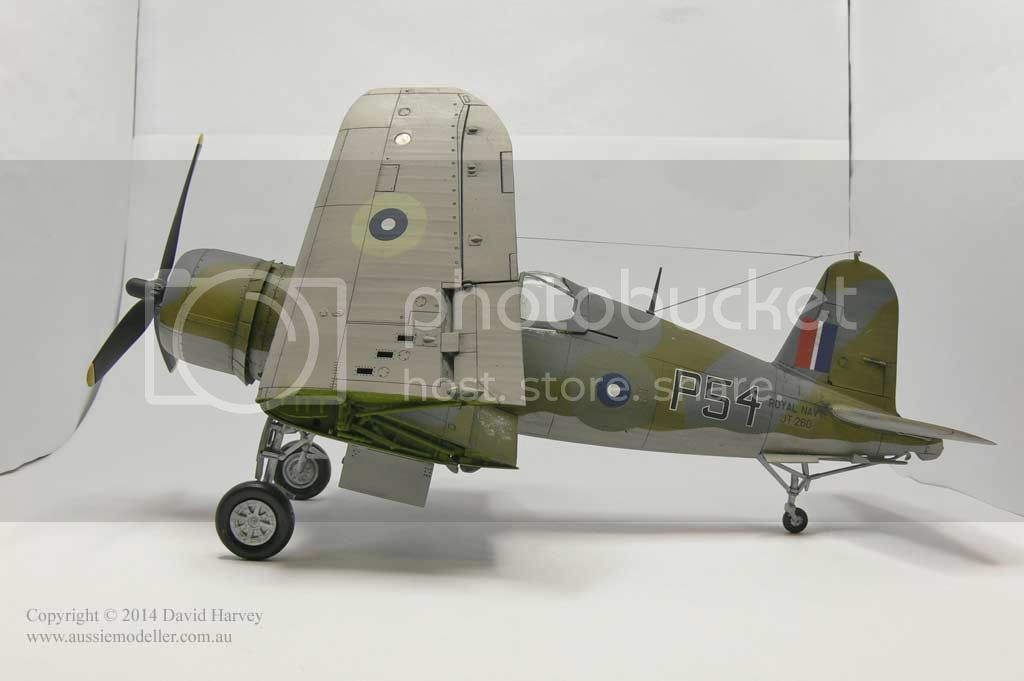
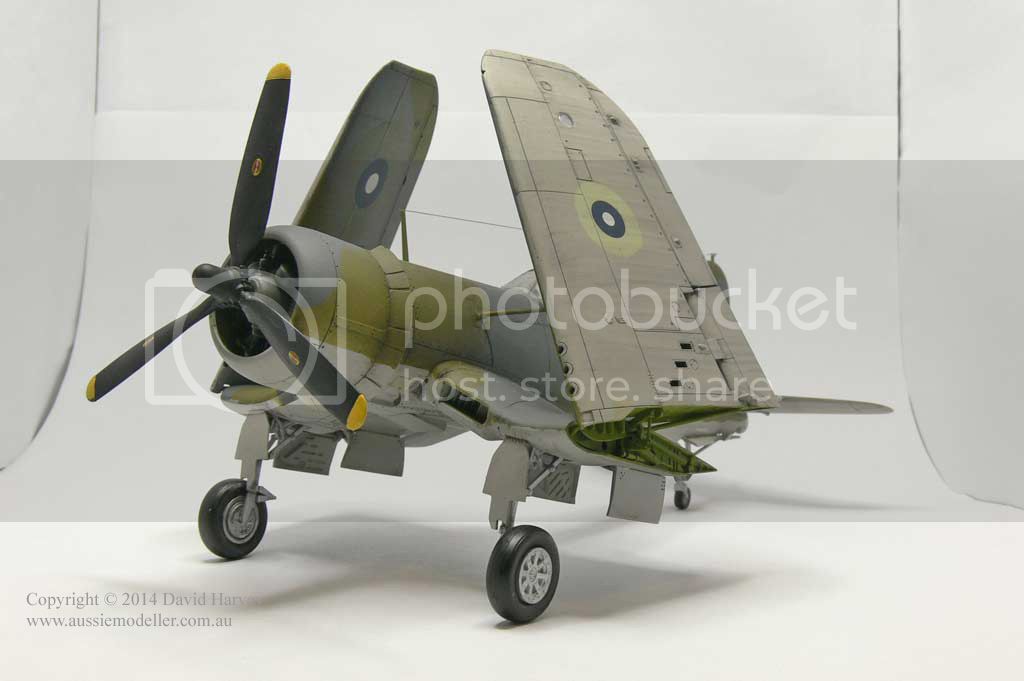
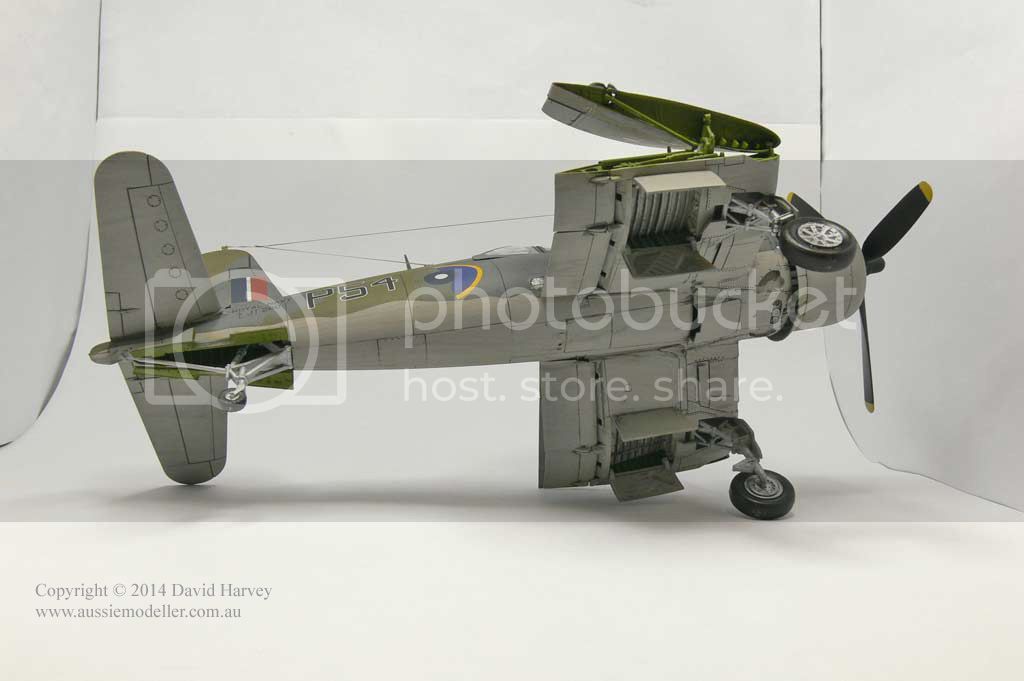
Here is number three with the wings folded:
Mcleod
Alberta, Canada
Joined: April 07, 2010
KitMaker: 1,028 posts
AeroScale: 939 posts
Joined: April 07, 2010
KitMaker: 1,028 posts
AeroScale: 939 posts
Posted: Sunday, June 01, 2014 - 01:19 AM UTC
A model so pleasing to look at, David. Well done, indeed. I'll bet not much room required with the wings folded.
Joel_W
Associate Editor
New York, United States
Joined: December 04, 2010
KitMaker: 11,666 posts
AeroScale: 7,410 posts
Joined: December 04, 2010
KitMaker: 11,666 posts
AeroScale: 7,410 posts
Posted: Sunday, June 01, 2014 - 04:08 AM UTC
David,
Great build with the folded wings. Was it intentional that the national insignia on both sides of the fuselage are different? One side has half the Blue/Yellow circle removed, while the other side has a different national insignia.
Joel
Great build with the folded wings. Was it intentional that the national insignia on both sides of the fuselage are different? One side has half the Blue/Yellow circle removed, while the other side has a different national insignia.
Joel
Harvs73
Queensland, Australia
Joined: January 23, 2012
KitMaker: 66 posts
AeroScale: 47 posts
Joined: January 23, 2012
KitMaker: 66 posts
AeroScale: 47 posts
Posted: Sunday, June 01, 2014 - 08:07 AM UTC
Joel, whilst odd it certainly was intentional. I would love to see the original image they based the decal sheet on just work out why they did it.
Joel_W
Associate Editor
New York, United States
Joined: December 04, 2010
KitMaker: 11,666 posts
AeroScale: 7,410 posts
Joined: December 04, 2010
KitMaker: 11,666 posts
AeroScale: 7,410 posts
Posted: Sunday, June 01, 2014 - 11:47 AM UTC
Quoted Text
Joel, whilst odd it certainly was intentional. I would love to see the original image they based the decal sheet on just work out why they did it.
David,
I wasn't suggesting that it wasn't intentional on your part, but rather the actual aircraft being marked that way. It certainly is unique.
Joel
Harvs73
Queensland, Australia
Joined: January 23, 2012
KitMaker: 66 posts
AeroScale: 47 posts
Joined: January 23, 2012
KitMaker: 66 posts
AeroScale: 47 posts
Posted: Sunday, June 01, 2014 - 09:43 PM UTC
Joel, I think they were disturbed mid paint job. They changed markings on the FAA acft at least three times that I know of. They went from the colourful markings including yellow, then they had the very small ones as they appear to have been changing the acft to then the very large markings you see on the other Corsair I have completed.
Joel_W
Associate Editor
New York, United States
Joined: December 04, 2010
KitMaker: 11,666 posts
AeroScale: 7,410 posts
Joined: December 04, 2010
KitMaker: 11,666 posts
AeroScale: 7,410 posts
Posted: Monday, June 02, 2014 - 09:39 AM UTC
David,
One would think that they would have been more considerate of future modelers efforts 40-60 years down the road.
I'm sure that your finished model with those markings will be the centerpiece of the 4 Corsairs.
Joel
One would think that they would have been more considerate of future modelers efforts 40-60 years down the road.
I'm sure that your finished model with those markings will be the centerpiece of the 4 Corsairs.
Joel