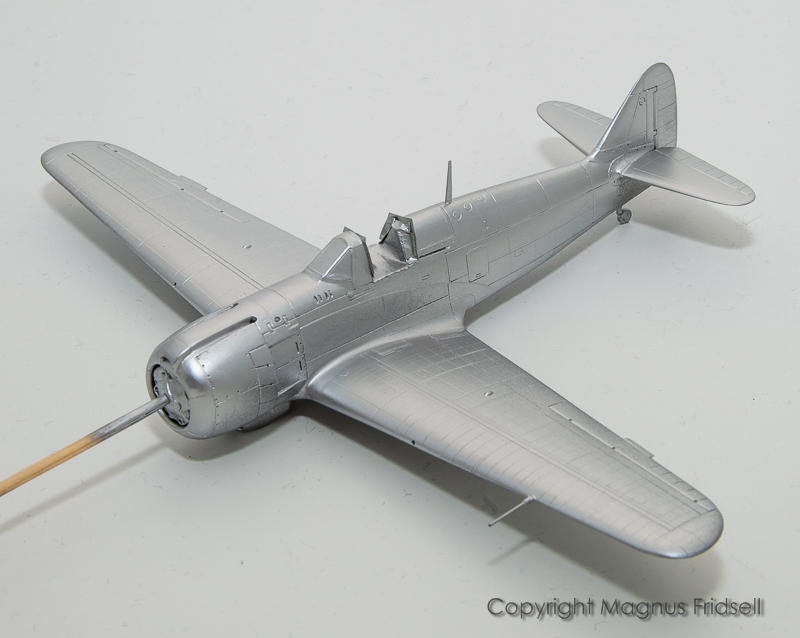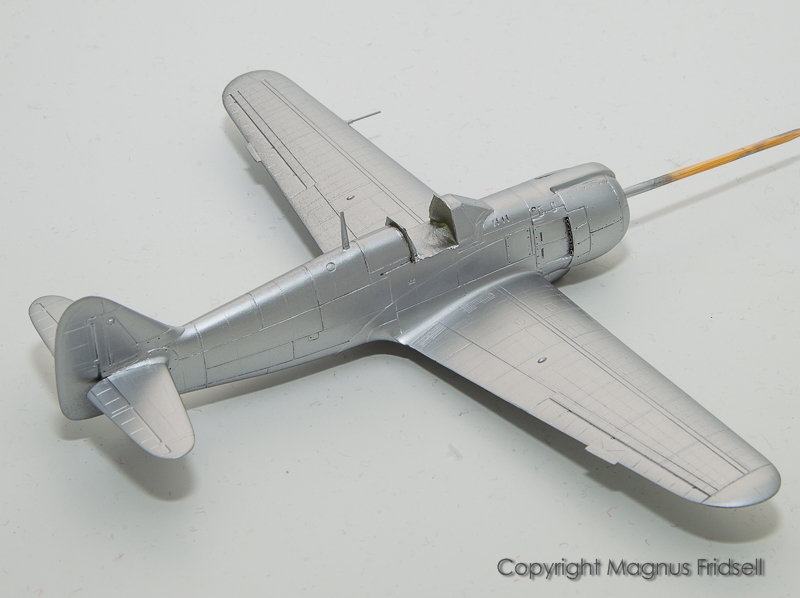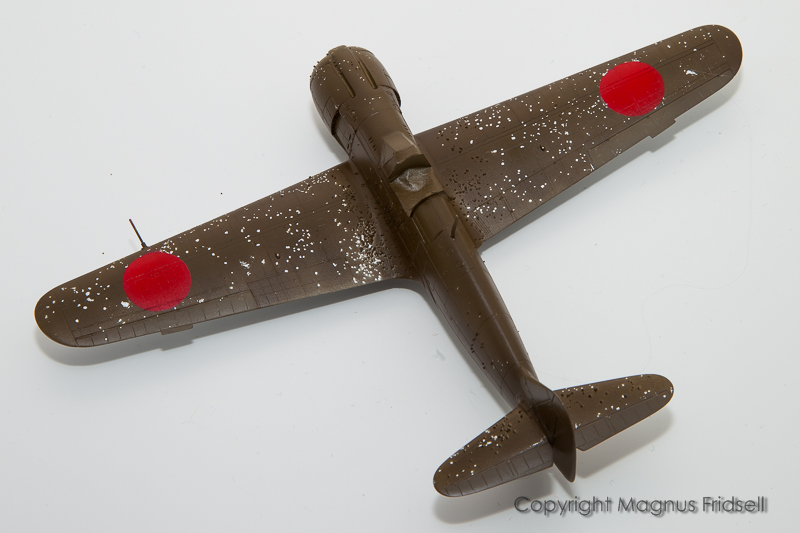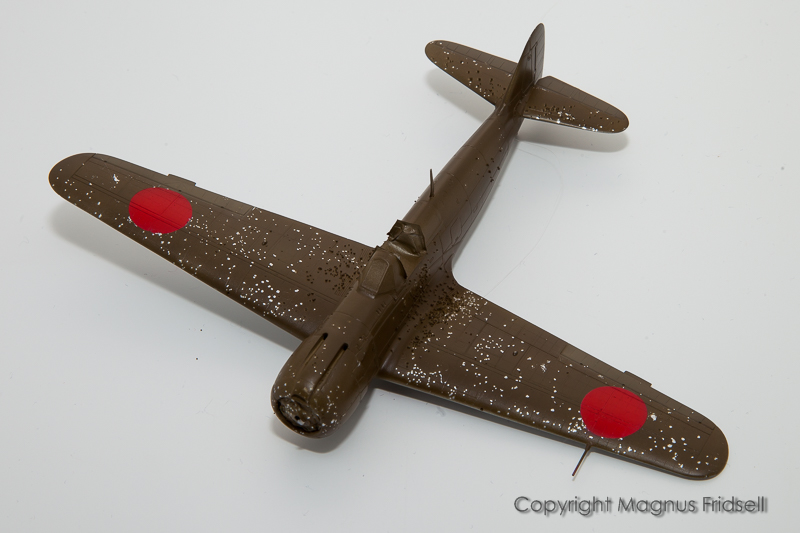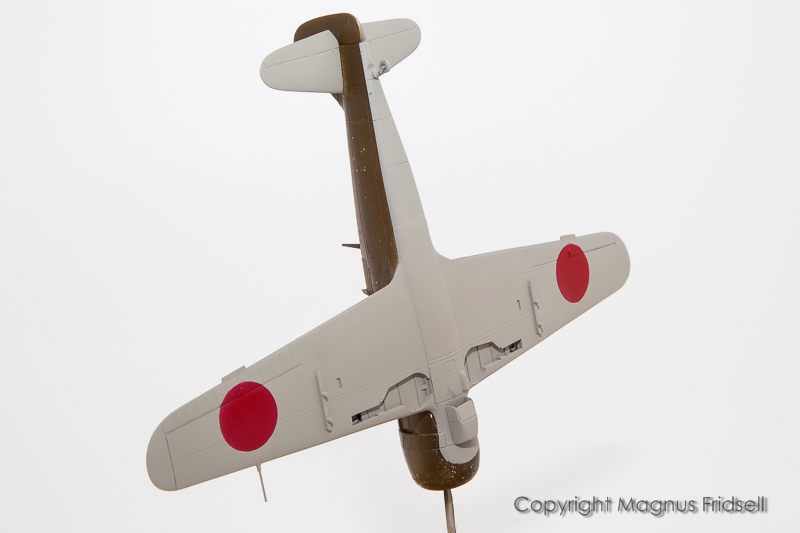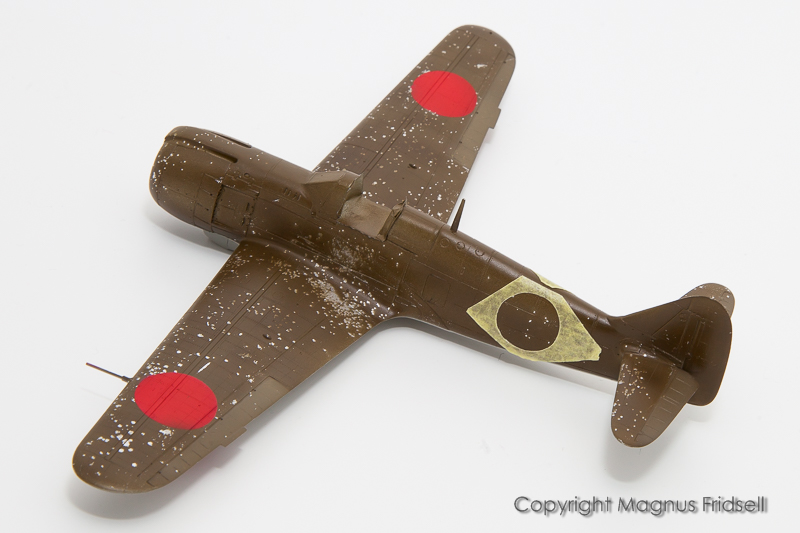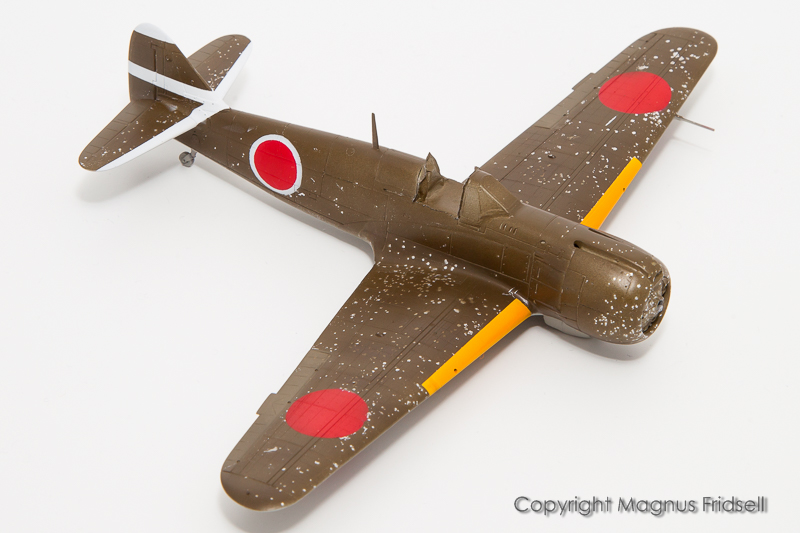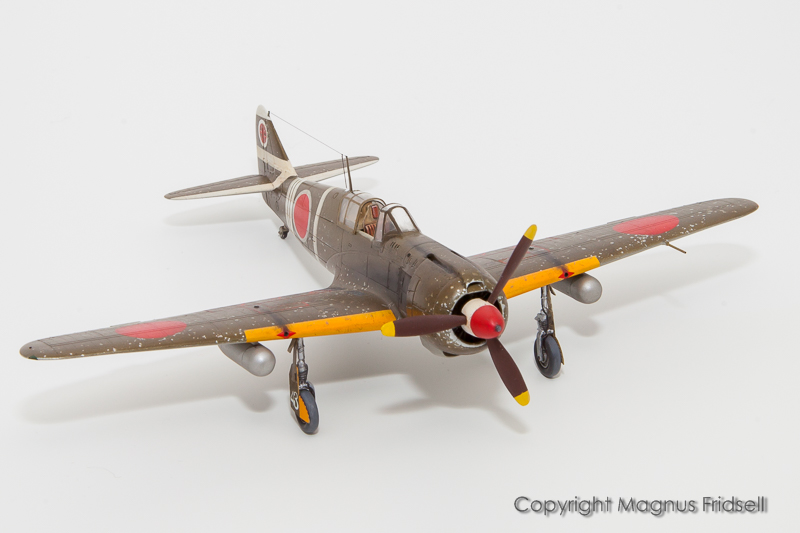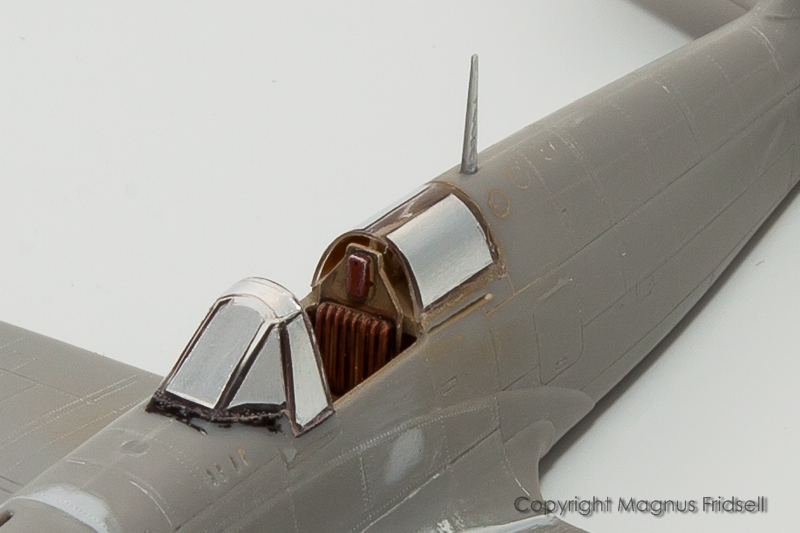
Some minor detailing done yesterday.
A new antenna post instead of the plastic one that I cut off early in the project. This is made from 1/0.8 mm diameter Albion Alloy aluminium tubing that I pressed flat using a pair of pliers and then sanded to a slight wedge shape. I avoided pressing the lower end so that I could mount it in a 1 mm hole drilled in the fuselage spine. Aluminium is very pliable and easy to handle.
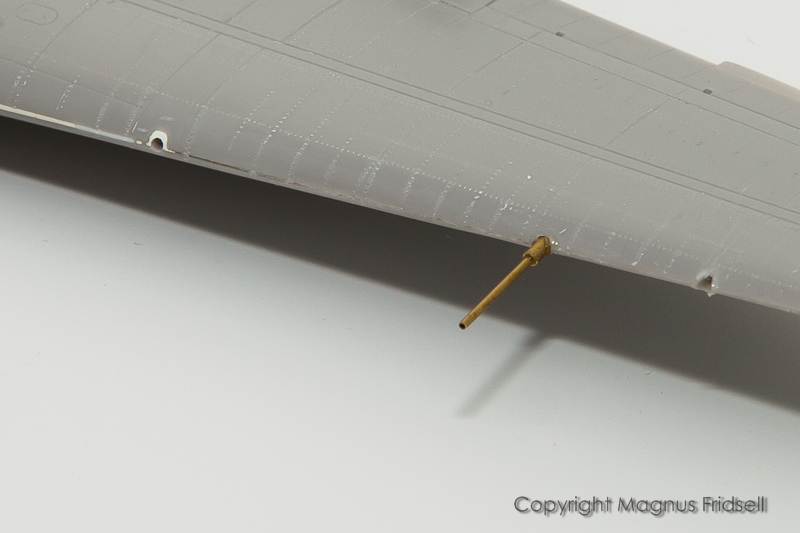
Another use for Albion tubing, this time brass. There will be one final section inserted after painting forming a full pitot tube assembly. The hole in the leading edge to the right was just a test... OK, I admit it, I managed to drill in the wrong spot...
Neighbouring sizes fits into each other making this kind of work a breeze. Cutting is done by carefully rolling the tube below a scalpel blade and then simply snapping it. In 99% of the cases I get a perfectly square and clean cut, if there are any burrs they are easily removed using the tip of a drill.
Magnus
Hosted by Rowan Baylis
1/72 Fine Molds Ki-100-1a
magnusf
Stockholm, Sweden
Joined: May 02, 2006
KitMaker: 1,953 posts
AeroScale: 1,902 posts
Joined: May 02, 2006
KitMaker: 1,953 posts
AeroScale: 1,902 posts
Posted: Tuesday, June 17, 2014 - 07:38 AM UTC
magnusf
Stockholm, Sweden
Joined: May 02, 2006
KitMaker: 1,953 posts
AeroScale: 1,902 posts
Joined: May 02, 2006
KitMaker: 1,953 posts
AeroScale: 1,902 posts
Posted: Sunday, August 17, 2014 - 07:43 AM UTC
A long summer with plenty of travelling and a weather simply too hot for modelling has taken its toll on progress. Now things are finally back to normal. What worries me is that there are only two weeks left for the group build...
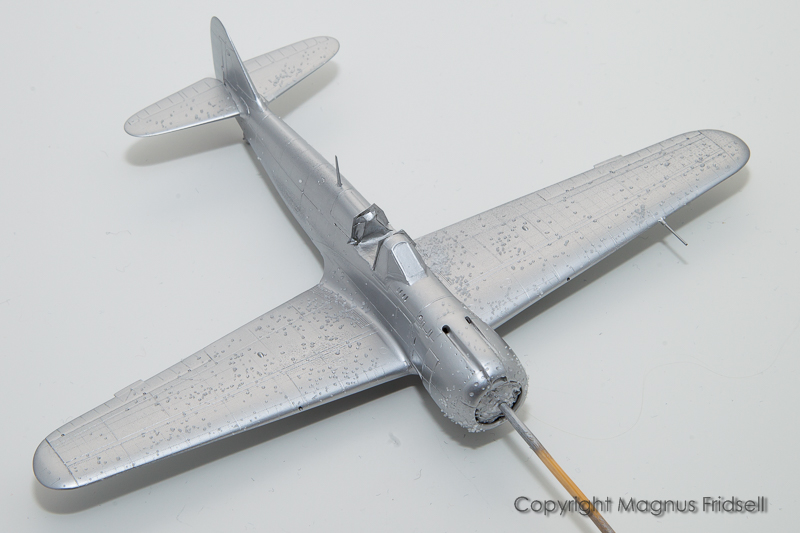
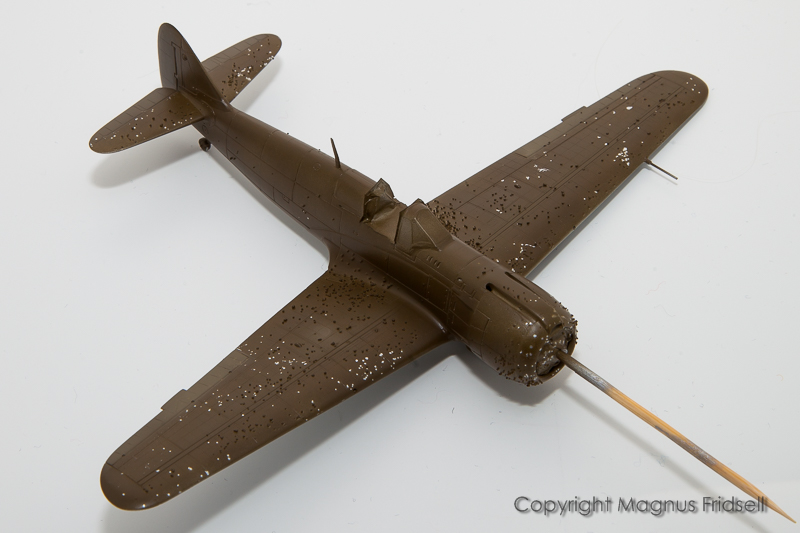
A bit of Tamiya rattle can silver...
...as a basis for future chipping using hairspray and/or salt...
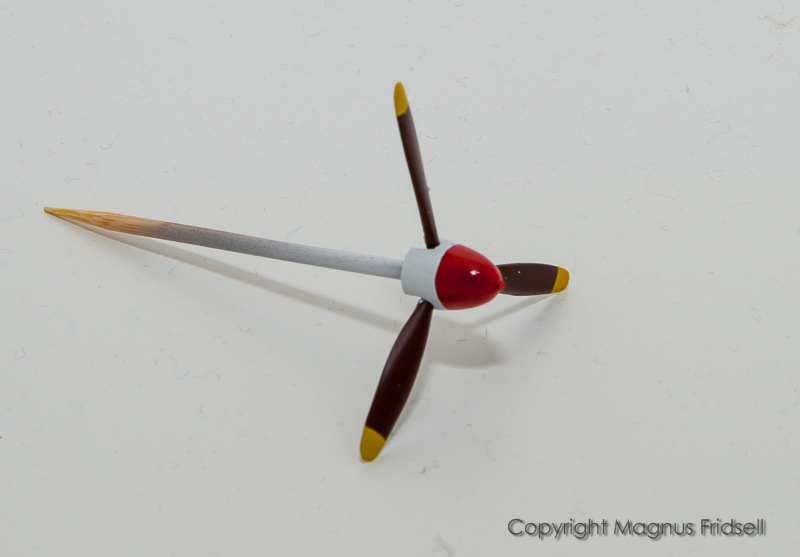
...and a painted spinner! That red looks a bit too bright for being Japanese but I can always tone it down during weathering.
Magnus
A bit of Tamiya rattle can silver...
...as a basis for future chipping using hairspray and/or salt...
...and a painted spinner! That red looks a bit too bright for being Japanese but I can always tone it down during weathering.
Magnus
Joel_W
Associate Editor
New York, United States
Joined: December 04, 2010
KitMaker: 11,666 posts
AeroScale: 7,410 posts
Joined: December 04, 2010
KitMaker: 11,666 posts
AeroScale: 7,410 posts
Posted: Monday, August 18, 2014 - 02:55 AM UTC
Magnus,
Was wondering where you've been.
Really like naming the hole "test hole" in the leading edge of the wing. I did the very same "test" last work session on the A-6E locating homemade pin mounts for the centerline gas tank pylon. I ended up with 3, when only 2 were needed. Got lucky as the "test" one is under the pylon.
So far your ki-100a looks real good. That base coat of silver will really stand out after the chipping process is complete.
Looking forward to your next update.
Joel
magnusf
Stockholm, Sweden
Joined: May 02, 2006
KitMaker: 1,953 posts
AeroScale: 1,902 posts
Joined: May 02, 2006
KitMaker: 1,953 posts
AeroScale: 1,902 posts
Posted: Sunday, August 24, 2014 - 01:14 AM UTC
Joel! Good to see that I still have at least one follower left despite my rather irregular posting (and building ) habits!
I had a painting session this Friday with quite some progress...
Salt chipping, tried it out on my old Tempest wreck before going live on the Ki...
...and this is what it looks like after a coat of paint. Salt doesn't stick very well...
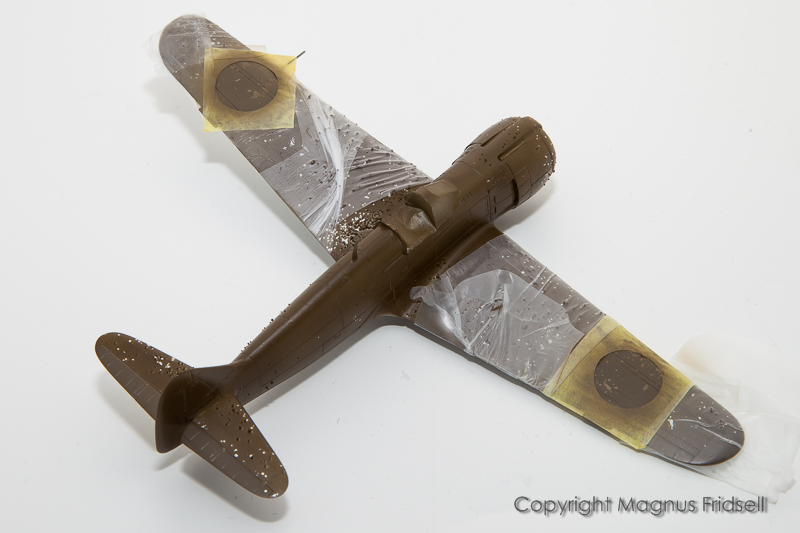
...while we are at it anyway, let's mask some hinomarus... Compass cutter for cutting circles in masking tape and a further quick coat of green to seal the edges...
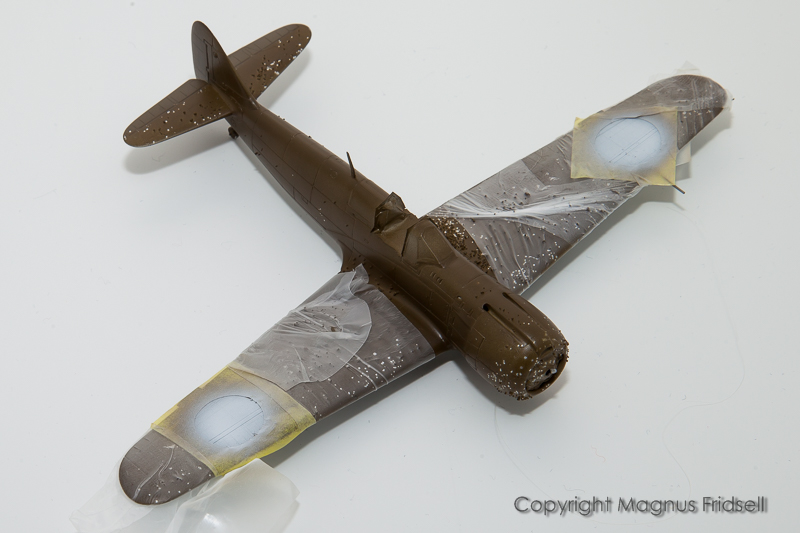
...before applying some white as a base...
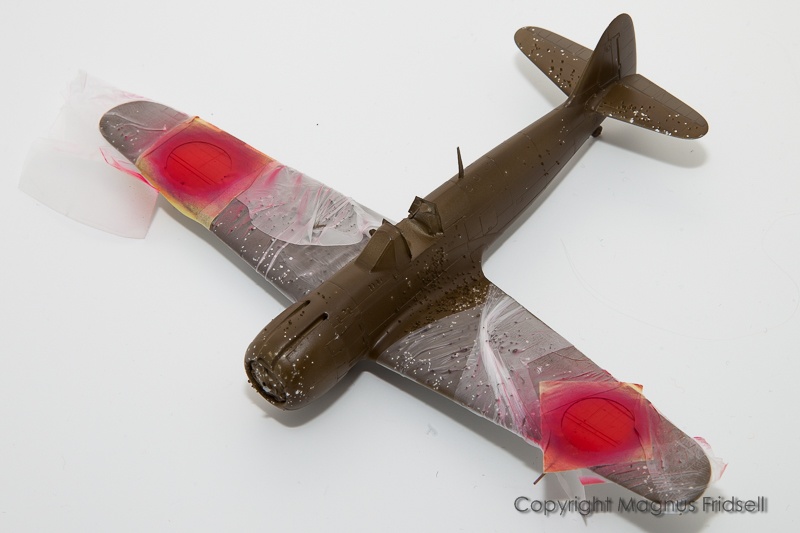
...for some read. Maybe I should have gone for some other undercoat (yellow?) since the red looked rather pink at first...
...but after a few thin coats it turned into an acceptable red...
...quite classy really!
Chipping is (as usual) a bit over the top (and then I haven't even brushed away all of the salt ) but I will try to tone it down later on. I also realised that one of the secrets of using salt chipping is applying the water using the airbrush so that you get an even mist of water covering the surface, a paintbrush doesn't work!
The Japanese green (that looks rather dark in the photos) was a story in itself: it is mixed straight from the Fine Molds mixing recipe using only primary colours. A rough equivalent is said go be Gunze H60 but I didn't have that one in stock.
Magnus
magnusf
Stockholm, Sweden
Joined: May 02, 2006
KitMaker: 1,953 posts
AeroScale: 1,902 posts
Joined: May 02, 2006
KitMaker: 1,953 posts
AeroScale: 1,902 posts
Posted: Saturday, August 30, 2014 - 05:17 AM UTC
Nearing completion, and with a two week extension granted I might even make the deadline !
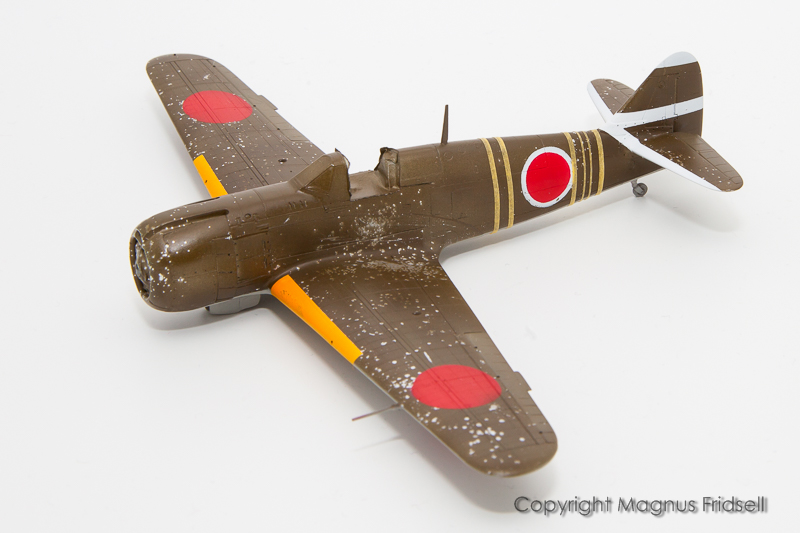
Another quick painting and masking session saw the lower surfaces finished. When I for some reason (intuition maybe?) checked the instructions (afterwards of course) I realised that it really should be silver/NM below with only the control surfaces in my carefully mixed underside colour. With the risk of offending the real Japanese aircraft enthusiasts I have decided to leave it as it is anyway! I have to admit that if it had been RAF or German I probably would have repainted...
I'll go for masked hinomarus on the fuselage sides as well, this time they have an offending white border though!
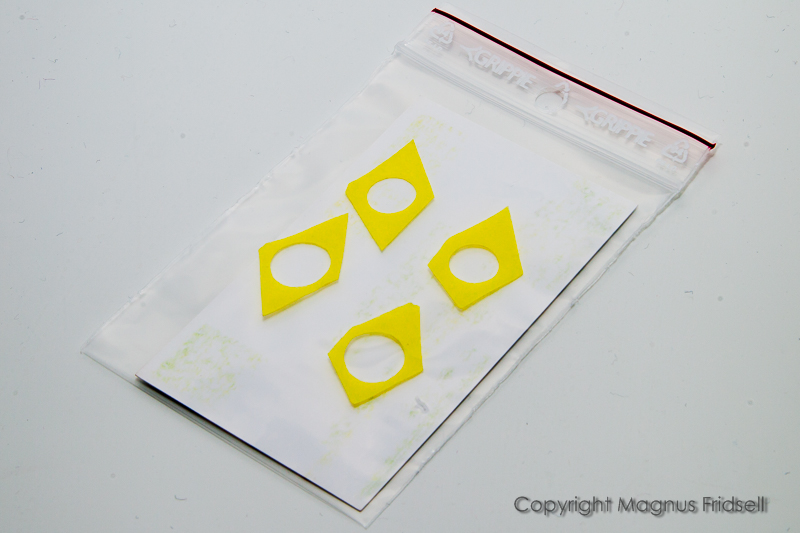
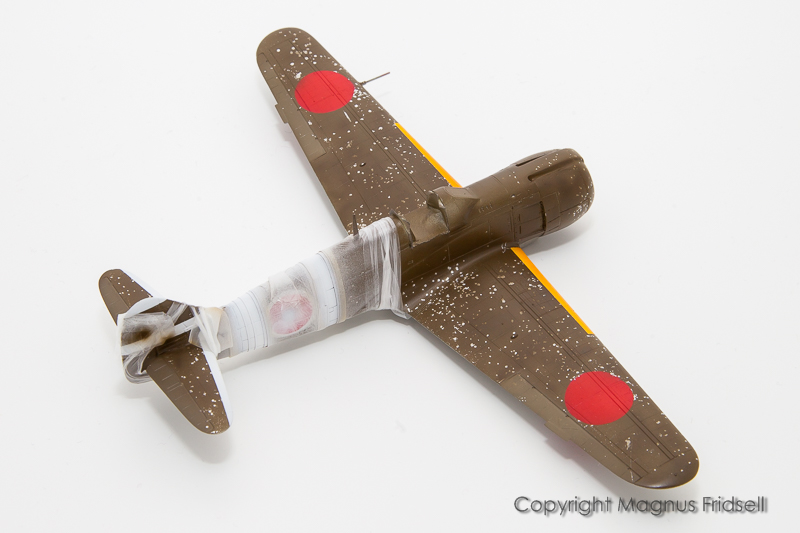
I started by cutting the big circle out of tape using a compass cutter. I then added another layer of tape on top of the finished first one and cut the smaller circle, carefully aiming for the previous center hole with the cutter. I then used a pair of scissors to cut the masks (with big and small circles still stuck together) into suitable sizes, finally separating them and attaching them to a plastic bag. I hope that I will be able to use the edges from the scissor cuts for centering.
Big masks (yes, I have double-checked ) attached and waiting for a sealing layer of green around the edges, then some white.
Magnus
magnusf
Stockholm, Sweden
Joined: May 02, 2006
KitMaker: 1,953 posts
AeroScale: 1,902 posts
Joined: May 02, 2006
KitMaker: 1,953 posts
AeroScale: 1,902 posts
Posted: Saturday, August 30, 2014 - 09:12 AM UTC
And this is how it all ended, fuselage hinomarus and yellow leading edges finished tonight. A few more fuselage stripes to paint and then on to a few decals!
Magnus
Magnus
berndm
Niedersachsen, Germany
Joined: March 26, 2014
KitMaker: 844 posts
AeroScale: 630 posts
Joined: March 26, 2014
KitMaker: 844 posts
AeroScale: 630 posts
Posted: Sunday, August 31, 2014 - 07:49 PM UTC
Hi Magnus, stunning ! The masked and sprayed markings look
spot on, as well the rest of this little, but great build.
Bernd
spot on, as well the rest of this little, but great build.
Bernd
Posted: Sunday, August 31, 2014 - 11:46 PM UTC
Looking very good Magnus. I love the idea for eraser use!
Joel_W
Associate Editor
New York, United States
Joined: December 04, 2010
KitMaker: 11,666 posts
AeroScale: 7,410 posts
Joined: December 04, 2010
KitMaker: 11,666 posts
AeroScale: 7,410 posts
Posted: Monday, September 01, 2014 - 03:03 AM UTC
Magnus,
Paint, especially your masks really came out quite well. I'm impressed to say the least. The salt technique seems to have done as you intended it to.
Joel
Paint, especially your masks really came out quite well. I'm impressed to say the least. The salt technique seems to have done as you intended it to.
Joel
Posted: Monday, September 01, 2014 - 04:00 AM UTC
Magnus,
What a beautiful NMF Ki-100! That's the problem with salt-chipping - you have to cover up the beautiful silver!
I think the chipping looks good. One thing I learned between salt-weathering my P-40, Brewster Buffalo, and Ki-84 is that table salt is too uniform (especially on larger models) and to mix it with sea salt. That combo makes an great effect.
I didn't read what paint the OD is but I also found that I can scratch custom chips into the top color, too. I always use enamel silvers and acrylic top colors, so if you used acrylic silver or all enamels, I would proceed with caution. However, IIRC, you have made many expert camo jobs in the past probably know all of that.
Posted: Monday, September 01, 2014 - 04:02 AM UTC
I keep going back to admire this image! :-)
magnusf
Stockholm, Sweden
Joined: May 02, 2006
KitMaker: 1,953 posts
AeroScale: 1,902 posts
Joined: May 02, 2006
KitMaker: 1,953 posts
AeroScale: 1,902 posts
Posted: Friday, September 05, 2014 - 05:42 PM UTC
Friends, sorry for answering late but I felt I wanted to have something new to show before writing again !
Bernd! Thanks!
Paul! Erasers: I approached German eraser manufacturer Pelikan to arrange for a sponsorship deal (they should be thankful for me finding them a new and lucrative area of use for this rather antiquated piece of office equipment) and they promised me as many erasers as I could eat ...
Joel and Frederick! I will continue to experiment with salt. I will probably try using crushed flake salt next time to get more of the irregular effect that I am after. I looked in the flake salt jar at first and just thought "nah, too big", it never occurred to me that it is perfectly allowed to crush the flakes for modelling use ! And Frederick: sorry that I had to ruin the metal finish but there are other projects in the pipeline that will satisfy your cravings!
Now on to the model with all the painted-on markings finally done!
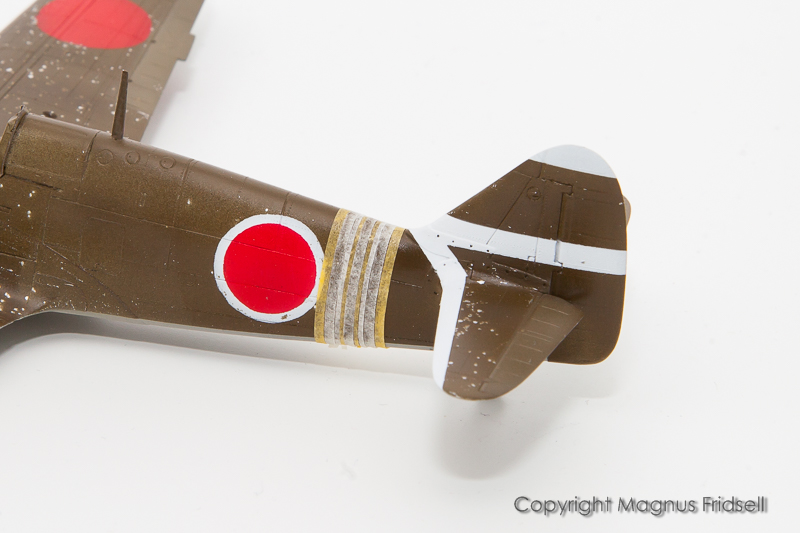
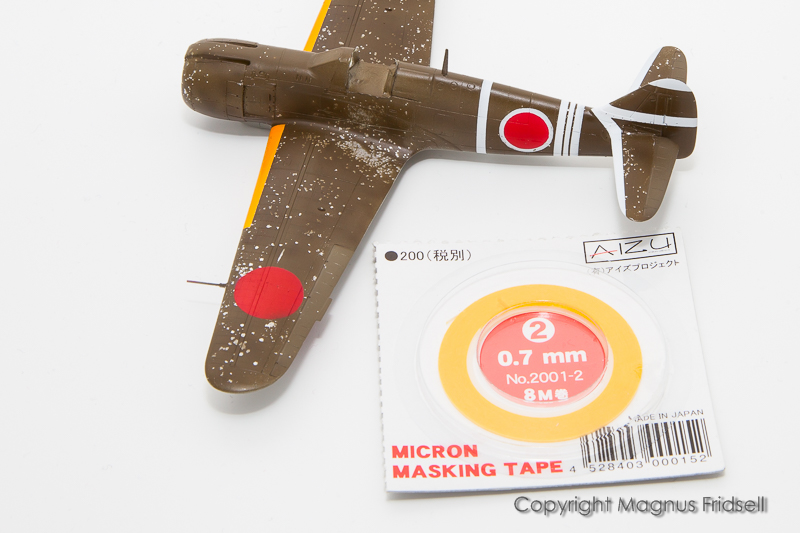
It didn't end with the hinomarus, it had of course to have a few ribbons around the rear fuselage as well... The lighter tape is Jammydog masking tape that I put as a ruler where I want the ribbon, the yellow is Aizu Micron Masking Tape. Jammydog is a bit stiffer and less sticky so it has a tendency to go "spoing" on curved surfaces.
I've weeded away the "ruler tape" and this is the actual masking...
...filled in using Parafilm (non-sticky and paint safe, I use a lot of that stuff!) followed by a quick run over using the background paint and then on to the white...
...and the final result with the masking tape used in the foreground!
Magnus
Gremlin56
Joined: October 30, 2005
KitMaker: 3,897 posts
AeroScale: 564 posts
KitMaker: 3,897 posts
AeroScale: 564 posts
Posted: Friday, September 05, 2014 - 06:58 PM UTC
That's a very nice build Magnus, great work on the masking of the Hinomaru's and fuselage bands. The salt effect might have been a bit denser but I can imagine that that is easier on a larger scale. I have to keep telling myself that this is 1/72.
I like it,
I like it,
magnusf
Stockholm, Sweden
Joined: May 02, 2006
KitMaker: 1,953 posts
AeroScale: 1,902 posts
Joined: May 02, 2006
KitMaker: 1,953 posts
AeroScale: 1,902 posts
Posted: Saturday, September 13, 2014 - 01:27 AM UTC
Julian! Thanks! I can offer a few final pieces of maskings as well as some genuine hand painting in this update!
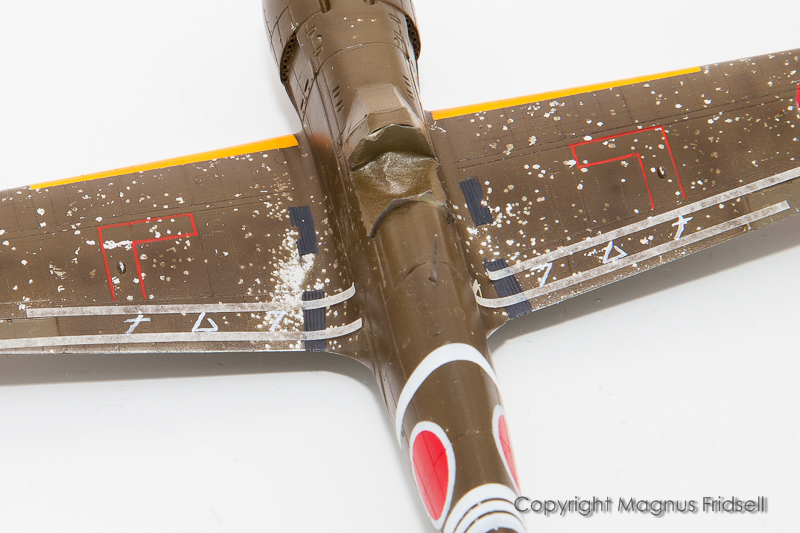
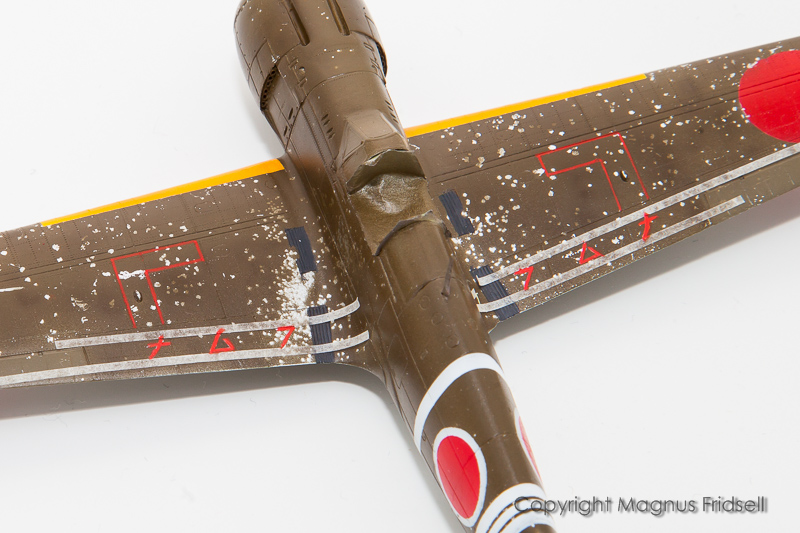
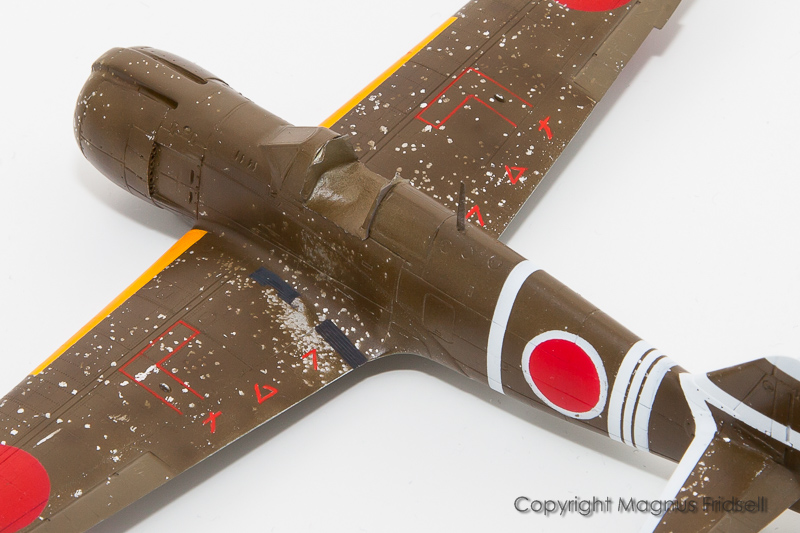
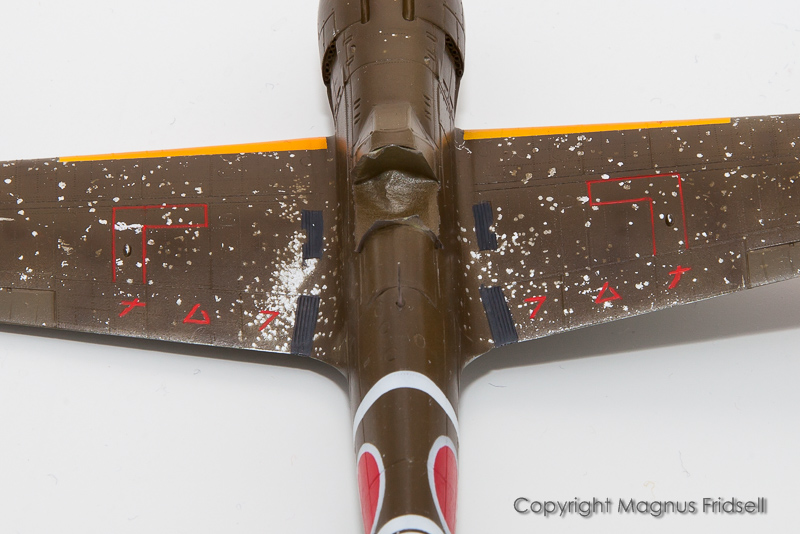
There was some further stuff to either mask and paint or use the kit decals. Since I have gotten less and less fond of decals over time and due to the fact that they also tend to ruin my current modelling style where a lot of the weathering goes on during the initial painting stage I decided to take out the dreaded tape for one final session on this kit...
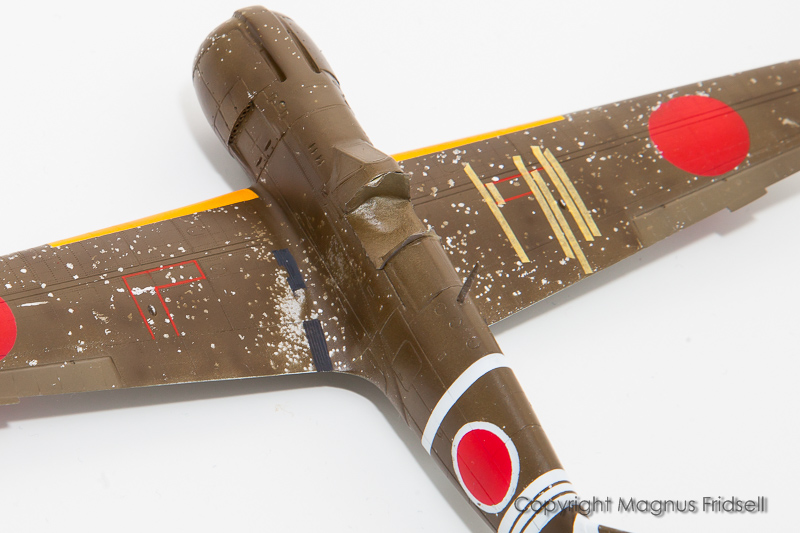
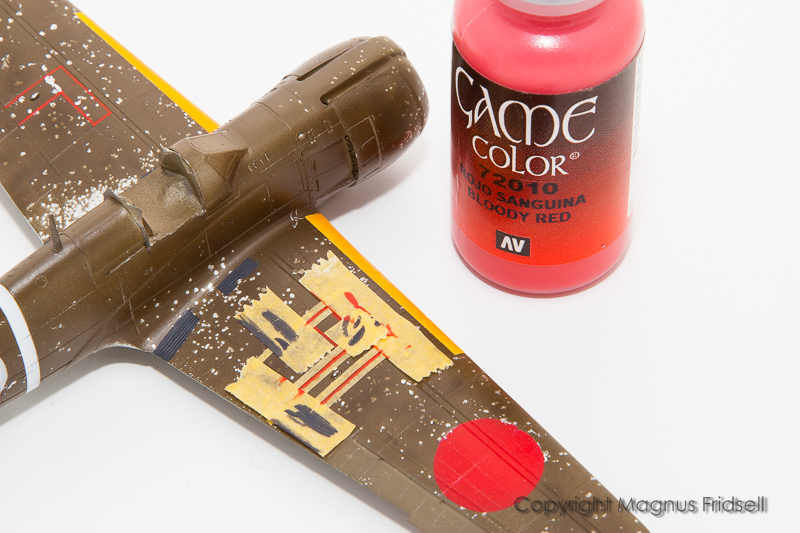
Red striping around the ammo bays...
...are masked off and carefully painted using a thin brush and some Vallejo space-monster paint that I stole from my kids ! I didn't dare to undercoat using white but a few strokes with the red letting the paint dry inbetween did the trick well enough.
While the thin paintbrush was out and about anyway I decided to try to paint the signs on the flaps (whatever they mean). Trying out a bit of sign-painting also felt like a very Japanese thing to do! Two thin strips of tape for size and then the signs were carefully drawn using Vallejo "Foundation white"...
...followed by filling them in using a steady hand and some more of that red monster-paint!
Not as hard as I thought it should be...
...and this was also the only way that I could think of that guaranteed no visible decal carrier film whatsoever!
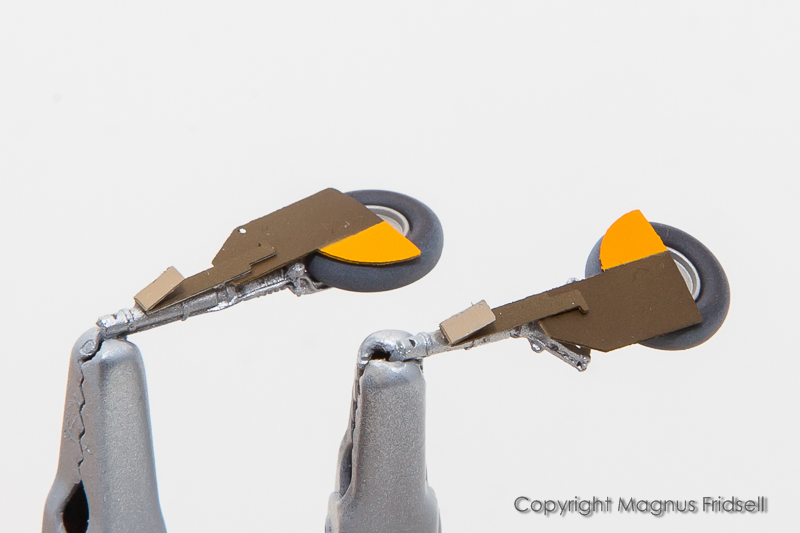
Finally, there is a set of main landing gear complete with etched doors to show!
Magnus
Joel_W
Associate Editor
New York, United States
Joined: December 04, 2010
KitMaker: 11,666 posts
AeroScale: 7,410 posts
Joined: December 04, 2010
KitMaker: 11,666 posts
AeroScale: 7,410 posts
Posted: Saturday, September 13, 2014 - 11:11 AM UTC
Magnus,
I'm really impressed with your masking and painting efforts, simply outstanding. For a 1st effort with the salt technique, it came out quite well. Main landing gear is certainly up to your usual high standards.
Looking forward to your next update.
Joel
I'm really impressed with your masking and painting efforts, simply outstanding. For a 1st effort with the salt technique, it came out quite well. Main landing gear is certainly up to your usual high standards.
Looking forward to your next update.
Joel
magnusf
Stockholm, Sweden
Joined: May 02, 2006
KitMaker: 1,953 posts
AeroScale: 1,902 posts
Joined: May 02, 2006
KitMaker: 1,953 posts
AeroScale: 1,902 posts
Posted: Thursday, October 09, 2014 - 01:04 AM UTC
Joel! Sorry to have kept you waiting!
Finally up on its landing gear! The sockets were a rather sloppy fit but a blob of epoxy in each fixed that one...
Magnus
Finally up on its landing gear! The sockets were a rather sloppy fit but a blob of epoxy in each fixed that one...
Magnus
berndm
Niedersachsen, Germany
Joined: March 26, 2014
KitMaker: 844 posts
AeroScale: 630 posts
Joined: March 26, 2014
KitMaker: 844 posts
AeroScale: 630 posts
Posted: Thursday, October 09, 2014 - 06:01 AM UTC
The amount of details in this scale is amazing.Looking very good
especially the undercarriage caught my eye.
Posted: Thursday, October 09, 2014 - 09:34 AM UTC
Beautiful work Magnus, looking great!
Like earlier posts have said, I need to remember that this is 1/72, the detail is really outstanding for Braille scale my friend, and the hand painted symbols are a nice touch.
Cheers, D
P.S. I was a bit disappointed not to see the legendary sticks in the undercarriage close-up
Like earlier posts have said, I need to remember that this is 1/72, the detail is really outstanding for Braille scale my friend, and the hand painted symbols are a nice touch.
Cheers, D
P.S. I was a bit disappointed not to see the legendary sticks in the undercarriage close-up
Gremlin56
Joined: October 30, 2005
KitMaker: 3,897 posts
AeroScale: 564 posts
KitMaker: 3,897 posts
AeroScale: 564 posts
Posted: Friday, October 10, 2014 - 02:48 AM UTC
Looking great Magnus, the work on the wheel bay doors is immaculate, really excellent,
Joel_W
Associate Editor
New York, United States
Joined: December 04, 2010
KitMaker: 11,666 posts
AeroScale: 7,410 posts
Joined: December 04, 2010
KitMaker: 11,666 posts
AeroScale: 7,410 posts
Posted: Friday, October 10, 2014 - 06:04 AM UTC
Magnus,
Nice to see the Ki-100 up on its legs. Looking really quite good now as you near the finish line.
Joel
Nice to see the Ki-100 up on its legs. Looking really quite good now as you near the finish line.
Joel
magnusf
Stockholm, Sweden
Joined: May 02, 2006
KitMaker: 1,953 posts
AeroScale: 1,902 posts
Joined: May 02, 2006
KitMaker: 1,953 posts
AeroScale: 1,902 posts
Posted: Friday, October 10, 2014 - 08:14 AM UTC
Friends! That undercarriage seems to have caught many´s attention :-) !
Working with oil washes now and also some polishing with a cotton swab that brought out the rivets nicely.
I'll let it dry thoroughly before applying a bit of exhaust stains and some more detail painting!
Magnus
Working with oil washes now and also some polishing with a cotton swab that brought out the rivets nicely.
I'll let it dry thoroughly before applying a bit of exhaust stains and some more detail painting!
Magnus
Scrodes
Ontario, Canada
Joined: July 22, 2012
KitMaker: 771 posts
AeroScale: 763 posts
Joined: July 22, 2012
KitMaker: 771 posts
AeroScale: 763 posts
Posted: Saturday, October 11, 2014 - 03:05 PM UTC
Looks good Magnus. I always feel my Hinomarus looked too bright, so I've actually taken to using a brown undercoat if I'm painting straight red. Otherwise I'll add a few drops of Tamiya red/brown into the red to tone it down a bit.
Remind me again what the salt-method is? I'm familiar with the hairspray technique, but I can't remember how you use salt for chipping.
Gorgeous work in the small scale.
Remind me again what the salt-method is? I'm familiar with the hairspray technique, but I can't remember how you use salt for chipping.
Gorgeous work in the small scale.
magnusf
Stockholm, Sweden
Joined: May 02, 2006
KitMaker: 1,953 posts
AeroScale: 1,902 posts
Joined: May 02, 2006
KitMaker: 1,953 posts
AeroScale: 1,902 posts
Posted: Saturday, October 18, 2014 - 02:23 AM UTC
Matt! Your'e right, undercoating with the right colour is a good trick and it is easy to try out beforehand on a piece of scrap plastic or one of the build kits I have saved for evil experiments... Sadly I am usually too impatient to actually do it but I am working on it ! Hinomarus look OK now I think after some light weathering.
Regarding the salt, have a look here:
Model misted with water from the airbrush, then sprinkled with ordinary table salt (next time I'll try crushed salt flakes instead)...
...and then overpainted after the water has dried off (aided by the airbrush, hair dryer or by simply letting the model rest overnight)...
...after a bit of scrubbing with an old toothbrush this is what you get!
Magnus
magnusf
Stockholm, Sweden
Joined: May 02, 2006
KitMaker: 1,953 posts
AeroScale: 1,902 posts
Joined: May 02, 2006
KitMaker: 1,953 posts
AeroScale: 1,902 posts
Posted: Saturday, October 18, 2014 - 02:34 AM UTC
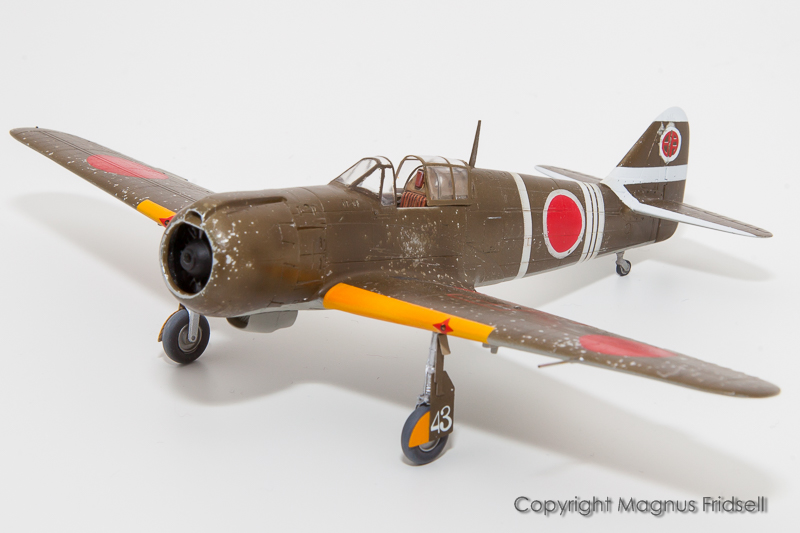
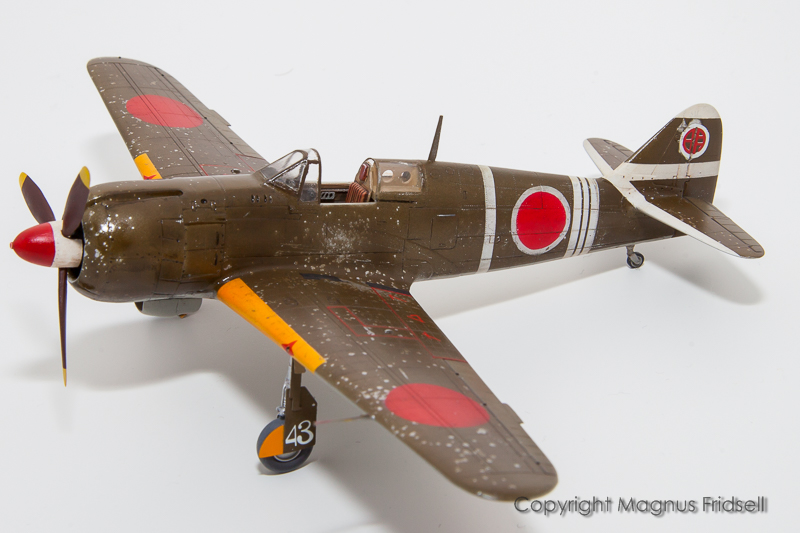
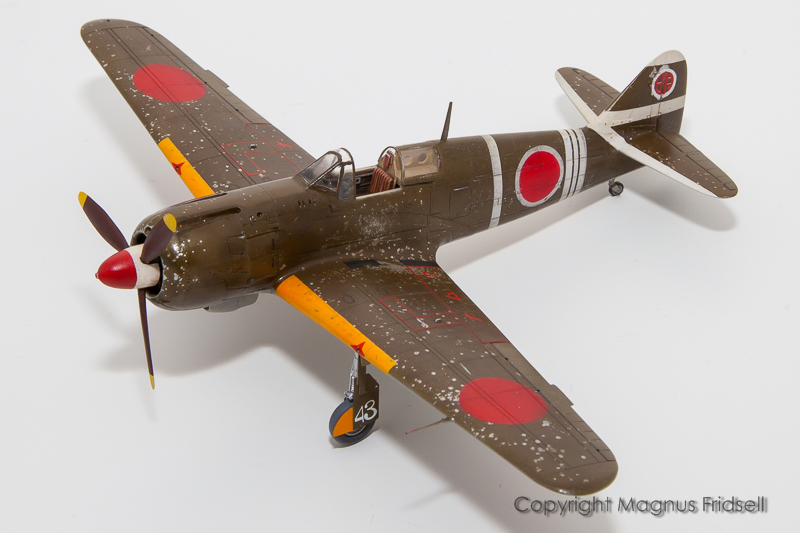
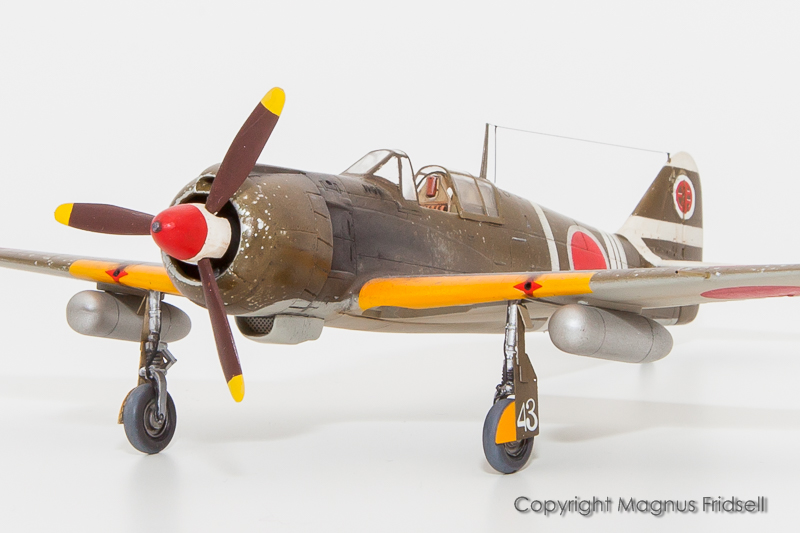
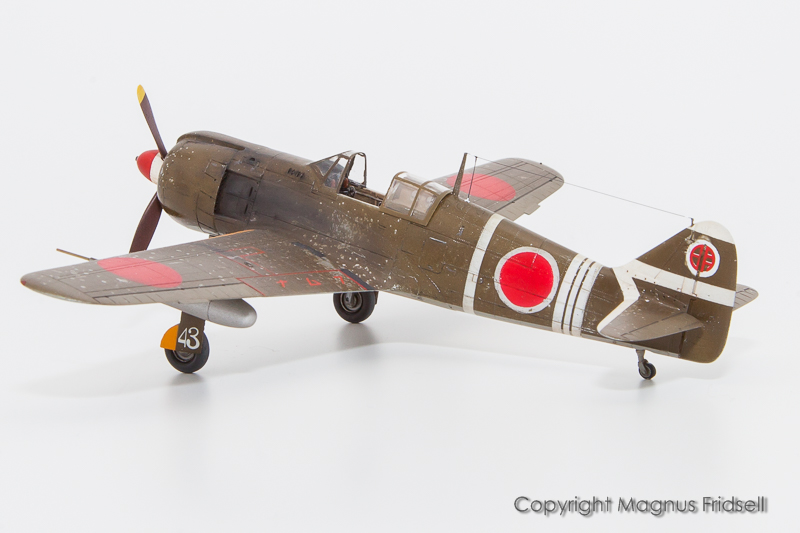
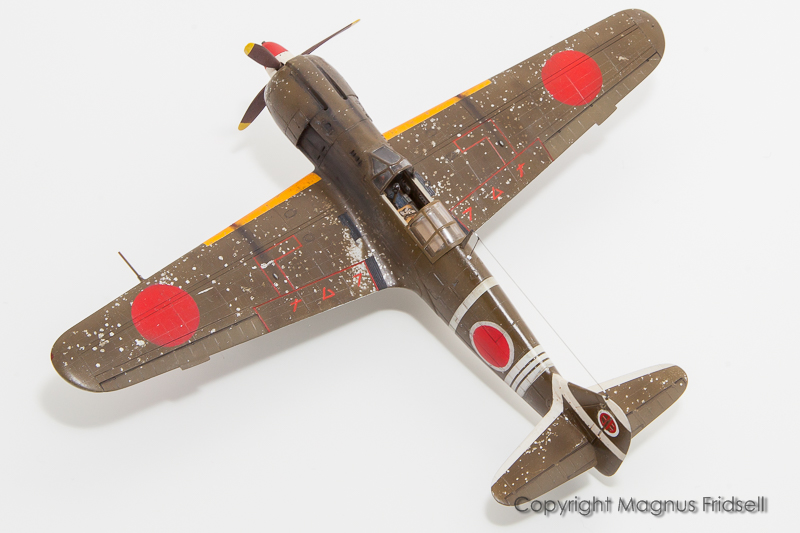
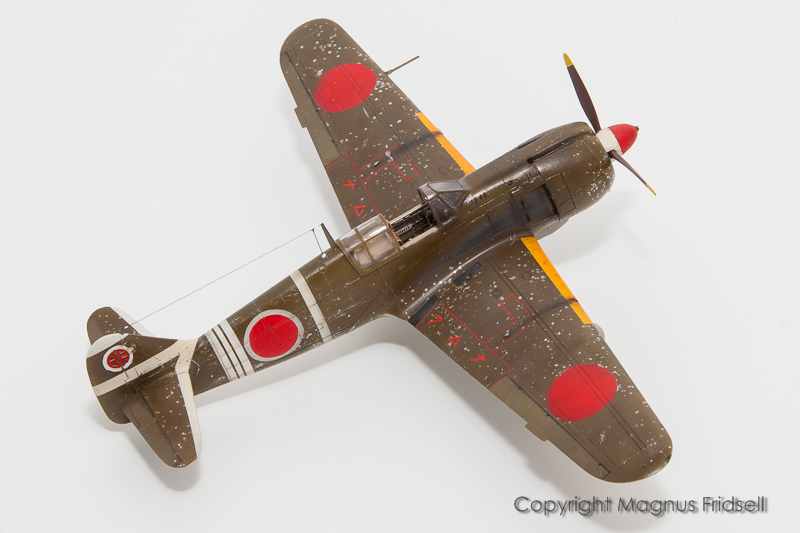
And while I'm around anyway, finally I'm finished!
I didn't make it in time for a ribbon but I can live with that, work commitments took away most of the planned modelling time and as usual I could have been a bit more effective as well !
All in all a fun build and I really ought to build more Japanese aircraft. I shouldn't have given away that Tojo...
Model has now been added to the collection.
Magnus
chukw1
California, United States
Joined: November 28, 2007
KitMaker: 817 posts
AeroScale: 729 posts
Joined: November 28, 2007
KitMaker: 817 posts
AeroScale: 729 posts
Posted: Saturday, October 18, 2014 - 03:14 AM UTC
Brilliant work Magnus! I've been quietly following along and am ,as ever, highly impressed by your skills and artistry. Cheer!