_GOTOBOTTOM
Early Aviation
Discuss World War I and the early years of aviation thru 1934.
1/32 Roden Siemens-Schuckert D.III Kessler
StukaJr
_VISITCOMMUNITY
California, United States
Joined: April 26, 2010
KitMaker: 346 posts
AeroScale: 292 posts
Posted: Sunday, May 11, 2014 - 12:44 PM UTC


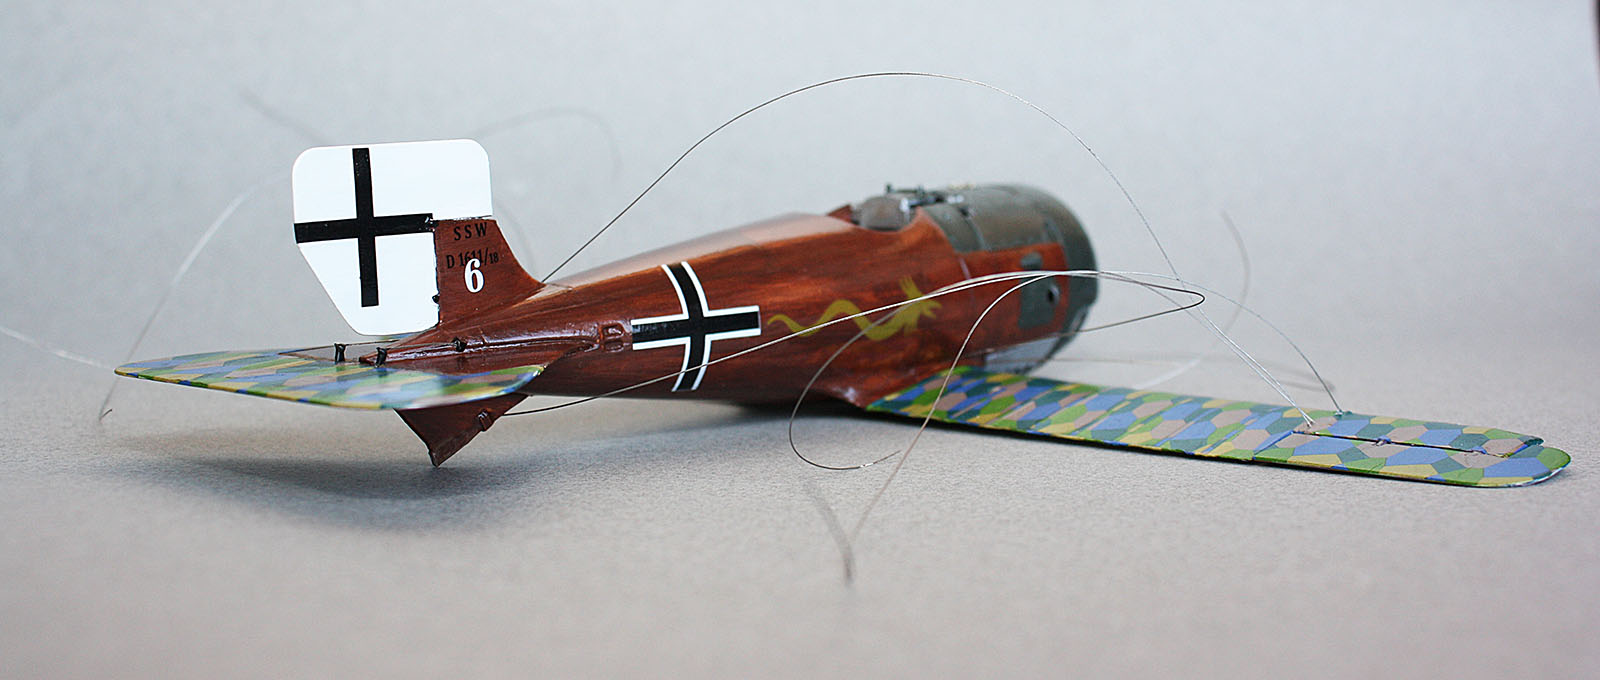
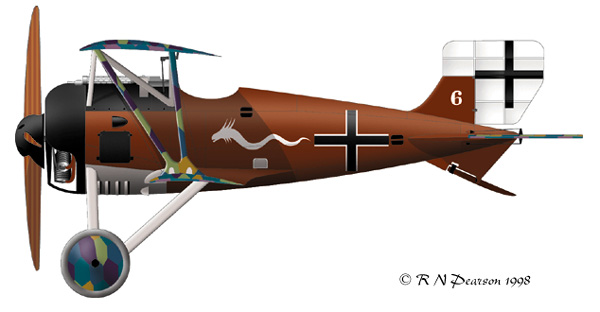
Humble beginnings of my SSD.III 1611/18 piloted by Kessler (first name and rank are unknown).

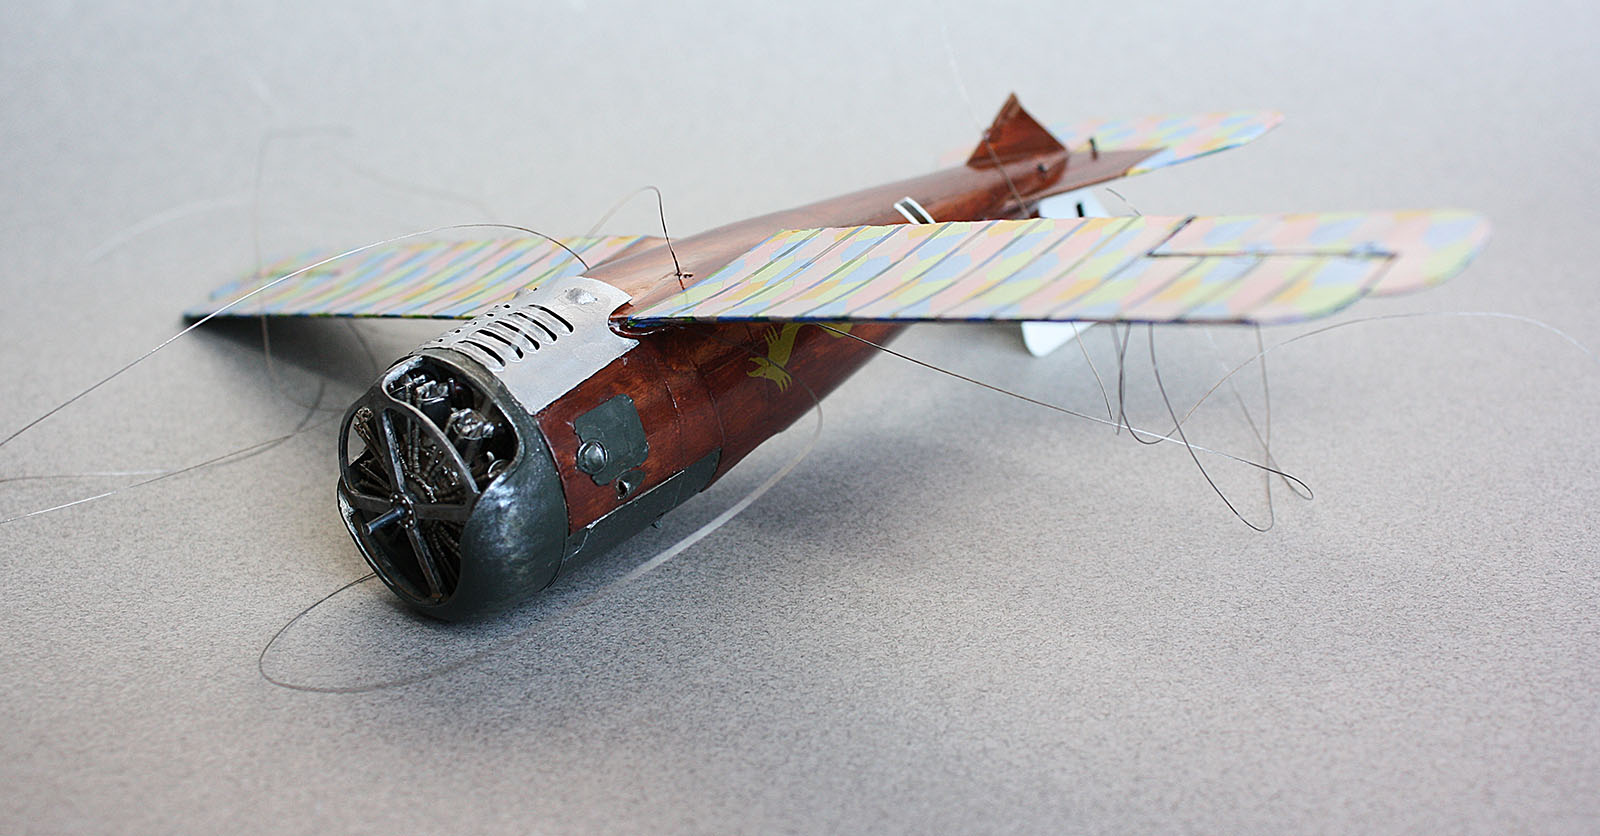
1/32 Roden kit with Eduard PE seatbelts, Master Model Spandau PE cooling jackets / turned brass barrels and Brengun.cz PE updates (as reviewed on this fine website and caught my attention almost immediately)


Notes on the Roden kit:

I'm calling it a "throwback" kit, thanks to amount of flash and bad fit - even the fuselage halves require sanding at the connection planes.

No instrument decals, though I was able to pillage my WingNut Wings spares box.


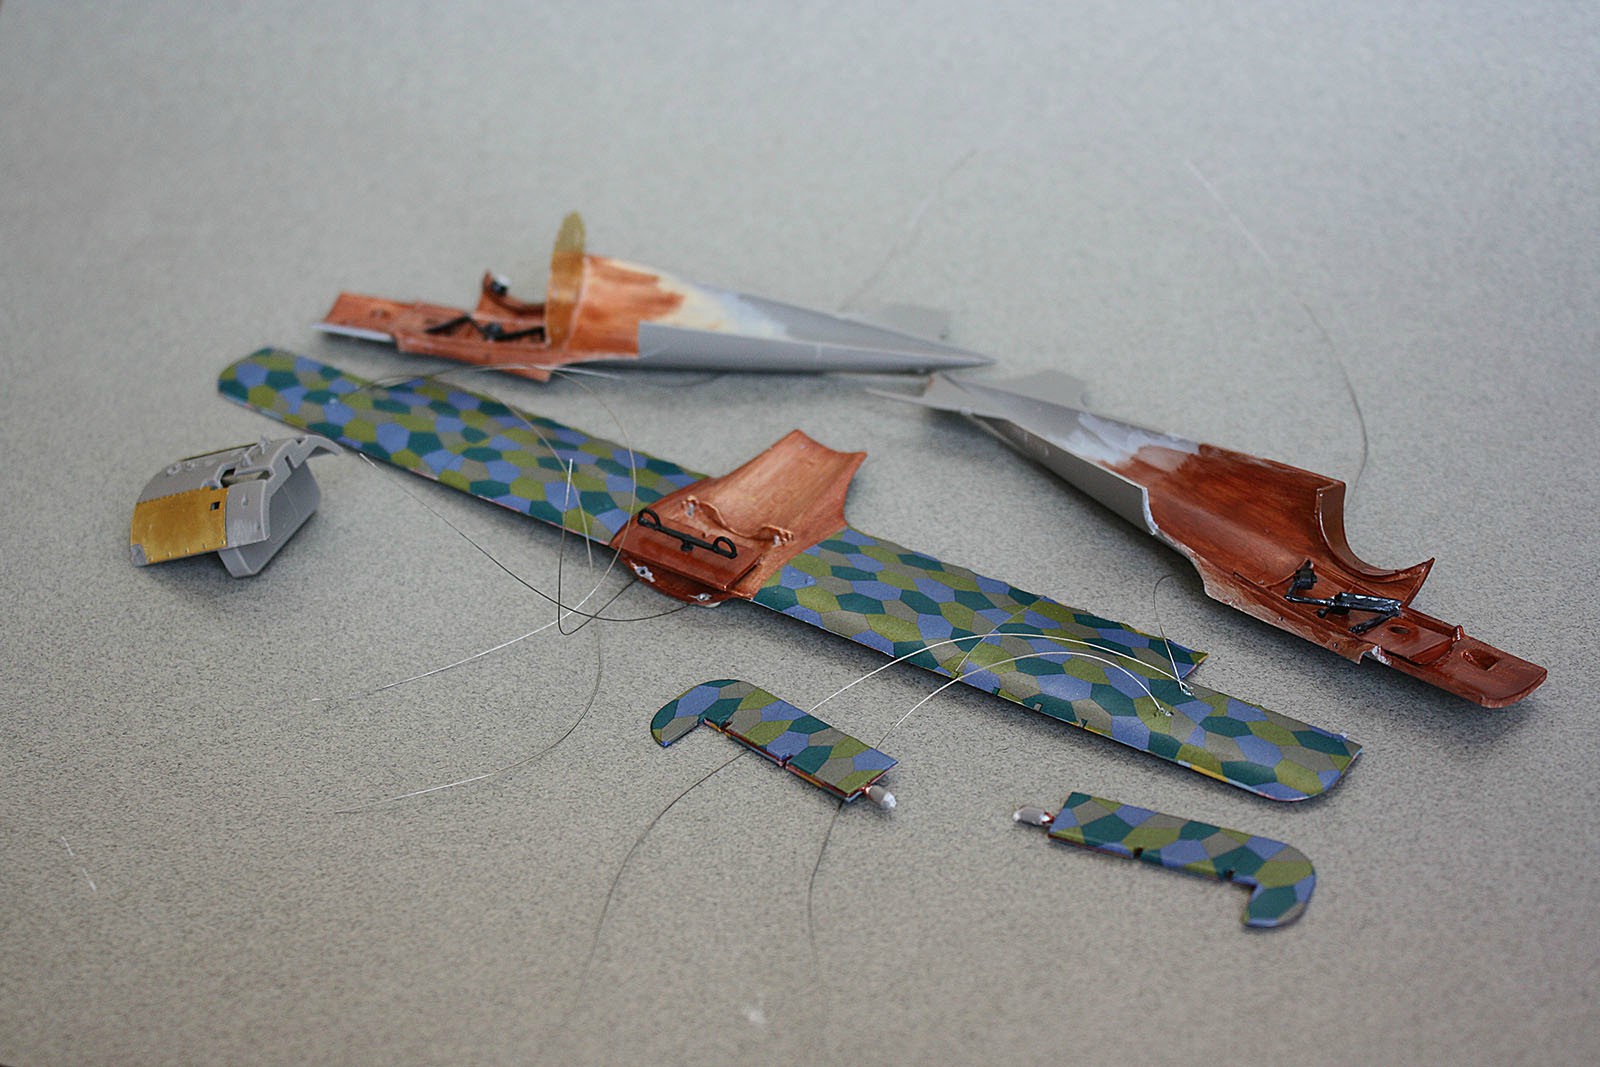
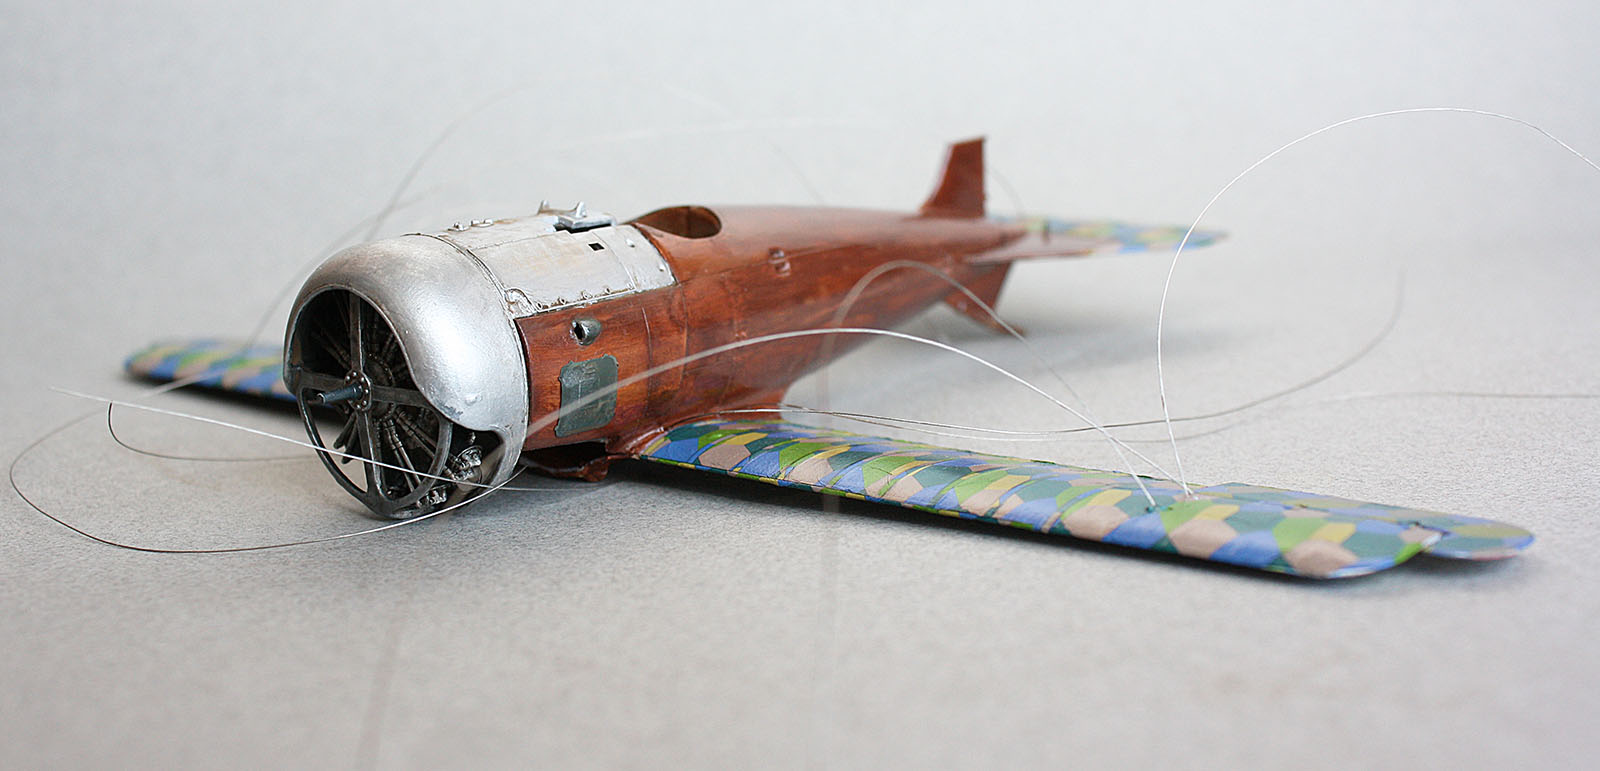
Though lozenge that comes with the kit is pre-cut, it is going straight to the bin - I've had horrible time with Roden lozenge before (too stiff, too brittle, colors and shapes are questionable) and this one promises to be no better (I've already flaked off a bit of a decal just by accidentally swiping it with a finger nail)


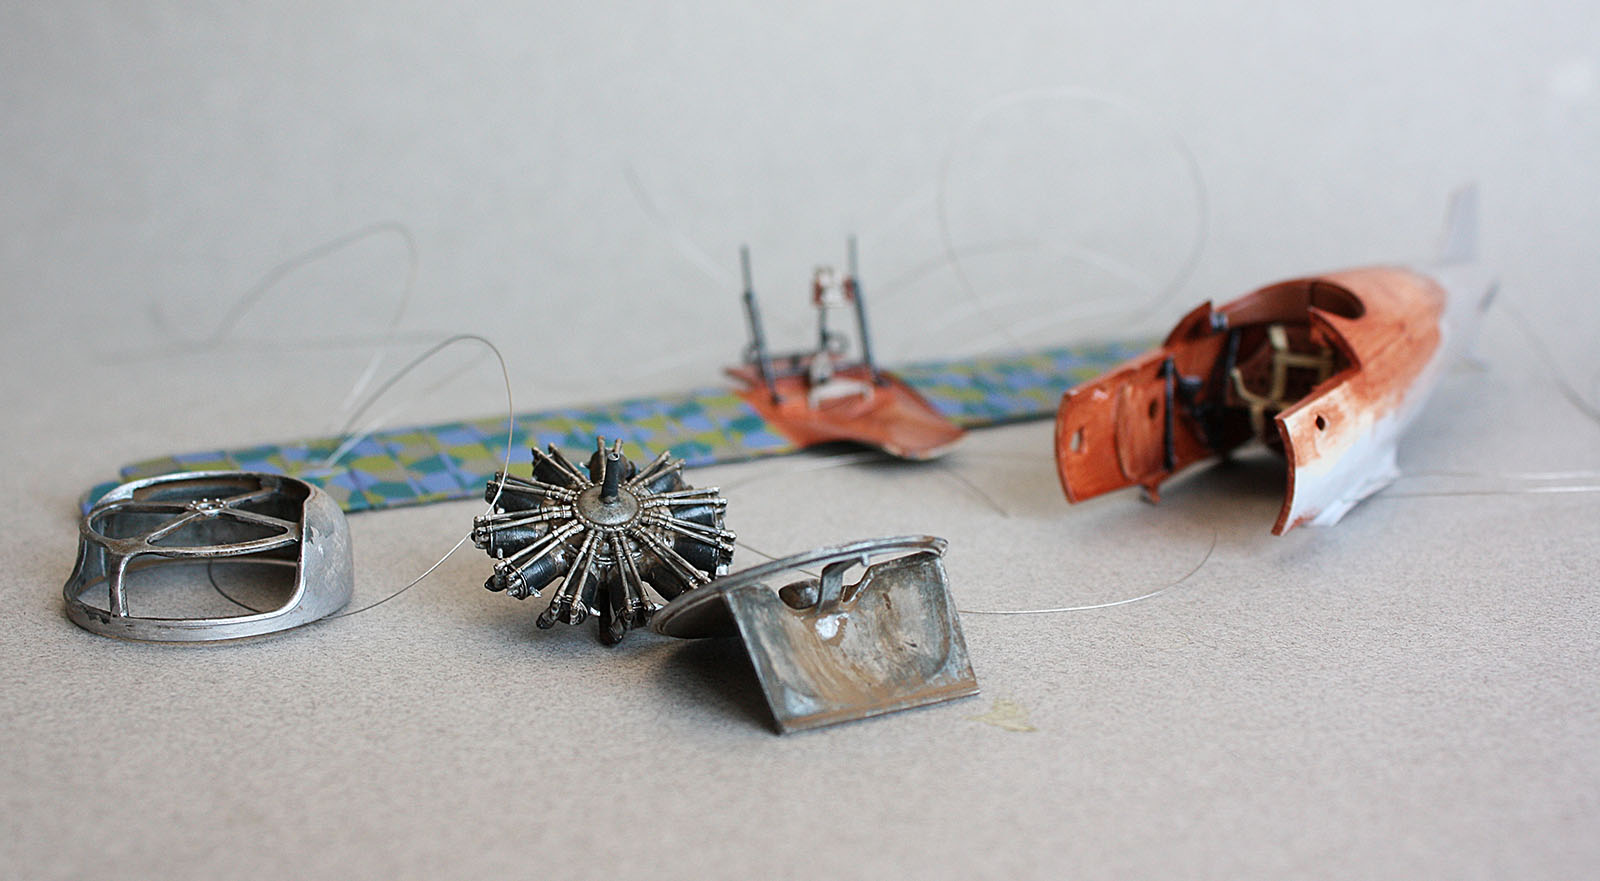
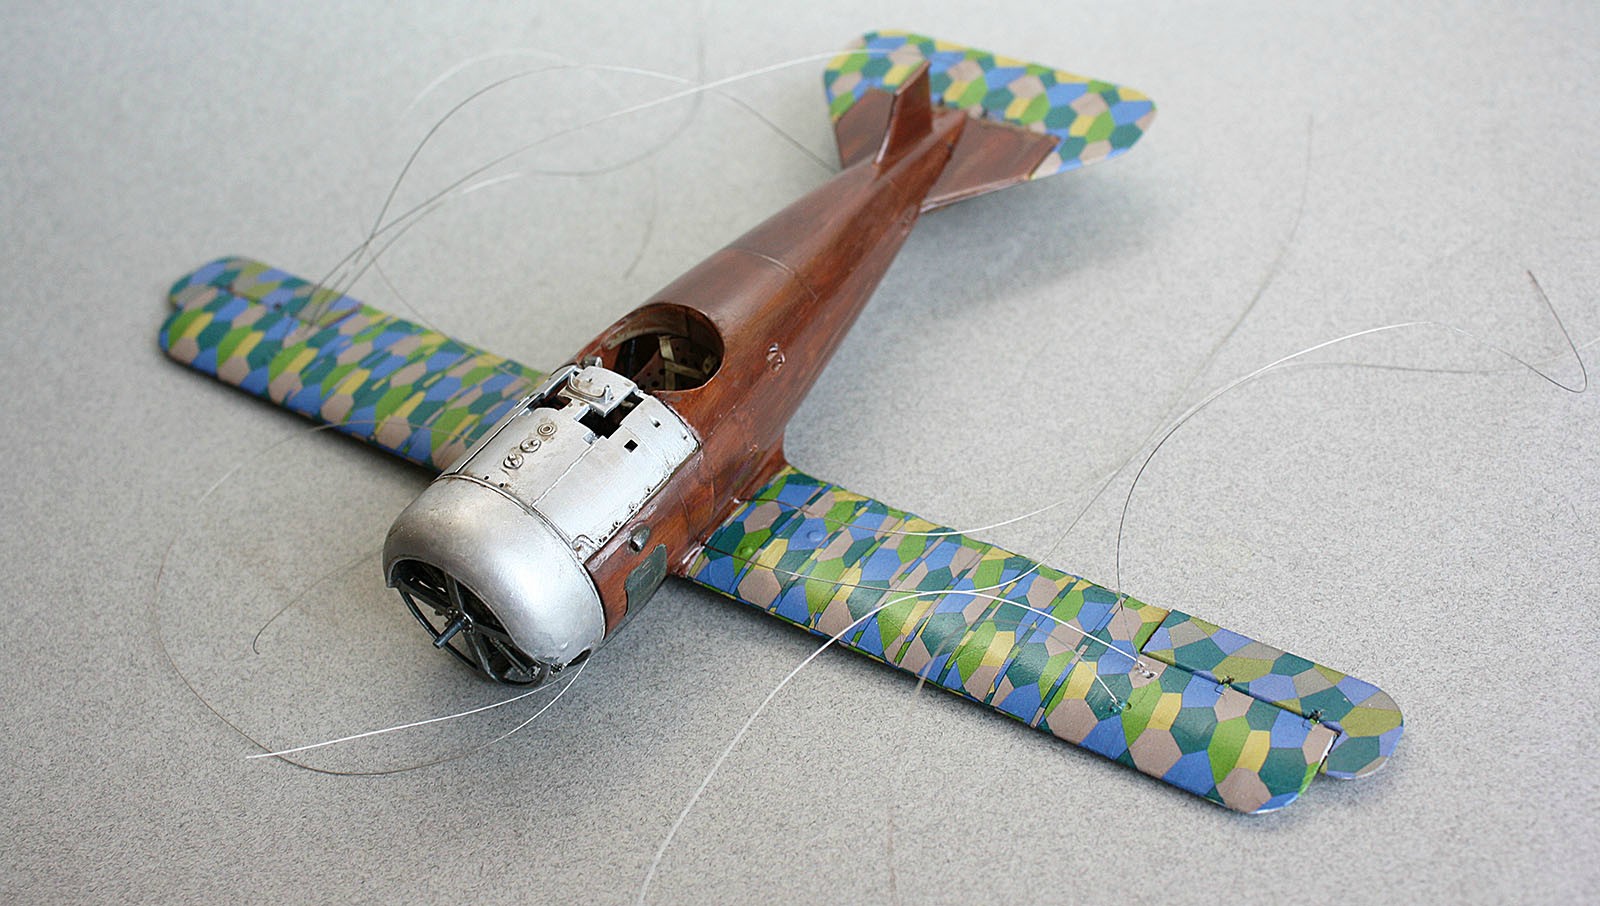
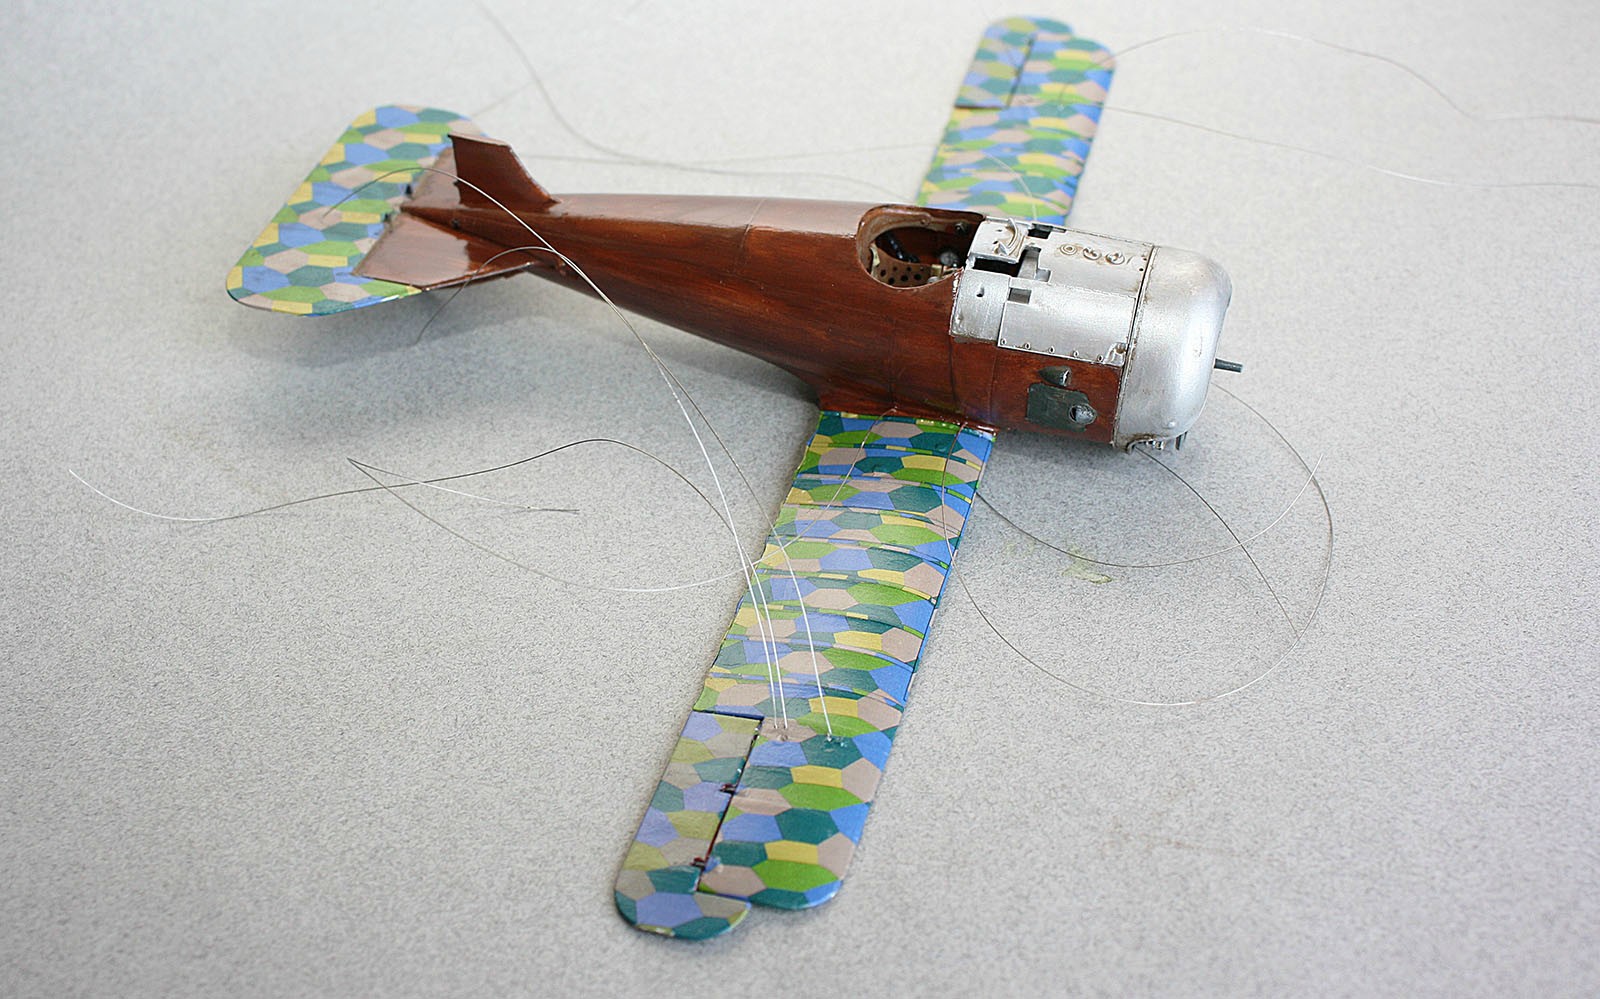
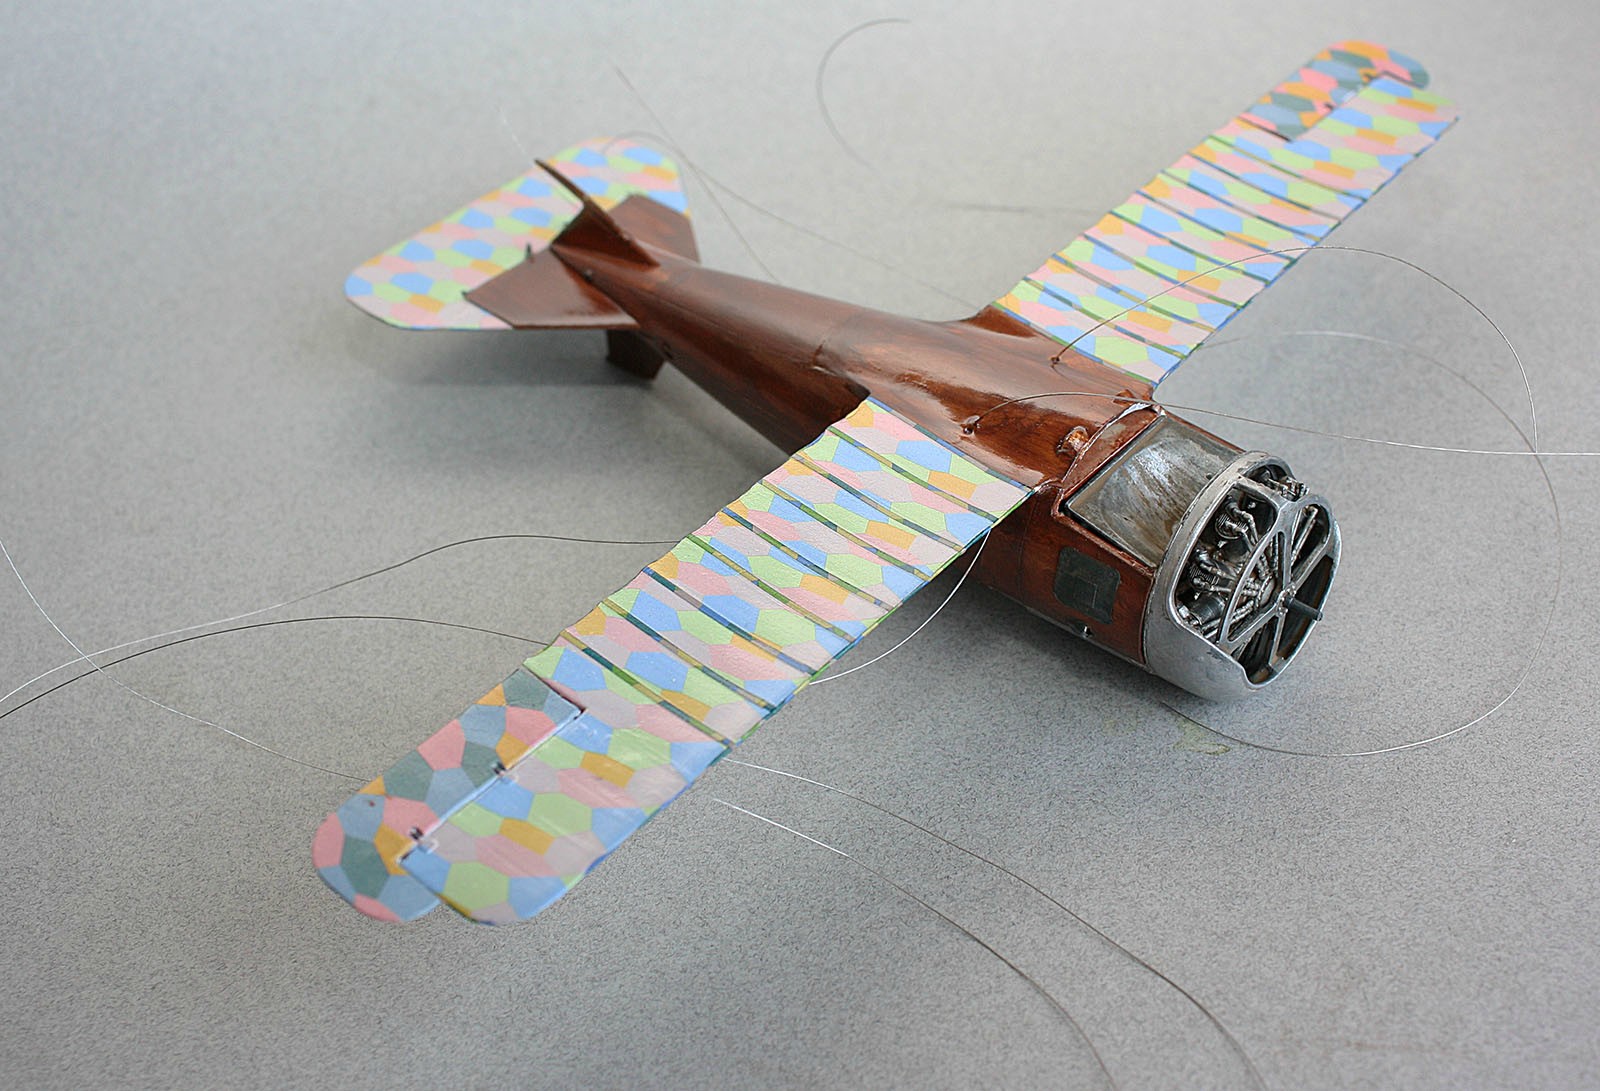
This kit is being donated with WingNut Wings spare lozenge decals (fingers crossed I have enough) - lower wing is mostly done and 0.01" jeweler's wire is anchored in preparation for rigging (this will be knuckle dragging "through wing" rigging job)


No notes on Master Spandau updates. PE pre-painted seatbelts are dandy, except for I can't anneal them without baking off the paint (I assume) - so I need to bend hard brass around relatively wimpy seat arrangement.

Brengun PE is dandy as well, except for one would wish for more detailed instructions - information is sparse and I'm having to review most of the piece placement by reviewing Windsock Datafile plans and photos. Color information is lacking, even on additional pieces, so one has to figure out what these pieces are and what color should be applied.

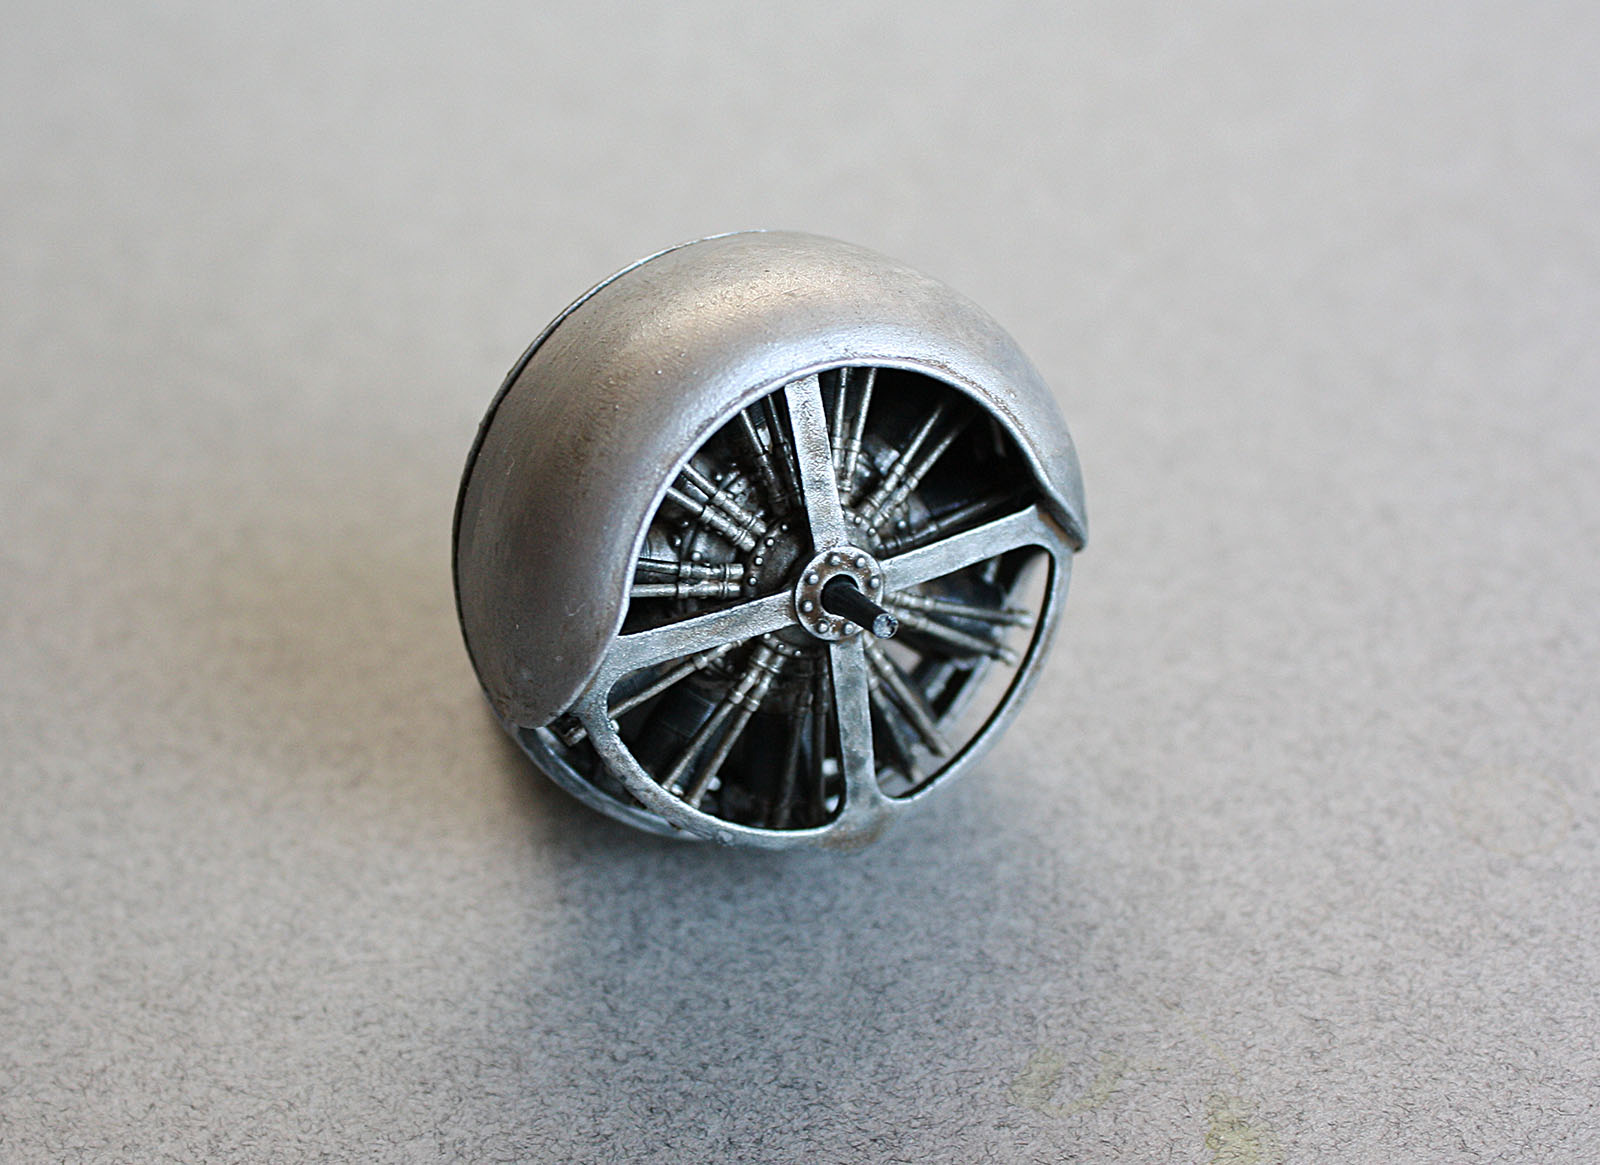
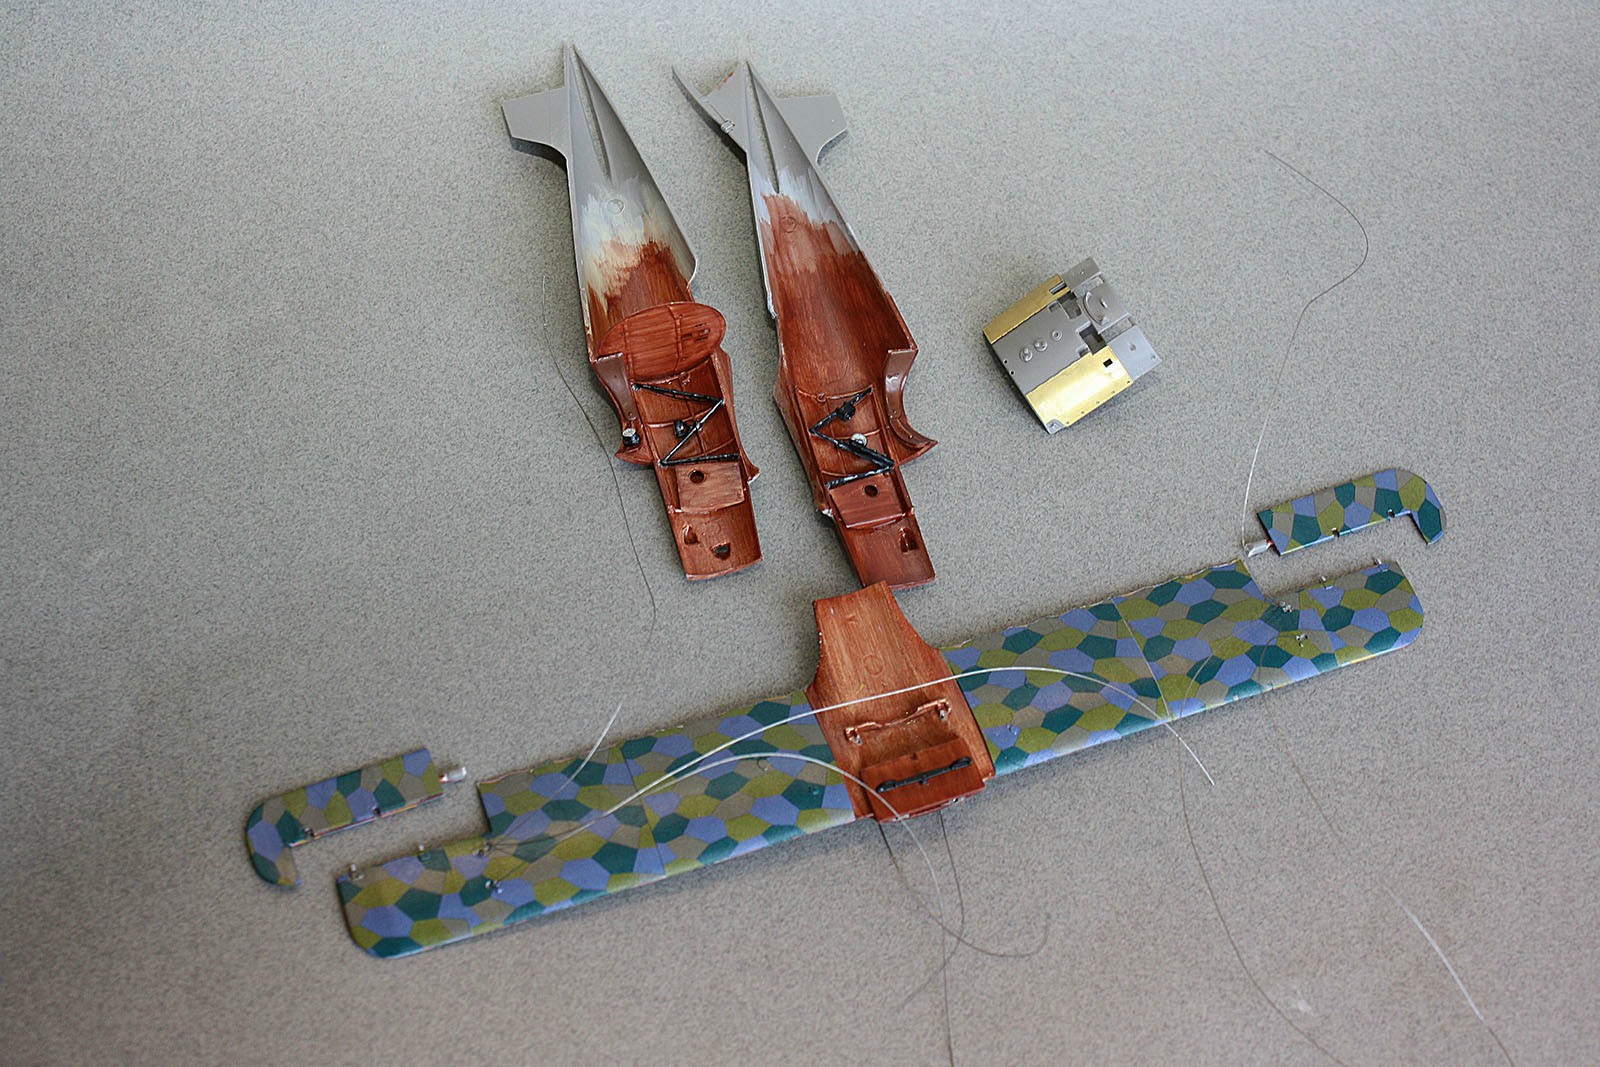
Fit of PE is good and pretty exact, details are sharp and crisp so really glad I chose to use it. Interior is receiving some updates, while most of the fine detail will find itself on panels behind the engine but in front of the pilot...

Really looking towards the getting to closed up fuselage - varnished wood, all the PE details and having it all come together.
berndm
_VISITCOMMUNITY
Niedersachsen, Germany
Joined: March 26, 2014
KitMaker: 844 posts
AeroScale: 630 posts
Posted: Sunday, May 11, 2014 - 07:59 PM UTC
Hi Ivan, great start !Great work, i wll follow this closely.
After i got mine, i was dissapointed about it.
It is great to see, how it`s coming together !

Bernd
Joel_W
Staff MemberAssociate Editor
AUTOMODELER
_VISITCOMMUNITY
New York, United States
Joined: December 04, 2010
KitMaker: 11,666 posts
AeroScale: 7,410 posts
Posted: Monday, May 12, 2014 - 03:14 AM UTC
Ivan,
While I don't build WW1 aircraft (lack of needed skills), I do appreciate those that do, and their builds. You "wood" interior looks really good. Looking forward to following your build and rigging.

Joel
thegirl
_VISITCOMMUNITY
Alberta, Canada
Joined: January 19, 2008
KitMaker: 6,743 posts
AeroScale: 6,151 posts
Posted: Monday, May 12, 2014 - 12:11 PM UTC
Your off to a great start so far , following along with interest .


Terri
StukaJr
_VISITCOMMUNITY
California, United States
Joined: April 26, 2010
KitMaker: 346 posts
AeroScale: 292 posts
Posted: Friday, May 16, 2014 - 12:44 PM UTC
Hello,

Firstly, thank you for the comments and encouragement - I'll try my best to make this build worth your while.

Just back from the photo session - here is the week's progress:


The cockpit interior is at the stage where I start closing things up, attaching the lower wing to the fuselage - test fitting shows a large gap in the belly where the wing meshes into the fuselage, so there will be interesting amount of sanding / filling ahead.


Detail of Brengun.cz photo-etch seat and back panel (Roden leaves that area open), plus Eduard pre-painted seatbelts


The lower wing is adorned with chord wise applied upper / lower 4 color lozenge, from WingNut Wings - the lot of my builds lozenge would clash horribly with Roden take on the colors (plus I don't trust Roden included lozenge not to flake and leave me with botched wings). Lower wing aeliron is applied with length wise 4 color lozenge


Only thing left to do on the lower wings are the National markings. Painted exterior wood patches are to be painted over - it's just there so I don't come too close to splashing paint into interior / wings. Rib tapes are not going all the way to the fuselage, as there will be some sanding and filling (which will hopefully get covered up with last of the ribtapes).


Siemens-Halske Sh.III engine - all painted up and test fitted into the cowling... I'm testing the approach of pre-weathering the engine / inside of the cowling before I close it up - this way I do not get stuck with un-grimed patches where I can't get in with the brush in the final stages.

The grime is a month old oil wash that has since separated and turned all grainy - it's not meant to look nice!

Positive take away from this build, so far - the engine. Roden engines are very nicely detailed and okay cast. There was some flash on the halves of the engine shells that created seams and the detail that caps each cylinder head took some work to lay flat onto the cylinder ends. But other than that, the engine is the real strength of the Roden kit(s)

A bit of a rant on the cost - between the kit, the Spandau, seatbelts and Brengun.cz detailing PE - the pricetag is well over $100 USD (not counting shipping, WingNut lozenge and left over detailing parts for future builds)... The price of WingNut Wing's offerings is suddenly a bargain and possibly explains how most of my project queue has been dominated by WnW... Not that my family has skipped a meal or gone barefoot for any length of time to afford this, but it's still a bit of a mystery how one can squawk about a "steep" pricetag of a decent OOB kit yet get caught up in overspending on correcting initial kit faults / omissions. Anywho - a bit

That's it! Stay tuned for some fancy varnished wood fuselage and heavy metal portions for next week.
thegirl
_VISITCOMMUNITY
Alberta, Canada
Joined: January 19, 2008
KitMaker: 6,743 posts
AeroScale: 6,151 posts
Posted: Sunday, May 18, 2014 - 02:04 AM UTC
Moving right along Ivan . Very nice job on painting up the engine . Curious on why you went with four colour lozenge ?


Terri
StukaJr
_VISITCOMMUNITY
California, United States
Joined: April 26, 2010
KitMaker: 346 posts
AeroScale: 292 posts
Posted: Sunday, May 18, 2014 - 04:48 AM UTC

Quoted Text

Moving right along Ivan . Very nice job on painting up the engine . Curious on why you went with four colour lozenge ?

Terri


... because I can't count, apparently

Somewhere I got it into my head that the kit was supplied with 4 color lozenge and it stuck that way... I need a nursery-type rhyme that if I see light and dark green, it's a 5 color camo...

Terri, thank you for catching my mistake and in the stage of the build where something can still be done about it! Look towards seeing 5 color as I paint the fuselage...
berndm
_VISITCOMMUNITY
Niedersachsen, Germany
Joined: March 26, 2014
KitMaker: 844 posts
AeroScale: 630 posts
Posted: Sunday, May 18, 2014 - 07:26 PM UTC
Hi
Your engine looks great, still enjoying the show ! Where do you get the informations about the used Lozenge ??
After i counted the needed aftermarked stuff and my ability on mind, i put my kit on sale on E*** .My favotite scale is still 1/48 for this kind of aircraft.

Bernd
StukaJr
_VISITCOMMUNITY
California, United States
Joined: April 26, 2010
KitMaker: 346 posts
AeroScale: 292 posts
Posted: Monday, May 19, 2014 - 06:23 AM UTC

Quoted Text

Hi
Your engine looks great, still enjoying the show ! Where do you get the informations about the used Lozenge ??
After i counted the needed aftermarked stuff and my ability on mind, i put my kit on sale on E*** .My favotite scale is still 1/48 for this kind of aircraft.

Bernd


World of information here:

https://aeroscale.kitmaker.net/forums/87962&page=1

Specifically to your question, you could either pick up appropriate Windsock Datafile or, if WingNut Wings has this model produced, download their excellent instructional manual - both will usually tell you.

You could count how many colors are on kit's lozenge (if replacing kit's lozenge with aftermarket corrections), some photographs of the original have good enough views to count varying grayscale shapes (little tough).

You could ask on this sub-forum You could read reviews of the kit that will usually state, though make sure to find multiple agreeing sources as to not make my mistake - reviewer must have made a typo on 4 instead of 5, as clearly the built model had 5.

Some aircraft mixed lozenge and repairs were made with what the groundcrews had on hand.

And thanks for following, I'll have another update middle of the week!
berndm
_VISITCOMMUNITY
Niedersachsen, Germany
Joined: March 26, 2014
KitMaker: 844 posts
AeroScale: 630 posts
Posted: Tuesday, May 20, 2014 - 04:01 AM UTC
Hi Ivan
thank you for this information.This may help for future builts !
I`am looking for your next update of this great built.

Bernd
thegirl
_VISITCOMMUNITY
Alberta, Canada
Joined: January 19, 2008
KitMaker: 6,743 posts
AeroScale: 6,151 posts
Posted: Wednesday, May 21, 2014 - 11:03 AM UTC

Quoted Text


Quoted Text

Moving right along Ivan . Very nice job on painting up the engine . Curious on why you went with four colour lozenge ?

Terri


... because I can't count, apparently

Somewhere I got it into my head that the kit was supplied with 4 color lozenge and it stuck that way... I need a nursery-type rhyme that if I see light and dark green, it's a 5 color camo...

Terri, thank you for catching my mistake and in the stage of the build where something can still be done about it! Look towards seeing 5 color as I paint the fuselage...


I miss it the first time , was wrap up on your wood effect and myself didn't pay attention . Glad that it is early enough for you for corrections .


Terri
thegirl
_VISITCOMMUNITY
Alberta, Canada
Joined: January 19, 2008
KitMaker: 6,743 posts
AeroScale: 6,151 posts
Posted: Wednesday, May 21, 2014 - 11:05 AM UTC

Quoted Text

Hi
Your engine looks great, still enjoying the show ! Where do you get the informations about the used Lozenge ??
After i counted the needed aftermarked stuff and my ability on mind, i put my kit on sale on E*** .My favotite scale is still 1/48 for this kind of aircraft.

Bernd


Eduard is releasing a new tooled kit of this aircraft some time this year . Rumor has it some time between June and August .
berndm
_VISITCOMMUNITY
Niedersachsen, Germany
Joined: March 26, 2014
KitMaker: 844 posts
AeroScale: 630 posts
Posted: Wednesday, May 21, 2014 - 11:25 PM UTC
Hi
This is good news, to hear ! This aircraft is one of my favorite WWI aircraft.
Looking forward of Ivan´s nest steps on this big one !

Bernd
StukaJr
_VISITCOMMUNITY
California, United States
Joined: April 26, 2010
KitMaker: 346 posts
AeroScale: 292 posts
Posted: Friday, May 23, 2014 - 11:28 AM UTC
Happy Friday!

Got a bit carried away with the in-progress shots, hope you enjoy!

Week's progress:

the lower wing got re-skinned in correct 5-color lengthwise WnW lozenge - this was not as easy as applying lozenge decal on the wing prior to installation to fuselage / ailerons. Ailerons are still incorrect 4 color. Rib tapes are 3/4 way done.

Quick note on lozenge - I have originally made incorrect use of 4 color lozenge applied chordwise on the lower wing. The correct lozenge application is 5 color and running lengthwise on the lower wing and control planes.

Fuselage is assembled over the lower wing and dark woodgrain painted and sealed. Quite a bit of woodgrain got obscured by darker varnish, though effect is very similar to woody boats so I'm rather content. Tail plane and elevator are installed, ready for the only control wires seen (2 upper, 2 lower) on this model.

The big selling point of Brengun.cz photo-etch kit are late / early access hatches that replace Roden's original molded fuselage hatches - adds good contrast of painted metal over lacquered wood.

Engine, cowling and metal portion of the fuselage is installed - this will be painted black-green, but it looks striking as bare aluminum and I've left it as is until after the photos are taken... Hope that painting over the assembled cowling / metal will produce the right result and enough bare metal showing through in places.


Current pucker factor(s):

I'm running dangerously low on lozenge decal donated by my WnW Roland D.VIb kit - the latest kit uses slightly different decal than standard 5 color upper lozenge. Geometry and 4 out of 5 colors are the same, but the burgundy red is now more of a beige color in the latest WnW print... Hoping to have just enough and plan on doing some color acrobatics if I don't! Have e-mail to WnW to see if they sell me just one decal sheet (I did successfully order PE parts from them).

Brengun.cz's lower louver appears to be 1-2mm shy of closing in with the lower cowling bit (not yet installed) - I can't confirm or deny whether it's my folly in fitting... Have plans on part closing up the gap with strip of brass and part sanding down bits that control placement of the piece in question... Either way, it's easier to snip brass than to extend it

Happy modeling, us Yanks got an extra long weekend in store for us
thegirl
_VISITCOMMUNITY
Alberta, Canada
Joined: January 19, 2008
KitMaker: 6,743 posts
AeroScale: 6,151 posts
Posted: Saturday, May 24, 2014 - 02:34 AM UTC
Ivan ,

Fuselage looks good . You really should be able to see the grain of the wood . If your able too still do it . A few coats of a clear orange will darker it up just right .

Nice metal work as well , shame to cover this up thought . Will look sharp with the black


Terri
StukaJr
_VISITCOMMUNITY
California, United States
Joined: April 26, 2010
KitMaker: 346 posts
AeroScale: 292 posts
Posted: Saturday, May 24, 2014 - 05:32 AM UTC

Quoted Text

Ivan ,

Fuselage looks good . You really should be able to see the grain of the wood . If your able too still do it . A few coats of a clear orange will darker it up just right .


You can see the grain under the glaze from up close and it looks streaky brown from further away...


... though I may still art it up with more noticeable grain, as you have suggested.
Jessie_C
_VISITCOMMUNITY
British Columbia, Canada
Joined: September 03, 2009
KitMaker: 6,965 posts
AeroScale: 6,247 posts
Posted: Saturday, May 24, 2014 - 06:08 AM UTC
I think that looks just about right on. Remember that individual trees are individual, therefore no two aircraft are going to look exactly the same. Some looked "woodgrainy" and others didn't.
berndm
_VISITCOMMUNITY
Niedersachsen, Germany
Joined: March 26, 2014
KitMaker: 844 posts
AeroScale: 630 posts
Posted: Monday, May 26, 2014 - 04:53 AM UTC
Hi Ivan
Great built, i still enjoy the "show"!

Bernd
thegirl
_VISITCOMMUNITY
Alberta, Canada
Joined: January 19, 2008
KitMaker: 6,743 posts
AeroScale: 6,151 posts
Posted: Monday, May 26, 2014 - 02:09 PM UTC
Ivan , re-reading my last reply I made a type-o . It should have been shouldn't . The fuselage was shellacked not varnished . This would be very very dark and you really shouldn't be able to see the gain effect .


Terri
CaptnTommy
_VISITCOMMUNITY
Connecticut, United States
Joined: October 26, 2009
KitMaker: 424 posts
AeroScale: 389 posts
Posted: Tuesday, May 27, 2014 - 02:48 AM UTC
Looking at the four color ailerons, all I can say is, "Those damned subcontrators used the wrong lozenge! Put it on the ship! We have to deliver them."

The deep varnish looks great.

Captn Tommy
StukaJr
_VISITCOMMUNITY
California, United States
Joined: April 26, 2010
KitMaker: 346 posts
AeroScale: 292 posts
Posted: Friday, May 30, 2014 - 01:28 PM UTC
Terri - gotcha on the typo and didn't know the original fuselage wood shellacked (thought it was just a very dark varnish); always good info to have.

Bernd - thanks for sticking around

Thanks, Jessica!

CaptnTommy - true, I was leaning on leaving either wings or ailerons as 4 color and explain it away as field "repair", but then I've opted to replace it... Takes time away from other build, but at least I can now say I did it

Here's week's update:


Still quite a bit of detail left to do on the fuselage, including the spandau guns, the sighting frames (part of the PE set), wingnuts and hardware for the tailskid... Tailskid broke in half while handling and went for a walkabout - when it comes back, I will need to add a pin to strengthen its placement.

Spent quite a bit of stuff working on the pieces that haven't made it into the shot - the outward wing struts, bottom lozenge on the top wing, landing gear and wheels.

Latest "pucker factor" - the front of landing gear supports will connect up to Photo-etch lower louvered panel and I'm concerned it may buckle under the weight... In hind sight, I should have left some of the original kit's plastic as a support, though will keep an eye out as I install the landing gear in place.
JackFlash
_VISITCOMMUNITY
Colorado, United States
Joined: January 25, 2004
KitMaker: 11,669 posts
AeroScale: 11,011 posts
Posted: Friday, May 30, 2014 - 03:47 PM UTC
Very decent work!
thegirl
_VISITCOMMUNITY
Alberta, Canada
Joined: January 19, 2008
KitMaker: 6,743 posts
AeroScale: 6,151 posts
Posted: Sunday, June 01, 2014 - 01:33 AM UTC
Hey Ivan


Most excellent progress , far better then with my own project . I really like the effect you got on the cowl , has an graphite appearance to it . One of the high points with this kit is Roden got the shade of the dragon/serpent close to the golden yellow . I have few sets of these makings in 48 scale but the dragons/serpents are white .
Down side is no prop logo's in the kit . Nice job on rolling the chin pan by the way . You don't have to worry about this part buckling under the weight . Once the rigging is in place you will be surprised on how much strength this adds . Are you going to pin them in place ? A flush mounted will cause troubles down the road , easily breakable at the join .


Terri
StukaJr
_VISITCOMMUNITY
California, United States
Joined: April 26, 2010
KitMaker: 346 posts
AeroScale: 292 posts
Posted: Sunday, June 01, 2014 - 05:58 AM UTC
Hi Stephen! Thanks!

Hi Terri! PM replied - thanks again, it will be super!

I tend to push my builds through as anything that's on the burner for too long becomes abandoned - it's a bit of a quirk that I have... As for dueling SSD.III's, I only wish I had your scratchbuilding and touch in making things fit (especially when they are specifically made not to)... Watching your build with continued interest and respect.

No longer worried about the aptly named "chin pan" - the front gears connect very close to where cowling joins, so it gets a lot more rigid. 3-4 mm away and it begins to act a bit like a pop lid on a jar with a broken seal (and that's where I have first tested). Roger on the rigging - it does strengthen landing gears and wings, indeed.

The cowling is thinly applied very dark, almost black green over the bare aluminum, as I had it before - because of the thin nature of acrylic coat, it's showing through in places. Afterwards, I dry brushed more aluminum over worn surfaces and edges.

I was going to pin the wheel axles only, but should consider pinning the landing gear / fuselage matting point as well. Roden provided "dimple and bump" means of meshing key structural elements leaves wishing for more... I'll need to be extra careful as cockpit controls are right on the other side - I have once speared through 1/48 Albatros interior with a pinwise anchoring rigging lines on the belly
Mgunns
_VISITCOMMUNITY
Arizona, United States
Joined: December 12, 2008
KitMaker: 1,423 posts
AeroScale: 1,319 posts
Posted: Wednesday, June 04, 2014 - 05:21 AM UTC
Hello Ivan:

Nice work to date. I am enjoying your build and your "rant". Like many, I have this kit in the stash, want to get at it, but WNW kits just continue to beckon. It is good to see you tackle this beast and the fine results you are achieving. Looking forward to more.

Best

Mark
 _GOTOTOP