_GOTOBOTTOM
Pre-Flight Check
Constructive critique of your finished or in-progress photos.
1/32 Hasegawa A-4F- Lady Jessie
ShawnM
_VISITCOMMUNITY
Missouri, United States
Joined: November 24, 2008
KitMaker: 564 posts
AeroScale: 510 posts
Posted: Tuesday, July 15, 2014 - 05:07 AM UTC
Haven't shared a build here in a while, this was the latest.
Added some scratch details, however is mostly OOB.
Kits decals used and worked a treat!


Other pics here:
https://www.flickr.com/photos/shawnmanny/sets/72157645040793448/
SuperSandaas
_VISITCOMMUNITY
Sør-Trøndelag, Norway
Joined: October 23, 2012
KitMaker: 189 posts
AeroScale: 142 posts
Posted: Tuesday, July 15, 2014 - 05:26 AM UTC
Very pretty!
A bit 
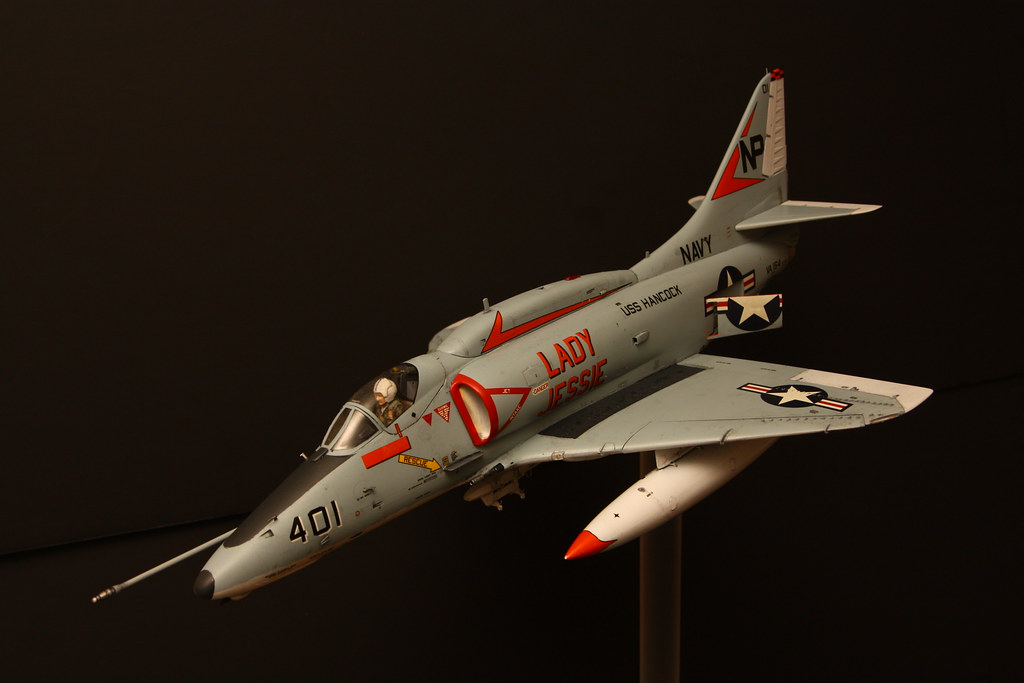
but where did you buy the rod you used to depict it flying?
ShawnM
_VISITCOMMUNITY
Missouri, United States
Joined: November 24, 2008
KitMaker: 564 posts
AeroScale: 510 posts
Posted: Tuesday, July 15, 2014 - 05:44 AM UTC
Thank you!

The rod is a clear acrylic toilet plunger
JPTRR
Staff MemberManaging Editor
RAILROAD MODELING
#051
_VISITCOMMUNITY
Tennessee, United States
Joined: December 21, 2002
KitMaker: 7,772 posts
AeroScale: 3,175 posts
Posted: Tuesday, July 15, 2014 - 03:38 PM UTC
Shawn ,

Very good! I like the subtle grunge on the weapons pylons and MERs.

Are those the kit decals?
Jessie_C
_VISITCOMMUNITY
British Columbia, Canada
Joined: September 03, 2009
KitMaker: 6,965 posts
AeroScale: 6,247 posts
Posted: Tuesday, July 15, 2014 - 05:19 PM UTC
I approve of this scheme
redcap
_VISITCOMMUNITY
England - East Midlands, United Kingdom
Joined: November 06, 2005
KitMaker: 753 posts
AeroScale: 311 posts
Posted: Tuesday, July 15, 2014 - 10:23 PM UTC

Quoted Text

Thank you!

The rod is a clear acrylic toilet plunger


Thanks for the laugh Shawn! I needed it whilst taking a break on the site from writing my latest letter to the dreaded taxman. Excellent A4 mate!

Gary
Joel_W
Staff MemberAssociate Editor
AUTOMODELER
_VISITCOMMUNITY
New York, United States
Joined: December 04, 2010
KitMaker: 11,666 posts
AeroScale: 7,410 posts
Posted: Wednesday, July 16, 2014 - 02:36 AM UTC
Shawn,
I've seen your A-4F before, and I'm still in awe of it. Just simply an outstanding overall build. Perfect paint, decaling, and implicit weathering. The various details like the wing guns, and pylons are exceeding well done. Even the little bit of dirt on the inside of the intakes adds to the overall effect.

And Jessica, I thought of you when I 1st saw Shawn's build.

Joel
ShawnM
_VISITCOMMUNITY
Missouri, United States
Joined: November 24, 2008
KitMaker: 564 posts
AeroScale: 510 posts
Posted: Wednesday, July 16, 2014 - 06:00 AM UTC
Thanks Guys and Gal

Frederick yes those are the kit decals, with some solvent over a gloss coat they worked beautifully.

Joel, many thanks again. The intake weather was kind of a happy accident. I painted the intakes white,primed the airframe with tan, then did the grey. Had just enough overspray sneak by but it looked right so I didn't correct it.

Cant wait to learn this airbrush thing and get away from rattle cans.
berndm
_VISITCOMMUNITY
Niedersachsen, Germany
Joined: March 26, 2014
KitMaker: 844 posts
AeroScale: 630 posts
Posted: Friday, July 18, 2014 - 02:15 AM UTC
Hi Shawn a great A-4,can t wait to see your results with an
airbrush.

diseasedspawn
_VISITCOMMUNITY
Florida, United States
Joined: September 22, 2012
KitMaker: 97 posts
AeroScale: 30 posts
Posted: Monday, July 21, 2014 - 04:41 PM UTC
Awesome build Shawn!

I like how you angled it into a dive and even have the dive flaps out. Yes, the weathering is outstanding; present yet not overbearing. Where did you get that bit of Styrofoam you use to hold the plane upside down? I have always just put my planes upside down and let them choose which wing they wanted to rest on

If you are airbrushing with a rattle can I advise you to get a generator. Yes they are pricey but I use mine for so much that it pays for itself. I have had mine since I was a teenager so they last forever. Mine has a built in moisture trap and you can vary the pressure, very important for being able to switch from detail work to large area spray.

The biggest things I have learned with my airbrush are 1) KEEP IT CLEAN. They're as temperamental as a baby during teething. 2) Adjusting the distance, angle, viscosity, and pressure you can create some really cool effects.

Good luck to you
ShawnM
_VISITCOMMUNITY
Missouri, United States
Joined: November 24, 2008
KitMaker: 564 posts
AeroScale: 510 posts
Posted: Tuesday, July 22, 2014 - 06:53 AM UTC
Thanks Mark!
Yes this and all my previous builds were done by spray cans.

I do have an airbrush with compressor, moisture trap, regulator etc.
Im going to be breaking it out on my current build once my new model room is complete.

The foam I used I can't recall where I got it from but it sure is a time saver!
Herchealer
_VISITCOMMUNITY
Indiana, United States
Joined: July 31, 2003
KitMaker: 1,523 posts
AeroScale: 175 posts
Posted: Thursday, September 11, 2014 - 01:48 AM UTC
Just saw this at a show this past weekend and looked Pretty damn good, Also met Shawn and chatted a good bit..
ShawnM
_VISITCOMMUNITY
Missouri, United States
Joined: November 24, 2008
KitMaker: 564 posts
AeroScale: 510 posts
Posted: Thursday, September 11, 2014 - 04:25 AM UTC

Well hi there!

Thanks for the compliment and it was nice to meet ya
SGTJKJ
#041
_VISITCOMMUNITY
Kobenhavn, Denmark
Joined: July 20, 2006
KitMaker: 10,069 posts
AeroScale: 3,788 posts
Posted: Tuesday, November 04, 2014 - 10:09 PM UTC
Beautiful build. Very nice color scheme and markings.

Thanks for sharing
 _GOTOTOP