FEATURE
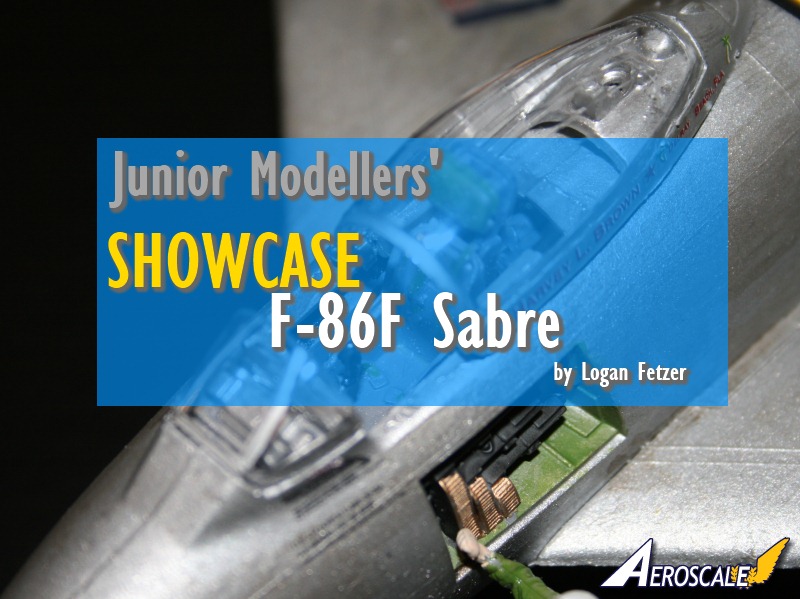
Junior Modellers' Showcase: F-86F
British Columbia, Canada
Joined: September 03, 2009
KitMaker: 6,965 posts
AeroScale: 6,247 posts
Posted: Friday, July 18, 2014 - 12:33 PM UTC
From time to time, Aeroscale features the work of our junior members. This weekend's Showcase is amply filled by Logan Fetzer, who built the 1/48 Revellogram F-86F-30 Sabre in Korean War markings.
 Link to Item
If you have comments or questions please post them here.
Thanks!
When once you have tasted flight you will walk the Earth with your eyes turned skyward.
For there you have been, and there you will always long to return.
-Leonardo Da Vinci
SgtRam
 Editor-at-Large
#197
Ontario, Canada
Joined: March 06, 2011
KitMaker: 3,971 posts
AeroScale: 511 posts
Posted: Friday, July 18, 2014 - 12:35 PM UTC
Logan - Great looking build, very nice work on paint and decals.
Alberta, Canada
Joined: April 07, 2010
KitMaker: 1,028 posts
AeroScale: 939 posts
Posted: Friday, July 18, 2014 - 01:17 PM UTC
Wow!! I so much enjoy seeing this, Logan. Well done

Hope we'll see a-lot more of your work

To prevent being called an 'expert', screw something up good every now and again.
Colorado, United States
Joined: May 18, 2014
KitMaker: 69 posts
AeroScale: 67 posts
Posted: Friday, July 18, 2014 - 01:23 PM UTC
Thanks guys! My next build will probably be a vintage B-47, it's an old model of my dads that he never built, I'm thinking circa 1970-80. I'll be sure to post when I'm done!
Colorado, United States
Joined: May 18, 2014
KitMaker: 69 posts
AeroScale: 67 posts
Posted: Friday, July 18, 2014 - 02:30 PM UTC
Or, after just checking, it's actually from 1954... This is going to be an old build!
SgtRam
Editor-at-Large #197
Ontario, Canada
Joined: March 06, 2011
KitMaker: 3,971 posts
AeroScale: 511 posts
Posted: Friday, July 18, 2014 - 02:40 PM UTC
Logan, I think I remember that kit, looking forward to seeing your build
United States
Joined: February 01, 2009
KitMaker: 1,233 posts
AeroScale: 663 posts
Posted: Friday, July 18, 2014 - 11:40 PM UTC
Well done, Logan. Always nice to see an -86.
It is a fact that under equal conditions, large-scale battles and whole wars are won by troops which have a strong will for victory, clear goals before them, high moral standards, and devotion to the banner under which they go into battle.
-Georgy Zhukov
JPTRR
Managing Editor #051
Tennessee, United States
Joined: December 21, 2002
KitMaker: 7,772 posts
AeroScale: 3,175 posts
Posted: Friday, July 18, 2014 - 11:56 PM UTC
Logan, a splendid job! Your seam work is impressive. Yes, silver - brushed, sprayed, or airbrushed - is a fickle paint prone to mocking us. Your's looks like a nice NMF F-86 that's seen some work. The yellow fuselage band looks great, as does the coloring around the intake. Yes, a simple base can really set off a model.
If they demand your loyalty, give them integrity; if they demand integrity, give them your loyalty.--Col John Boyd, USAF
Any plan where you lose your hat is a bad plan.
AussieReg
Associate Editor #007
Victoria, Australia
Joined: June 09, 2009
KitMaker: 8,156 posts
AeroScale: 3,756 posts
Posted: Saturday, July 19, 2014 - 12:58 AM UTC
Beautiful work Logan, NMF is scary and you have done a great job. A tip to make your next build better, just keep doing what you are doing and enjoy this great hobby!
ON the bench
Revell 1/24 '53 Corvette (building as '54)
Revell 1/24 BMW 507 Coupe and Cabrio
Italeri 1/48 Me262 B-1a/U1 Nightfighter
Monogram 1/24 '57 Chevy Nomad
Dragon 1/350 USS Frank Knox DD-742
Colorado, United States
Joined: February 24, 2014
KitMaker: 3,033 posts
AeroScale: 60 posts
Posted: Saturday, July 19, 2014 - 01:10 AM UTC
Hi Logan,
Nice job! ... And nice recovery with the paint issue you mentioned.

You persisted and that makes the build all the more special.

Keep up the good work!
--mike
England - South East, United Kingdom
Joined: February 05, 2008
KitMaker: 1,381 posts
AeroScale: 1,110 posts
Posted: Saturday, July 19, 2014 - 01:58 AM UTC
excellent keep up the good work, be sure to show us your next build.
Colorado, United States
Joined: May 18, 2014
KitMaker: 69 posts
AeroScale: 67 posts
Posted: Saturday, July 19, 2014 - 01:39 PM UTC
Joel_W
Associate Editor New York, United States
Joined: December 04, 2010
KitMaker: 11,666 posts
AeroScale: 7,410 posts
Posted: Saturday, July 19, 2014 - 02:11 PM UTC
Logan,
Well done, especially your NMF done with a rattle can. Looking forward to your B-47 build.
Just one word of advice for a build of such an old kit. The decals could have dried out and become brittle with the clear film turning yellow. Test one decal that you won't be using, as it may be wiser to buy a after market sheet.
Looking forward to your next build feature.
Joel
On my Workbench:
Monogram 1/24 scale 427 Shelby Cobra
Just Completed:
Beemax 1/24 scale BMW M3 E30 1992 Evolution II
Colorado, United States
Joined: May 18, 2014
KitMaker: 69 posts
AeroScale: 67 posts
Posted: Saturday, July 19, 2014 - 02:20 PM UTC
Thanks for the tip, Joel. I can tell that they've gotten pretty brittle, I tried to put one on the stand, and got about three cracks in it. Where do you suggest I look for one of these aftermarket sticker sheets?
British Columbia, Canada
Joined: September 03, 2009
KitMaker: 6,965 posts
AeroScale: 6,247 posts
Posted: Saturday, July 19, 2014 - 04:44 PM UTC
That may very well be difficult, especially if the model is not standard scale. Perhaps you can scan the decal, digitally remove the yellow and print it on clear decal film.
Alternatively, you can probably piece together the insignia, major markings and serial numbers from generic decals.
Yellowed decals can sometimes be salvaged by bleaching them in sunlight for a couple of weeks. Seal them in a plastic bag and tape them to a south or west facing window. You can prevent cracking by coating them with
Microscale Liquid Decal Film.
When once you have tasted flight you will walk the Earth with your eyes turned skyward.
For there you have been, and there you will always long to return.
-Leonardo Da Vinci
Namabiiru
Associate Editor #399
Rhode Island, United States
Joined: March 05, 2014
KitMaker: 2,888 posts
AeroScale: 307 posts
Posted: Saturday, July 19, 2014 - 08:04 PM UTC
Colorado, United States
Joined: May 18, 2014
KitMaker: 69 posts
AeroScale: 67 posts
Posted: Sunday, July 20, 2014 - 02:52 AM UTC
So fill a plastic bag with bleach, put in the decals, and then leave it in the sun?
British Columbia, Canada
Joined: September 03, 2009
KitMaker: 6,965 posts
AeroScale: 6,247 posts
Posted: Sunday, July 20, 2014 - 05:23 AM UTC
Oh no! No bleach, that will ruin them! The UV in the sunlight will "bleach" them over the period of a couple of weeks. Put the decals in a bag to protect them from any moisture that may be in the air and just tape them into the inside of the glass.
When once you have tasted flight you will walk the Earth with your eyes turned skyward.
For there you have been, and there you will always long to return.
-Leonardo Da Vinci
Colorado, United States
Joined: May 18, 2014
KitMaker: 69 posts
AeroScale: 67 posts
Posted: Sunday, July 20, 2014 - 06:48 AM UTC
Okay, I thought that sounded like a weird method haha! Decals might not be the best route, either- For all of the locatirons for decals, there are raised ridges. It might be easier to just paint inside the ridges, as putting decals over them could prove difficult anyways.
British Columbia, Canada
Joined: September 03, 2009
KitMaker: 6,965 posts
AeroScale: 6,247 posts
Posted: Sunday, July 20, 2014 - 07:49 AM UTC
Oh wow, that's an oldie

Most of us carefully sand and polish those decal locations off but if you're going to use them, I'd recommend that you paint them white first. That will help to make the colours look brighter.
When once you have tasted flight you will walk the Earth with your eyes turned skyward.
For there you have been, and there you will always long to return.
-Leonardo Da Vinci
Colorado, United States
Joined: May 18, 2014
KitMaker: 69 posts
AeroScale: 67 posts
Posted: Sunday, July 20, 2014 - 08:17 AM UTC
Thanks for the tips Jessie!