_GOTOBOTTOM
World War II: USA
Aircraft of the United States in WWII.
Hosted by Rowan Baylis
1/72 b-17c/d
fightnjoe
_VISITCOMMUNITY
Washington, United States
Joined: August 16, 2004
KitMaker: 603 posts
AeroScale: 565 posts
Posted: Saturday, July 26, 2014 - 03:05 AM UTC
well it is time for me to again force my passion on others.

it is time for me to again catalog my build to remember the attack on hawaii, dec 7, 1941.

this year i will be working on this.....


the markings will be custom as i am looking at one of two birds from the 38th recon that were inbound during the attack.


hope you enjoy the build.


joe
fightnjoe
_VISITCOMMUNITY
Washington, United States
Joined: August 16, 2004
KitMaker: 603 posts
AeroScale: 565 posts
Posted: Tuesday, July 29, 2014 - 04:20 PM UTC
Well folks to prove that I am actually working on this.

The instructions call for the cockpit construction first. So that is where I start.

There is some decent detail in this kit.


First thing to notice was the god awful machine marks. They are everywhere. So first out came the putty.


You will notice that I began the painting process by starting on the floor forward of the Instrument Panel bulkhead. I started with Testors little square bottle of Light Tan. When that was tacky I then went over it again only this time trying to leave brush strokes. After that dried I then used Burnt Umber Oil Paint to give it the grain look. Did not turn out quite as I hoped on the floor but wow it sure did on the table. I then brush painted Model Master Euro Green on the parts that required it. I am told this is pretty close to what was actually used in the Fortress. While that dried I started on the other pieces that would make up the cockpit. The seat cushions were first painted Model Master Dark Yellow, in part as my yellow selection is very scarce at this moment. I then painted some of the bits and bobs the same Euro Green as seen in some of my reference pictures. As one set dried I moved to the next. On the whole they came out like this...


And that is where we are tonight. The seats and control stick are not finished. Note also the cockpit floor and the bulkheads received a oil wash to try to bring out a little of the detail.

Next session will be to finish the detail painting and start to put this all together. There will not be much time or effort put into the interior as in this scale not much will be seen. I will not even be installing anything past that rear cockpit bulkhead.

All comments, critiques, and criticism are encouraged.


Joe
fightnjoe
_VISITCOMMUNITY
Washington, United States
Joined: August 16, 2004
KitMaker: 603 posts
AeroScale: 565 posts
Posted: Wednesday, August 06, 2014 - 04:47 PM UTC
Well here we go again.

Here is a brief update to show where I am with this.

First up is the cockpit. It is together and ready for installation.


Next is to show off something I am pretty proud of. Because of the many pieces of clear that are in the fuselage I had planned to paint the body prior to installing the clear.

There were several steps here. First is the primer coat. For this I used Rust-Oleum Flat Black. After this dried overnight I then used Model Master Olive Drab (Not handy so I can not tell you which one) and sprayed very cautiously, avoiding the panel lines. This part of the process took approximately two hours. Like I said I was being very careful. After this dried I then added Rust-Oleum Flat White to lighten the paint. I then concentrated on the panel centers. I wanted to get a definite different shade.


I am very happy with the way this turned out. However my plan has a serious flaw. I cannot spray a flat coat over the fuselage without masking off the clear parts. I will have to think on this. I may have to see about finding a liquid masking agent as some of these clear parts may pop off with traditional tape/foil masking.


But there she is so far. Hopefully there will not be major seams to deal with.


All comments, critiques, and criticism are encouraged.


Joe
Mcleod
_VISITCOMMUNITY
Alberta, Canada
Joined: April 07, 2010
KitMaker: 1,028 posts
AeroScale: 939 posts
Posted: Wednesday, August 06, 2014 - 05:20 PM UTC
Really nice, Joe. I must say, its unusual to see the fuselage halves painted on the sprue. You must be expecting a perfect join.
The paint looks terrific.
stooge
_VISITCOMMUNITY
South Australia, Australia
Joined: June 20, 2013
KitMaker: 210 posts
AeroScale: 210 posts
Posted: Wednesday, August 06, 2014 - 09:15 PM UTC
Not much leg room there for the passengers.

Yellow leather? Just curious.
Joel_W
Staff MemberAssociate Editor
AUTOMODELER
_VISITCOMMUNITY
New York, United States
Joined: December 04, 2010
KitMaker: 11,666 posts
AeroScale: 7,410 posts
Posted: Thursday, August 07, 2014 - 02:16 AM UTC
Joe,
Interesting build/paint procedures. After following your 1/32 P40 build, I'm fairly confident that you have a master plan for this build.

Will be following right along with you.

Joel
fightnjoe
_VISITCOMMUNITY
Washington, United States
Joined: August 16, 2004
KitMaker: 603 posts
AeroScale: 565 posts
Posted: Thursday, August 07, 2014 - 03:50 AM UTC
Thanks all for tagging along.

This is definitely something different for me. I normally do not paint the fuselage on the sprues. Normally I build it and then mask and then paint. With all the clear though I wanted to give it a try. Just not sure yet on it.

The yellow seat cushions were a result of what I had been seeing on the net. I had seen both yellow and a light tan. I chose to go with the yellow and to be honest they will not be seen very well when the fuse is closed up.

I was hoping for decent seams and for the most part it looks as though they will comply. There are a few spots though that could give issue.

Last night I spent some time putting the two halves together. It will require some putty but not a whole lot. The upper seam forward the pit will cause me the most issue.


Joe
fightnjoe
_VISITCOMMUNITY
Washington, United States
Joined: August 16, 2004
KitMaker: 603 posts
AeroScale: 565 posts
Posted: Tuesday, August 12, 2014 - 03:28 PM UTC
Well one step forward and then ten steps backward.

The step forward:
The wings are installed, the fuselage is together, some of the clear parts are installed.

The ten steps the other direction:
The seams are horrible, I will need to respray 90% of the entire build. Oh well.

So with that said, pictures.


So with all that let me say, I am pretty happy with the progress so far. The steps backward were of my own making. I used stretched sprue when getting the wings aligned. This allowed me to get the angle close (I think) and also gave me a start on filling the horrible gaps that were a product of fixing the angle.

Thanks you for taking a look. All comments, critiques, and criticism are encouraged.


Joe
fightnjoe
_VISITCOMMUNITY
Washington, United States
Joined: August 16, 2004
KitMaker: 603 posts
AeroScale: 565 posts
Posted: Thursday, August 14, 2014 - 04:48 PM UTC
Ok, this will be a two part update.

First will be the initial stage of painting of the fuselage. Setting the stage. The build was primed with Rust-Oleum Flat Black, I then thinned Model Master Olive Drab. I then sprayed the paint on the model, being careful to avoid as many panel lines as I could. This process was a bit time consuming.


Second stage is a mixture of the Model Master Olive Drab and Rust-Oleum Flat White in approximately a 50/50 mix. I sprayed this concentrating on the center of the panels. I also kept my focus on the upper sections of the fuselage and the wings.


Second part of this update shortly.


Joe
fightnjoe
_VISITCOMMUNITY
Washington, United States
Joined: August 16, 2004
KitMaker: 603 posts
AeroScale: 565 posts
Posted: Thursday, August 14, 2014 - 04:59 PM UTC
Part two.

For the third stage of the painting I mixed in more of the Model Master Olive Drab in approximately a 50/50 mix and then thinned to the consistency of fat free milk. I then sprayed a misting over the entire upper surface, I was being very careful to not spray too heavy. I did however make a mistake as I finished with some pebbly surfaces. I then used a very fine sandpaper to beat down the pebbles and then sprayed to fix any blemishes caused by the sanding.

The result.


And there you have it.

Next up for me on this will be to spray a gloss on the fuselage to prep for decals.


Comments, Critiques, and Criticism are encouraged.


Joe
fightnjoe
_VISITCOMMUNITY
Washington, United States
Joined: August 16, 2004
KitMaker: 603 posts
AeroScale: 565 posts
Posted: Tuesday, August 19, 2014 - 05:05 PM UTC
Update:

Decals are on and she is ready for some subtle weathering.


And the way the engines look right now.


Next up will be oils.


All comments, critiques, and criticism are encouraged.


Joe
fightnjoe
_VISITCOMMUNITY
Washington, United States
Joined: August 16, 2004
KitMaker: 603 posts
AeroScale: 565 posts
Posted: Thursday, August 28, 2014 - 01:31 PM UTC
Well the end is near for this one.

This update is for the little fiddly bits that needed to be installed and painted prior to a final flat coat. It will also show the subtle weathering and staining on the aircraft.


So there we are. Almost. Almost done.

All that is left is the wheels and a flat coat to seal it all in.


All comments, critiques, and criticism are encouraged.


Joe
JPTRR
Staff MemberManaging Editor
RAILROAD MODELING
#051
_VISITCOMMUNITY
Tennessee, United States
Joined: December 21, 2002
KitMaker: 7,772 posts
AeroScale: 3,175 posts
Posted: Thursday, August 28, 2014 - 02:05 PM UTC
Hi Joe,

I always wanted one of these. Never seen one being built. Good work - I'll keep watching.
fightnjoe
_VISITCOMMUNITY
Washington, United States
Joined: August 16, 2004
KitMaker: 603 posts
AeroScale: 565 posts
Posted: Saturday, August 30, 2014 - 03:19 AM UTC
Many thanks for the kindness.


Joe
fightnjoe
_VISITCOMMUNITY
Washington, United States
Joined: August 16, 2004
KitMaker: 603 posts
AeroScale: 565 posts
Posted: Saturday, August 30, 2014 - 04:21 AM UTC
And she is finished.

Some stuff at the end was not pleasing. You will see it in the pictures.

But in the end.

The aircraft
B-17C/40-2049

Landed at Bellows Field where she was determined to be repairable but she was later used for spare parts and not repaired.

The Crew
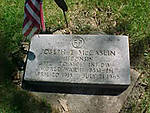
1st Lt. Robert H. Richards, 2D Lt. Leonard S. Humiston, Avn Cdt William F. B. Morris, Avn Cdt George E. Gammans, SSgt Joseph S. Angelini, SSgt Erwin B. Casebolt, SSgt Melvin D. Zajic, SSgt Lawrence B Velarde, and Pvt Vernon D. Tomlinson.

And the pictures.


Thank you for tagging along. I appreciate the very kind words.

All comments, critiques, and criticism are encouraged.


For those who died...
For those who survived...

You will never be forgotten.


Joe
 _GOTOTOP