Yak-3 Marcel Albert - Zvezda 1/48
Germany
Joined: September 07, 2005
KitMaker: 5,609 posts
AeroScale: 5,231 posts
Posted: Wednesday, September 10, 2014 - 10:17 PM UTC
Hi all
with the
La-5FN done it was time to start a nother soviet project (yes I still have a few started, but anyway). I just got the updateset from Komplekt ZiP so I wanted to give it a try.
I'll use:
Zvezda Yak-3Vector Yak-3 Wheel BayVector Yak-3 PropKomplekt ZiP Yak-3 Update SetEduard Yak-3 PE Update SetEduard Yak-3 Masks(links point to product reviews on IPMS Deutschland site)
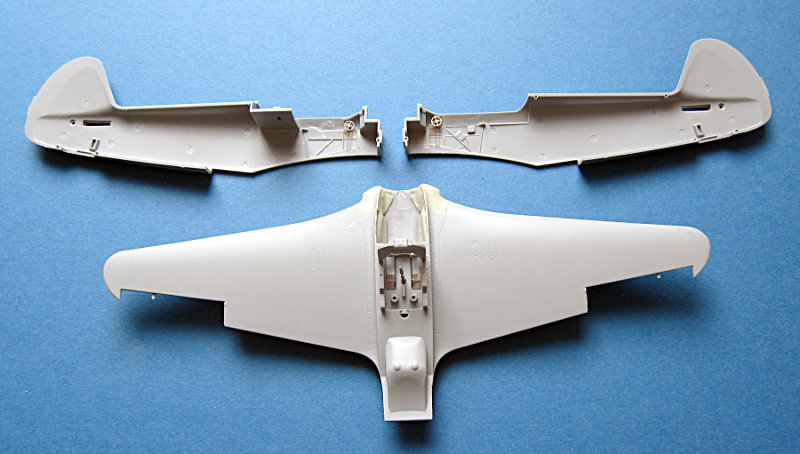
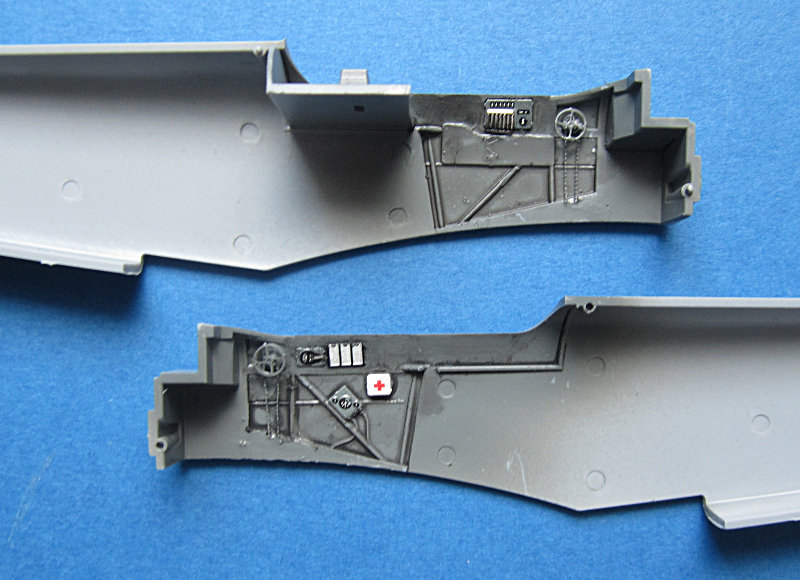
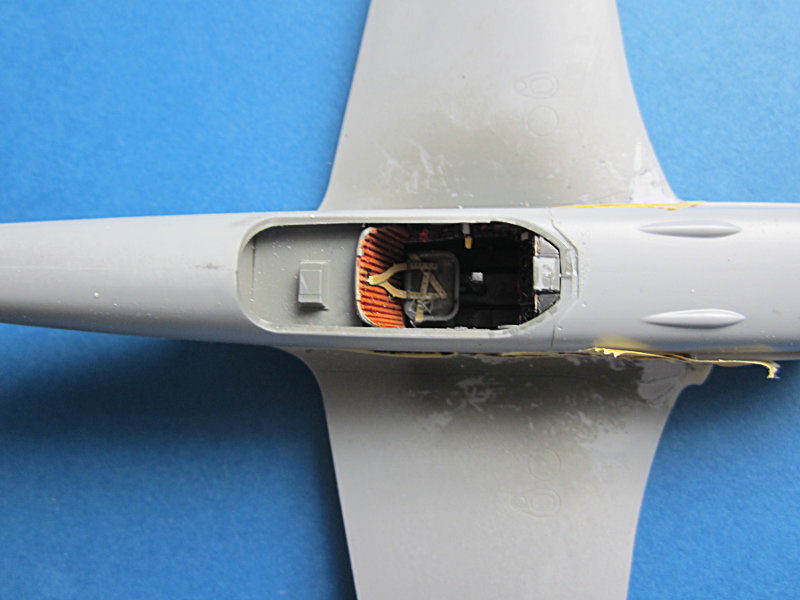
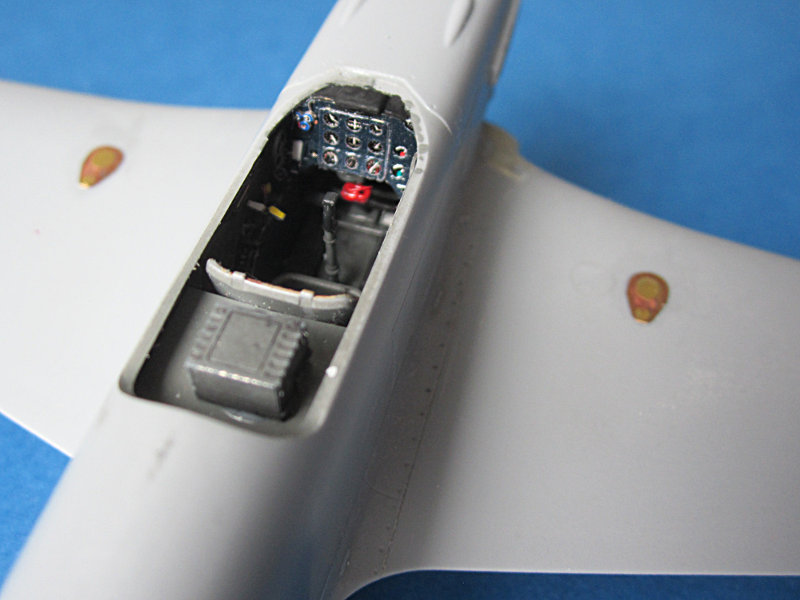
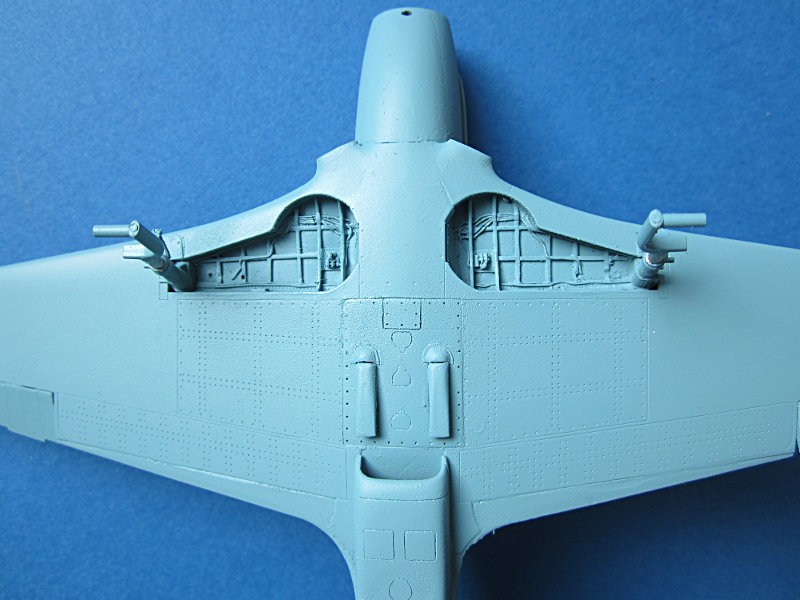
I started with the wings and a bit of cutting and grinding. This is necessary to fit in the Vector wheel bay and Komplekt ZiP belly panel.
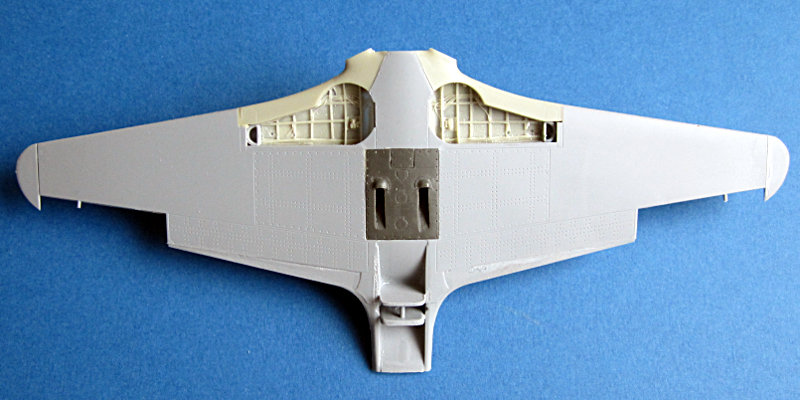
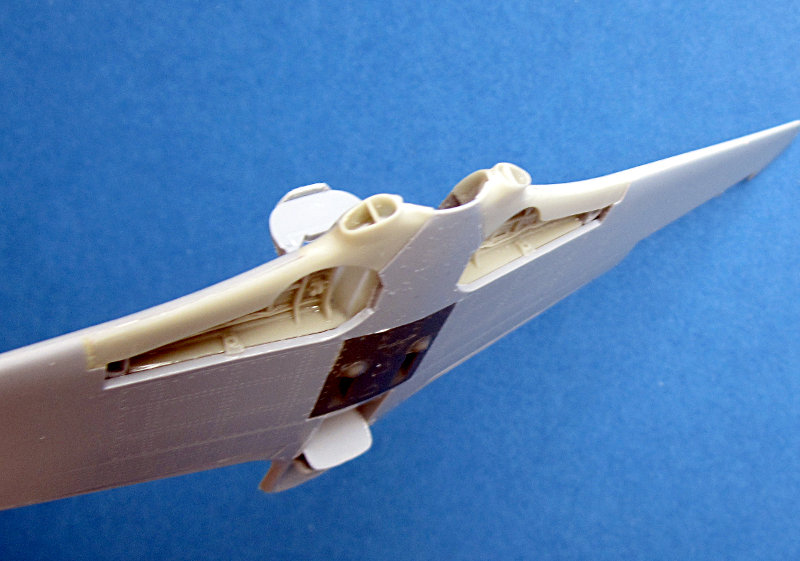
I also added a few PE Items in the Cockpit that will get AKAN interior paint (Stalnii)
all the best
Steffen
DULCE ET DECORUM EST PRO HOBBY MORI
Joel_W
 Associate Editor
New York, United States
Joined: December 04, 2010
KitMaker: 11,666 posts
AeroScale: 7,410 posts
Posted: Thursday, September 11, 2014 - 02:03 AM UTC
Steffen,
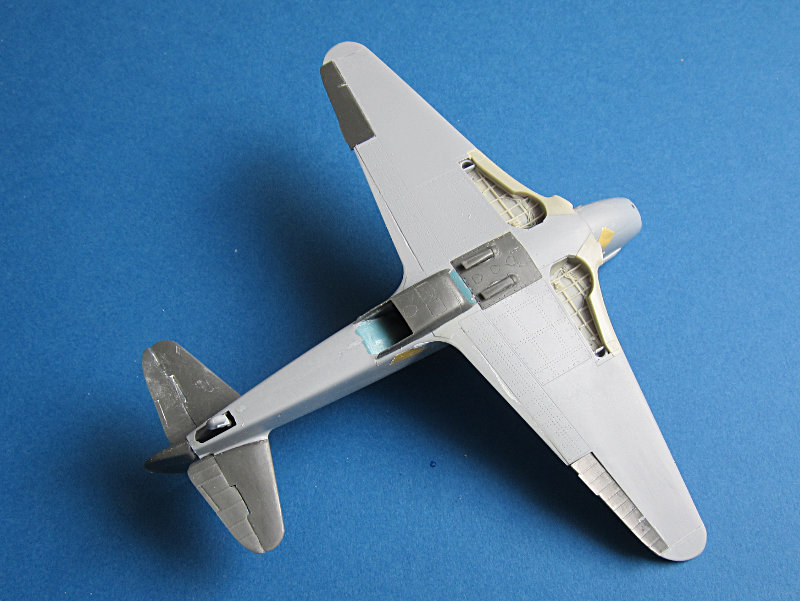
Will be following your build as I'm already quite impressed with the conversions. Just a great job on those wheel wells. I'm sure it was a lot of work to get them to fit that way. The Belly pan looks like it fits like a glove.
Joel
On my Workbench:
Monogram 1/24 scale 427 Shelby Cobra
Just Completed:
Beemax 1/24 scale BMW M3 E30 1992 Evolution II
Joined: October 30, 2005
KitMaker: 3,897 posts
AeroScale: 564 posts
Posted: Thursday, September 11, 2014 - 02:49 AM UTC
Nice work Steffen, lots of "grafts" to blend in.

Germany
Joined: September 07, 2005
KitMaker: 5,609 posts
AeroScale: 5,231 posts
Posted: Thursday, September 11, 2014 - 03:13 AM UTC
Thanks guys!
Actually i like this kind of stuff .. much better than doing cockpits.
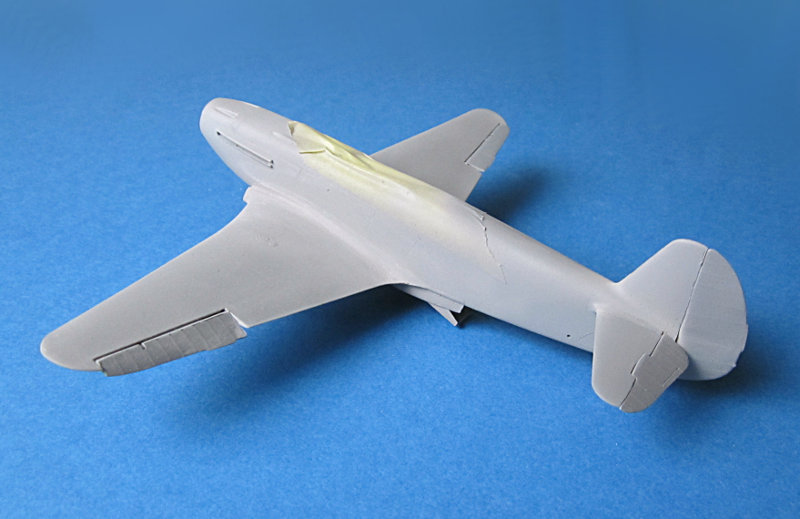
To make the panel fit was a bit of work, but it turned out quite good. The wing to fuselage transition will need some filler and sanding due to the strange design of Zvezda: the glue line is not a panel line. Instead this is 1mm higher on the fuselage.
Still a lot of work to do.
all the best
Steffen
DULCE ET DECORUM EST PRO HOBBY MORI
Germany
Joined: September 07, 2005
KitMaker: 5,609 posts
AeroScale: 5,231 posts
Posted: Thursday, September 11, 2014 - 07:21 PM UTC
Hi again,
so now I had to do some of my pet hates ... the cockpit. I just love the Eduard instrument panels.
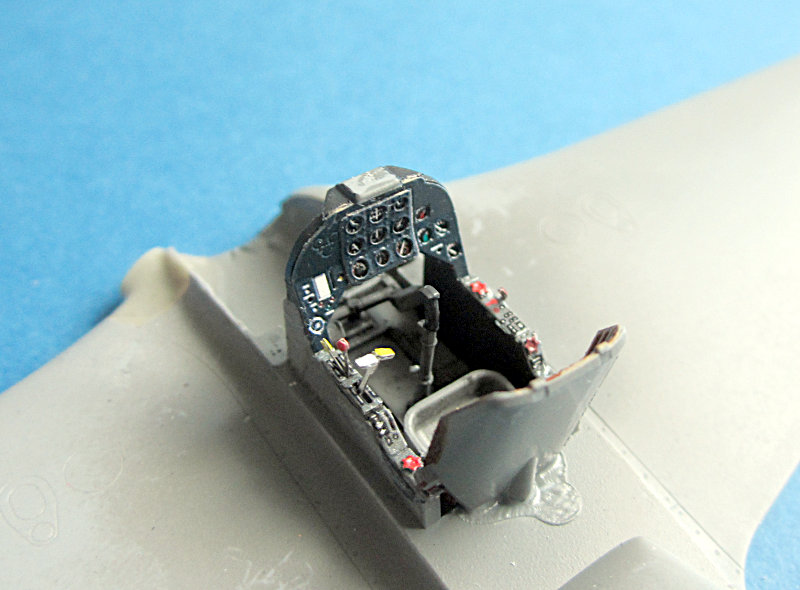
Though some of the switches are not useable for me .. just too small to fold and glue them on (for myself). As you can hardly see them inside the fuselage I left the smallest off.
all the best
Steffen
DULCE ET DECORUM EST PRO HOBBY MORI
Merlin
Senior Editor 
#017
United Kingdom
Joined: June 11, 2003
KitMaker: 17,582 posts
AeroScale: 12,795 posts
Posted: Friday, September 12, 2014 - 07:25 AM UTC
Nice one Steffen!
Looking good already!

I'll be following this one to see how the upgrades work out. I know you hate "offices", but you've done a nice job on this one.

All the best
Rowan

BEWARE OF THE FEW...
As I grow older, I regret to say that a detestable habit of thinking seems to be getting a hold of me. - H. Rider Haggard
Germany
Joined: September 07, 2005
KitMaker: 5,609 posts
AeroScale: 5,231 posts
Posted: Friday, September 12, 2014 - 08:27 PM UTC
Cheers Rowan,
well I just noticed I forgot one PE part on the panel...
Meanwhile I proceeded with construction. Everything went together well. Just a few things tricky because I deviated from the instructions, no big deal though. Not it is time to get rid of the seam.
This is one of the most stupid things Zvezda did. The seam is very very (very!) close to the panel line so it is most difficult not to damage it. And fit would have been good enough to just leave teh seam as a panel line. Did I mention that this is a stupid design? So here we go:
all the best
Steffen
DULCE ET DECORUM EST PRO HOBBY MORI
Germany
Joined: September 07, 2005
KitMaker: 5,609 posts
AeroScale: 5,231 posts
Posted: Saturday, September 13, 2014 - 07:25 PM UTC
construction continues...
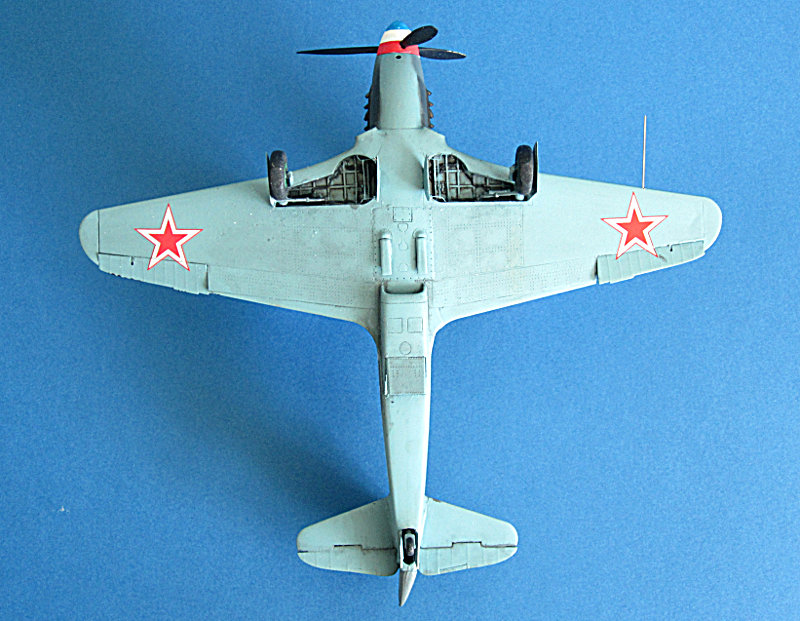
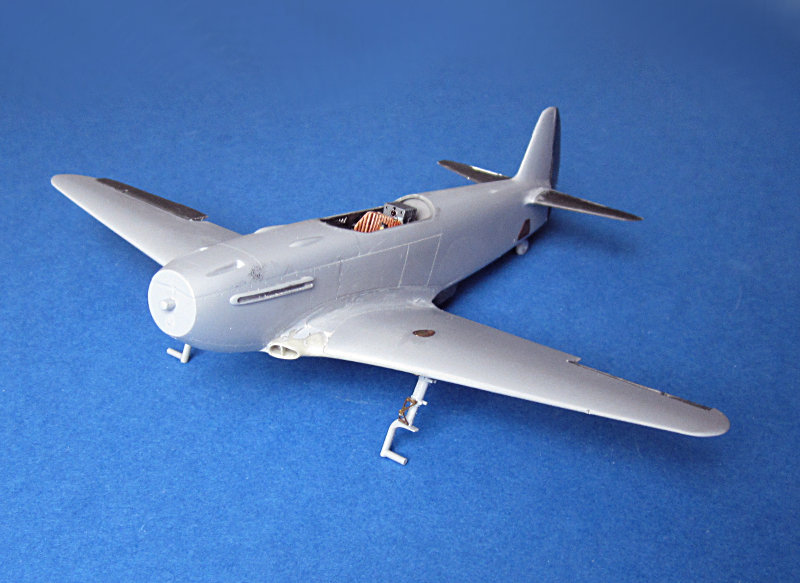
I have added the main u/c legs and much of the Eduard exterior details (leaving off the fuel gauges until after painting). I also used the radiator flap from the eduard set because it has nicer detail than the Komplekt ZiP. It is a bit smaller but should be o.k. after some paint.
I also added the radio (Akan "Stalnii" matches the eduard colour pretty well) and the missing part on the instrument panel.
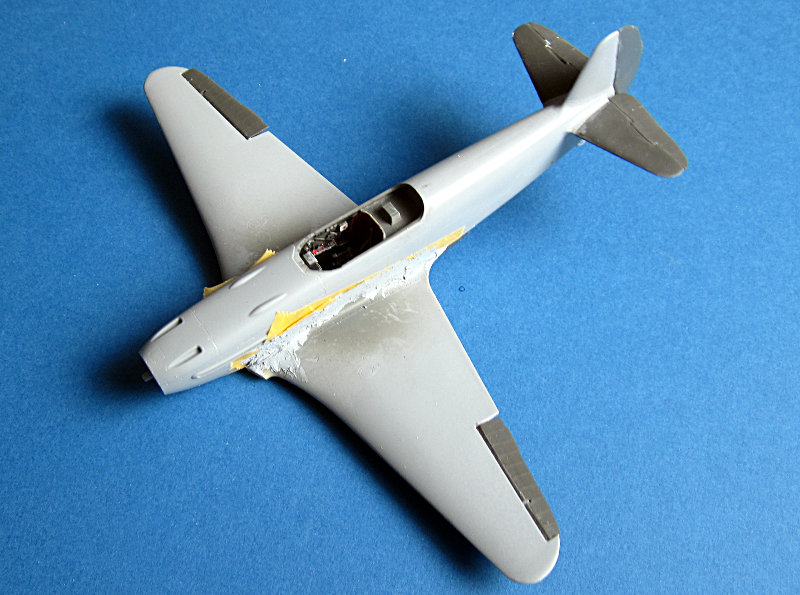
Then I masked off the canopy area and gave the model a nice coat of Alclad grey primer.
Progress will slow down now as my vacation is over and I have to get back to work.

all the best
Steffen
DULCE ET DECORUM EST PRO HOBBY MORI
Germany
Joined: September 07, 2005
KitMaker: 5,609 posts
AeroScale: 5,231 posts
Posted: Saturday, September 20, 2014 - 07:45 PM UTC
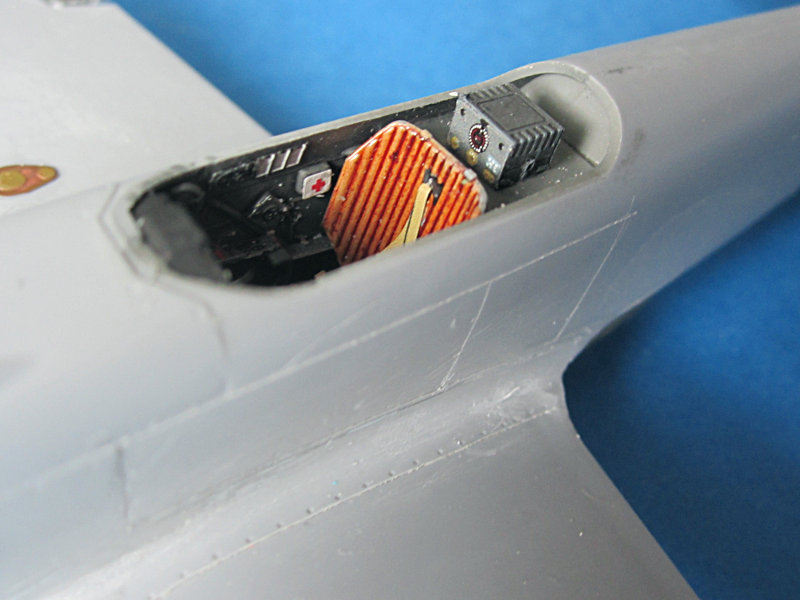
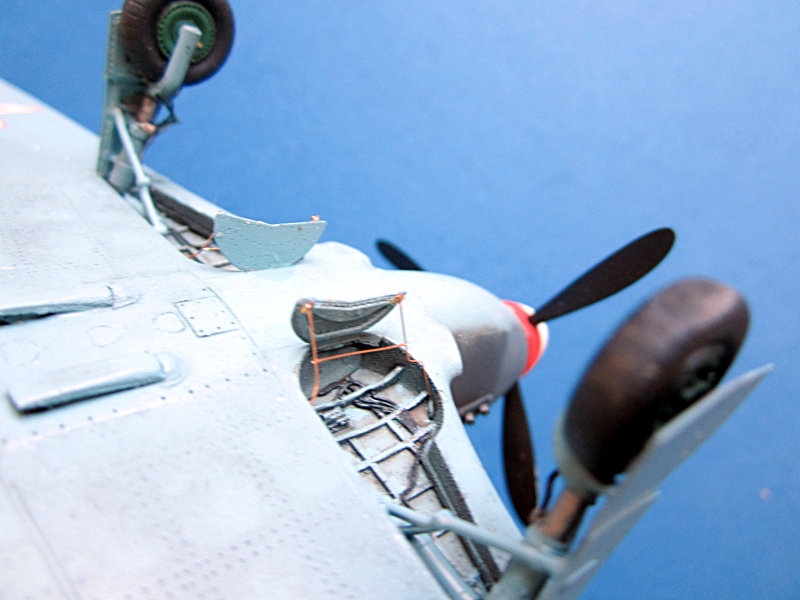
Now I proceeded with the cockpit.
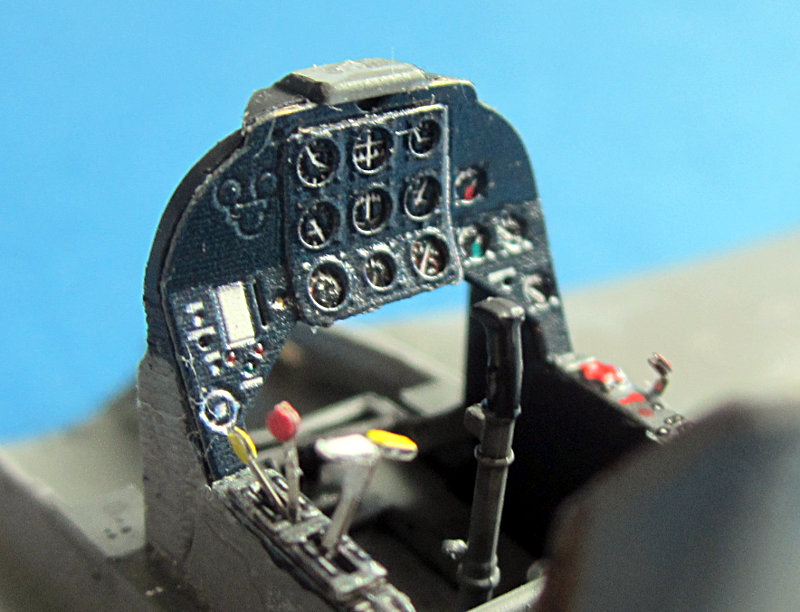
The rear canopy for the opened option was installed and masked. The head armour was masked but left off for now. Then I added the gun sight with the PE provisional gun sight and control wheel added. For protection I glued on the wind shield.
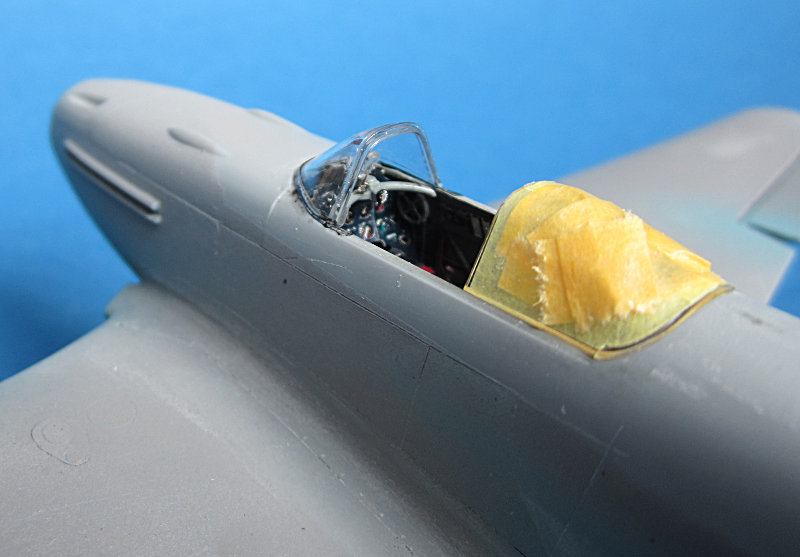
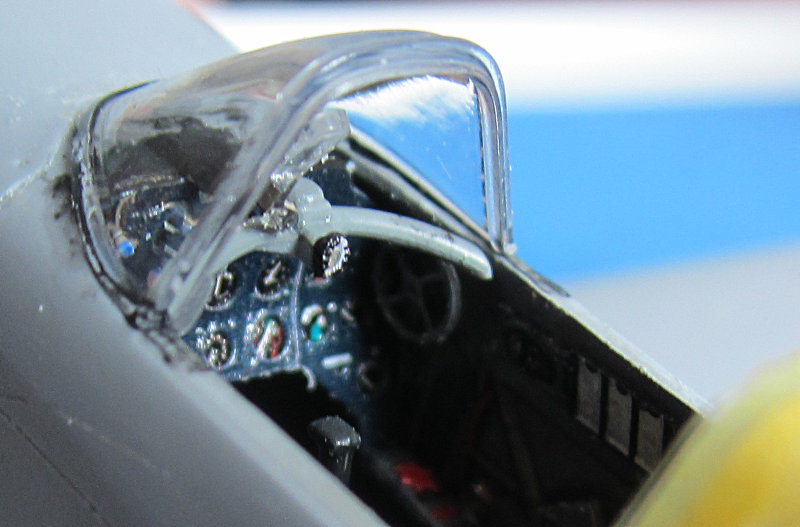
sorry for the mediocre pix, but this is hard to photograph.
all the best
Steffen
DULCE ET DECORUM EST PRO HOBBY MORI
Joined: October 30, 2005
KitMaker: 3,897 posts
AeroScale: 564 posts
Posted: Saturday, September 20, 2014 - 07:49 PM UTC
Nice progress Steffen,
Germany
Joined: September 07, 2005
KitMaker: 5,609 posts
AeroScale: 5,231 posts
Posted: Sunday, September 21, 2014 - 08:00 AM UTC
Cheers Julian!
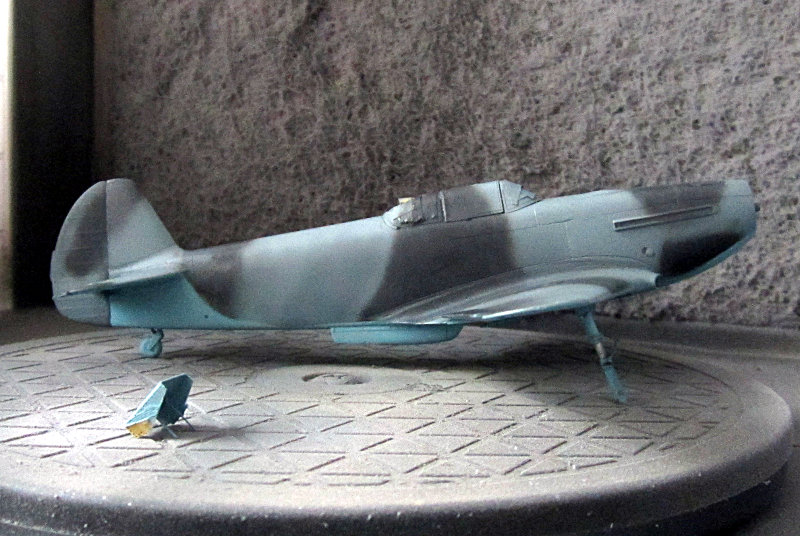
time for some paint: all AKAN
all the best
Steffen
DULCE ET DECORUM EST PRO HOBBY MORI
Germany
Joined: September 07, 2005
KitMaker: 5,609 posts
AeroScale: 5,231 posts
Posted: Tuesday, September 23, 2014 - 05:07 AM UTC
so desaster err Steffen strikes agan
I applied the firs decals on a coat of Klear, but these wrinkled a lot and even wors it dried that way. Well I tried to smooth that out, which worked quite o.k. but damaged the white arrow a bit so i wanted to mask it and touch it up with some white paint ... you might guess it, I lifted some of the other decals with the masking tape (should have added a protective coat after polishing) ... well back to bare plastic, almost:
I have ordered another kit for the decals... (though I have the Begemot set as a backup if it takes too long)
all the best
Steffen
DULCE ET DECORUM EST PRO HOBBY MORI
Joel_W
Associate Editor New York, United States
Joined: December 04, 2010
KitMaker: 11,666 posts
AeroScale: 7,410 posts
Posted: Wednesday, September 24, 2014 - 12:41 PM UTC
Steffen,
For someone who doesn't like cockpits, your turned out quite well, especially the IP. thought that you were really flying through the build, then disaster with the decal issue.
I like to start off with Microsoft's Set & Sol, as they're the mildest decal solutions. If multiple coats don't work, then I need a stronger set of solutions. I'm trying to get Gunze Mr. Set & Mr. Sol as they're just a little stronger then the Micro system for stubborn decals. I really don't want to Walthers Solvaset as it can easily damage a decal.
Joel
On my Workbench:
Monogram 1/24 scale 427 Shelby Cobra
Just Completed:
Beemax 1/24 scale BMW M3 E30 1992 Evolution II
Germany
Joined: September 07, 2005
KitMaker: 5,609 posts
AeroScale: 5,231 posts
Posted: Friday, September 26, 2014 - 10:18 PM UTC
Thank you Joel!
Well, I started this when I still had 3 days of my vacation left and could build whenever I wanted so I got a bit of progress. As I wrote on 14th September progress slowed down then and the decal mistake did not help either.
Still waiting for the 2nd kit - it's out of stock at Modellbau König at the moment, but the price is good so I will wait. And it is not like I could not build anything else
As for decal mediums: I have changed to Klear some years ago and it works very well for me. Also sandwiching the decal between several Klear layers provides good contact with the surface and little chance for silvering or discolouration. I had this with one of my Wildcats using Daco .. just search for that thread here on aeroscale.
I guess it is some kind of reaction between Klear and the Begemot decals from the kit tha made these wrinkle. Normally Klear stretches everything out.
So for this build I will use other mediums I have plenty of material in my stash so it is no problem to break the routine.
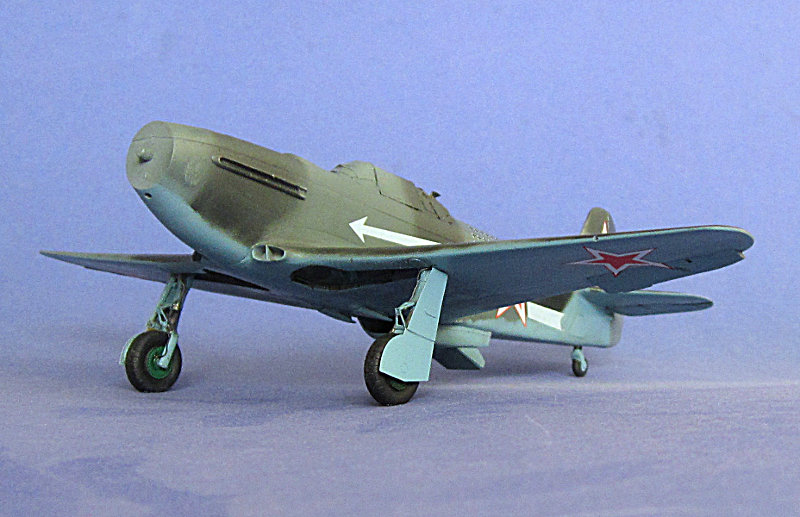
Here is the kit repainted .. still need to repair the exhaust panel.
all the best
Steffen
DULCE ET DECORUM EST PRO HOBBY MORI
Joel_W
Associate Editor New York, United States
Joined: December 04, 2010
KitMaker: 11,666 posts
AeroScale: 7,410 posts
Posted: Saturday, September 27, 2014 - 02:08 AM UTC
Steffen,
Really nice recovery on the paint.
I've read about using Plege/Future for decaling, but I must confess that I've never tried it. Honestly, I rarely use the stuff these days. I prefer Glosscoat, or one of the Alcad clears over Future for glossing a full model. For small parts I still use Pledge with a brush.
Joel
On my Workbench:
Monogram 1/24 scale 427 Shelby Cobra
Just Completed:
Beemax 1/24 scale BMW M3 E30 1992 Evolution II
Germany
Joined: September 07, 2005
KitMaker: 5,609 posts
AeroScale: 5,231 posts
Posted: Saturday, October 11, 2014 - 09:27 PM UTC
Cheers guys,
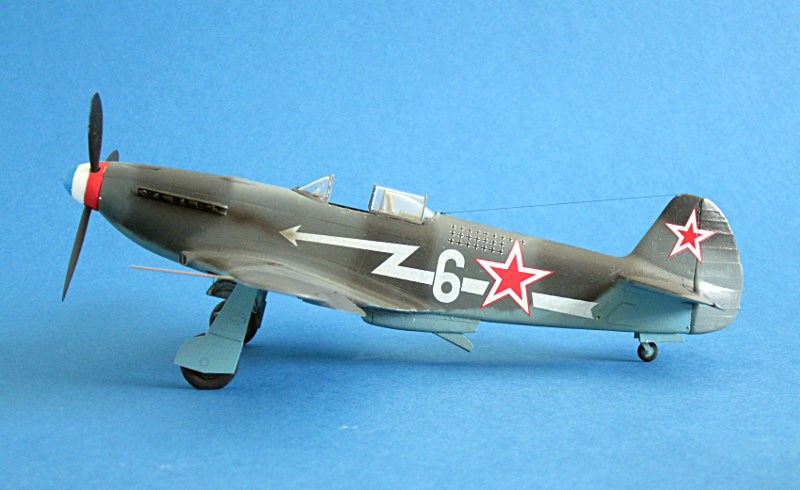
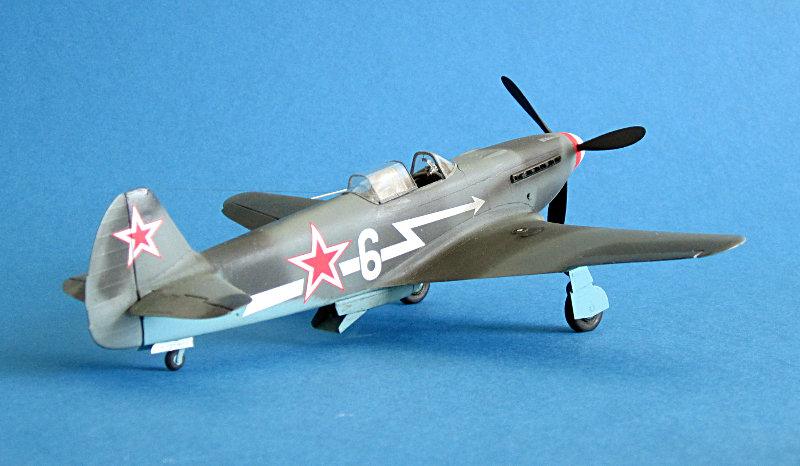
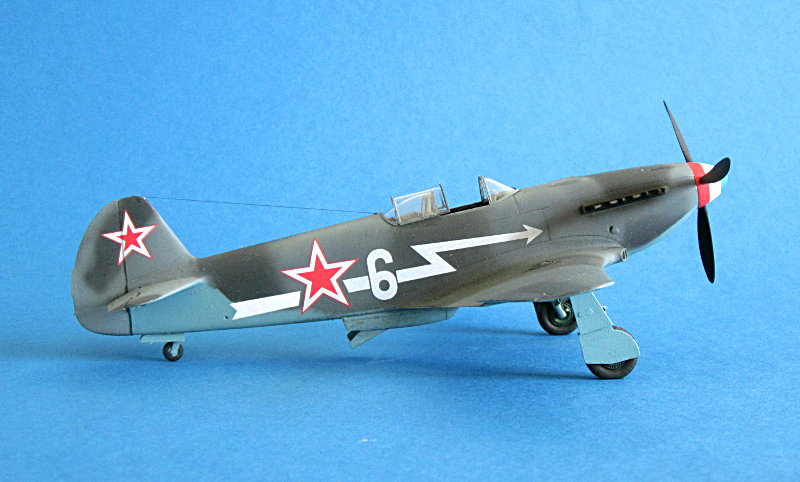
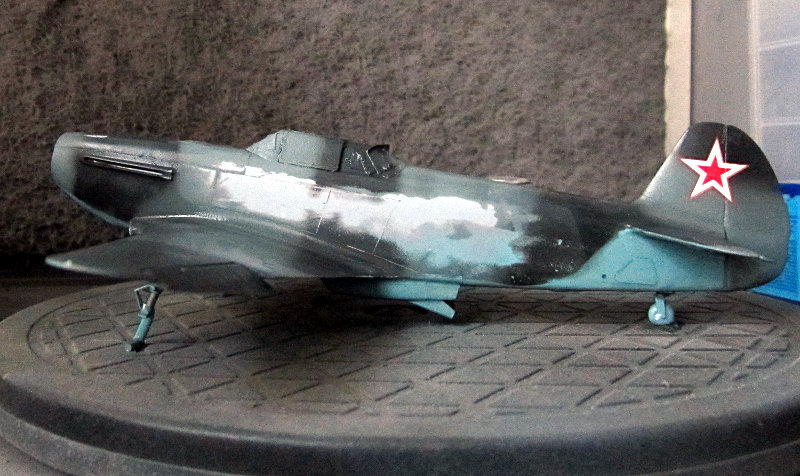
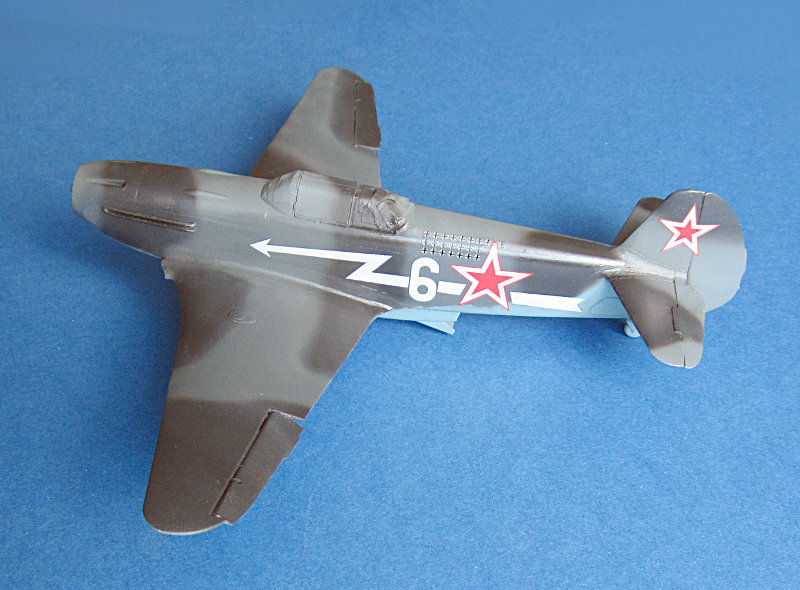
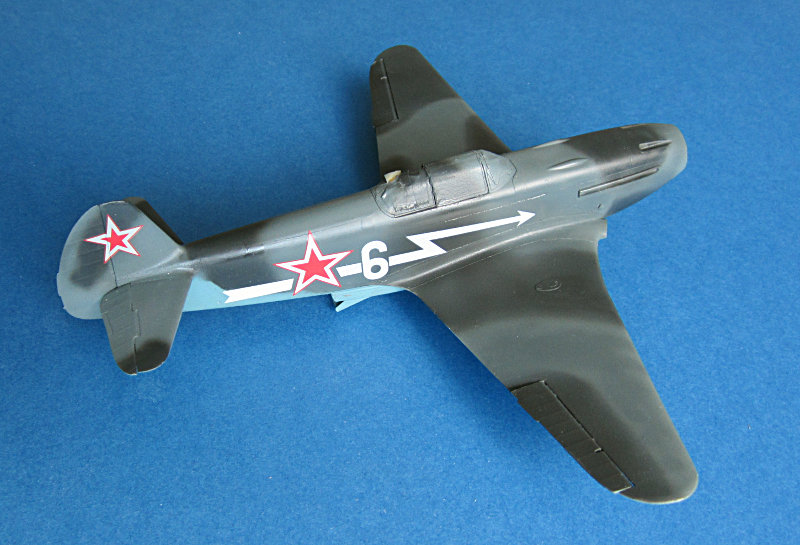
had the same problem on the other side just using Daco Orange, so same procedure on that side. meanwhile the new kit arrived and the decals looked much better on teh sheet so I went back to my Klear method, which worked out very well.
Some might notice that the arrow on the lhs is a tad too much aft (about 2mm). I noticed when it was too late and I decided I can live with it as the whole thing is a bit too large and this way it ends about right at the front. Another mistake is the new kill markings. It is misprinted just a bit but noticable. Again I will probably leave it as it is.
Just noticed the tail wheel is a bit wobbly .. not sure how I can strengthen it. For those who use the PE it is maybe wise to rebuild or re-enforce it with metal tubes.
all the best
Steffen
DULCE ET DECORUM EST PRO HOBBY MORI
Germany
Joined: September 07, 2005
KitMaker: 5,609 posts
AeroScale: 5,231 posts
Posted: Friday, January 02, 2015 - 10:17 PM UTC
Hi all,
after Fokker Dr.I is done I am now slowly working my way through the rest of the PE for my Yak-3:
The breakline is a bit of a puzzle to me as it is not very clear in the instructions. I think I found a possible solution, though I am not 100% positive this is correct (picture follows soon).
all the best
Steffen
DULCE ET DECORUM EST PRO HOBBY MORI
Germany
Joined: September 07, 2005
KitMaker: 5,609 posts
AeroScale: 5,231 posts
Posted: Saturday, January 03, 2015 - 02:21 PM UTC
Good morning,
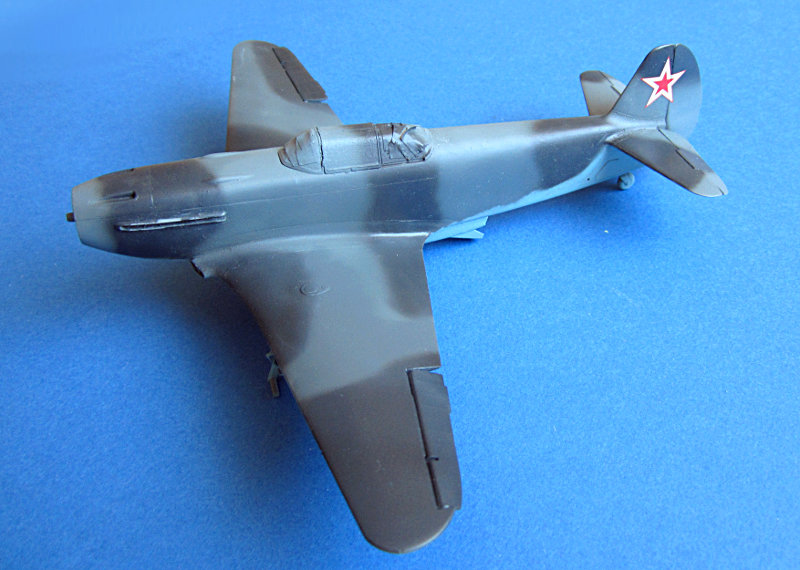
two more pix with break lines and main u/c covers on:
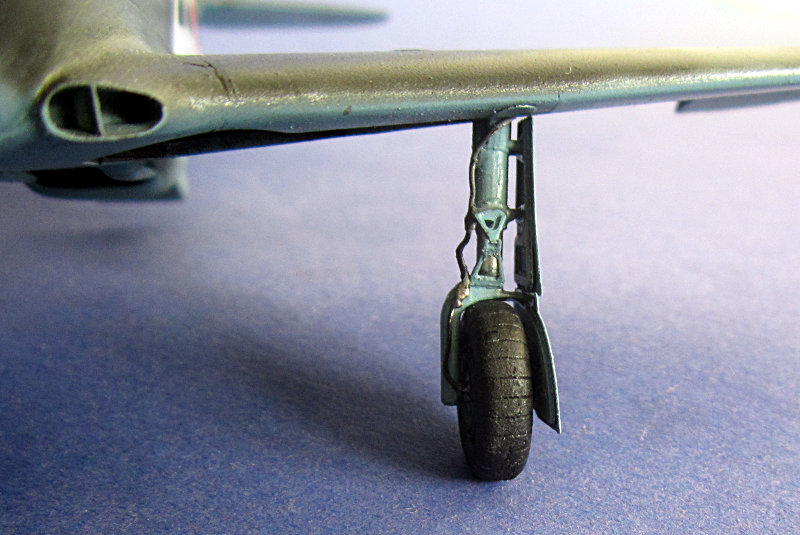
I am quite happy with the turnout though the rhs was a bit of a pain.
all the best
Steffen
DULCE ET DECORUM EST PRO HOBBY MORI
Germany
Joined: September 07, 2005
KitMaker: 5,609 posts
AeroScale: 5,231 posts
Posted: Friday, March 27, 2015 - 02:28 PM UTC
Hi all,
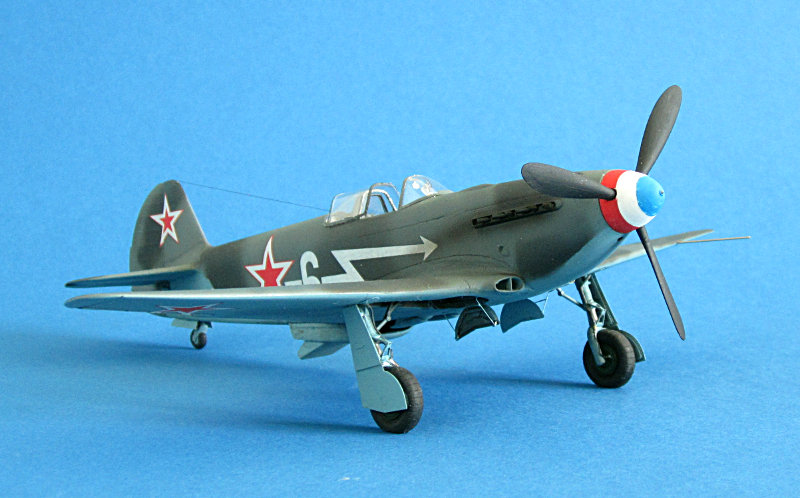
do not think I am not working on this kit... but it is more steps back than forward. I scrapped away the kill markings again to replace the misprinted (2nd) kit decals with the Begemot decals --- both were done by Begemot, but the kits decals are larger ant thus I could not opverlay them. Guess what ... misprinted too (the first ones were o.k.)


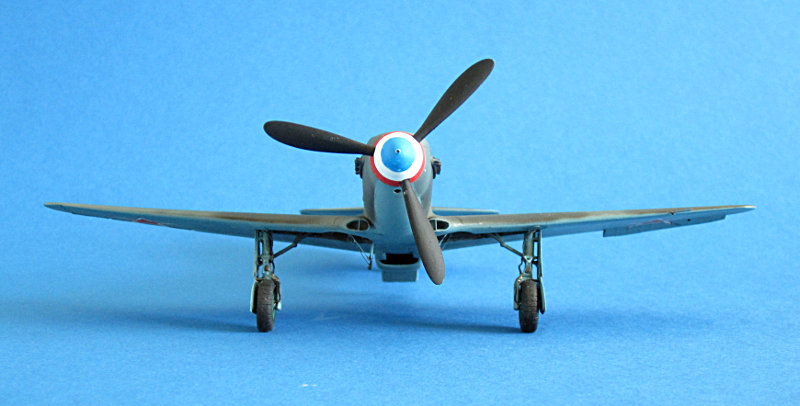
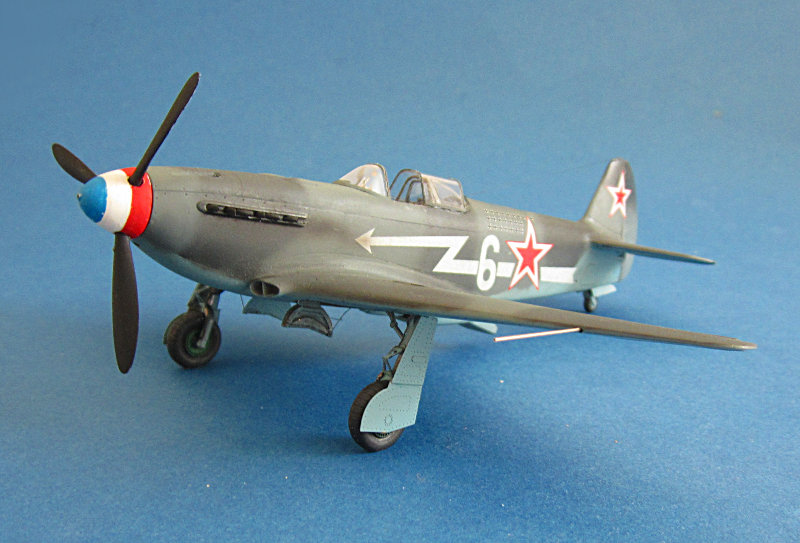
Another thing that bugs me is the spinner. Of course I could not make the kits decals fit the Vector spinner. All tries of masking it were futile as this thing is much too small for my fat finges and I could not get the Aizu tape stick properly, i.e. straight and flush. Thus I had to paint it by hand. I am not really happy with it, but after so much tries it is just like it is and i decided not to change again. At a meter distance you don't see it, but of course it is very visible on (close up) pictures.
all the best
Steffen
DULCE ET DECORUM EST PRO HOBBY MORI
Germany
Joined: September 07, 2005
KitMaker: 5,609 posts
AeroScale: 5,231 posts
Posted: Friday, July 31, 2015 - 03:24 PM UTC
Now that I have the A-36 done and some motivation back I want to finish something else before tackling the next project (Swallow campaign is also almost at end).
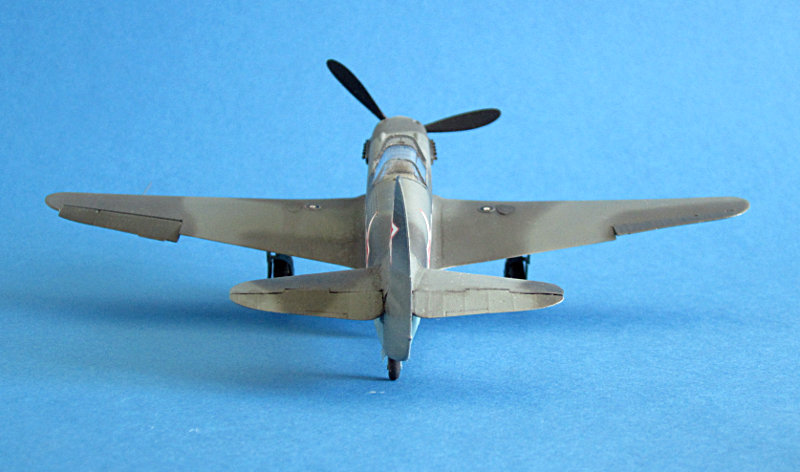
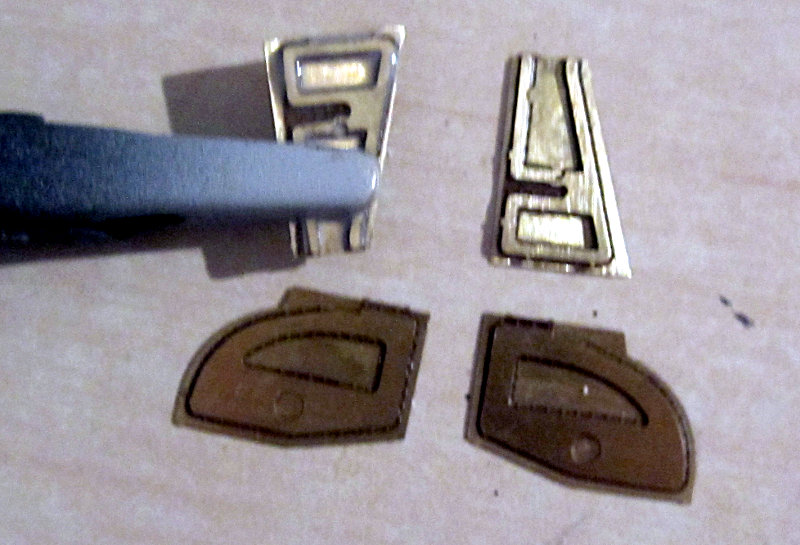
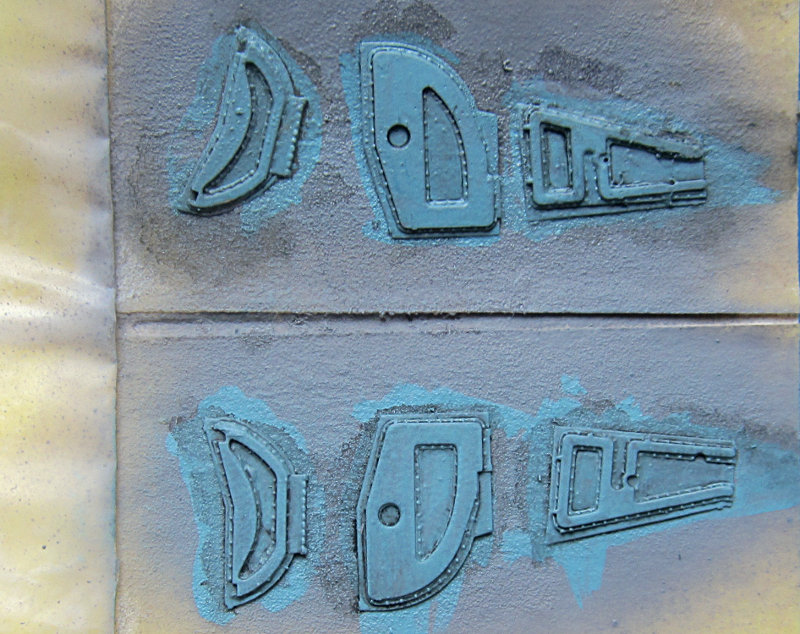
So now I try to fix the missing door closing mechanism. Of course very simplified, but better than absent. I used very thin copper wire cut to lenght an bent. The attachment points at the tips of the u/c door are not correct, they should be at about the midddle of the door, but I had these already attached and I will live with it (these parts are so tiny, that I am happy I did not loose them).
Here is the current state:
some trimming and painting required, but i hope to finish the thing finally this weekend.
all the best
Steffen
DULCE ET DECORUM EST PRO HOBBY MORI
#522
New Jersey, United States
Joined: January 20, 2013
KitMaker: 1,460 posts
AeroScale: 1,443 posts
Posted: Friday, July 31, 2015 - 06:54 PM UTC
Good heavens, what an ambitious build!
On my Workbench: 1/48 B-17F Luscious Lady (with H.G. Barnes and Karl Hauffe - Research) and with Contributions from the late Arthur T. Babiarz, Jr.
Two Special Hobby AF-2 Guardians, one AF-2W, and one AS-2S
Germany
Joined: September 07, 2005
KitMaker: 5,609 posts
AeroScale: 5,231 posts
Posted: Friday, July 31, 2015 - 07:18 PM UTC
Cheers Brian!
Normally I like this cutting & grinding stuff much better than doing cockpits or detailpainting, so this is not one of the major/ larger projects in my book. I have several kits sitting in the shelf with tons of resin, PE and other stuff that I do want to do but I am afraid of (e.g. Ventura or Tu-2) not to mention the totally wrong Fw 200.
Sadly from time to time I loose my modelling spirit and then such small things like this mechanism can put me off an almost completed project... still, often I find my way back
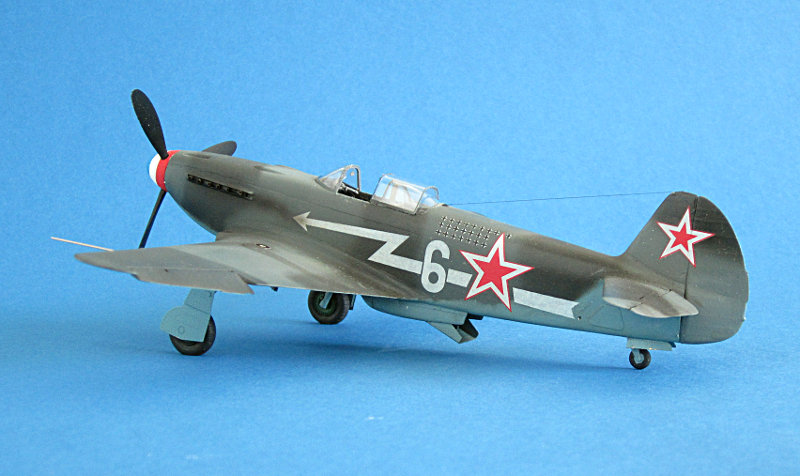
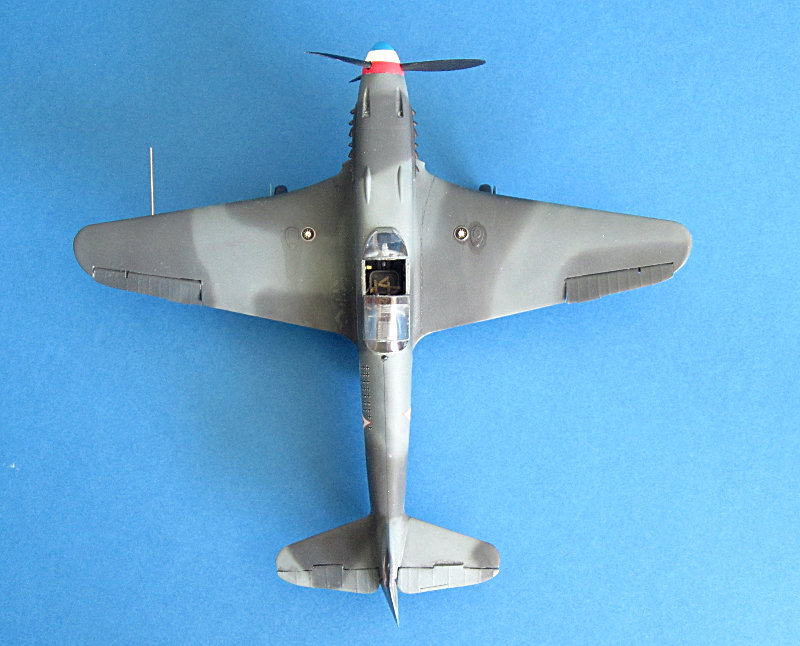
I have added some more stuff, UvdR rigging thread as antenna (hard to see), Albion Alloys Pitot (0.7mm nickel steel tube) some more PE on the canopy and the head armour. I still have to check if I forgot somethng but this is it :
all the best
Steffen
DULCE ET DECORUM EST PRO HOBBY MORI
Joel_W
Associate Editor New York, United States
Joined: December 04, 2010
KitMaker: 11,666 posts
AeroScale: 7,410 posts
Posted: Friday, July 31, 2015 - 07:56 PM UTC
Steffen,
What an impressive fix for the landing gear doors mechanisms. The Yak-3 looks great.
Joel
On my Workbench:
Monogram 1/24 scale 427 Shelby Cobra
Just Completed:
Beemax 1/24 scale BMW M3 E30 1992 Evolution II
Germany
Joined: September 07, 2005
KitMaker: 5,609 posts
AeroScale: 5,231 posts
Posted: Saturday, August 01, 2015 - 03:44 PM UTC
DULCE ET DECORUM EST PRO HOBBY MORI
Merlin
Senior Editor #017
United Kingdom
Joined: June 11, 2003
KitMaker: 17,582 posts
AeroScale: 12,795 posts
Posted: Saturday, August 01, 2015 - 03:55 PM UTC
Hi Steffen
Another really nice build!
Keep 'em coming.
All the best
Rowan
BEWARE OF THE FEW...
As I grow older, I regret to say that a detestable habit of thinking seems to be getting a hold of me. - H. Rider Haggard