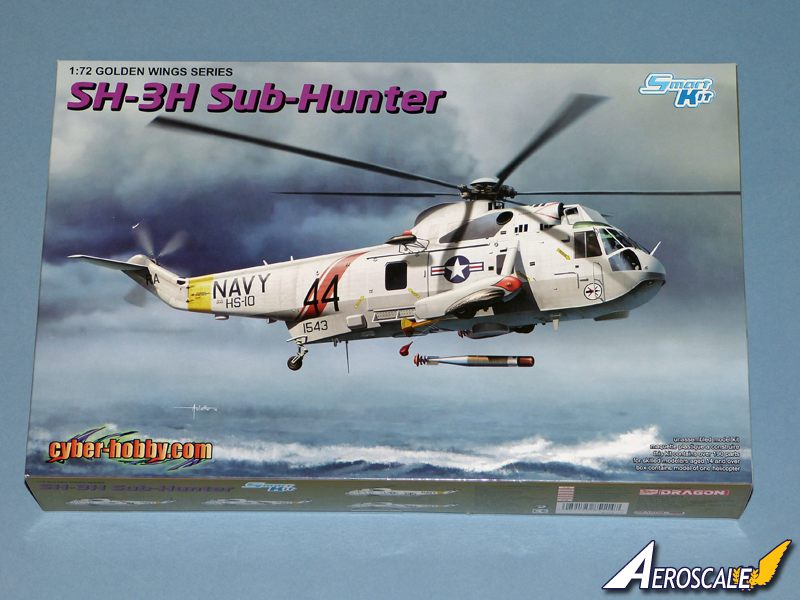
Hi All
This will be the build blog of my Sea King in box review.
I will build this craft in a stowed condtion using Eduard exterior set.:-
Rotary Wing
Discuss helicopters and other rotary wing aircraft from any era.
Hosted by Gino P. Quintiliani
S-61A Sea King Build Blog
Posted: Tuesday, November 11, 2014 - 03:27 AM UTC
Mcleod
Alberta, Canada
Joined: April 07, 2010
KitMaker: 1,028 posts
AeroScale: 939 posts
Joined: April 07, 2010
KitMaker: 1,028 posts
AeroScale: 939 posts
Posted: Tuesday, November 11, 2014 - 04:31 AM UTC
Cool, Richard. I'll be looking in. If I ever get around to trying out a chopper, it would be something like this Sea King.
Posted: Wednesday, November 12, 2014 - 02:27 AM UTC
Nice one Richard
Just to note - if anyone wants to review Cyber-Hobby's latest kit of the Sea King, there's still a sample available. Just drop me a line if you're interested:
All the best
Rowan
Just to note - if anyone wants to review Cyber-Hobby's latest kit of the Sea King, there's still a sample available. Just drop me a line if you're interested:
All the best
Rowan
Posted: Wednesday, November 12, 2014 - 01:06 PM UTC
Hi all
Just an update - the SH-3H Sub-Hunter now has a taker. Many thanks to all those who wrote to me overnight.
All the best
Rowan
Just an update - the SH-3H Sub-Hunter now has a taker. Many thanks to all those who wrote to me overnight.
All the best
Rowan
Posted: Sunday, November 23, 2014 - 07:12 AM UTC
Managed to get started on the cockpit, primer and detail painting next:-
Posted: Friday, November 28, 2014 - 09:48 PM UTC
Moving onto the exhaust pipes I beleve that C61 and C62 should be in the reverse to as shown in #3 layout page.
To line up the parts the two fuselage halfs were held together with a rubber band and the pipe assembly installed and glued then held with tape until dry:-
Posted: Wednesday, July 22, 2015 - 04:03 AM UTC
Finaly got back to work on this build!
Cockpit primed then painted light gray and control panel dials painted so next thing will be to close up the two halfs:-
KelticKnot
Scotland, United Kingdom
Joined: May 11, 2015
KitMaker: 768 posts
AeroScale: 656 posts
Joined: May 11, 2015
KitMaker: 768 posts
AeroScale: 656 posts
Posted: Wednesday, July 22, 2015 - 07:57 PM UTC
Looks like a much nicer kit than the 1/72 airfix that I'm currently wresting with for the RPM Campaign. Some better interior detail to start with.
Watching with interest to see how you find the fit is on this example.
DougCohen
Texas, United States
Joined: May 27, 2009
KitMaker: 1,293 posts
AeroScale: 1,072 posts
Joined: May 27, 2009
KitMaker: 1,293 posts
AeroScale: 1,072 posts
Posted: Wednesday, July 22, 2015 - 10:33 PM UTC
yes this kit is so much better than the old Airfix kit, it is the way to go I have the Airfix, old MPC new Revell, and this one and it is much better than all of them.
Posted: Friday, July 24, 2015 - 04:53 AM UTC
Hi Dough and Paul.
This release that I am building has had many releases as can be told by all the extra parts not used in this version.
The cockpit may well be more detailed than other kit makers out there but as with most models when closed up the inside details are hard to see.
I did not buy the Eduard interior set but I will add the exterior set on this build as I want to try to build a stored on deck version.
Thanks for stopping by.
Posted: Saturday, July 25, 2015 - 08:17 PM UTC
Lot of holes to fill and details to remove that are not on this version:-
Posted: Sunday, August 16, 2015 - 01:21 AM UTC
Filled most of the un-used locations.
Checking the web for photos the "box" does not show on many ac and is not on this version, also the step mount is filled and a fuel port cut out.
Some kit makers love to pump out models and only change the decals and pass the ac off as new release.
Checking the web for photos the "box" does not show on many ac and is not on this version, also the step mount is filled and a fuel port cut out.
Some kit makers love to pump out models and only change the decals and pass the ac off as new release.
Posted: Sunday, August 30, 2015 - 01:47 AM UTC
Finished removing all the lumps and bumps not on this version and ready to start adding all the PE parts:
KelticKnot
Scotland, United Kingdom
Joined: May 11, 2015
KitMaker: 768 posts
AeroScale: 656 posts
Joined: May 11, 2015
KitMaker: 768 posts
AeroScale: 656 posts
Posted: Sunday, August 30, 2015 - 12:03 PM UTC
Nice clean lines... A good looking base to work from.