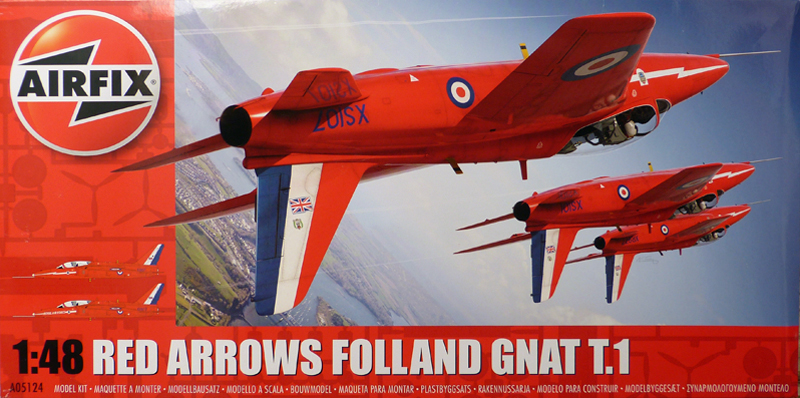
Airfix have answered many wishes with a new-tool quarterscale kit of the RAF's classic Cold War jet trainer and mount of the Red Arrows - the Folland Gnat.
Link to Item
If you have comments or questions please post them here.
Thanks!
Cold War (1950-1974)
Discuss the aircraft modeling subjects during the Cold War period.
Hosted by Tim Hatton
REVIEW
1:48 Red Arrows Folland Gnat T.1Posted: Monday, January 26, 2015 - 02:34 AM UTC
Posted: Tuesday, January 27, 2015 - 01:49 AM UTC
Hi again
I'm being a very naughty boy and have started building this beasty! I know, it's always trouble when I get more than one build on the go, but I couldn't resist it. So far, it's going together like a breeze... (Pics to follow in due course.)
All the best
Rowan
I'm being a very naughty boy and have started building this beasty! I know, it's always trouble when I get more than one build on the go, but I couldn't resist it. So far, it's going together like a breeze... (Pics to follow in due course.)
All the best
Rowan
Joel_W
Associate Editor
New York, United States
Joined: December 04, 2010
KitMaker: 11,666 posts
AeroScale: 7,410 posts
Joined: December 04, 2010
KitMaker: 11,666 posts
AeroScale: 7,410 posts
Posted: Wednesday, January 28, 2015 - 04:14 AM UTC
If you're building it along with the Bronco, it must be a fantastic kit.
As usual, another excellent review. I really like the fact that you dry fitted the major parts so that we know how the kit assembly will actually go. From what you've said, it sounds like very little filler if any will be needed as the parts fit is that good. And one shouldn't run into any build issues.
Joel
Posted: Thursday, January 29, 2015 - 02:54 AM UTC
Cheers Joel
Just to prove I actually am underway, here are a few pics. I'm building this one as light relief, so won't get bogged-down in trying to keep the Blog very comprehensive.
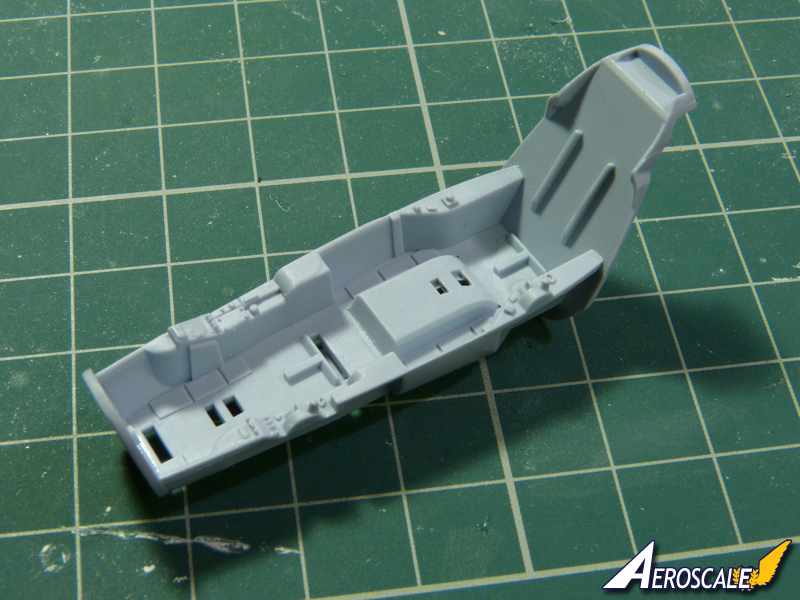
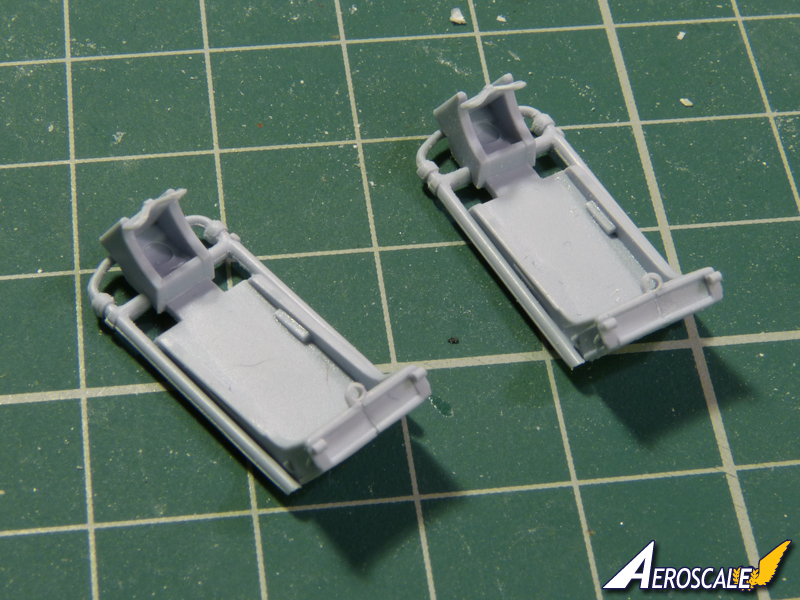
I've got the cockpit tub and ejector seats assembled, ready to paint (actually, the base-coat went on tonight):
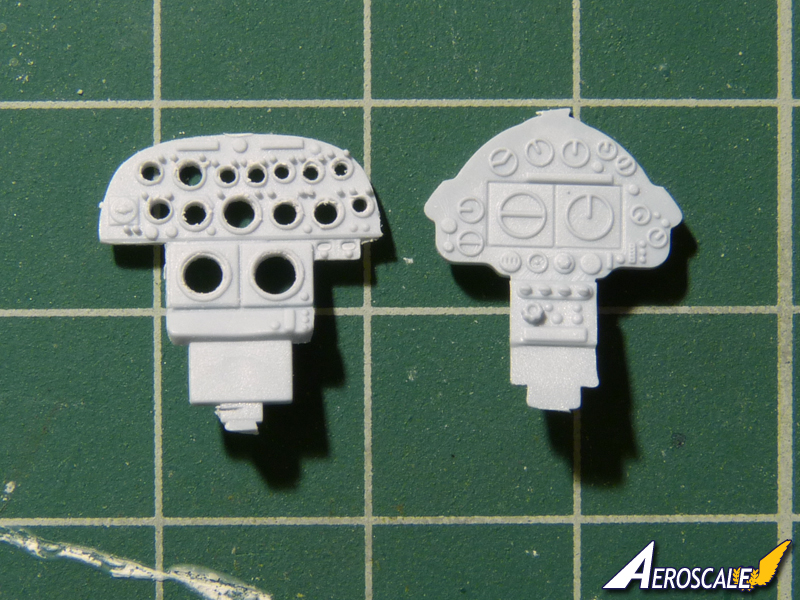
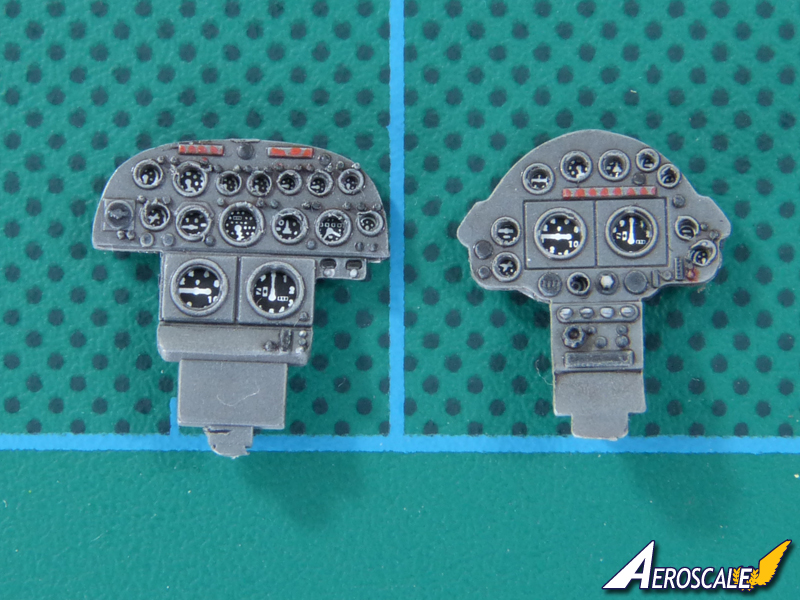
I've decided to drill out the instruments to mount the kit decals behind. Obviously, still a bit of cleaning up to do when I took the photo, but the effect should be OK:
Just playing with intakes here - so still some painting to do - but Airfix's approach gives a very neat result:
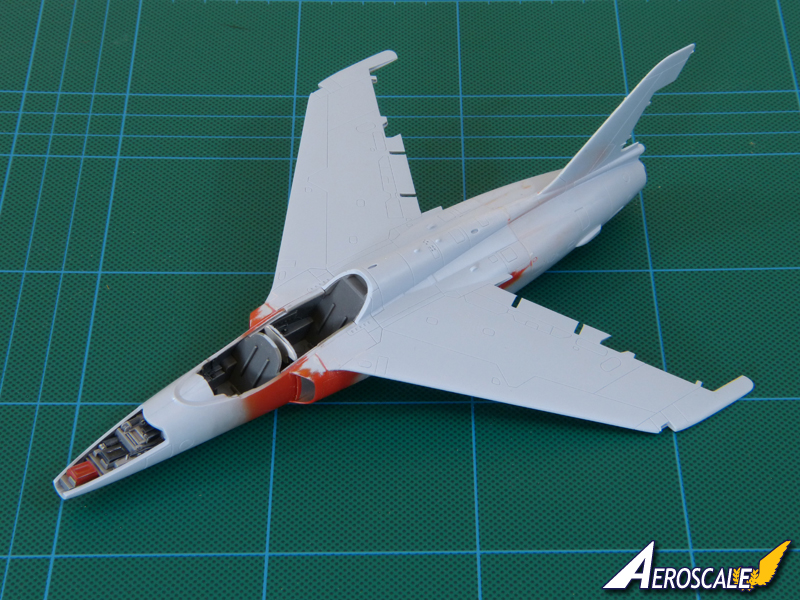
This is one of those builds where I hope a lot should come together pretty quickly - it's slotting together that neatly.
All the best
Rowan
Joel_W
Associate Editor
New York, United States
Joined: December 04, 2010
KitMaker: 11,666 posts
AeroScale: 7,410 posts
Joined: December 04, 2010
KitMaker: 11,666 posts
AeroScale: 7,410 posts
Posted: Thursday, January 29, 2015 - 03:34 AM UTC
Rowan,
Impressive progress. Nice detailing on the IP. If you're using a decal from behind, you could thin down the IP a little.
Those intakes really look quite good. The engineering in having them slide into the fuselage side, saves a ton of work. My only concern is there a intake fan or something to block ones view from looking right through into the empty fuselage?
Looking forward to your next update.
Joel
Posted: Thursday, January 29, 2015 - 12:55 PM UTC
Cheers Joel
I forgot to mention that I've thinned the panels down to about a quarter of their original depth so the decals will sit just behind the bezels.
Don't worry - there's a nice fan to go into the fuselage, and the exhaust has details of the burner, so there'll be no see-through look.
All the best
Rowan
I forgot to mention that I've thinned the panels down to about a quarter of their original depth so the decals will sit just behind the bezels.
Don't worry - there's a nice fan to go into the fuselage, and the exhaust has details of the burner, so there'll be no see-through look.
All the best
Rowan
Joel_W
Associate Editor
New York, United States
Joined: December 04, 2010
KitMaker: 11,666 posts
AeroScale: 7,410 posts
Joined: December 04, 2010
KitMaker: 11,666 posts
AeroScale: 7,410 posts
Posted: Thursday, January 29, 2015 - 06:57 PM UTC
Quoted Text
Cheers Joel
I forgot to mention that I've thinned the panels down to about a quarter of their original depth so the decals will sit just behind the bezels.
Don't worry - there's a nice fan to go into the fuselage, and the exhaust has details of the burner, so there'll be no see-through look.
All the best
Rowan
Rowan,
Nicely done. I should have known that you wouldn't leave those thick IPs that way. Glad to hear that Airfix took care of the look through issue.
Looking forward to your next update.
Joel
Posted: Friday, February 13, 2015 - 04:18 PM UTC
Hi again
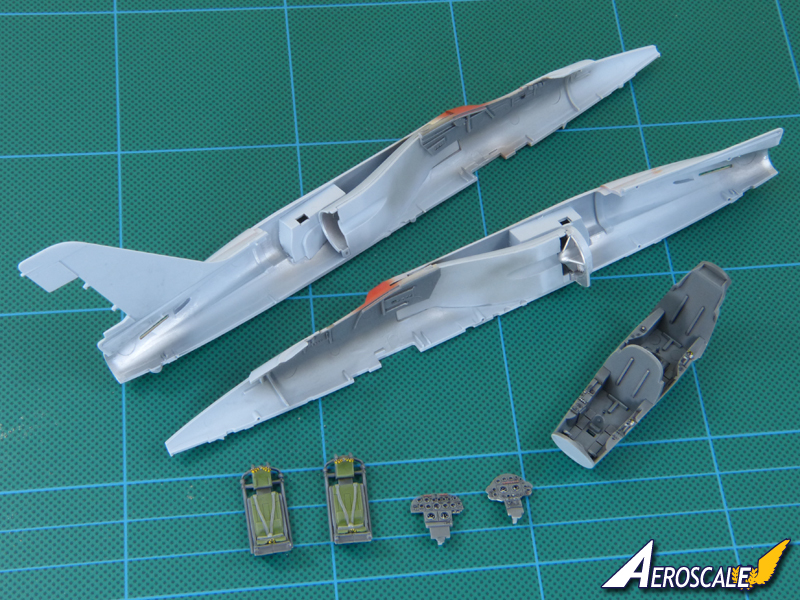
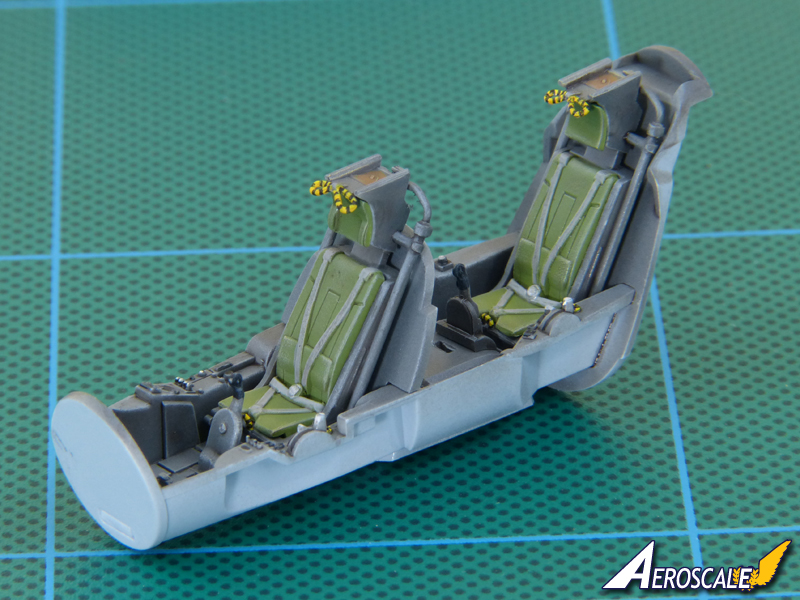
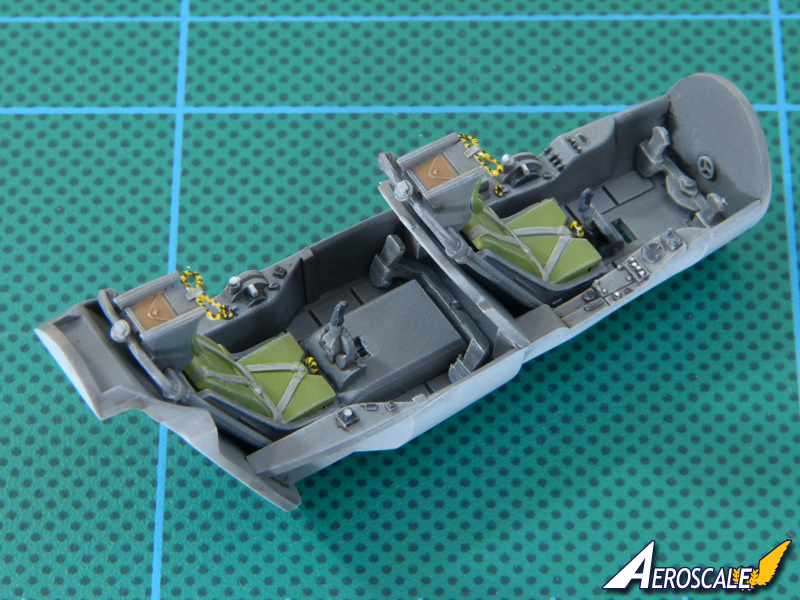
After a bit of a delay due to problems at home, I've got back to the workbench and have the "office" just about finished. I'm sticking strictly OOB for this one so, although Pavla do a beautiful resin replacement seat, and Eduard have etched extras lined up, I've just gone with the kit parts:
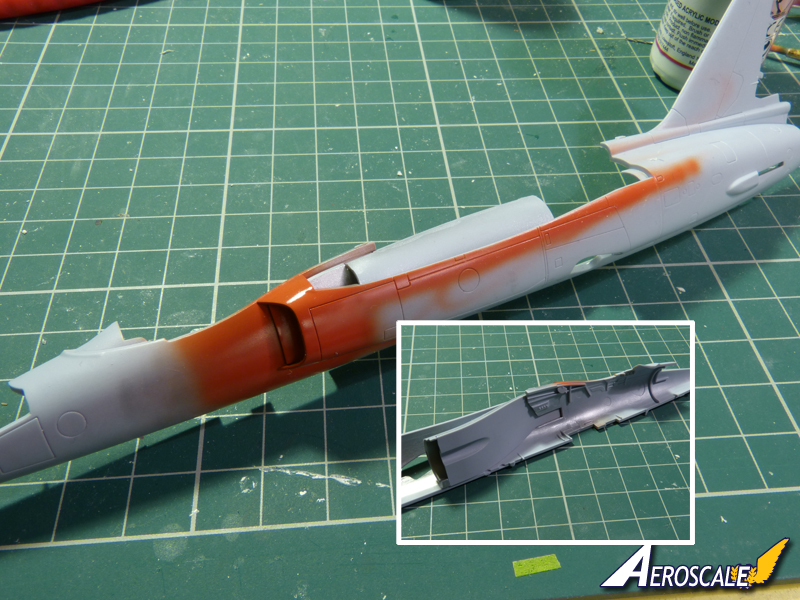
I wasn't going to bother with the nose avionics bay, but I guess I should, just to see how it turns out. I'll paint that this weekend and should get the basic airframe completed.
All the best
Rowan
Joel_W
Associate Editor
New York, United States
Joined: December 04, 2010
KitMaker: 11,666 posts
AeroScale: 7,410 posts
Joined: December 04, 2010
KitMaker: 11,666 posts
AeroScale: 7,410 posts
Posted: Friday, February 13, 2015 - 08:05 PM UTC
Rowan,
I'm really impressed with how both IPs turned out. They look great. Cockpit is looking quite good.
Joel
I'm really impressed with how both IPs turned out. They look great. Cockpit is looking quite good.
Joel
thegirl
Alberta, Canada
Joined: January 19, 2008
KitMaker: 6,743 posts
AeroScale: 6,151 posts
Joined: January 19, 2008
KitMaker: 6,743 posts
AeroScale: 6,151 posts
Posted: Friday, February 13, 2015 - 08:39 PM UTC
Nice tip on the instrument panels , I've done this in the past depending on the decals them self .
I'm over all impressed with Air Fix's new kits coming out . They are of great value and bang for ones buck which won't break the bank for some .
Terri
I'm over all impressed with Air Fix's new kits coming out . They are of great value and bang for ones buck which won't break the bank for some .
Terri
Posted: Saturday, February 14, 2015 - 12:41 AM UTC
Thanks Joel and Terri
It's nice simply to be building again - it definitely helps take my mind off Mum's health problems.
I was quite pleased with how the instruments turned out. The biggest problem was centring the point to drill out the bezels, because the moulded hands got in the way. As you can see, a couple of the smaller ones are definitely off-centre - although the extreme close-up exaggerates the problem; at around the size of your little-finger nail, the panels don't look too bad to the naked eye. I have a "Plan B" for the next time I try it - probably on Airfix's new-tool Spitfire Mk.I.
All the best
Rowan
Joel_W
Associate Editor
New York, United States
Joined: December 04, 2010
KitMaker: 11,666 posts
AeroScale: 7,410 posts
Joined: December 04, 2010
KitMaker: 11,666 posts
AeroScale: 7,410 posts
Posted: Sunday, February 15, 2015 - 04:03 AM UTC
Rowan,
One of the problems I have when posting WIP pics is that they're greater then life size, so small issues that wouldn't be normally seen in the context of the model, because huge eye sores. Your IPs once installed in the cockpit will look just about perfect.
Joel
One of the problems I have when posting WIP pics is that they're greater then life size, so small issues that wouldn't be normally seen in the context of the model, because huge eye sores. Your IPs once installed in the cockpit will look just about perfect.
Joel
drabslab
European Union
Joined: September 28, 2004
KitMaker: 2,186 posts
AeroScale: 1,587 posts
Joined: September 28, 2004
KitMaker: 2,186 posts
AeroScale: 1,587 posts
Posted: Sunday, February 15, 2015 - 03:58 PM UTC
Quoted Text
This is one of those builds where I hope a lot should come together pretty quickly - it's slotting together that neatly.
In my case, this usually is the first announcement of total disaster
Posted: Sunday, February 15, 2015 - 11:01 PM UTC
Hi Drabslab
Same here - that's why I'm surprised to have got this far:
All the best
Rowan
Same here - that's why I'm surprised to have got this far:
All the best
Rowan
Joel_W
Associate Editor
New York, United States
Joined: December 04, 2010
KitMaker: 11,666 posts
AeroScale: 7,410 posts
Joined: December 04, 2010
KitMaker: 11,666 posts
AeroScale: 7,410 posts
Posted: Monday, February 16, 2015 - 04:31 AM UTC
Rowan,
Lookin' real good.
Joel
Lookin' real good.
Joel
Posted: Thursday, February 19, 2015 - 04:15 AM UTC
Cheers Joel
I took a quick look at it today to remind myself where I was at. Hopefully, more progress soon.
All the best
Rowan
I took a quick look at it today to remind myself where I was at. Hopefully, more progress soon.
All the best
Rowan
Joel_W
Associate Editor
New York, United States
Joined: December 04, 2010
KitMaker: 11,666 posts
AeroScale: 7,410 posts
Joined: December 04, 2010
KitMaker: 11,666 posts
AeroScale: 7,410 posts
Posted: Saturday, February 21, 2015 - 03:23 AM UTC
Quoted Text
Cheers Joel
I took a quick look at it today to remind myself where I was at. Hopefully, more progress soon.
All the best
Rowan
Rowan,
You'll know when the time is right, because it will fill right.
Joel