litespeed
 News Reporter
England - North West, United Kingdom
Joined: October 15, 2009
KitMaker: 1,976 posts
AeroScale: 1,789 posts
Posted: Saturday, February 21, 2015 - 10:44 PM UTC
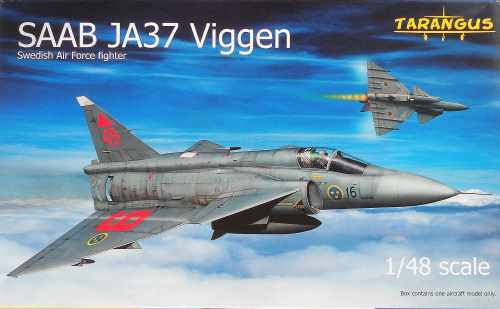
Here is the start of a build log for the recent and most welcome release of the SAAB JA 37 Viggen from Tarangus models. I did a inbox review of the kit and you can find it
here if you are interested.
This will be a straight out of the box build; I am not hanging around waiting for aftermarket products. Anyway the detail generally is pretty good.
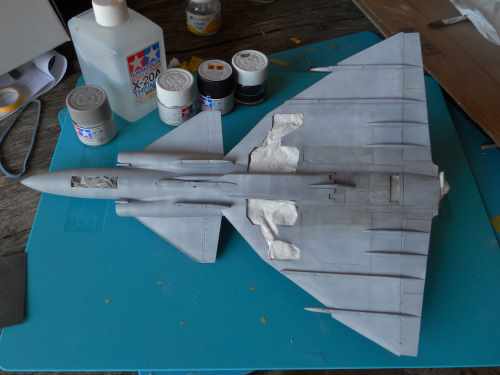
I am already considering which paint scheme to paint this kit. I really fancy the four colour upper camouflage scheme, but I do like the two tone grey scheme. The grey Viggens seem particularly heavily weathered which I find appealing.
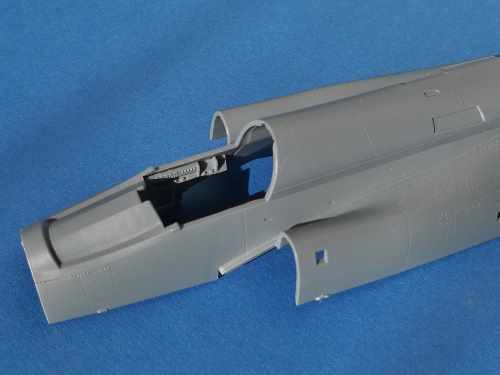
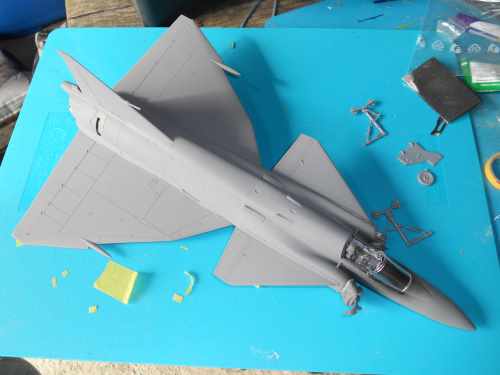
I have started with the fitting of the additional instrumentation that goes onto the cockpit wall. Hopefully the images are clear enough for you to see the fine raised detail. I do like the slightly recessed areas indicating where things like instruments, air inlets and outlets fit. One thing that is immediately apparent is how soft the plastic is. So you need to take great care separating the parts from the sprues. I would suggest using snips rather than using a blade. The holes you can see along the fuselage just behind where the air intake fits is for the fitting of the canards.
I have also glued in place the one piece front under carriage bay.
To be continued

Germany
Joined: September 07, 2005
KitMaker: 5,609 posts
AeroScale: 5,231 posts
Posted: Saturday, February 21, 2015 - 10:55 PM UTC
Great Tim!
It is good to have someone ahead with a project to find all the booby traps

I bought mine at Telford and I am really looking forward to build it (I am waiting for the masks and maybe I will buy a cockpit set as I found it a bit sparse in the kit)
cheers
Steffen
DULCE ET DECORUM EST PRO HOBBY MORI
litespeed
News Reporter England - North West, United Kingdom
Joined: October 15, 2009
KitMaker: 1,976 posts
AeroScale: 1,789 posts
Posted: Monday, February 23, 2015 - 01:31 AM UTC
Hi Steffen, glad to be of service. Thanks for following the build.
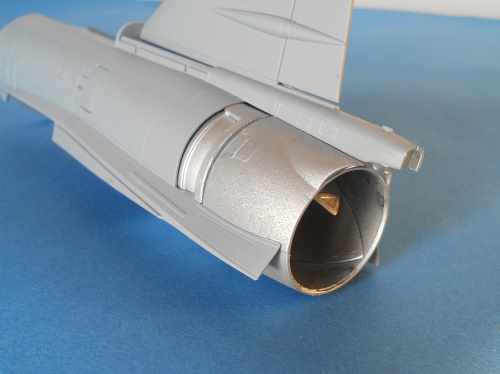
I joined the two parts that makes up the rear fuselage of the Viggen. From the images the join does not look clean, but this is hidden under the spine attached to the upper front fuselage. I have not glued the most rearward part of this section just yet. I also glued together the two part duct and the bulkhead that fits around the primary compressor. I gave them and the inside of the air intakes a quick spray this morning with aluminium from a Humbrol rattle can. Normally I would use Aclad II paints, but Im pretty sure you will see very little of the compressor fan once the fuselage is buttoned up. I did use a dark wash over the fans just to give them more of a chance to be seen.

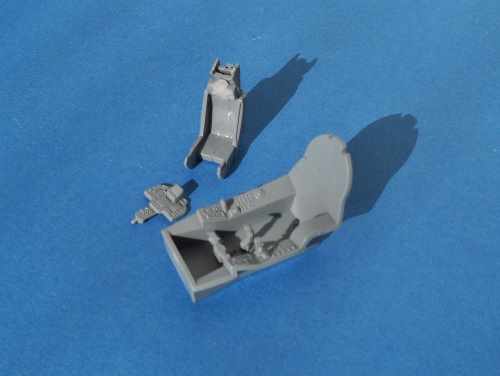
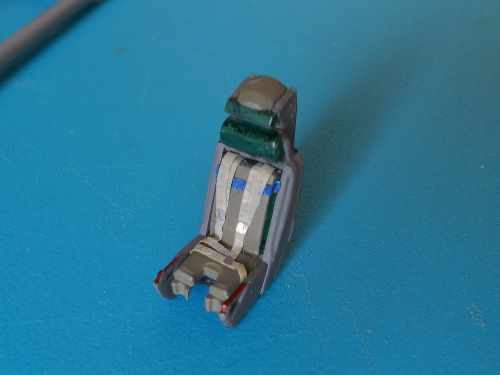
The cockpit goes together pretty well. I dry fitted the tub into the fuselage and fits very snuggly. The seat does look the part; although some filler is needed on the join in the middle of the headrest. The two small control sticks on the left side console look a little large scale wise.
To be continued
.
MichaelSatin
Campaigns Administrator Colorado, United States
Joined: January 19, 2008
KitMaker: 3,909 posts
AeroScale: 2,904 posts
Posted: Monday, February 23, 2015 - 05:17 AM UTC
Hey Tim, this build definitely qualifies for the
Hot Out of the Molds Campaign if you're interested.
Michael

On the bench:
Sorta depends on your definition of "on the bench"...

#041
Kobenhavn, Denmark
Joined: July 20, 2006
KitMaker: 10,069 posts
AeroScale: 3,788 posts
Posted: Monday, February 23, 2015 - 12:50 PM UTC
Nice start, Tim.
Looking forward to follow this one.
Campaign'oholic - 252+ campaigns completed
litespeed
News Reporter England - North West, United Kingdom
Joined: October 15, 2009
KitMaker: 1,976 posts
AeroScale: 1,789 posts
Posted: Tuesday, February 24, 2015 - 02:20 AM UTC
Thanks Michael, I have just enrolled on the Hot out of the moulds campaign. Its great to have you along on the build Jesper.
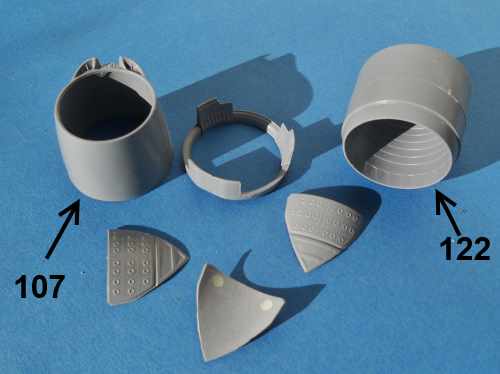
I spent a little time organising the parts for the jet pipe, rear fairing and reverse thrust. A touch of filler was used on the recessed ejector marks on the thrust reversal petals. I'm not sure how much you will see of the ejector marks, but I would rather play safe.
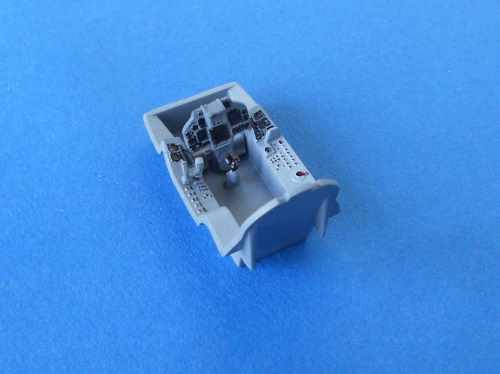
The cockpit and seat were painted last night. Despite this being an inbox build, I could not resist adding some homemade seat harness.
To be continued
.
Joel_W
Associate Editor New York, United States
Joined: December 04, 2010
KitMaker: 11,666 posts
AeroScale: 7,410 posts
Posted: Wednesday, February 25, 2015 - 12:47 AM UTC
Tim,
I'll be following right along with your build. So far, it looks really good, especially for what is a limited run kit. Details looks crisp and clean.
I do agree with your assessment of the two tone Gray scheme. I've seen one of those JA37's built up in that scheme, along with several reference pictures, and they sure do show some wear and tear.
Joel
On my Workbench:
Monogram 1/24 scale 427 Shelby Cobra
Just Completed:
Beemax 1/24 scale BMW M3 E30 1992 Evolution II
litespeed
News Reporter England - North West, United Kingdom
Joined: October 15, 2009
KitMaker: 1,976 posts
AeroScale: 1,789 posts
Posted: Wednesday, February 25, 2015 - 09:52 PM UTC
Quoted Text
Tim,
I'll be following right along with your build. So far, it looks really good, especially for what is a limited run kit. Details looks crisp and clean.
I do agree with your assessment of the two tone Gray scheme. I've seen one of those JA37's built up in that scheme, along with several reference pictures, and they sure do show some wear and tear.
Joel
Hi Joel
Yes this seems to be an exceptional good kit for a limited run company. I built a previous release of Tarangus a while back: the Lansen. Although that was a good building experience some filling and blending was required, but this seems a quantum leap in quality. The recessed surface detail is also hugely improved.
Im still mulling over the finish to be honest Joel. I really like the four colour splinter camouflage even though its a fairly challenging scheme to achieve. This scheme also shows evidence of heavy fading in places. I was thinking of making some stencils for the large numbers, but as you can see from the image
here, the numbers do look a lot glossier, similar in look to kit decals.
tim
Joel_W
Associate Editor New York, United States
Joined: December 04, 2010
KitMaker: 11,666 posts
AeroScale: 7,410 posts
Posted: Thursday, February 26, 2015 - 12:15 AM UTC
Tim,
I'm just more partial to less fancy two and three tone camo schemes. My friend had real issues with those large numbers. Bleed through of the base color, and they didn't react consistently with the Micro system, causing some wrinkling, and a lot of additional work to correct. Other then those issues, he really enjoyed the build.
Joel
On my Workbench:
Monogram 1/24 scale 427 Shelby Cobra
Just Completed:
Beemax 1/24 scale BMW M3 E30 1992 Evolution II
litespeed
News Reporter England - North West, United Kingdom
Joined: October 15, 2009
KitMaker: 1,976 posts
AeroScale: 1,789 posts
Posted: Thursday, February 26, 2015 - 03:35 AM UTC
Quoted Text
Tim,
I'm just more partial to less fancy two and three tone camo schemes. My friend had real issues with those large numbers. Bleed through of the base color, and they didn't react consistently with the Micro system, causing some wrinkling, and a lot of additional work to correct. Other then those issues, he really enjoyed the build.
Joel
Joel, thanks for the heads up on those decals.
I took another route assembling the reverse thrust petals to the one suggested in the instructions. Instead of gluing the three petals to the rim of part 122, I glued them directly into the rear fairing part 107. You will find in the fairing there are three recesses where the petals sit in flight mode. I think this is a much easier approach. I have placed the petals as arranged with power off. The upper petal has drooped a bit due to the gradual loss of hydraulic pressure. There is a very good image of the arrangement of two of the petals
here.

To be continued
.
Joel_W
Associate Editor New York, United States
Joined: December 04, 2010
KitMaker: 11,666 posts
AeroScale: 7,410 posts
Posted: Thursday, February 26, 2015 - 09:40 PM UTC
Tim,
Excellent use of research material. The end result really looks quite realistic.
Joel
On my Workbench:
Monogram 1/24 scale 427 Shelby Cobra
Just Completed:
Beemax 1/24 scale BMW M3 E30 1992 Evolution II
litespeed
News Reporter England - North West, United Kingdom
Joined: October 15, 2009
KitMaker: 1,976 posts
AeroScale: 1,789 posts
Posted: Friday, February 27, 2015 - 02:13 AM UTC
Quoted Text
Tim,
Excellent use of research material. The end result really looks quite realistic.
Joel
Thanks Joel
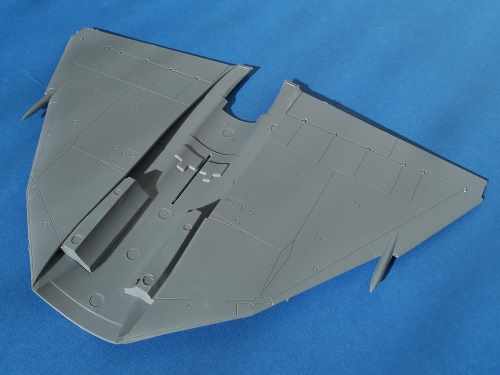
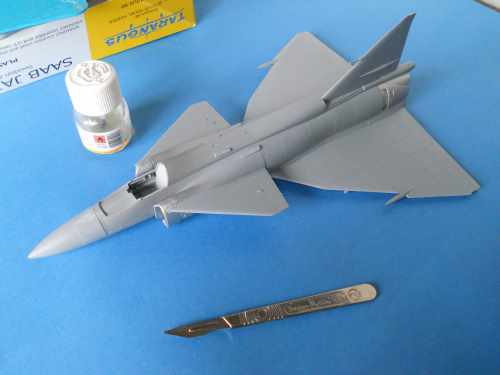
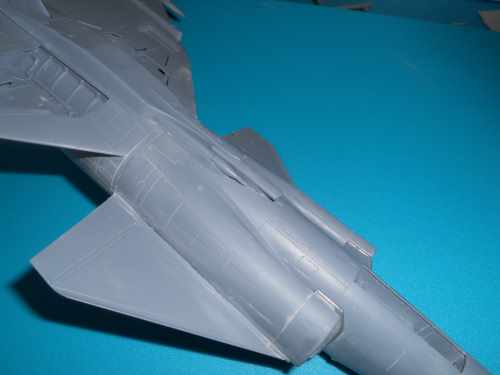
I have attached the nicely detailed main wheel wells to the one piece lower wing. I also drilled out some holes [red circles] for the elevon actuator housing. I glued the wings together and also attached the canards to the forward fuselage. Obviously being a plastic modeller I have disregarded some of the steps in the instructions. They would have you gluing the lower wing surface to the fuselage before assembling the wings. A dry run attaching the whole wing to the fuselage did not raise any issues.
I also checked out the quality of the mid fuselage join and it looks very good indeed. The fuselage extension has been glued to the rear fuselage rather than the front. The vertical fin has not been glued in place just yet, but the join seems good and firm.
Attaching the canards now, meant I could apply some decent pressure through the canard, while applying counter pressure from inside the fuselage. The fit of the canard into the fuselage is extremely good.


To be continued
.
Joel_W
Associate Editor New York, United States
Joined: December 04, 2010
KitMaker: 11,666 posts
AeroScale: 7,410 posts
Posted: Friday, February 27, 2015 - 08:50 PM UTC
Tim,
Believe me when I say I'm not even a neophyte when it comes to Swedish Viggens, but I do have a few modeling friends from Sweden who are. To them Viggens are like F-4s to us. And one of them, Janne just is about finishing up his Viggen build.
There are certain inaccuracies to this kit, most I couldn't see unless they pointed them out along with some reference pictures. A few are major compared to others. One issue that you might consider correcting is the too small and incorrectly shaped vertical Stabilizer. The corrections do make for a completely different overall look to it.
Here's a picture of the part over laid over a 1/48 scale picture.

Then the correction with some sheet plastic and putty.
Some sanding, a little polishing, and then primer.
Joel
On my Workbench:
Monogram 1/24 scale 427 Shelby Cobra
Just Completed:
Beemax 1/24 scale BMW M3 E30 1992 Evolution II
litespeed
News Reporter England - North West, United Kingdom
Joined: October 15, 2009
KitMaker: 1,976 posts
AeroScale: 1,789 posts
Posted: Sunday, March 01, 2015 - 09:34 PM UTC
Hi Joel
Its not much of a deal breaker for me I'm afraid. The image you have posted is interesting, but far from conclusive. I checked out the forum were this thread is from, I think Janne calls it somewhere the fin debacle. A bit harsh, but everyone is open to their interpretations on these things. It does look like the pitot tube is too high and a little thick where it comes out of the fin. At the end of the day I think the model out of the box as this build log is will look very much like a JA 37 Viggen.
Thanks for posting Joel its much appreciated
Germany
Joined: September 07, 2005
KitMaker: 5,609 posts
AeroScale: 5,231 posts
Posted: Sunday, March 01, 2015 - 10:17 PM UTC
I fully agree with Tim!
My first thought was (and still is) that it is just a matter of photographic angle and distorsion.
I will most probably not change my kit.
Anyway, everyone can make his/her one conclusion so thanks for posting!
all the best
Steffen
DULCE ET DECORUM EST PRO HOBBY MORI
litespeed
News Reporter England - North West, United Kingdom
Joined: October 15, 2009
KitMaker: 1,976 posts
AeroScale: 1,789 posts
Posted: Monday, March 02, 2015 - 02:50 AM UTC
Hi all
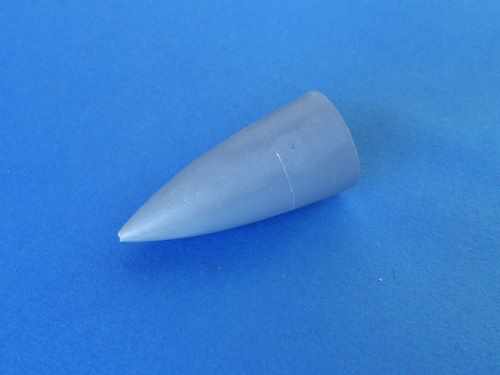
I have glued the wing to the rear fuselage. The join is excellent, I spot welded the seam with liquid glue. The glue flowed superbly along the join. No need for filler there at all I think. I also assembled the nose. This went together well, but seams needed a little light sanding.
The biggest flaw I have found with this release so far is that the seat does not sit in the cockpit properly. It sticks out of the cockpit so much that the canopy cannot be displayed closed. Even if I displayed the canopy open, the seat would look somewhat silly. So the seat is going to require some surgery.
To be continued
.
Joel_W
Associate Editor New York, United States
Joined: December 04, 2010
KitMaker: 11,666 posts
AeroScale: 7,410 posts
Posted: Monday, March 02, 2015 - 03:43 AM UTC
Tim,
Excellent progress. Your build is really coming along quite well. Did you ever decide on what Camo paint scheme you're going with?
Joel
On my Workbench:
Monogram 1/24 scale 427 Shelby Cobra
Just Completed:
Beemax 1/24 scale BMW M3 E30 1992 Evolution II
litespeed
News Reporter England - North West, United Kingdom
Joined: October 15, 2009
KitMaker: 1,976 posts
AeroScale: 1,789 posts
Posted: Monday, March 02, 2015 - 04:05 AM UTC
Joel
At the moment I'm leaning heavily towards the two tone grey. I'm really taken with the box lid illustration. I still fancy applying some strong weathering to it as well.
tim
litespeed
News Reporter England - North West, United Kingdom
Joined: October 15, 2009
KitMaker: 1,976 posts
AeroScale: 1,789 posts
Posted: Thursday, March 05, 2015 - 02:57 AM UTC
Hi all
Moving along nicely now. The forward and aft fuselage has now been joined as has the nose, air intakes and vertical tail surface. No real dramas here, the joins all seem very good. I dry fitted the parts together and once happy with the alignment, I applied liquid glue in a few spots. The glue ran around the joins perfectly. No clamping was necessary. I will leave it overnight to set, but at the moment there does not seem to be any need for filler. Well we will see once the glue has set, lets not get too excited! There is a very slight difference in level around the mid fuselage join and the radome join which may need some sanding. One thing I did try before joining the nose was to see whether the model needed any nose weight. The instructions claim that it does not need it. Im very happy to confirm that fact.
To be continued
Joel_W
Associate Editor New York, United States
Joined: December 04, 2010
KitMaker: 11,666 posts
AeroScale: 7,410 posts
Posted: Thursday, March 05, 2015 - 03:12 AM UTC
Tim,
Most impressive progress. Looking real good.
Joel
On my Workbench:
Monogram 1/24 scale 427 Shelby Cobra
Just Completed:
Beemax 1/24 scale BMW M3 E30 1992 Evolution II
Blekinge, Sweden
Joined: July 01, 2006
KitMaker: 20 posts
AeroScale: 19 posts
Posted: Thursday, March 05, 2015 - 04:18 AM UTC
That's looking real good.
The exhaust is perfect with one flap hanging down.
I as an old SF/SH 37 mechanic just notice some small things...
When the landing gear is out you always have the canard flaps angled.
Also the hatch below is always open and with the popped out emergency windmill generator.
To make it easy as you didn't want any aftermarket stuff, angle the flaps and skip the windmill.
(second half of the picture)
How does the sloped wing edge end up to the RWR pylon on the kit? Hard to see on your pictures.

Looking forward to see more of this build

Two Seater Campaign - Fairchild PT-19 Cornell
Schwalbe Campaign - Me 262 A-1a/U3
litespeed
News Reporter England - North West, United Kingdom
Joined: October 15, 2009
KitMaker: 1,976 posts
AeroScale: 1,789 posts
Posted: Friday, March 06, 2015 - 01:35 AM UTC
Hi WildeSau
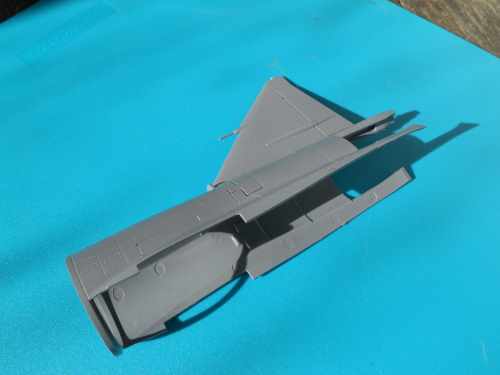
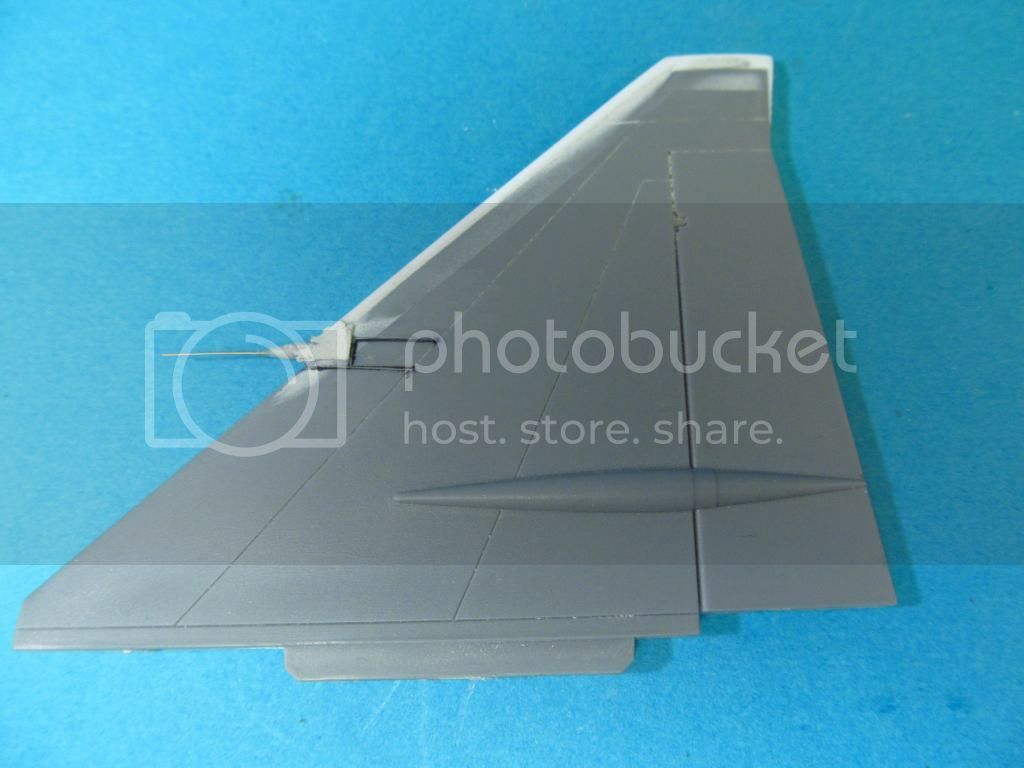
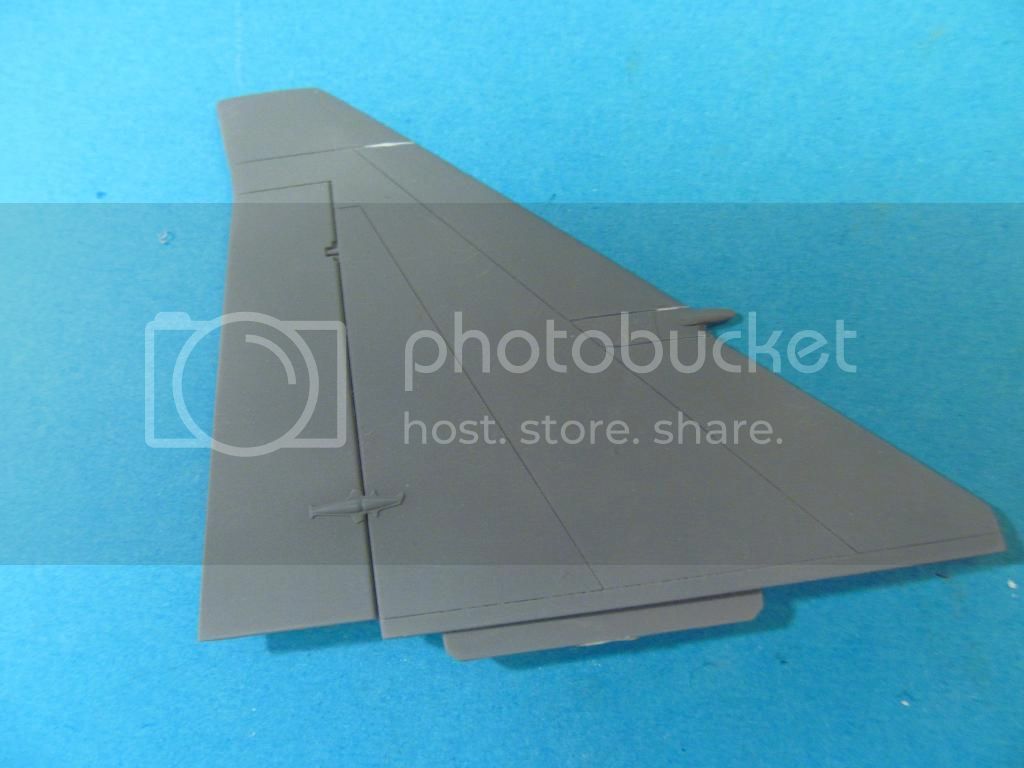
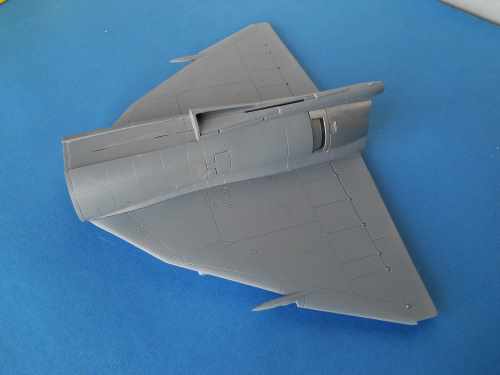
Thanks for the comments and those fantastic photos. I did consider dropping the canard flaps before I glued them to the fuselage. There are a host of images showing the flaps angled down. But alas Im a bit of a chicken particularly now the canards are glued on. I really dont want to break anything and make life difficult. Also as I have pointed out and you have noted this is an OOB build.
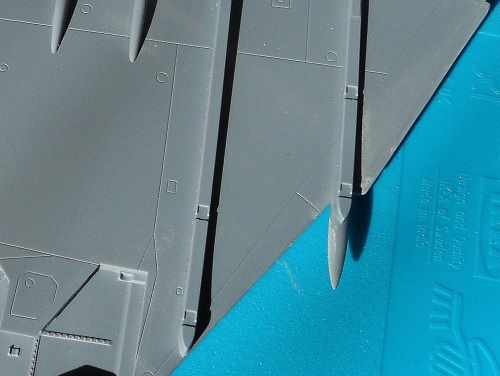
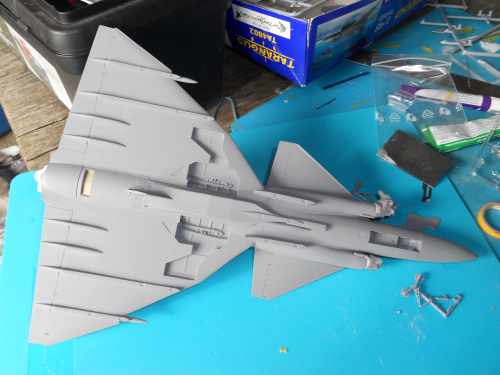
You asked
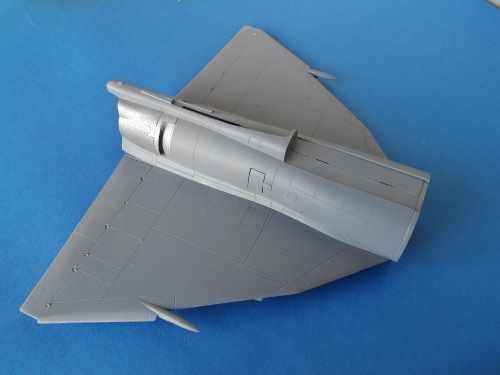
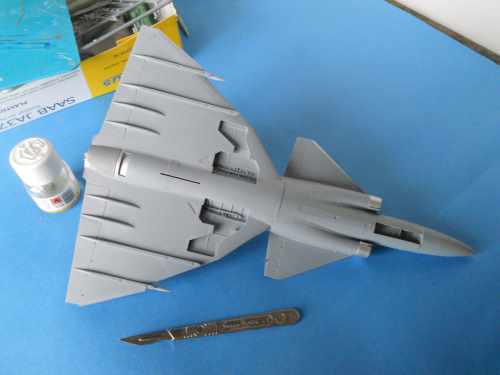
"How does the sloped wing edge end up to the RWR pylon on the kit"?Well I have attached three images that show the RWR pylon wing fit. Hope these help.


litespeed
News Reporter England - North West, United Kingdom
Joined: October 15, 2009
KitMaker: 1,976 posts
AeroScale: 1,789 posts
Posted: Tuesday, March 10, 2015 - 02:25 AM UTC
Hi all
I left the JA 37 for a couple of days to allow the joins to harden. There are a few of areas that needed the attention of my sanding sticks. The join of radome was not quite lined up with the fuselage. The air intakes looks fine, but the plastic that melted with the glue is a little inconsistent. So a little filling and blending in was be necessary. The join of the forward and aft fuselage sections was slightly out as well. It did not require filler just a little sanding. I have to point out that these are problems of my own making and not the fault of the kit. I was not a 100% happy with the look of the speed brake on the side of the fuselage. The gaps look a little to pronounced, so I reduced the gaps with stretched sprue.
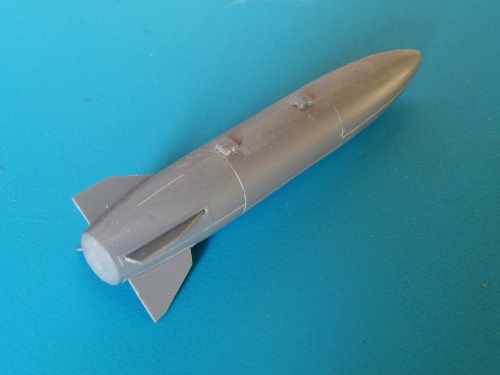
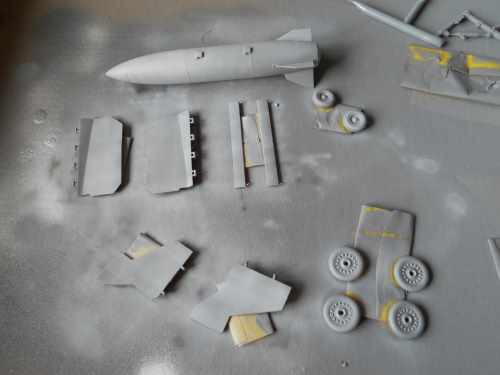
I have added the air vents, the gun pack and the fin underneath. The fit of the gun pack is superb and only needed spot gluing in a few places. The belly fuel tank has also been built.
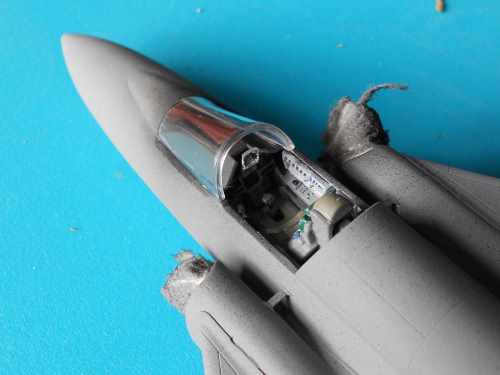
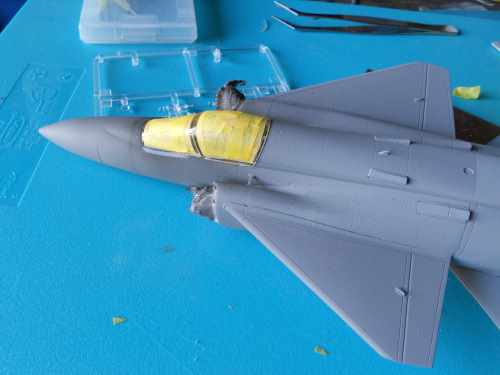
I primed the whole thing last night and painted the anti-glare shield black before adding the windscreen and HUD. The seat as I mentioned earlier in this build is too large for the cockpit tub. So I had to reduce the width and the height a little. Thankfully without damaging the visible parts of the seat. I then masked the canopy and windscreen ready for painting.
To be continued
.
Joel_W
Associate Editor New York, United States
Joined: December 04, 2010
KitMaker: 11,666 posts
AeroScale: 7,410 posts
Posted: Wednesday, March 11, 2015 - 01:25 AM UTC
Tim,
Looking real good. Your progress has been both consistent and steady.
Joel
On my Workbench:
Monogram 1/24 scale 427 Shelby Cobra
Just Completed:
Beemax 1/24 scale BMW M3 E30 1992 Evolution II
litespeed
News Reporter England - North West, United Kingdom
Joined: October 15, 2009
KitMaker: 1,976 posts
AeroScale: 1,789 posts
Posted: Thursday, March 12, 2015 - 02:24 AM UTC
Thanks Joel. It is a pretty simple kit to put together thanks to the thoughtful breakdown of parts. Also the parts generally fit very well indeed. As a result progress has been pretty rapid by my standards.
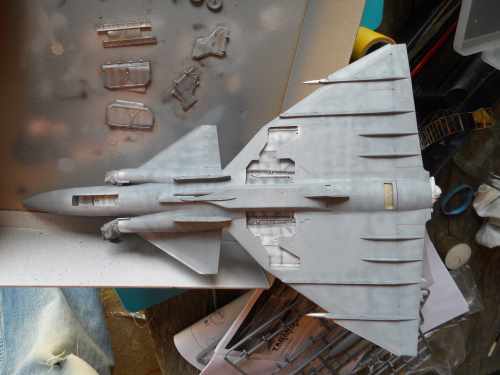
I have painted all the under surfaces with various shades of light grey using Tamiya acrylics. Coats have been built up to try to achieve a more weathered and less than pristine finish. The weathering has been achieved by brushing heavily thinning Tamiya matt black paint and then blowing the wet paint aft wards with an airbrush. All internal surfaces have been sprayed aluminium and then weathered.
To be continued
.


