Hi again
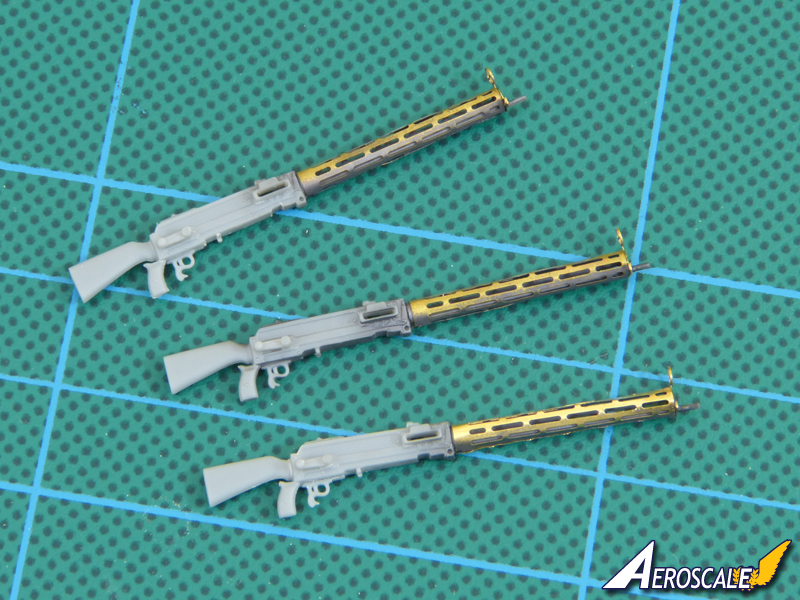
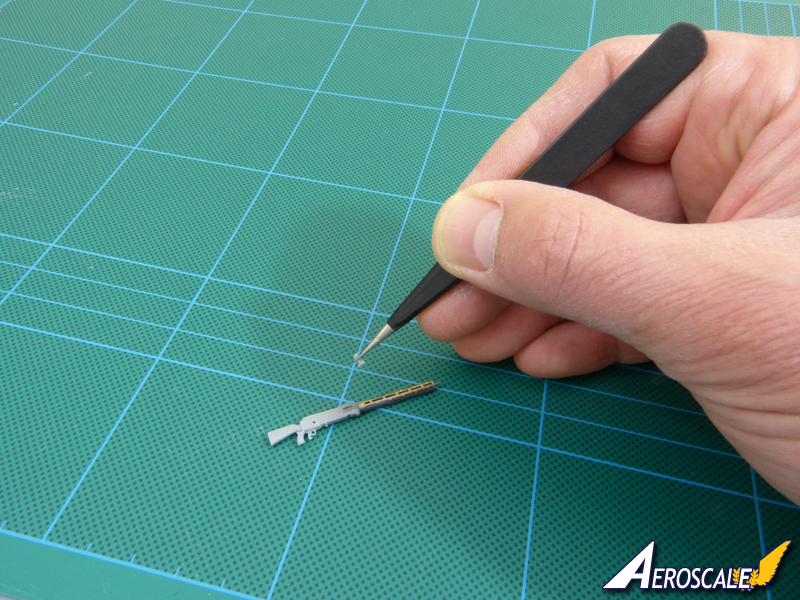
I started tinkering (sorry Andy! ) with the guns today:
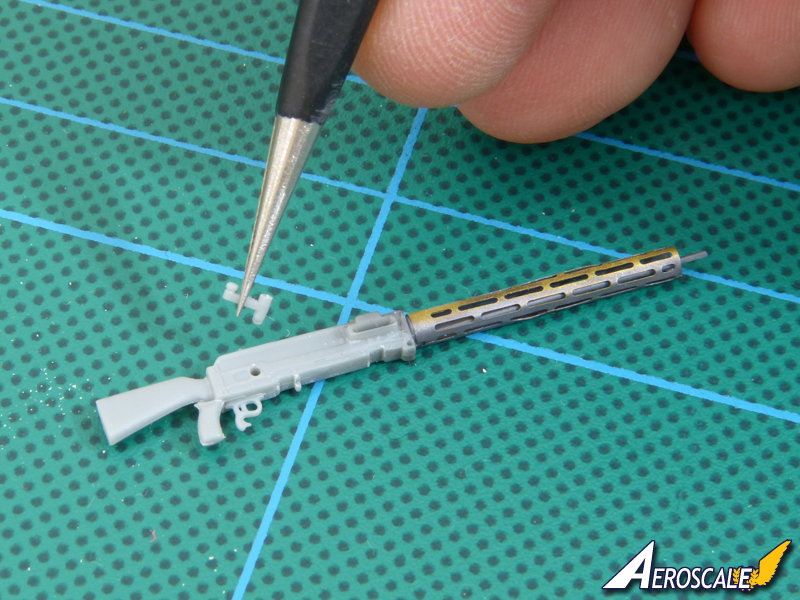
I've been using a pair of Wilder modelling tweezers that The Airbrush Company kindly sent me to try:
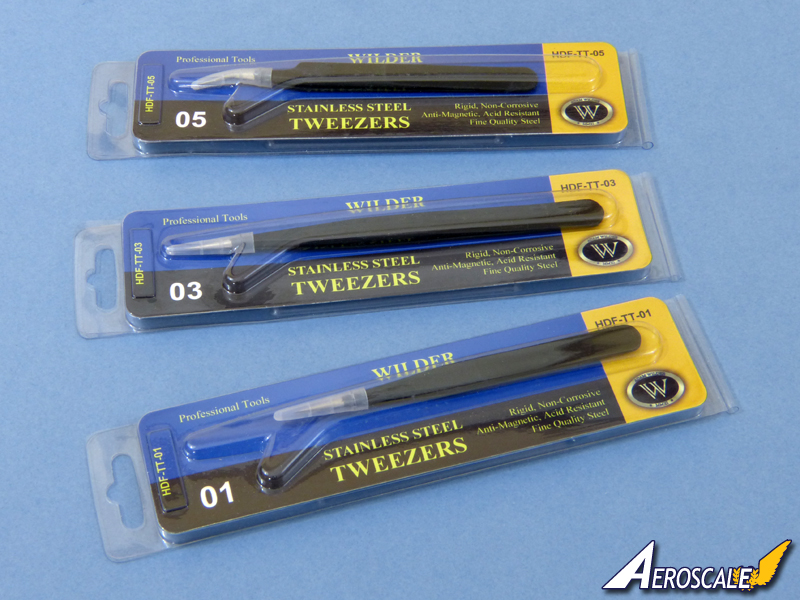
They're excellent quality and perfect for delicate jobs like this:
All the best
Rowan
Early Aviation
Discuss World War I and the early years of aviation thru 1934.
Hosted by Jim Starkweather
REVIEW 1:32 AEG G.IV
Posted: Wednesday, May 20, 2015 - 10:08 PM UTC
Joel_W
Associate Editor
New York, United States
Joined: December 04, 2010
KitMaker: 11,666 posts
AeroScale: 7,410 posts
Joined: December 04, 2010
KitMaker: 11,666 posts
AeroScale: 7,410 posts
Posted: Thursday, May 21, 2015 - 03:42 AM UTC
Rowan,
I finally found the time to read through your entire build blog to date. Needless to say I'm more then just impressed.
The cockpit is truly amazing in both detail, and your quite impressive weathering skills. I've tried neither the AK product nor the Hairspray technique, but I've used the Salt technique which also yields some nice worn effects. the finer the salt, and the more discretionary use locations, should yield some interesting results. If anything, you've reminded me that I need to start to weather the F3A-3 cockpit rather then leaving it for later.
So, I'll be along for the rest of your journey, which I'm hoping will take us across the finish line.
Joel
Posted: Thursday, May 21, 2015 - 11:08 AM UTC
Hi Joel
Many thanks for your kind comments. I really appreciate them - all the more so following your own excellent work on the Buffalo cockpit.
I've tried salt and latex chipping techniques, but I have to say this chipping fluid has produced the best results I've managed yet. As mentioned, it won't work with enamels, though, so the other ways aren't redundant.
I'll certainly do my best to finish this beauty! I think I'll need to help and advice when I get to the rigging stage (if not before), because I've never tackled anything like this in this scale before. The way I've rigged smaller models probably won't look good enough.
All the best
Rowan
CaptnTommy
Connecticut, United States
Joined: October 26, 2009
KitMaker: 424 posts
AeroScale: 389 posts
Joined: October 26, 2009
KitMaker: 424 posts
AeroScale: 389 posts
Posted: Thursday, May 21, 2015 - 06:11 PM UTC
This is really an outstanding build. I am looking at your cockpit assembly and thinking this would, right here, make one great movie set diorama, right as it is, with the surrounding area made up for the cockpit close ups.
Just perfect.
Captn Tommy
Just perfect.
Captn Tommy
Posted: Friday, May 22, 2015 - 12:07 AM UTC
Hi again Tom
Thank you again for your generous praise. I know what you mean about the cockpit. It's the largest I've ever built, and I've enjoyed figuring out how the crew would have moved around it. It must have been hard going with heavy flying suits on - some of the crawl spaces are really tight.
All the best
Rowan
Thank you again for your generous praise. I know what you mean about the cockpit. It's the largest I've ever built, and I've enjoyed figuring out how the crew would have moved around it. It must have been hard going with heavy flying suits on - some of the crawl spaces are really tight.
All the best
Rowan
Posted: Tuesday, May 26, 2015 - 12:47 AM UTC
Hi again
I really will frustrate Andy this time, because I've a bunch of reviews to work on lately, so the last couple of days have been a time of tinkering when I've had a few moments, with nothing much to show for it. But the guns are basically there, and I've started work on the propellers. All being well, I'll post some pics next time.
All the best
Rowan
CaptnTommy
Connecticut, United States
Joined: October 26, 2009
KitMaker: 424 posts
AeroScale: 389 posts
Joined: October 26, 2009
KitMaker: 424 posts
AeroScale: 389 posts
Posted: Tuesday, May 26, 2015 - 01:06 AM UTC
I like having pilots in my aircraft. I am currently attempting to modify some German WWII motorcyclists to a Hannover pilot and gunner. When I start (actually cut plastic), I will let you Know.
Captn Tommy
Captn Tommy
Posted: Tuesday, May 26, 2015 - 01:21 AM UTC
Hi Tom
I'm looking forward to seeing your figure modifications.
I've seriously thought about adding a crew, but I've got to be honest with myself and admit I'm pretty rubbish at painting figures. It's an art which I've always wanted to master, but have simply never really persevered with. One day...
I'll be pushing so many personal boundaries with this build already - it's by far the most complex WWI kit I've built, and the rigging alone will be at a level I've never attempted - I think figures would be one step too far.
All the best
Rowan
Posted: Wednesday, May 27, 2015 - 12:51 AM UTC
Hi again
The oils are drying on the props, so I might risk a photo session tomorrow sometime. I think they've turned out reasonably well for a first effort, touch wood...
All the best
Rowan
The oils are drying on the props, so I might risk a photo session tomorrow sometime. I think they've turned out reasonably well for a first effort, touch wood...
All the best
Rowan
Posted: Wednesday, May 27, 2015 - 10:14 PM UTC
Hi again
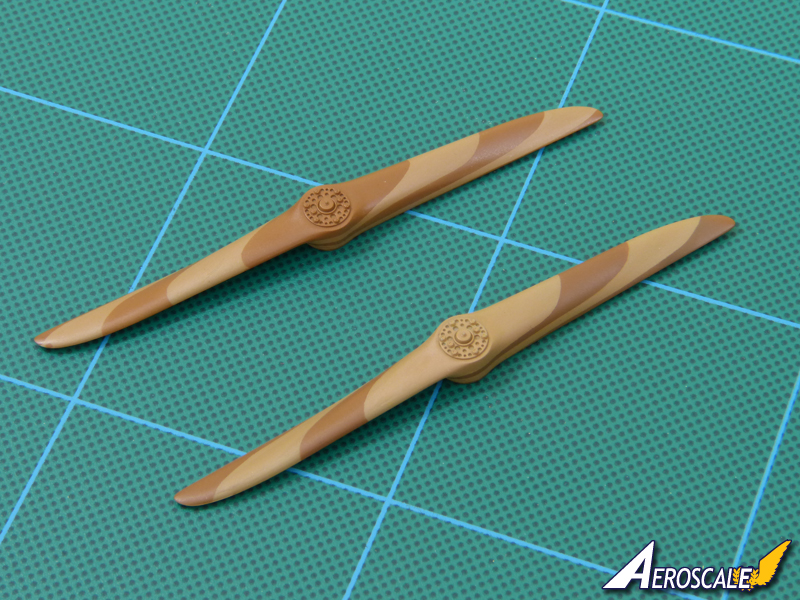
As promised, an update on the props. After painting them in a light tan base-coat, I masked them ready to apply a darker shade.
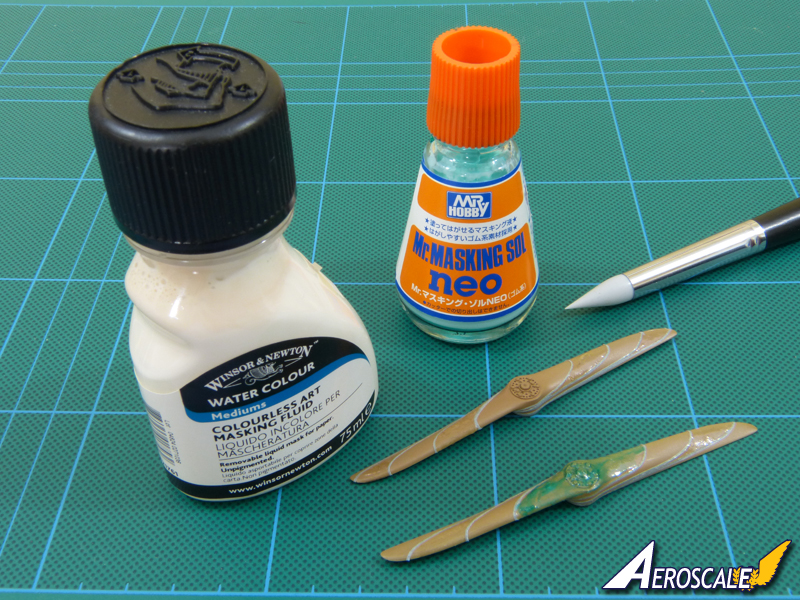
I started off with Mr Masking Sol, but found it rather too thick for this task, so I switched to Windsor & Newton masking fluid from the local art shop:
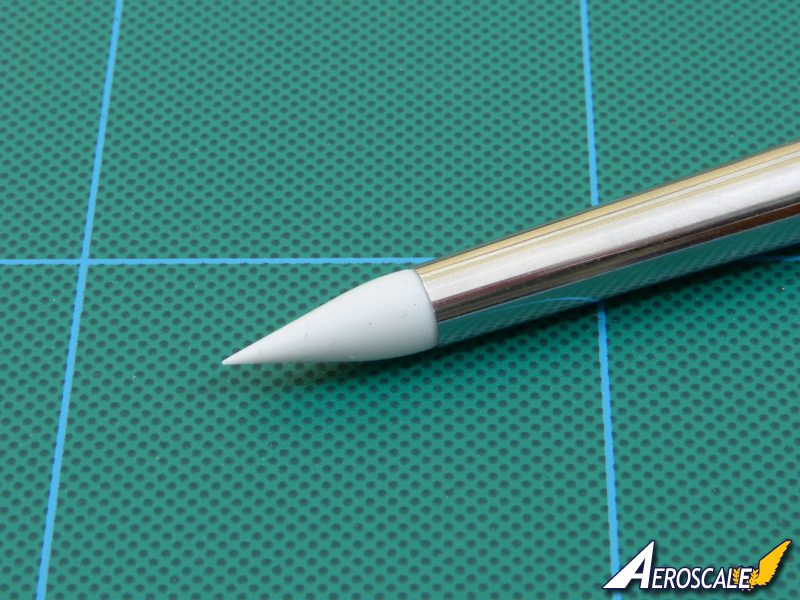
As an experiment, I ditched using a conventional brush and tried a silicone modelling brush. It worked brilliantly, with a fine flexible tip and, of course, no risk of getting clogged with masking fluid. As a bonus, it was really cheap at a discount store:
With the masking dry, I applied a coat of LifeColor wood brown:
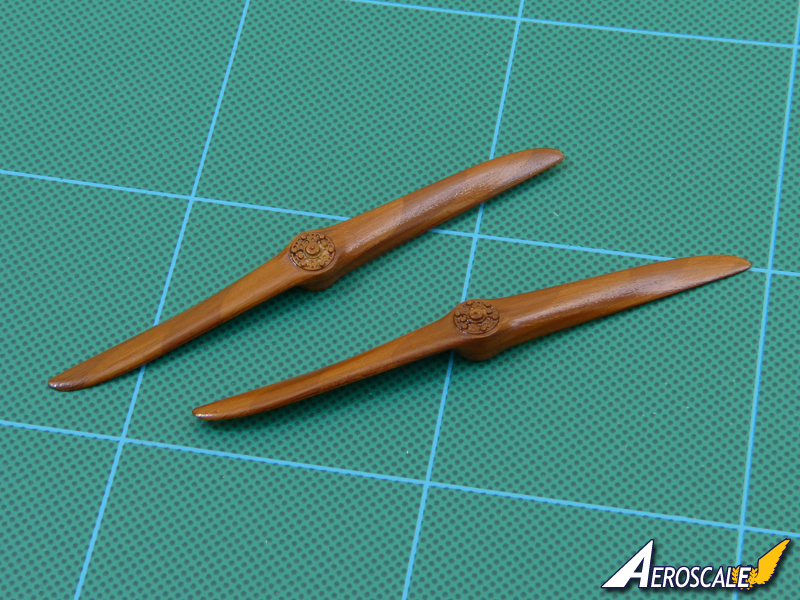
Once that was dry, I applied a light coat of oil paint, streaking it to create a wood grain effect:
There's a bit more work to do, but think the basics are reasonable.
All the best
Rowan
Joel_W
Associate Editor
New York, United States
Joined: December 04, 2010
KitMaker: 11,666 posts
AeroScale: 7,410 posts
Joined: December 04, 2010
KitMaker: 11,666 posts
AeroScale: 7,410 posts
Posted: Thursday, May 28, 2015 - 01:06 AM UTC
Rowan,
Just an excellent job on both props. I'm going to have to get a pair of those fine tip tweezers. as well as a silicone brush, as I can see other uses for it.
Joel
Just an excellent job on both props. I'm going to have to get a pair of those fine tip tweezers. as well as a silicone brush, as I can see other uses for it.
Joel
Posted: Thursday, May 28, 2015 - 01:36 AM UTC
Hi Joel
I must admit I'm a hopeless "it'll come in useful one day" type of modeller! But the silicone brush was a revelation when I finally got round to trying it.
I've got so fed up with clogging up brushes with masking fluid, and the props were too small to use the Mr Masking built-in brush on, so I looked around the workshop for alternatives. I think they cost a couple of quid for a set of four. After use, the remaining masking fluid just peels off and you're set to go again.
All the best
Rowan
I must admit I'm a hopeless "it'll come in useful one day" type of modeller! But the silicone brush was a revelation when I finally got round to trying it.
I've got so fed up with clogging up brushes with masking fluid, and the props were too small to use the Mr Masking built-in brush on, so I looked around the workshop for alternatives. I think they cost a couple of quid for a set of four. After use, the remaining masking fluid just peels off and you're set to go again.
All the best
Rowan
Joel_W
Associate Editor
New York, United States
Joined: December 04, 2010
KitMaker: 11,666 posts
AeroScale: 7,410 posts
Joined: December 04, 2010
KitMaker: 11,666 posts
AeroScale: 7,410 posts
Posted: Thursday, May 28, 2015 - 02:56 AM UTC
Quoted Text
Hi Joel
I must admit I'm a hopeless "it'll come in useful one day" type of modeller! But the silicone brush was a revelation when I finally got round to trying it.
I've got so fed up with clogging up brushes with masking fluid, and the props were too small to use the Mr Masking built-in brush on, so I looked around the workshop for alternatives. I think they cost a couple of quid for a set of four. After use, the remaining masking fluid just peels off and you're set to go again.
All the best
Rowan
Rowan,
I'm sold on them. Now all I have to do is find them.
Joel
thegirl
Alberta, Canada
Joined: January 19, 2008
KitMaker: 6,743 posts
AeroScale: 6,151 posts
Joined: January 19, 2008
KitMaker: 6,743 posts
AeroScale: 6,151 posts
Posted: Thursday, May 28, 2015 - 04:19 AM UTC
Nice work on the prop's so far Rowan . In the past I never had luck masking wooden prop's . Now I use pencil crayrons that I pick up at an art store and is now my preferred method for doing the laminations and graining .
Terri
Terri
Posted: Friday, May 29, 2015 - 11:13 AM UTC
Nice work on those props Rowan, I'll be looking out for those silicone brushes
Posted: Friday, May 29, 2015 - 01:18 PM UTC
Hi Mal
They should be easy to find. I think my set was from either a "£ shop" or The Works a year or so ago. The probably also turn up at Lidl every so often when they do an art materials promotion.
All the best
Rowan
They should be easy to find. I think my set was from either a "£ shop" or The Works a year or so ago. The probably also turn up at Lidl every so often when they do an art materials promotion.
All the best
Rowan
Posted: Monday, June 01, 2015 - 01:08 AM UTC
Hi again
Lest you're worried that "all's quiet on the AEG front", I'm waiting for rigging materials to arrive. I bought some Albion Alloys brass tube, and had a try at making turnbuckles and fittings. It all worked well up to a point, but the wire I've already got (which I thought would be fine enough) turned out to be a tad too thick - hence the delay. I could fudge things for the remaining interior cables, but I want to use them as an easy practice run for the big job that lies ahead when I rig the beast for real.
All the best
Rowan
Posted: Monday, June 01, 2015 - 12:06 PM UTC
I'll keep an eye out in Lidl and pop into the pound shop
I had no worries about no progress, I just khew you were working hard in the background Have you thought about "Ezee line", its elastic thread and works well?
Posted: Monday, June 01, 2015 - 12:16 PM UTC
Hi Mal
Yes, I've got some EZ Line, although I may use monofilament - we'll see. It's just wire to make the turnbuckles that I'm waiting for.
All the best
Rowan
Yes, I've got some EZ Line, although I may use monofilament - we'll see. It's just wire to make the turnbuckles that I'm waiting for.
All the best
Rowan
goodn8
Berlin, Germany
Joined: October 12, 2008
KitMaker: 709 posts
AeroScale: 651 posts
Joined: October 12, 2008
KitMaker: 709 posts
AeroScale: 651 posts
Posted: Monday, June 01, 2015 - 05:24 PM UTC
Rowan, outstanding and subtile work on the cockpit!
But think about the propellers, now it looks like it is made of 4 planks instead of a multilayer of plywood (should be at least 7-8 layers). If it is made of a massive piece of wood there will be only slight wood grain visible. I really don't want to underestimate that work and the effect is very nice (whish I could do same or better) but it not compares to the excellent cockpit work and this kit (too expensive for me!) is worth a second look. And please, I don't want you to feel annoyed
Thomas
BTW: I got 7 different Tweezer of the same style in a bundle (they all came from the same manufacturer in China!) from Amazon for 7something € last week. They work very fine!
Posted: Tuesday, June 02, 2015 - 12:20 AM UTC
Hi Thomas
Crikey - I'm certainly not annoyed. I'm flattered that you've taken an interest in the build and by your comments on the other aspects.
I'm learning at every stage on this build. So, just like with CaptnTommy spotting that the floor was too clean, I really appreciate and need feedback to steer it along the right course. I've learnt a new technique thanks to that, which I'll apply to future projects.
I totally share your concerns that the wood effect is a bit too simplified. I based it on a scale wooden propeller, but that probably didn't have enough layers to the sandwich itself. I've already started tinkering with one of the other styles of prop in the kit to up the number.
All the best
Rowan
Crikey - I'm certainly not annoyed. I'm flattered that you've taken an interest in the build and by your comments on the other aspects.
I'm learning at every stage on this build. So, just like with CaptnTommy spotting that the floor was too clean, I really appreciate and need feedback to steer it along the right course. I've learnt a new technique thanks to that, which I'll apply to future projects.
I totally share your concerns that the wood effect is a bit too simplified. I based it on a scale wooden propeller, but that probably didn't have enough layers to the sandwich itself. I've already started tinkering with one of the other styles of prop in the kit to up the number.
All the best
Rowan
Posted: Tuesday, June 02, 2015 - 11:23 AM UTC
Talking of laminated propellers, I am work on producing a set of masks to do the job, in a similar fashion to the way you did it Rowan. If you can give me some dimensions of the prop I could see if I can produce you a set of masks that will give you 7/8 laminations?
Posted: Wednesday, June 03, 2015 - 01:12 AM UTC
Cheers Mal
It may be too late in the day for this build, because I'm already underway with a couple of different masking styles, but I'd obviously be happy to try anything you come up with in future. If you make a set for the Roland C.II you've got, I still owe Richard a build of mine. The Roland includes props common to many WNW kits, so it'd be a good source for patterns.
All the best
Rowan
Posted: Wednesday, June 03, 2015 - 11:39 AM UTC
OK Rowan, it was Alex Glass, Uschi van der Rosten, that asked if I could do these masks I have, as usual, got a lot on so it might be a while but I will try and get something done sooner rather than later. The problem is trying to comup with a set that will cover all props! That is looking increasingly unlikely so a few different shaped ones in a set might be the way to go?
Posted: Wednesday, June 03, 2015 - 11:54 AM UTC
Quoted Text
The problem is trying to comup with a set that will cover all props! That is looking increasingly unlikely so a few different shaped ones in a set might be the way to go?
Hi Mal
Yep - I think it would be almost impossible to create a "one-size fits all" set - there are just so many variations in shape which all effect the patterns created by the layers.
All the best
Rowan