This is my second attempt to do a plane build log. The first I think has become a long term hangar queen so I hope this is more successful.
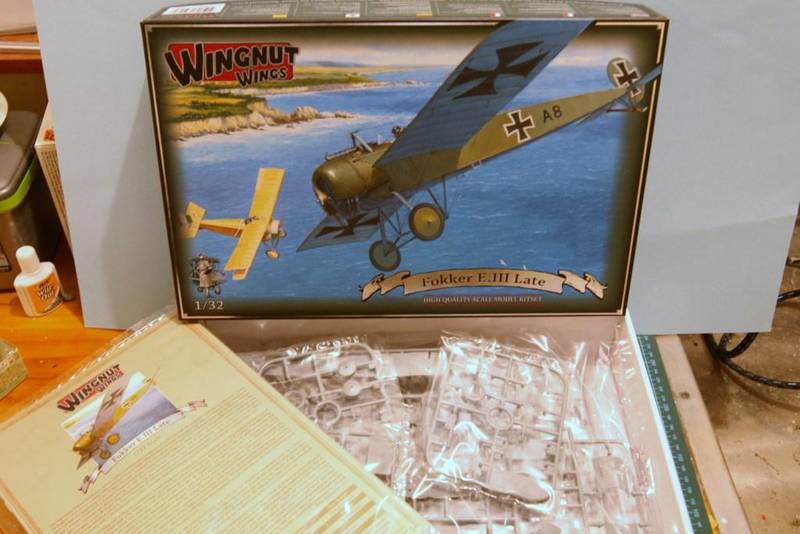
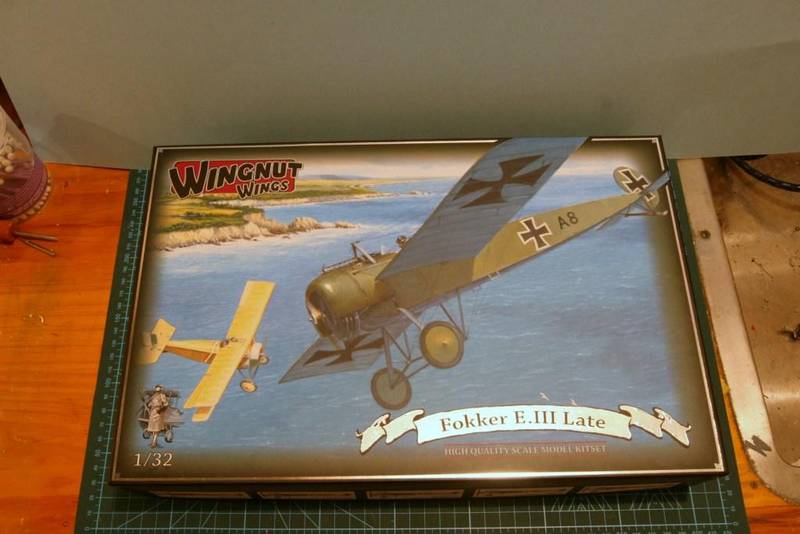
I bought this kit about two years ago and fortunately I think it just fits into the first year of the war for this campaign. I think everybody is familiar with the Eindeckers and Wingnut Wings so I will skip the plane history.
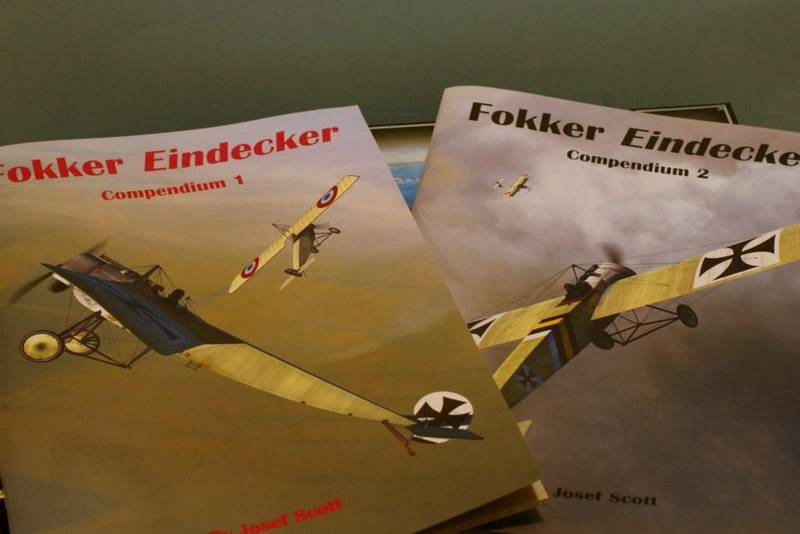
At the time I also bought a couple reference magazines from Windsock which are very interesting and should make sure it all stays on track though I think WnW have it pretty much covered.
The kit offers markings for 5 planes and I have chosen option A, since it comes from a production batch in October 1915.
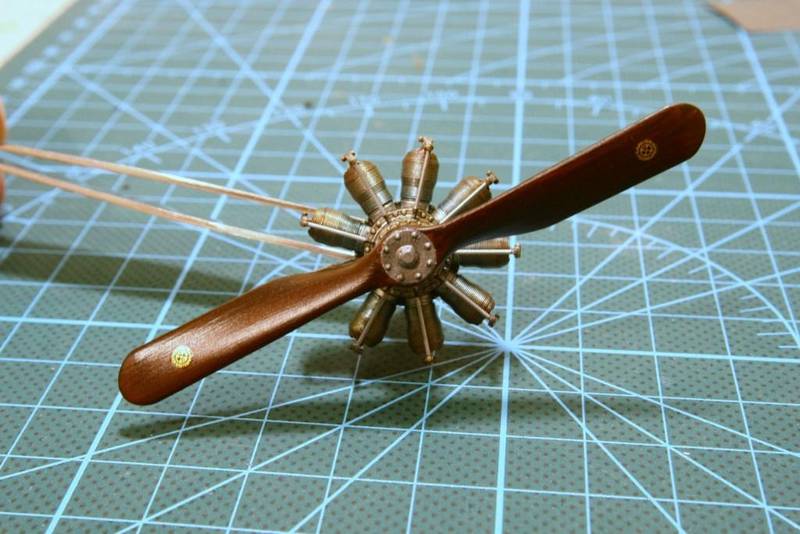
For no good reason I decided to start at the front with the engine and propeller.
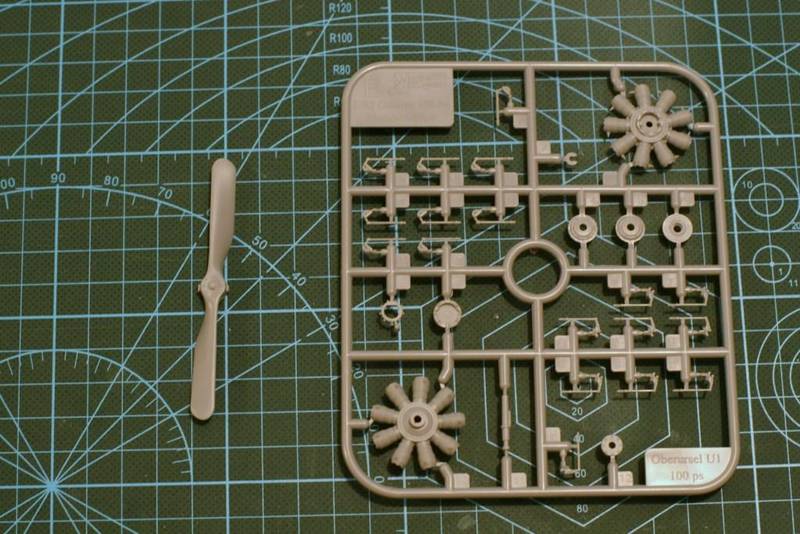
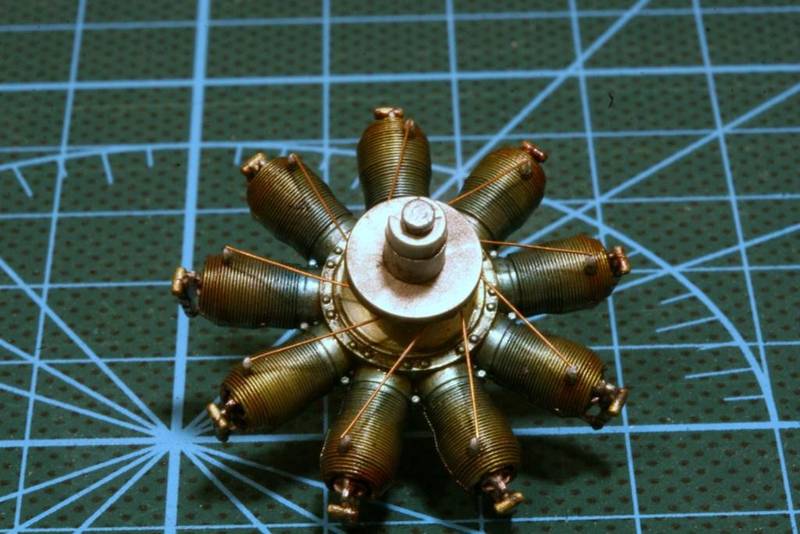
The engine sprue is multi use, being both Oberursel and Gnome, with the only difference being which rockers to use.
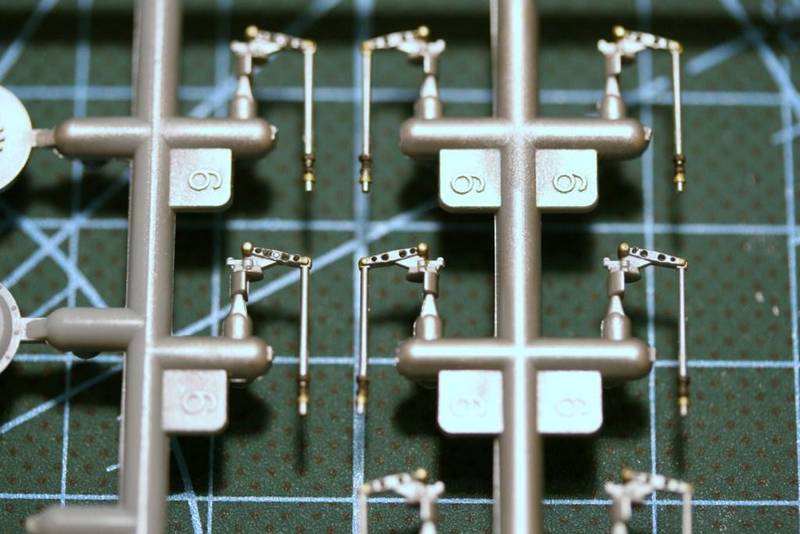
I drilled out the holes in the linkage but I don't think you will ever see that effect unless you turn the kit upside down.
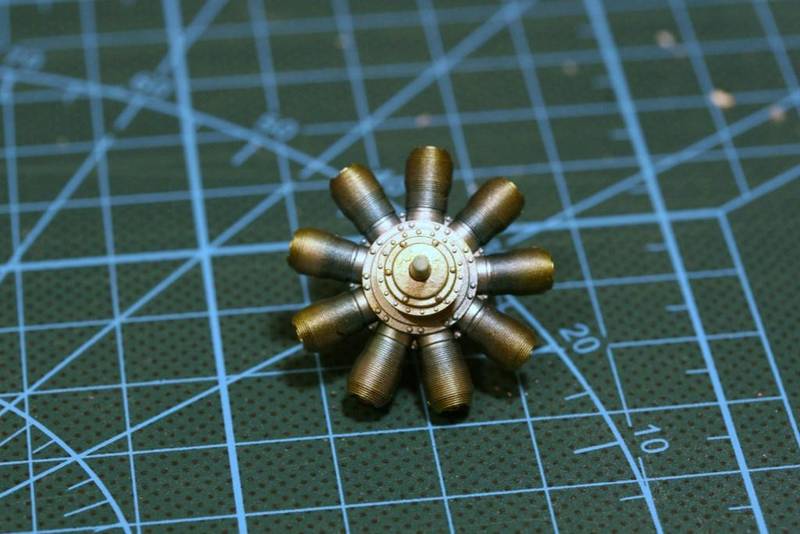
The engine was done with various Alclad shades
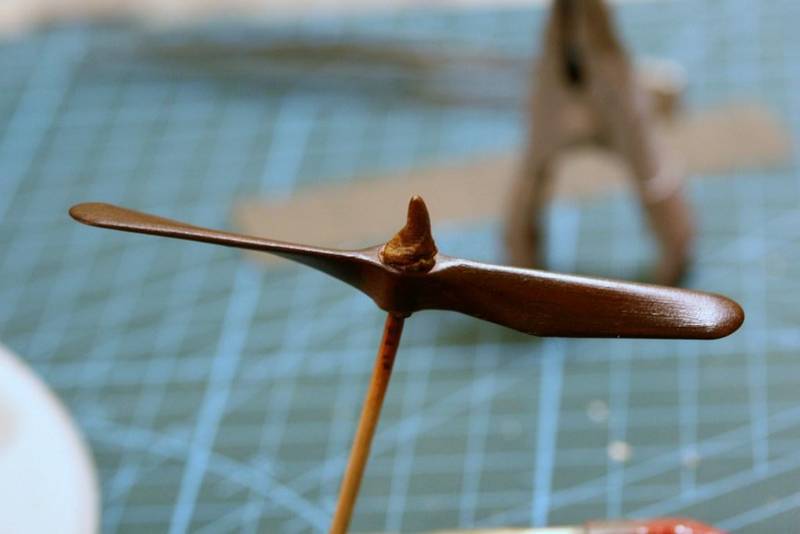
And the propeller painted and oiled for effect.
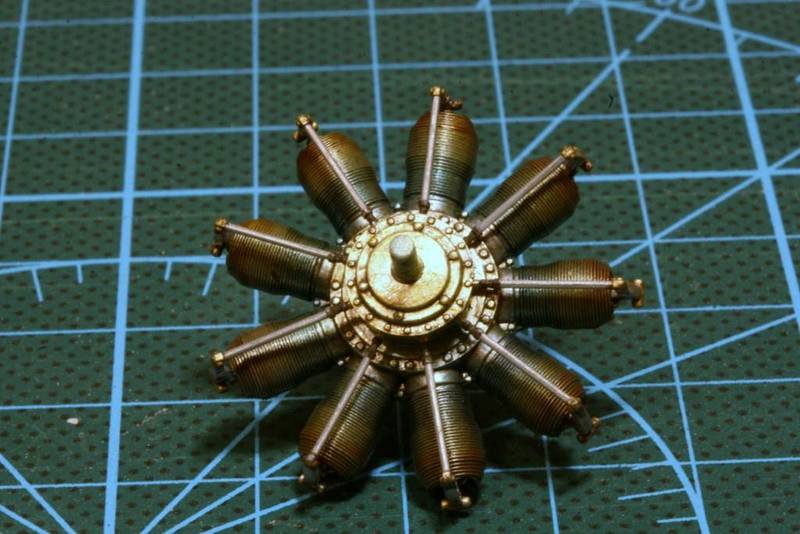
I "oiled and grimed" the engine to tone down the base colours and added the wiring
The propeller is given it maker labels and a coat of transperent yellow
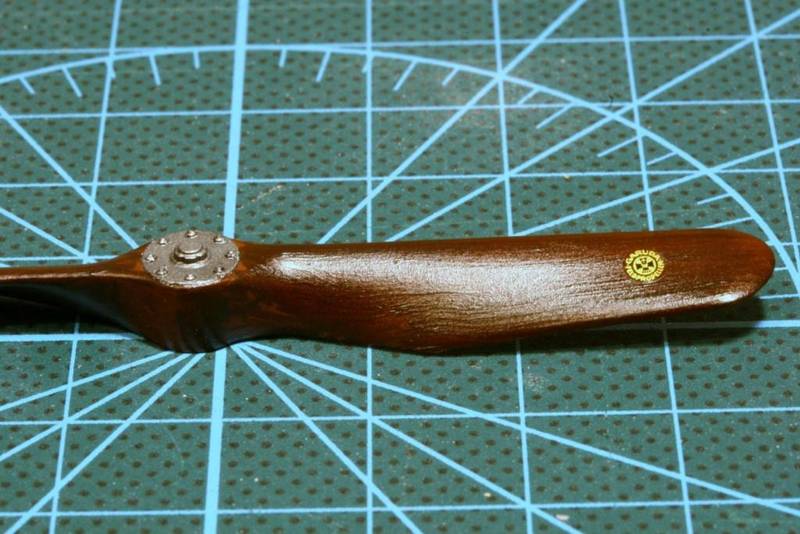
And it's done.
Next update hopefully the cockpit.
cheers
Michael
Early Aviation
Discuss World War I and the early years of aviation thru 1934.
Hosted by Jim Starkweather
Canvas Falcon 1 - WnW Fokker E.III Late
Posted: Thursday, April 09, 2015 - 04:14 PM UTC
Posted: Friday, April 10, 2015 - 01:41 AM UTC
Hi Michael
What you've done so far on the engine and prop is simply gorgeous! I love the colour toning on the cylinders and the subtle woodgrain.
I can't wait to see what you do with the "office".
All the best
Rowan
What you've done so far on the engine and prop is simply gorgeous! I love the colour toning on the cylinders and the subtle woodgrain.
I can't wait to see what you do with the "office".
All the best
Rowan
Posted: Sunday, July 19, 2015 - 03:53 PM UTC
Thank you Rowan!
I am embarrassed that it's been three months since I looked at this or even the kit. I struggle with getting motivated to build planes, so much happier with things that float
But its a campaign and lacking serious progress I put aside my fifty shades of grey, that's ship paints!! and with bad weather this weekend managed to almost crack the "office" or so I thought.
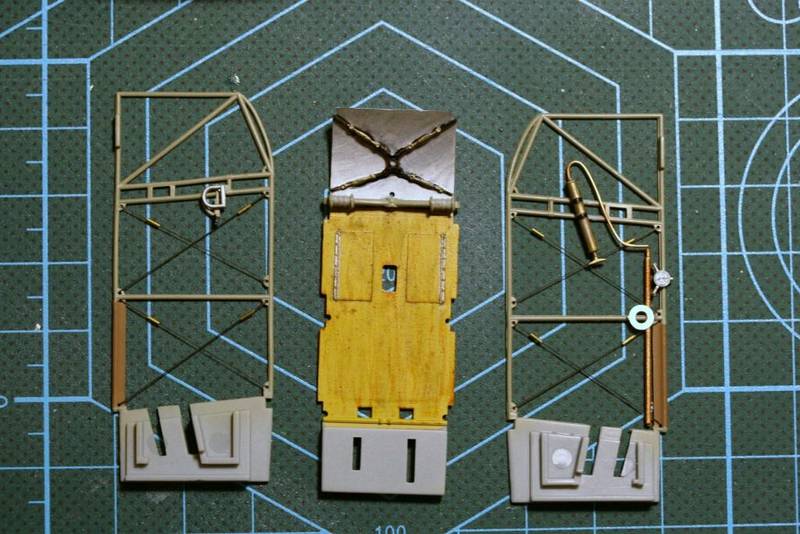
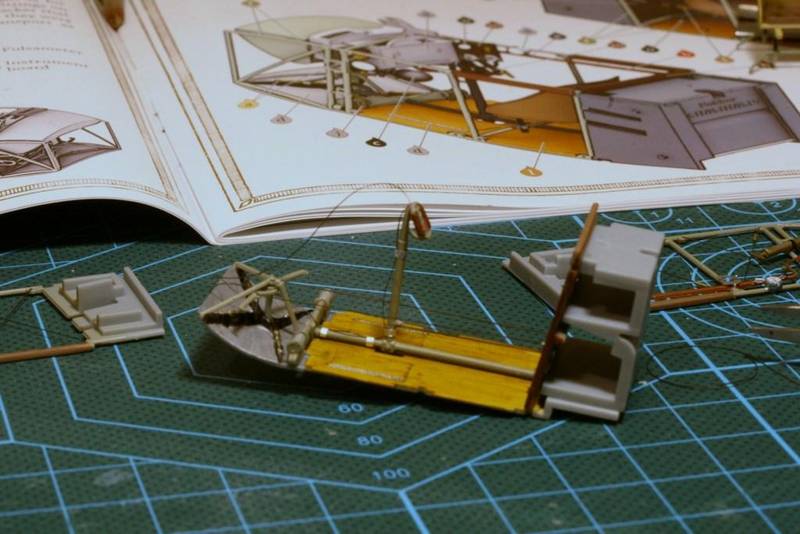
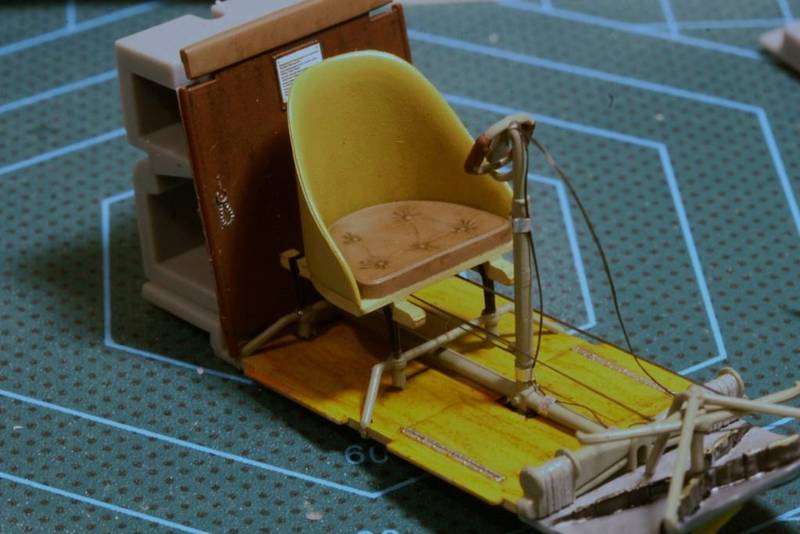
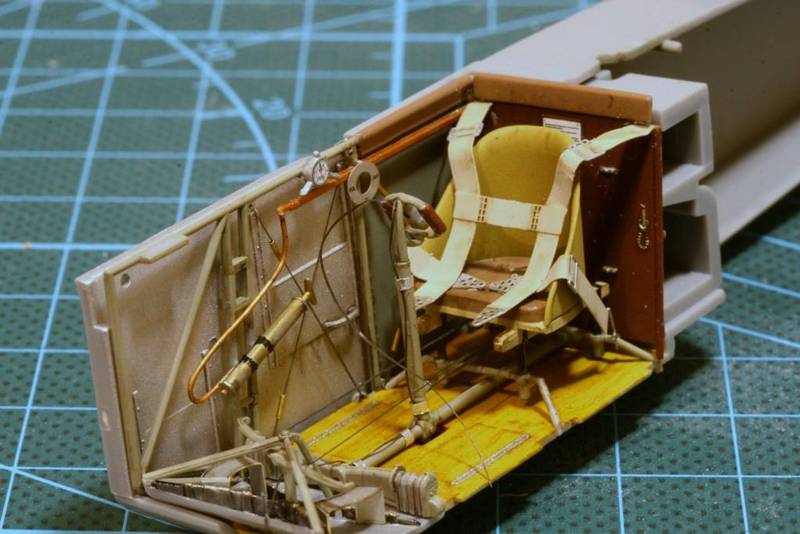
I started with the floor and sides, though I think I need to work on my wood effects. Maybe some french mud will tone it down. The bracing on the side really needed turnbuckles but with none to hand some brass tubes provide the effect.
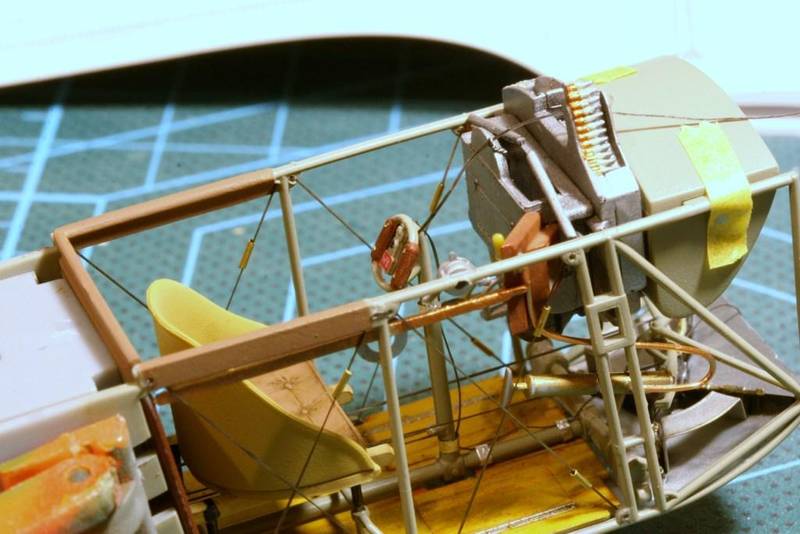
I added the flight control cables with some ez-line, and added a cable to the back of the stick and a cable for the machine gun.
First big error. I had assembled the seat and frame but then when I went to install it realised the cables went through the seat framing. I added it the list of things I learn every day!
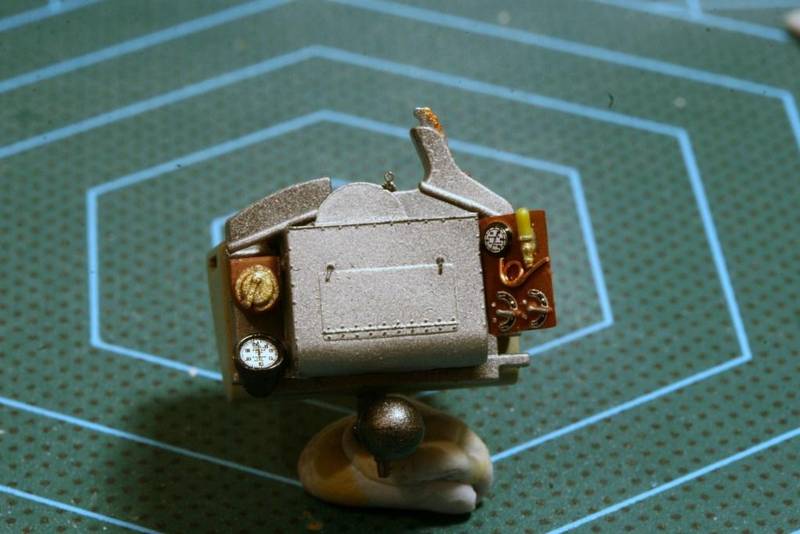
The control panel. I added some copper wire to replace the molded on piece and a little loop on top of the used casings bin for the MG cable.
And I thought I was pretty much done. Ready to button it up but a last quick check of the instructions showed I had forgotten the seat belts. Oh well, there should be another wet weekend along shortly.
Looking at the last photo, I think it needs some oil and dirt to tone it down. That can come with the belts.
cheers
Michael
Posted: Monday, July 20, 2015 - 01:53 AM UTC
Hi Michael
Great to see you back with more excellent progress!
I've suffered a similar loss of momentum to my AEG through work keeping me away from the workbench. I need a few clear days to build up a head of steam again.
All the best
Rowan
Great to see you back with more excellent progress!
I've suffered a similar loss of momentum to my AEG through work keeping me away from the workbench. I need a few clear days to build up a head of steam again.
All the best
Rowan
Posted: Monday, July 20, 2015 - 03:25 PM UTC
Thanks Rowan. I have followed the AEG build with interest. It looks a mighty beast compared to the Eindecker. Maybe something I would attempt for Canvas Falcon 3 if the campaigns continue.
I looked at the seat belts tonight. I see they are attached by loops to the seat frame. It has to come off again. Ah well, I know it says somewhere in modelling 101...read the instructions closely
cheers
Michael
I looked at the seat belts tonight. I see they are attached by loops to the seat frame. It has to come off again. Ah well, I know it says somewhere in modelling 101...read the instructions closely
cheers
Michael
Posted: Sunday, July 26, 2015 - 12:15 PM UTC
The weather gods smiled and rained on us.
I got the seat belts installed. They were a lot more fiddly than I had anticipated. The brass was much stiffer than I am use to in ship PE and despite my attempts to anneal remained tough to bend to shape. The shoulder belts were also much bigger than required and it wasnt until I looked at some other builds that I realised that WnW had provided excess belts that just needed to be trimmed.
The fit is very good
Though as expected there will be not much to see once its all buttoned up.
cheers
Michael
Posted: Monday, July 27, 2015 - 02:30 AM UTC
Hi Michael
It's looking beautiful! I wonder if you can get the shoulder straps to sit down a bit deeper into the seat and "flop" over the edge? I know what you mean about their stiffness - I battled slightly with their cousins in the AEG too.
All the best
Rowan
It's looking beautiful! I wonder if you can get the shoulder straps to sit down a bit deeper into the seat and "flop" over the edge? I know what you mean about their stiffness - I battled slightly with their cousins in the AEG too.
All the best
Rowan
Posted: Monday, July 27, 2015 - 03:22 PM UTC
Michael,
Despite your battle with the seat belts, your work looks fantastic! And these WNW kits are marvellously detailed.
Best Wishes,
Gary
Despite your battle with the seat belts, your work looks fantastic! And these WNW kits are marvellously detailed.
Best Wishes,
Gary
Posted: Tuesday, July 28, 2015 - 04:59 AM UTC
Quoted Text
Hi Michael
It's looking beautiful! I wonder if you can get the shoulder straps to sit down a bit deeper into the seat and "flop" over the edge? I know what you mean about their stiffness - I battled slightly with their cousins in the AEG too.
All the best
Rowan
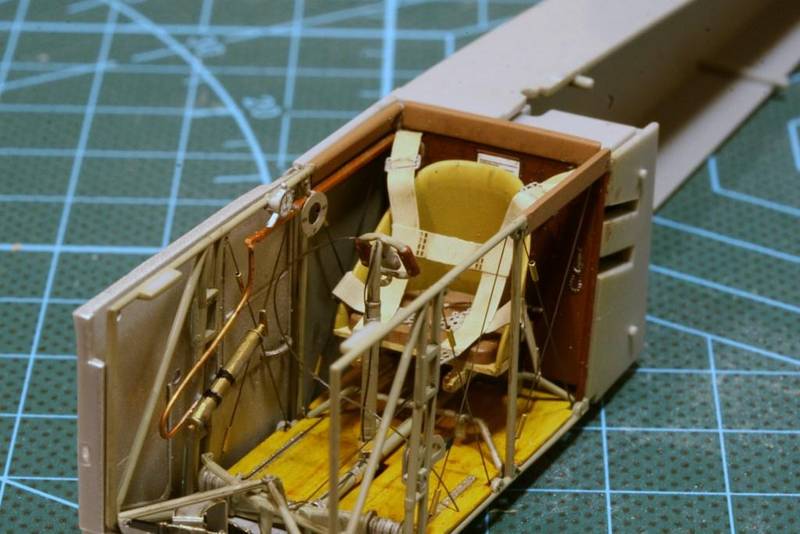
Thanks Rowan, you are right about the belts!
I have made a bit of a rod for my own back here. Forgetting the seat belts at the beginning has compounded the problem. I guess ideally you would shape the belts over the seat before painting. I have the option of removing the seat (again) and shaping the belts, accept all the damage to the paint and just redo all of that again, or option 2 which is to try and push the belts into the seat without damaging the paint. I will try the latter first though the seat sort of floats on four very slim anchor points so there is not much resistance. I will post a picture and see if there is any improvement.
cheers
Michael
Posted: Tuesday, July 28, 2015 - 05:02 AM UTC
Quoted Text
Michael,
Despite your battle with the seat belts, your work looks fantastic! And these WNW kits are marvellously detailed.
Best Wishes,
Gary
Thanks Gary.
The kit and detail is amazing. I have a couple more, so if Canvas Falcon extends over the next few years I will build another for sure.
cheers
Michael
Posted: Monday, August 03, 2015 - 01:28 PM UTC
A brief update about a lot of work but not many photos.
I pushed the seatbelts deeper into the seat but without redoing the whole seat I think that is the best I am going to achieve.
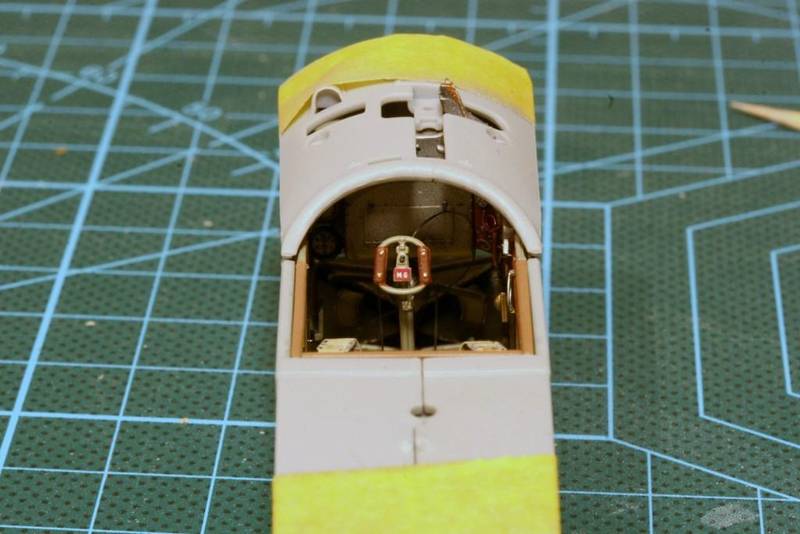
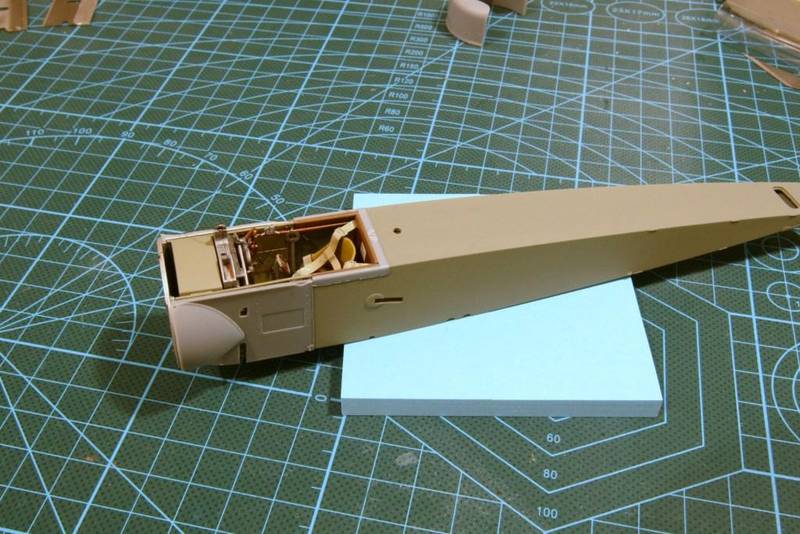
I put the cockpit into the fuselage. It fit perfectly. The fuselage itself only need some slight filling along the seam and some light sanding. On the underside WnW cleverly use the stitching to hide the join.
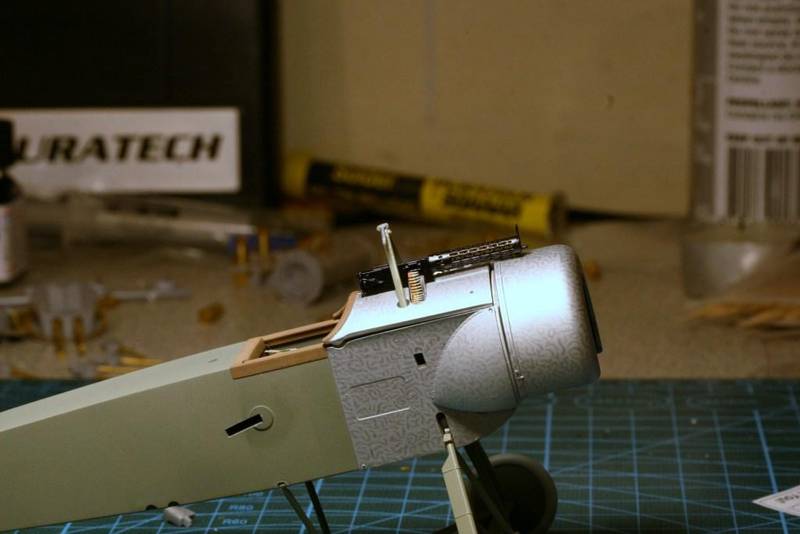
The fuselage and wings have been painted RLM grey. Next up is the nose with its "turned" finish effect. I am not sure how that's going to turn out. WnW give some tips on the website so I will see how that works.
cheers
Michael
Posted: Wednesday, August 12, 2015 - 02:50 PM UTC
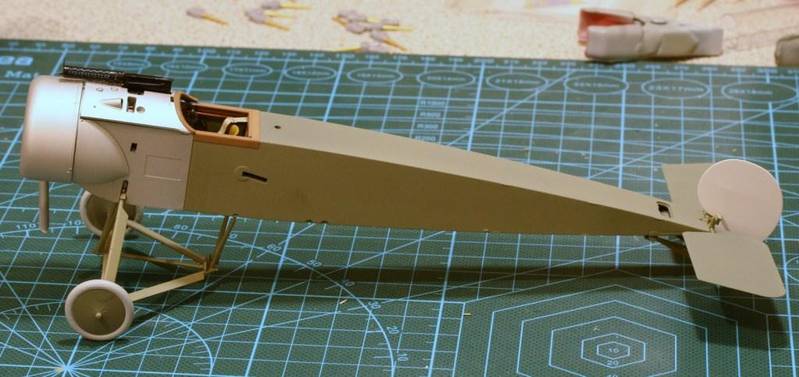
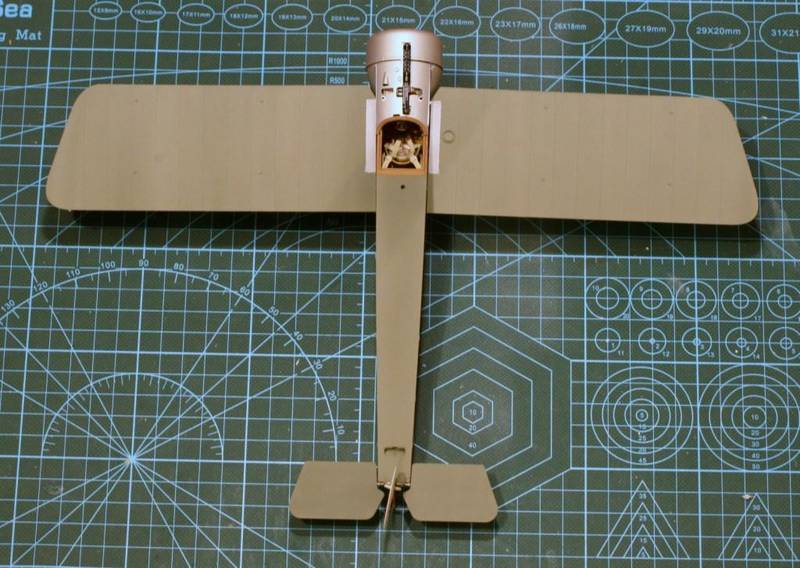
A small update. All the key elements bar one thing are painted and have been dry fit assembled to see how it looks.
There are a couple of touch ups to do but other than that I am happy with this as a base to start the finishing process on.
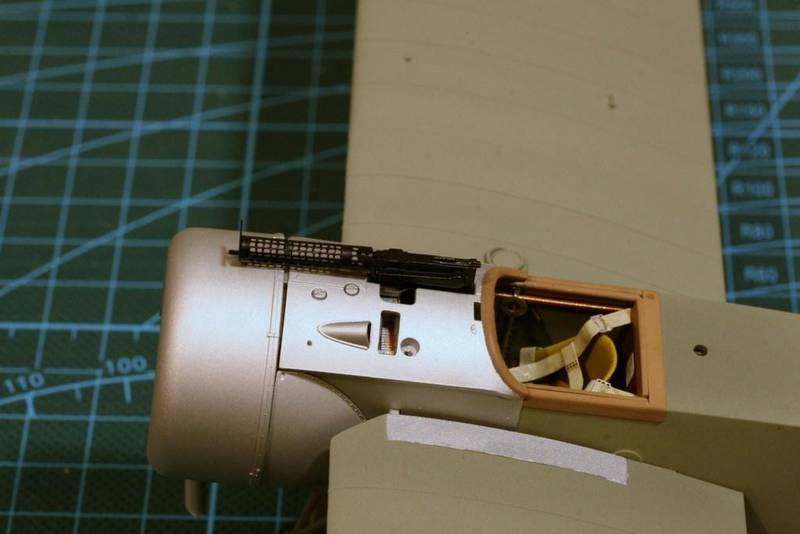
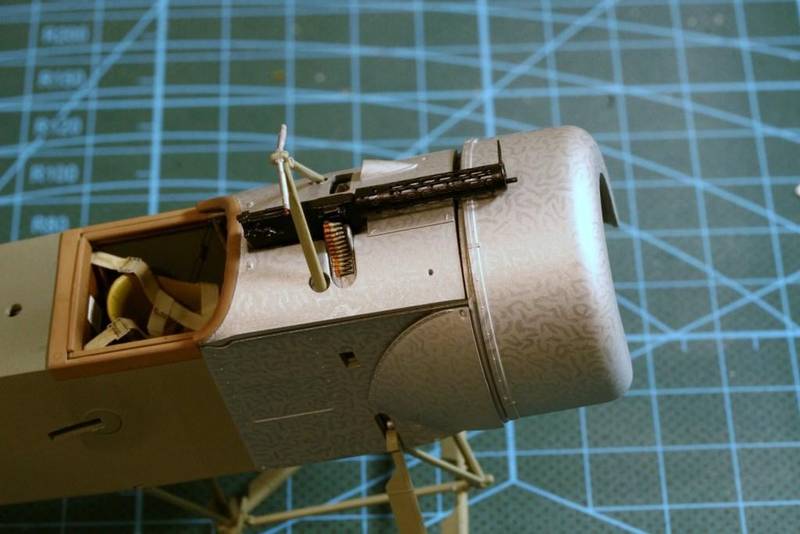
I had much better luck with softening the gun barrel and it rolled very easily.
Its painted with Alclad gun metal but needs to a be a touch lighter I think.
The next step is painting the "turned" effect on the cowling etc. I have viewed a range of styles on other models so I will be happy with a close approximation if I get there.
Lastly,the wings are a very tight fit but when on sit very slightly below the horizontal. I don't know if that is right because I was going to use Ez-line for the rigging and that won't be strong enough to raise them if its required.
cheers
Michael
Posted: Monday, August 17, 2015 - 12:43 PM UTC
Well I squiggled away for several hours to complete the "turned" cowl effect. It was challenging to paint silver on aluminium and often it just seemed to disappear. Rotating the pieces helped but with my eyes this took several nights.
In some light the chrome silver is very bright and in others a dirty gray. From a distance its invisible but close up the effect is pretty much like the pictures. Windsock shows dozens of styles so there is no right way.
All the pieces are still dry fitted. I will attach the necessary rigging points after putting on a protective coat.
Which leads to some help required.
The metal effect is enamel but the body acrylic. Can I use an acrylic clear coat or does it have to be enamel? Would Future work equally across both? Any comments gratefully received.
cheers
Michael
Posted: Tuesday, August 18, 2015 - 03:00 AM UTC
Hi Michael,
Your work looks great! Your cowling in particular is inspiring. I've been using Future over artist acrylics, Testors MM enamels, and Tamiya enamels in mixed and single layer situations. There've been no adverse reactions anywhere. Future is pretty benign in that respect.
The only trouble I have had with Future has been when applying a pin wash. If the solvent used in the pin wash is too strong, it will eat holes in the Future.
Hope this helps,
Gary
Posted: Tuesday, August 18, 2015 - 12:18 PM UTC
The effect on the cowling is great. Nice and subtle effect.
The details and paint job on the propeller and engine is fantastic! Are you sure the engine will not start if you crack the propeller?
This is going to be an awesome build.
The details and paint job on the propeller and engine is fantastic! Are you sure the engine will not start if you crack the propeller?
This is going to be an awesome build.
Posted: Tuesday, August 18, 2015 - 02:10 PM UTC
Quoted Text
Hi Michael,
Your work looks great! Your cowling in particular is inspiring. I've been using Future over artist acrylics, Testors MM enamels, and Tamiya enamels in mixed and single layer situations. There've been no adverse reactions anywhere. Future is pretty benign in that respect.
The only trouble I have had with Future has been when applying a pin wash. If the solvent used in the pin wash is too strong, it will eat holes in the Future.
Hope this helps,
Gary
Thanks Gary,
I have used Future before and I have some Alclad clear cote I thought I would try but maybe another time for that.
cheers
Michael
Posted: Tuesday, August 18, 2015 - 02:13 PM UTC
Quoted Text
The effect on the cowling is great. Nice and subtle effect.
The details and paint job on the propeller and engine is fantastic! Are you sure the engine will not start if you crack the propeller?
This is going to be an awesome build.
Thanks Jesper,
I see you have re-animated your Albatros build so looking forward to seeing that.
cheers
Michael
Posted: Wednesday, September 02, 2015 - 01:24 PM UTC
Well in modelling despair and happiness go hand in hand.
After laying down some coats of Future the decals went on well until I got to the wings. The very large wing decals refused to lie flat over the ribs. Despite a week of micro sol the small tents remained over the ribs.
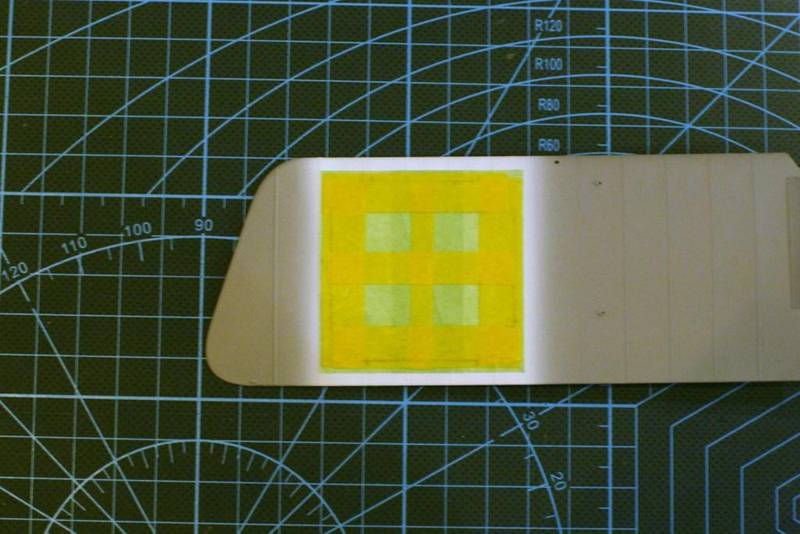
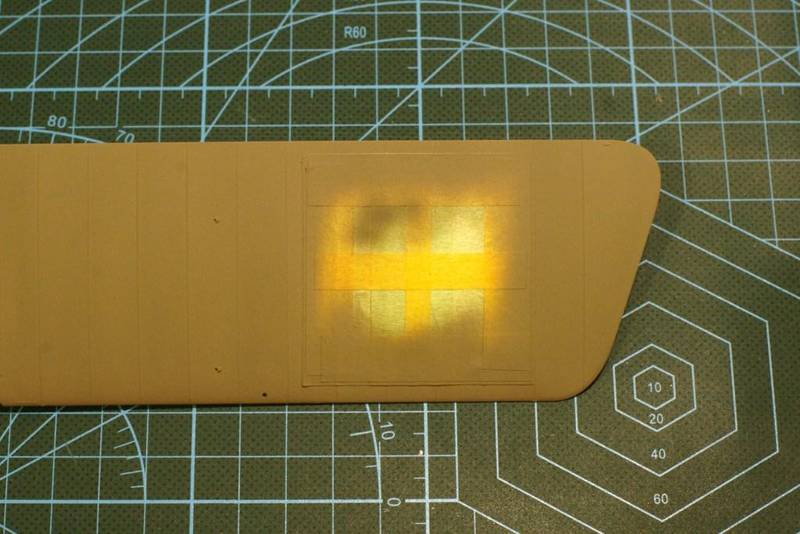
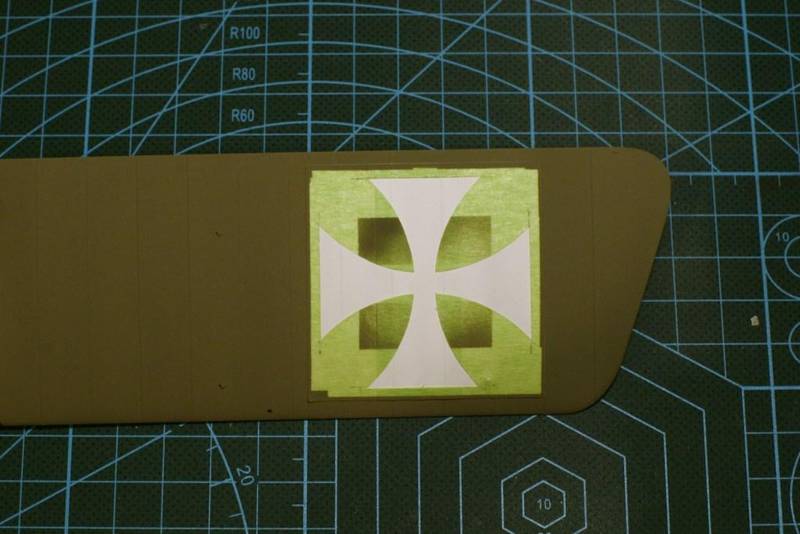
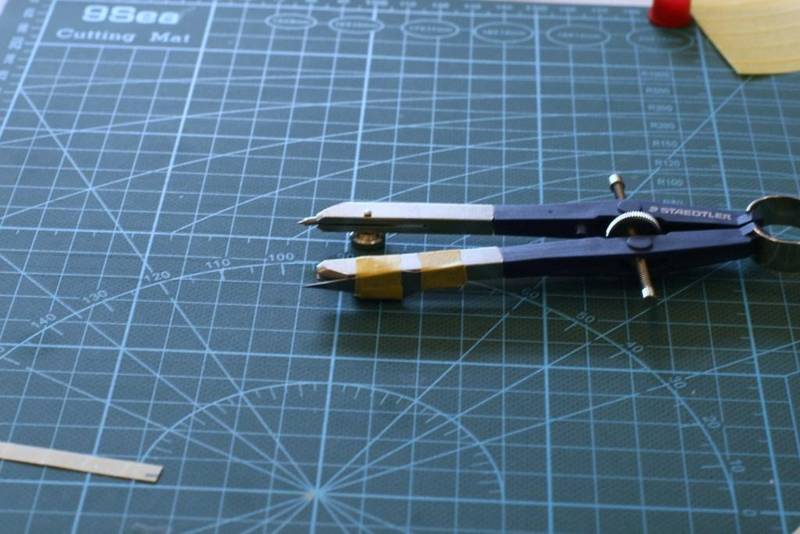
I decided to take the plunge and go for a first me and try and fashion some paint masks to replicate the decals. I am sure there are specialised products for doing this but I went with what was at hand. I forgot to take any photos but I carefully measured the decals for the template. After much trial and error I ended up using some household masking tape and an arc cutter fashioned from my son's school stationery set. I can tell you the arc of the black cross is from a 58mm circle.
In NZ we call this the "No.8 wire" approach.
The cutter
I stripped the wings back to the plastic, reprimed and applied the white square base.
The masks had to be strenghtened with Tamiya tape to get them off the backing paper.(Don't use art tracing paper for this!) I made four rather than go for re-use since I wasn't that sure about them.
Put down the final colour coat
And then the first moment of truth
Phew. The cutter had gone through the overlapping layers of tape.
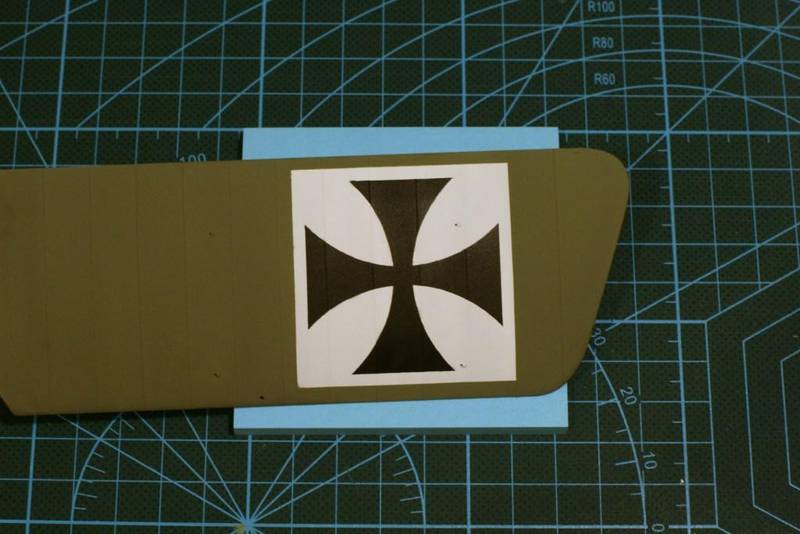
On went the black and then the rest of mask removed
Very chuffed with that!
I can see why people swear by paint masks. The effect is much more satisfying...especially when you've done it yourself.
Next stop rigging.
cheers
Michael
Posted: Sunday, September 27, 2015 - 12:35 PM UTC
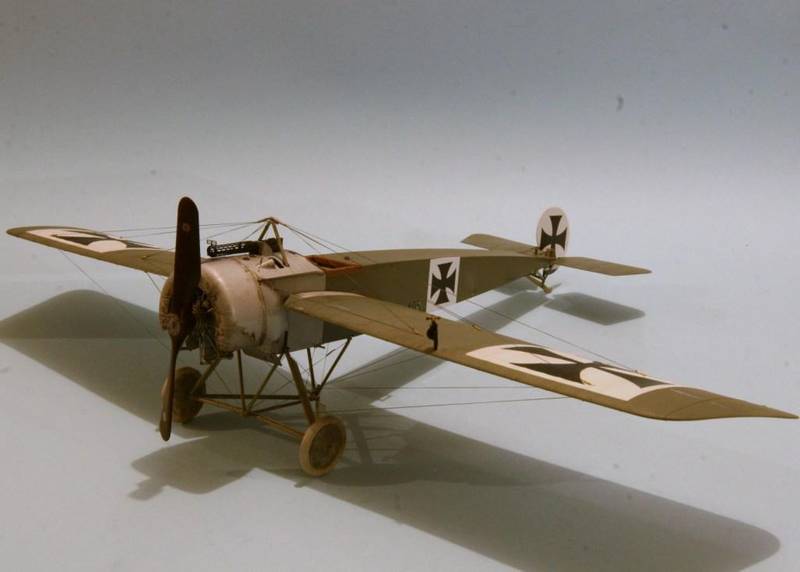
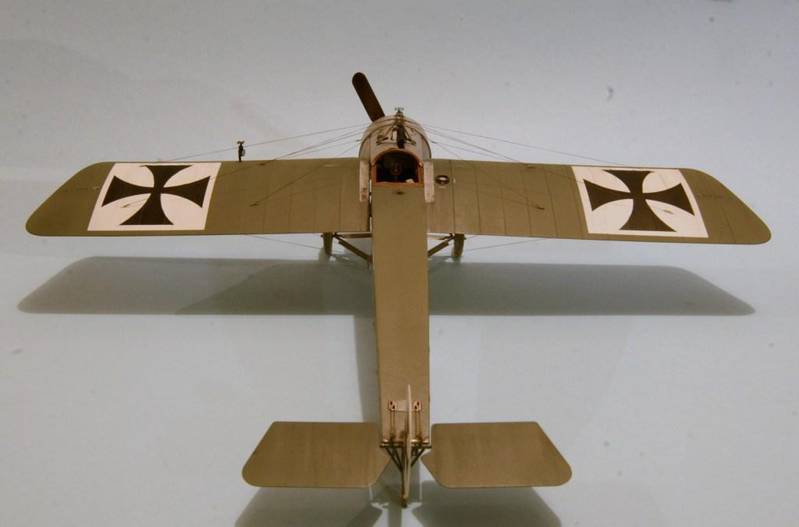
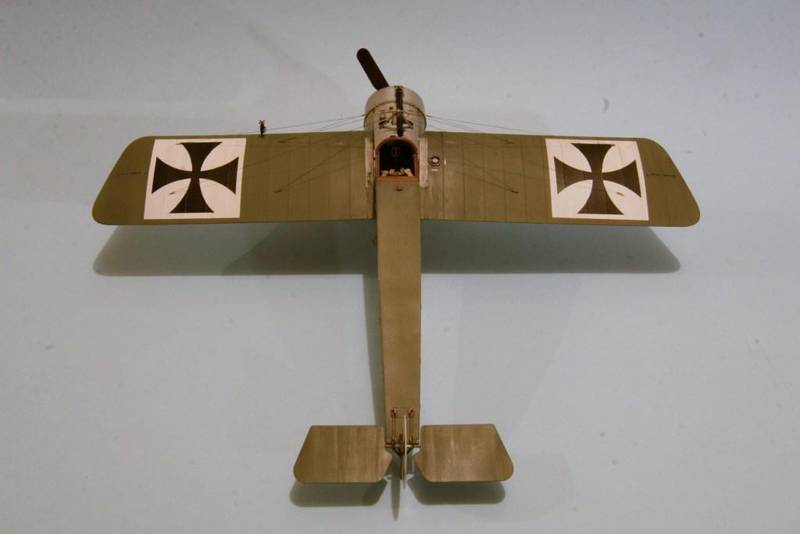
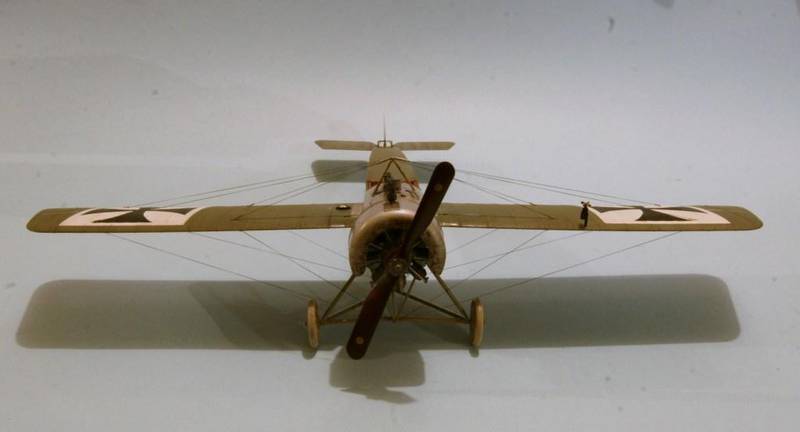
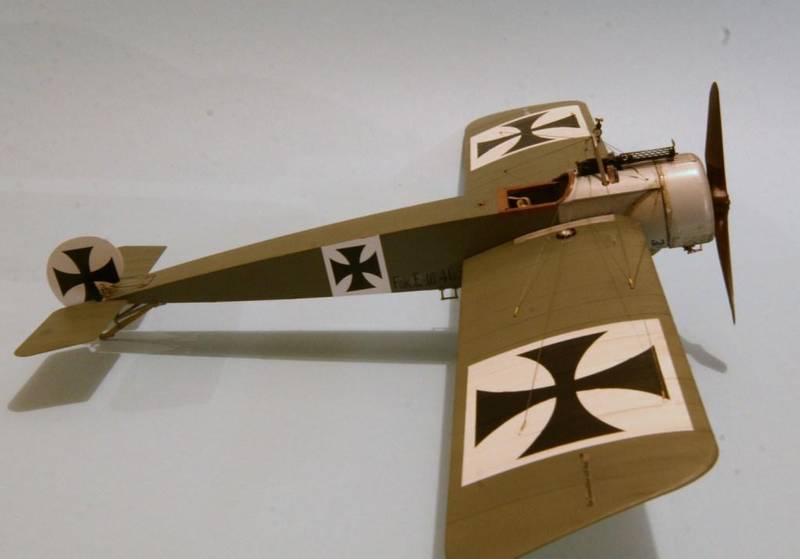
Well a month on and I think this is finished.
Of course, conquering the rigging was the first order and for me that took some figuring.
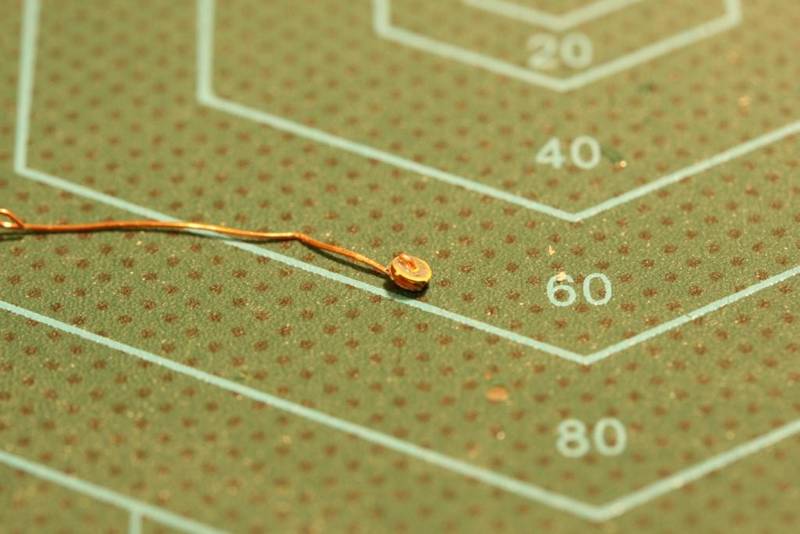
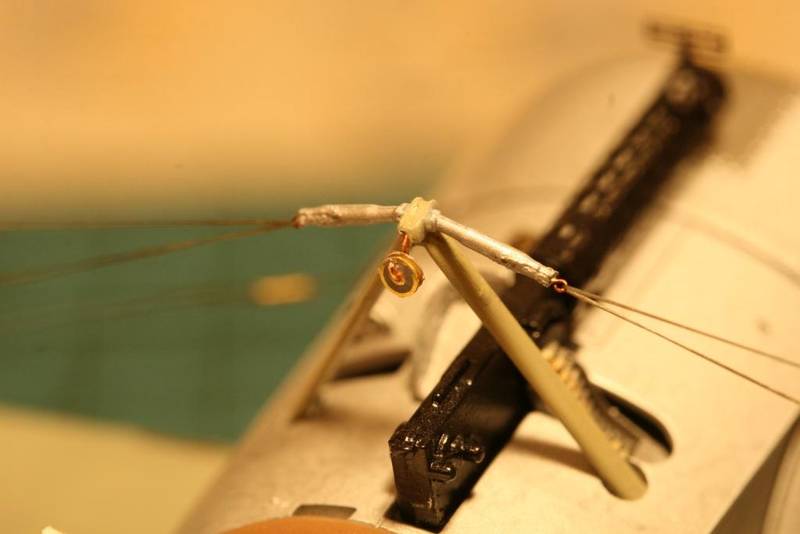
First off the pulley had to be replaced. The styrene piece would not have withstood the tension of the line and a replacement was made (helped by the fact that I lost the orginal part anyway). A couple of 1/350 scale Dreadnought coal scuttle hatches and a piece of copper wire did the job.
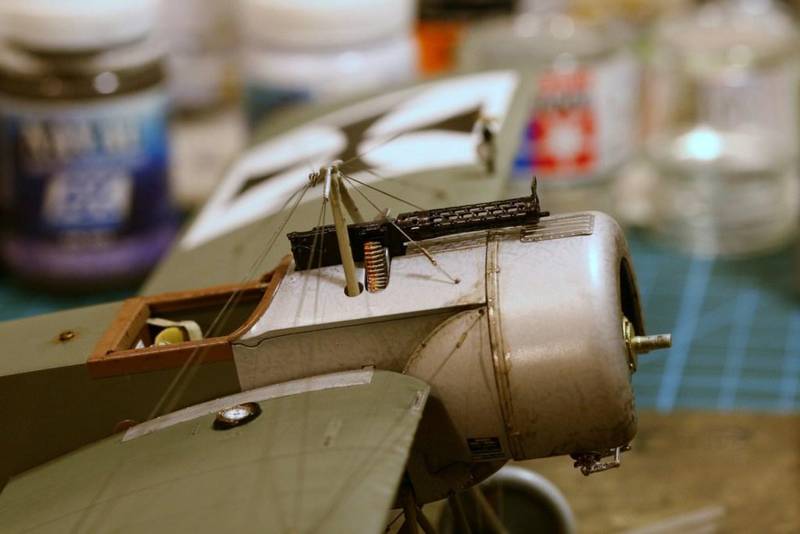
For the rigging I used Bob's Buckles tubes and eyelets. (I had them from my ship rigging). For the wings I drilled through and connected the opposing turnbuckles with copper wire so it would be easy to adjust the angle and direction.
After the rigging I tried some weathering to show a bit of oil and grease.
When you look at the photos of the planes they are nearly all formal shots of pilots or groups of pilots and I guess the ground crew furiously polish up the metal so it is spotless but the planes are well marked. A couple of unposed photos show lots of engine grime. Interestingly in a recent mag there was a flight of a replica EIII in Australia which showed the plane on the ground nice and clean, but the aerial photos show plently of oil on the engine covers.
So its done though I might yet play around with the staining effects.
Roll on Canvas II, I guess.
cheers
Michael
Of course, conquering the rigging was the first order and for me that took some figuring.
First off the pulley had to be replaced. The styrene piece would not have withstood the tension of the line and a replacement was made (helped by the fact that I lost the orginal part anyway). A couple of 1/350 scale Dreadnought coal scuttle hatches and a piece of copper wire did the job.
For the rigging I used Bob's Buckles tubes and eyelets. (I had them from my ship rigging). For the wings I drilled through and connected the opposing turnbuckles with copper wire so it would be easy to adjust the angle and direction.
After the rigging I tried some weathering to show a bit of oil and grease.
When you look at the photos of the planes they are nearly all formal shots of pilots or groups of pilots and I guess the ground crew furiously polish up the metal so it is spotless but the planes are well marked. A couple of unposed photos show lots of engine grime. Interestingly in a recent mag there was a flight of a replica EIII in Australia which showed the plane on the ground nice and clean, but the aerial photos show plently of oil on the engine covers.
So its done though I might yet play around with the staining effects.
Roll on Canvas II, I guess.
cheers
Michael