OFFICIAL: In Foreign Service Campaign
MichaelSatin
 Campaigns Administrator
Colorado, United States
Joined: January 19, 2008
KitMaker: 3,909 posts
AeroScale: 2,904 posts
Posted: Tuesday, June 30, 2015 - 04:00 AM UTC
Welcome to the 2015 In Foreign Service Campaign!
The campaign will run from July 1, 2015 through December 31, 2015.
If you haven't signed up yet, or want to see the rules, go
here.
Please post your initial and in-progress photos as well as campaign discussion in this thread. Please post your finished build photos in the
campaign gallery.
Looking forward to some fine builds of aircraft in foreign colors here! On with the show!
Michael

On the bench:
Sorta depends on your definition of "on the bench"...
Oregon, United States
Joined: January 13, 2014
KitMaker: 107 posts
AeroScale: 105 posts
Posted: Tuesday, June 30, 2015 - 08:33 AM UTC
I'll be building a venerable Revell 1/72 Republic P-47 Thunderbolt kit for this campaign. After my Airacomet got put on the shelf recently, this kit looks like a nice clean build. So I'll be hoping to turn this:

To this fighter of the Mexican Expeditionary Force, using markings from Aztec Decals:

On the WIF Workbench: 1/72 IL-2 Sturmovik (Cuban Air Force)
"I shall either find a way or I shall make one." - supposedly, Hannibal Barca

#259
Massachusetts, United States
Joined: October 23, 2011
KitMaker: 2,265 posts
AeroScale: 1,715 posts
Posted: Tuesday, June 30, 2015 - 02:06 PM UTC
The US Army embraced the Canadian DHC-4 Caribou in a big way.
I have two Amodel kits

I'm going for this grey and white transit scheme, as seen on Kwajalein in the 1970s.

Ontario, Canada
Joined: February 04, 2008
KitMaker: 2,507 posts
AeroScale: 1,814 posts
Posted: Friday, July 17, 2015 - 03:32 AM UTC
This is my entry in this campaign:-

Built under licence in Canada by Canadair and exported to Greece,United Kingdom,South Africa and Pakistan.
I will be building the United Kingdom model.

" The Die Hards"
43rd MIDDLESEX REGIMENT
MACHINE GUN CORPS
XXX CORP
The most effective way to do it, is to do it.
- Amelia Earhart
Oregon, United States
Joined: January 13, 2014
KitMaker: 107 posts
AeroScale: 105 posts
Posted: Thursday, August 06, 2015 - 05:31 AM UTC
Quick update: here's an not-so-great picture of the kit I'm working with..

And the decal sheet from Aztec decals I'll be using to transform it into a Mexican Expeditionary Force fighter:

On the WIF Workbench: 1/72 IL-2 Sturmovik (Cuban Air Force)
"I shall either find a way or I shall make one." - supposedly, Hannibal Barca
Oregon, United States
Joined: January 13, 2014
KitMaker: 107 posts
AeroScale: 105 posts
Posted: Friday, August 07, 2015 - 08:22 AM UTC
On the WIF Workbench: 1/72 IL-2 Sturmovik (Cuban Air Force)
"I shall either find a way or I shall make one." - supposedly, Hannibal Barca
Oregon, United States
Joined: January 13, 2014
KitMaker: 107 posts
AeroScale: 105 posts
Posted: Monday, August 17, 2015 - 04:02 AM UTC
The Thunderbolt is finished! This particular set of markings represents an aircraft piloted by Capt. Radames Gaxiola, commanding officer of the 201st Squadron/Mexican Expeditionary Air Force. As part of the Allied war effort 300 Mexican personnel served in the pacific theater. Their missions were flown over the Philippines and Taiwan in 1945.


[img]
On the WIF Workbench: 1/72 IL-2 Sturmovik (Cuban Air Force)
"I shall either find a way or I shall make one." - supposedly, Hannibal Barca

#259
Massachusetts, United States
Joined: October 23, 2011
KitMaker: 2,265 posts
AeroScale: 1,715 posts
Posted: Monday, August 17, 2015 - 07:37 AM UTC
You knocked that out pretty well! a very interesting subject.
I havent openned the box on my Caribou project since my first post, but Im wrapping up some other stuff this week, so I expect to get back to this campaign soon.
Ontario, Canada
Joined: February 04, 2008
KitMaker: 2,507 posts
AeroScale: 1,814 posts
Posted: Saturday, September 05, 2015 - 10:53 PM UTC
My build update:


" The Die Hards"
43rd MIDDLESEX REGIMENT
MACHINE GUN CORPS
XXX CORP
The most effective way to do it, is to do it.
- Amelia Earhart
Germany
Joined: March 05, 2015
KitMaker: 28 posts
AeroScale: 28 posts
Posted: Monday, September 07, 2015 - 10:40 PM UTC
So I´m starting with a 1/72 Italeri Starfighter from the german air force.
I hope for an easy quick build.


#259
Massachusetts, United States
Joined: October 23, 2011
KitMaker: 2,265 posts
AeroScale: 1,715 posts
Posted: Tuesday, September 08, 2015 - 03:42 AM UTC
Ha Jan, good to see you again, and another kit started.

I started my kit in here too. actually two kits - I am building 1/144 scale, so I always build twins.
This is the AModel DHC-4 Caribou kit.
mostly, 144 scale aircraft are too small and dark to warrent interior detail, but this model has a lot of glass and light, so something may be visible inside.
The kits have for interior the longitudal benches for paratroops. but I am building a civilian passenger version, so I scratch built the seats.

room for 10 grams of Lead ballast under the cockpit floor.


#363
Pennsylvania, United States
Joined: January 08, 2014
KitMaker: 425 posts
AeroScale: 401 posts
Posted: Sunday, September 13, 2015 - 02:33 AM UTC
Hasegawa 1:48 Ki-61-I Tei "Tony"
Well, I still can't upload to my gallery but I got started on this yesterday. I'll post pics when I can.
I am building Hasegawa's excellent Ki-61 OOB with nothing but a change of decals and a set of PE seat belts. It is a very straightforward kit, excellent fit and very accurate. I just wanted something simple to build that wouldn't take up a lot of time. I have the "Dying Sun Pt. 1" decals from Max Models, which I beleive are actually a reprint of a previous set by the now defunct Rising Sun. I think.
Anyway, I will be taking Kawasaki's inline fighter and giving it a makeover as a captured bird used as the VMF 322 squadron hack flown on Okinawa in May 1945.
On the Bench:
The Big Three: Eduard 1:48 Bf 109G-2 Trop
Radial Fighters: Hasegawa 1:48 Ki84 Frank
The Mighty Eighth: Eduard 1:48 P-51D-10
MichaelSatin
 Campaigns Administrator
Colorado, United States
Joined: January 19, 2008
KitMaker: 3,909 posts
AeroScale: 2,904 posts
Posted: Sunday, September 13, 2015 - 06:29 PM UTC
Quoted Text
Hasegawa 1:48 Ki-61-I Tei "Tony"
Well, I still can't upload to my gallery but I got started on this yesterday. I'll post pics when I can.
The gallery is experiencing issues and admin is aware of it and working on it. I'll try to post when it gets fixed.
Michael

On the bench:
Sorta depends on your definition of "on the bench"...
Ontario, Canada
Joined: February 04, 2008
KitMaker: 2,507 posts
AeroScale: 1,814 posts
Posted: Monday, September 14, 2015 - 04:51 AM UTC
Ready to mask and prime:


" The Die Hards"
43rd MIDDLESEX REGIMENT
MACHINE GUN CORPS
XXX CORP
The most effective way to do it, is to do it.
- Amelia Earhart
MichaelSatin
 Campaigns Administrator
Colorado, United States
Joined: January 19, 2008
KitMaker: 3,909 posts
AeroScale: 2,904 posts
Posted: Tuesday, September 15, 2015 - 04:42 AM UTC
OK, apparently the galleries are fixed. A big thanks to Jim at Admin! Post away everyone!
Michael

On the bench:
Sorta depends on your definition of "on the bench"...
Ontario, Canada
Joined: February 04, 2008
KitMaker: 2,507 posts
AeroScale: 1,814 posts
Posted: Friday, September 18, 2015 - 03:20 AM UTC
Ready for primer:


" The Die Hards"
43rd MIDDLESEX REGIMENT
MACHINE GUN CORPS
XXX CORP
The most effective way to do it, is to do it.
- Amelia Earhart

#363
Pennsylvania, United States
Joined: January 08, 2014
KitMaker: 425 posts
AeroScale: 401 posts
Posted: Friday, September 18, 2015 - 04:32 AM UTC
Hasegawa 1:48 Ki-61-I Tei "Tony"Gallery is up, so here we go:
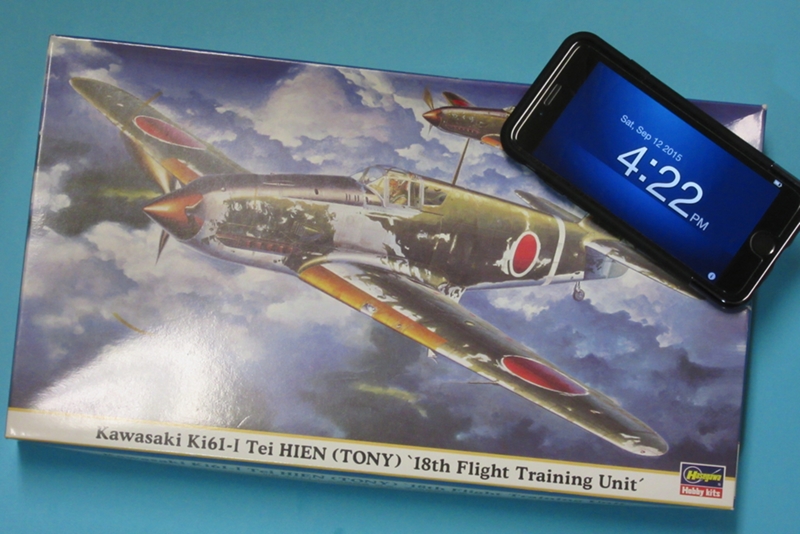


More pics to come, I am making good progress.
On the Bench:
The Big Three: Eduard 1:48 Bf 109G-2 Trop
Radial Fighters: Hasegawa 1:48 Ki84 Frank
The Mighty Eighth: Eduard 1:48 P-51D-10
Germany
Joined: March 05, 2015
KitMaker: 28 posts
AeroScale: 28 posts
Posted: Friday, September 18, 2015 - 06:19 PM UTC
@Jonathan: Thx mate. You will see me on even more soon.
So the build was fast and easy just as expected.
Primer and Pre-Shading done.

Next step main-colours. Just need some little work on the edges of the camo.
Next step Future, Decals, Satin Varnish and Weathering.


Ontario, Canada
Joined: February 04, 2008
KitMaker: 2,507 posts
AeroScale: 1,814 posts
Posted: Friday, September 25, 2015 - 03:04 AM UTC
Primer on up next PR blue:


" The Die Hards"
43rd MIDDLESEX REGIMENT
MACHINE GUN CORPS
XXX CORP
The most effective way to do it, is to do it.
- Amelia Earhart
Germany
Joined: March 05, 2015
KitMaker: 28 posts
AeroScale: 28 posts
Posted: Sunday, September 27, 2015 - 12:50 AM UTC
Guys I was quick on this one.
As already said it was a nice fast build and the paint turned out to be very nice.
Finished it with decals and weathering. I hope you like it.


Pics will be in the galery soon.

#363
Pennsylvania, United States
Joined: January 08, 2014
KitMaker: 425 posts
AeroScale: 401 posts
Posted: Thursday, October 08, 2015 - 06:43 PM UTC
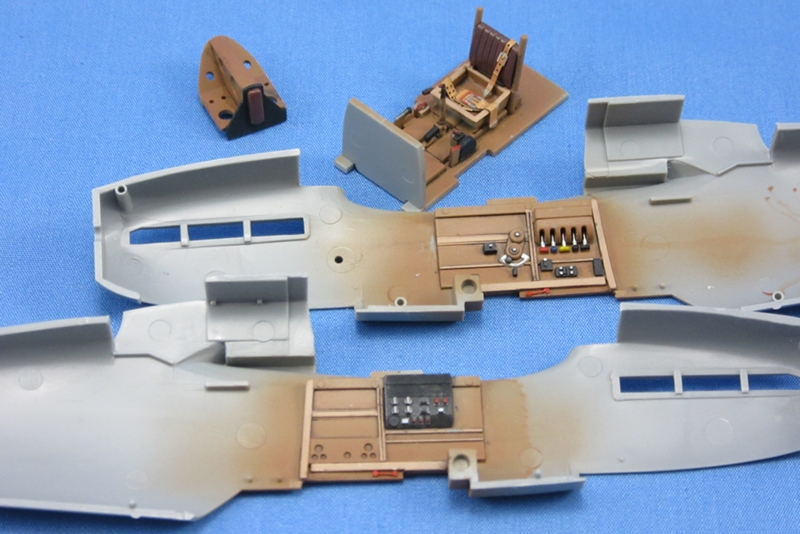
Hasegawa 1:48 Ki-61-I Tei "Tony"Finished the interior in shades of RLM 79 and closed it up. I botched the instruments trying to use the kit decals so broke down and bought an Eduard Zoom for the PE seatbelts and IP.
On the Bench:
The Big Three: Eduard 1:48 Bf 109G-2 Trop
Radial Fighters: Hasegawa 1:48 Ki84 Frank
The Mighty Eighth: Eduard 1:48 P-51D-10
Georgia, United States
Joined: January 07, 2013
KitMaker: 572 posts
AeroScale: 130 posts
Posted: Friday, October 23, 2015 - 06:32 AM UTC
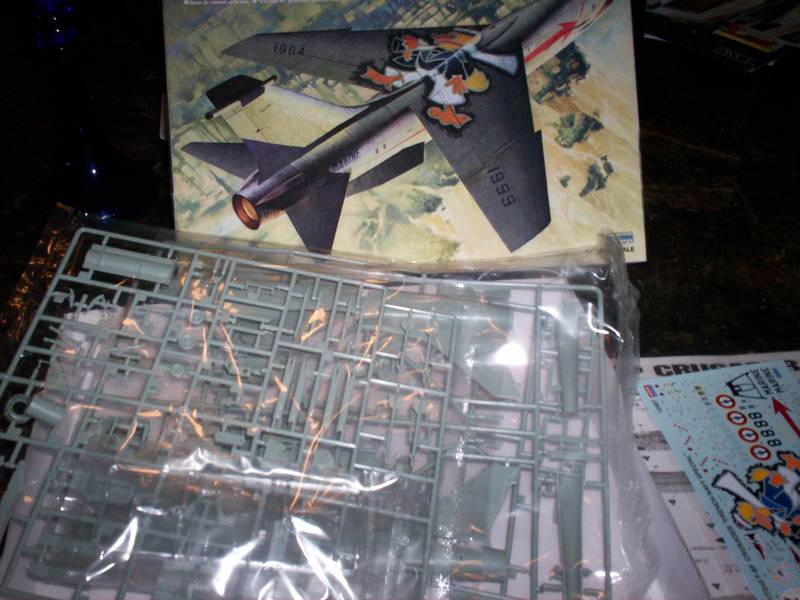
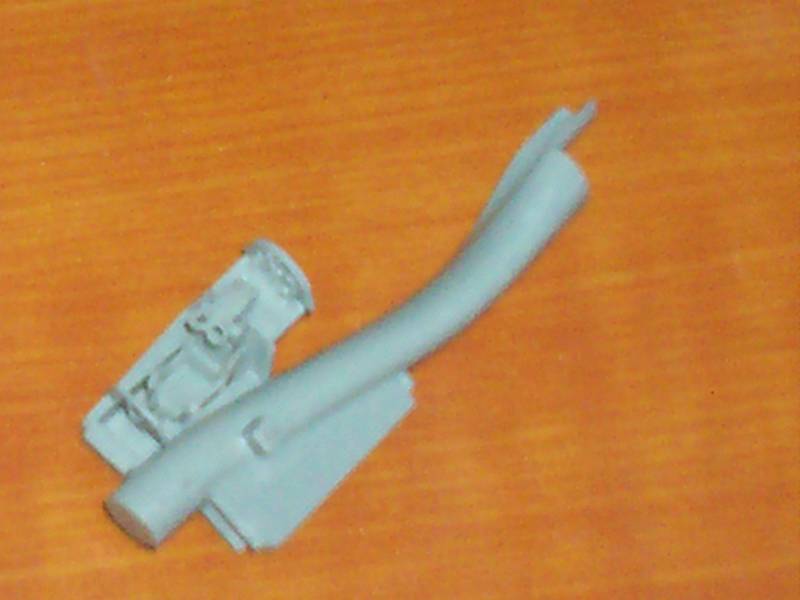
Finally heres my start pic will be doing the Academy F-8 Crusader marked up in French Navy(Marine) markings 1/72 scale.
Sascha(Ironowl)

Georgia, United States
Joined: January 07, 2013
KitMaker: 572 posts
AeroScale: 130 posts
Posted: Friday, October 23, 2015 - 06:34 AM UTC
heres 1st photo of some progress seat and another small piece finished well built anyways
Ironowl

Georgia, United States
Joined: January 07, 2013
KitMaker: 572 posts
AeroScale: 130 posts
Posted: Friday, October 23, 2015 - 06:38 AM UTC
and another blurry shot ugh sorry about that hope the rest come out better as there taken.

Sascha(Ironowl)


#259
Massachusetts, United States
Joined: October 23, 2011
KitMaker: 2,265 posts
AeroScale: 1,715 posts
Posted: Sunday, December 06, 2015 - 10:41 AM UTC
This campaign has been rather quiet. I wasnt sure Id be able to finish, myself.
The Amodel Caribou has been a beastly thing to put together, its part and parcel of Amodel kits, I closed the box and ignored it for quite a while - but they are built now. I've had enough of filling seams.

I have masked the cockpit glass and got some primer on this evening. Now that I am past the assembly, and over the ugly joins, Im quite happy with how they look.

one little improvement I made that I'm pleased with, the engine air intakes above the cowlings are quite distinctive on the Caribou. in the Amodel kit, they are featureless, so I did a little whittling to create the right look.
before and after -

Ill be done painting in a few days , then I have to design and print decals.


