_GOTOBOTTOM
Early Aviation
Discuss World War I and the early years of aviation thru 1934.
WNW 1/32 Fokker D.VII F Udet
MichaelSatin
Staff MemberCampaigns Administrator
AEROSCALE
_VISITCOMMUNITY
Colorado, United States
Joined: January 19, 2008
KitMaker: 3,909 posts
AeroScale: 2,904 posts
Posted: Sunday, August 09, 2015 - 03:35 AM UTC

Quoted Text

Mmmh, a black nose?
Thomas


Thomas,

Black nose? The nose is red, like the rest of the fuselage. You must be seeing things.

Thanks, by the way!

Michael
GazzaS
#424
_VISITCOMMUNITY
Queensland, Australia
Joined: April 23, 2015
KitMaker: 4,648 posts
AeroScale: 1,938 posts
Posted: Sunday, August 09, 2015 - 06:02 AM UTC
I like it too! How many lozenge decals did it take to cover the top of the upper wing?

Gary
MichaelSatin
Staff MemberCampaigns Administrator
AEROSCALE
_VISITCOMMUNITY
Colorado, United States
Joined: January 19, 2008
KitMaker: 3,909 posts
AeroScale: 2,904 posts
Posted: Sunday, August 09, 2015 - 07:35 AM UTC

Quoted Text

I like it too! How many lozenge decals did it take to cover the top of the upper wing?

Gary


3. WNW did "cookie cutter" lozenge decals and gives you large sections of the wing and fuselage (if you need them for your model) as single decals. A little tricky to get applied correctly, but they look great when they're done!

Michael
MichaelSatin
Staff MemberCampaigns Administrator
AEROSCALE
_VISITCOMMUNITY
Colorado, United States
Joined: January 19, 2008
KitMaker: 3,909 posts
AeroScale: 2,904 posts
Posted: Monday, August 10, 2015 - 04:54 AM UTC
Question for the finish experts. I mixed my own semi-gloss coating and am wondering if it's too glossy:

 photo 20150810_172210_zps8g9axygi.jpg

I know it's kind of hard to tell from the picture, but I'd be glad for your opinions.

Thanks!

Michael
GazzaS
#424
_VISITCOMMUNITY
Queensland, Australia
Joined: April 23, 2015
KitMaker: 4,648 posts
AeroScale: 1,938 posts
Posted: Monday, August 10, 2015 - 10:58 AM UTC
I've been told by experts that to be 'to scale' it would be almost matte to us in smaller scales. Germany didn't have perfectly matte paint in either world war. But I think in a scale as big as your Fokker, some sheen would be necessary. I've been toying with mixing Testors dull and gloss coats to make a satin coat for anything bigger than 1/72 scale. I'm gonna apply this theory to my next 109.

Your plane looks great! But a little too reflective on your left wing tip.

Gary
MichaelSatin
Staff MemberCampaigns Administrator
AEROSCALE
_VISITCOMMUNITY
Colorado, United States
Joined: January 19, 2008
KitMaker: 3,909 posts
AeroScale: 2,904 posts
Posted: Tuesday, August 18, 2015 - 11:29 PM UTC
Finished! God I love these WNW kits!

 photo Finished pt beam_zpskhnwtab3.jpg

 photo Finished underside from nose_zpsbbgqk1ew.jpg

 photo Finished cockpit fwd_zpshugbmjy7.jpg

More pics in the gallery.

Michael
GazzaS
#424
_VISITCOMMUNITY
Queensland, Australia
Joined: April 23, 2015
KitMaker: 4,648 posts
AeroScale: 1,938 posts
Posted: Wednesday, August 19, 2015 - 04:00 AM UTC
Michael,
Looks great!
JackFlash
_VISITCOMMUNITY
Colorado, United States
Joined: January 25, 2004
KitMaker: 11,669 posts
AeroScale: 11,011 posts
Posted: Friday, September 04, 2015 - 06:26 AM UTC
 photo Finished underside from nose_zpsbbgqk1ew.jpg

"On 4 June 1918 the horizontal arm on the latin cross with an a ratio of 4:5 was introduced. The vertical arm was to be full chord of the wing and full depth of the side of the fuselage. The arm width was a ratio 8:1 of the vertical. The white border width was reduced to a ratio of 4:1 the width of the arm. The horizontal arm was to be the same wide as the vertical arm. The wing crosses are to be placed at the wing tips. On the Fok.D.VII, OAW did this, but, Fokker and Albatros did not. . ." The lower crosses on this kit represent ones from June 4. The upper wing and fuselage crosses represent those from April 10 until June 4.

"On 10 April 1918, Idflieg issued a third order that specified the cross sizes to be used for the rudder, fuselage and wings. The size for the rudder 400 mm, for the fuselage, 600 and the wings 1000mm. The white border was over 150mm wide for the wings only. All these changes created havoc in the field, which resulted in a wide variety of balken crosses. . ."

 photo Finished pt beam_zpskhnwtab3.jpg

Fokker D.VII (Schwerin) 2nd production was D.4250/18 to D.4449/18 and was release to frontline duties in late May early June 1918. D.4253/18 represented here has been well photographed. Other than the kit instrument panel (which represents an OAW type rather than a Schwerin type) the build is a solid attempt.


JackFlash
_VISITCOMMUNITY
Colorado, United States
Joined: January 25, 2004
KitMaker: 11,669 posts
AeroScale: 11,011 posts
Posted: Friday, September 04, 2015 - 06:49 AM UTC

Quoted Text

". . .Here's something I got done, my crack at the prop:


 photo 20150705_162924_zpsnqx14w92.jpg

For the next time the left side of the prop blades in this image with the laminations wrapping at the leading edge of the blade is good. The right is backwards in the laminations wrapping at the trailing edge of the blade.
JackFlash
_VISITCOMMUNITY
Colorado, United States
Joined: January 25, 2004
KitMaker: 11,669 posts
AeroScale: 11,011 posts
Posted: Friday, September 04, 2015 - 06:52 AM UTC
[quote]
Quoted Text

". . .Here's something I got done, my crack at the prop:


 photo 20150705_162924_zpsnqx14w92.jpg

For the next time the left side of the prop blades in your image with the laminations wrapping at the leading edge of the blade is good. The right is backwards in the laminations wrapping at the trailing edge of the blade.

See here.

MichaelSatin
Staff MemberCampaigns Administrator
AEROSCALE
_VISITCOMMUNITY
Colorado, United States
Joined: January 19, 2008
KitMaker: 3,909 posts
AeroScale: 2,904 posts
Posted: Friday, September 04, 2015 - 10:02 PM UTC
Stephen,

Thanks for your critique. Given my paucity of D.VII references I basically went with the WNW instructions as they've proven to be pretty reliable in the past. I will pay more attention to the prop next time.

Michael
Merlin
Staff MemberSenior Editor
AEROSCALE
#017
_VISITCOMMUNITY
United Kingdom
Joined: June 11, 2003
KitMaker: 17,582 posts
AeroScale: 12,795 posts
Posted: Saturday, September 05, 2015 - 12:24 AM UTC
Hi Michael

Nice one! You should get the build on the front page where it belongs. It's interesting that the prop in Stephen's reference shot (is it a modern replica?) doesn't appear to have as many laminations as was discussed in the AEG G.IV thread, but the principle's the same - the pattern on each blade should be basically identical if the prop's been carved correctly (if they didn't match, I wouldn't fly it (or probably even risk starting the engine), because the prop would be unbalanced).

All the best

Rowan
JackFlash
_VISITCOMMUNITY
Colorado, United States
Joined: January 25, 2004
KitMaker: 11,669 posts
AeroScale: 11,011 posts
Posted: Saturday, September 05, 2015 - 07:34 AM UTC
I am surprised at you Merlin. The average was 5-7 laminations in WWI era wooden propellers. The modern clear coated prop in the image I provided has 5 laminations. Remember that the thickness of each plank used varied to some degree. The blank was then ground down and sanded to the needed thickness & depth. It was the length and angle that determined the pitch and horsepower it was designed for. The resulting paddle profile was the company's hallmark.

See here.

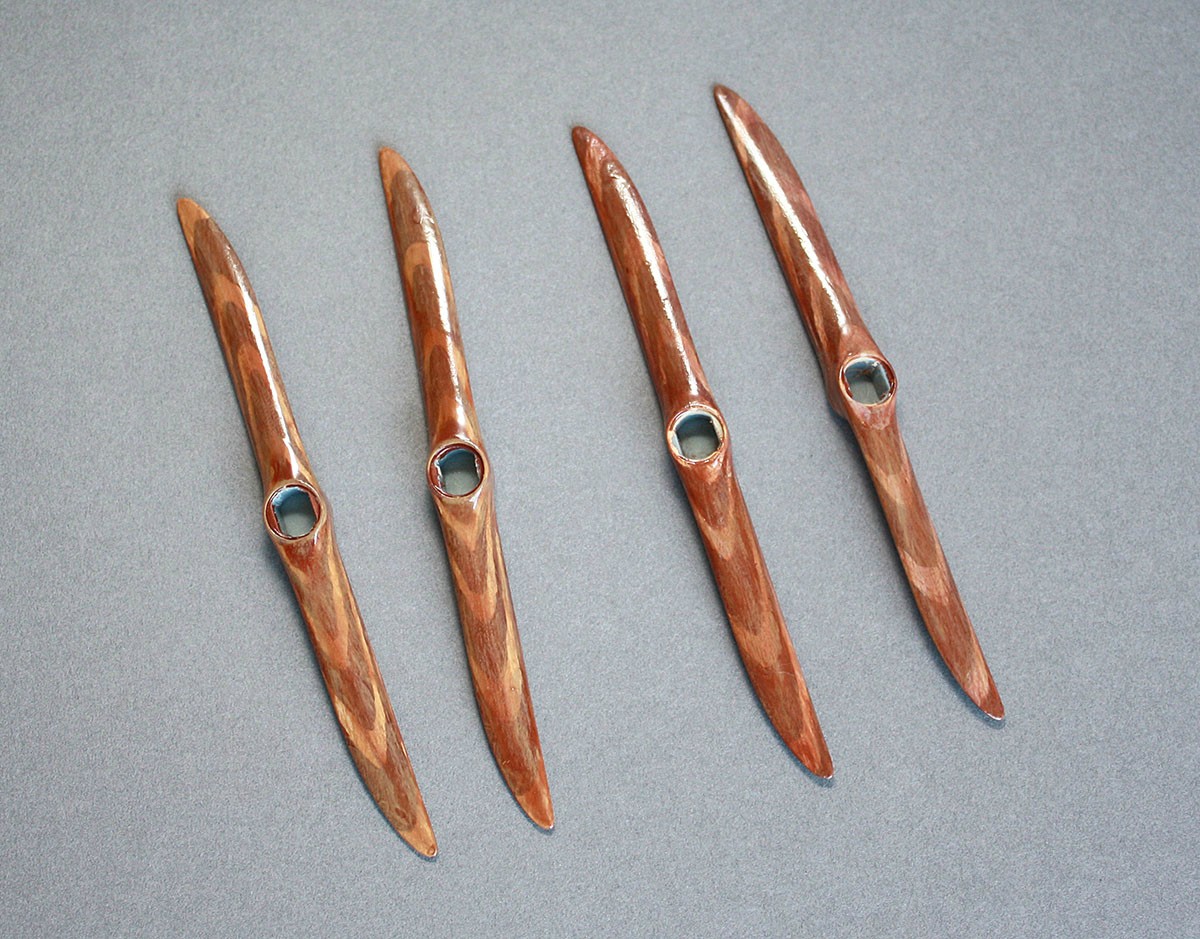
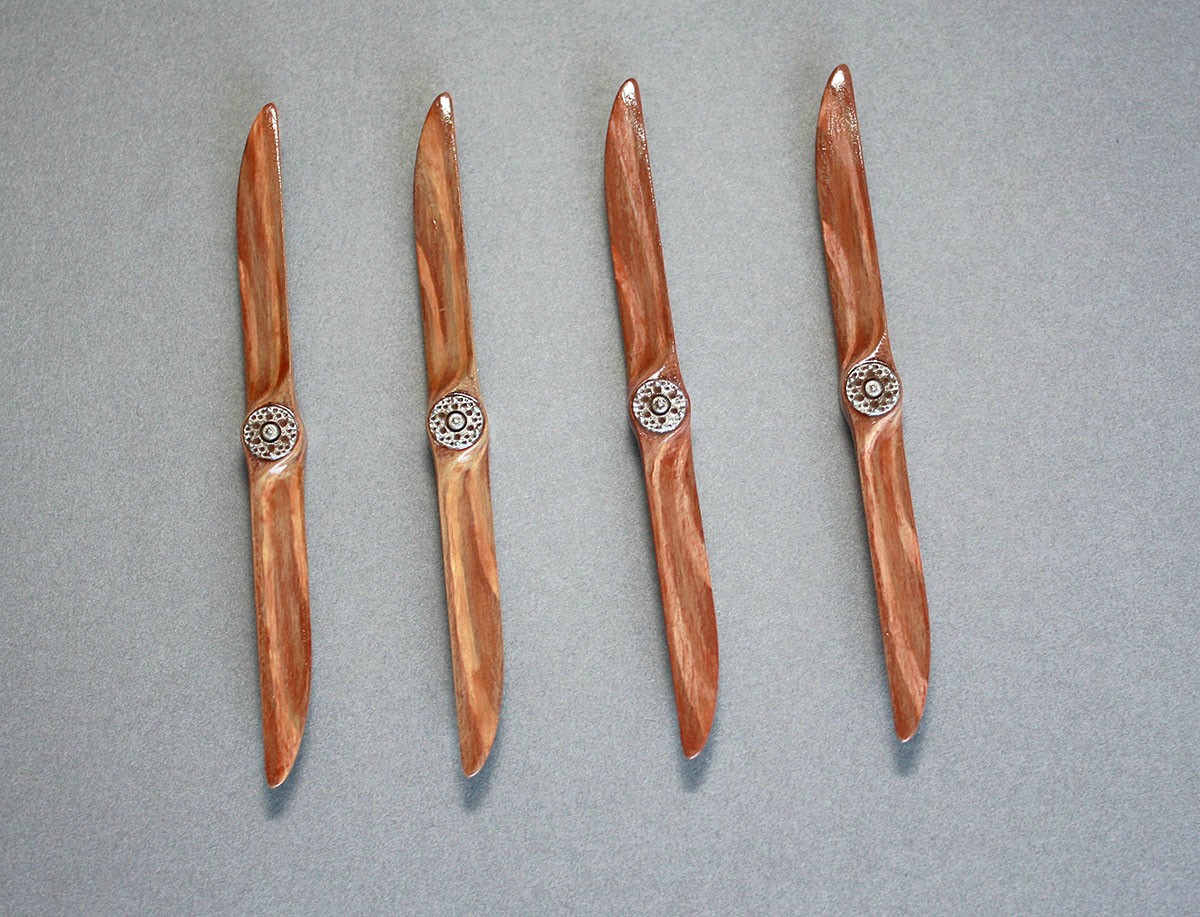
No worries Michael, there is always the next build. Or you could swap it out with another one later. Here is a bit of fun concerning a 4 bladed laminated prop.


1/32 SSW D.III - IV prop laminated wood. Front.


1/32 SSW D.III - IV prop laminated wood. Rear.
JackFlash
_VISITCOMMUNITY
Colorado, United States
Joined: January 25, 2004
KitMaker: 11,669 posts
AeroScale: 11,011 posts
Posted: Saturday, September 05, 2015 - 07:39 AM UTC


Merlin
Staff MemberSenior Editor
AEROSCALE
#017
_VISITCOMMUNITY
United Kingdom
Joined: June 11, 2003
KitMaker: 17,582 posts
AeroScale: 12,795 posts
Posted: Saturday, September 05, 2015 - 11:45 AM UTC

Quoted Text

I am surprised at you Merlin...


Hi Stephen

Not as much as I will be at myself, the day I finish the AEG.

Seriously, though - 8 laminations in one of those last pics, and maybe 11(!) in the other. Ouch! No doubt someone's managed it, but it must be pushing the boundaries of using the masking technique I tried.

All the best

Rowan
MichaelSatin
Staff MemberCampaigns Administrator
AEROSCALE
_VISITCOMMUNITY
Colorado, United States
Joined: January 19, 2008
KitMaker: 3,909 posts
AeroScale: 2,904 posts
Posted: Sunday, September 06, 2015 - 06:17 PM UTC

Quoted Text

Hi Michael

Nice one! You should get the build on the front page where it belongs.

Rowan


Rowan,

I don't have anything against putting it on the front page if you think it's appropriate, but have no idea how. And thanks for your kind words. I actually finished it while recovering from a (holy crap!) heart attack, so it holds a special place for me at this point.

Michael
Merlin
Staff MemberSenior Editor
AEROSCALE
#017
_VISITCOMMUNITY
United Kingdom
Joined: June 11, 2003
KitMaker: 17,582 posts
AeroScale: 12,795 posts
Posted: Monday, September 07, 2015 - 11:38 AM UTC

Quoted Text


Quoted Text

Hi Michael

Nice one! You should get the build on the front page where it belongs.

Rowan


Rowan,

I don't have anything against putting it on the front page if you think it's appropriate, but have no idea how. And thanks for your kind words. I actually finished it while recovering from a (holy crap!) heart attack, so it holds a special place for me at this point.

Michael


Hi Michael

Blimey - even more reason to showcase it! I hope you're making a good recovery and not overdoing things!

Just drop Jessie a line and she'll be delighted to help you prepare the text and pics ready for her to run.

Take care of yourself - and all the best

Rowan
JackFlash
_VISITCOMMUNITY
Colorado, United States
Joined: January 25, 2004
KitMaker: 11,669 posts
AeroScale: 11,011 posts
Posted: Monday, September 07, 2015 - 10:51 PM UTC

Quoted Text


Quoted Text

I am surprised at you Merlin...


Hi Stephen

Not as much as I will be at myself, the day I finish the AEG.

Seriously, though - 8 laminations in one of those last pics, and maybe 11(!) in the other. Ouch! No doubt someone's managed it, but it must be pushing the boundaries of using the masking technique I tried.

All the best

Rowan


The larger multiseat bombers and reconn aircraft even Zeppelin rigid airships all need the bigger props of course.
StukaJr
_VISITCOMMUNITY
California, United States
Joined: April 26, 2010
KitMaker: 346 posts
AeroScale: 292 posts
Posted: Wednesday, September 09, 2015 - 12:29 AM UTC
Build thread highjack! p-)

Heine props are tricky, but general rule of thumb is that lamination mirrors what happens on one blade to the next - paraphrasing what JackFlash have said... It also wraps around to the other side - just imagine slicing it like a loaf of bread, rather than drawing a line.

Painting lamination tips and tricks...

Mount prop on a dowel (I use chopped down chopstick - hah!)
Turn prop sideways
Using a liner brush (long bristle, thin - I use number 2) draw a straight line center to about half way - as the blade flattens, do not turn the prop, but carry the line as it travels to stay center of your view...
Repeat on other 3 sides
Turn prop facing flat - continue the lines to the edge of the prop, connecting back side with front.
As prop flattens, the lamination gets wider.
Repeat as many times as necessary.

It's worth looking up particular prop in photographic reference, but shape of the propeller will dictate how lamination travels the surface. When looking at the prop from the side, you should see straight line that doesn't change thickness.

Heine is especially tricky as the lamination "turns" back in a curve as it wraps around, rather than going in a straight line.

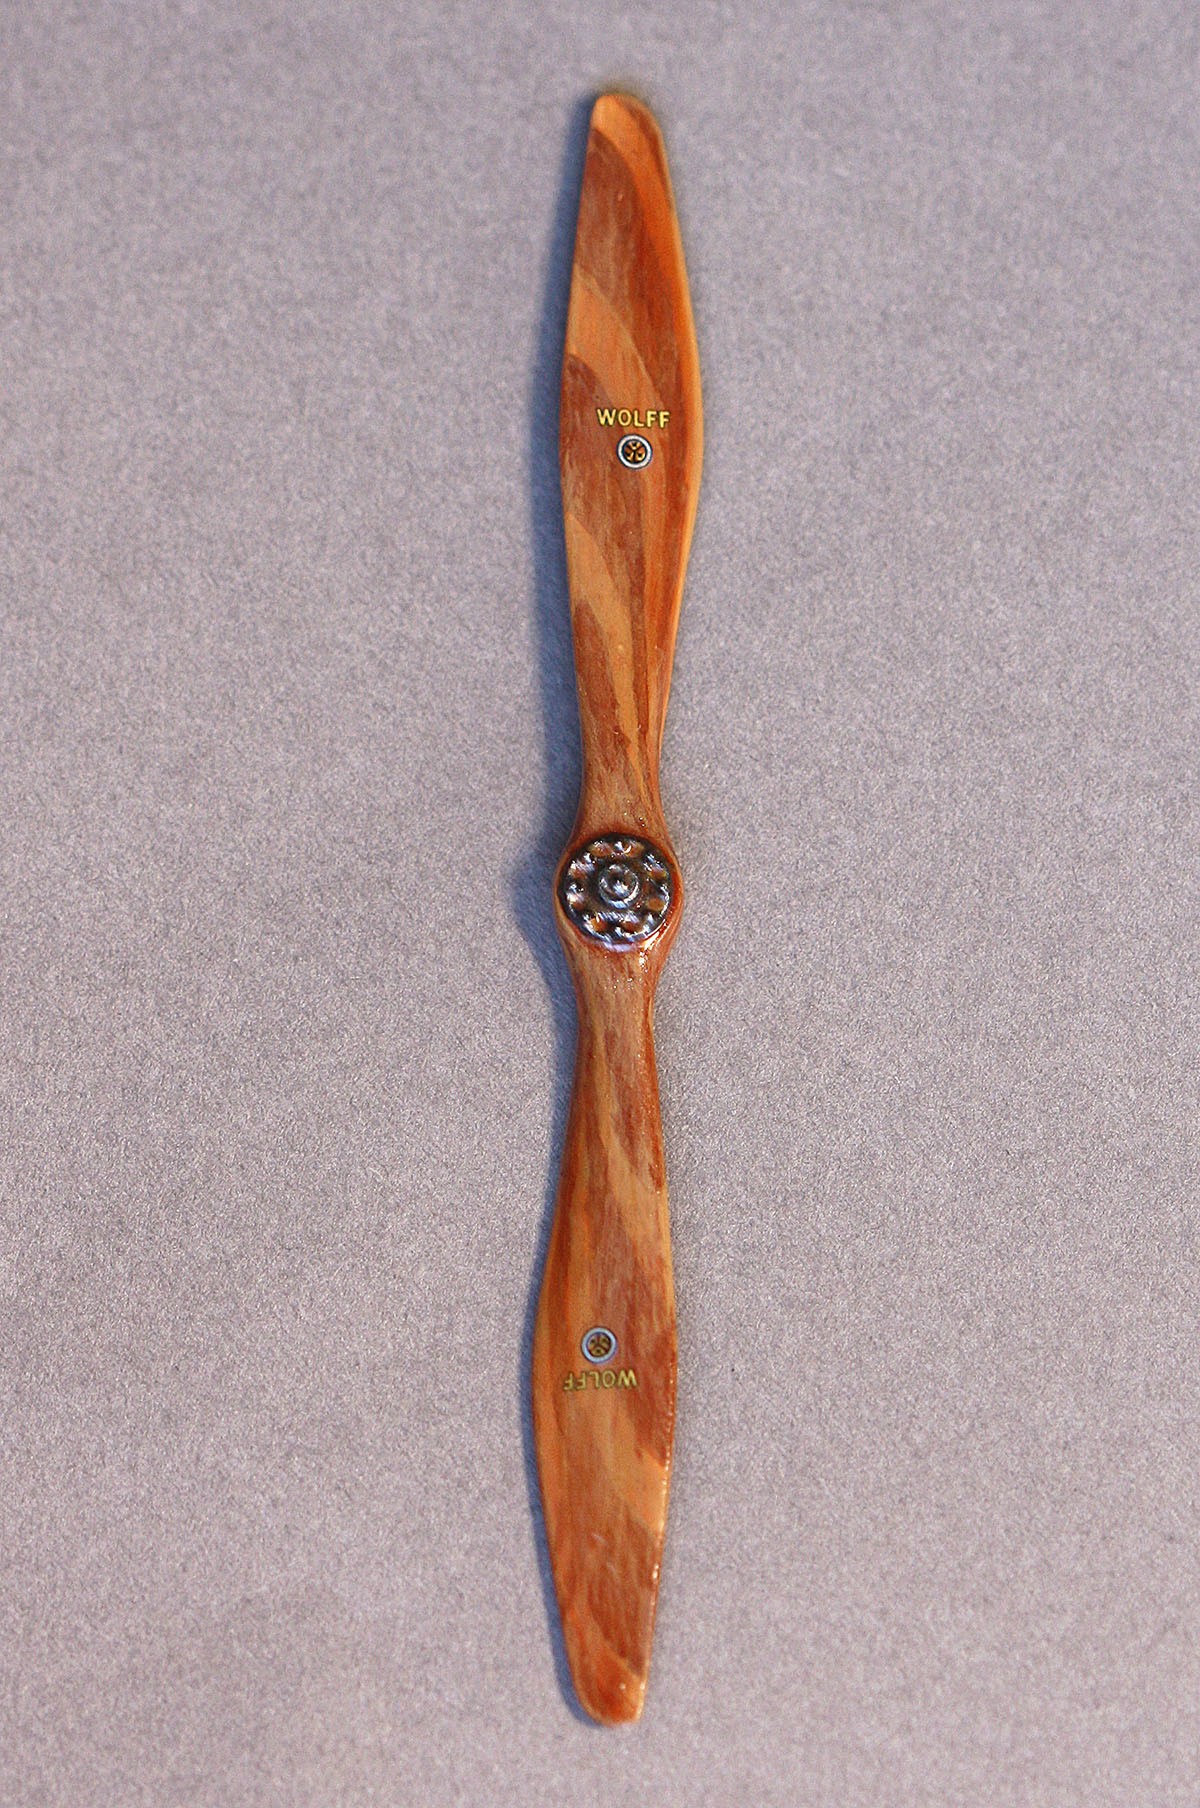
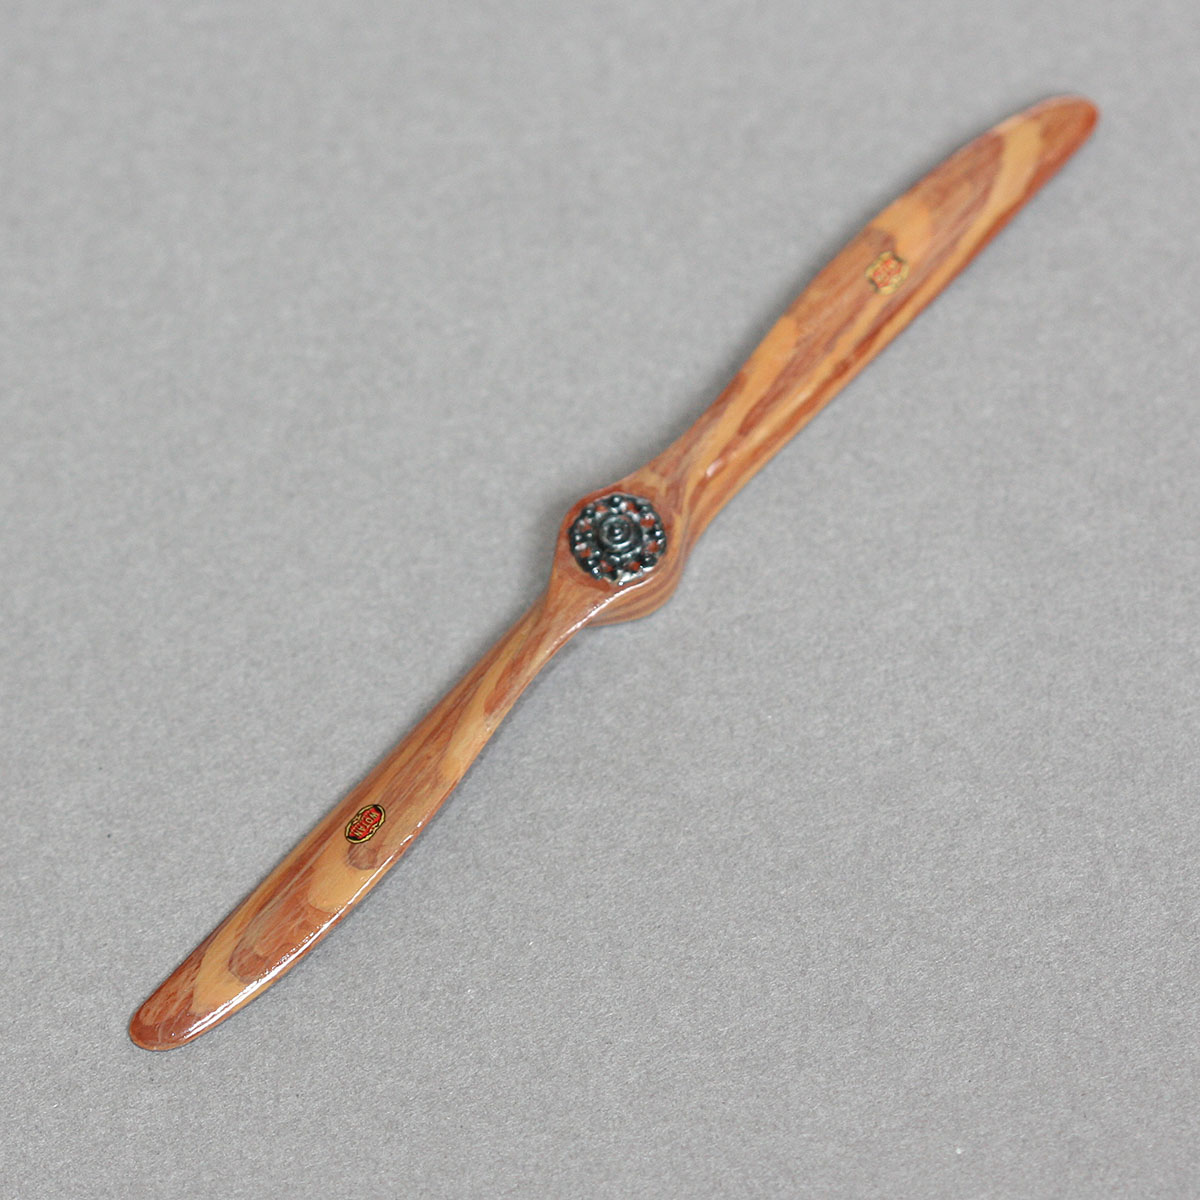
Some of my latest attempts:


Wolff


Wotan - similar to Heine shape. You can see the lamination is thin at the hub and gets wider with the twist, then "turns" at the edge before it wraps around to the back side.


Gotha G.IV - Heine (back)


Gotha G.IV - Heine (front)

Note that the backside lamination is quite wild while front (flat) part of the blade is rather linear. The rear facing plane of the Heine bomber propeller has similar lamination pattern that Heine scout propeller would exhibit - what I've described as a "turn".

My Inbox is open to PM's inquiring about props.

P.S. Yes, Gotha props were my favorite to paint - it's a shame WnW doesn't sell them separately...


JackFlash
_VISITCOMMUNITY
Colorado, United States
Joined: January 25, 2004
KitMaker: 11,669 posts
AeroScale: 11,011 posts
Posted: Wednesday, September 09, 2015 - 02:39 AM UTC
Very nice Ivan!
Twentecable
_VISITCOMMUNITY
Overijssel, Netherlands
Joined: September 13, 2003
KitMaker: 339 posts
AeroScale: 244 posts
Posted: Thursday, September 10, 2015 - 03:54 PM UTC
Hi Ivan,

impressive!
Whar colours did you use? And how did you get the woodgrain effect in the darker wood parts?

gr TC
StukaJr
_VISITCOMMUNITY
California, United States
Joined: April 26, 2010
KitMaker: 346 posts
AeroScale: 292 posts
Posted: Friday, September 11, 2015 - 01:56 AM UTC
I use Model Master Acryl - most readily available and low cost option in US. I use Tan for the light and Burnt Sienna for the dark - the paint is nothing special and should be easy substituted for anything you would use.

The grain is achieved via dry brush - dip the brush in the paint, then paint scrap surface (I prefer clean cardboard) until your brush is leaving nothing but faint streaks - give propeller a good rubbing with that. I use my oldest brush, with bristle that looks like an old broom.

You want to do it with both dark and light colors. Layer for effect. If dry brushing covers up too much of the lamination detail - do a faint re-trace with heavily diluted original color (either dark over dark or light over light).

Final step is the glaze - I add very small amount of Burnt Sienna Acryl to the first Future clear coat. Gravity will want to pull color down the slope of the twist, so use it to add further variation to the lamination. Give time to dry, then add 2-3 more clear coats to seal. Sometimes you can do very small amount of dry brushing in between clear coats.

It's a lot of trial and error... Fortunately, most WWI aircraft come with multiple prop choices
 _GOTOTOP