Well for this build I will be using Revells 1/32nd Spitfire IIa, along with Pavla and Eduard update sets. Mal has kindly given me a couple of sets of Miracle Masks to finish her off.
The markings will be of
Unit: 145 Sqn, RAF
Serial: SO-M (P8071)
Tangmere, Sussex, UK, March 1941.
Now this build is going to take me a while as I don't seem to get as much bench time as I would like, due to work trying to kill me with long hours (it pays for more models though lol).
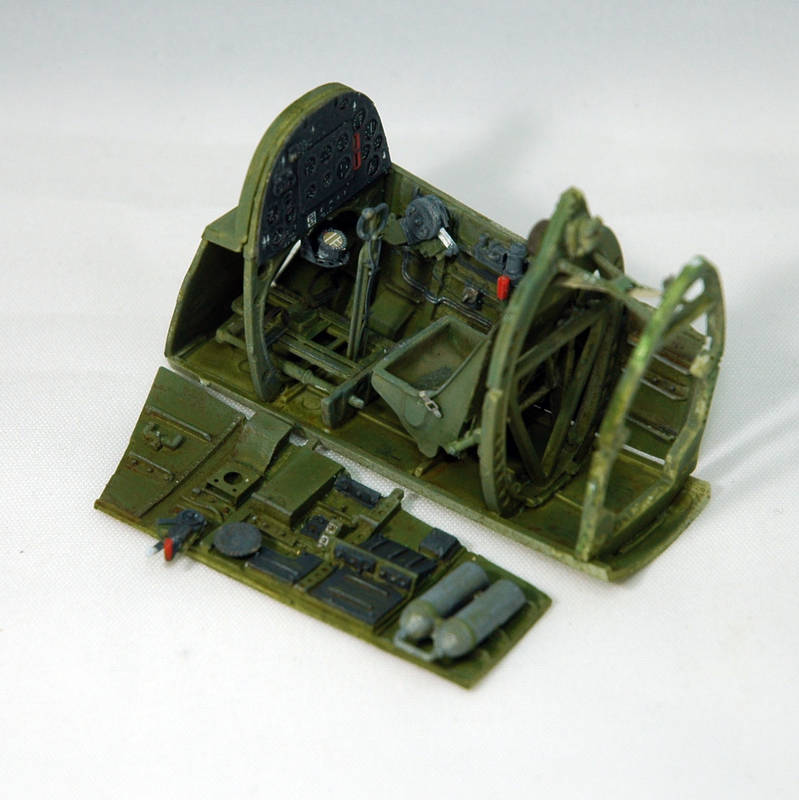
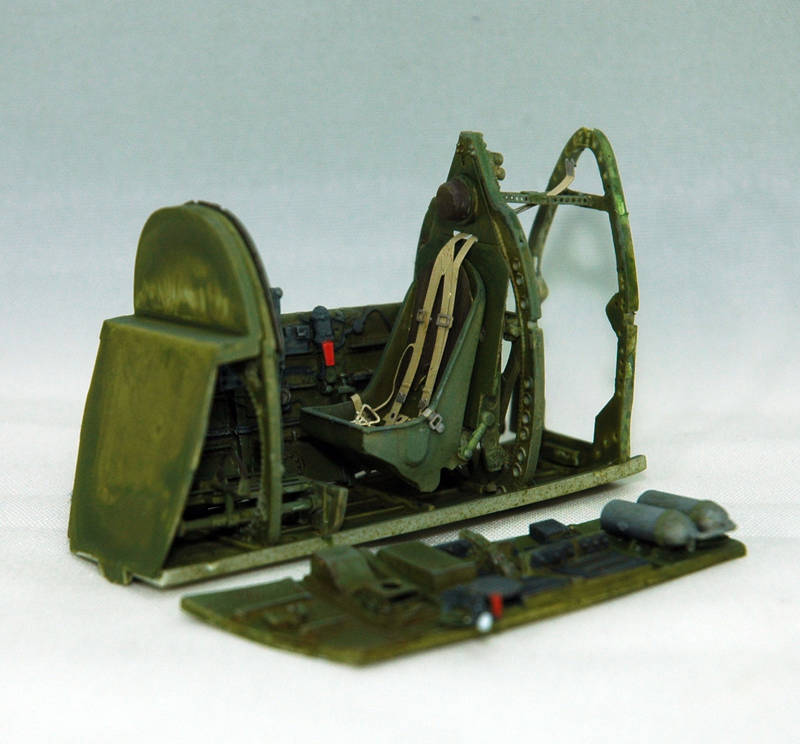
I started with the cockpit, and added the resin Pavla sidewalls, and metal type seat (yes I know that would probably be fitted with the red plastic seats, but the Revell one is horrible and the Pavla offering does look better). The Eduard seat once folded and bent to shape is a bit wider then the Pavla seat, which I found out when adding the back cushion and had too cut it down.
The rudder pedals are Eduard along with the instrument panel, and harness.
I used Xtracrylix's interior green and a couple of washes of burnt sienna to finish it off.
Next up is attaching the outstanding parts to the cockpit sidewalls in the upper fuselage sides, and adding the tail wheel before closing her up.
All comments welcome.
Andy
Hosted by Rowan Baylis
1/32nd Revell Spitfire Mk.IIa, with A.M
Posted: Friday, September 04, 2015 - 11:44 PM UTC
Posted: Saturday, September 05, 2015 - 12:02 AM UTC
Hi Andy
Nice start. This should be a fun build to watch with so many goodies thrown into the mix.
All the best
Rowan
Nice start. This should be a fun build to watch with so many goodies thrown into the mix.
All the best
Rowan
Joel_W
Associate Editor
New York, United States
Joined: December 04, 2010
KitMaker: 11,666 posts
AeroScale: 7,410 posts
Joined: December 04, 2010
KitMaker: 11,666 posts
AeroScale: 7,410 posts
Posted: Saturday, September 05, 2015 - 06:23 AM UTC
Andy,
I'll be following along as well. So far you're off to a solid start. I realize why you decided on the seat you used. Any thought of just painting the lower half that Redish Brown color for effect? The rest of the cockpit looks great especially with your weathering.
Joel
I'll be following along as well. So far you're off to a solid start. I realize why you decided on the seat you used. Any thought of just painting the lower half that Redish Brown color for effect? The rest of the cockpit looks great especially with your weathering.
Joel
Posted: Saturday, September 05, 2015 - 07:03 AM UTC
Nice start Andy, I'll expect it finished when I see you in a couple of weeks
bdanie6
New Hampshire, United States
Joined: November 09, 2008
KitMaker: 615 posts
AeroScale: 459 posts
Joined: November 09, 2008
KitMaker: 615 posts
AeroScale: 459 posts
Posted: Saturday, September 05, 2015 - 09:26 AM UTC
Nice start Andy, the cockpit looks great. I'll be here watching and following along.
Later
Later
Posted: Saturday, September 05, 2015 - 12:19 PM UTC
Hi Andy, nice start, but those RAF code masks won't give you the correct style of markings. Do you want me to produce them for you?
Posted: Sunday, September 06, 2015 - 03:49 AM UTC
Thanks guys, glad to have you all along for the ride.
Rowan, I' m not looking forward to building the landing flaps, as they do look at little fiddly.
Joel, I think I will just leave the seat green, if its half red it might just confuse people lol.
Lucky, this won't be finished for Farnborough, Telford is a possibility though lol.
Thanks Bruce, I will try and post an update at least once a week.
Yes please Mal. To tell the truth I didn't even look at the code markings to see if they were the correct style lol.
I have stuck a couple of bits into the upper fuselage halves, and once the rest of them are in along with the tail wheel I will update the blog.
Andy :-)
Posted: Sunday, September 06, 2015 - 04:09 AM UTC
Quoted Text
T
Lucky, this won't be finished for Farnborough, Telford is a possibility though lol.
Andy :-)
And there was me thinking this was one of your 24 hour builds
Posted: Sunday, September 06, 2015 - 04:49 AM UTC
Quoted Text
Quoted TextT
Lucky, this won't be finished for Farnborough, Telford is a possibility though lol.
Andy :-)
And there was me thinking this was one of your 24 hour builds
I can't remember the last time I could get 24 hours at the bench at one time, I probably don't get that much a month nowadays lol.
Andy :-)
Posted: Sunday, September 06, 2015 - 02:14 PM UTC
Quoted Text
Yes please Mal. To tell the truth I didn't even look at the code markings to see if they were the correct style lol.
Roger that, but you will have to give me a shout to remind me, I'm a bit snowed under at the moment!
Posted: Saturday, October 03, 2015 - 03:39 PM UTC
Well work as normal has got in the way of making much progress on this build, but I have been attaching parts when I get a spare 5 minutes.
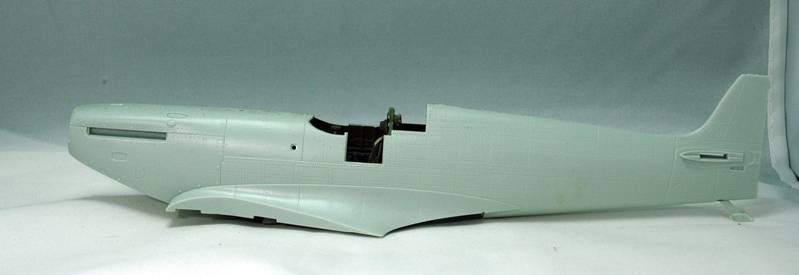
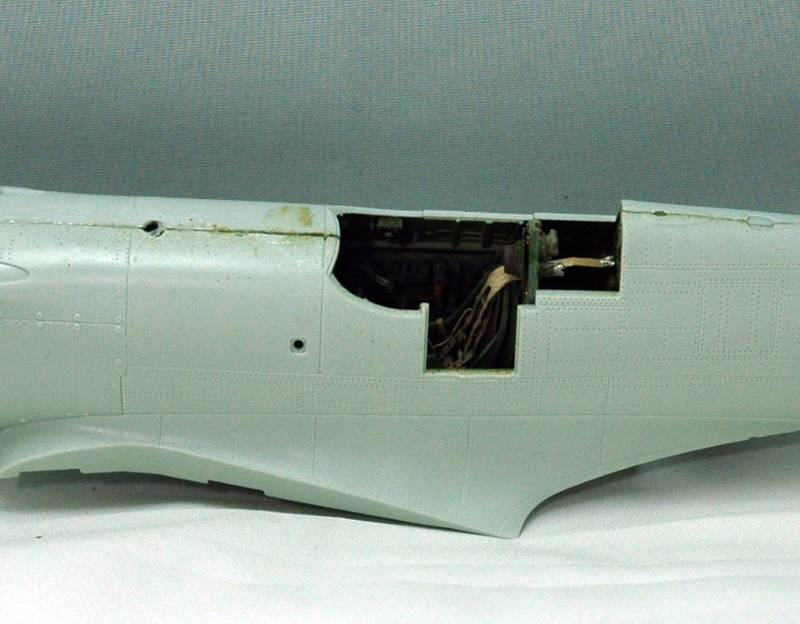
The fuselage is together, but it will need some filler as the inclusion of the Pavla sidewall set does make it all a very tight fit.
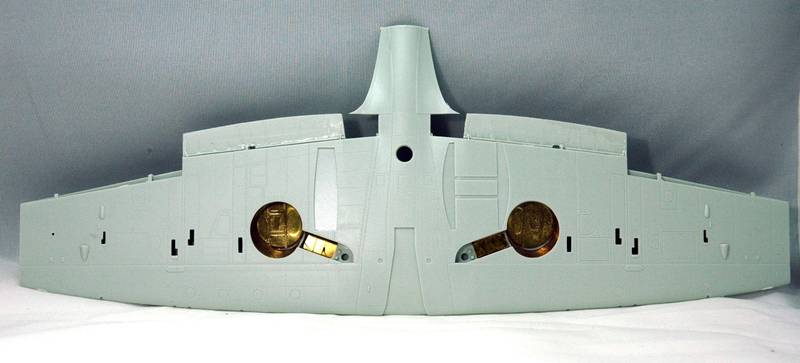
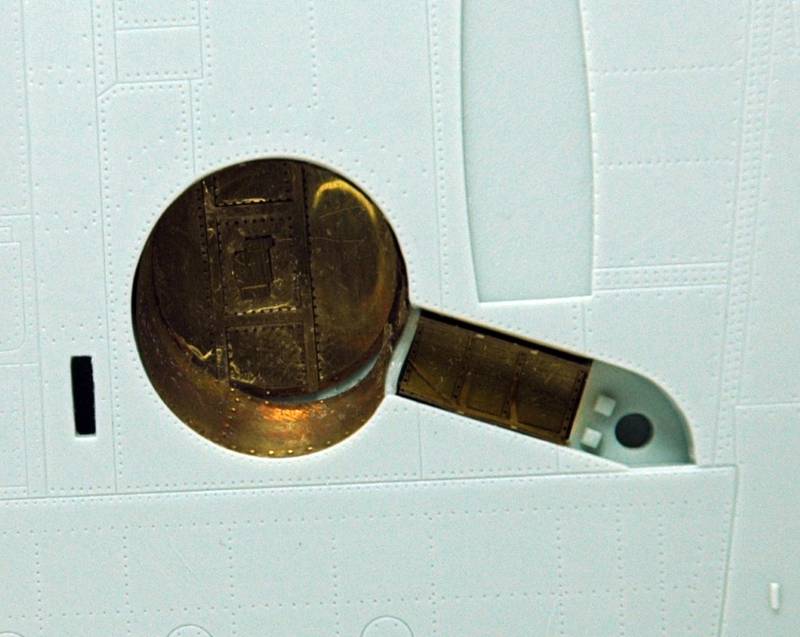
The wheel wells have got the Eduard P.E parts installed, and the top and lower wings closed up.
I will attach the wings, tail planes and rudder next and a few other parts before I start with the filling.
Andy