Tamiya 1/48 A6M2 Zero
Paints: Gunze Silver, Vallejo Model Color, Iwata Com.Art
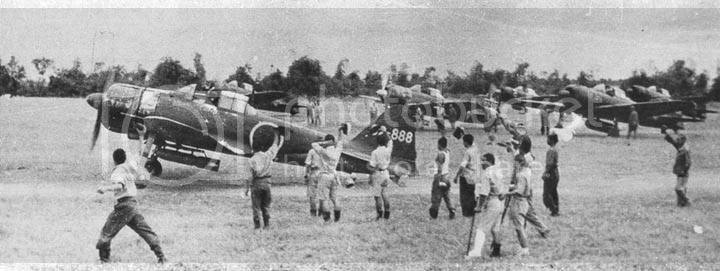
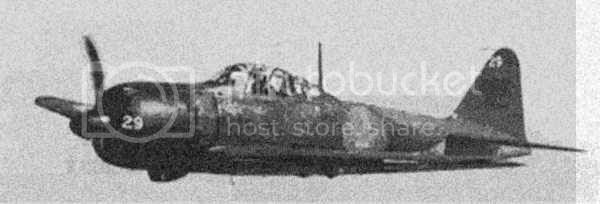
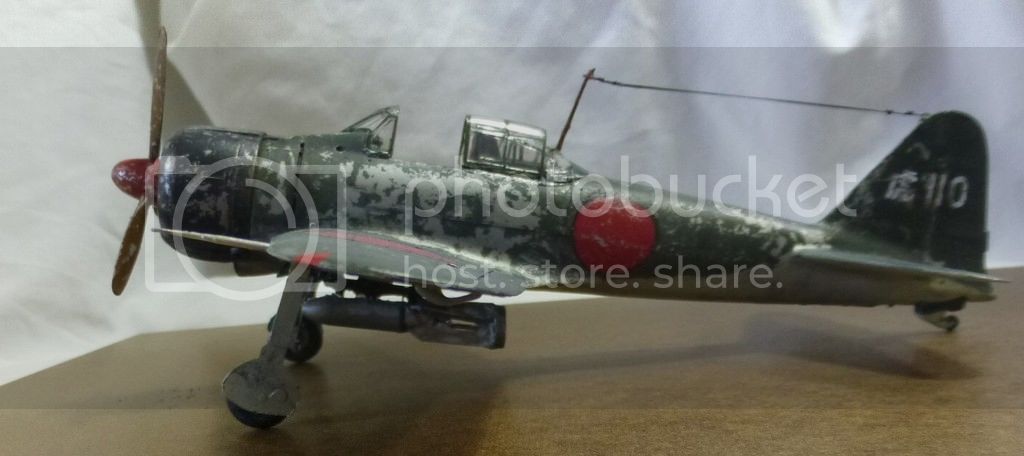
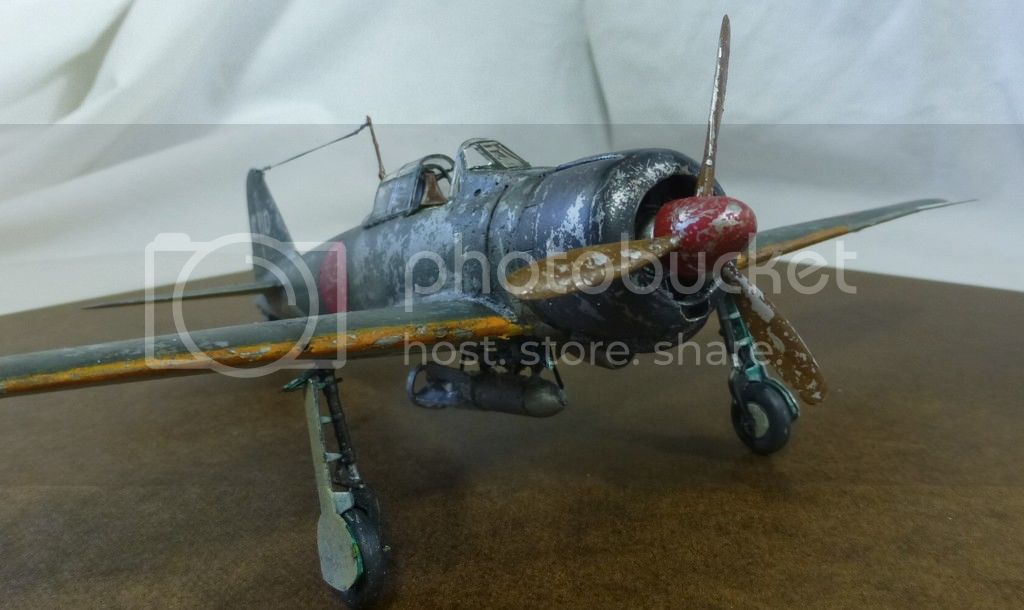
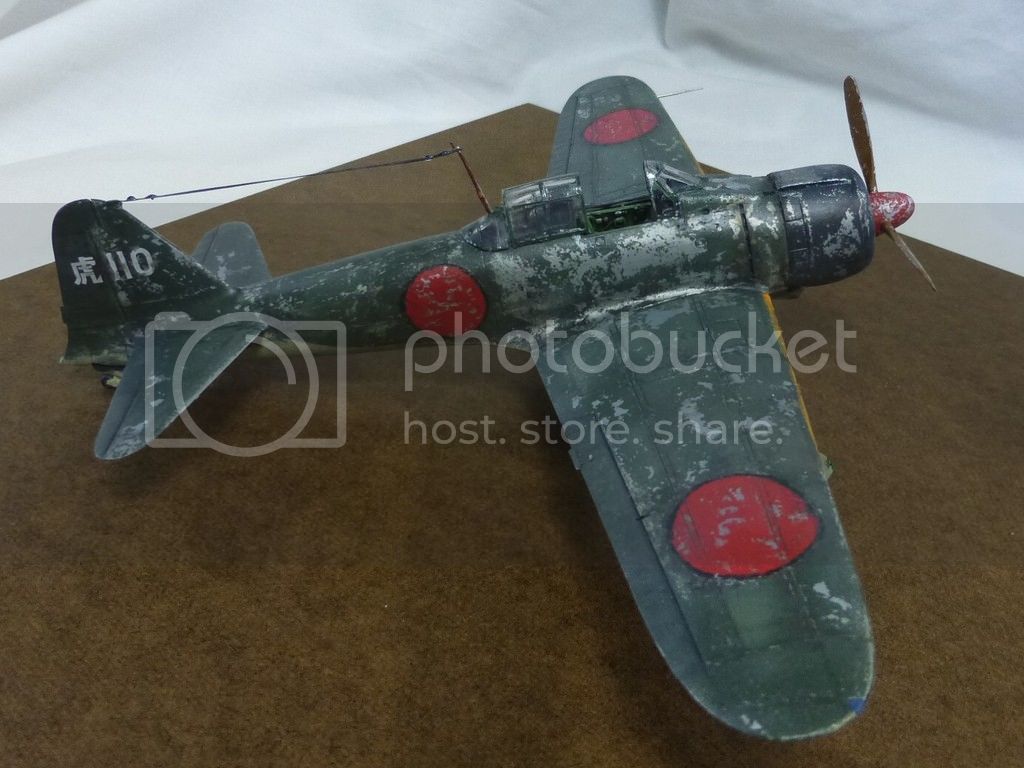
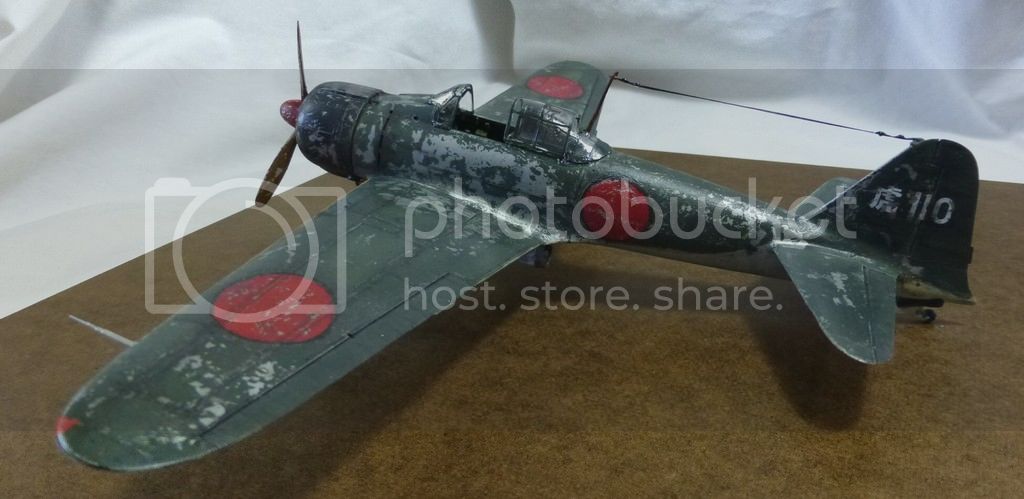
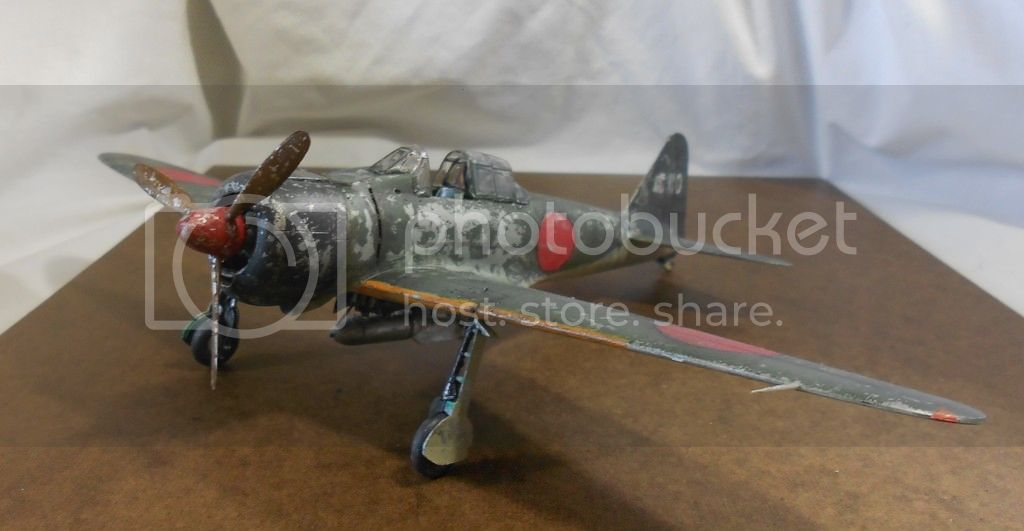
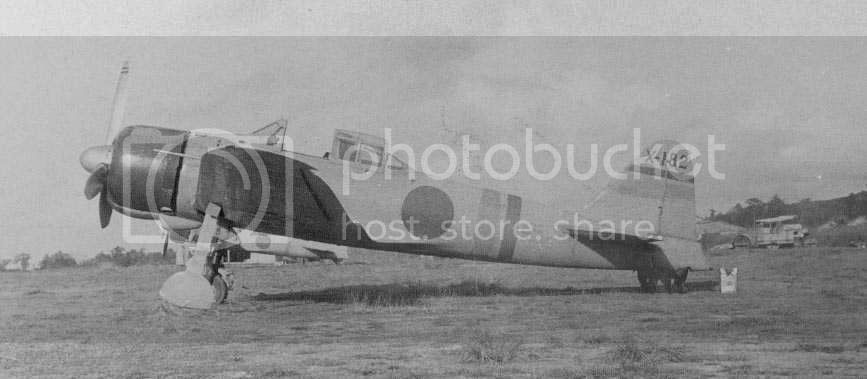
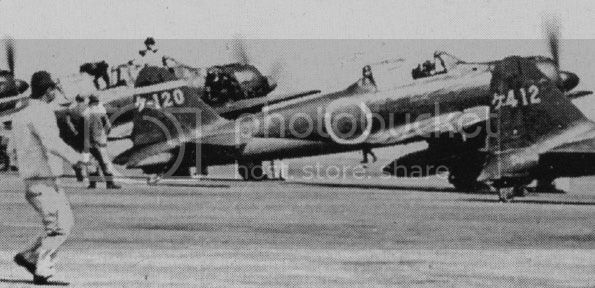
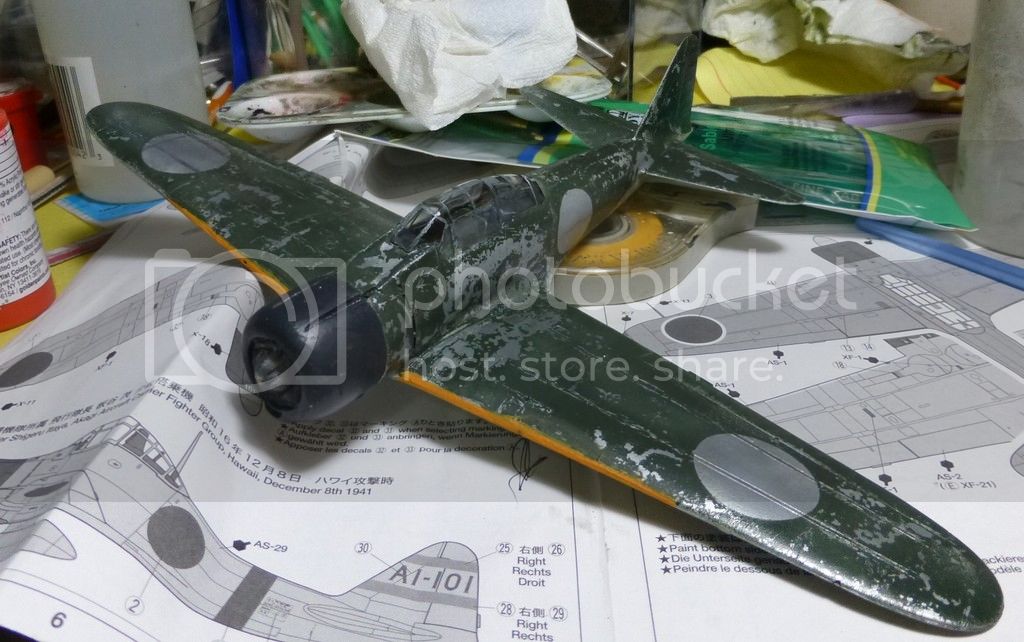
This was done for a 1945 Group Build on Finescale. What Japanese subject would fit better than a Kamikaze? At the planning stage I checked out a lot of photos and found a number like the two WWII era pics above – very heavily chipped Zeros with a lot of A6M2s in the mix. This fit into long term plans nicely. I have a lot of Pacific War kits unbilt and depending upon time or place they could be heavily weathered indeed. Some of the US planes flying out of places like Munda Point with coral strips were operating off sandpaper and showed it. There are a lot of ways to do chipping and I used my medical experiment kits to try things out. Finally decided that a variation on the “hairspray technique” often used by armor fans would work the best. But I wasn't sure how to put on heavy weather and also remain coherent. So, let her rip says I.
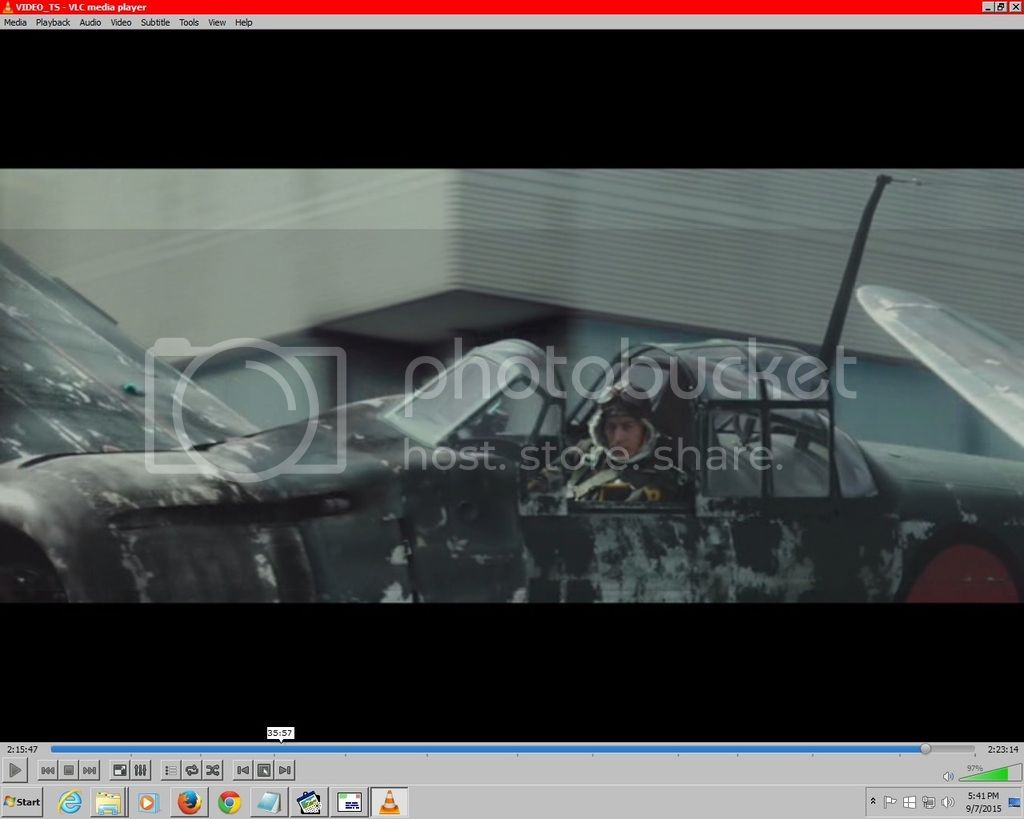
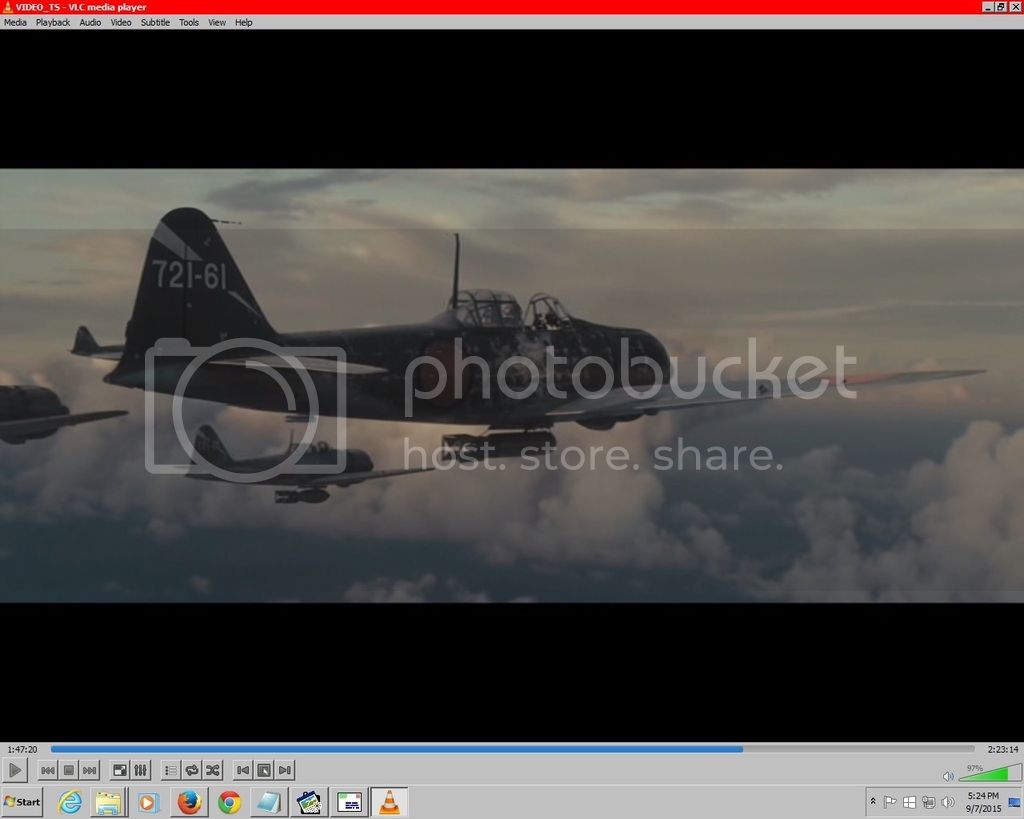
There's history here too. The pic with the Zeros loaded with the very distinctive bombs was a group of A6M2s attacking Leyte in 1944. (I found a list of IJN Special Attack Missions and there were a large number of A6M2s used. They or planes like them intervened at the tail end of the Samar battle and sunk St. Lo – a better job than Yamato and company.) Nakajima built them until 1944 because the IJNAF could use anything produced.) I also got a copy of a really neat movie called “Eternal Zero.” This flick was a mega hit in Japan and I broke down a bought a DVD from a Japanese movie site. (Only $18 and in “International” format which played on my player very nicely – sellers on eBay are asking $50.) The movie was a bit sentimental – not unusual for the Japanese – but it brims with excellent history, splendid ground sets with replica aircraft and jaw-dropping CGI. I know a bit about the Pacific War, and some of my friends know even more and everyone I know has been impressed with the technical accuracy. The longer the war goes on, the more heavily weathered appear the planes. A quirk of the plot has the hero intentionally using an A6M2 for his final flight and it's a mess. But I froze a number of shots that gave me a really good guide on how to duplicate the mega-chipping used in the movie. I can't prove that's what they looked like in real life, but I'd put more credit to the techno wizards than my own ability to throw something together based on black/white photos.
A short word on the kit. This is an oldie, and lacks the detail Tamiya's new “Zeke” releases. (I have the new A6M5 and it look terrific.) But the kit is perfectly adequate for detail, has more recessed lines than many of Tamiya's early fighters, and went together very nicely. That's a $10 model – what's not to like – particularly if you're planning on tearing it apart.
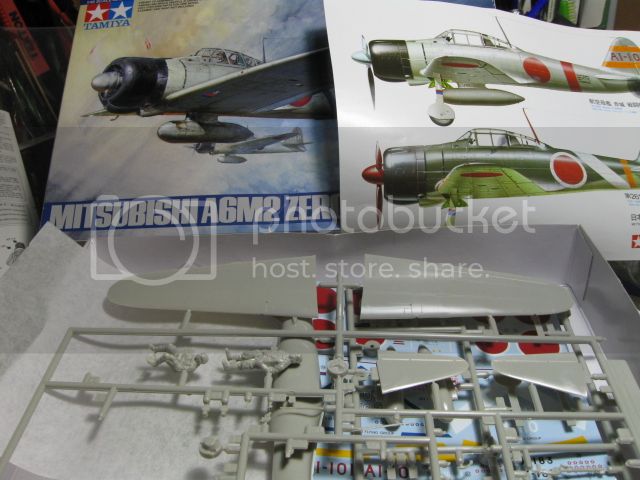
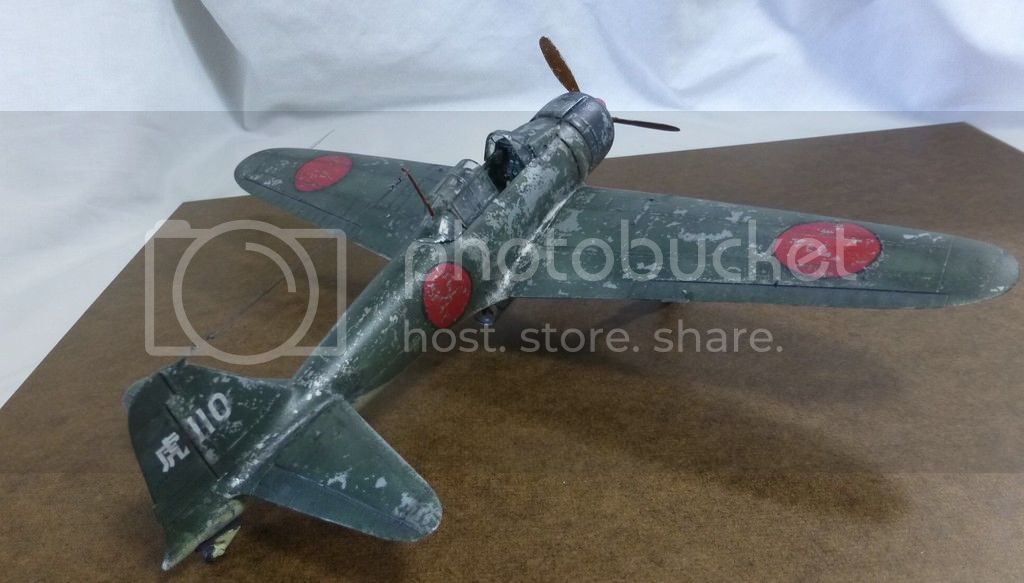
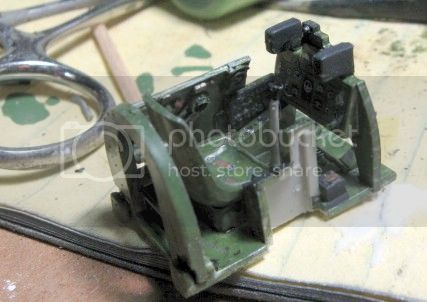
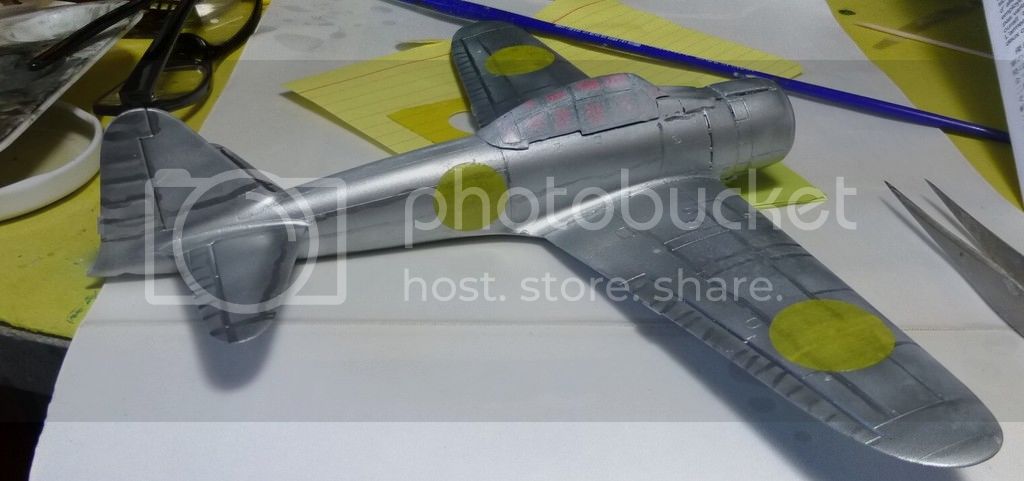
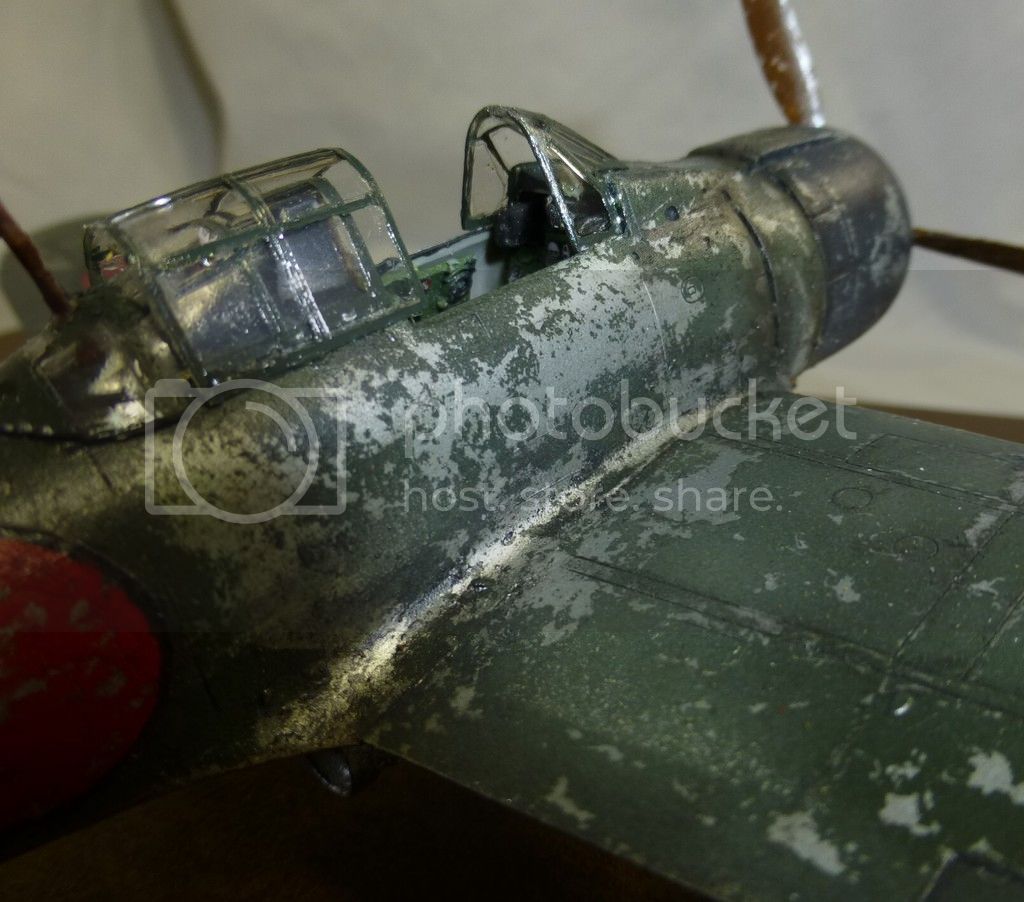
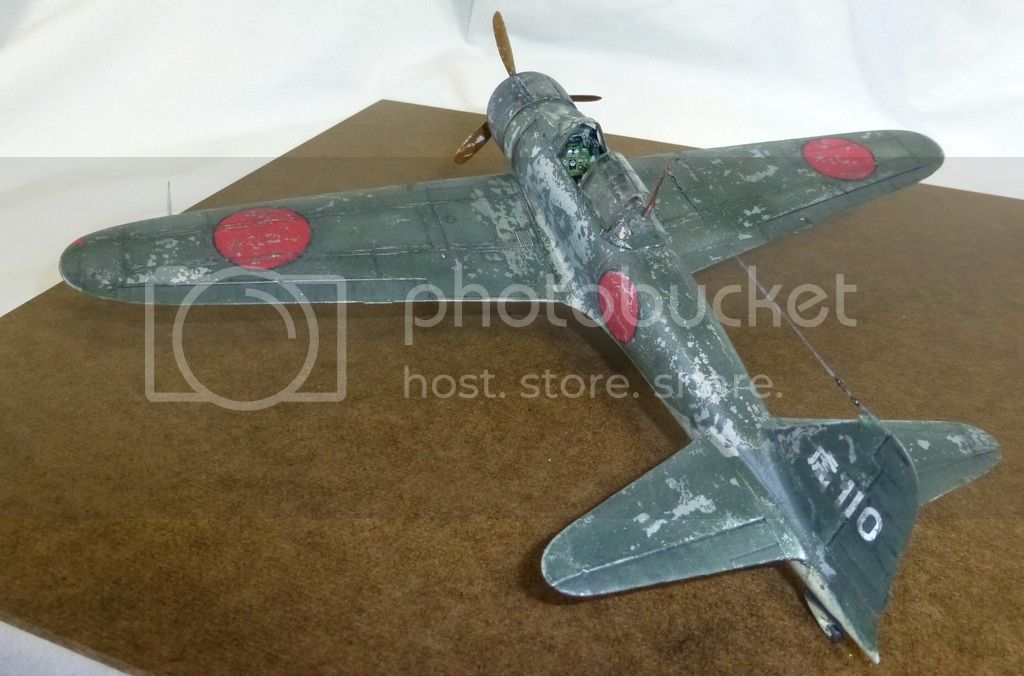
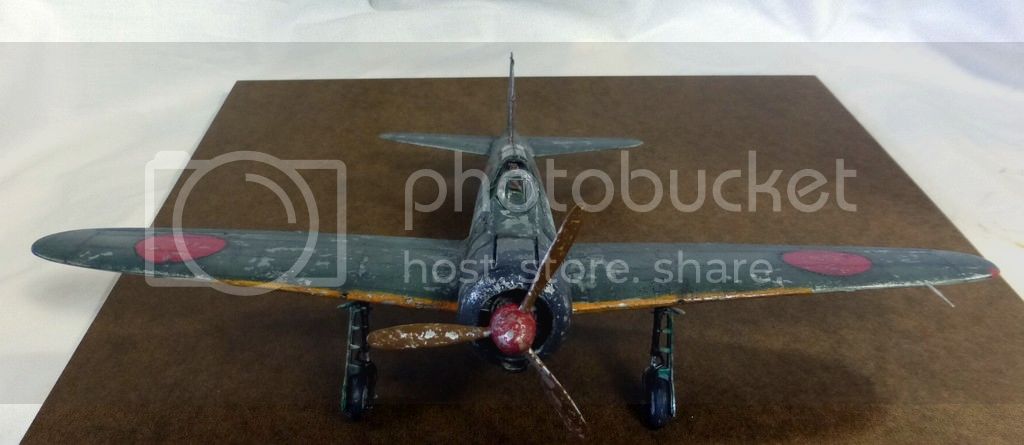
Once I got the hang of it, the chipping was pretty direct. After priming, I painted the plane Gunze Shine Silver – Gunze makes fine metallics and this one went down nicely. I put on some future to toughen the surface and let it dry for a day. Then I put on AK “Worn Effects” which emulates the “hairspray technique” used by armor fans. This is one specialized product that's a real improvement over something cheap from a drug store. I gave it an adequate coat, and then painted most of the plane a combination of Vallejo MC Bronze Green and German External Dark Green – the effect was a very black green. (I took all coloring advice from Nick Millman the kind and immensely knowledgeable head of the Japan Aircraft site. Colors are Nick's specialty.) It's not so apparent because I did some serious fading with a Tamiya Weathering Set that had a “fading green” pigment that was just perfect in hue. In future I'm going to be thinking about using pigments for fading on aircraft – I liked the effect a lot. I used Iwata Com.Art for panel lines and pin washes – it's a light effect but leaves a little grime on the surface which is what I wanted. Underneath I used MC Stone Grey and weathered it with a Flory wash – it's been a long time since I used one of those but it worked nicely.
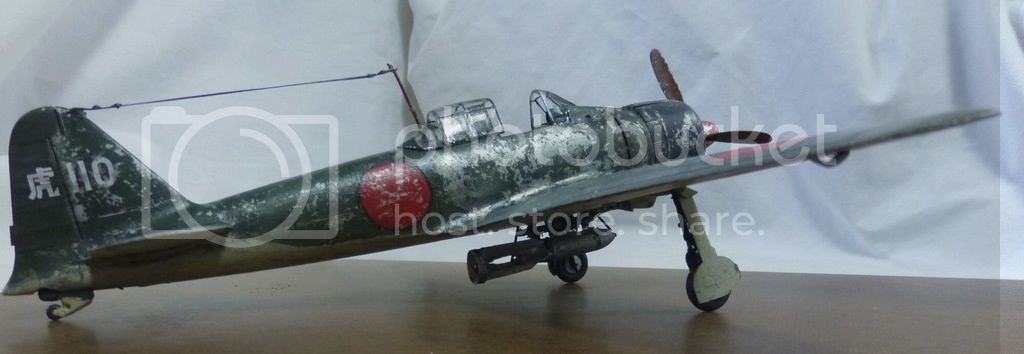
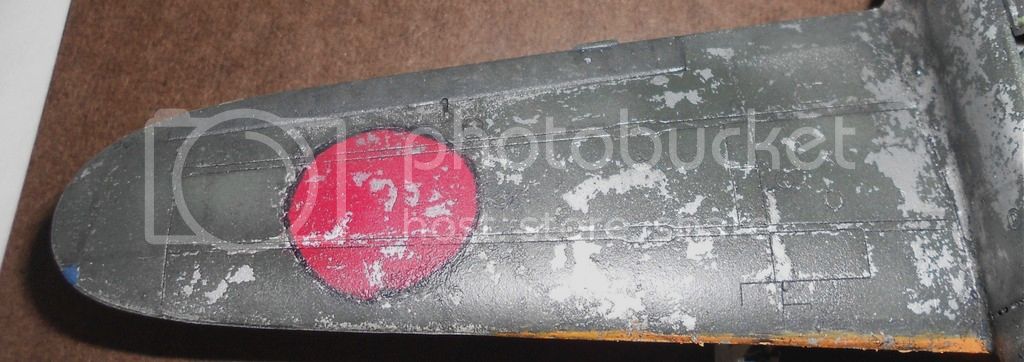
One of the nice things about Worn Effects is that you can wet it again two days later and it will still come off, if a bit more slowly. This was good I think. There was major chipping across the surface, especially below the cockpit on both sides. But the CGI shots showed that the overall effect was made by many micro chips along panel lines which I applied with air-brush cleaning tool and a hobby knife. Smaller the better was usually the case although blotches existed throughout. AK has a more aggressive chipping fluid (so does Vallejo) and they both make chipping easier, but it would easy to get too many big botches off. Anyway, it took a while. So did the blinking resin bomb. The IJN 250 KG bomb had a very unique look to it so I could just throw on an American version. A company called KMC made a resin version now sold by Squadron. I've used resin, but this one was no picnic. There was only one slot to help fit six different parts and it was not designed for a particular kit. That meant I had to do a lot of stuff combining CA and the eyeball. And unless my photos are wrong, the configuration of the bomb frame/bomb is a little off. They said paint it silver, so I did. The pics from the movie showed gray I think.
But in for a penny.... The overall effected required chips on the national markings. So they had to be masked and painted on. Fortunately the usual white stripe around the hinomarus was often painted over by hand with black on the sides and upper wings – which I did. The numbers are decals with light chipping done with silver paint. Should point out that every stage of painting with Worn Effects on had to be done separately and given a good dry to prevent masking tape from bringing up unwanted streaks.
It was hard not to do this subject without thinking about the “Special Attack” forces. We know a lot about them now. The first class were volunteers to a man and represented the best educated Japanese youth. After Okinawa – and I think the Tokyo government knew this – morale was beginning to yield but public display was impossible so great was the psychological and physical control held by the Japanese military. There's no doubt that a large number of the late pilots (at least 3,000 were trained and had planes on VJ Day) had been the victims of massive psychological pressure. Kamikazes were a nasty weapon off Leyte and Okinawa. The only thing that limited their effectiveness was the inability to fuze their bombs to penetrate decks. Ideally one wanted a bigger bomb than 250 kg, but if something that size penetrated, it could do ugly damage to any vessel this side of the Iowa. (The soul victim of the Cherry Blossum was a US picket escort that sunk in minutes because it was a flying fuzed bomb.) Most planes hit by a conventional Kamikaze would suffer damage on deck where the bomb went off and often severe loss of life. But the number of ships sunk, particularly anything larger than a DE, was low considering the extraordinary size of the USN and healthy number of aircraft expended – around 2,500.
Attacking US troops ships and landing ships from bases in Kyushu might have been a different story. It would have been extremely difficult for USN combat air patrol to protect the landings with attackers coming in low and maybe 20 minutes from their field. And the Japanese were going to pursue soft targets like LST and troop transports. The USN knew this all too well, and were getting cold feet on Olympic before Hiroshima made the question moot. That didn't mean the USN was getting cold feet on the war – the close blockade planned in the winter of 45-46 would have been designed to starve Japan. There were even plans to spray pesticides on cropland. Both nations were close to a war of annihilation. But this tragedy was no case of moral equivalence. It was the willingness of the Japanese soldier (or airman) to sacrifice his life for the honor of Japan that had convinced American soldiers and their leaders in Washington that Japan was – can't think of another word – crazy. And if you're dealing with crazy people, normal power politics don't work well. I look at all of this has a product of a generation of all-out indoctrination on the part of the Japanese military which controlled “social studies” in the Japanese school system from the time of Meiji and were running everything by the 1930s. The result was the spread of a kind of ersatz bushido designed to wed citizen and emperor. It worked all too well. Japanese fighting men often encouraged each other by saying “we shall meet at the Yasakuni Shrine.” This reflected an incredible physical courage. It also almost brought utter ruin to a great nation. Sobering.
More pics below.
Eric
Pre-Flight Check
Constructive critique of your finished or in-progress photos.
Hosted by Jim Starkweather
1/48 Tamiya A6M2: Mega Chipped Kamikaze
ebergerud
California, United States
Joined: July 15, 2010
KitMaker: 297 posts
AeroScale: 76 posts
Joined: July 15, 2010
KitMaker: 297 posts
AeroScale: 76 posts
Posted: Monday, October 05, 2015 - 10:18 AM UTC
Posted: Monday, October 05, 2015 - 06:21 PM UTC
The finish looks fabulous. However, I would re-do the antenna wire with something much thinner or eliminate it altogether. I also think the antenna post is pulled back too far and/or could be "sawed off" for a kamikaze like this.
But, as I said, the finish is breathtaking.
Joel_W
Associate Editor
New York, United States
Joined: December 04, 2010
KitMaker: 11,666 posts
AeroScale: 7,410 posts
Joined: December 04, 2010
KitMaker: 11,666 posts
AeroScale: 7,410 posts
Posted: Monday, October 05, 2015 - 08:03 PM UTC
Eric,
A most impressive prefix to your build. The introduction of the Kamikaze philosophy which was 1st seen during the invasions of Iwo Jima and Okinawa, took a very deadly toll which the USN wasn't prepared for. Yet, the overwhelming size of the ever growing USN would and did withstand those assaults, as both invasions were successful.
Both islands were needed for the B-29s and P-51s massive round the clock carpet incendiary bombing of the main 4 Japanese home islands.
Your very accurate reproduction of a well worn A6M2 Zero for a Kamikaze attack, does indeed look almost exactly as they looked in those pictures. And for those that want to replicate history rather then a more pristine to museum quality build, you succeeded to the nth degree.
Your use of so many various weathering techniques and materials was certainly eye opening to me. I keep on promising myself to expend my weathering options, but I haven't done so as yet. Seeing how the combination worked for your build, I'm determined to actually start to try other techniques.
As Brian alluded to, the only "if" is your antenna wire. It's a little to thick, and somewhat uneven, as though it was pulled from stretched sprue. A minor point for sure, but when one produces such an outstanding build, it's the smallest of things that semm to stand out.
Joel
Posted: Monday, October 05, 2015 - 10:23 PM UTC
Quoted Text
As Brian alluded to, the only "if" is your antenna wire. It's a little to thick, and somewhat uneven, as though it was pulled from stretched sprue. A minor point for sure, but when one produces such an outstanding build, it's the smallest of things that semm to stand out.
Joel
Eric, "what Joel said." My only reason for pointing this out is that it does distract from the rest of the build. I would look at some other historic pics to see if I'm right about the sawed off antenna. Understand, I am light years away from anything even close to your great finish on this build.
spaarndammer
Noord-Holland, Netherlands
Joined: January 28, 2007
KitMaker: 1,945 posts
AeroScale: 388 posts
Joined: January 28, 2007
KitMaker: 1,945 posts
AeroScale: 388 posts
Posted: Monday, October 05, 2015 - 10:31 PM UTC
An amazing piece of work and very well explained. The close-up picture really show really the quality of the job, using small chips. If you would like to post more close ups than that would be highly appreciated.
Jelger
Jelger
ebergerud
California, United States
Joined: July 15, 2010
KitMaker: 297 posts
AeroScale: 76 posts
Joined: July 15, 2010
KitMaker: 297 posts
AeroScale: 76 posts
Posted: Tuesday, October 06, 2015 - 03:02 AM UTC
You're probably right about the antenna. Here's what happened. Because I was doing the most delicate fitting of the entire build right at the end, I was really worried about mishandling something and wrecking the project. I'm prone to project fatigue and had no intention of a major rebuild - the kit would have been demoted to medical experiments. The antenna had snapped during construction so it was very delicate. I used EZ Line which works good - perhaps I used lite in the past. Drilled a little hole in the tail and got it secure - ran it up very gingerly across the CA on the antenna and it held. A few hours later I came back and the EZ line had pulled the antenna back. I said hell with it. Nobody sees my kits anyway.
Ironically before I even put on the antenna I was looking all over for a pic of a Kamikaze without one. I did know that the Zeros had their guns and radios removed to allow the 250kg bomb. Why have an antenna? Couldn't find one. (The movie let me down there.) So - natch - I'm thinking someone will say "where's the aerial." (G) Anyway, I'll take your word for it and just snip the thing. If I get the energy. I don't build for the ages under the best of circumstances and was pleased with the adventures in heavy weathering and that was the point. Thinking about the next project now. A Spitfire XVI - never built a Spit.
Thanks
Eric
ebergerud
California, United States
Joined: July 15, 2010
KitMaker: 297 posts
AeroScale: 76 posts
Joined: July 15, 2010
KitMaker: 297 posts
AeroScale: 76 posts
Posted: Tuesday, October 06, 2015 - 04:19 AM UTC
OK - chalk one for accuracy. We leave all other sins for another day.
Here's the woebegone Zeke without an antenna.
Here's another detail shot of the wing. Hard to take these for me. Anyway, it does show some of the fading coming from the pigments. It's much more visible in person - that's a technique I'll use again.
Eric
Here's the woebegone Zeke without an antenna.
Here's another detail shot of the wing. Hard to take these for me. Anyway, it does show some of the fading coming from the pigments. It's much more visible in person - that's a technique I'll use again.
Eric
Posted: Tuesday, October 06, 2015 - 06:23 AM UTC
Looks 1000% better. And, while rare, they are out there:
RobBye
Manitoba, Canada
Joined: February 04, 2015
KitMaker: 90 posts
AeroScale: 2 posts
Joined: February 04, 2015
KitMaker: 90 posts
AeroScale: 2 posts
Posted: Tuesday, October 06, 2015 - 07:08 AM UTC
I think that's a terrific build Eric.
I saw the movie you based your build on - the Eternal Zero. Fittingly, it was during a flight over to Japan last year. I thought it was brilliant, and I'd recommend it to anyone with an interest in this subject.
Posted: Tuesday, October 06, 2015 - 07:44 AM UTC
Eric,
Extraordinary work! Inspirational technique.
Joel_W
Associate Editor
New York, United States
Joined: December 04, 2010
KitMaker: 11,666 posts
AeroScale: 7,410 posts
Joined: December 04, 2010
KitMaker: 11,666 posts
AeroScale: 7,410 posts
Posted: Wednesday, October 07, 2015 - 12:44 AM UTC
I'll 2nd what Brain said. They effect of not Antenna and wire is amazing. Well done.
Joel
Joel
phumbles
Australia
Joined: June 14, 2013
KitMaker: 82 posts
AeroScale: 81 posts
Joined: June 14, 2013
KitMaker: 82 posts
AeroScale: 81 posts
Posted: Thursday, October 22, 2015 - 02:03 PM UTC
Great build and exceptional finish.