Albatros B.II (Early) - 1//32 by Wingnut Wing
Baden-Württemberg, Germany
Joined: December 26, 2009
KitMaker: 813 posts
AeroScale: 98 posts
Posted: Saturday, January 09, 2016 - 12:27 AM UTC
All parts painted with oil colors in wood optic.... then put together ....
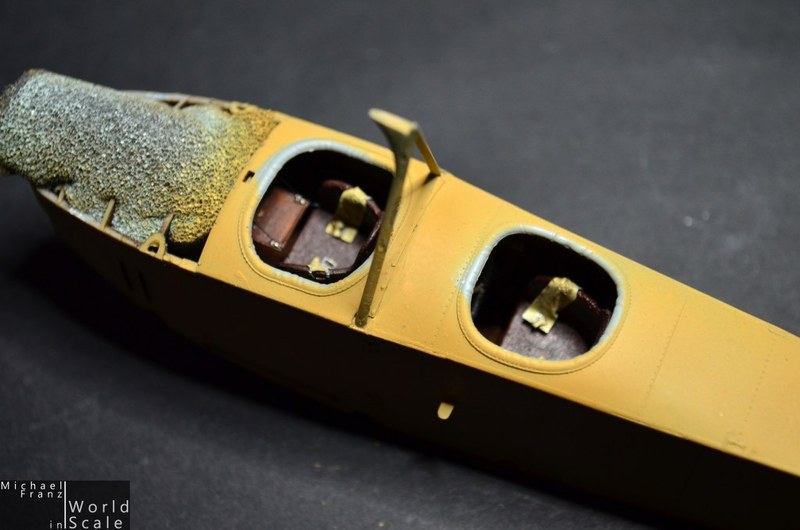
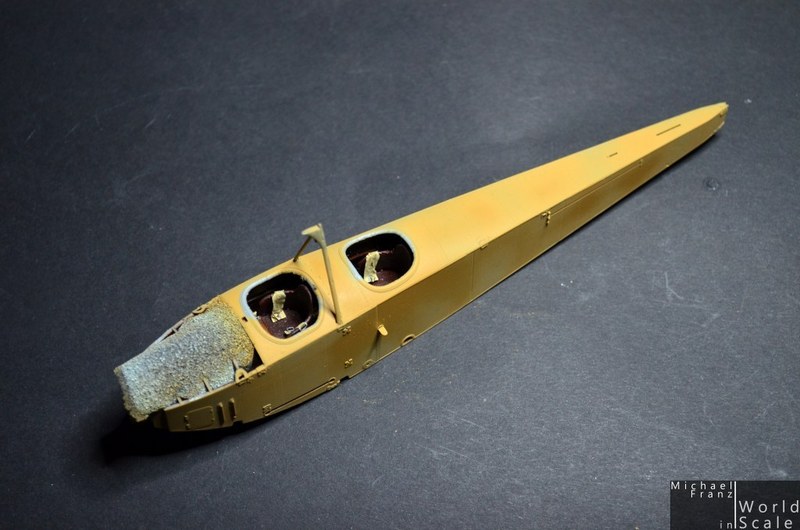
The seats got painted with oil colors and put together. The photo etched seat belts were annealed on a flame, painted in beige and silver, then glued to the seats and formed. Oil color washing (brown) followes. The steering wheel was reworked with tape stripes, then painted black, also washed with oil colors.
Next step, some rigging inside ....


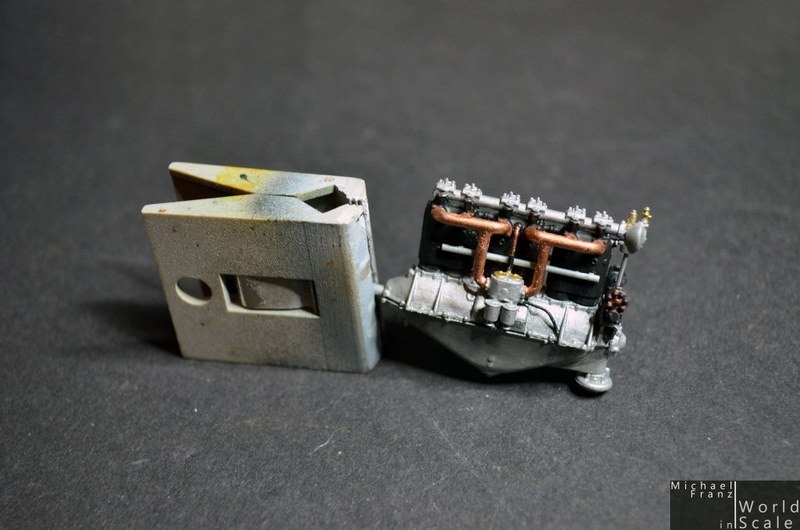
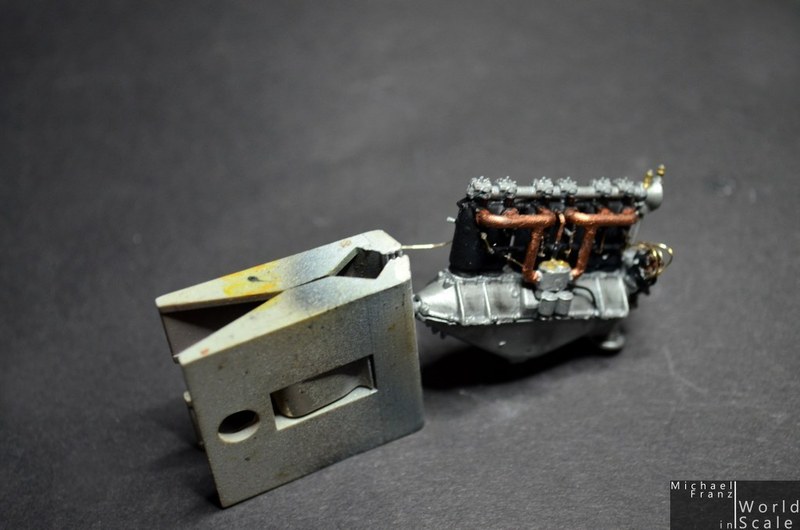
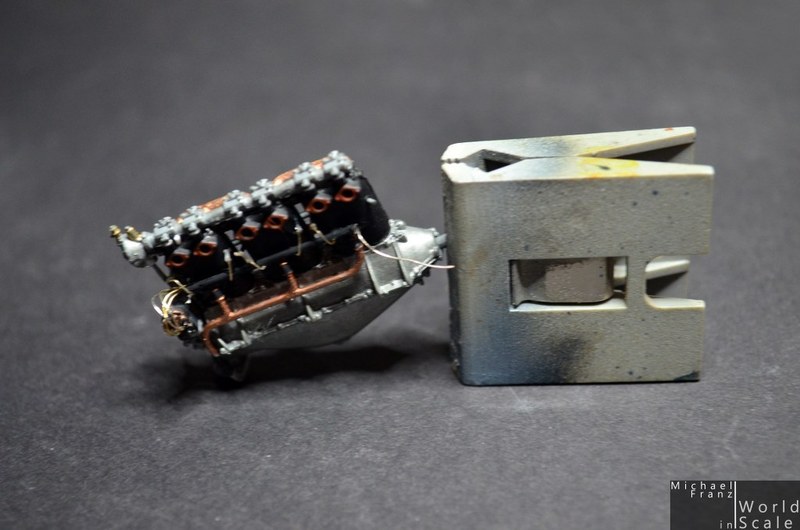
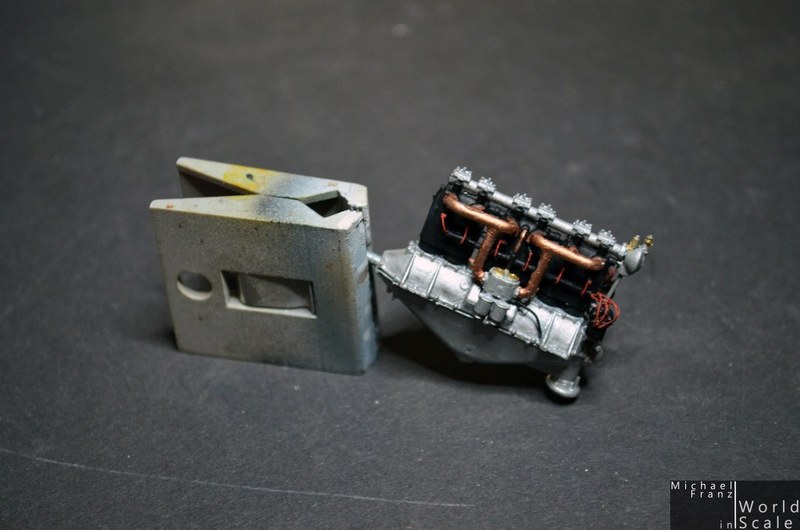
The engine parts were colored, the silver ones polished with metal powder. The brass and copper parts painted with AK Interactive's metal colors. Then all put together.... some wiring follows next, then weathering ....

Cheers
Micha
regards,
Michael
http://www.world-in-scale.de
Quebec, Canada
Joined: June 23, 2008
KitMaker: 414 posts
AeroScale: 364 posts
Posted: Saturday, January 09, 2016 - 03:03 AM UTC
Outstanding! Such care and patience. I will be following your progress with interest. The B.II was an elegant aircraft, especially in CDl.
British Columbia, Canada
Joined: March 16, 2010
KitMaker: 473 posts
AeroScale: 101 posts
Posted: Saturday, January 09, 2016 - 03:12 AM UTC
The usual excellence. How did you like working with the powder?
Is it Uschi's powder?
I have some , yet to try it...
fbook : Custom Motorcycle Modeler Page
Thank you , Steve
Baden-Württemberg, Germany
Joined: December 26, 2009
KitMaker: 813 posts
AeroScale: 98 posts
Posted: Wednesday, January 13, 2016 - 02:41 AM UTC
Yes it is Uschis .... and it is very good I think... I like working with it

regards,
Michael
http://www.world-in-scale.de
Baden-Württemberg, Germany
Joined: December 26, 2009
KitMaker: 813 posts
AeroScale: 98 posts
Posted: Wednesday, January 13, 2016 - 02:42 AM UTC
*** UPDATE ***
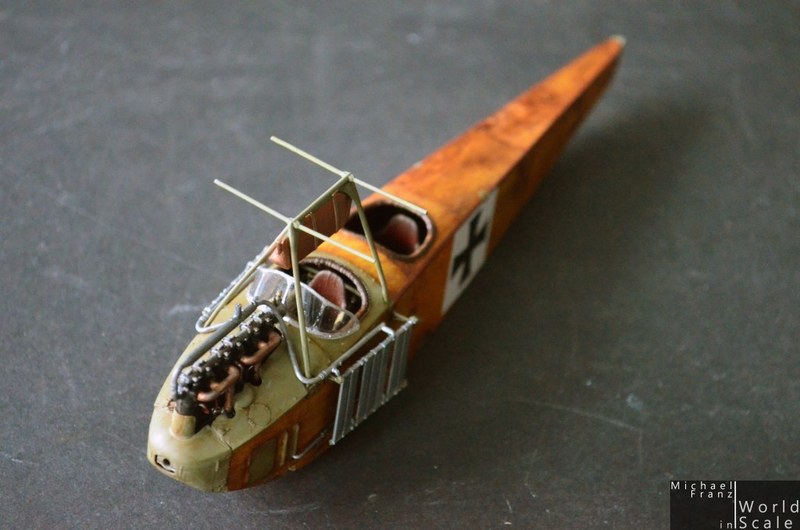
Thin plastic strips, cut in very short parts are used as the sparking plugs, glued to the engine, painted in silver. Thin wire is used for the wiring of the engine... painting follows later.
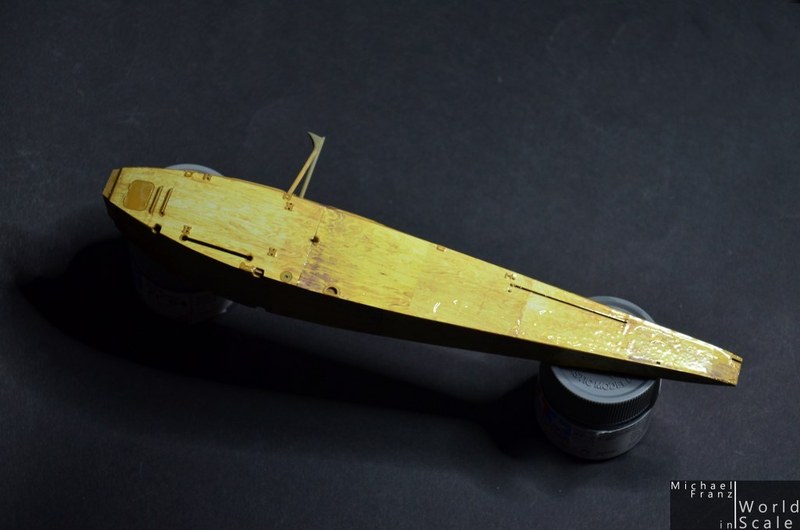
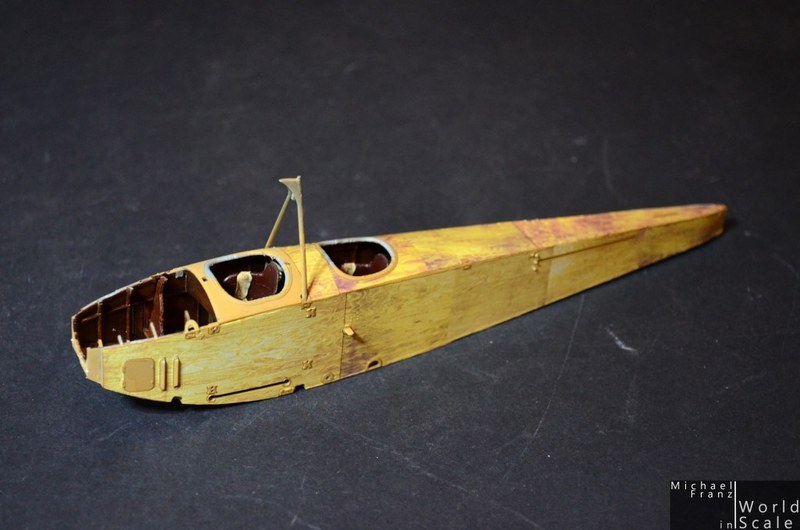
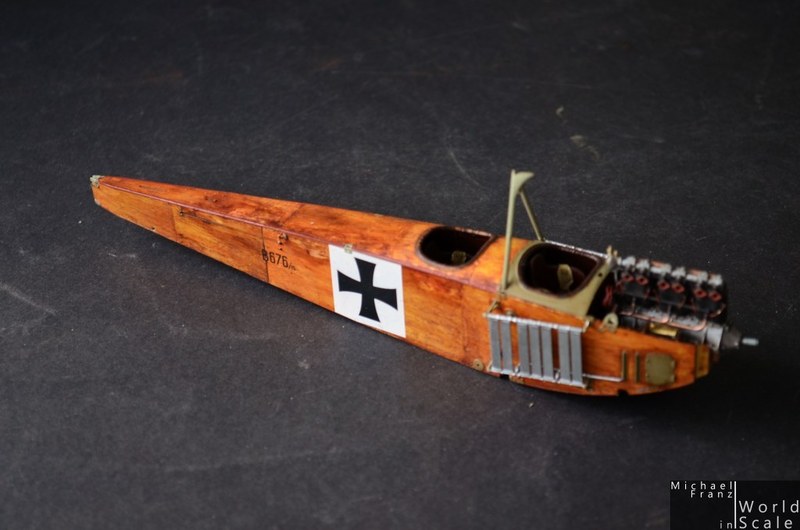
In the meantime the interior is glued inside the hull. Fitting was very well I think... no problems. Then I have sprayed a light beige on it.... as a base for the decals. It is the first Wingnut Wings kit which includes the wooden decals already. I wanted to try these .... the fitting is also fantastic, the wooden optic as well. I only want to give them a more brownish optic later, which I will make with oil colors again.


Next step will be a layer of clear coat, then brown / redbrown / grey oil colors for the final color of the wooden optic, then clear coat, then painting of the grey/green metal parts, then decals (markings, stripes, ...) then clear coat again ...
Cheers
Micha
regards,
Michael
http://www.world-in-scale.de
Baden-Württemberg, Germany
Joined: December 26, 2009
KitMaker: 813 posts
AeroScale: 98 posts
Posted: Monday, January 18, 2016 - 03:26 AM UTC
*** UPDATE ***
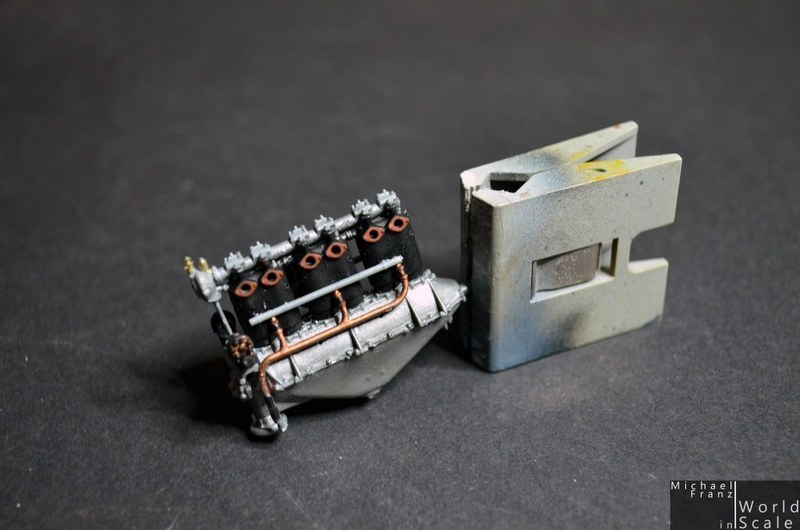
The engine.... after adding and painting the wiring... next step: Weathering....

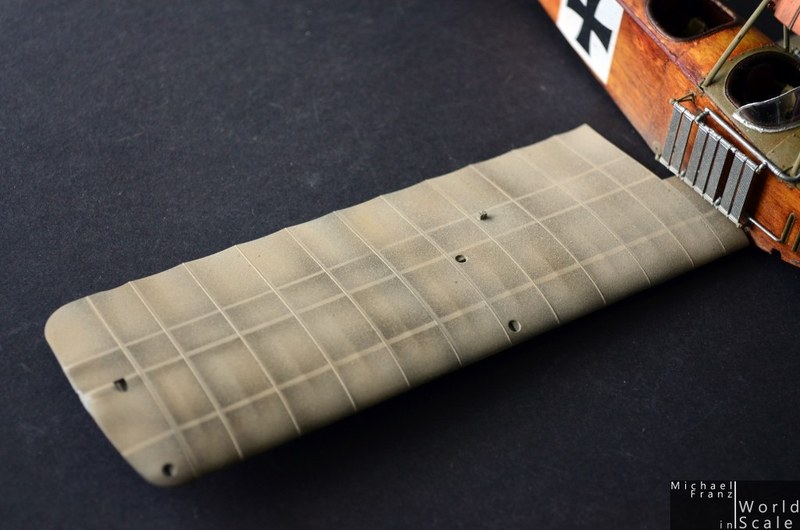
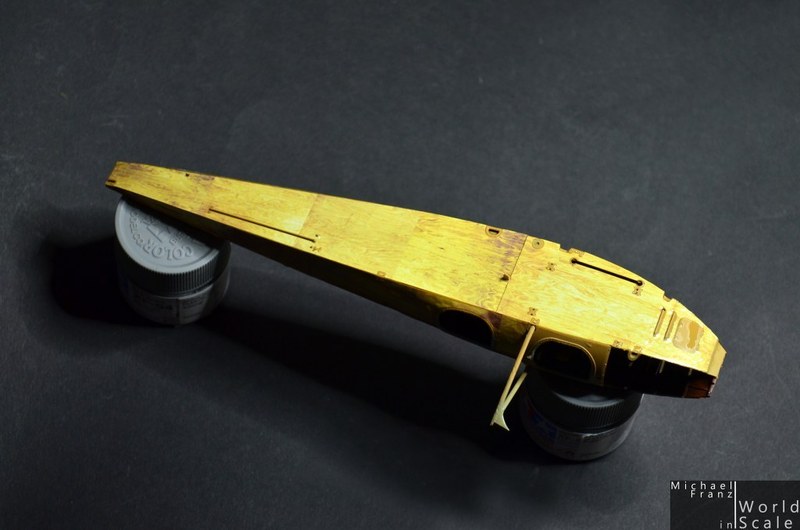
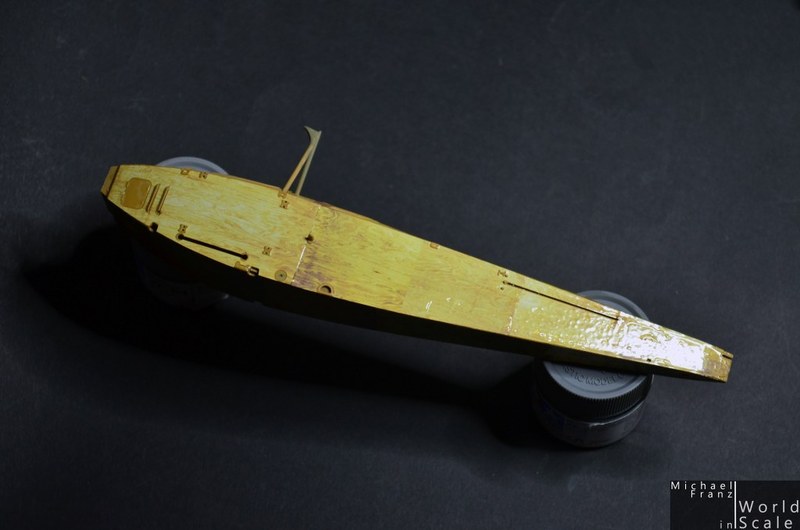
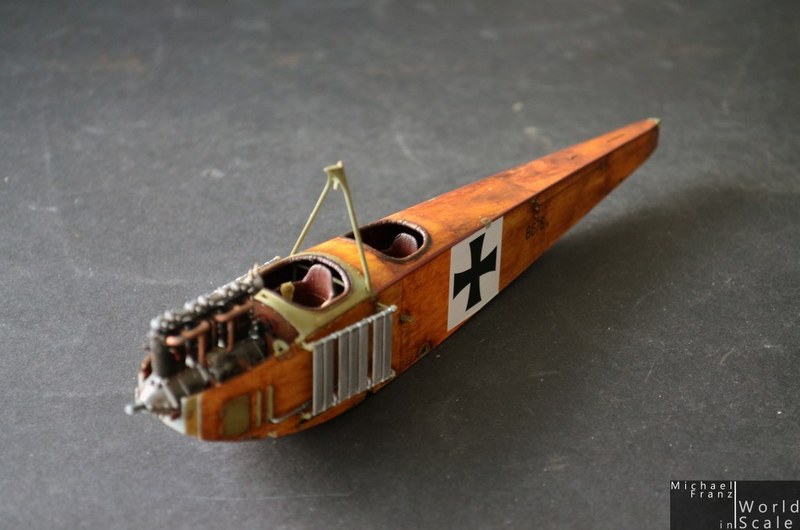
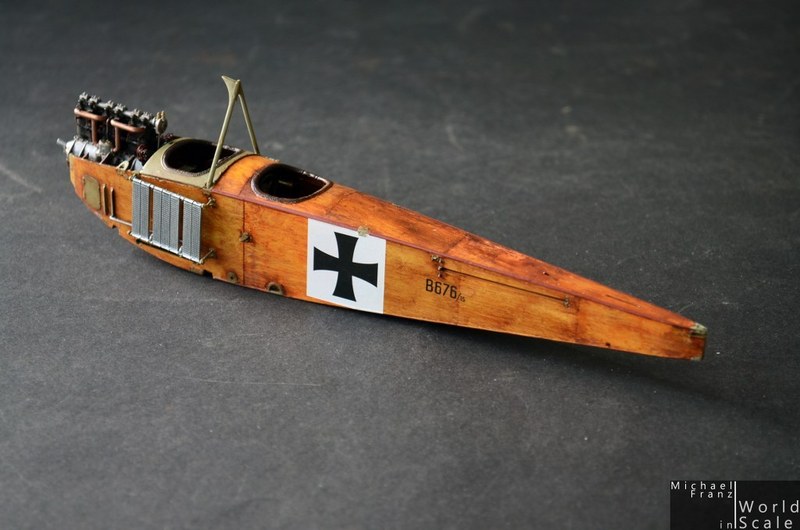
The wooden fusealge with the wooden decals from Wingnut Wings ....

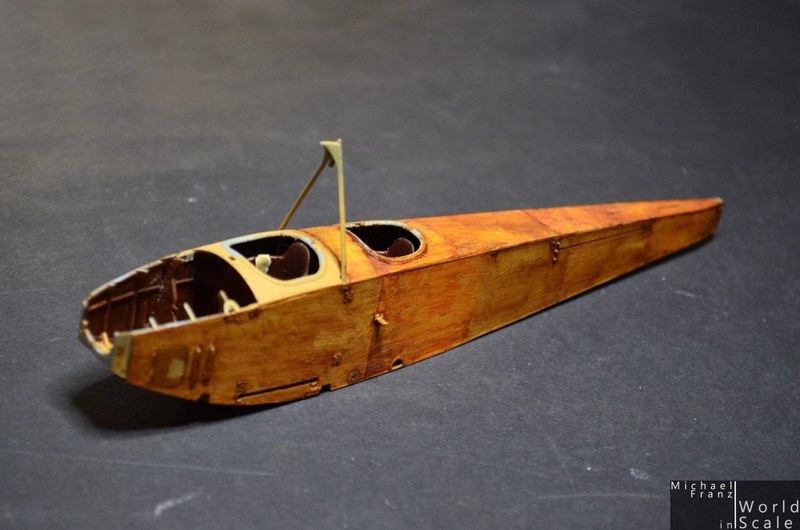
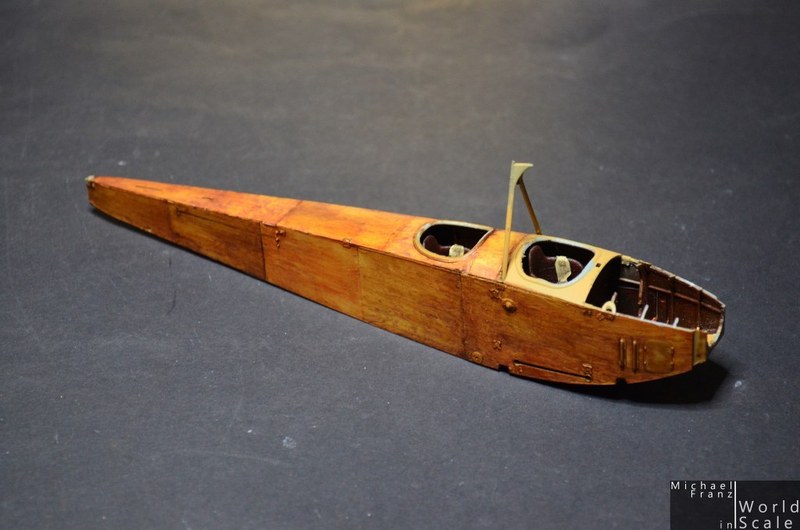
... and the same after working with some kind of oil colors.


Next step: Painting the details, clear coat (matt), decals (markings), clear coat....
Cheers
Micha
regards,
Michael
http://www.world-in-scale.de
Connecticut, United States
Joined: October 26, 2009
KitMaker: 424 posts
AeroScale: 389 posts
Posted: Tuesday, January 19, 2016 - 02:04 AM UTC
This is an awesome fuselage!
Nice wood technique.
Captn Tommy
Baden-Württemberg, Germany
Joined: December 26, 2009
KitMaker: 813 posts
AeroScale: 98 posts
Posted: Saturday, January 23, 2016 - 10:31 PM UTC
*** UPDATE ***
The decals are done, a layer of clear coat matt added.
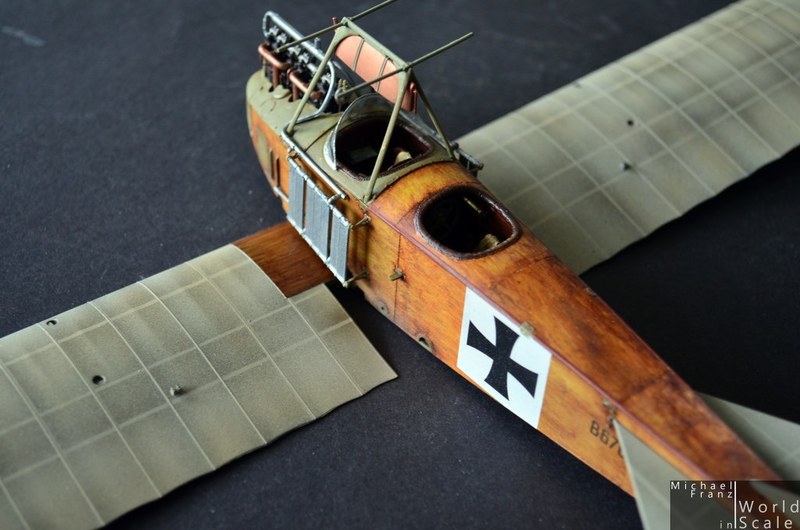
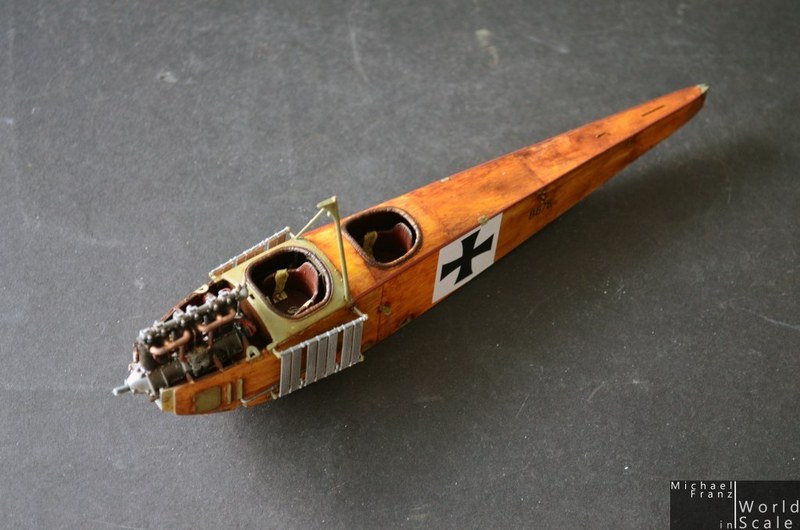
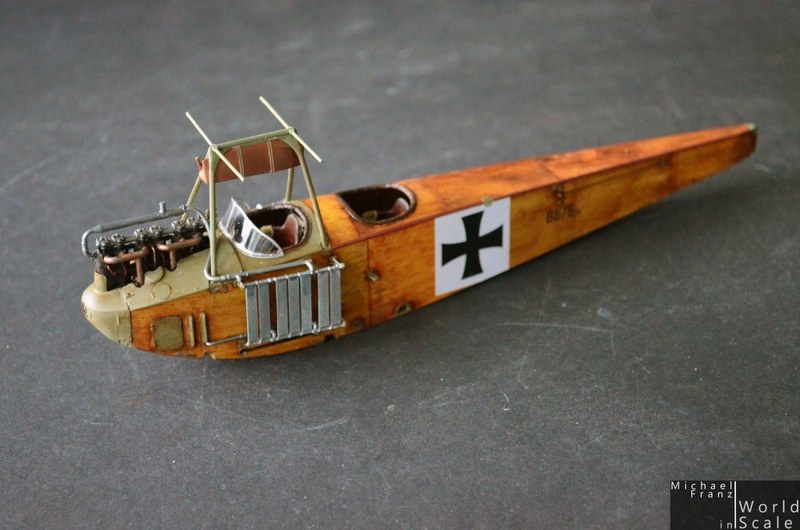
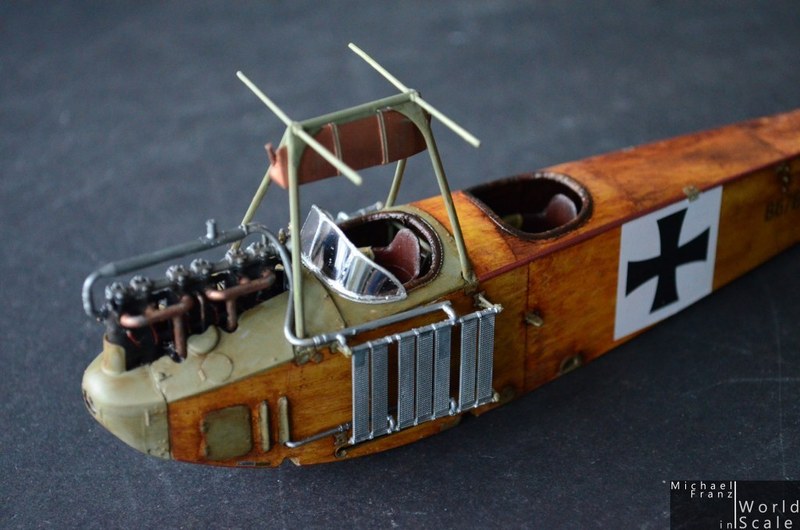
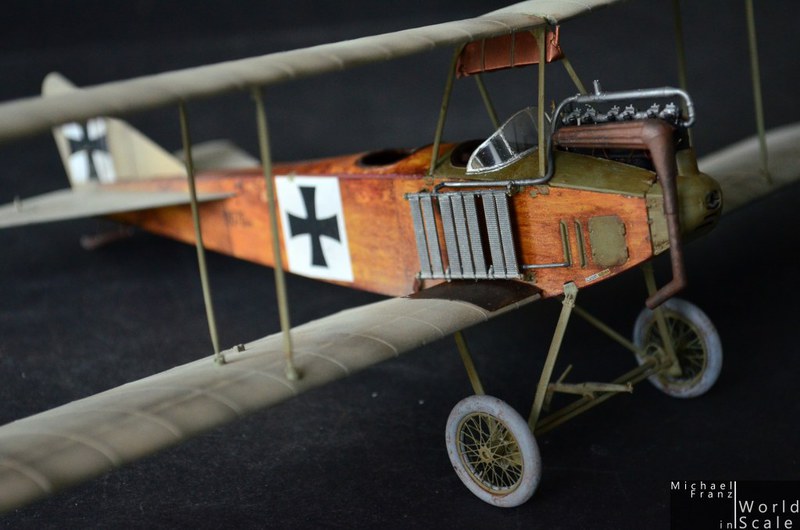
Then the engine was installed inside the fuselage and the coolers added on the outside, with some first parts of the pipes.......

Cheers
Micha
regards,
Michael
http://www.world-in-scale.de

#424
Queensland, Australia
Joined: April 23, 2015
KitMaker: 4,648 posts
AeroScale: 1,938 posts
Posted: Saturday, January 23, 2016 - 10:49 PM UTC
That looks really good, Michael. The engine detail and radiators reqlly draws the eye.
Gary
"Artillery adds dignity, to what would otherwise be an ugly brawl."
Frederick The Great
Baden-Württemberg, Germany
Joined: December 26, 2009
KitMaker: 813 posts
AeroScale: 98 posts
Posted: Monday, February 01, 2016 - 01:25 PM UTC
*** UPDATE ***
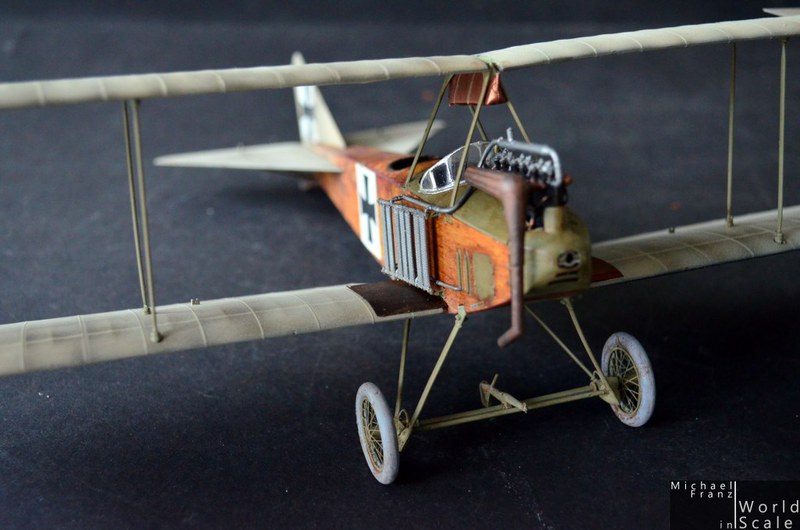
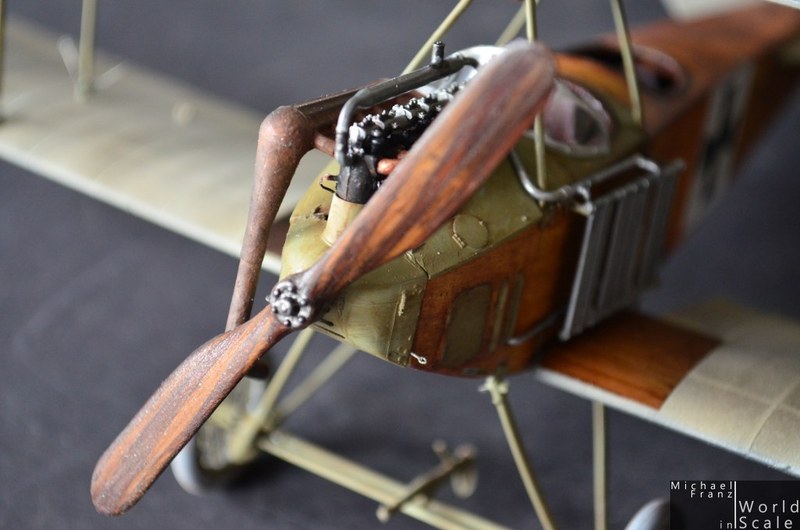
The engine is installed, the pipes are connected. The window received some frame painted in silver and polished. The center struts for the upper wing is installed as well as the tank inside.
the actual thing ....


Cheers
Micha
regards,
Michael
http://www.world-in-scale.de
#424
Queensland, Australia
Joined: April 23, 2015
KitMaker: 4,648 posts
AeroScale: 1,938 posts
Posted: Tuesday, February 02, 2016 - 01:32 AM UTC
"Artillery adds dignity, to what would otherwise be an ugly brawl."
Frederick The Great
Baden-Württemberg, Germany
Joined: December 26, 2009
KitMaker: 813 posts
AeroScale: 98 posts
Posted: Sunday, February 21, 2016 - 02:08 PM UTC
regards,
Michael
http://www.world-in-scale.de
#424
Queensland, Australia
Joined: April 23, 2015
KitMaker: 4,648 posts
AeroScale: 1,938 posts
Posted: Sunday, February 21, 2016 - 11:21 PM UTC
Michael,
You are a busy man! Everything looks excellent and worn. I can just anout feel that the wings are made of cloth and not plastic.
Gary
"Artillery adds dignity, to what would otherwise be an ugly brawl."
Frederick The Great
Baden-Württemberg, Germany
Joined: December 26, 2009
KitMaker: 813 posts
AeroScale: 98 posts
Posted: Sunday, February 28, 2016 - 03:05 PM UTC
*** UPDATE ***
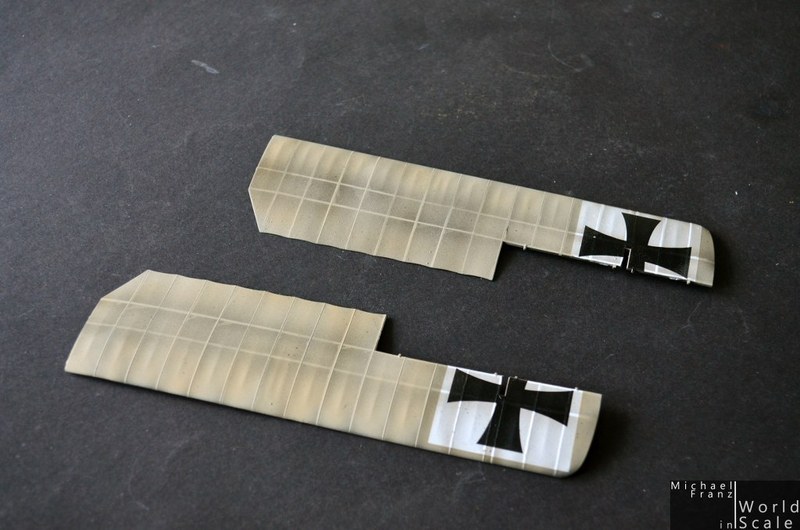
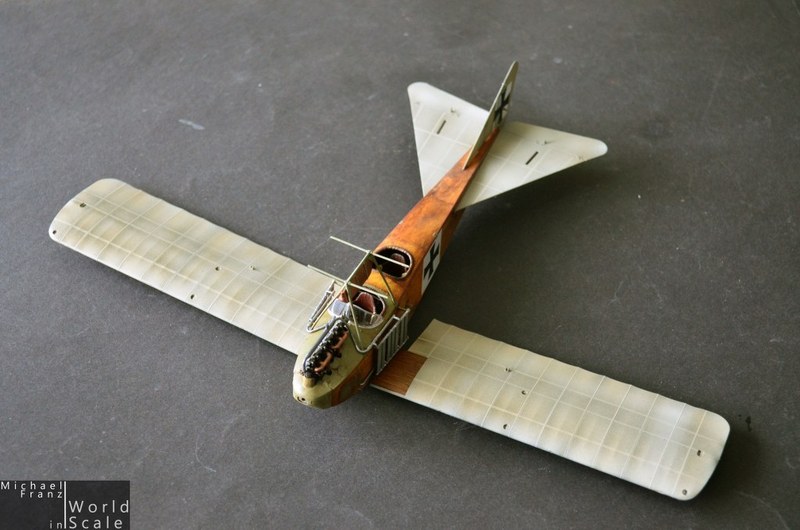
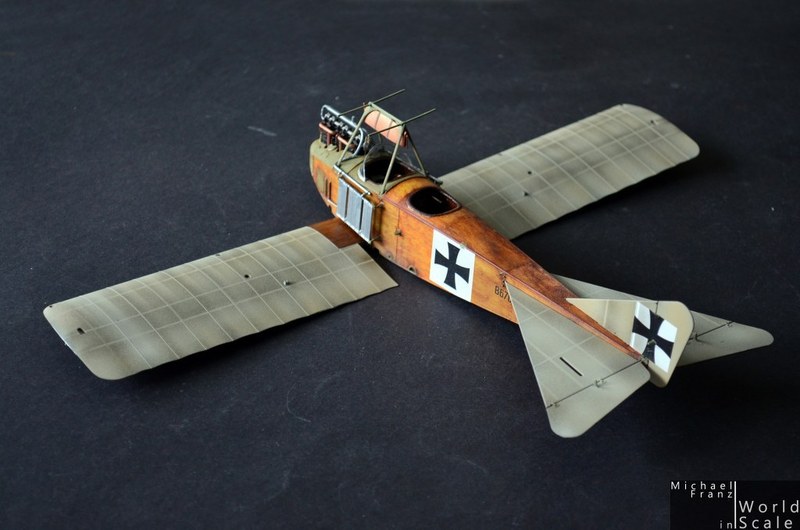
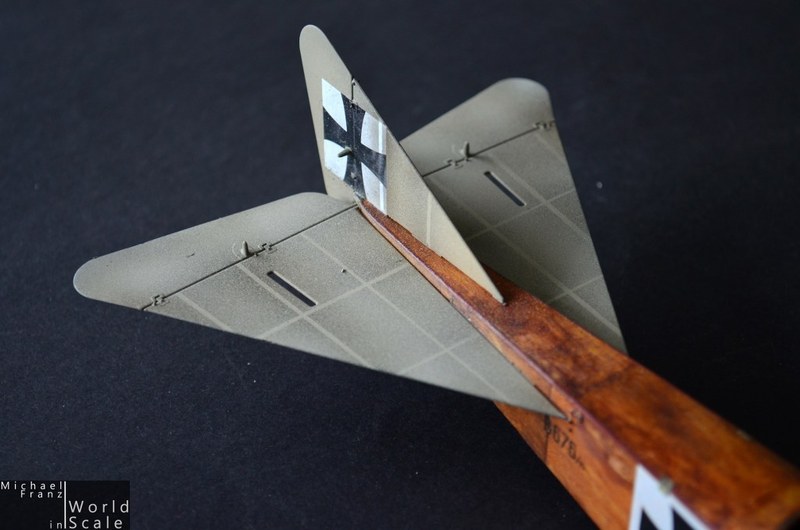
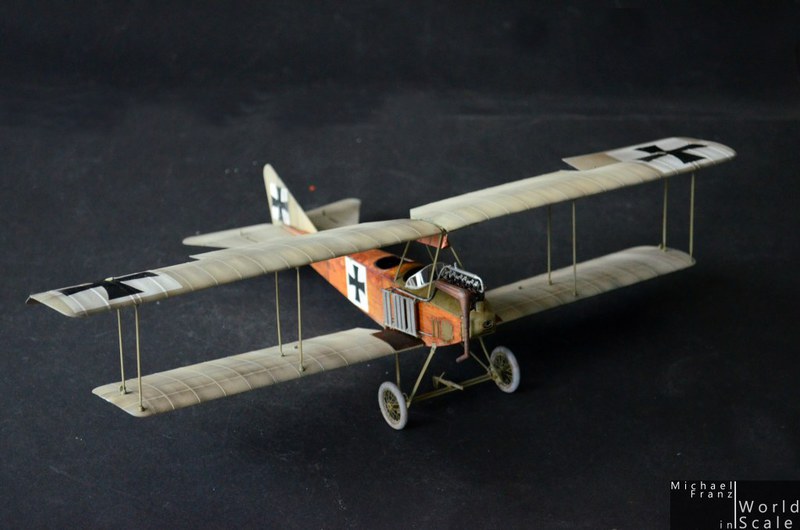
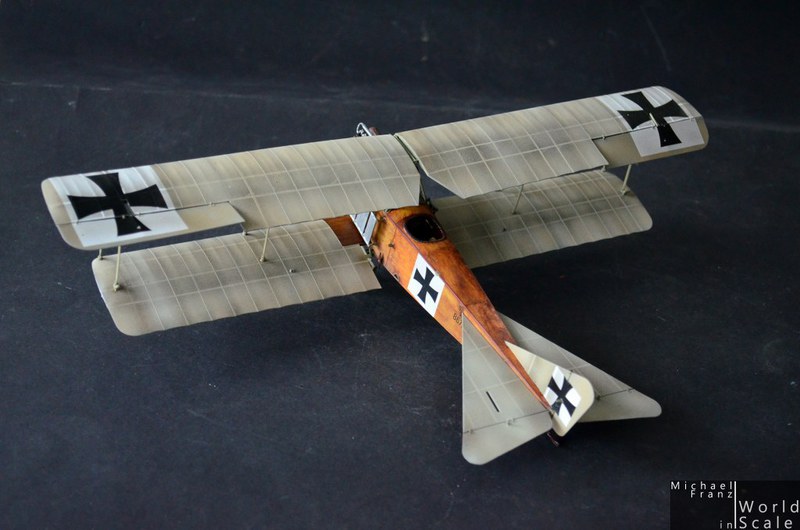
The finished wings were mounted and glued to the fuselage.
The wheels are finished - the kit offers three different versions: Plastic spoke 1-piece wheels, wheels with closed rims, separate tires with etched 4-piece spoke rims. I used the last ones which look really great I think.
Once finished the wheels I have installed these with to the fuselage.
The exhaust was mounted, painted in iron color, then used Lifecolors rust colors in differend shades, then black pigments for smoke on the full exhaust.

Now some further paintings and weatherings, then painting of the propeller, the bombs and bombracks. Then rigging ...
Cheers
Micha
regards,
Michael
http://www.world-in-scale.de
Gdańsk, Poland
Joined: February 18, 2016
KitMaker: 92 posts
AeroScale: 90 posts
Posted: Sunday, February 28, 2016 - 03:08 PM UTC
Simply beautiful - outstanding build Micha

Bart
Baden-Württemberg, Germany
Joined: December 26, 2009
KitMaker: 813 posts
AeroScale: 98 posts
Posted: Monday, March 07, 2016 - 02:42 PM UTC
*** UPDATE ***
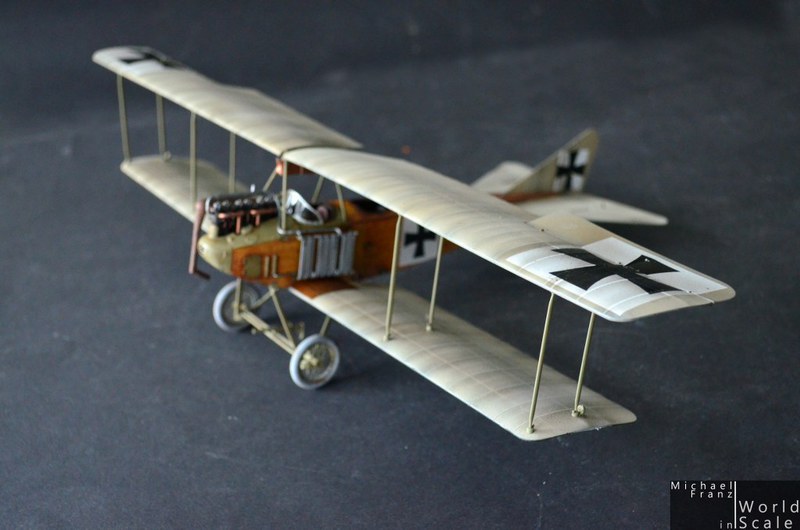
The propeller of the Albatros was painted. First a layer of Lifecolor Acrylics beige, then masked and painted with darker brown. Once dry I have added a layer of dark brown oil colours on the full propeller and wiped it in the direction of the texture to bring back the wood grain under it.
Once dried I have sanded it and gave it some layers of glossy clear coat and more sanding .... then installed it.
For the rigging I have glued some turnbuckles from Gaspatch Models to the wings. These parts are absolutly best on the market in my eyes. Great help, great look!
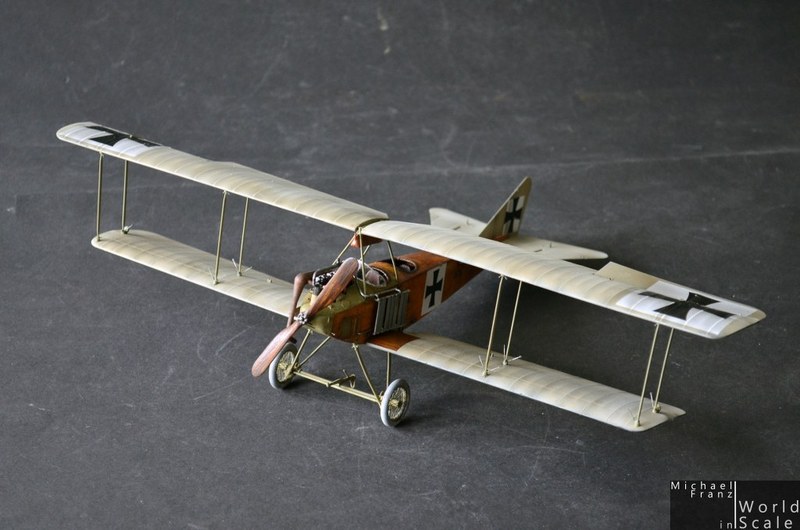
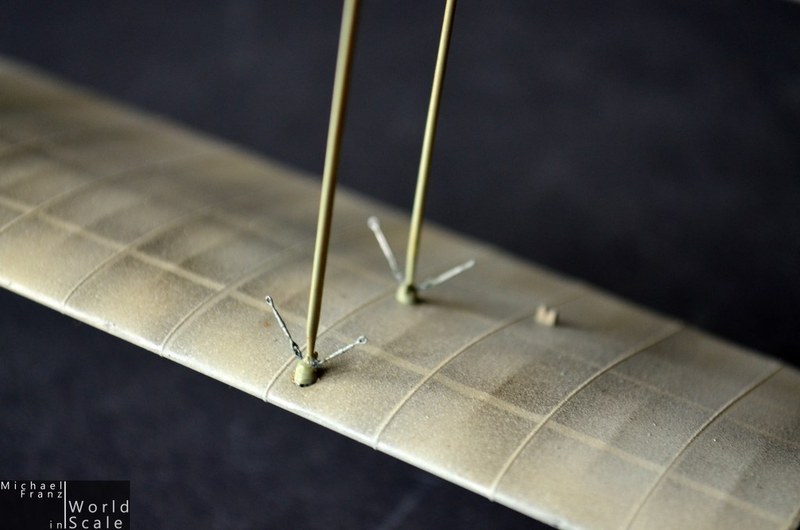
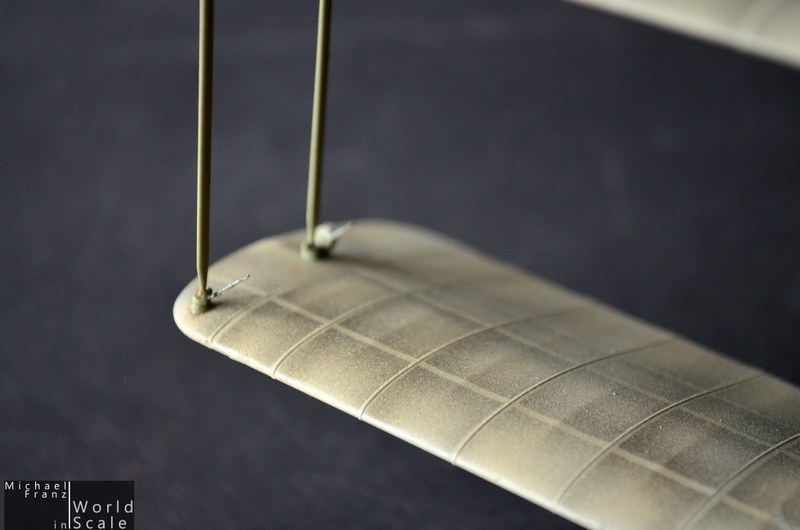
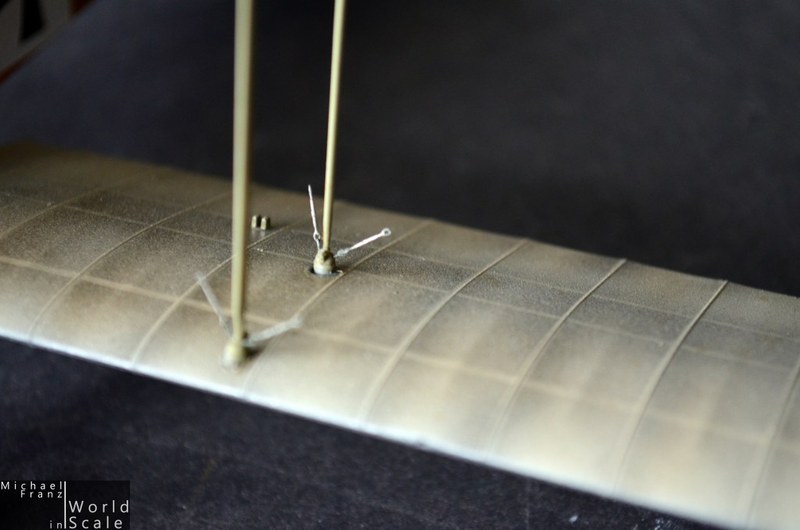


Next step - adding the rigging itself, made of EZ line glued to the turnbuckles.
Cheers
Michael
regards,
Michael
http://www.world-in-scale.de
Connecticut, United States
Joined: October 26, 2009
KitMaker: 424 posts
AeroScale: 389 posts
Posted: Wednesday, March 09, 2016 - 06:58 PM UTC
Top notch! Like the turnbuckles.
Love the wing finish
Captn Tommy
Merlin
 Senior Editor
#017
United Kingdom
Joined: June 11, 2003
KitMaker: 17,582 posts
AeroScale: 12,795 posts
Posted: Friday, March 11, 2016 - 01:52 AM UTC
Hi Michael
Beautiful work! I've been seriously tempted to get the new Albatros myself and seeing how great yours has turned out has put it firmly in my must-have list.

Please submit it as a Feature once it's finished so we can showcase it on the front page.
All the best
Rowan
BEWARE OF THE FEW...
As I grow older, I regret to say that a detestable habit of thinking seems to be getting a hold of me. - H. Rider Haggard
Baden-Württemberg, Germany
Joined: December 26, 2009
KitMaker: 813 posts
AeroScale: 98 posts
Posted: Sunday, March 13, 2016 - 04:06 PM UTC
regards,
Michael
http://www.world-in-scale.de
Baden-Württemberg, Germany
Joined: December 26, 2009
KitMaker: 813 posts
AeroScale: 98 posts
Posted: Sunday, March 13, 2016 - 04:07 PM UTC
Hi Rowanm
thank you very much.
How could I do that?
Cheers
Michael
regards,
Michael
http://www.world-in-scale.de
Merlin
Senior Editor #017
United Kingdom
Joined: June 11, 2003
KitMaker: 17,582 posts
AeroScale: 12,795 posts
Posted: Monday, March 14, 2016 - 01:35 AM UTC
Hi Michael
Just drop Jessie a line and she'll be delighted to get a build of this quality in our Feature's section
 [email protected]
All the best
Rowan
BEWARE OF THE FEW...
As I grow older, I regret to say that a detestable habit of thinking seems to be getting a hold of me. - H. Rider Haggard
#372
United Kingdom
Joined: March 10, 2010
KitMaker: 2,568 posts
AeroScale: 1,619 posts
Posted: Monday, March 14, 2016 - 02:14 AM UTC
Beautiful build Michael. I just love the finish, very realistic!
On the bench: 1/72 Mosquito, Lightning F.6, DH.2,
AMT Vulcan Shuttle Surak.
Cyber-Hobby 1:35 Sherman Firefly IC - still stalled.