Overijssel, Netherlands
Joined: September 13, 2003
KitMaker: 339 posts
AeroScale: 244 posts
Posted: Sunday, March 27, 2016 - 08:51 PM UTC
Hi guys,
after finishing my Dornier Do 217 E-5 (to view:
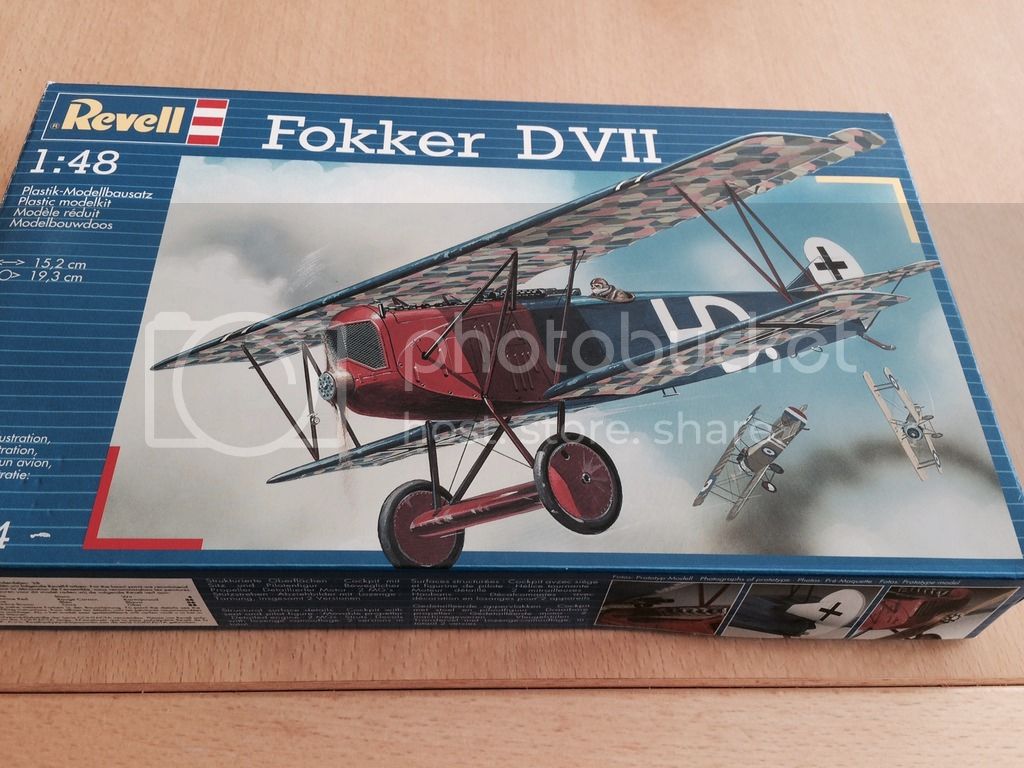
https://archive.kitmaker.net/forums/241359&page=4#2077894 I will start my next project. This time it will be Revells Fokker D-VII in 1/48.
This will be it:
I think the plane is well known enough and doesnt need introduction.
What I want to practice on in this build are three things:
1. Wood grain effects
2. Rigging
3. Shading and decolouration effects
For rigging this is a nice subject because there is not so much to do (for a WW1 aircraft).
Maybe I will do some scratch building in the cockpit and on the motor but I am not sure.
I will build the Herman Goering version... not because I like the guy... but because of the white finish. My challenge will be to make that as interesting as possible.
gr TC
Colorado, United States
Joined: January 25, 2004
KitMaker: 11,669 posts
AeroScale: 11,011 posts
Posted: Sunday, March 27, 2016 - 11:49 PM UTC
Ah yes, the old Aurora / Monogram Fokker D.VII mold. Best of luck!
". . .The most important thing is to know why you build and then get the most that you can out of building." via D.D.
Overijssel, Netherlands
Joined: September 13, 2003
KitMaker: 339 posts
AeroScale: 244 posts
Posted: Monday, March 28, 2016 - 12:28 AM UTC
Hi Jack,
you got any experience with this one?
gr TC
Colorado, United States
Joined: January 25, 2004
KitMaker: 11,669 posts
AeroScale: 11,011 posts
Posted: Monday, March 28, 2016 - 07:48 PM UTC
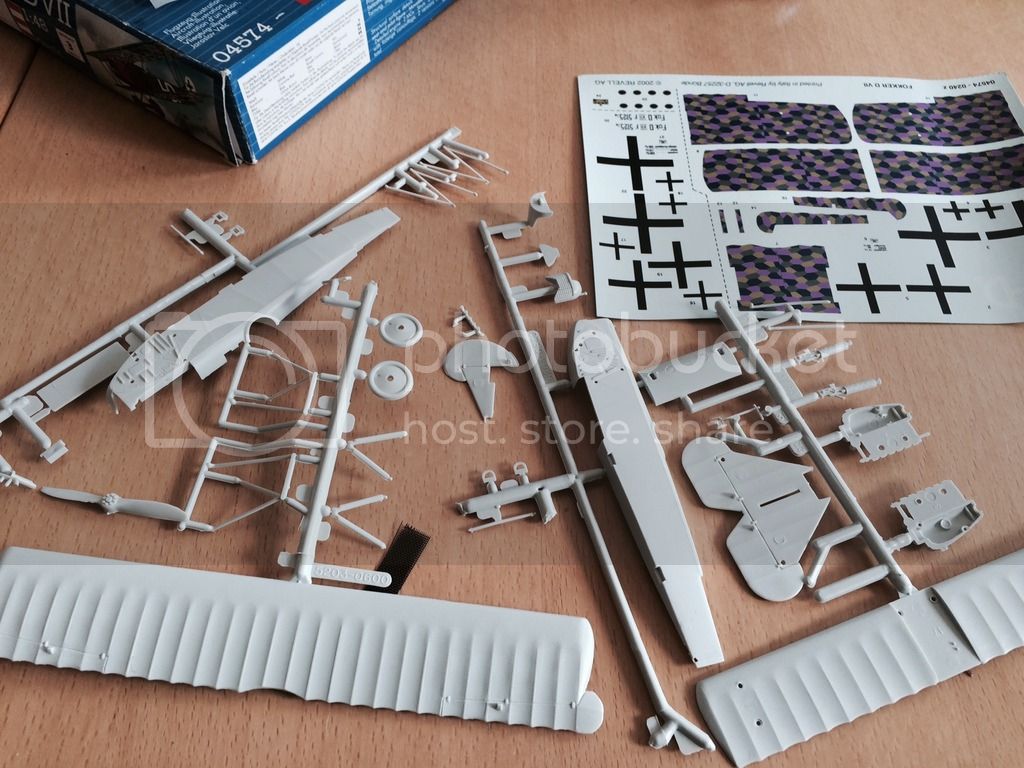
Yes sir. The Aurora kit came out in 1958. It was based on the Aircraft in the Old Rhinebeck Aerodrome collection. That aircraft was modified from the 2 seater C.I version. When you compare the kit to another like Roden or Eduard you will see the wings on your kit are 2 rib spaces too long. The fuselage is also a bit long and the kit actually scales out to 1/46. OOB with a little work the parts assemble into a reasonable facimile of the aircraft type but can be improved. It has only a little cockpit detail. The aileron, rudder and elevator control horns are simply chunks of plastic that should be removed and replaced. Consider replacing the struts with extruded brass rod (flattened to an oval cross section). This mold has seen service under the logos of Aurora, Monogram, Hasegawa and now Revell. Replace the propeller too. It looks like a flattened wing nut.
". . .The most important thing is to know why you build and then get the most that you can out of building." via D.D.
Quebec, Canada
Joined: June 23, 2008
KitMaker: 414 posts
AeroScale: 364 posts
Posted: Monday, March 28, 2016 - 08:32 PM UTC
There's lots to work on with this one. I built it about 6 years ago. First off - wing ribs - sand them down a bit, second, try re-sculpting the propeller , then try wood grain finishing it. I had trouble with the struts as well, I don't remember why. Decals were very good. With a white overall finish you will have plenty of scope for weathering, oil stains etc.
try E-Z line for the rigging - the D.VII doesn't have much.

Overijssel, Netherlands
Joined: September 13, 2003
KitMaker: 339 posts
AeroScale: 244 posts
Posted: Monday, March 28, 2016 - 11:25 PM UTC
Hi guys...
well this was supposed to be a quick training build. I already saw on some research that the kit is way off and needs some improvements. Now I am not even sure if I will start at all :-S...
.. Or I will just build it OTB with all errors and see it as an excercise model.
Well I will think about it.
gr TC
Quebec, Canada
Joined: June 23, 2008
KitMaker: 414 posts
AeroScale: 364 posts
Posted: Tuesday, March 29, 2016 - 04:29 PM UTC
It's still worth building. The blue and red paint scheme with the lozenge pattern on the lowere surfaces is very attractive if you decid to go that route. The decals are very good.
Goerings all white D.VII would provide you with a clean pallet to try all the weathering effects without Worrying about potentially ruining an expensive kit.
I bought an 'old tool'Airfix 1/48 Hurricane a few years ago - raised panel lines, ill fitting canopy, quite inexpensive, so I experimented with it. In the end it turned out quite well.
I say go for it.
Overijssel, Netherlands
Joined: September 13, 2003
KitMaker: 339 posts
AeroScale: 244 posts
Posted: Wednesday, March 30, 2016 - 12:29 AM UTC
Hi Richard I will. And I will start of tommorow :-)
gr TC

#372
United Kingdom
Joined: March 10, 2010
KitMaker: 2,568 posts
AeroScale: 1,619 posts
Posted: Wednesday, March 30, 2016 - 12:49 AM UTC
Quoted Text
Yes sir. The Aurora kit came out in 1958. It was based on the Aircraft in the Old Rhinebeck Aerodrome collection. That aircraft was modified from the 2 seater C.I version. When you compare the kit to another like Roden or Eduard you will see the wings on your kit are 2 rib spaces too long. The fuselage is also a bit long and the kit actually scales out to 1/46. OOB with a little work the parts assemble into a reasonable facimile of the aircraft type but can be improved. It has only a little cockpit detail. The aileron, rudder and elevator control horns are simply chunks of plastic that should be removed and replaced. Consider replacing the struts with extruded brass rod (flattened to an oval cross section). This mold has seen service under the logos of Aurora, Monogram, Hasegawa and now Revell. Replace the propeller too. It looks like a flattened wing nut.
I wonder then if it would be possible to kitbash this kit into a C1?
On the bench: 1/72 Mosquito, Lightning F.6, DH.2,
AMT Vulcan Shuttle Surak.
Cyber-Hobby 1:35 Sherman Firefly IC - still stalled.
California, United States
Joined: June 07, 2006
KitMaker: 264 posts
AeroScale: 87 posts
Posted: Wednesday, March 30, 2016 - 02:05 AM UTC
Howdy,
Here's one I did a few years ago.


Brian Riedel
Colorado, United States
Joined: January 25, 2004
KitMaker: 11,669 posts
AeroScale: 11,011 posts
Posted: Wednesday, March 30, 2016 - 05:57 AM UTC
Quoted Text
Quoted Text
"Yes sir. The Aurora kit came out in 1958. It was based on the Aircraft in the Old Rhinebeck Aerodrome collection. That aircraft was modified from the 2 seater C.I version. . ."
I wonder then if it would be possible to kitbash this kit into a C1?
It would take both lengthening and adding depth to the kit fuselage. The tail unit needs more area horizontally and the fin/rudder height & length. The lengthening is of course for the rear cockpit and repositioning of the pilot cockpit. (It might be easier to scratchbuild the fuselage).
". . .The most important thing is to know why you build and then get the most that you can out of building." via D.D.
Overijssel, Netherlands
Joined: September 13, 2003
KitMaker: 339 posts
AeroScale: 244 posts
Posted: Wednesday, March 30, 2016 - 10:58 PM UTC
Hi brian,
nice one!
Is the loreze hand painted?
gr TC
California, United States
Joined: June 07, 2006
KitMaker: 264 posts
AeroScale: 87 posts
Posted: Wednesday, March 30, 2016 - 11:45 PM UTC
Howdy,
It's the late, great Americal Gryphon 4 color lozenge. Do yourself a favor and explore the Aviattic range of lozenge.
http://www.aviattic.co.uk/148-decals.htmlBrian Riedel
Overijssel, Netherlands
Joined: September 13, 2003
KitMaker: 339 posts
AeroScale: 244 posts
Posted: Friday, April 08, 2016 - 12:11 AM UTC
Ok,
this doesnt go like plannend. The first period I was too busy to start due to private stuff and wor. Yesterday finally was the kick off. I wanted to start painting the engine today when I notices I have misplaced the nozzle of the airbrush :-S. I hope my locale dealer has a replacement.
Furthermore I noticed the cockpit is more then crap. Now I have an Idea. A while back I saw a picture of a german scoutplane with a canvas cover on the cockpit. I cant recall where I saw this pic. Maybe you guys can help me out with some reference? It would be much appreciated.
gr TC
#372
United Kingdom
Joined: March 10, 2010
KitMaker: 2,568 posts
AeroScale: 1,619 posts
Posted: Friday, April 08, 2016 - 12:31 AM UTC
I've seen similar photos yes. I can imagine it being common practice to protect the open cockpits from the elements. Somebody did it with the old Airfix Albatros DV in the last Airfix campaign.
I say build it as is and then invest in something much better from Eduard or Roden. Treat it as a practice.
Hope you can get your airbrush nozzle replaced.
On the bench: 1/72 Mosquito, Lightning F.6, DH.2,
AMT Vulcan Shuttle Surak.
Cyber-Hobby 1:35 Sherman Firefly IC - still stalled.
Quebec, Canada
Joined: June 23, 2008
KitMaker: 414 posts
AeroScale: 364 posts
Posted: Friday, April 08, 2016 - 02:07 AM UTC
Why don't you make this D.VII as the Rheinbeck aircraft? It's still a Fokker. Make it a Fokker D.VII (Rheinbeck)

Overijssel, Netherlands
Joined: September 13, 2003
KitMaker: 339 posts
AeroScale: 244 posts
Posted: Friday, April 08, 2016 - 11:16 PM UTC
Ok I ordered a new nozzle. Will be in next week hopefully. I am considering what to do now.
@Richard, what do you mean with Reinbeck?
gr TC
Overijssel, Netherlands
Joined: September 13, 2003
KitMaker: 339 posts
AeroScale: 244 posts
Posted: Sunday, May 01, 2016 - 10:42 PM UTC
Ok guys,
it took me a while (lost my aiirbrush nozzle, had a vacation). I finally lifted off with my project. I assembled and painted the motor before joining the fuselages. I will build no cockpit parts as mentioned before sono pics of them.
At least I started :-)

gr TC
Overijssel, Netherlands
Joined: September 13, 2003
KitMaker: 339 posts
AeroScale: 244 posts
Posted: Monday, May 02, 2016 - 10:02 PM UTC
Hi guys,
started drilling holes for the rigging yesterday. Did some test fitting and now I wonder if the wire is in scale.
What do you guys think?
gr Tc

Overijssel, Netherlands
Joined: September 13, 2003
KitMaker: 339 posts
AeroScale: 244 posts
Posted: Monday, May 09, 2016 - 01:06 AM UTC
Hi guys,
another little update from me.. the last few (hot) days I spent drilling holes and cleaning up the kit parts. This evening I gave it a serious try with the rigging. I used fish line. What do you guys think?

gr TC
British Columbia, Canada
Joined: September 03, 2009
KitMaker: 6,965 posts
AeroScale: 6,247 posts
Posted: Monday, May 09, 2016 - 03:26 AM UTC
Try drilling your holes at an angle rather than perpendicular to the surface. That way the cables can lead straight in instead of curving the way they do now. To correct those ones you have, lay the point of your hobby knife in the hole, and twirl it as you bring the handle down to nearly parallel with the surface. You'll eventually dig a small oval rather than a round hole.
When once you have tasted flight you will walk the Earth with your eyes turned skyward.
For there you have been, and there you will always long to return.
-Leonardo Da Vinci
Overijssel, Netherlands
Joined: September 13, 2003
KitMaker: 339 posts
AeroScale: 244 posts
Posted: Thursday, May 12, 2016 - 12:03 AM UTC
Hi Jssie,
nice that you drop by :-)
I have made a litte correction and it is a bit better now... I will make sure I drill the other relevant holes more in an angle
thx!
gr TC