OFFICIAL: Harrier Campaign
litespeed
 News Reporter
England - North West, United Kingdom
Joined: October 15, 2009
KitMaker: 1,976 posts
AeroScale: 1,789 posts
Posted: Friday, June 10, 2016 - 03:53 AM UTC
litespeed
News Reporter England - North West, United Kingdom
Joined: October 15, 2009
KitMaker: 1,976 posts
AeroScale: 1,789 posts
Posted: Wednesday, June 15, 2016 - 03:29 AM UTC
Hi all
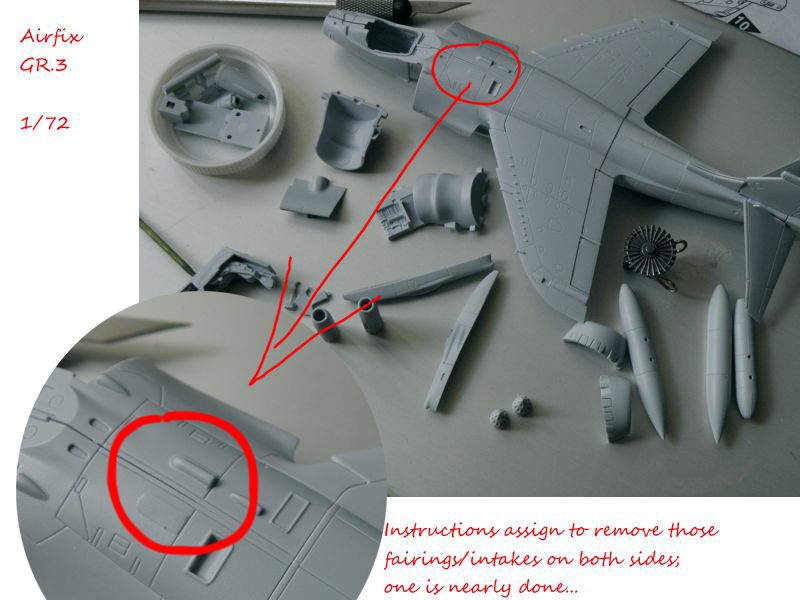
I have made a bit more progress over the last few days. I constructed the wing and glued it to the fuselage. Fit is again pretty good. The filler on the under surface of the fuselage is for the unwanted location holes for pylons. The air intakes were also constructed and fitted in place. Kinetic kindly supply two sets of doors for the auxiliary intakes. One option is for fully closed doors or you can use the doors partially open as seen when the Harrier is at rest. The wing control surfaces are separate parts and will be fitted later.
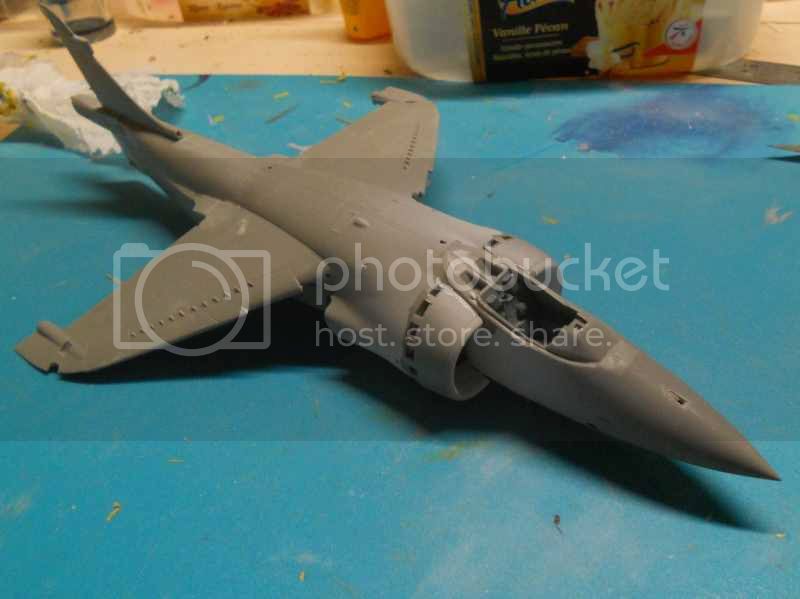
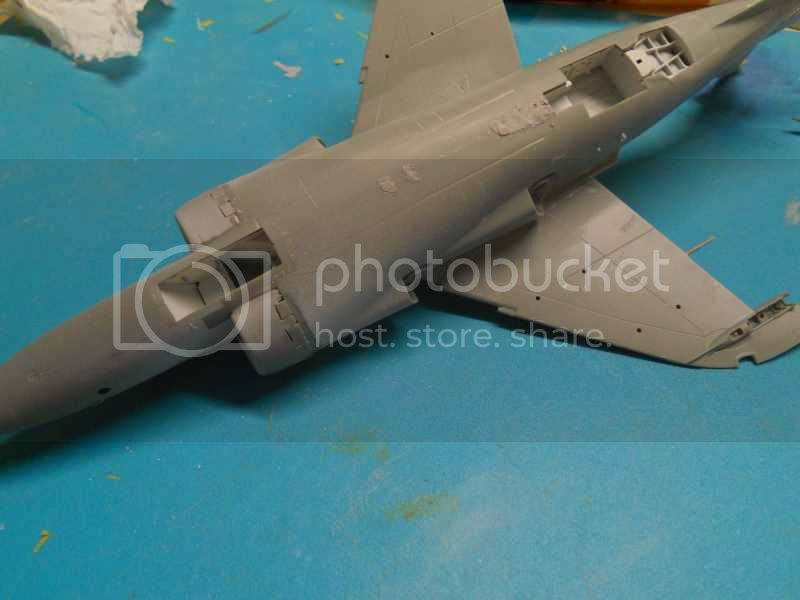
The fairing behind the cockpit has also been attached.
To be continued
..
tim

Western Australia, Australia
Joined: March 21, 2016
KitMaker: 247 posts
AeroScale: 105 posts
Posted: Friday, June 17, 2016 - 05:17 PM UTC
Western Australia, Australia
Joined: March 21, 2016
KitMaker: 247 posts
AeroScale: 105 posts
Posted: Saturday, June 18, 2016 - 08:17 AM UTC
Update pictures from today

litespeed
News Reporter England - North West, United Kingdom
Joined: October 15, 2009
KitMaker: 1,976 posts
AeroScale: 1,789 posts
Posted: Sunday, June 19, 2016 - 02:50 AM UTC
Hi all
Blimey Linus thats good going. Looking good too.
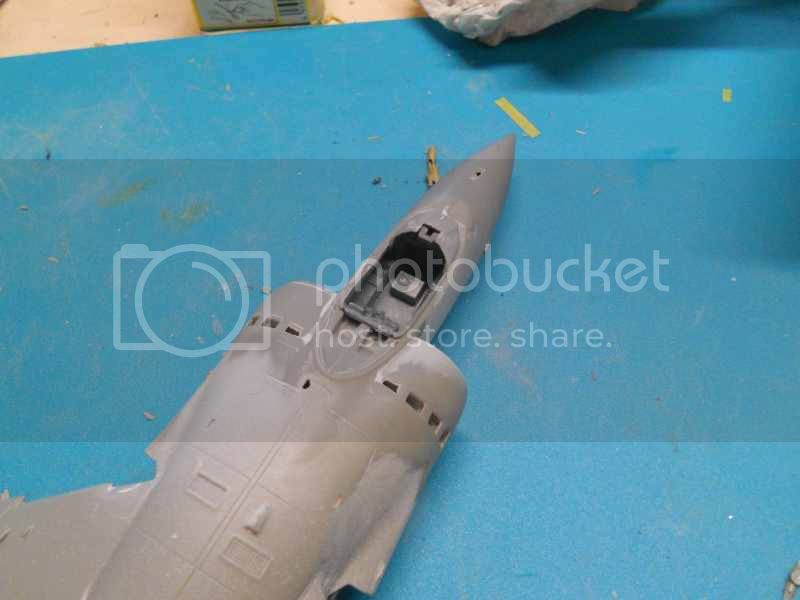
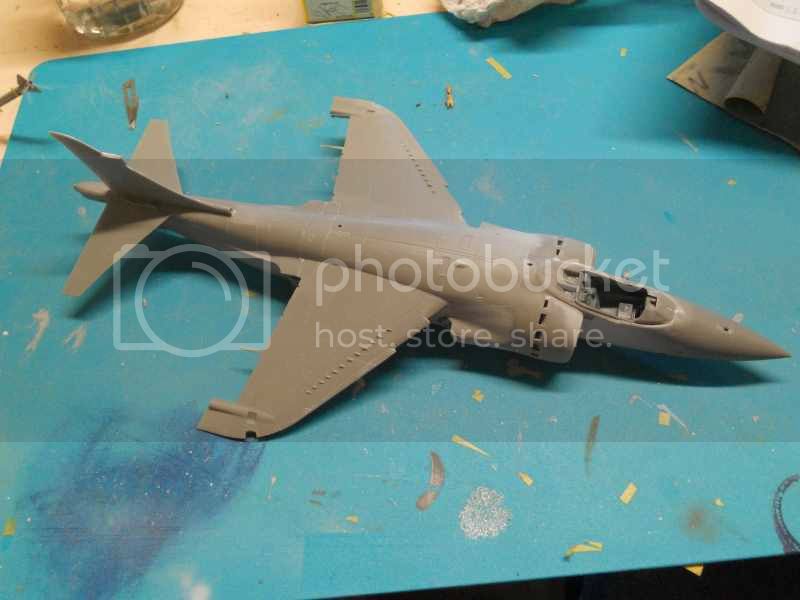
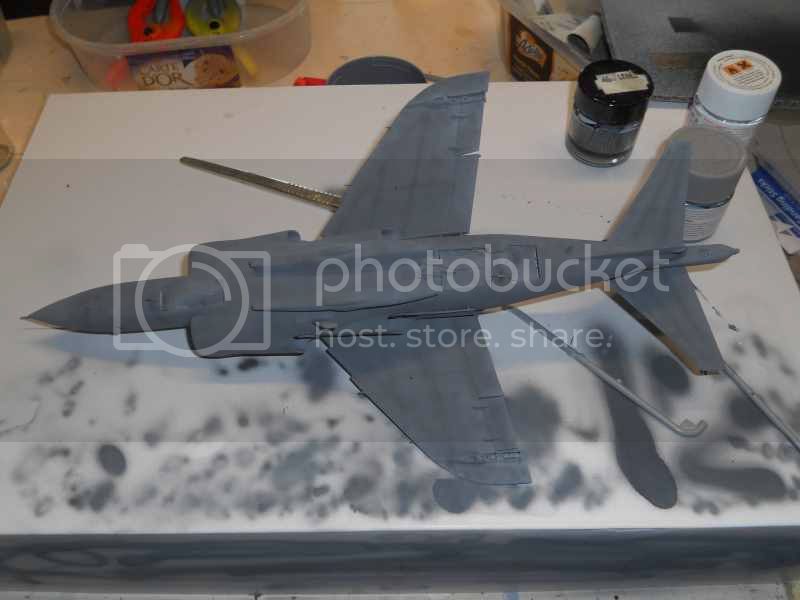
Im moving slowly along with this build. I forgot to mention last time that I had added the radome. I have not added any nose weight as I suspect with the Harriers unusual under carriage layout it wont require any. Ummmm famous last words!
Anyway I have added the rudder and the rear horizontal stabilisers. Well sort of as they have a distinct anhedral that seems to match the anhedral of the main wing. This is not mentioned in the instructions though. Talking of instructions, these are typical Kinetic. Quite a few miss numbered parts to look out for. Also some of the placement of parts is very vague. I am contemplating putting the two cannon pods under the fuselage, but the building instructions are no help at all. The painting guides do provide a clue though. Despite the small hiccups with the instructions this is a really nice kit to build so far.
To be continued
Tim
MichaelSatin
Campaigns Administrator Colorado, United States
Joined: January 19, 2008
KitMaker: 3,909 posts
AeroScale: 2,904 posts
Posted: Sunday, June 19, 2016 - 04:03 AM UTC
Really nice work so far Tim! I'm still planning on doing the FA2 for this campaign and am watching your build carefully.
Michael

On the bench:
Sorta depends on your definition of "on the bench"...
Buenos Aires, Argentina
Joined: May 21, 2012
KitMaker: 765 posts
AeroScale: 316 posts
Posted: Sunday, June 19, 2016 - 04:52 AM UTC
@Tim,
A lot of work for a 1/48 kit.........

Those Radial Fighters Campaign: 1/72 FW 190 A5
Delta 2 Campaign: 1/48 Hobby Boss Mirage IIIC
Navy Boys on those Postage Stamps 1/72 Airfix Sea Harrier FA2
Working: Trumpeter A-5 Vigilante
Waiting: Phantom 60 Campaign
litespeed
News Reporter England - North West, United Kingdom
Joined: October 15, 2009
KitMaker: 1,976 posts
AeroScale: 1,789 posts
Posted: Monday, June 20, 2016 - 01:43 AM UTC
Maybe its just the way I work Shaky, I do seem to make a meal of my builds. Its actually one of the easiest Kinetic kits I have built.
All the best.
tim
Ohio, United States
Joined: March 09, 2002
KitMaker: 818 posts
AeroScale: 137 posts
Posted: Monday, June 27, 2016 - 04:58 AM UTC
litespeed
News Reporter England - North West, United Kingdom
Joined: October 15, 2009
KitMaker: 1,976 posts
AeroScale: 1,789 posts
Posted: Friday, July 01, 2016 - 04:42 PM UTC
Hi all
Your Harrier is looking very impressive Mike.
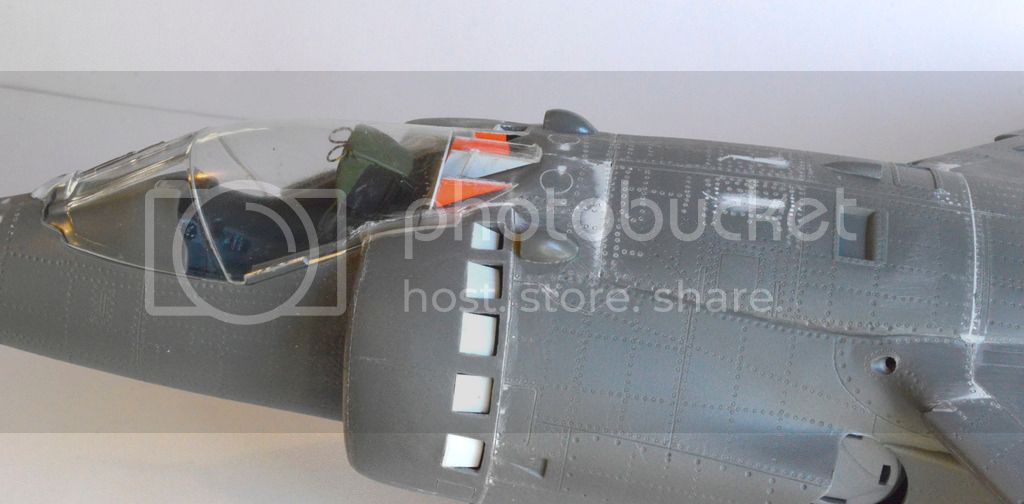
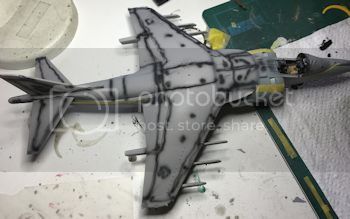
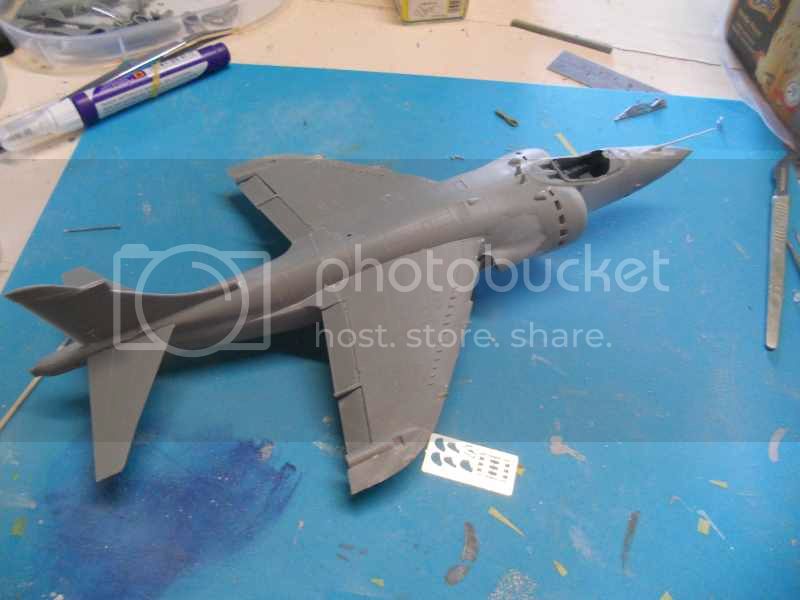
Some progress on my Sea Harrier. I had to do a little cleaning up around the auxiliary intake doors and the interior of the intake was sprayed white. I added the flaps/ailerons, cannon pods and various smaller intakes and aerials. The probe on the nose was also added. The PE etched wing fences are an abysmal fit and needed a few drops of super glue to fill a noticeable gap between the leading edge and fence. I may have placed the wing fences incorrectly but the instructions supply no part numbers. So fitting is a bit hit and miss to find the correct fence that fits each location.
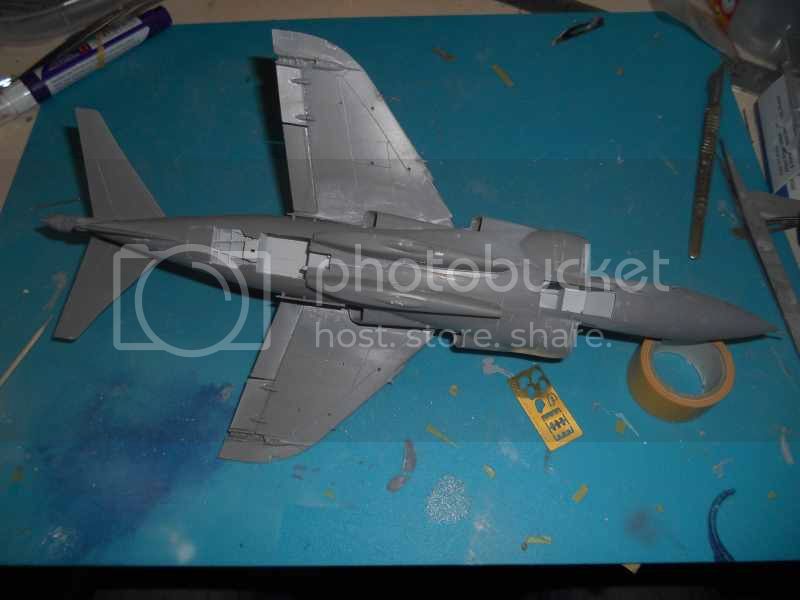
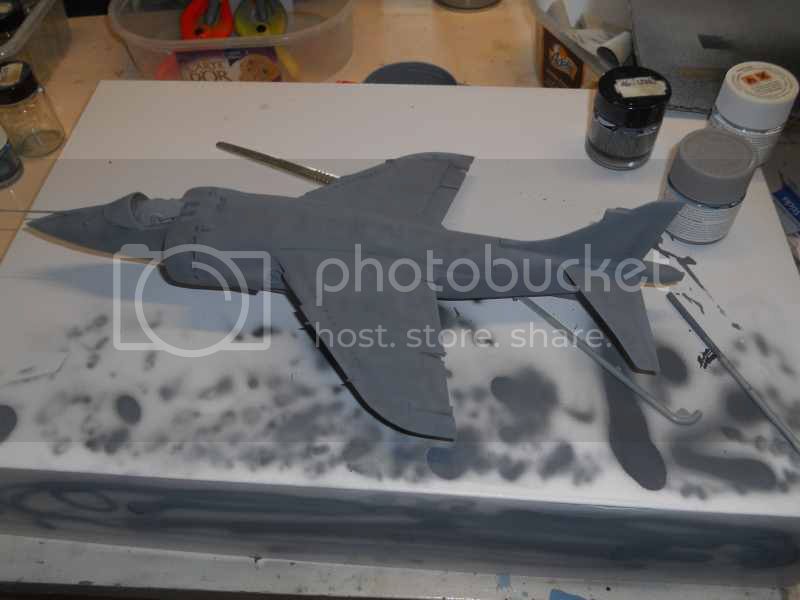
Windscreen, cockpit, wheel wells and air intake were masked and Halfords rattle can primer has been applied. I used Tamiya XF-19 sky grey for the overall finish of extra dark sea grey. Initially I added a little Tamiya matt white XF-02to lighten the colour and used progressively darker paint with each coat. I finished off using a darker shade of grey to highlight the areas around panel lines.
Next a few coats of clear.
To be continued
tim
MichaelSatin
Campaigns Administrator Colorado, United States
Joined: January 19, 2008
KitMaker: 3,909 posts
AeroScale: 2,904 posts
Posted: Saturday, July 02, 2016 - 06:46 PM UTC
Well, no one else besides Thomas jumped in with a ribbon idea, so I'm going for his first one. Any other ideas are welcome, of course!
Michael
On the bench:
Sorta depends on your definition of "on the bench"...
Ohio, United States
Joined: March 09, 2002
KitMaker: 818 posts
AeroScale: 137 posts
Posted: Saturday, July 16, 2016 - 08:04 PM UTC
Buenos Aires, Argentina
Joined: September 07, 2006
KitMaker: 918 posts
AeroScale: 688 posts
Posted: Sunday, July 17, 2016 - 05:41 AM UTC
Hi,
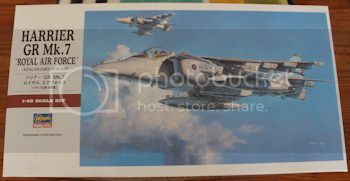
I'm going to begin this campaign with a Hasegawa 1/48 Gr Mk7,

Buenos Aires, Argentina
Joined: September 07, 2006
KitMaker: 918 posts
AeroScale: 688 posts
Posted: Sunday, July 17, 2016 - 05:43 AM UTC
litespeed
News Reporter England - North West, United Kingdom
Joined: October 15, 2009
KitMaker: 1,976 posts
AeroScale: 1,789 posts
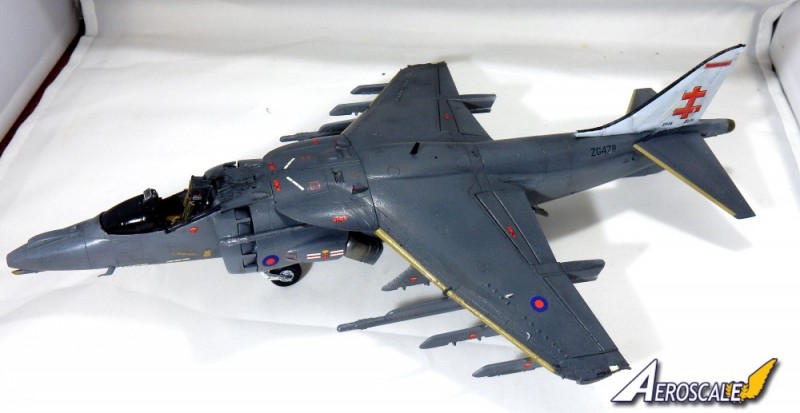
Posted: Saturday, July 23, 2016 - 03:46 AM UTC
Hi all
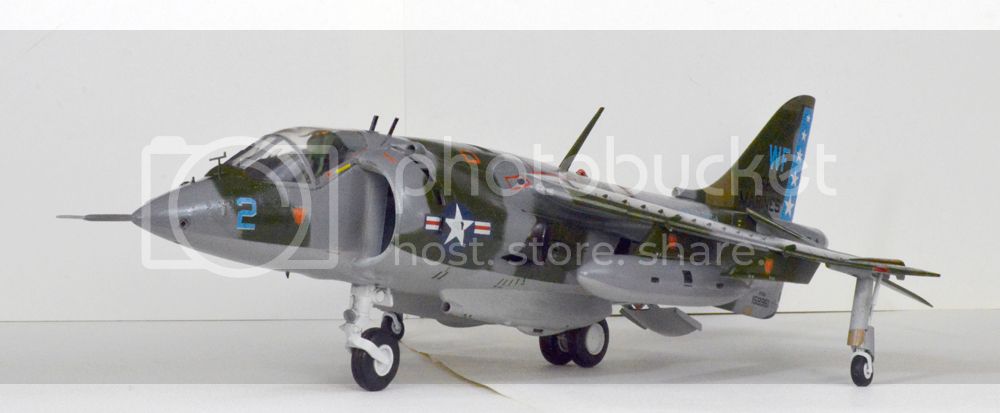
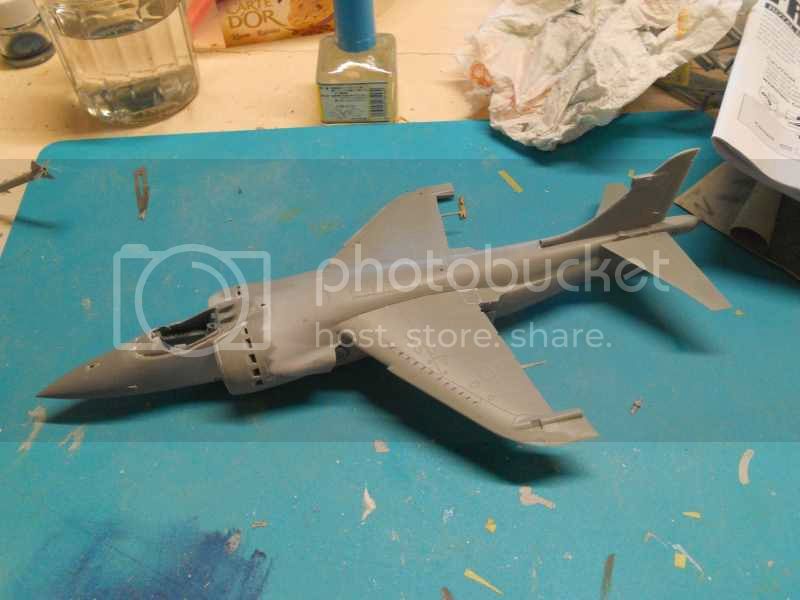
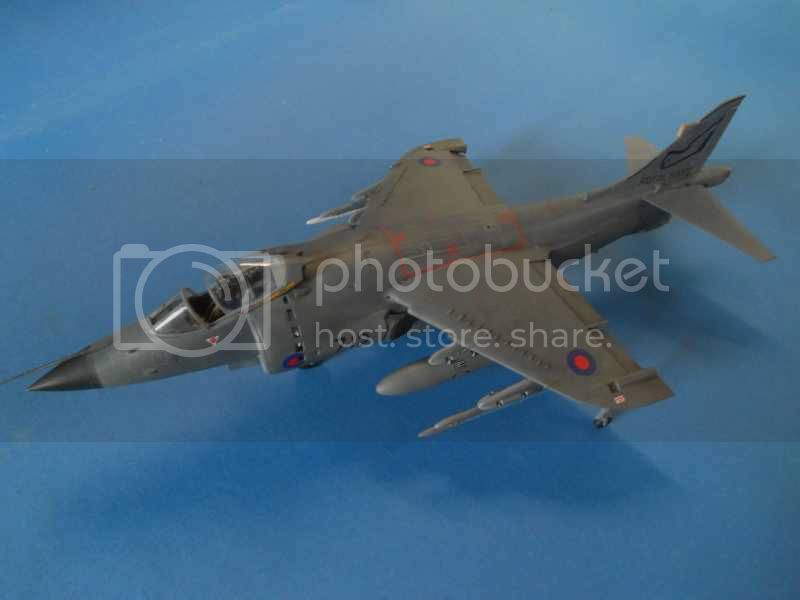
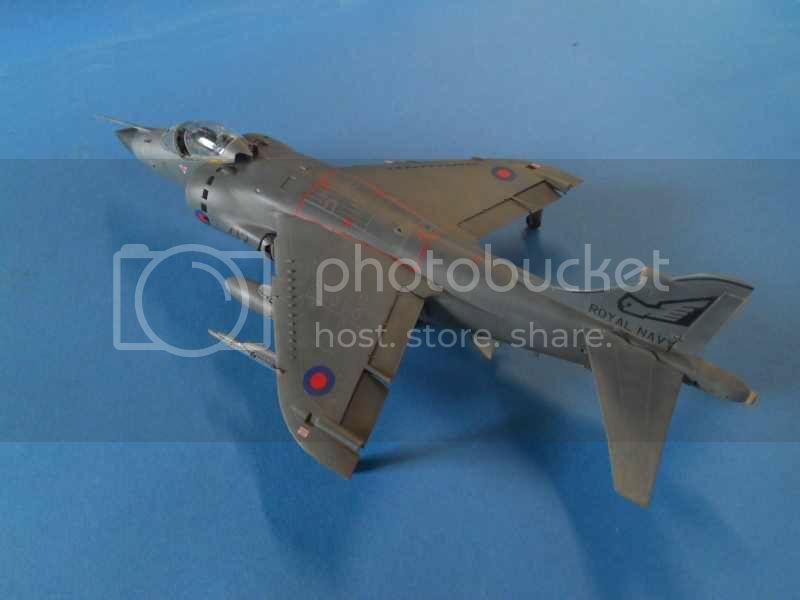
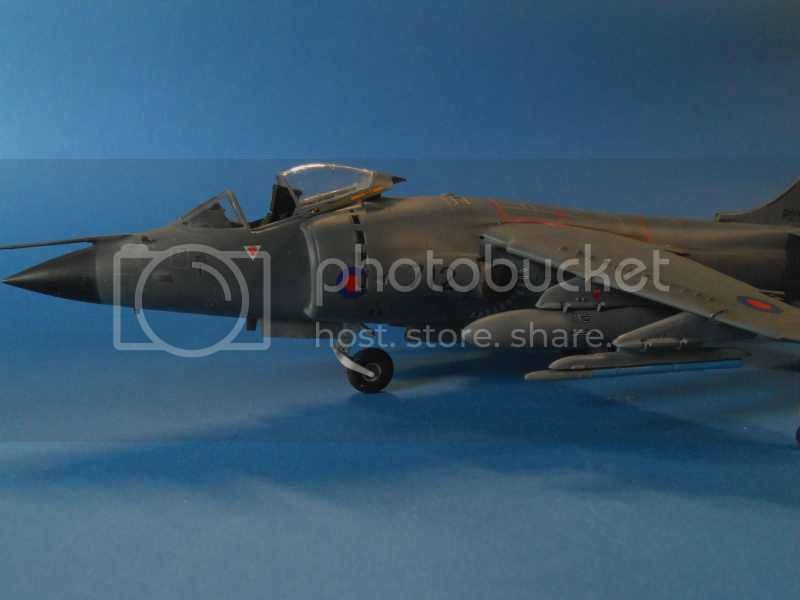
I am going to call my Kinetic 1/48 Sea Harrier FRS.1 finished. Decals went on with no problem. It did take me several sessions to apply all the stencils. I added an Acqui AIM9 and a RAIDS pods as these can be seen on many of the images of the Sea Harrier. These were made from the AIM-9s included in the kit.
This was a really enjoyable build and is one of the easiest Kinetic kits I have put together. There are plenty of marking options also.
Thanks for creating the campaign Michael.
tim
Berlin, Germany
Joined: October 12, 2008
KitMaker: 709 posts
AeroScale: 651 posts
Posted: Sunday, July 31, 2016 - 09:38 PM UTC
Great work here guys!
Mike and Tim, really fast builds and both are looking
very cool. Either the camo as well as the "all-over-grey" are nicely done including the decaling. Congrats for finishing already!
After my vacation has ended I'm back on my Harrier with some
sanding, dry fitting, sub assemblies and a few paint. For the cockpit I used the decals as there are no instruments molded.The office isn't much detailed because of the scale.

Thomas

Sometimes you need to distance yourself to see things clearly - Lao Tzu -
... in scale and in real life -T.
Buenos Aires, Argentina
Joined: September 07, 2006
KitMaker: 918 posts
AeroScale: 688 posts
Posted: Monday, August 01, 2016 - 12:33 AM UTC
litespeed
News Reporter England - North West, United Kingdom
Joined: October 15, 2009
KitMaker: 1,976 posts
AeroScale: 1,789 posts
Posted: Monday, August 01, 2016 - 01:58 AM UTC
Quoted Text
Great work here guys!
Mike and Tim, really fast builds and both are looking
very cool. Either the camo as well as the "all-over-grey" are nicely done including the decaling. Congrats for finishing already!
Thanks Thomas
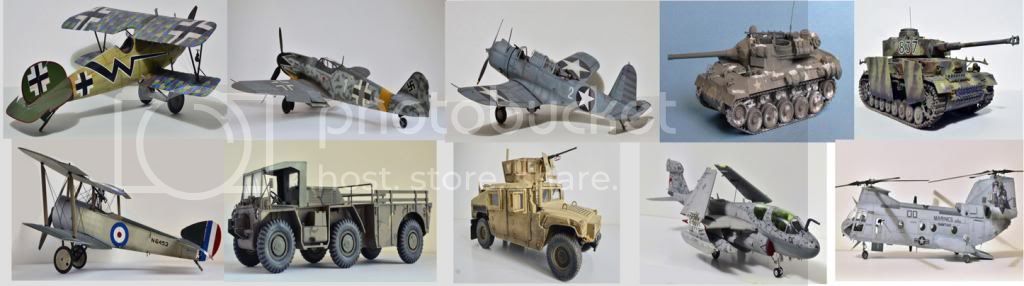
Great start to your build, I like the photo montage you have created.
Daniel that bang seat looks superb. looking forward to seeing the rest of your build.
tim
Berlin, Germany
Joined: October 12, 2008
KitMaker: 709 posts
AeroScale: 651 posts
Posted: Thursday, August 18, 2016 - 08:10 PM UTC
Fellow modellers,
a small update. Cockpit and blade wheel installed, fuselage closed and wings on. Some more color and the basic coat on the underside.
Thomas
Sometimes you need to distance yourself to see things clearly - Lao Tzu -
... in scale and in real life -T.
Ontario, Canada
Joined: February 04, 2008
KitMaker: 2,507 posts
AeroScale: 1,814 posts
Posted: Sunday, August 28, 2016 - 04:17 AM UTC
Nice builds going on here!.
Here is an update on my build:-


" The Die Hards"
43rd MIDDLESEX REGIMENT
MACHINE GUN CORPS
XXX CORP
The most effective way to do it, is to do it.
- Amelia Earhart
Buenos Aires, Argentina
Joined: September 07, 2006
KitMaker: 918 posts
AeroScale: 688 posts
Posted: Monday, August 29, 2016 - 06:26 AM UTC
betheyn
Senior Editor 
#019
England - South East, United Kingdom
Joined: October 14, 2004
KitMaker: 4,560 posts
AeroScale: 2,225 posts
Posted: Saturday, September 03, 2016 - 02:16 PM UTC
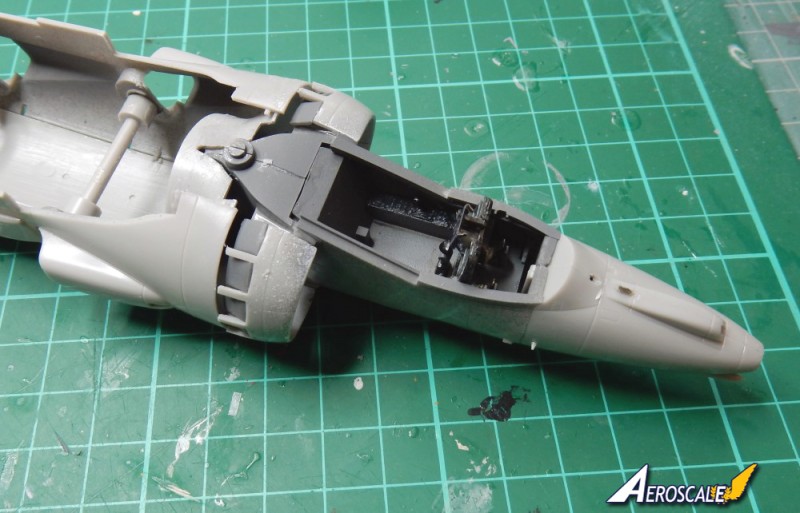
Well here is the start of my entry.
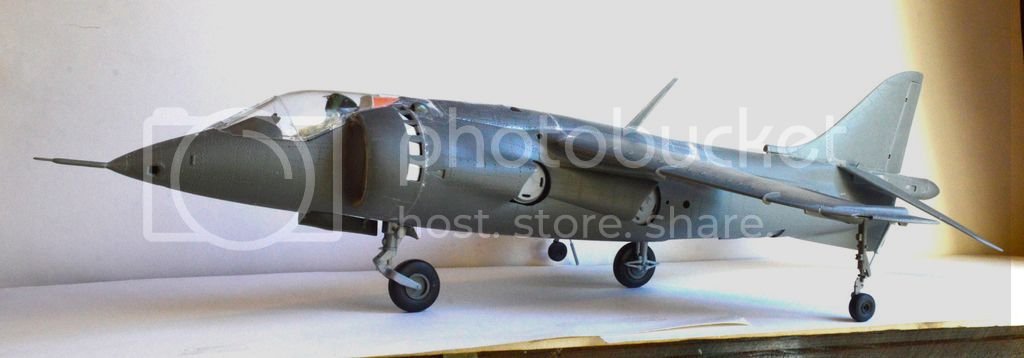
Eduard's reboxed Hasegawa kit of the GR.7/9.
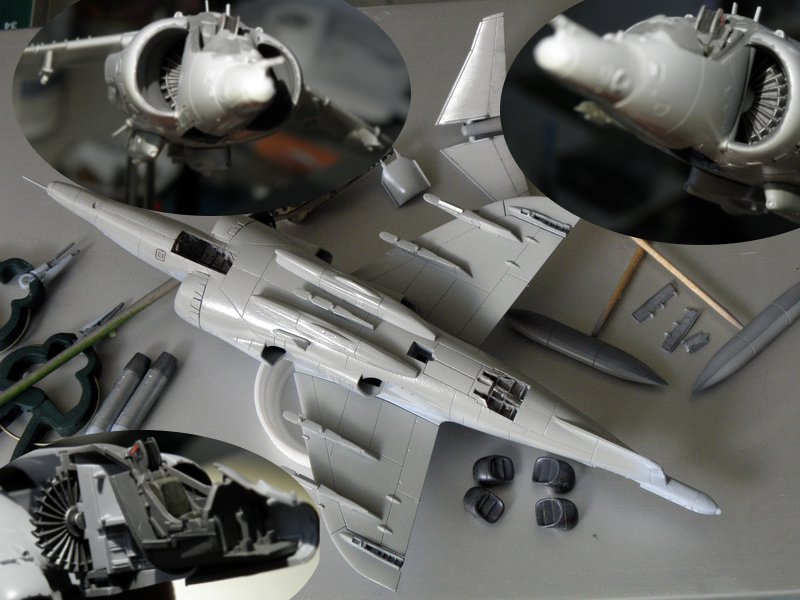
I started with the fuselage interior and added the supports for the exhausts and the fan assembly.
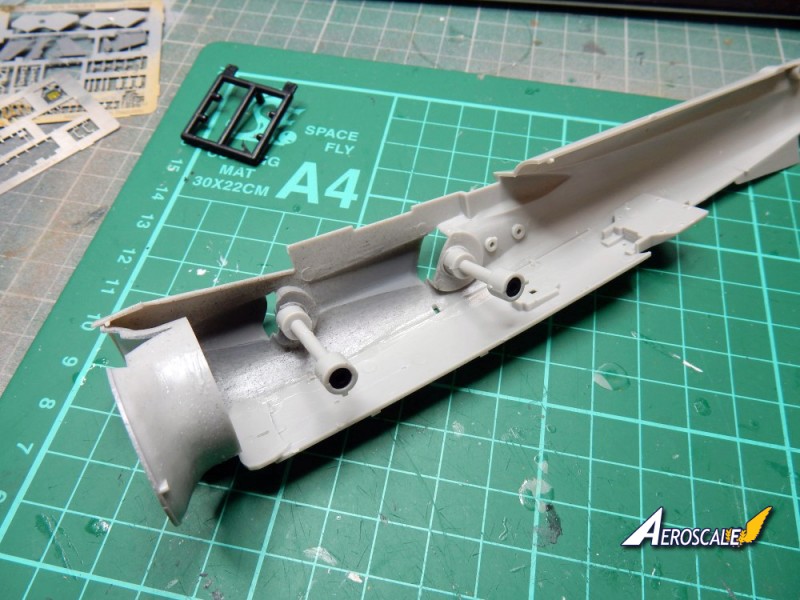
The cockpit is in.
The front section is made up of several parts, the nose and cockpit are separate then fit into the fuselage halves. This part is a little tricky to line up, but once the intakes go on it all seems to come together.
The rest of the build of the major parts is pretty easy, with the rudder, and stabilisers going on with out a hitch.
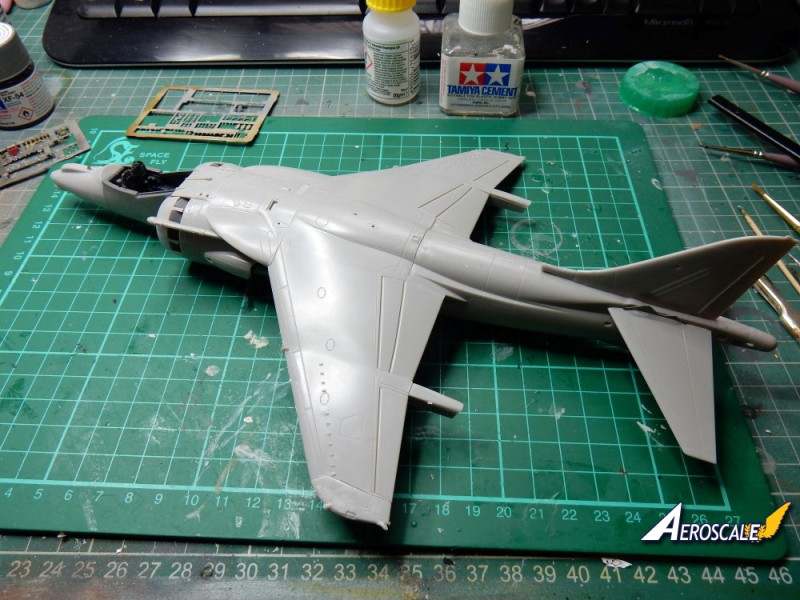
Weapons pylons added.
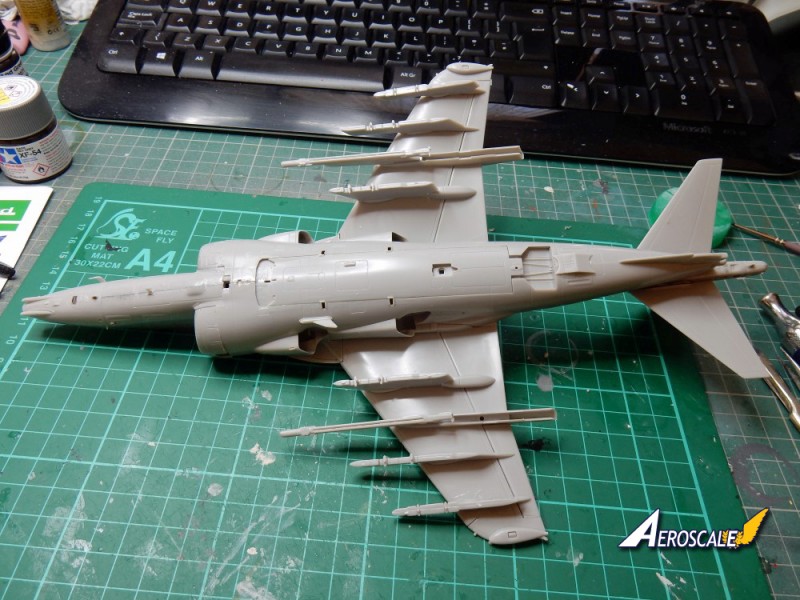
Now to go and throw some paint at it.
Andy
It's not the same, better, but not the same...
MichaelSatin
Campaigns Administrator Colorado, United States
Joined: January 19, 2008
KitMaker: 3,909 posts
AeroScale: 2,904 posts
Posted: Saturday, September 03, 2016 - 07:04 PM UTC
Some very nice work going on here everyone. Just a reminder that this one goes until 1 October, so less than a month left!
Michael
On the bench:
Sorta depends on your definition of "on the bench"...
betheyn
Senior Editor #019
England - South East, United Kingdom
Joined: October 14, 2004
KitMaker: 4,560 posts
AeroScale: 2,225 posts
Posted: Tuesday, September 06, 2016 - 03:49 PM UTC
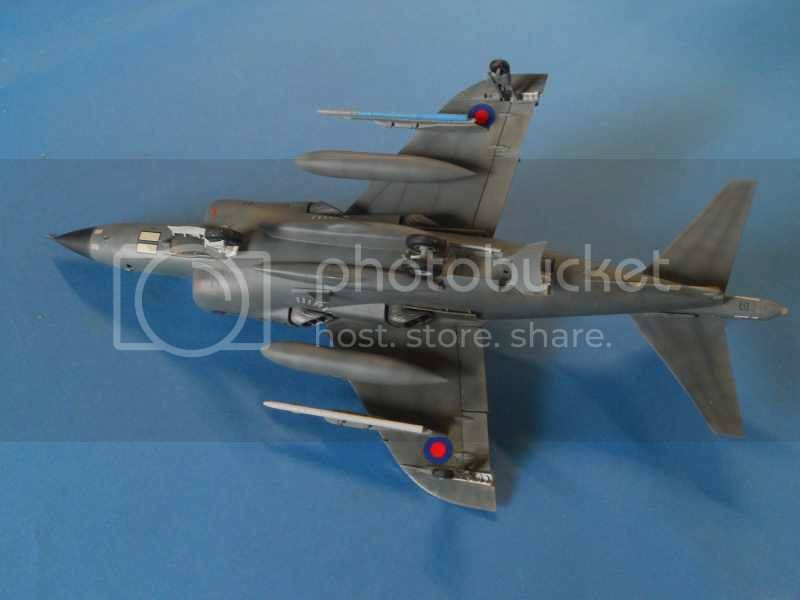
Paint and decals on.
Now sorting out the various weapons to hang off her.
Andy
It's not the same, better, but not the same...
Berlin, Germany
Joined: October 12, 2008
KitMaker: 709 posts
AeroScale: 651 posts
Posted: Thursday, September 08, 2016 - 07:48 PM UTC
Michael: Thanks for the reminder ...
Andy: Thats a fast and nice build, looks very good with that color and the decals on. For sure there is a lot of space to hang weaponary.
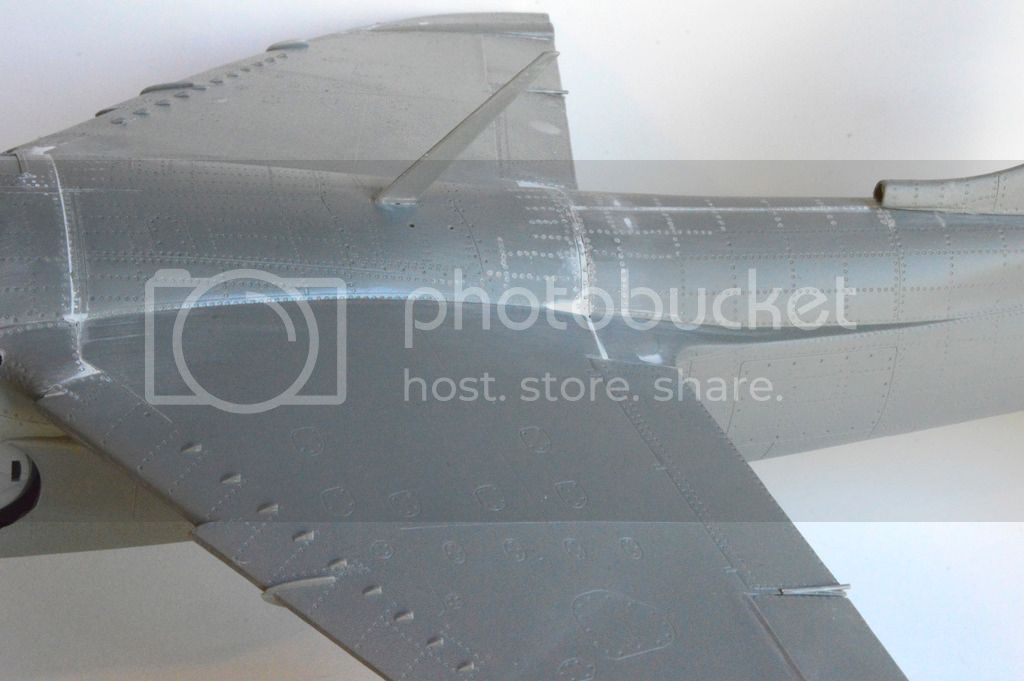
I´m not far from the final assembly and decaling. Decided to paint/AB the camo in seperate steps and while the parts are not fitted together. That gives me a better handling for the fiddling masking on the fuselage. I used Humbrol acrylics (dark green 163 & dark sea grey 164). Now I just have to match the lines from upper wing with the fuselage. The fit is very good so there will be no much obvious visible seams.
Added also a headlight on the front gear (not supported) with a piece of clear sprue.

Thomas
Sometimes you need to distance yourself to see things clearly - Lao Tzu -
... in scale and in real life -T.