

Kent,
The Turret really looks quite good.
As for the Miracle Masks, you're going to love them. I was really nervous when I used Mal's masks on my Spitfire, but the placement is easy, and his directions make it a no brainer.
Joel
World War II
Discuss WWII and the era directly before and after the war from 1935-1949.
Discuss WWII and the era directly before and after the war from 1935-1949.
Hosted by Rowan Baylis
1/48 Airfix BP Defiant
Joel_W

Joined: December 04, 2010
KitMaker: 11,666 posts
AeroScale: 7,410 posts
Posted: Friday, May 13, 2016 - 07:18 PM UTC


kahunaminor

Joined: April 06, 2008
KitMaker: 151 posts
AeroScale: 141 posts

Posted: Saturday, May 14, 2016 - 04:33 AM UTC
Thanks Joel,
I am looking forward to using the masks. I have some for my big Spitfires markings that I am yet to complete (or start).
Regards,
I am looking forward to using the masks. I have some for my big Spitfires markings that I am yet to complete (or start).
Regards,
kahunaminor
Joined: April 06, 2008
KitMaker: 151 posts
AeroScale: 141 posts
Posted: Sunday, May 15, 2016 - 11:12 AM UTC
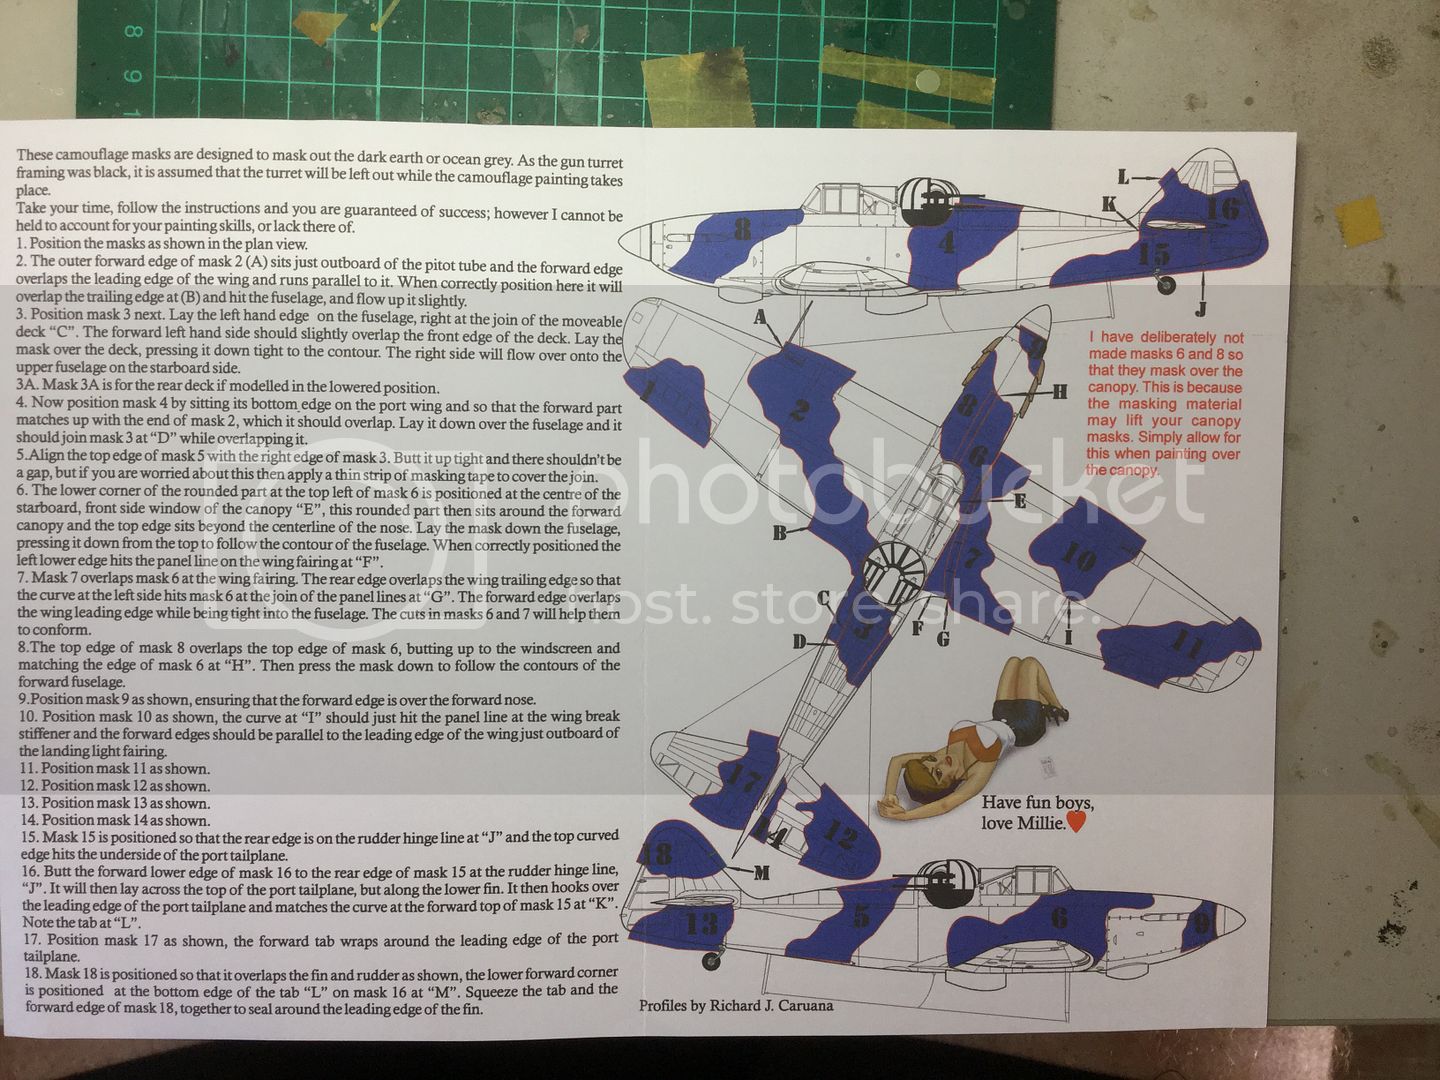
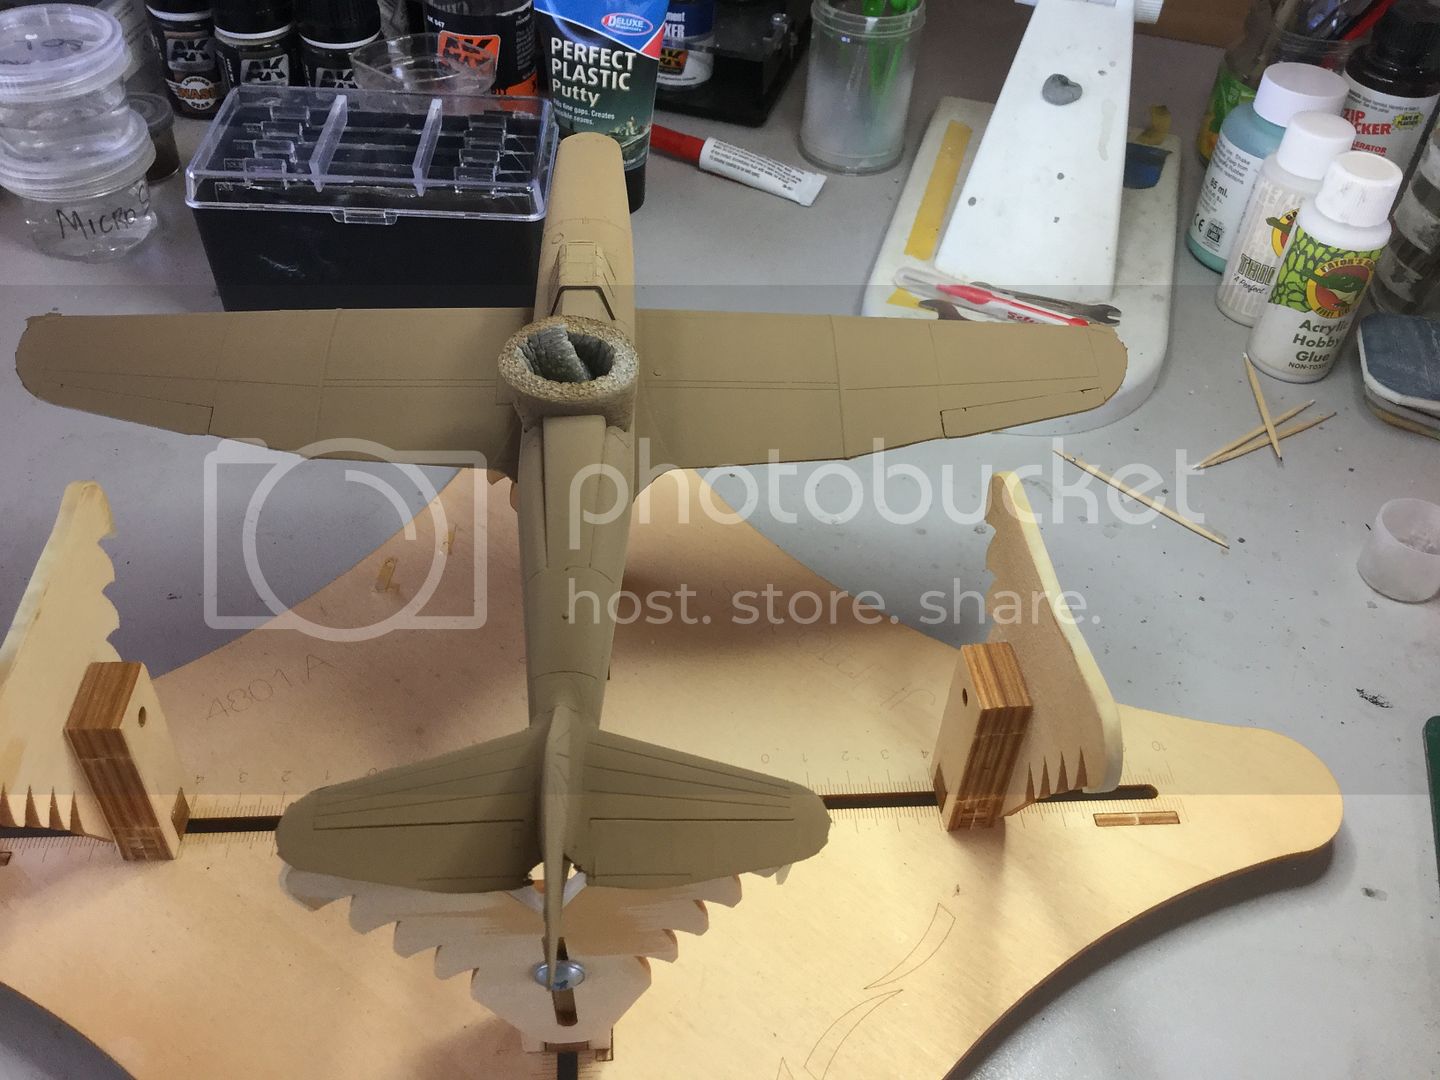
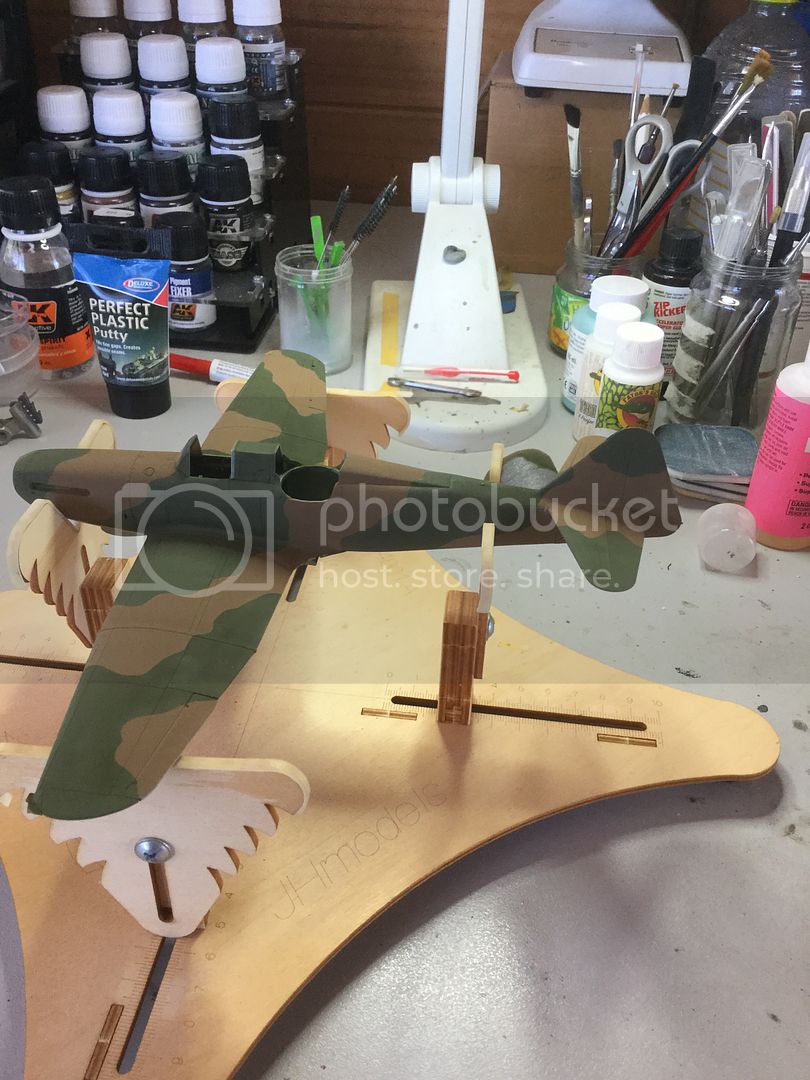
Masking the camouflage commences. Orientate the masks the same as the instructions and number them accordingly. You don't have to do this step but I think it avoids problems.The instructions are quite detailed....even I couldn't stray too far:

Buy some shares in Tamiya tape... Pilot's canopy tacked on with Micro temporary adhesive and a thin Tamiya tape strip added to the front interior as an extra guard against spray getting inside. Foam to seal the turret opening:
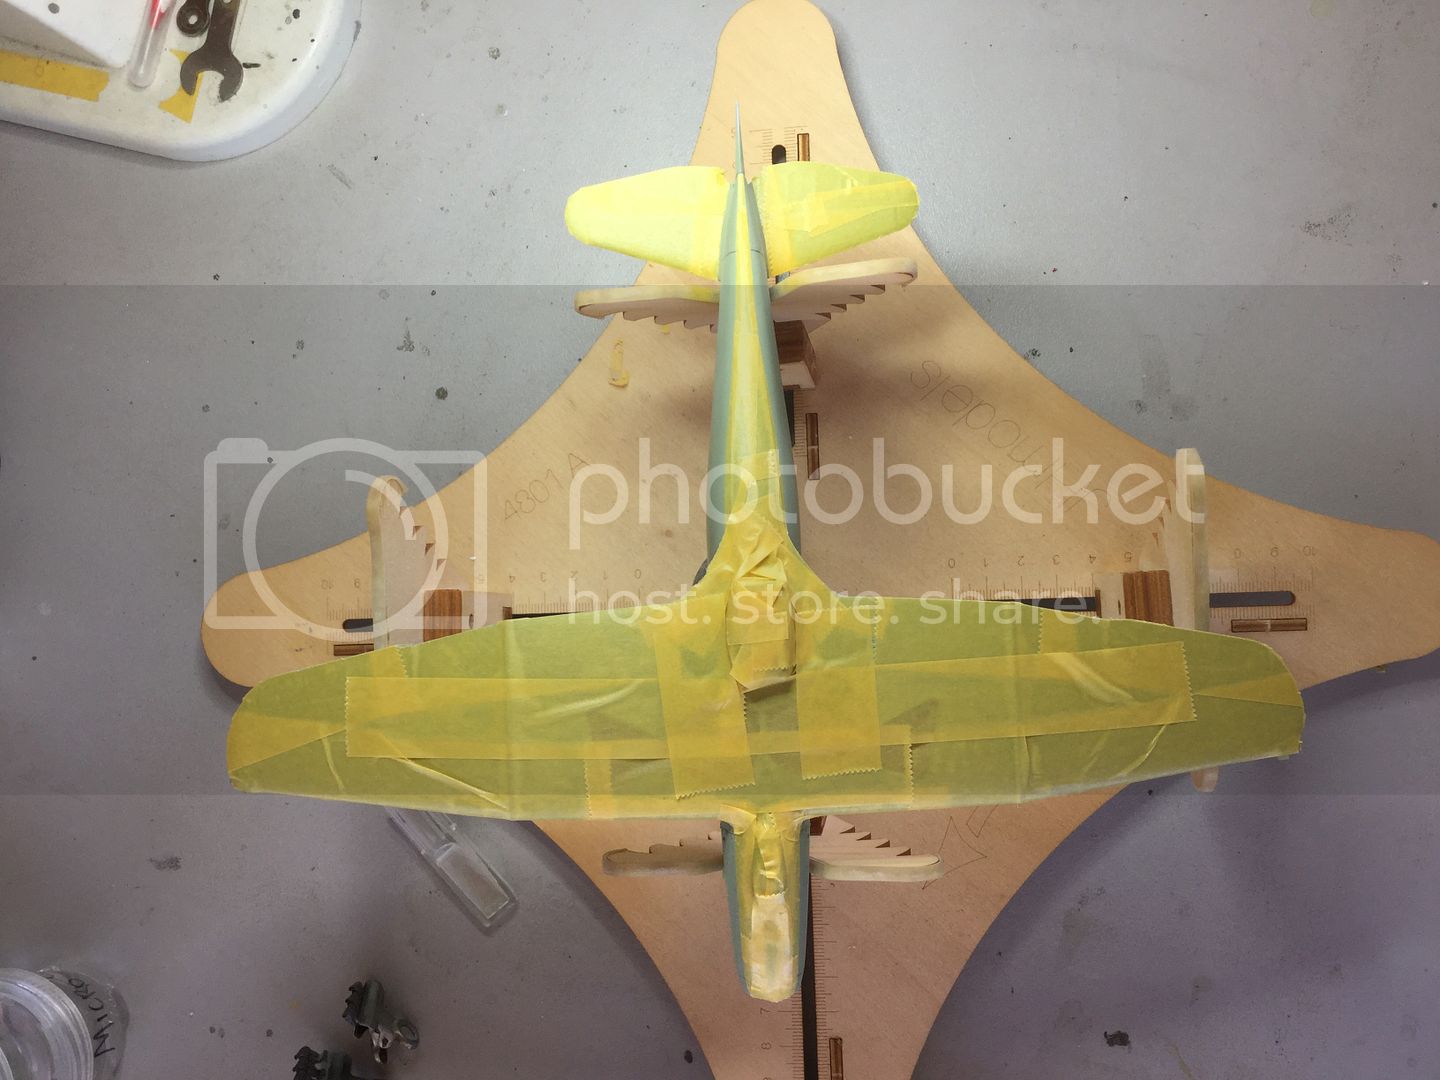

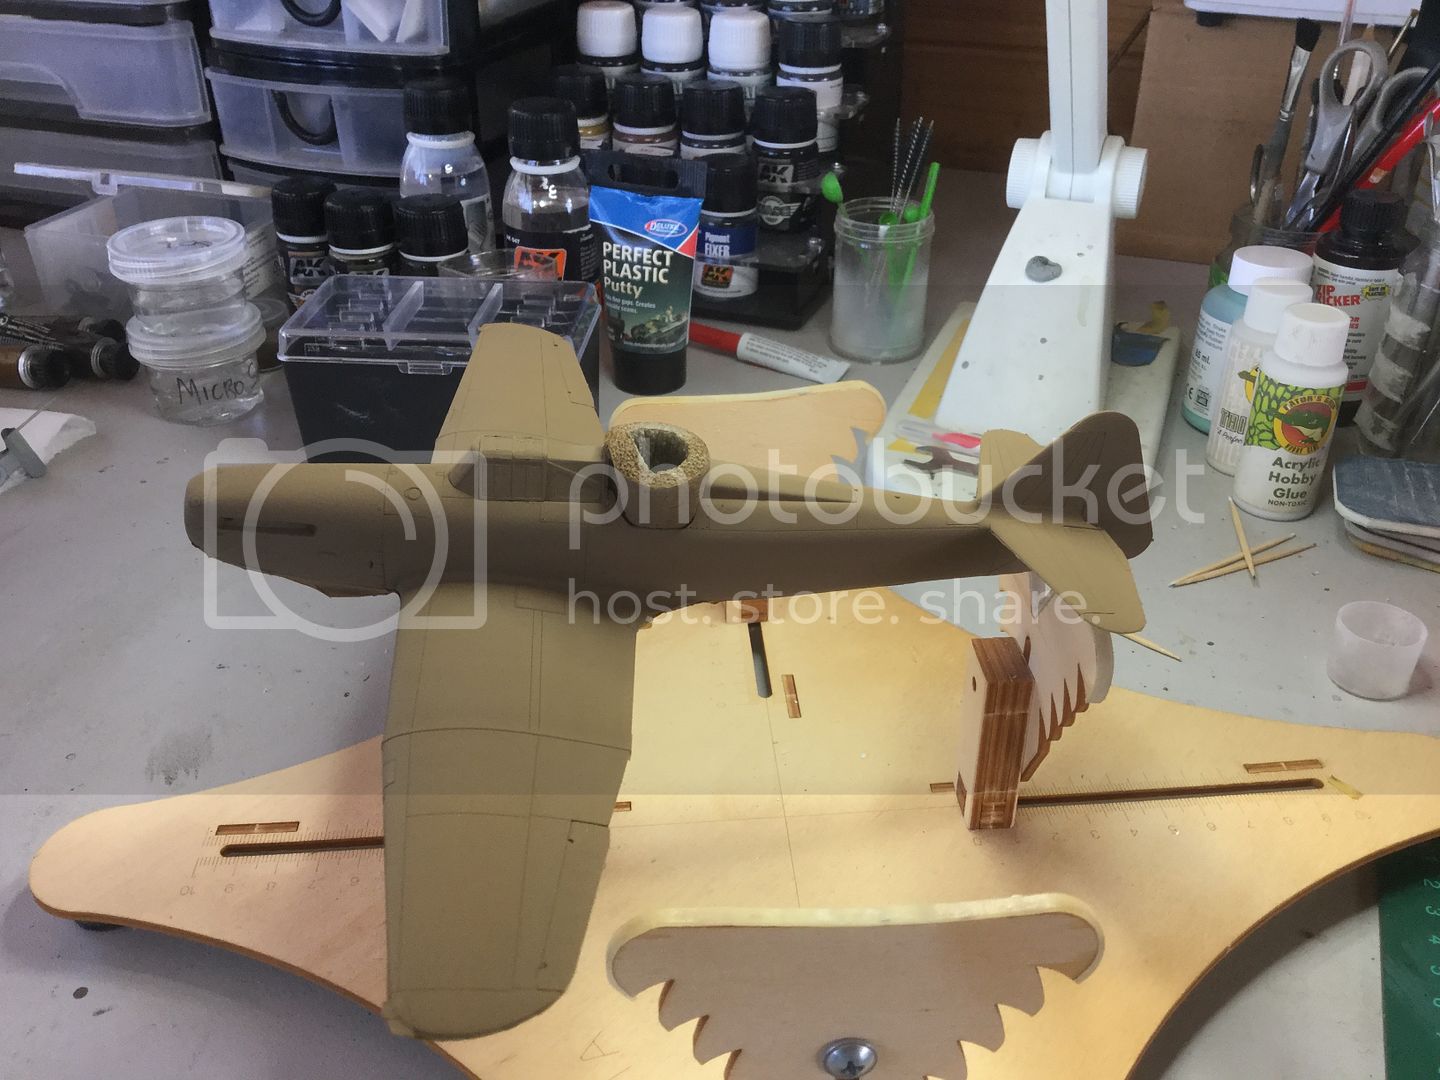
A coat of Humbrol 29 Dark Earth was sprayed over the entire upper fuselage and wings:

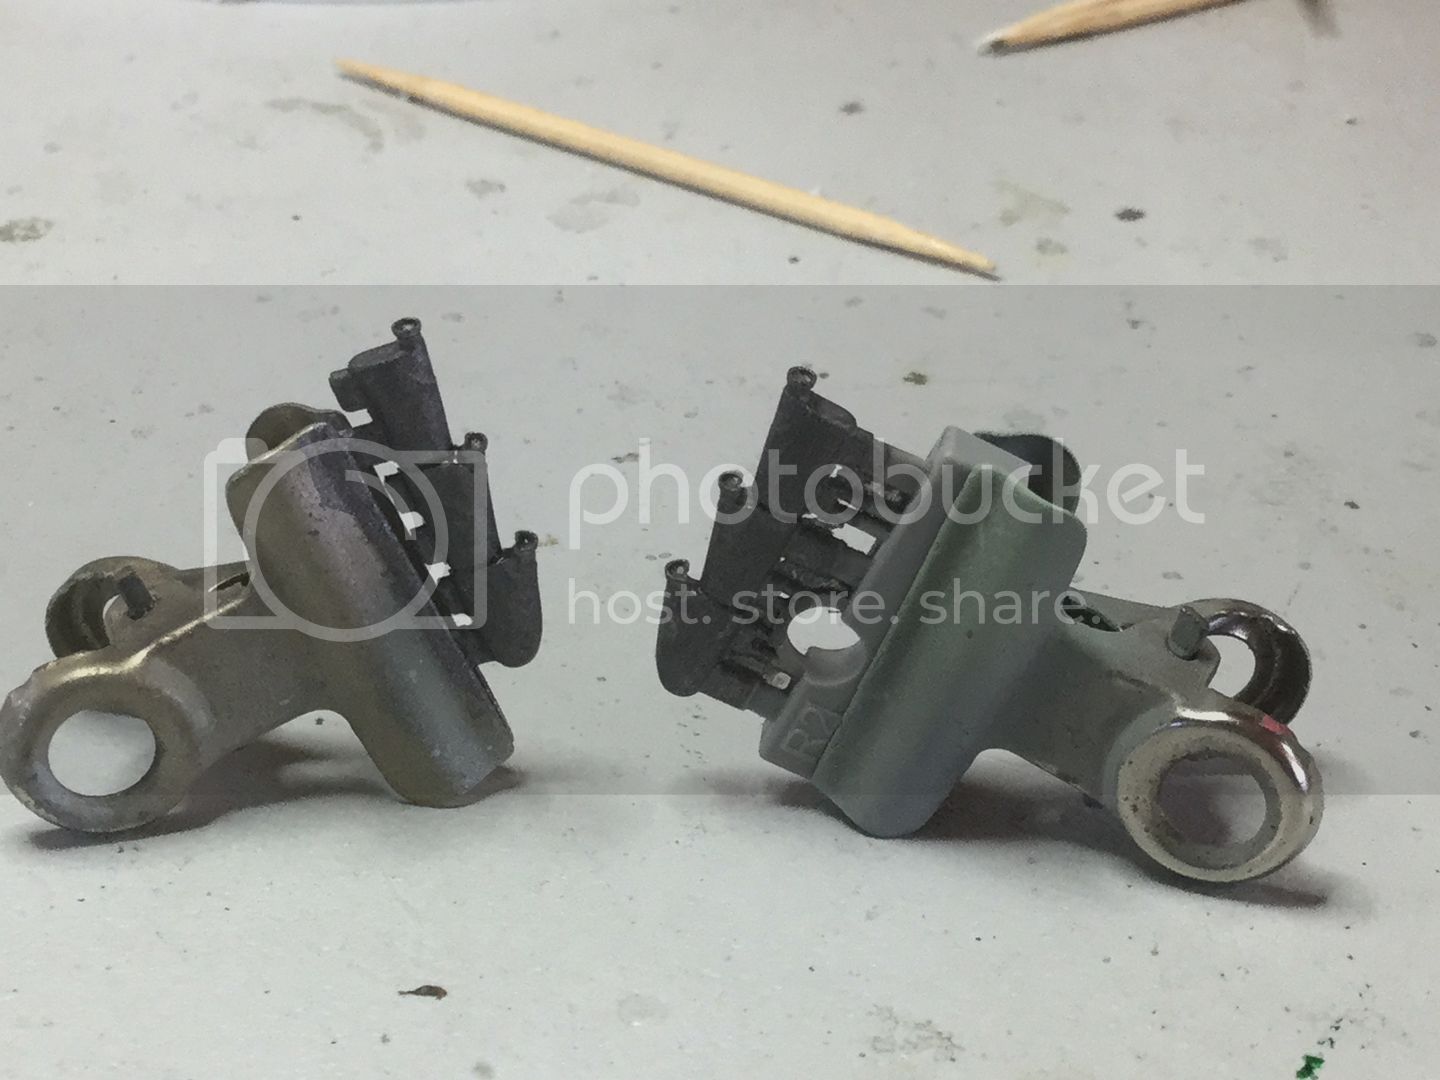
Whilst that dries, I commence to paint the Eduard Brassin exhausts under a couple of coats of Gunze H76 Burnt Iron:
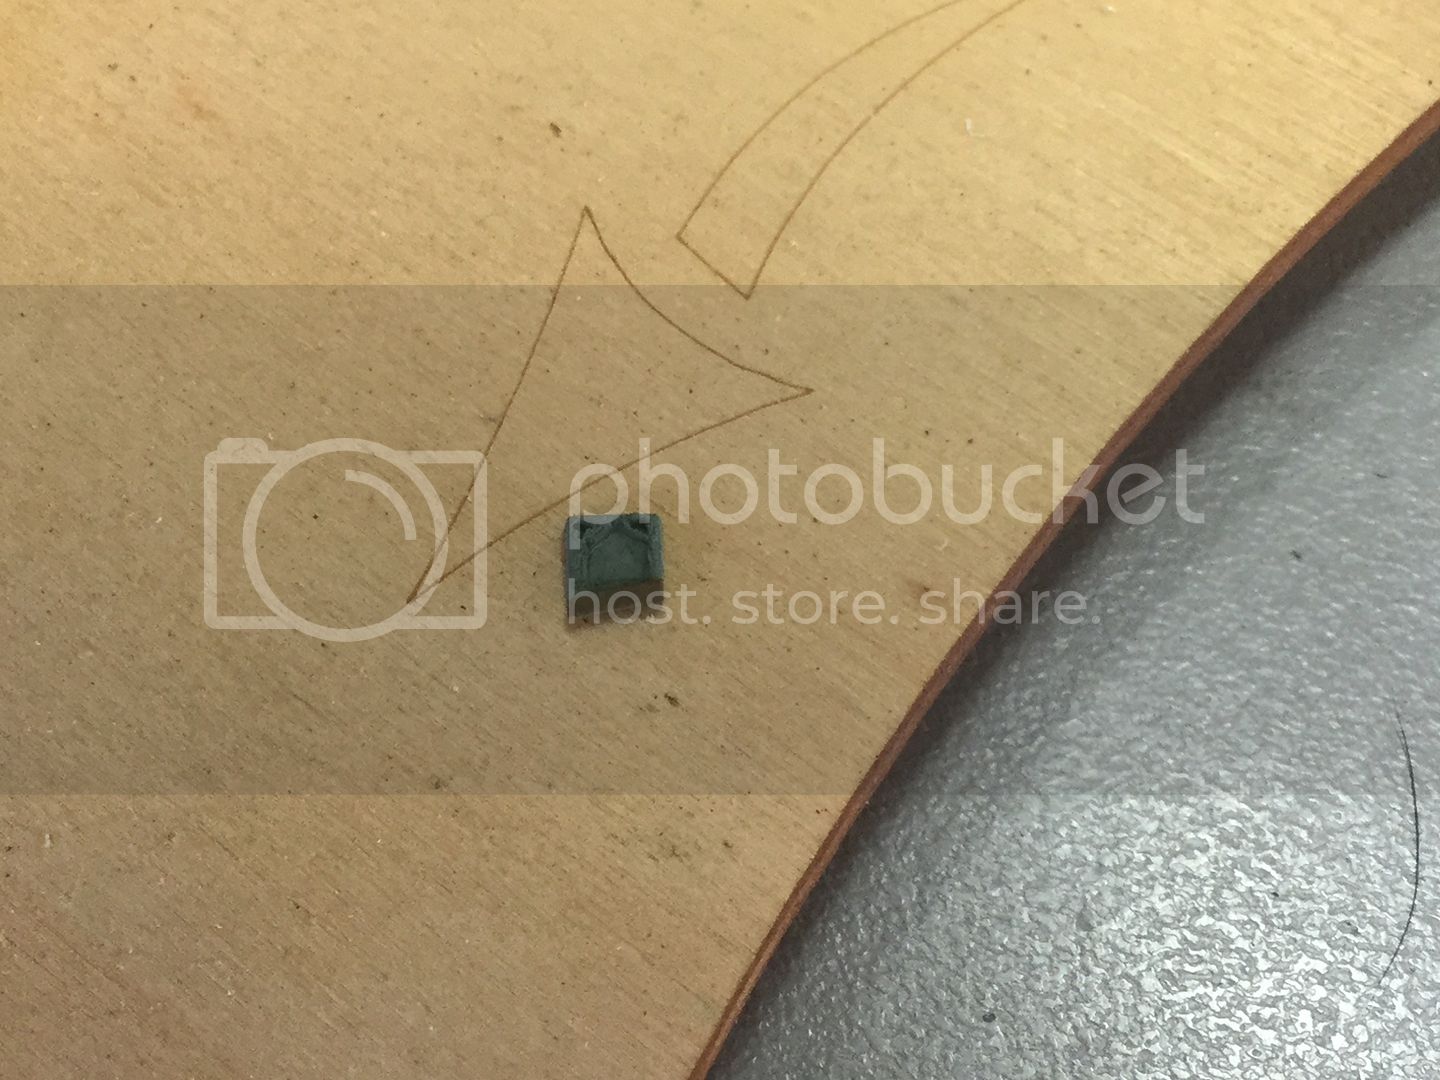
The interior of the wing fillet step, I have detailed it from the blank piece you are given by chiselling out and pin drilling:
I will try and await overnight to let the DE dry totally before I commence to add the masks. Thanks for looking in.
Buy some shares in Tamiya tape... Pilot's canopy tacked on with Micro temporary adhesive and a thin Tamiya tape strip added to the front interior as an extra guard against spray getting inside. Foam to seal the turret opening:
A coat of Humbrol 29 Dark Earth was sprayed over the entire upper fuselage and wings:
Whilst that dries, I commence to paint the Eduard Brassin exhausts under a couple of coats of Gunze H76 Burnt Iron:
The interior of the wing fillet step, I have detailed it from the blank piece you are given by chiselling out and pin drilling:
I will try and await overnight to let the DE dry totally before I commence to add the masks. Thanks for looking in.
kahunaminor
Joined: April 06, 2008
KitMaker: 151 posts
AeroScale: 141 posts
Posted: Monday, May 16, 2016 - 10:25 AM UTC
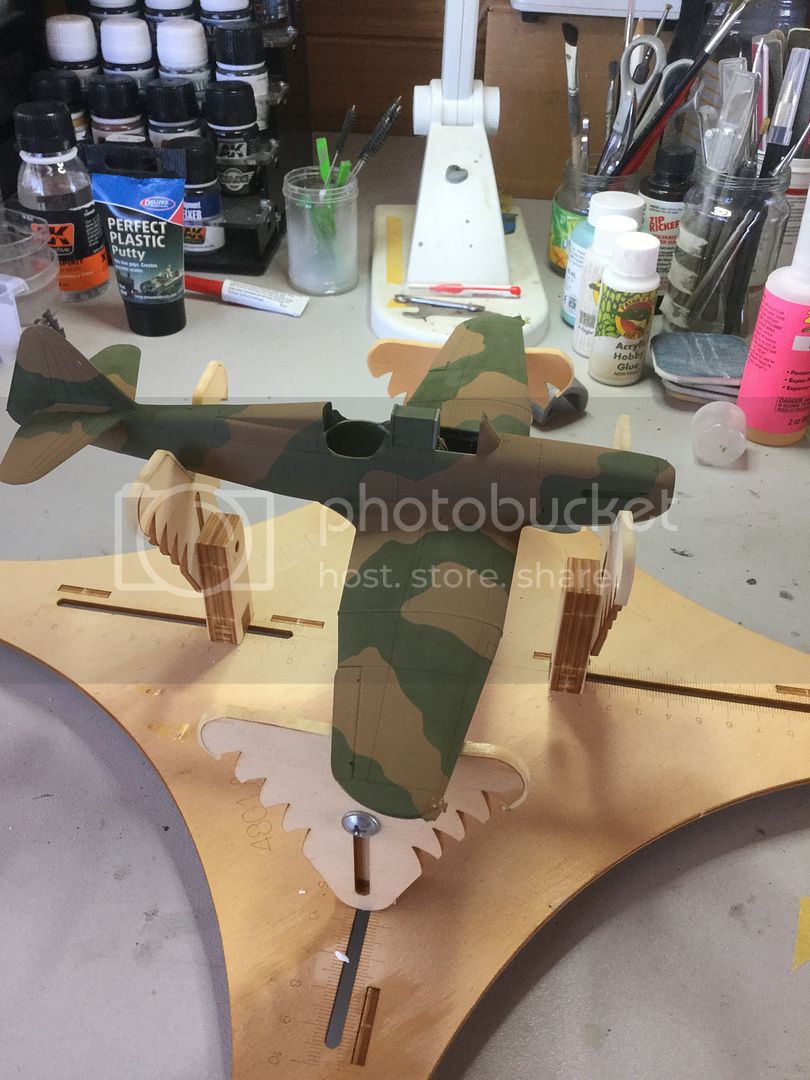
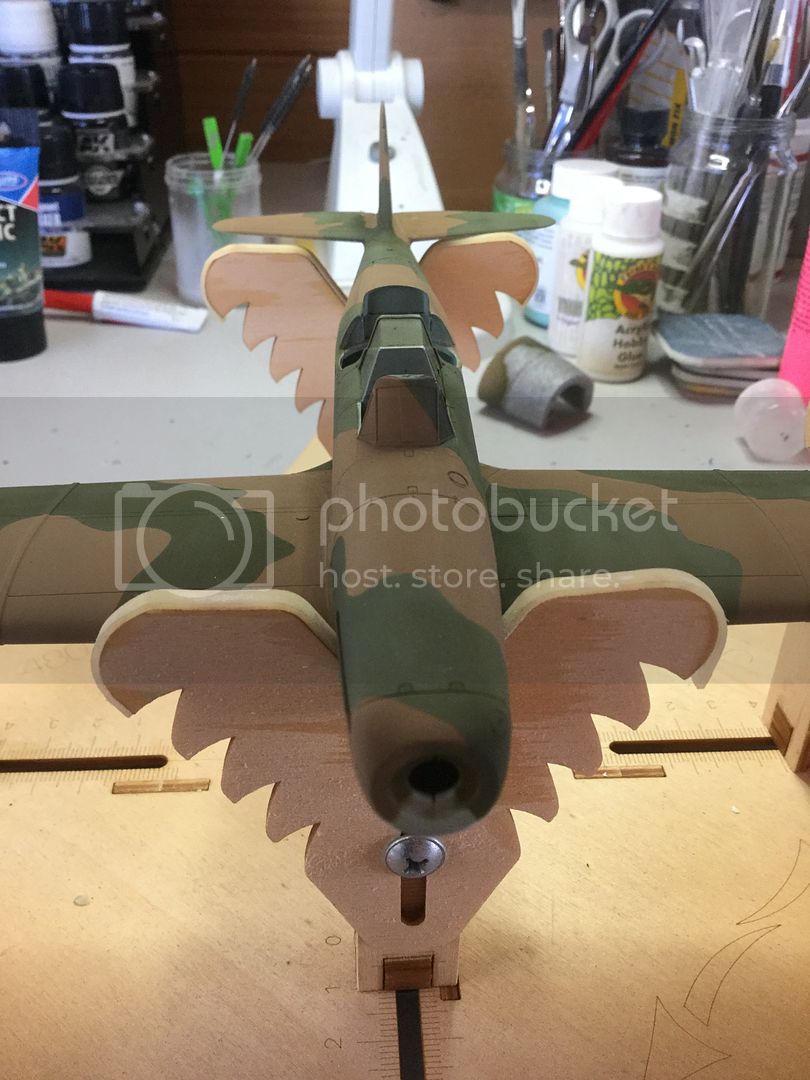
In the time honoured tradition of "The Karate Kid" and the words of Mr Miyagi, "Masks on, masks off." I found the instructions immensely helpful as they explained how the masks go on. I think just the pictures themselves would leave it to some guesstimating which may adversely affect the result. Having said that, I did find the no.2 mask didn't want to fit 100% and I had to add a small piece of tape to ensure coverage:

However as this was the first time I have used Miracle Masks and this was one of the first masks applied, I tend to believe it was "user error". The remaining masks fit as described and they are well engineered and easy, as long as you follow the instruction sequence:
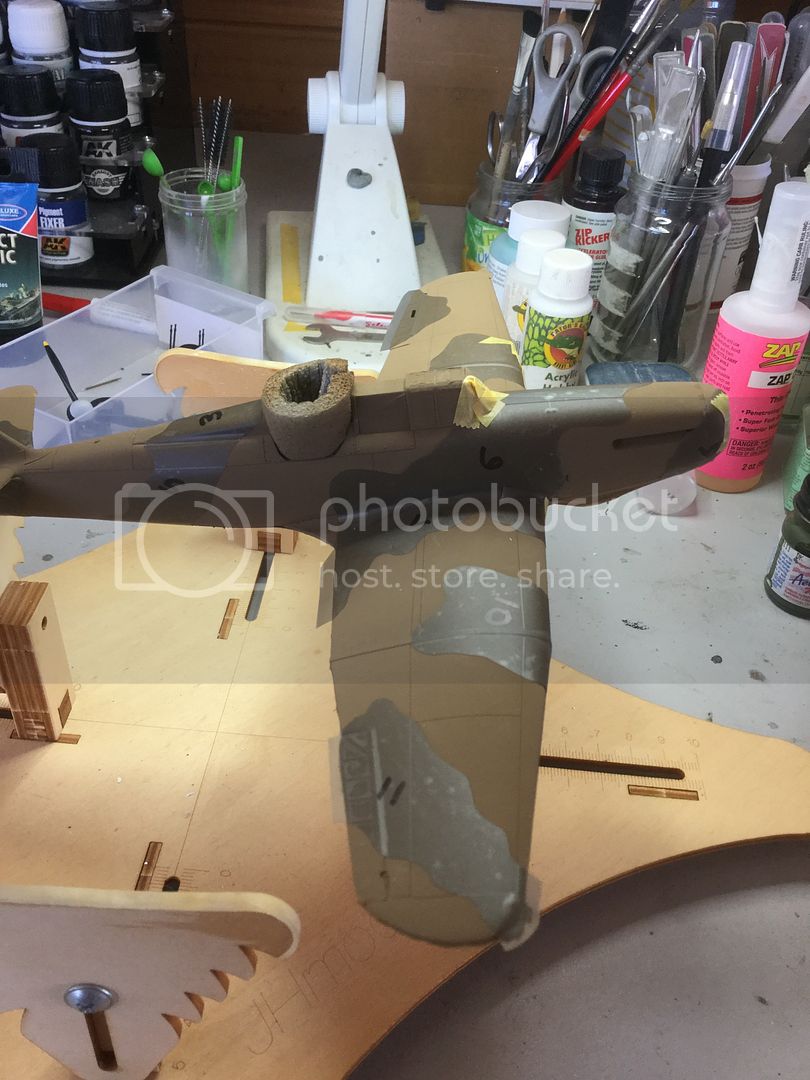

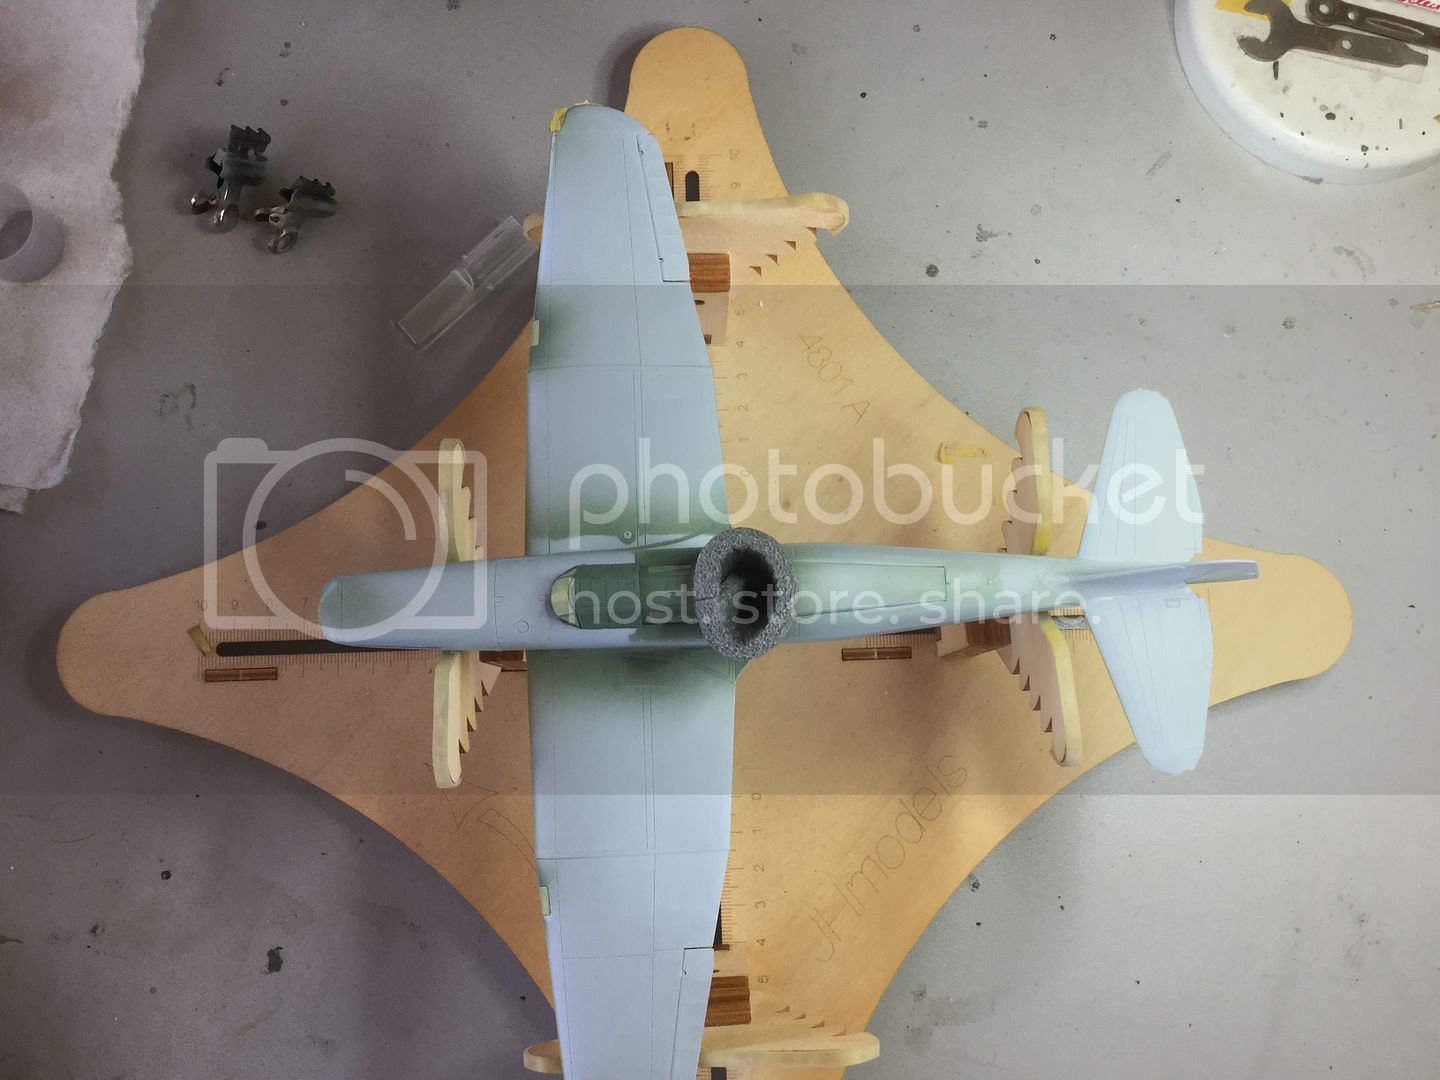
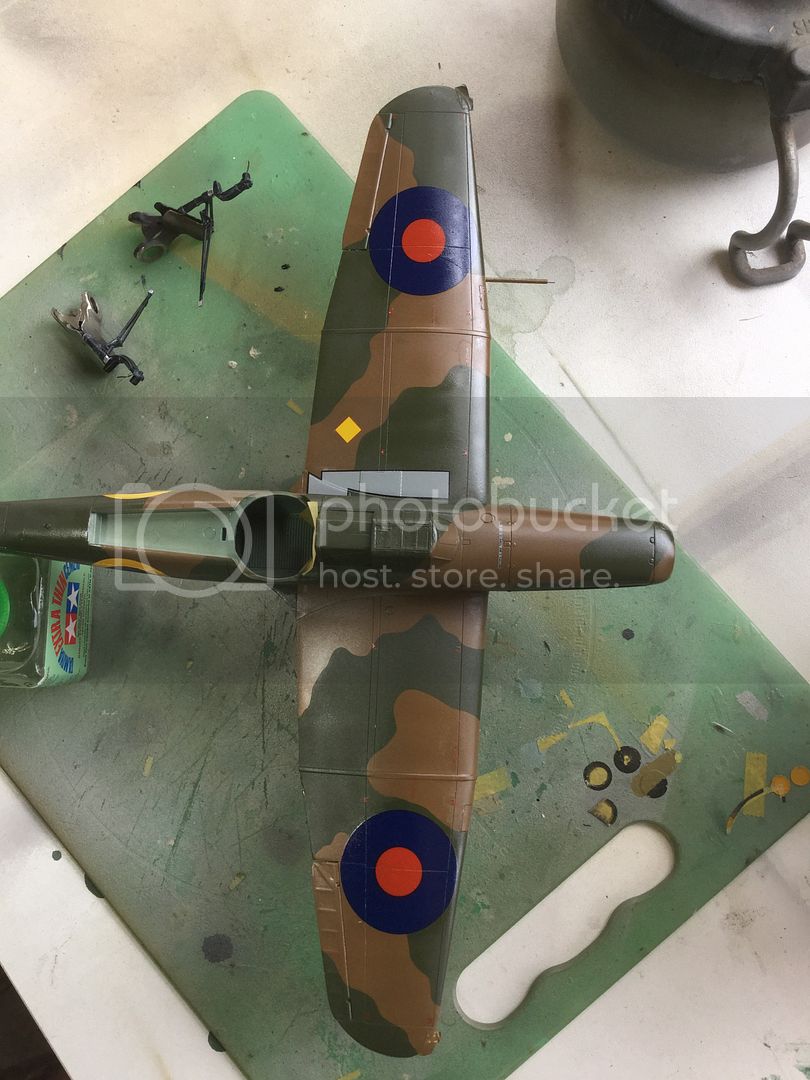
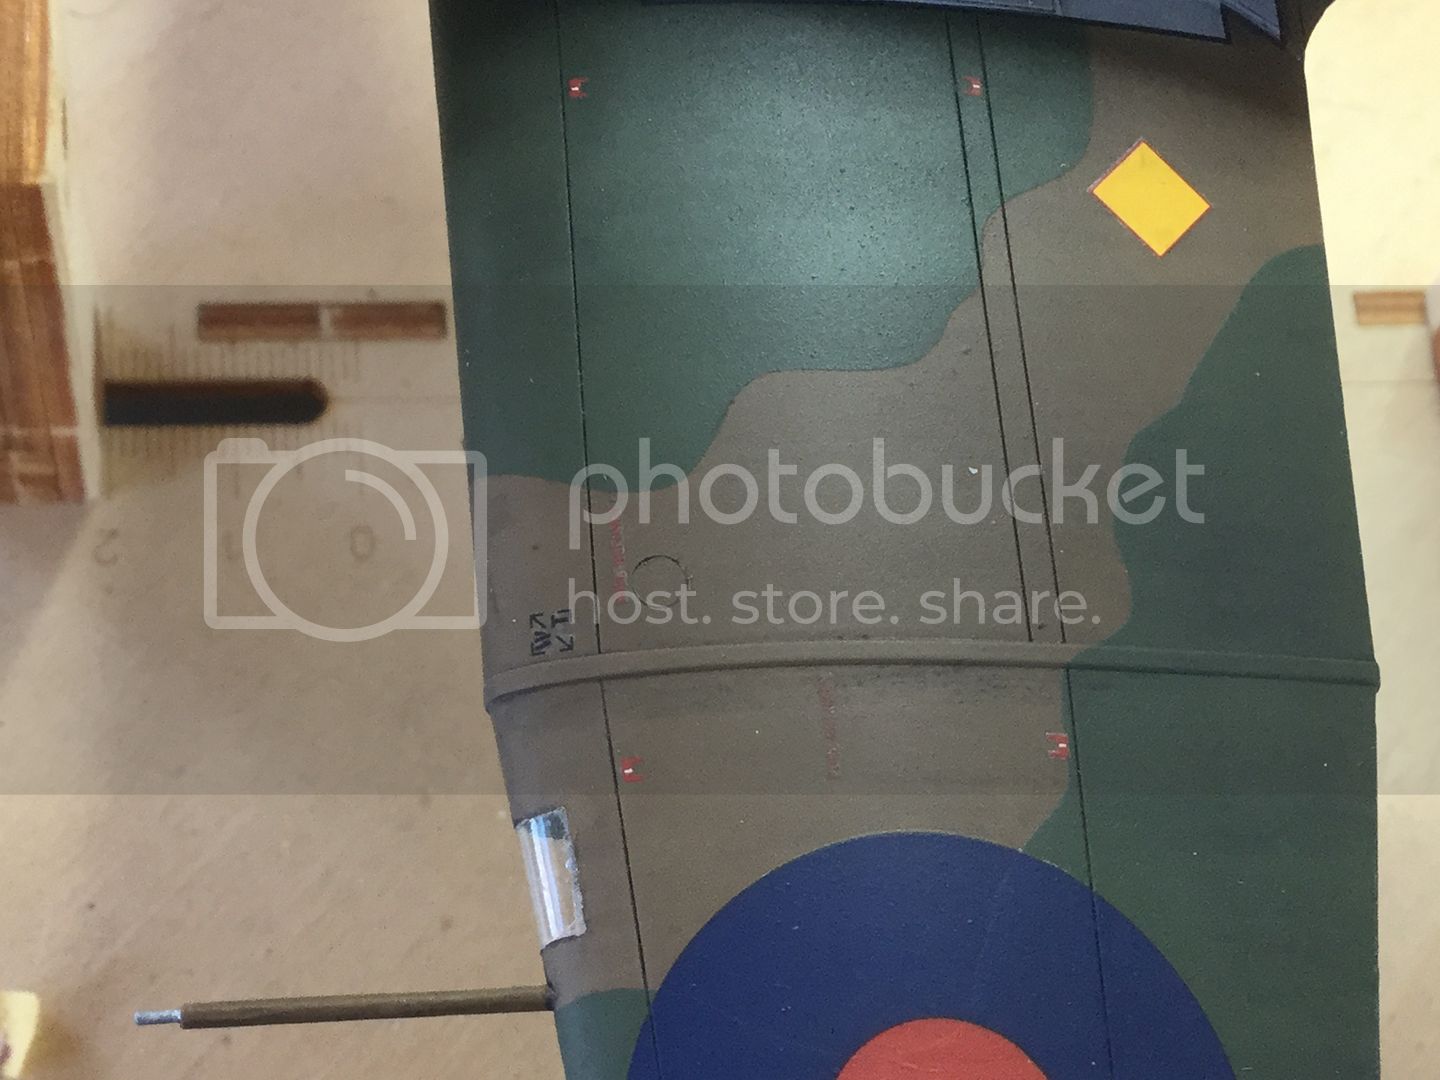
Once applied and checked, I shot Aeromaster RAF Dk Green in a couple of thin coats, gently building opacity:

By the time I had disassembled, cleaned, reassembled and checked my airbrush, the masks were ready to come off. They were gently removed and replaced on the mask sheet, ready for the next Defiant in A scheme. I removed all the masking and was left with nice, well defined demarcations:

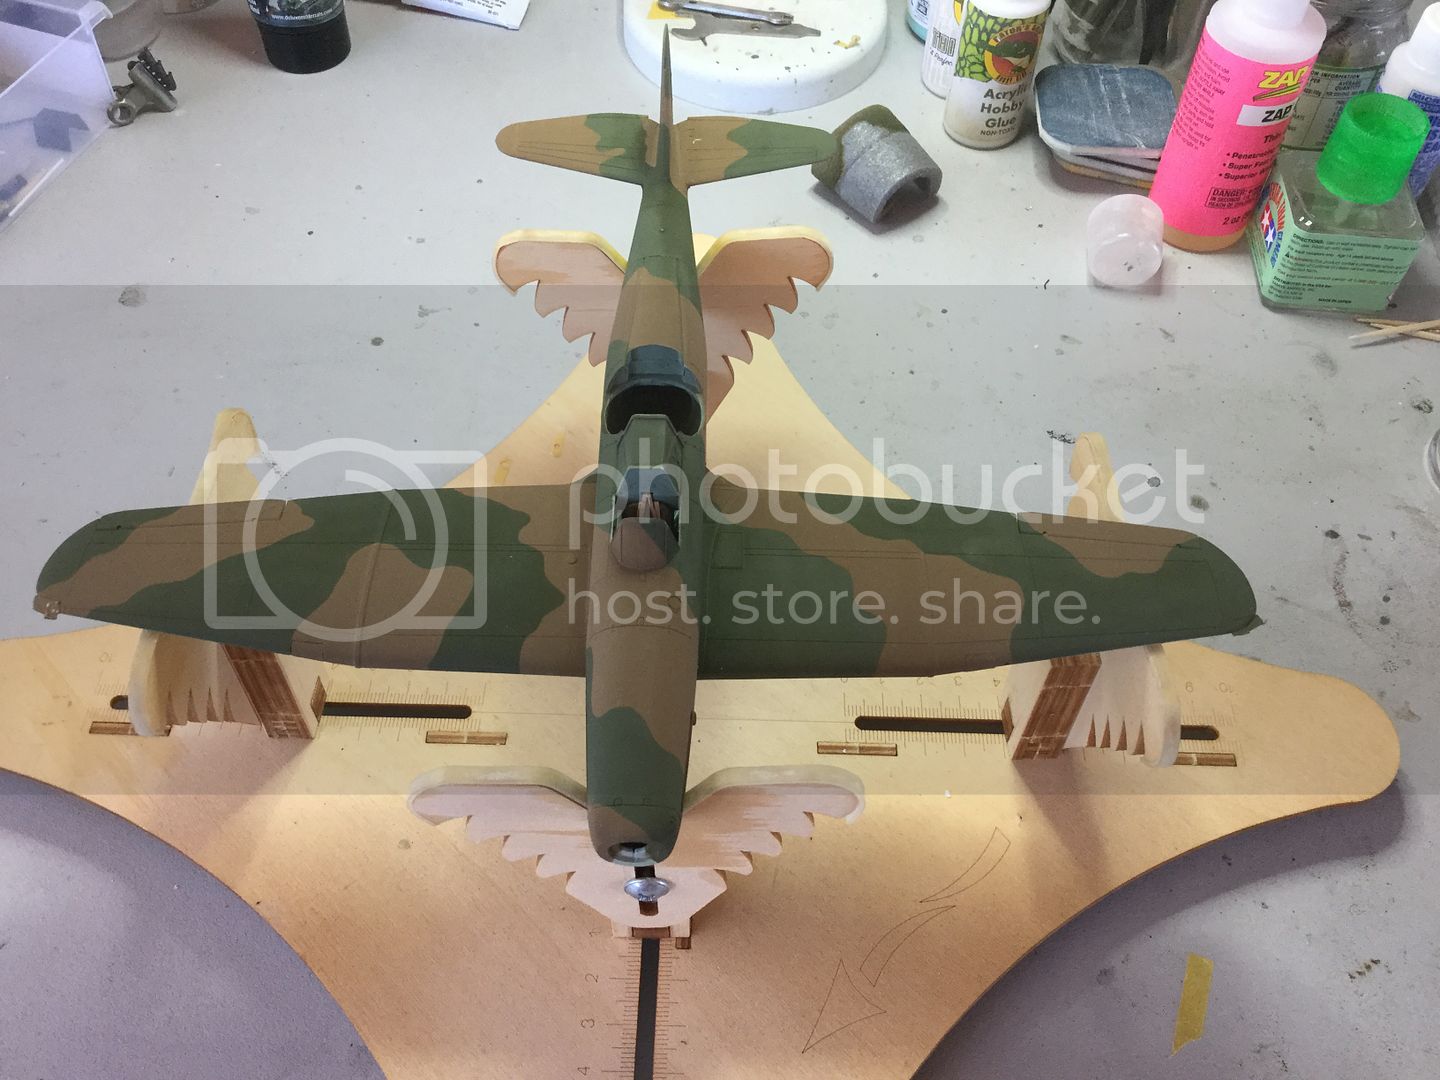
There are a couple of minor scratches to touch up and I may have to widen the Sky near the tail a little but this is where she sits for the night before a gloss coat and decals:


Regards,
However as this was the first time I have used Miracle Masks and this was one of the first masks applied, I tend to believe it was "user error". The remaining masks fit as described and they are well engineered and easy, as long as you follow the instruction sequence:
Once applied and checked, I shot Aeromaster RAF Dk Green in a couple of thin coats, gently building opacity:
By the time I had disassembled, cleaned, reassembled and checked my airbrush, the masks were ready to come off. They were gently removed and replaced on the mask sheet, ready for the next Defiant in A scheme. I removed all the masking and was left with nice, well defined demarcations:
There are a couple of minor scratches to touch up and I may have to widen the Sky near the tail a little but this is where she sits for the night before a gloss coat and decals:
Regards,

goodn8

Joined: October 12, 2008
KitMaker: 709 posts
AeroScale: 651 posts
Posted: Monday, May 16, 2016 - 11:09 AM UTC
Beautiful job, Kent! 
Very well done on the masking and painting the upper- and underside. The camo looks really nice and crisp - I think Mal's masks are worth a try. Great work so far!
Thomas
Very well done on the masking and painting the upper- and underside. The camo looks really nice and crisp - I think Mal's masks are worth a try. Great work so far!
Thomas

Joel_W
Joined: December 04, 2010
KitMaker: 11,666 posts
AeroScale: 7,410 posts
Posted: Tuesday, May 17, 2016 - 05:31 AM UTC
Kent,
Mal's masks, and your painting skills, resulted in a perfect Camo scheme A. Well done.
Joel
Mal's masks, and your painting skills, resulted in a perfect Camo scheme A. Well done.
Joel
kahunaminor
Joined: April 06, 2008
KitMaker: 151 posts
AeroScale: 141 posts
Posted: Friday, May 20, 2016 - 03:26 AM UTC
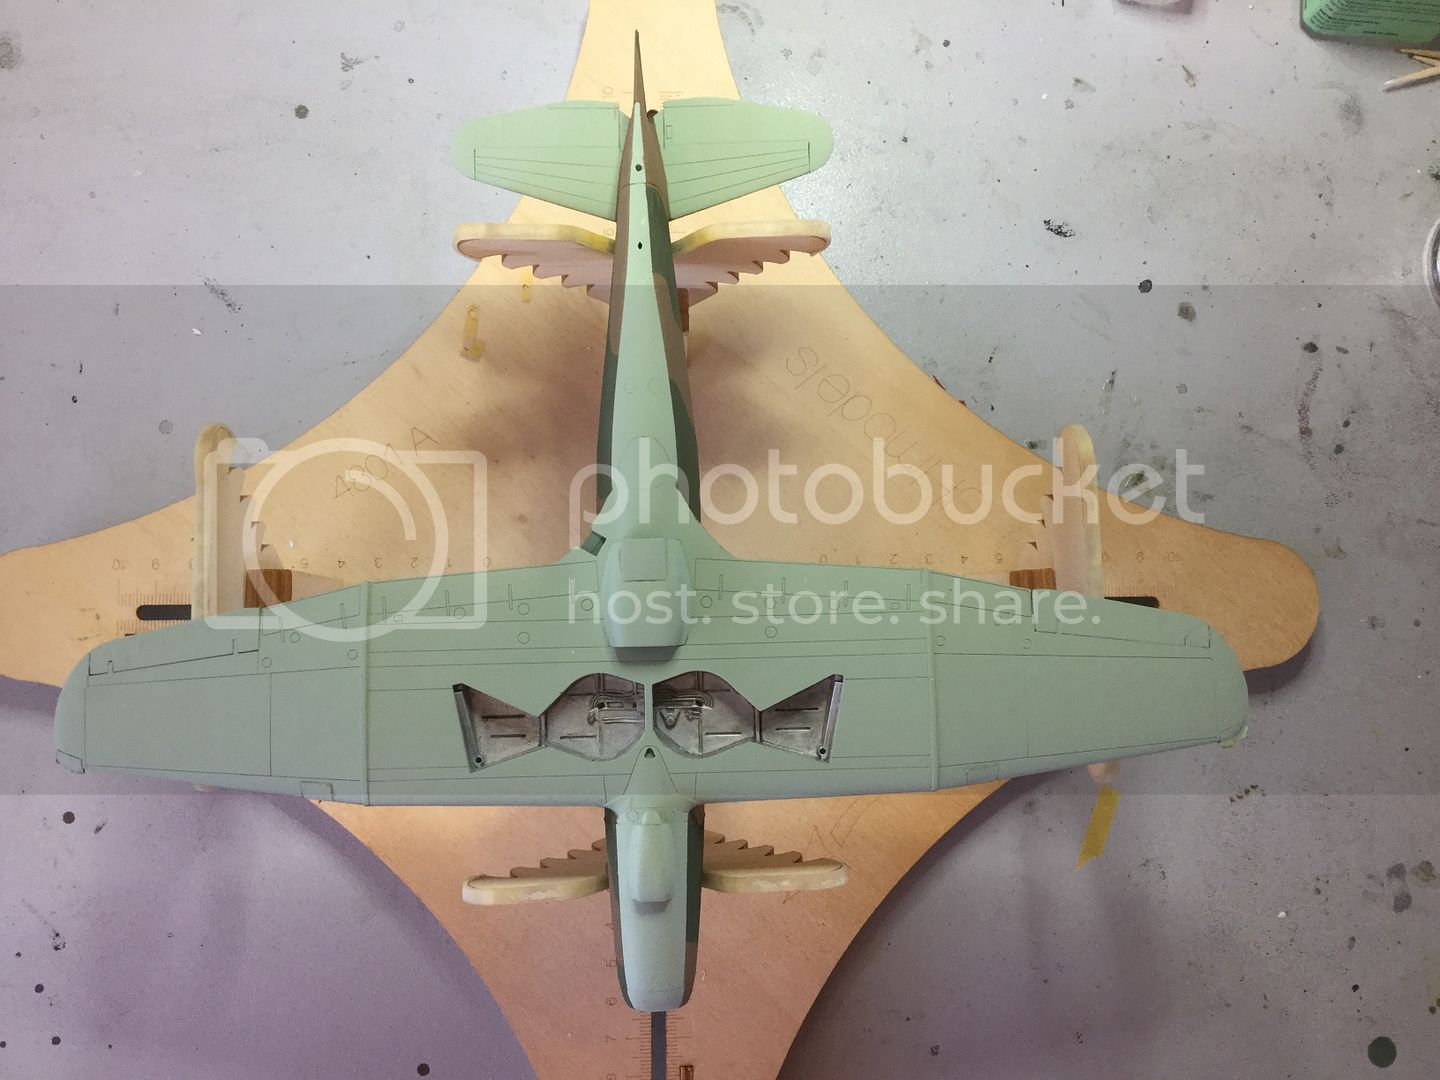
A bit of remedial work done on the sky undersurface. It was only a small correction but what had been seen could not be unseen and I had to do it. I probably could have curved it out a tad more but better left alone than risk buggering it up:

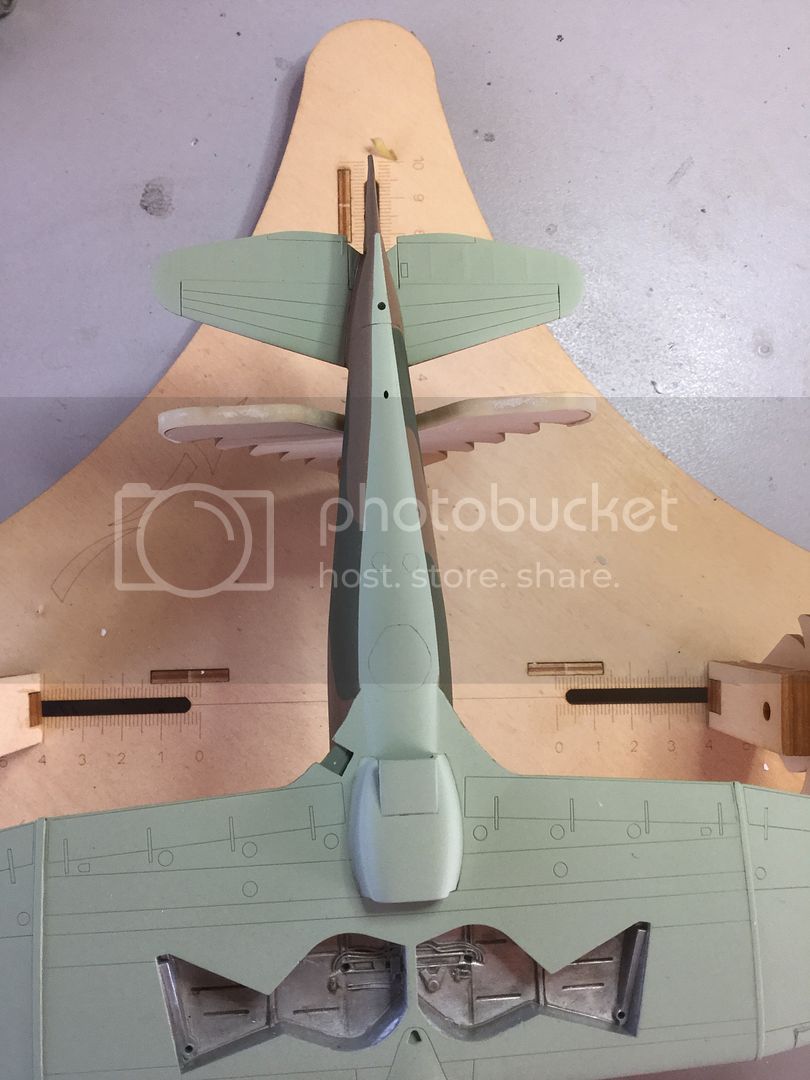
The airframe received its gloss coat of Future (Pledge One Go) in preparation for decals.The antenna rods and tail wheel was added and the lot up on cocktail sticks to dry:
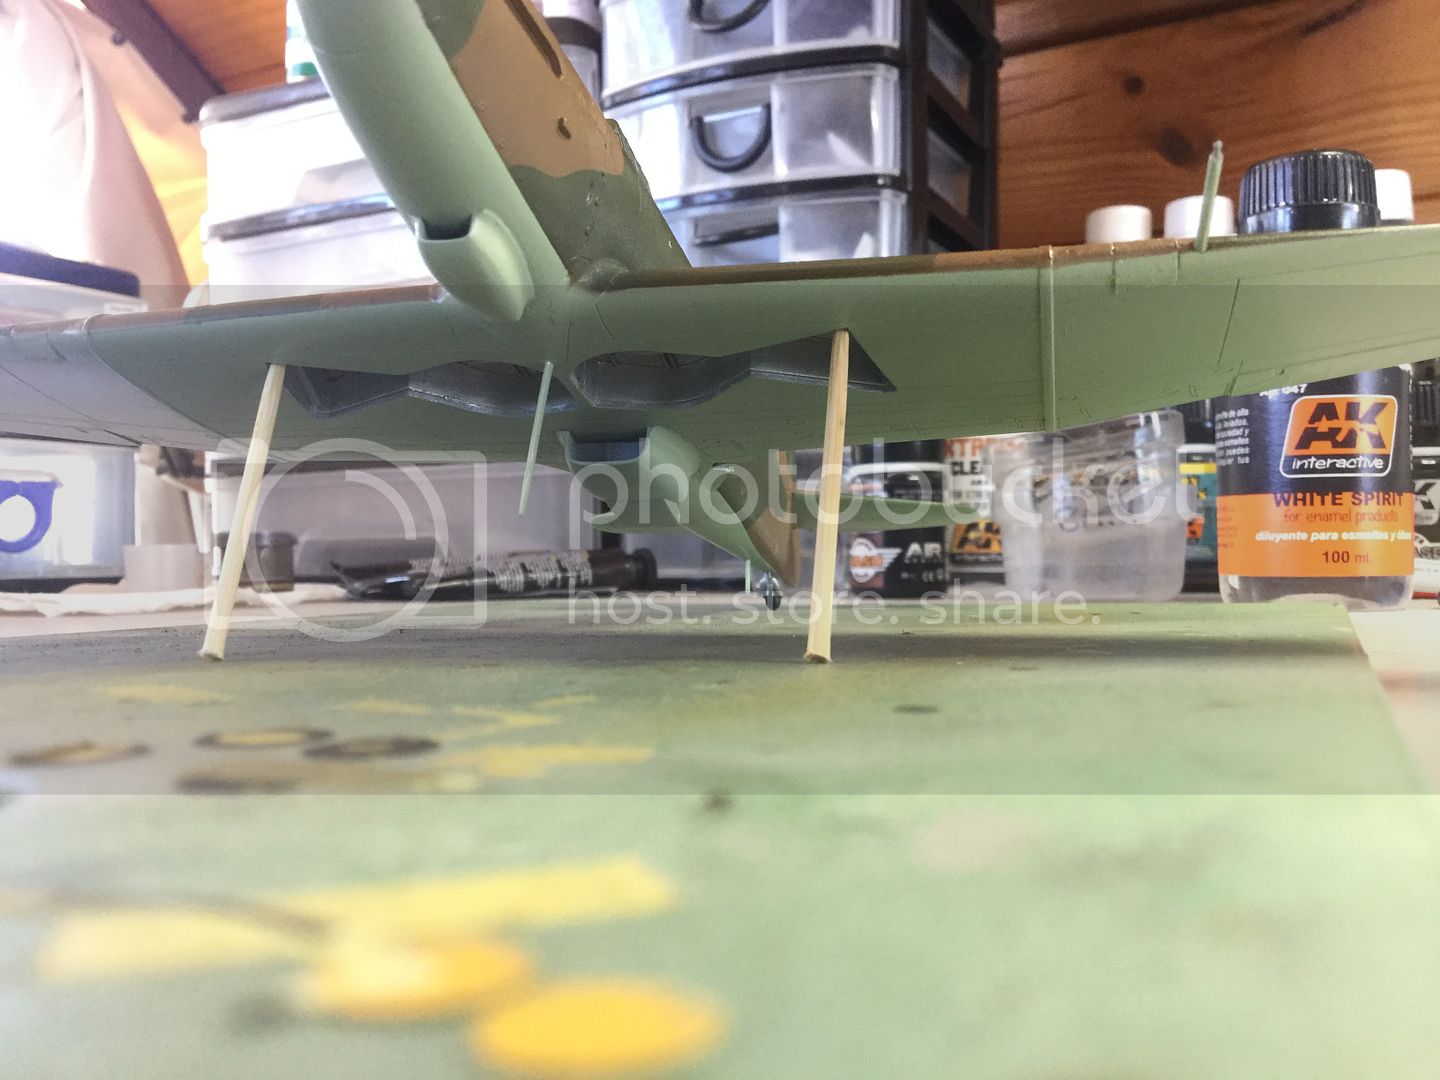


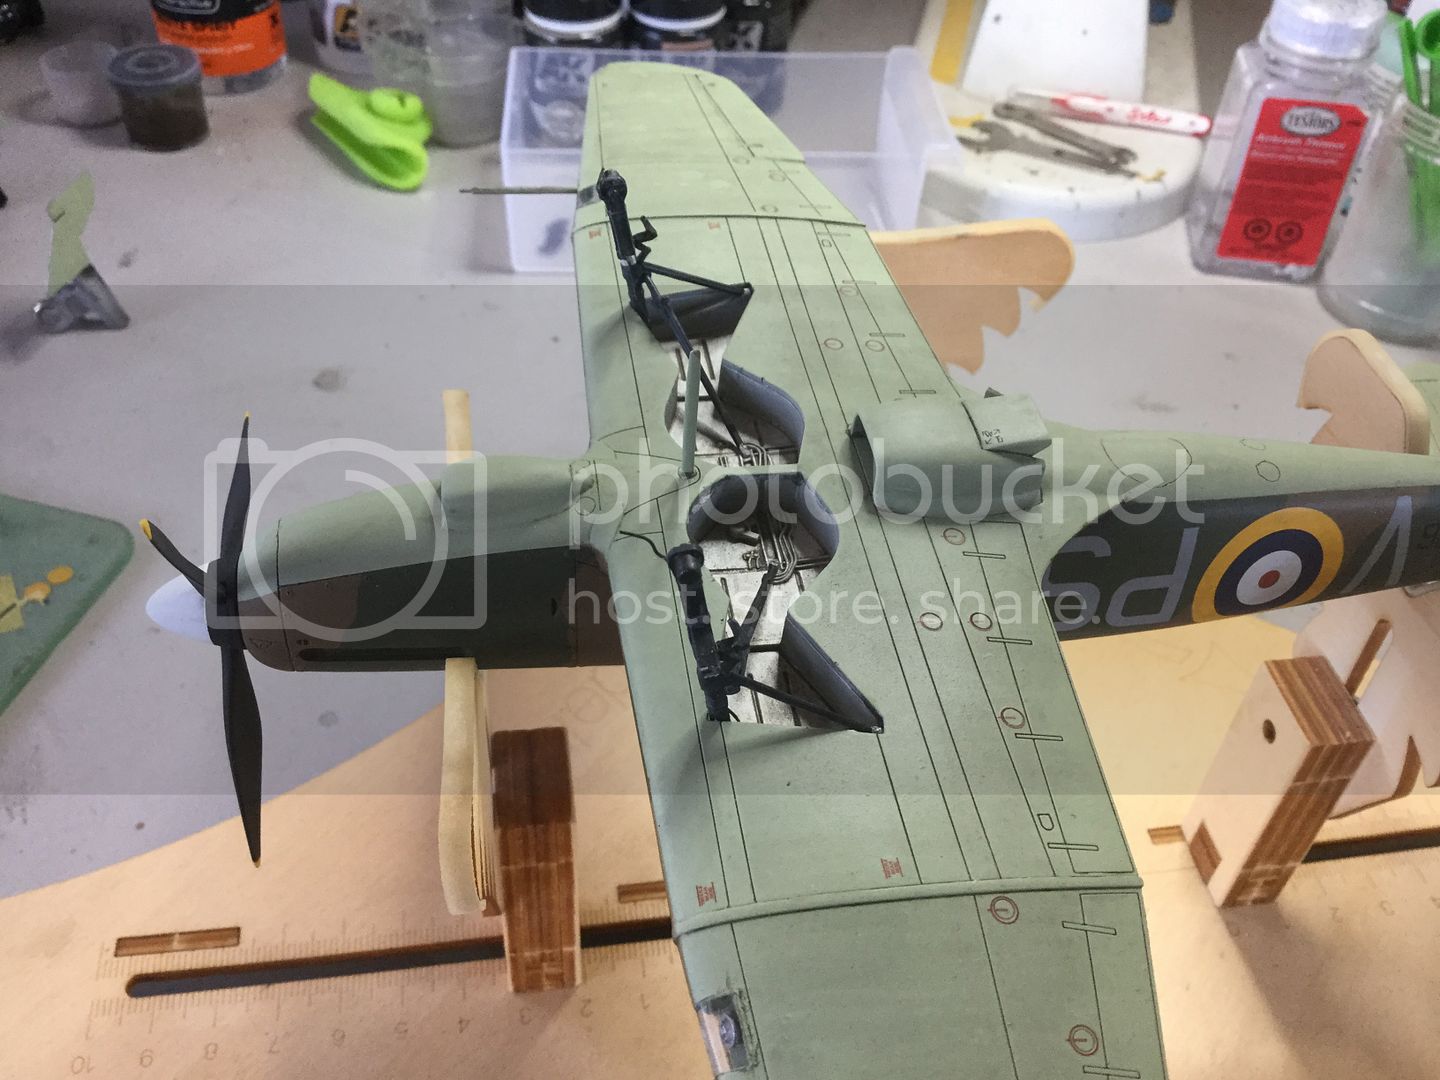
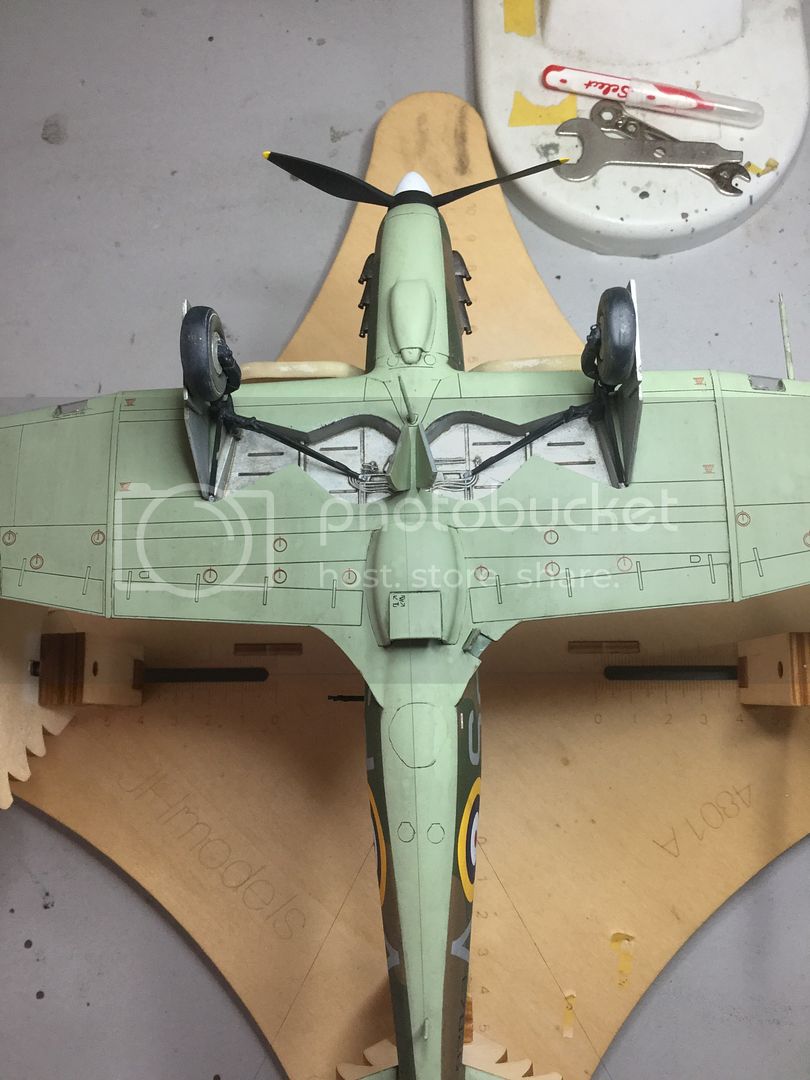
I added brake lines from 0.3 lead wire and secured them with thin strips of Bare Metal Foil. The MLG was then temporarily set into position and the retraction struts attached to the main legs and cemented at the join and allowed to set. They should now be just drop in. Once set, they were removed and MM Flat Black over all followed by Future to seal the enamel to the lot:
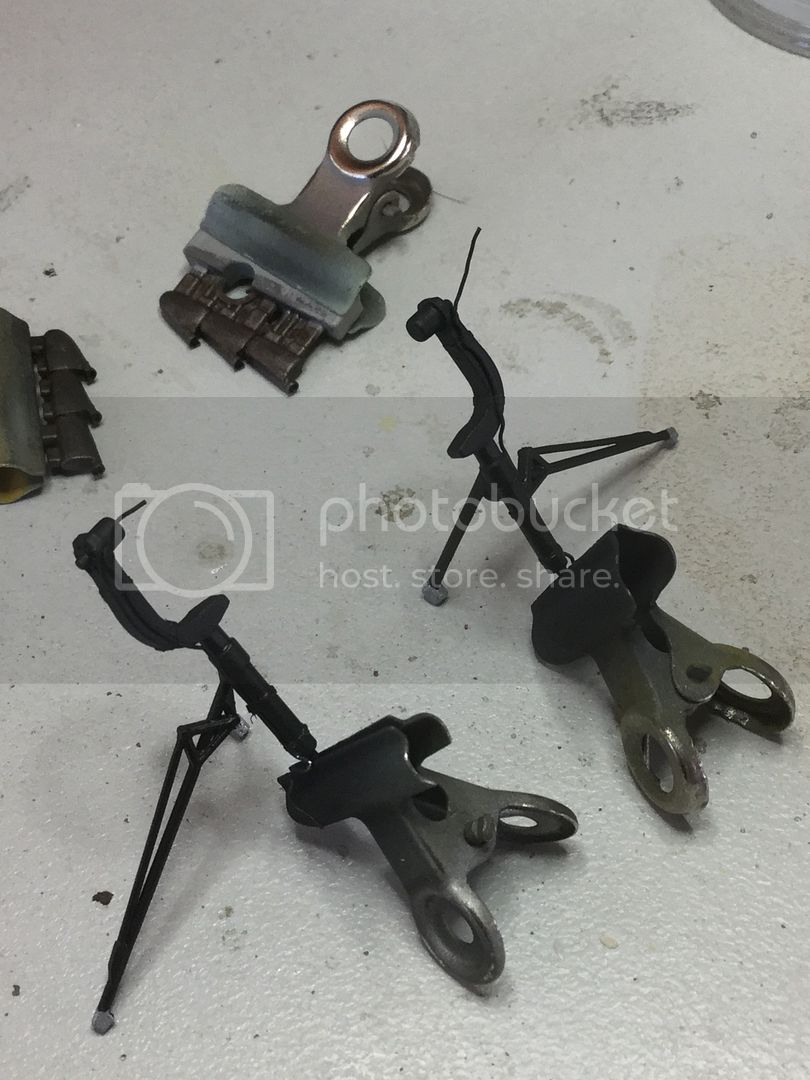
The exhausts were painted Gunze H76 Burnt Iron, a coat of Future and then my first use of AK Interactive Exhaust wash. It is an enamel wash. I am not sure I like the result as yet, I will let it go overnight and have a look with fresh eyes:

Regards,


The airframe received its gloss coat of Future (Pledge One Go) in preparation for decals.The antenna rods and tail wheel was added and the lot up on cocktail sticks to dry:


I added brake lines from 0.3 lead wire and secured them with thin strips of Bare Metal Foil. The MLG was then temporarily set into position and the retraction struts attached to the main legs and cemented at the join and allowed to set. They should now be just drop in. Once set, they were removed and MM Flat Black over all followed by Future to seal the enamel to the lot:


The exhausts were painted Gunze H76 Burnt Iron, a coat of Future and then my first use of AK Interactive Exhaust wash. It is an enamel wash. I am not sure I like the result as yet, I will let it go overnight and have a look with fresh eyes:

Regards,
Holdfast

#056

Joined: September 30, 2002
KitMaker: 8,581 posts
AeroScale: 4,913 posts

Posted: Friday, May 20, 2016 - 11:56 AM UTC
Nicely done with the camo masks Kent I will double check masks 2 but I'm sure that it was just "user error"  It does take a bit of positioning and is probably the hardest of them all to position, but nice save If necessary I will alter the mask/instructions, I will get back to you on here on my findings
Rather than take shares in Tamiya tape look for "Kip" tape, it comes in proper man rolls and you can get it in greater widths as well. Look on Decorators sites. "Frog" tape is good as well but a bit more expensive, that can be found in B&Q, here in the UK.
Your BP Defiant is looking cool
I will double check masks 2 but I'm sure that it was just "user error" It does take a bit of positioning and is probably the hardest of them all to position, but nice save If necessary I will alter the mask/instructions, I will get back to you on here on my findings Rather than take shares in Tamiya tape look for "Kip" tape, it comes in proper man rolls and you can get it in greater widths as well. Look on Decorators sites. "Frog" tape is good as well but a bit more expensive, that can be found in B&Q, here in the UK.
Your BP Defiant is looking cool

kahunaminor
Joined: April 06, 2008
KitMaker: 151 posts
AeroScale: 141 posts
Posted: Friday, May 20, 2016 - 12:05 PM UTC
Thanks Mal,
I think "user error" is the most likely reason. The issue was that forward left corner/edge just seemed a bit short on the "outer" edge. I think it was me as the rest went down like a dream as planned.
I have had a few inquiries as to the masks so hopefully I have done your product justice and you are getting some orders!
Thanks for the comments and support.
Regards,

GazzaS

#424
Joined: April 23, 2015
KitMaker: 4,648 posts
AeroScale: 1,938 posts

Posted: Friday, May 20, 2016 - 01:03 PM UTC
Kent,
Looks great!
Gaz
Looks great!
Gaz

AussieReg
#007
Joined: June 09, 2009
KitMaker: 8,156 posts
AeroScale: 3,756 posts
Posted: Friday, May 20, 2016 - 01:12 PM UTC
Kent, I am in total agreement with Gaz, your Defiant looks great!
Every time I see a thread with Mal's Masks I remind myself that it is time to get a set for one of my upcoming builds.
Cheers, D
Every time I see a thread with Mal's Masks I remind myself that it is time to get a set for one of my upcoming builds.
Cheers, D

kahunaminor
Joined: April 06, 2008
KitMaker: 151 posts
AeroScale: 141 posts
Posted: Sunday, May 22, 2016 - 01:23 PM UTC
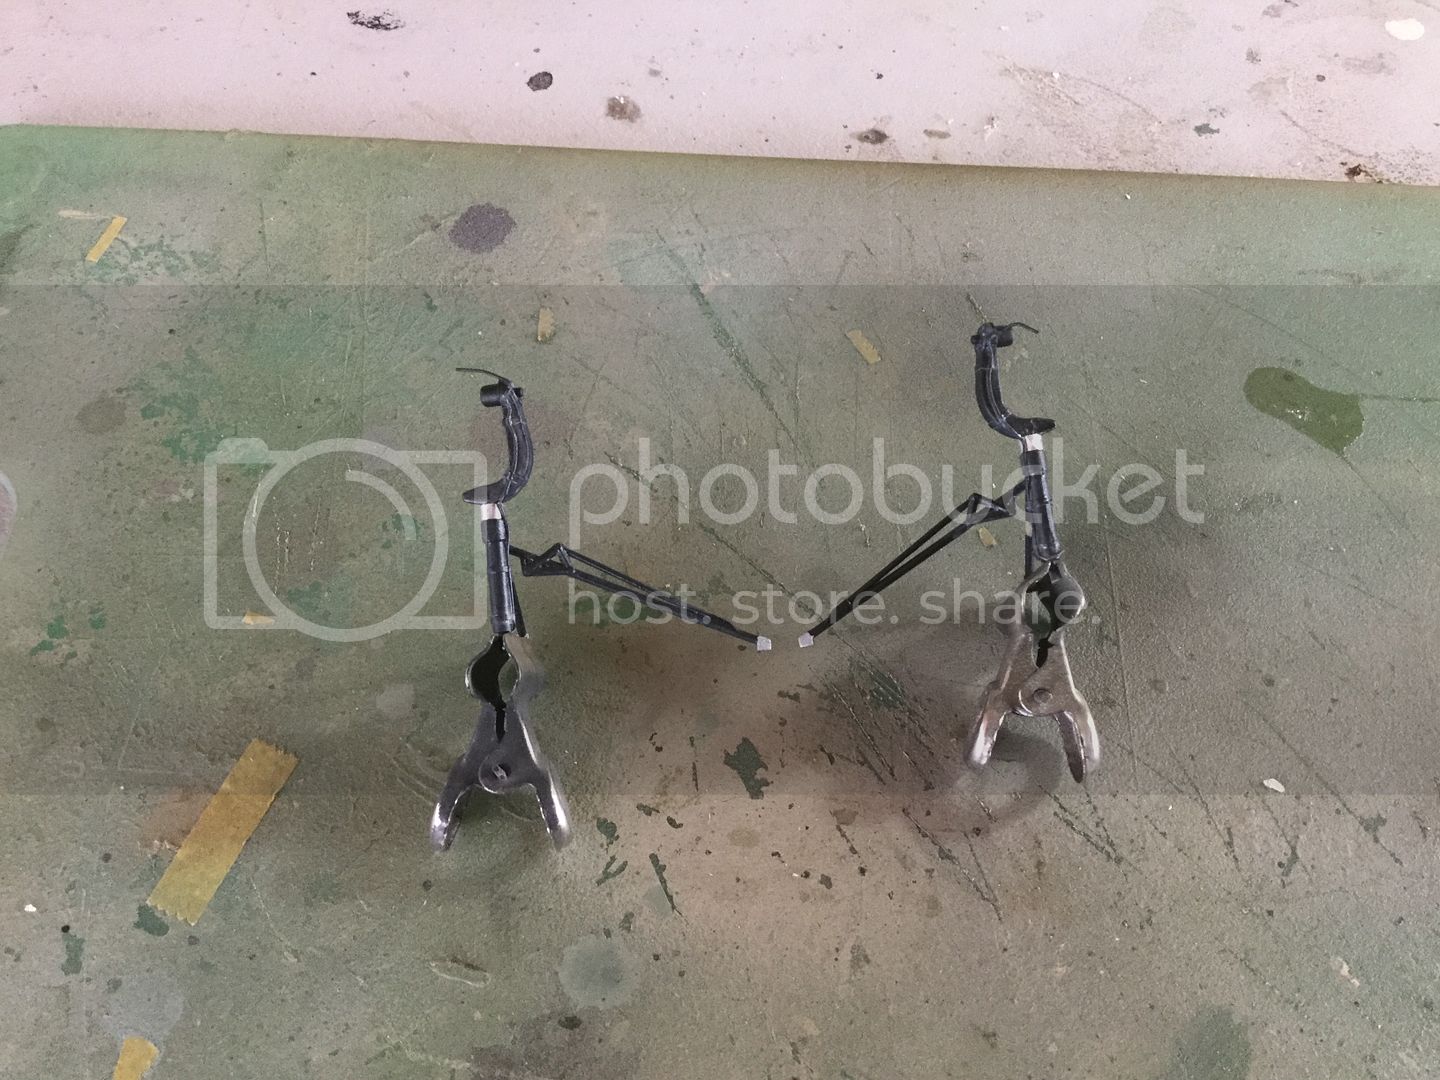
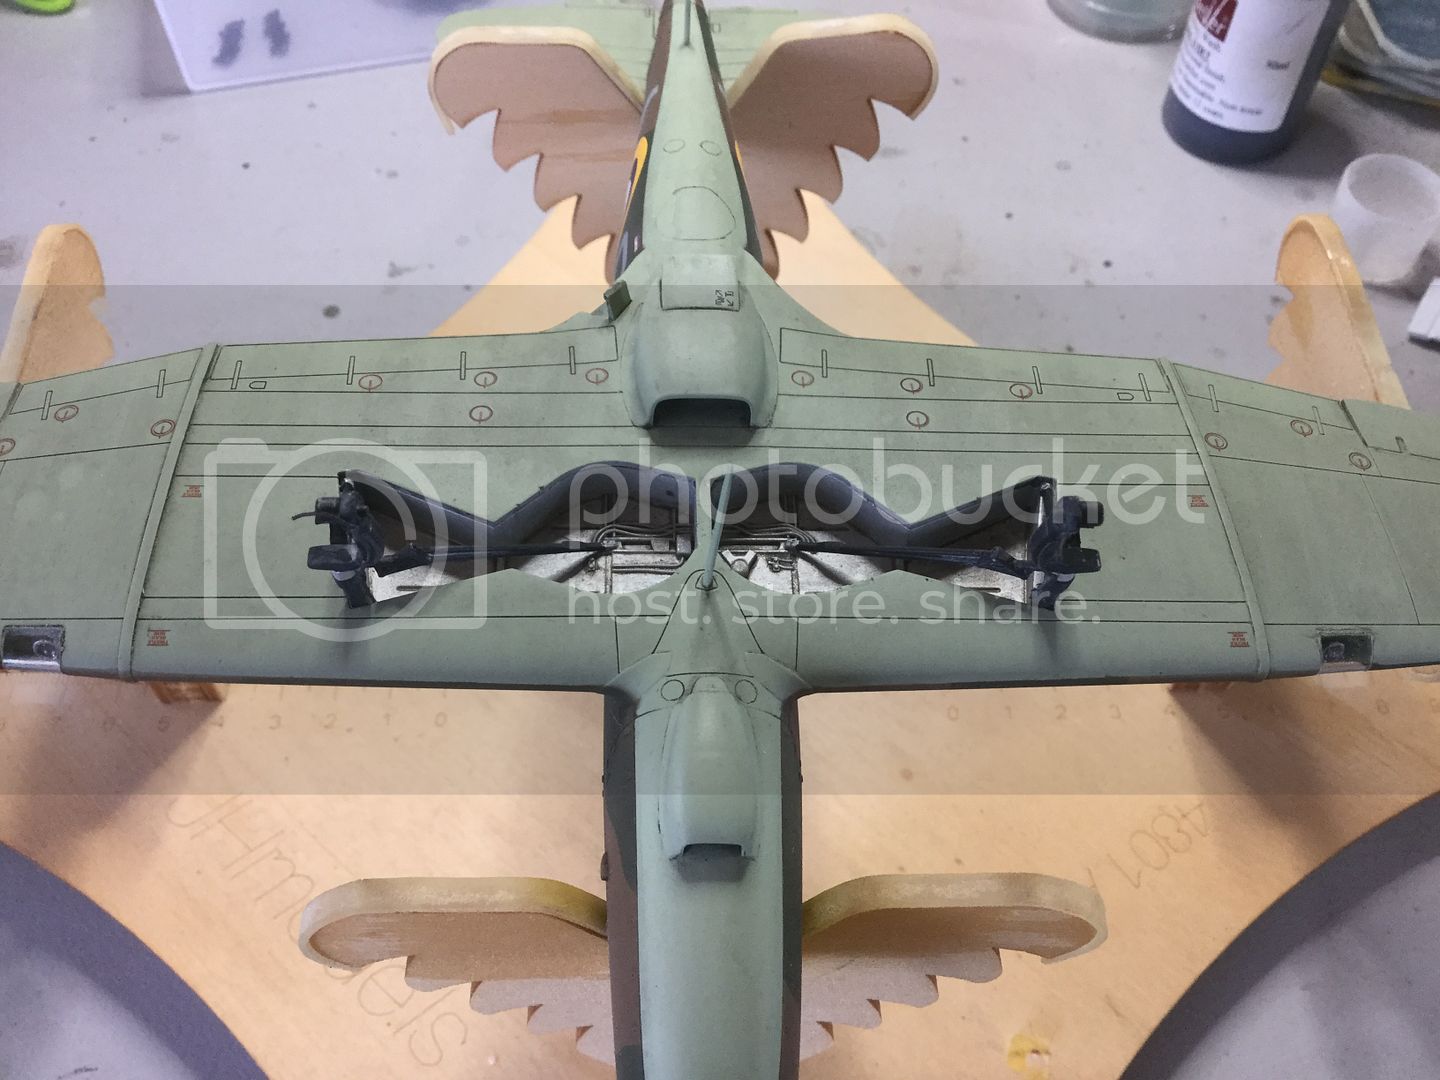
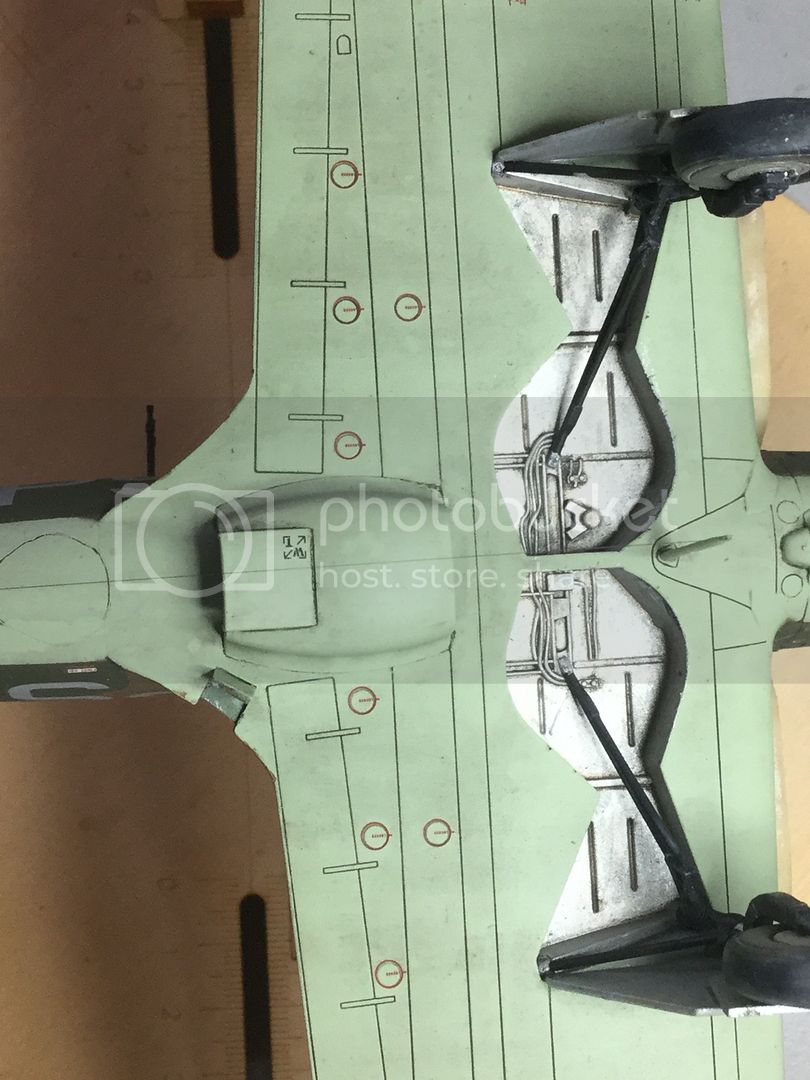
The decals are on and over coated with Pledge (Future) before an overall Flory wash:


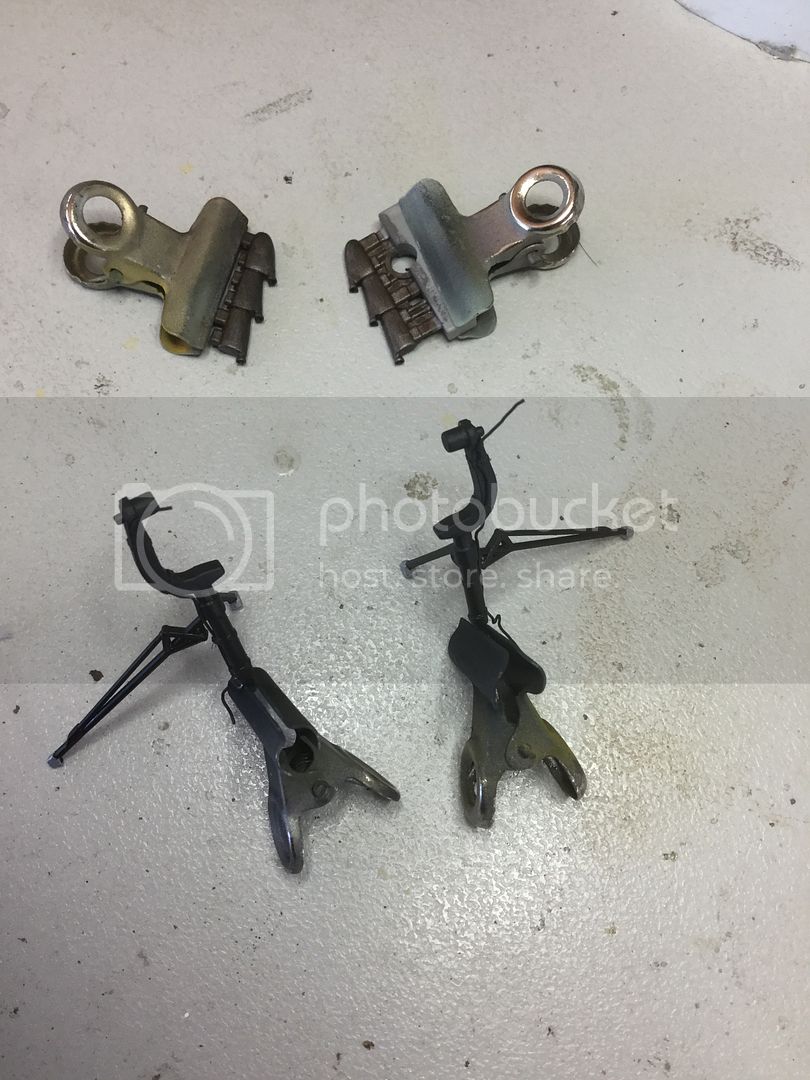
The MLG have been washed with AK Interactive Landing Gear Dust effect and the excess removed. The chrome on the oleos has been added by Bare Metal Foil cut to size:
Time to make little notes so as not to forget the little stuff, IFF antennas, wheel scrapers and bits!
Regards,


The MLG have been washed with AK Interactive Landing Gear Dust effect and the excess removed. The chrome on the oleos has been added by Bare Metal Foil cut to size:

Time to make little notes so as not to forget the little stuff, IFF antennas, wheel scrapers and bits!
Regards,
GazzaS
#424
Joined: April 23, 2015
KitMaker: 4,648 posts
AeroScale: 1,938 posts
Posted: Sunday, May 22, 2016 - 02:19 PM UTC
Kent,
The decals look very well laid. Nice to see the foil on the oleos!
Gaz
The decals look very well laid. Nice to see the foil on the oleos!
Gaz
Joel_W
Joined: December 04, 2010
KitMaker: 11,666 posts
AeroScale: 7,410 posts
Posted: Tuesday, May 24, 2016 - 02:23 AM UTC
Kent,
The decals do indeed look just like they were painted on. Nicely detailed struts. The Bare Metal Foil on the oleos really looks exceptional. I've got to buy a sheet as it will solve so many issues of polished aluminum or steel on parts just to small to air brush Alcad on, or too hard to mask once air brushed.
Joel
kahunaminor
Joined: April 06, 2008
KitMaker: 151 posts
AeroScale: 141 posts
Posted: Wednesday, May 25, 2016 - 05:22 PM UTC
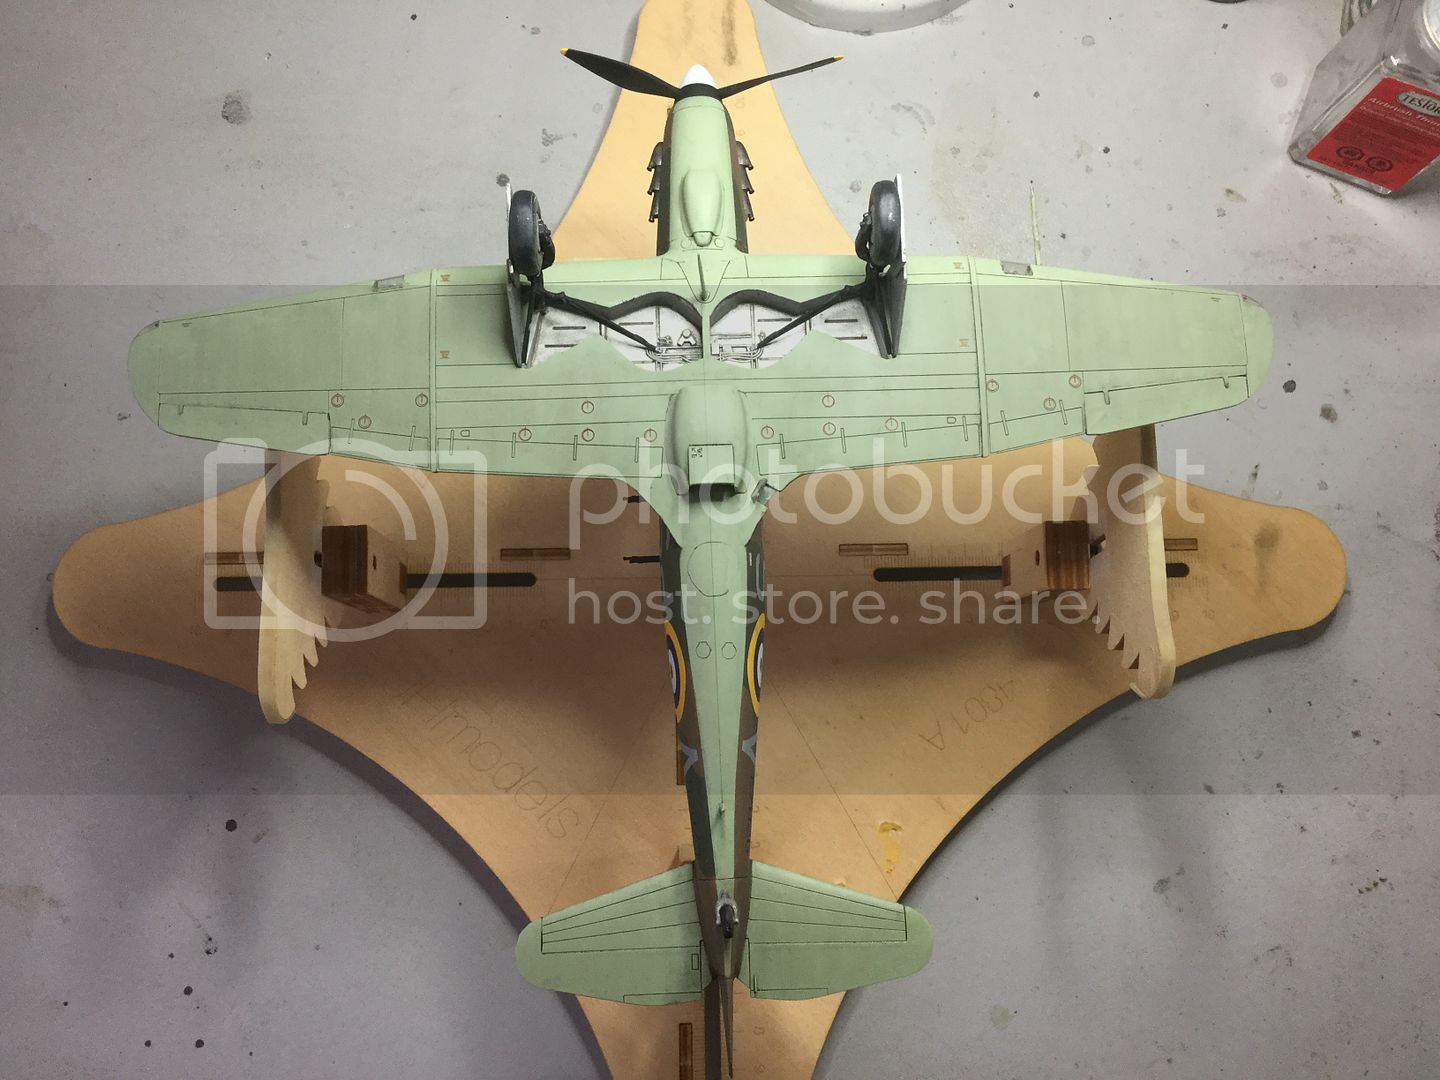
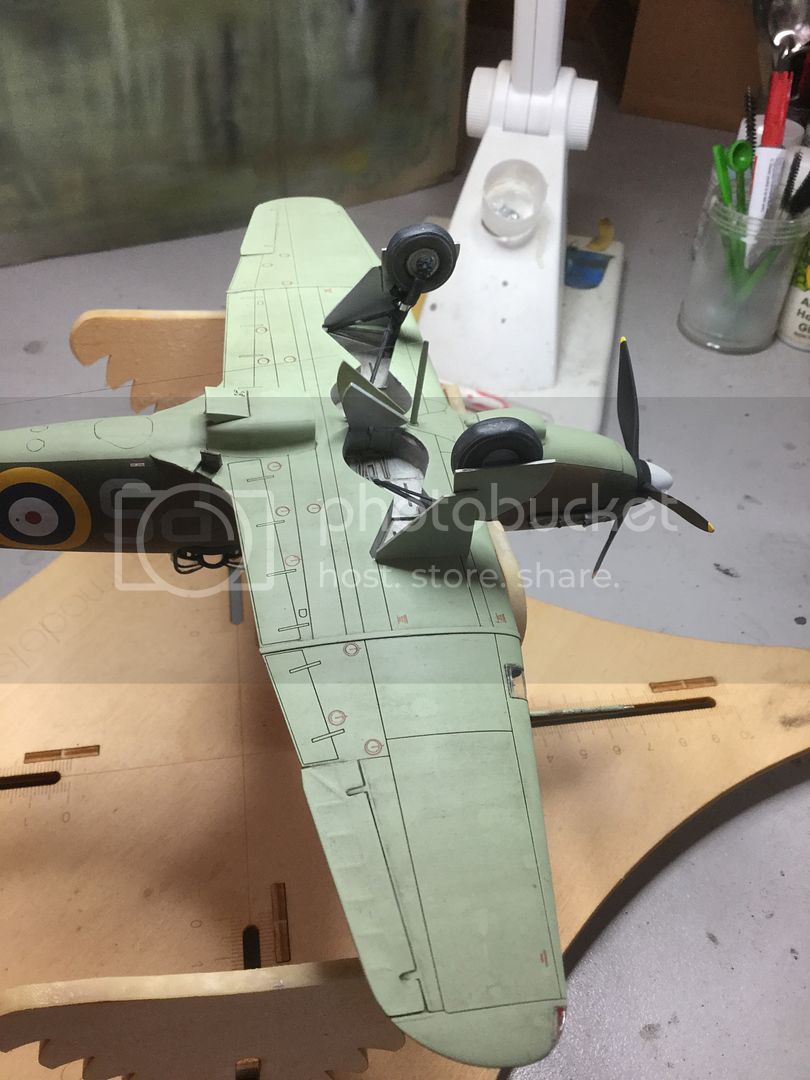
With the MM Dullcote having dried, it was time to start the run to the finish. The MLG, the prop and spinner were attached:
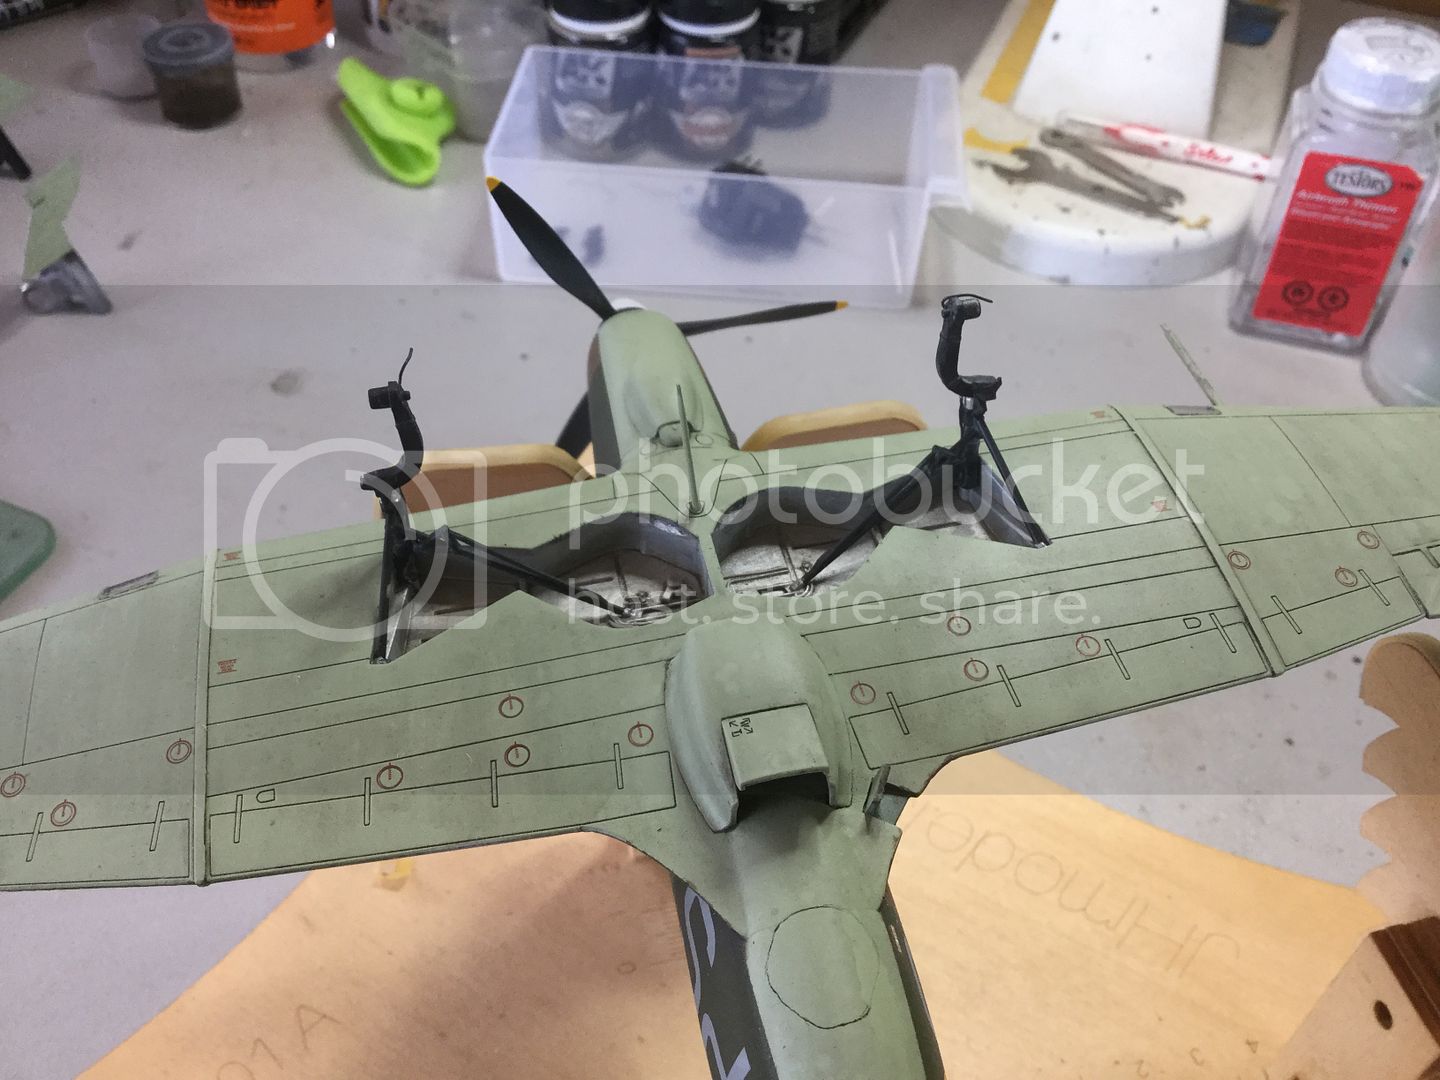
I noticed during the stencil application that no fuel filler points were present in the wings. A 3.5mm circle was scribed in each wing, painted and washed:
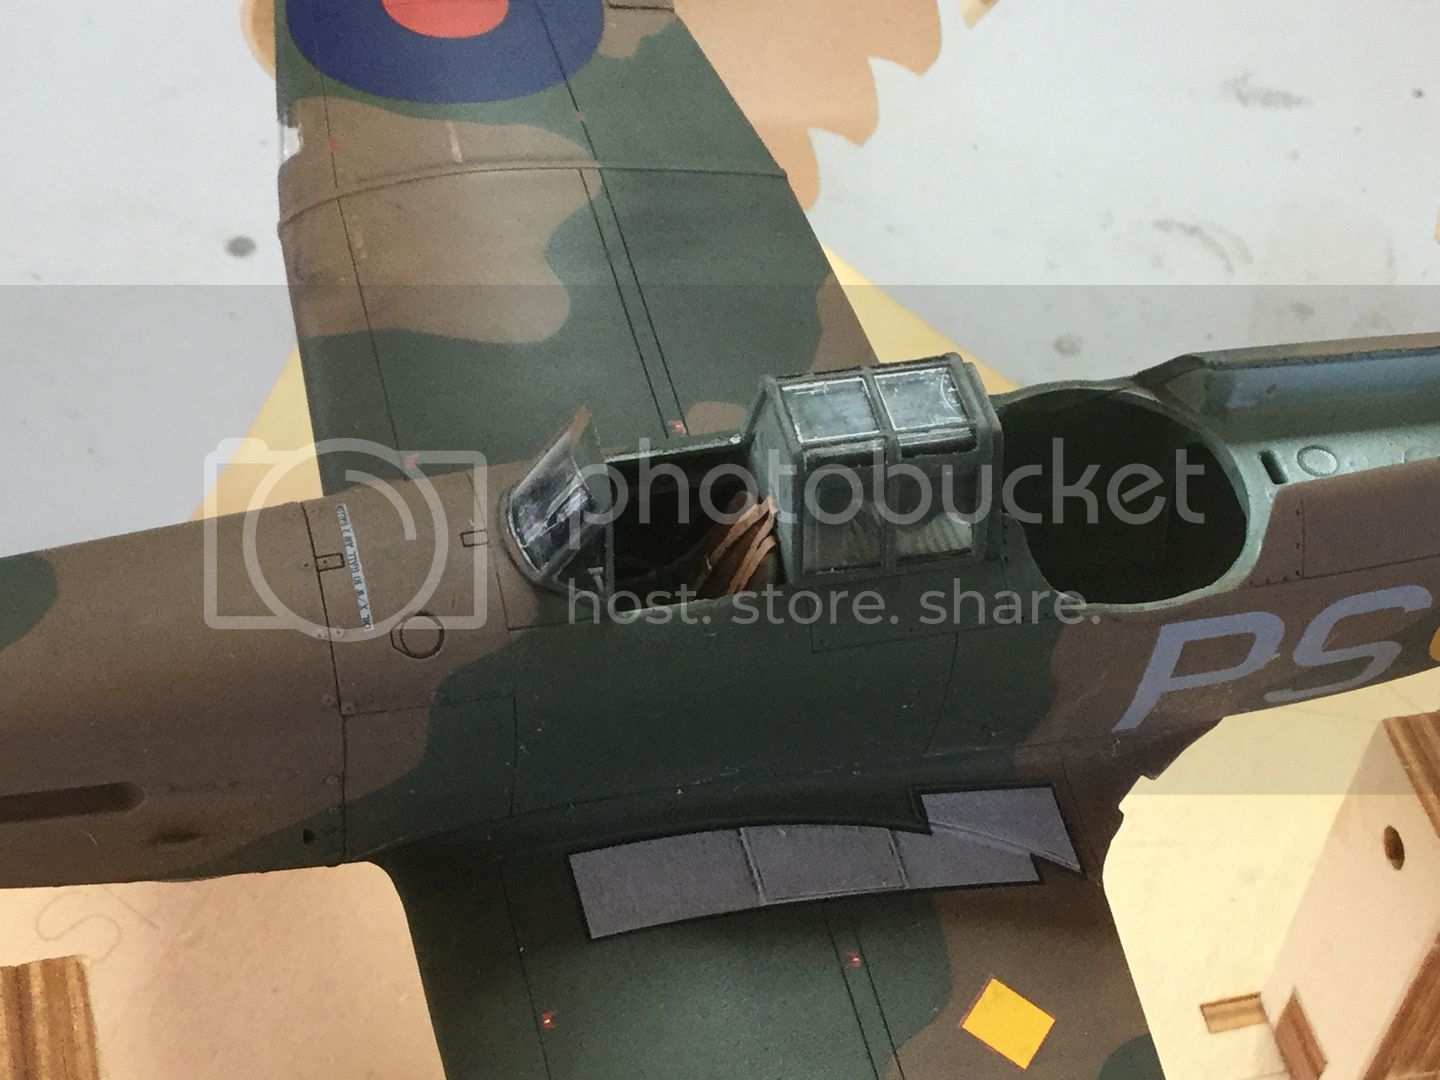
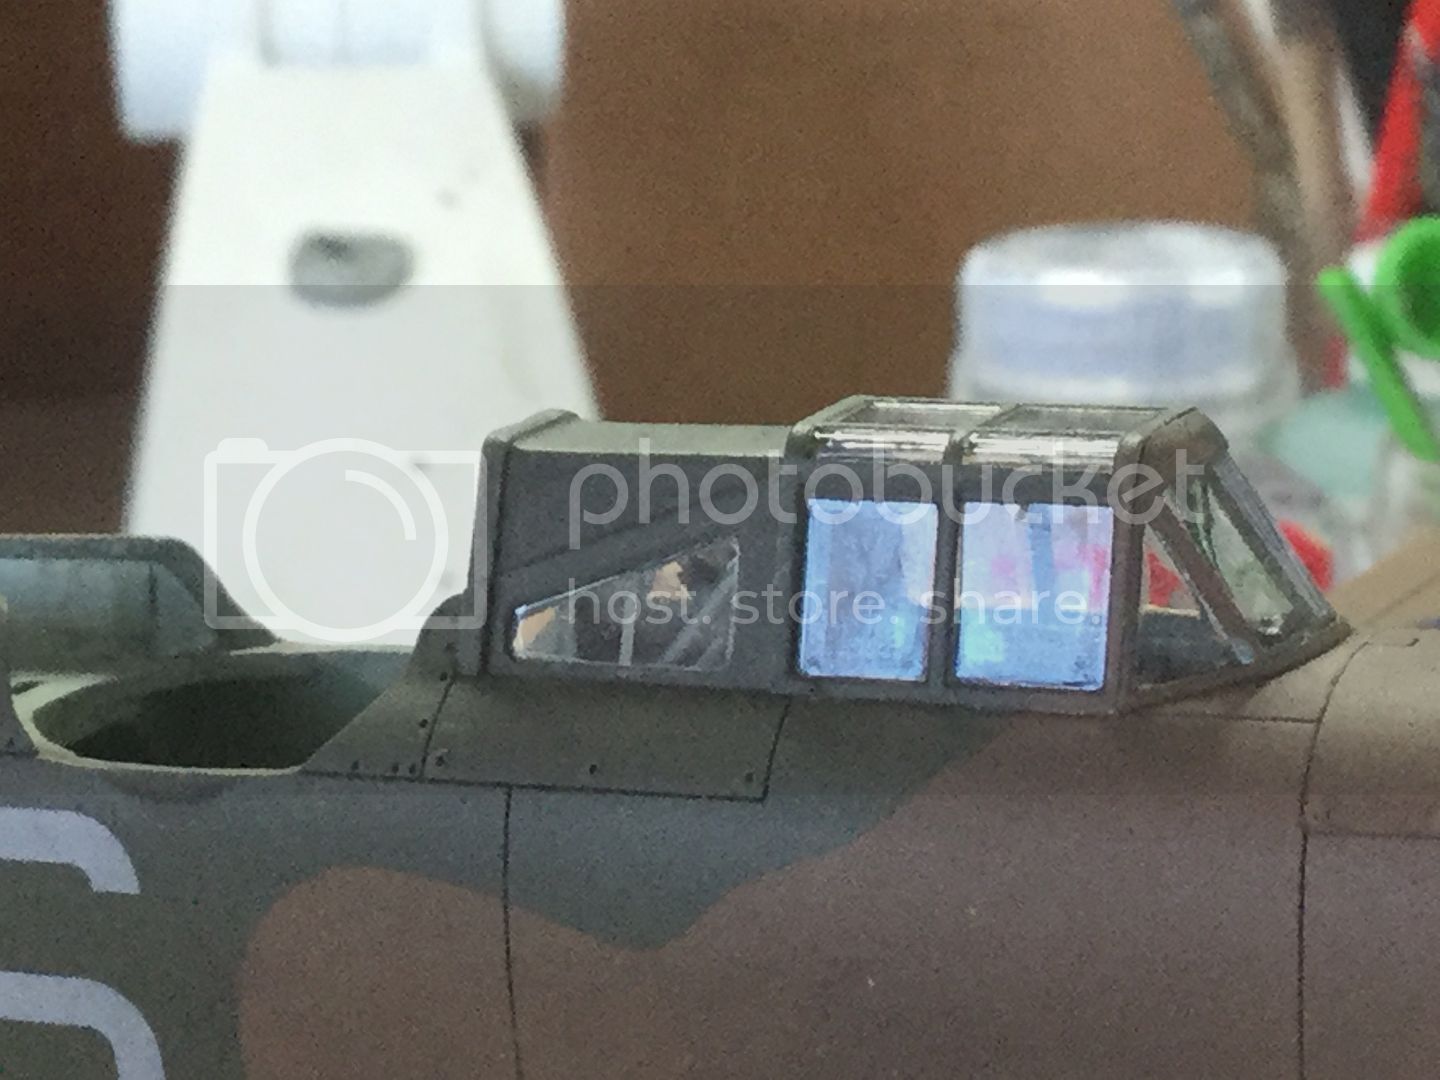
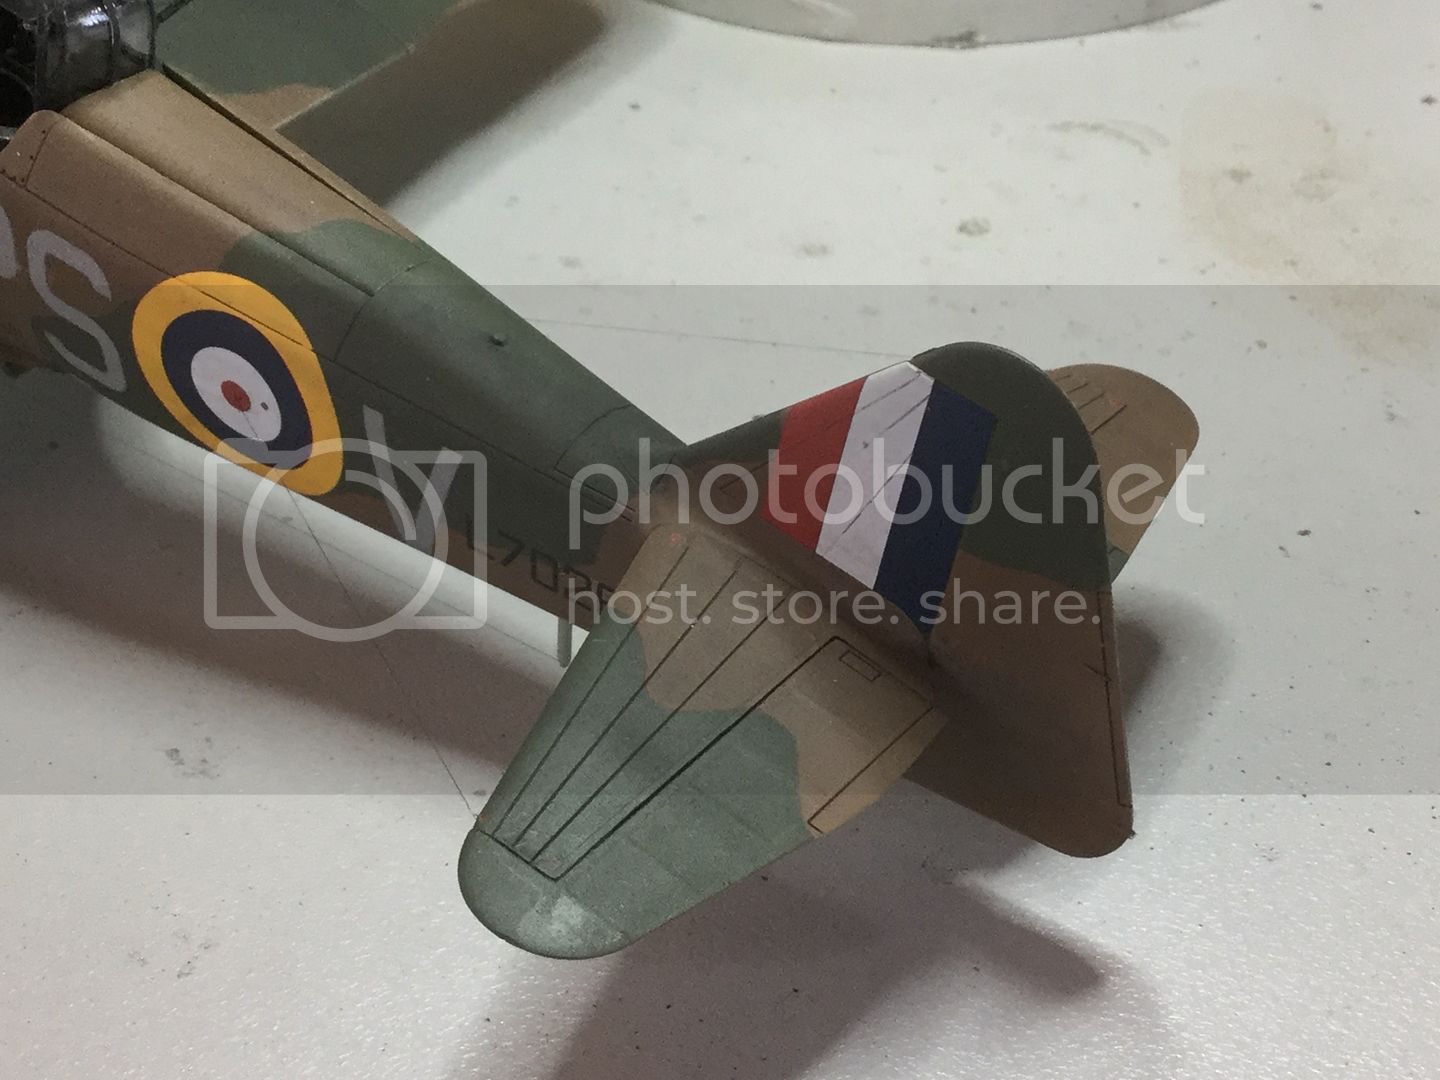
The canopy masks came off and it was time to see if all that work under the rear airfoil was worth it. Pretty happy with that actually:


More to follow.....
I noticed during the stencil application that no fuel filler points were present in the wings. A 3.5mm circle was scribed in each wing, painted and washed:
The canopy masks came off and it was time to see if all that work under the rear airfoil was worth it. Pretty happy with that actually:
More to follow.....
kahunaminor
Joined: April 06, 2008
KitMaker: 151 posts
AeroScale: 141 posts
Posted: Thursday, May 26, 2016 - 01:19 AM UTC
MLG wheels attached, aligned and the brake lines fixed into place. The antenna was strung between the fore and aft masts using Uschi ultra fine rigging line:


The frame was then flipped over and the turret installed. It can be a difficult fit. After some test runs I found it best to align the guns rearward with the fuselage and then rotate it carefully into position:
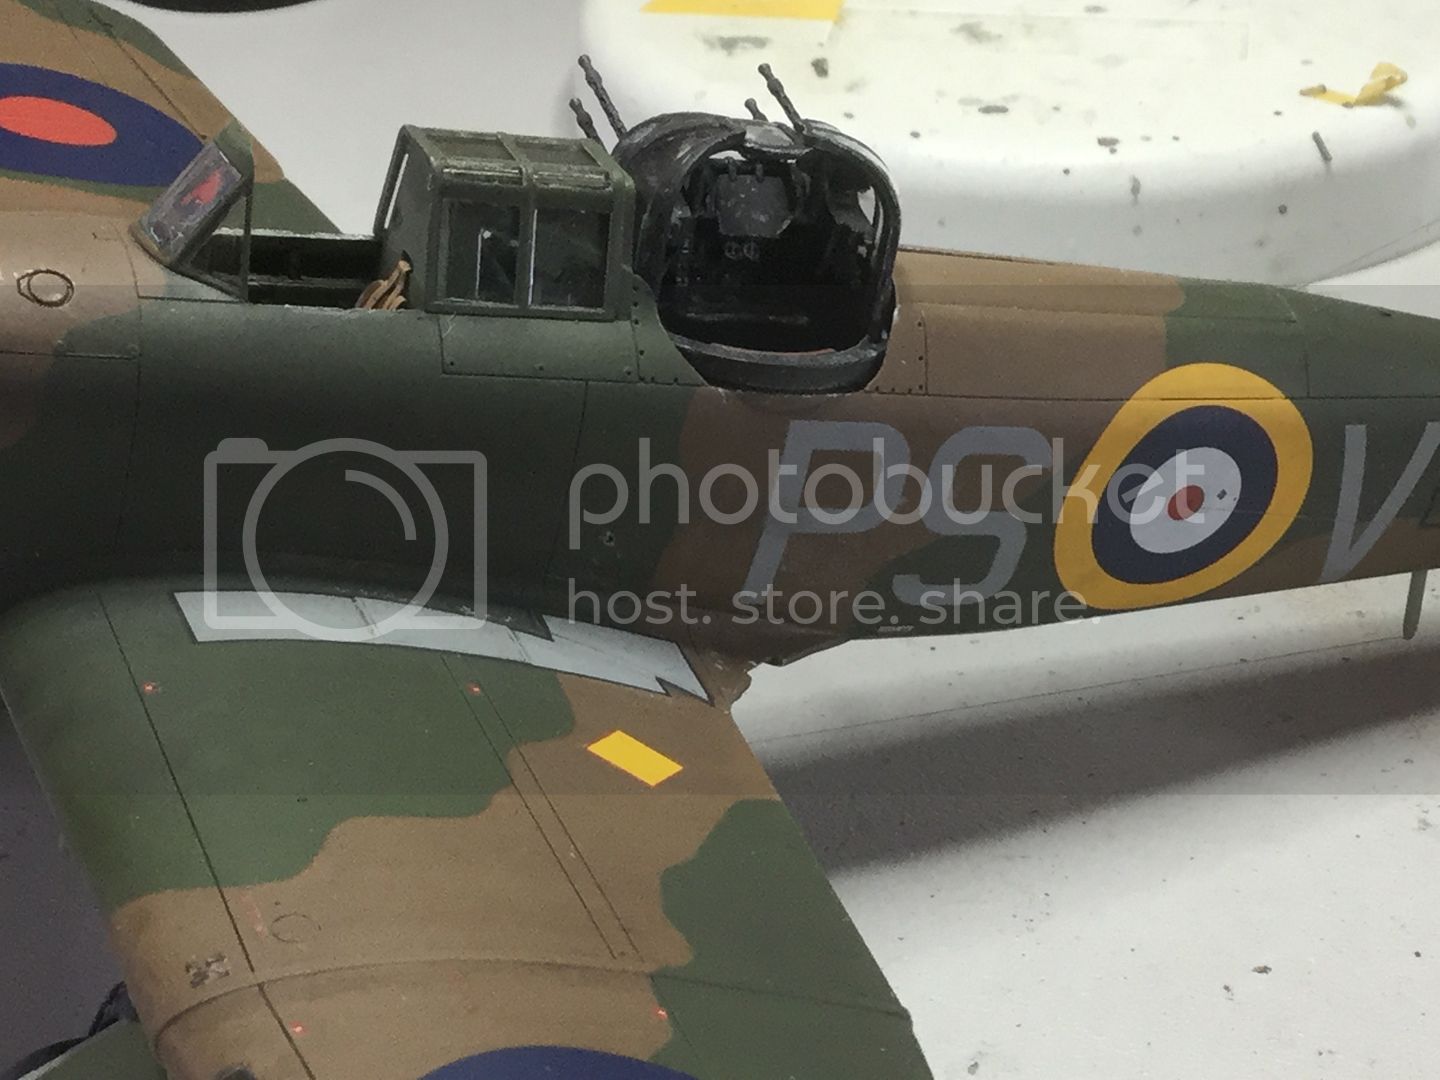

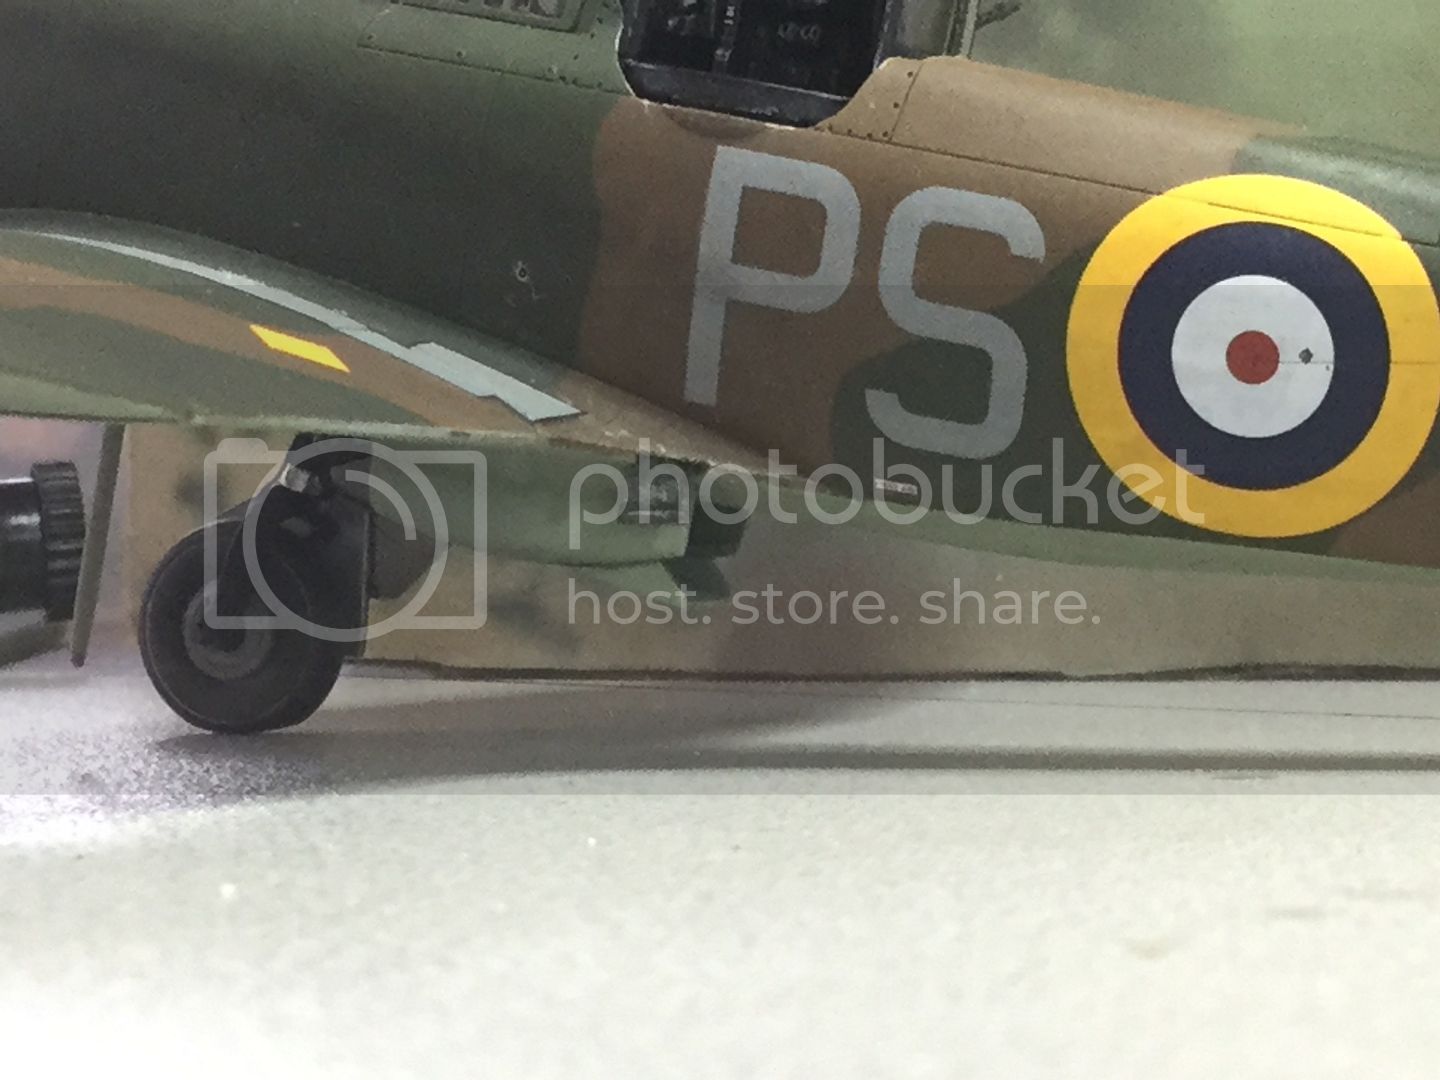
Exhaust staining was lightly applied down each side of the fuselage with Tamiiya Weathering Powder "Soot". The IFF wires (again Uschi) were then attached at rear stabilisers and into small holes drilled into the centre of each roundel. The Brassin exhausts were fitted and secured with CA. The MLG inner doors were fixed into place and the crew step to complete the build:


Thanks for following my build. Some more shots in RFI soon,
Regards,


The frame was then flipped over and the turret installed. It can be a difficult fit. After some test runs I found it best to align the guns rearward with the fuselage and then rotate it carefully into position:


Exhaust staining was lightly applied down each side of the fuselage with Tamiiya Weathering Powder "Soot". The IFF wires (again Uschi) were then attached at rear stabilisers and into small holes drilled into the centre of each roundel. The Brassin exhausts were fitted and secured with CA. The MLG inner doors were fixed into place and the crew step to complete the build:


Thanks for following my build. Some more shots in RFI soon,
Regards,
Joel_W
Joined: December 04, 2010
KitMaker: 11,666 posts
AeroScale: 7,410 posts
Posted: Thursday, May 26, 2016 - 01:28 AM UTC
Kent,
A very impressive and informative build blog. The end result is a truly outstanding build.
Joel
A very impressive and informative build blog. The end result is a truly outstanding build.
Joel

rdt1953
Joined: February 06, 2015
KitMaker: 1,098 posts
AeroScale: 900 posts
Posted: Thursday, May 26, 2016 - 06:11 AM UTC
Kent-
Very nice job - I've been following along since the beginning and I think you are due a sales commission from Airfix/Hornby because your build log made me buy one. It is apparently a very tough aircraft because mine survived a direct hit from the U. S. Postal Service . ( see " What the Postman brought today " ) Ha - turned out well for me in the end . Any way , I've enjoyed following along and thanks for sharing . Cheers ! - Richard
Very nice job - I've been following along since the beginning and I think you are due a sales commission from Airfix/Hornby because your build log made me buy one. It is apparently a very tough aircraft because mine survived a direct hit from the U. S. Postal Service . ( see " What the Postman brought today " ) Ha - turned out well for me in the end . Any way , I've enjoyed following along and thanks for sharing . Cheers ! - Richard
goodn8
Joined: October 12, 2008
KitMaker: 709 posts
AeroScale: 651 posts
Posted: Thursday, May 26, 2016 - 11:45 AM UTC
Very well done, Kent on building, painting and weathering. As I mentioned before, the camo went out beautiful as well as the turret is a real eyecatcher. For me the exhausts looking very good.
You spend a lot of time doing this kit and it's really nicely done so why not give it an adequate background (too many things on your desk that distract from the main subject)?
Thomas
You spend a lot of time doing this kit and it's really nicely done so why not give it an adequate background (too many things on your desk that distract from the main subject)?
Thomas
kahunaminor
Joined: April 06, 2008
KitMaker: 151 posts
AeroScale: 141 posts
Posted: Thursday, May 26, 2016 - 11:50 AM UTC
Thanks Gents
Good to have had you along for the ride. Thomas, you are correct, I really should improve my photographic attempts as it does detract.
Regards,
Good to have had you along for the ride. Thomas, you are correct, I really should improve my photographic attempts as it does detract.
Regards,
Holdfast
#056
Joined: September 30, 2002
KitMaker: 8,581 posts
AeroScale: 4,913 posts
Posted: Thursday, May 26, 2016 - 03:35 PM UTC
It looks like you were correct about mask 2  It looks like it is about 5.5% too small! I haven't been able to work out how it became smaller but I am in the process of correcting all of my drawings and the layouts. So many thanks for pointing this out
It looks like it is about 5.5% too small! I haven't been able to work out how it became smaller but I am in the process of correcting all of my drawings and the layouts. So many thanks for pointing this out kahunaminor
Joined: April 06, 2008
KitMaker: 151 posts
AeroScale: 141 posts
Posted: Thursday, May 26, 2016 - 04:18 PM UTC
Quoted Text
It looks like you were correct about mask 2
Glad I could be of assistance. Thanks for letting me know.
Regards,
 |

WEB HOSTING BY


Copyright ©2021 AeroScale and Kitmaker Network, a subsidiary of Silver Star Enterprises
All Rights Reserved. Please read our Conditions of Use and Privacy Policy.
All Rights Reserved. Please read our Conditions of Use and Privacy Policy.