New Jersey, United States
Joined: June 02, 2006
KitMaker: 1,212 posts
AeroScale: 468 posts
Posted: Wednesday, April 20, 2016 - 05:33 PM UTC
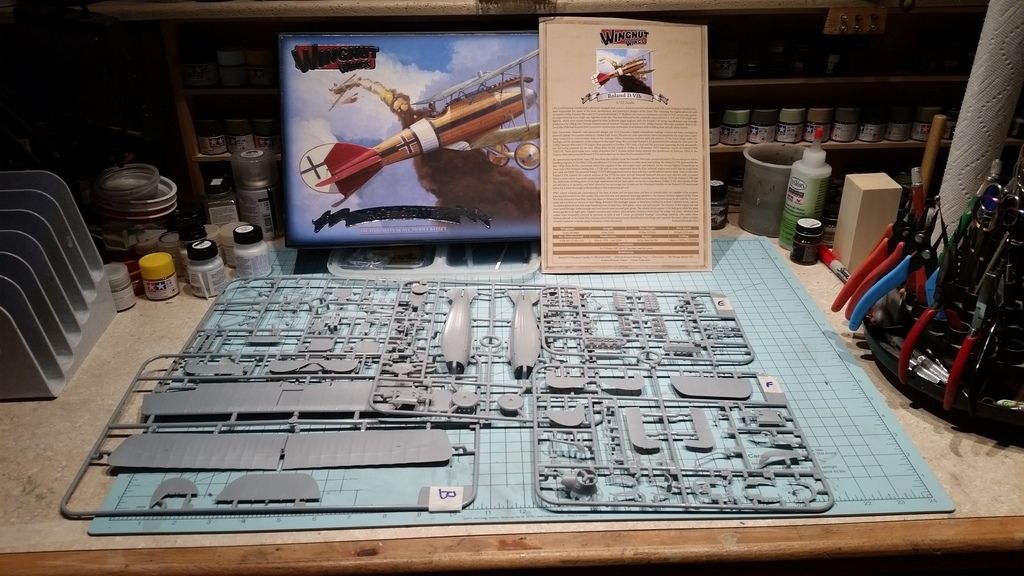
Step 1. Take it out of the box, set the sprues out nice and neat. Drool.
Step 2. Wipe drool off the sprues.
Berlin, Germany
Joined: June 14, 2016
KitMaker: 25 posts
AeroScale: 25 posts
Posted: Thursday, June 16, 2016 - 07:10 PM UTC
Hy Marc, have you been able to stop droolin' inbetween???

I've opend my Sopwith Sanke early by WNW stared in the box started drooling and closed the box imediadly because of the rising level in the box...
No I stopped the building proced before I started to avoid a kit disaster.
:-H Christian
"Anything that can go right, will go right."
Yhprum's law
In the building yard:
1/32 Acadamy Sopwith Camel F.1
New Jersey, United States
Joined: June 02, 2006
KitMaker: 1,212 posts
AeroScale: 468 posts
Posted: Saturday, June 18, 2016 - 12:50 AM UTC
Christian, No... still drooling

I've only just gotta to it relay though having finally finished my Monogram Lockheed "Connie" from 1956.
Not much in the way of progress but it something at least. The cockpit interior is Uschi wood planking decals.


#372
United Kingdom
Joined: March 10, 2010
KitMaker: 2,568 posts
AeroScale: 1,619 posts
Posted: Saturday, June 18, 2016 - 01:24 AM UTC
Looks great. What colour did you use for the interior grey? I got their Pfalz yesterday and the instructions also suggest a grey/green colour for the interior parts. I was expecting varnished ply, but thinking about it a painted interior was probably more durable.
On the bench: 1/72 Mosquito, Lightning F.6, DH.2,
AMT Vulcan Shuttle Surak.
Cyber-Hobby 1:35 Sherman Firefly IC - still stalled.
New Jersey, United States
Joined: June 02, 2006
KitMaker: 1,212 posts
AeroScale: 468 posts
Posted: Saturday, June 18, 2016 - 04:01 AM UTC
Thanks Stephen. I just use the color call out from their sheet. Tamiya XF76 gray/green
#372
United Kingdom
Joined: March 10, 2010
KitMaker: 2,568 posts
AeroScale: 1,619 posts
Posted: Saturday, June 18, 2016 - 04:29 AM UTC
Thanks I might go with the same colour.
I'll be watching your build to see how it turns out. It's one of the kits on my wish list.
Started their Rumpler tonight. Fantastic kit.
On the bench: 1/72 Mosquito, Lightning F.6, DH.2,
AMT Vulcan Shuttle Surak.
Cyber-Hobby 1:35 Sherman Firefly IC - still stalled.
New Jersey, United States
Joined: June 02, 2006
KitMaker: 1,212 posts
AeroScale: 468 posts
Posted: Tuesday, July 05, 2016 - 10:04 PM UTC
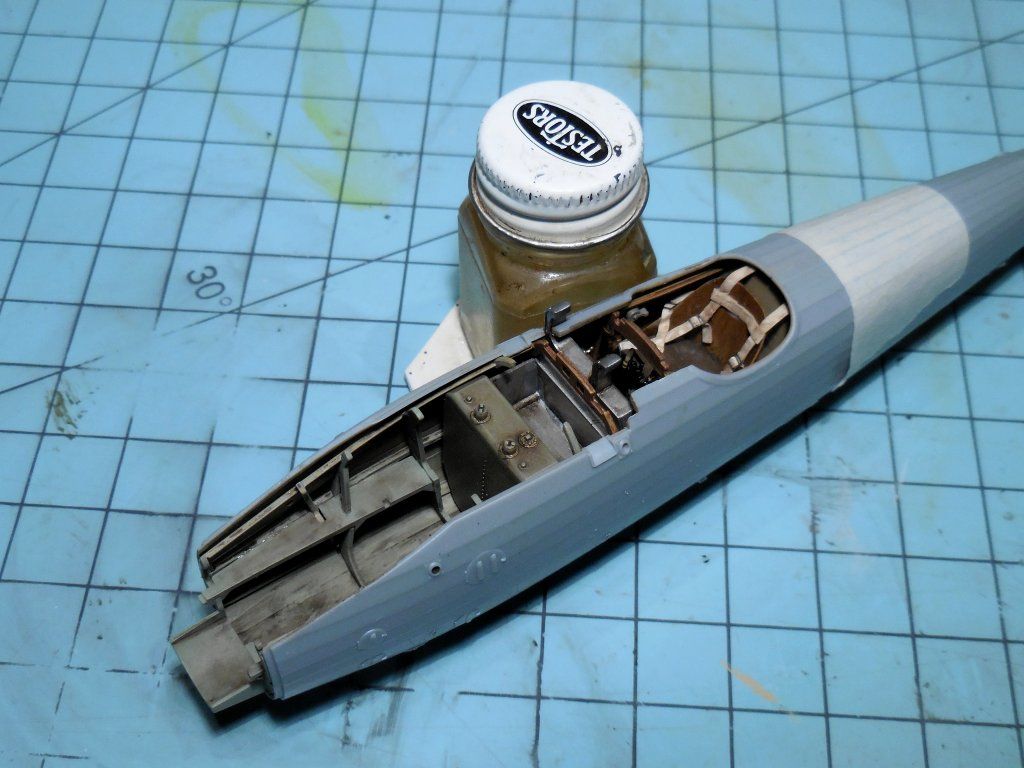
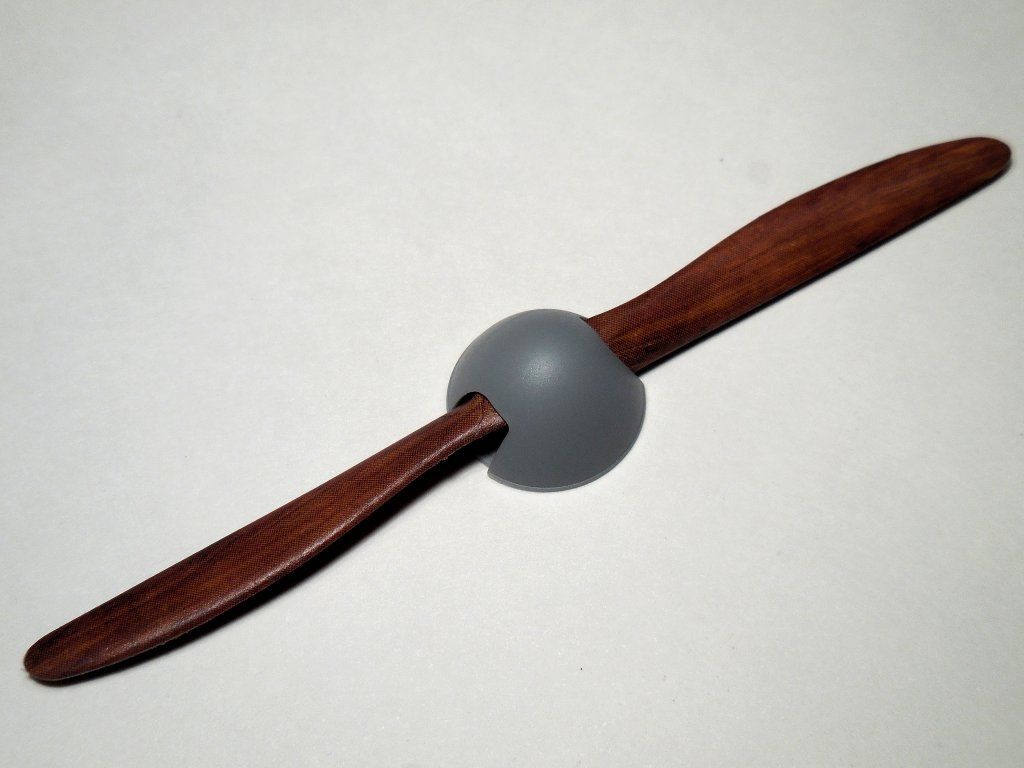
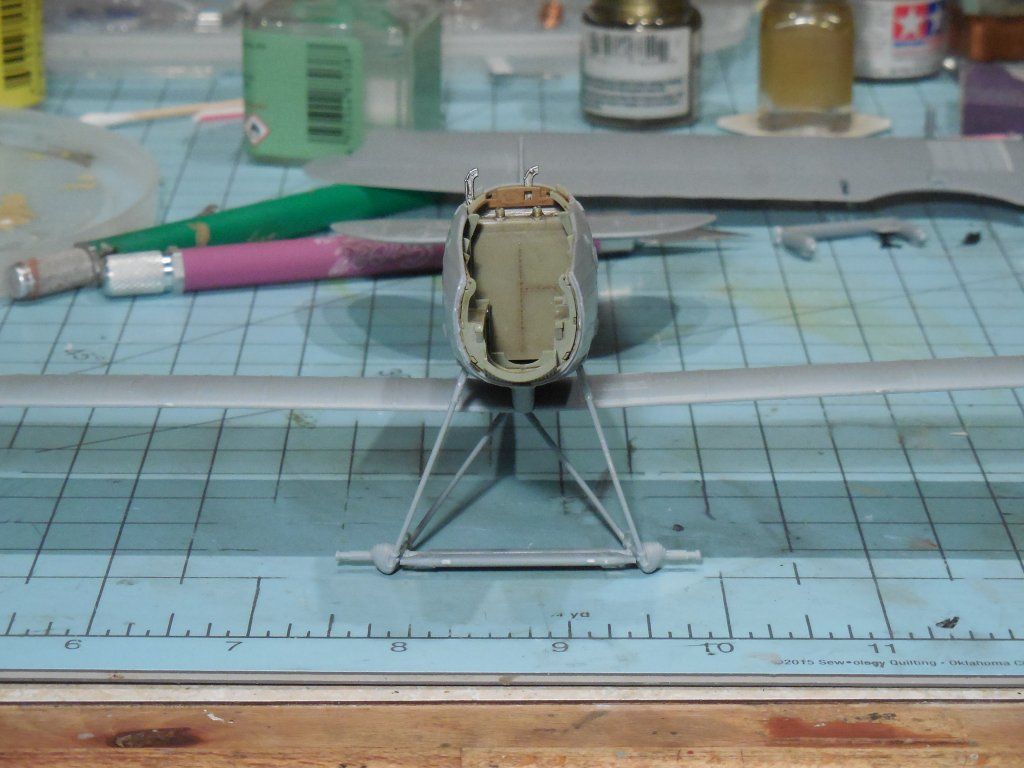
Back from the land of the lost. For the moment anyway. I long for the day when was accused of building fast. Some headway has been made none the less. While there is still lots to do there's not much "building left.
Used Uschi wood planking decals for the prop.
Cowling just set in place to see just how little of the engine will be seen.

Aileron attachment points are tiny so metal pins will make then stronger.

Lower wing in place so the LG can be glued up and set in the right position for the glue to set.

Ontario, Canada
Joined: July 22, 2012
KitMaker: 771 posts
AeroScale: 763 posts
Posted: Wednesday, July 06, 2016 - 02:29 AM UTC
Nice methodical approach to your build.
We should all take time to think our builds out this well. There would be less projects shelved.
Matt Odom
I've been known to build a few things
New Jersey, United States
Joined: June 02, 2006
KitMaker: 1,212 posts
AeroScale: 468 posts
Posted: Friday, July 08, 2016 - 03:44 AM UTC
Thanks Matt. It's only because I can barley get to the bench these days that I can be methodical... read that as'slow"

Merlin
 Senior Editor
#017
United Kingdom
Joined: June 11, 2003
KitMaker: 17,582 posts
AeroScale: 12,795 posts
Posted: Monday, July 11, 2016 - 01:00 PM UTC
Hi Marc
Beautiful work. I certainly wouldn't class your work as "slow" - not by my recent standards, at least!

All the best
Rowan

BEWARE OF THE FEW...
As I grow older, I regret to say that a detestable habit of thinking seems to be getting a hold of me. - H. Rider Haggard
New Jersey, United States
Joined: June 02, 2006
KitMaker: 1,212 posts
AeroScale: 468 posts
Posted: Tuesday, July 12, 2016 - 08:40 PM UTC
Thanks Rowan. I am worry though that this will become the new standard. If I can't deplete the stash at a reasonable rate, how do I justify adding to it?

Although, in all this time, that has never really been a consideration so why should it now?
OK, I'm good.
New Jersey, United States
Joined: June 02, 2006
KitMaker: 1,212 posts
AeroScale: 468 posts
Posted: Tuesday, July 19, 2016 - 05:47 AM UTC
New Jersey, United States
Joined: June 02, 2006
KitMaker: 1,212 posts
AeroScale: 468 posts
Posted: Saturday, July 30, 2016 - 06:15 PM UTC
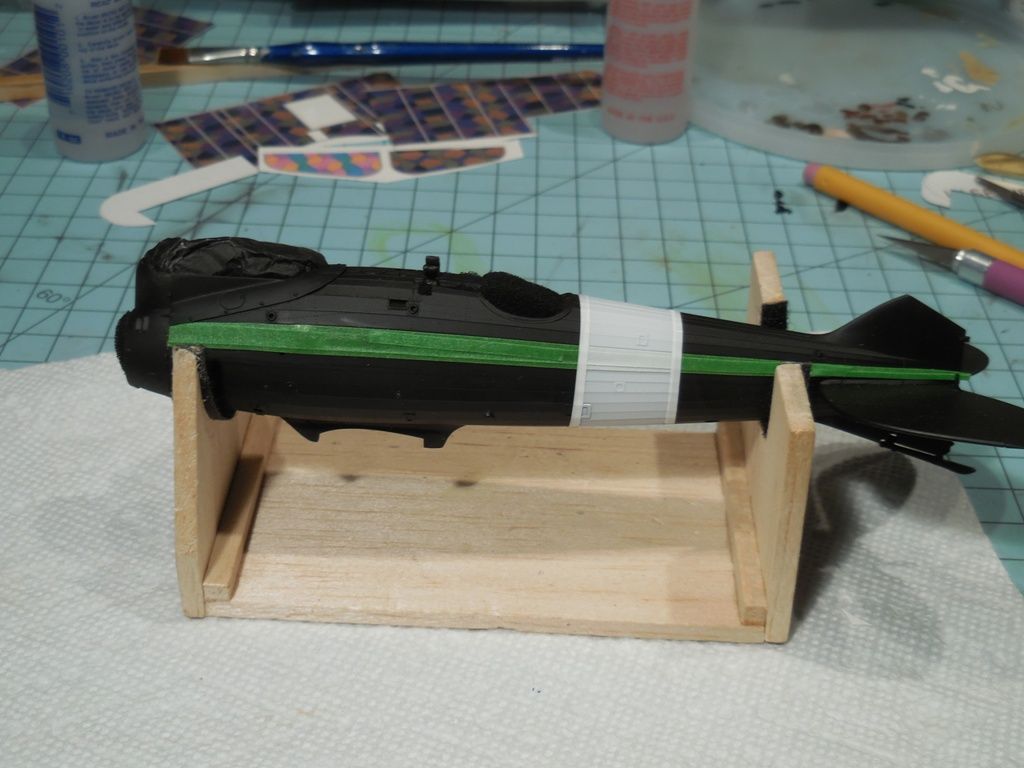
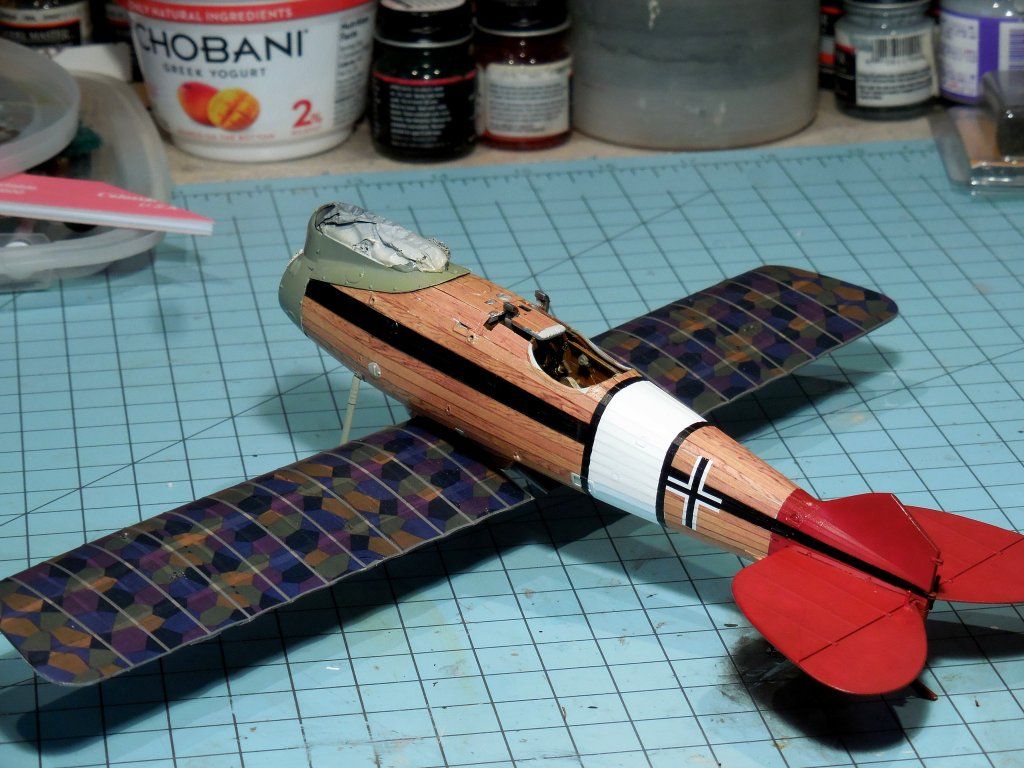
1st iteration of fuselage paint.
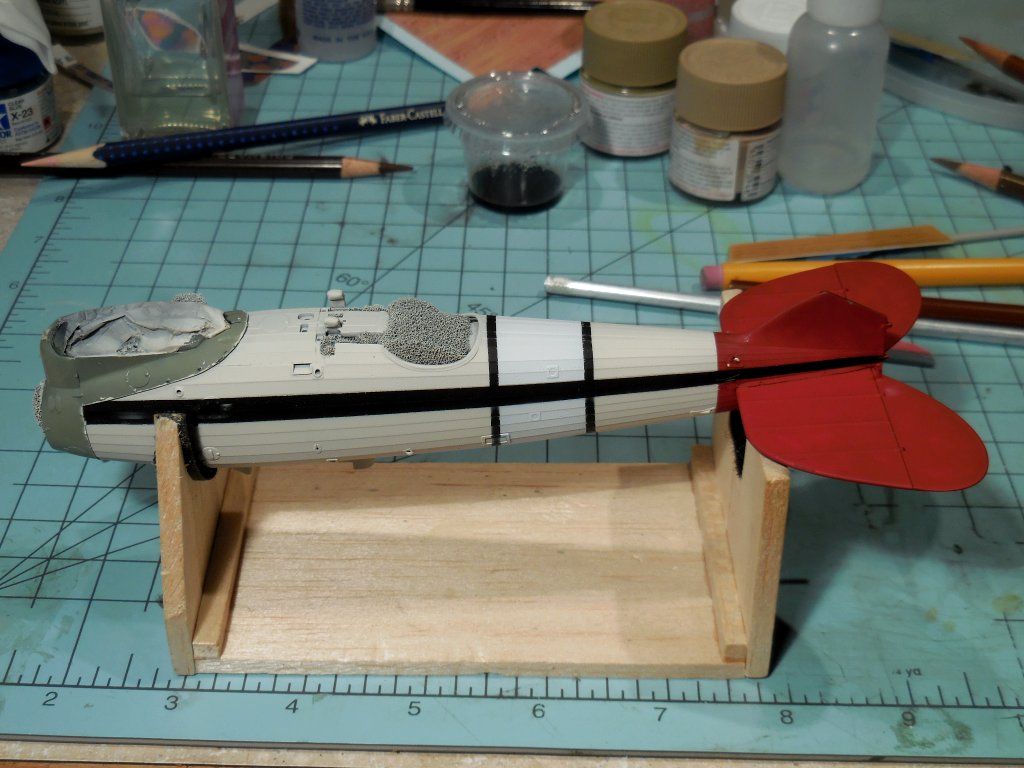
Fuselage masking f-ups all fixed. LOTS of bleeds that cant be seen in the pics but oh brother are they there. And... oh yeah... the black stripe was not supposed not pass through the white band. Hence the term "fuselage band" That was fun to cover. A technique picked up in another forum of laying down a coat of Mr. Paint Leveling Thinner a few minutes after spraying Tamiya clear, decanted from the rattle can, once again produces a mirror finish.
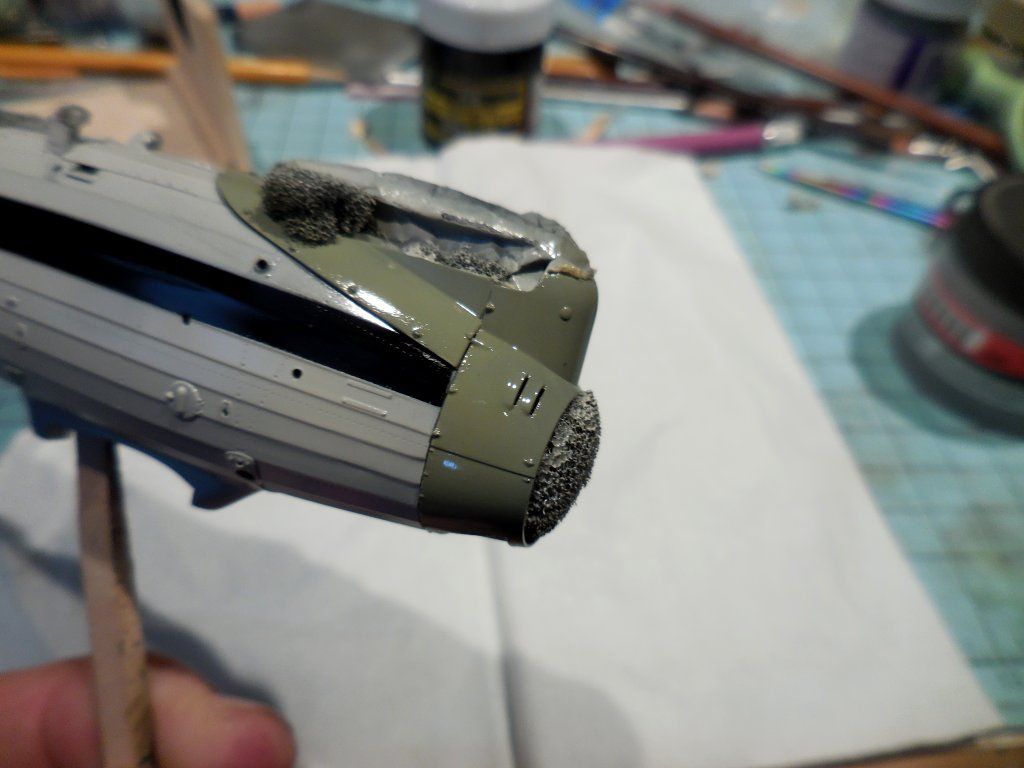
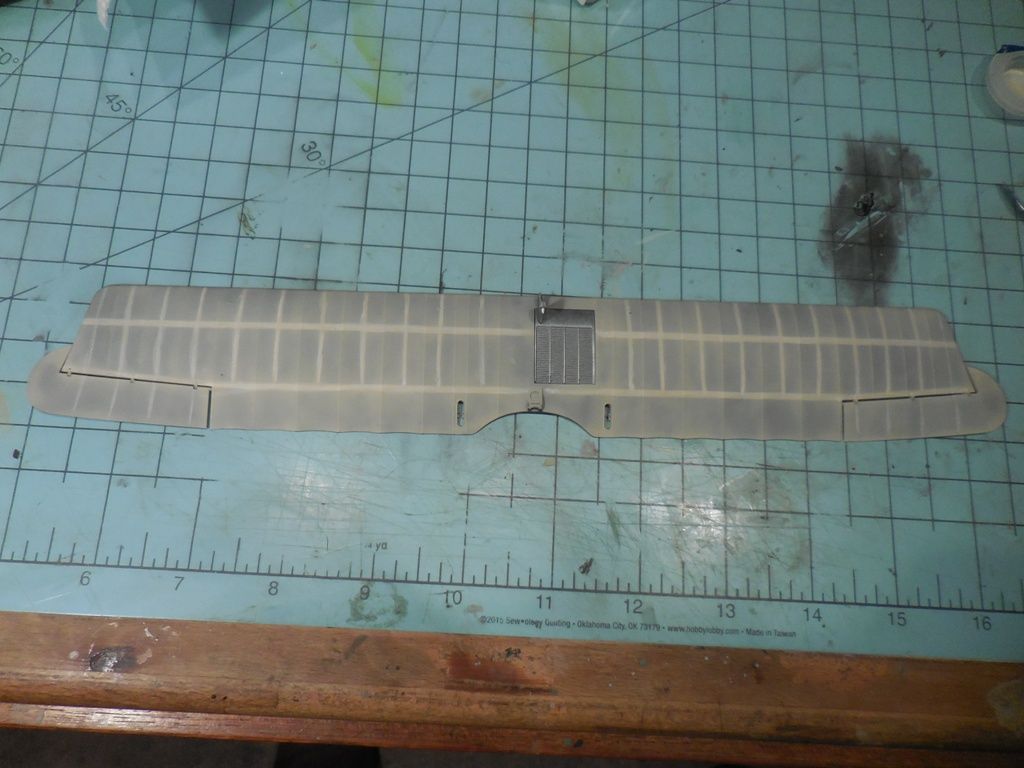
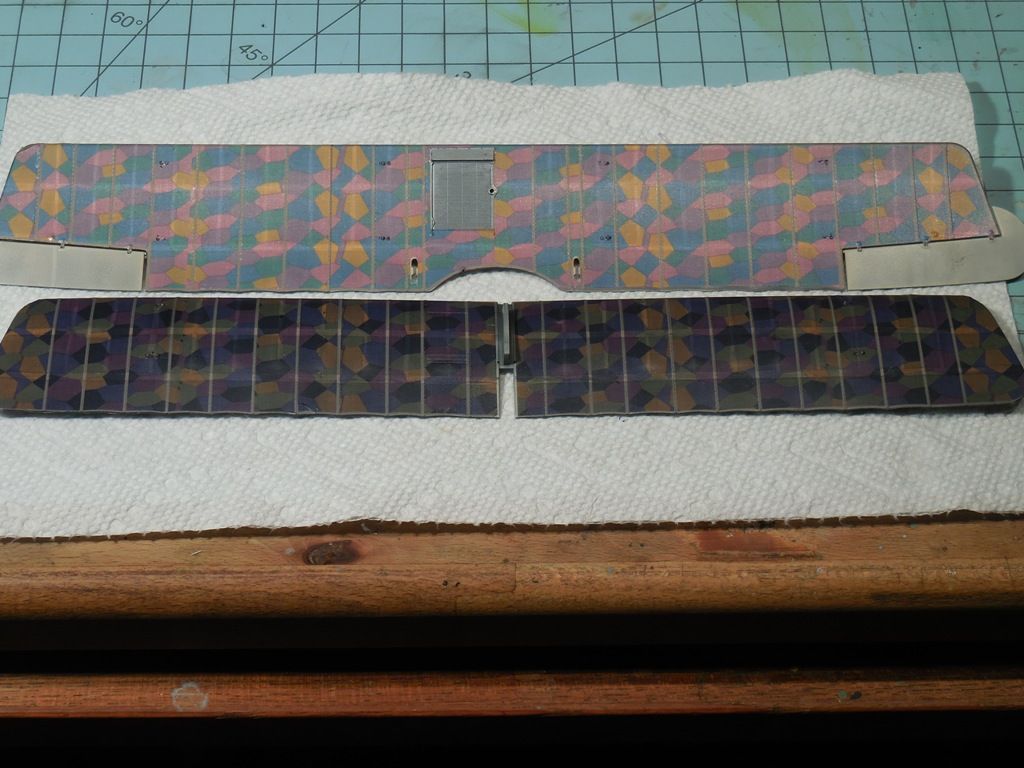
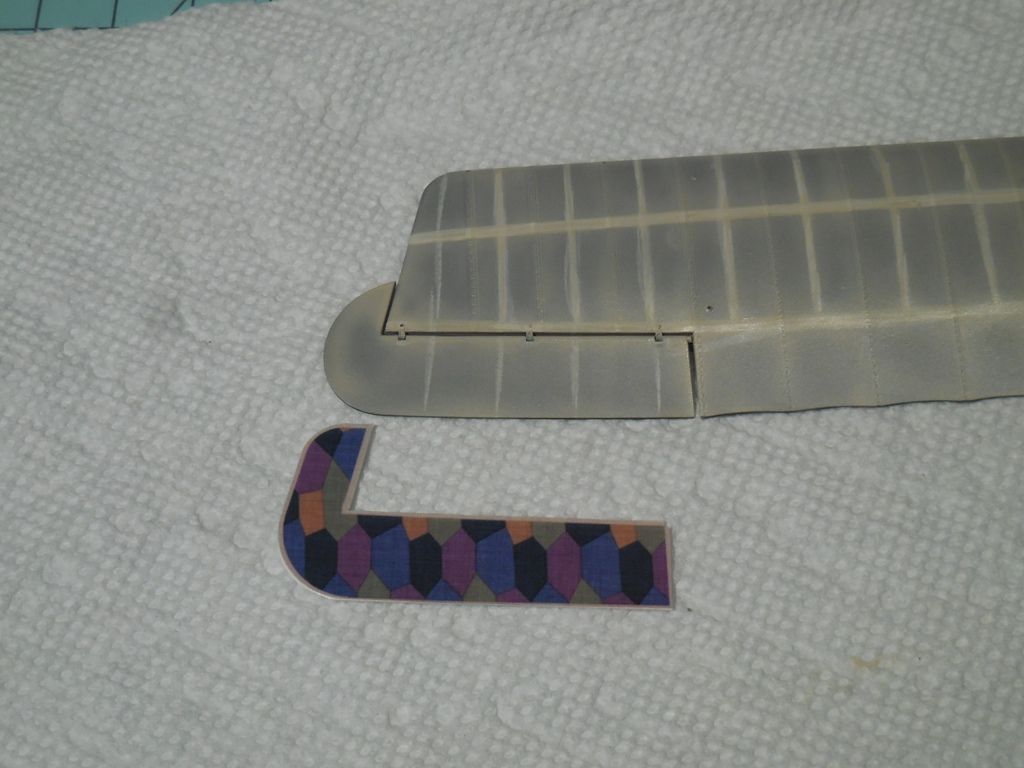
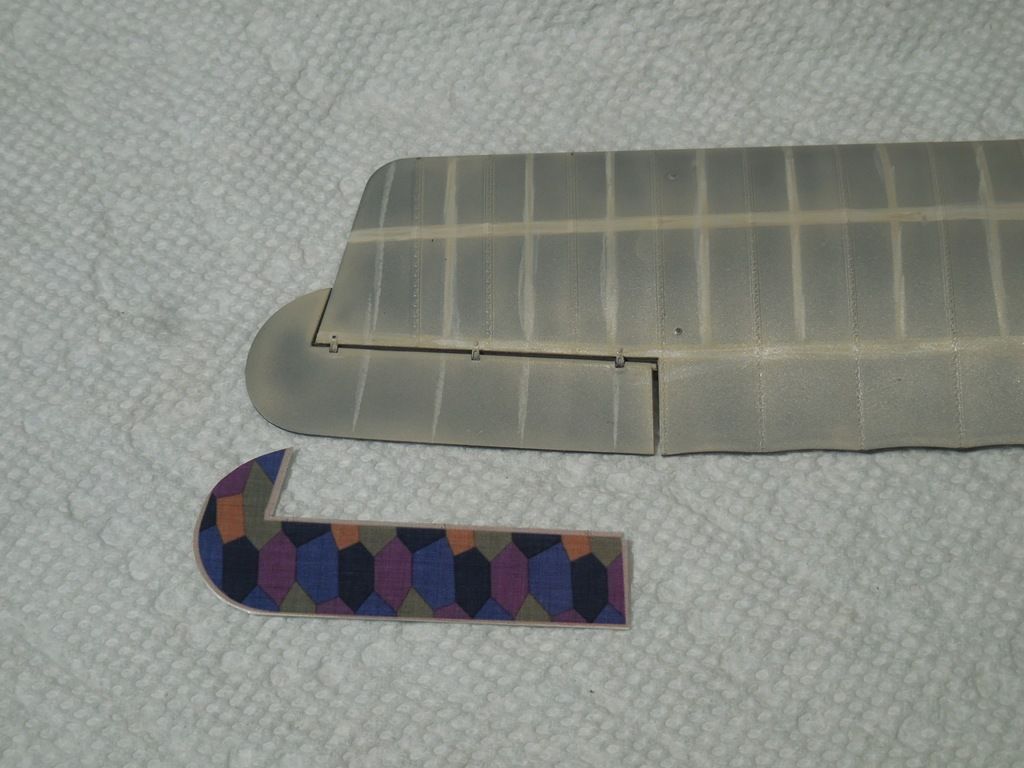
I can't even begin to calculate how long it's going to take doing plank by plank with the Ushci wood plank decals. Each one is cut to length, applied and trimmed for its full length since they are wider than the "planks" on the model. But I think it's gonna be some kinda special when all done.

Merlin
Senior Editor #017
United Kingdom
Joined: June 11, 2003
KitMaker: 17,582 posts
AeroScale: 12,795 posts
Posted: Monday, August 01, 2016 - 01:16 AM UTC
Hi Marc
Awesome! That wood finish is going to look amazing!

The only thing I have to ask is... wouldn't it have made life (a little) easier to have done the planking before painting the other markings? At least there'd have been a bit less cutting and measuring.
All the best
Rowan
BEWARE OF THE FEW...
As I grow older, I regret to say that a detestable habit of thinking seems to be getting a hold of me. - H. Rider Haggard
New Jersey, United States
Joined: June 02, 2006
KitMaker: 1,212 posts
AeroScale: 468 posts
Posted: Monday, August 01, 2016 - 02:03 AM UTC
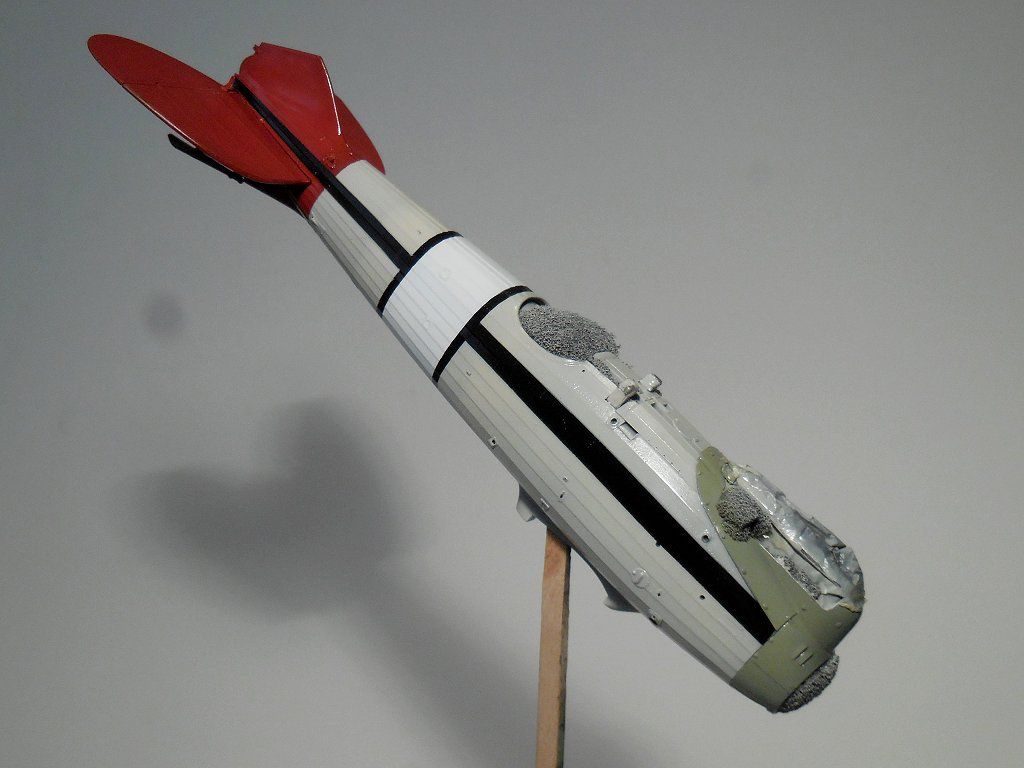
Thanks very much Rowan. Now that all the tail end is done and about 1/2 of the forward part it's really starting to look cool.
Whenever someone asks how to get old decals off a models someone invariably will suggest tape. I've done that myself so the thought of doing the planking and then masking just didn't; seem the way to go. Now that I've worked with these there is no way they would stand up to masking tape. Ends are easily trimmed and the long cut down one side of the planking gets easier the more I do. The trick it to time the drying. Not enough and it all shifts when you cut. Too dry and it doesn't want to peel off nice and clean. Guess how I get that off if I am not paying attention? Yup, masking tape
#424
Queensland, Australia
Joined: April 23, 2015
KitMaker: 4,648 posts
AeroScale: 1,938 posts
Posted: Monday, August 01, 2016 - 10:57 AM UTC
Marc,
Been following along and drooling! That wood detail is magnificent!
Gaz
"Artillery adds dignity, to what would otherwise be an ugly brawl."
Frederick The Great
New Jersey, United States
Joined: June 02, 2006
KitMaker: 1,212 posts
AeroScale: 468 posts
Posted: Monday, August 01, 2016 - 04:56 PM UTC
Thank Gaz. Glad you are enjoying it.
New Jersey, United States
Joined: June 02, 2006
KitMaker: 1,212 posts
AeroScale: 468 posts
Posted: Tuesday, August 02, 2016 - 12:18 AM UTC
Merlin
Senior Editor #017
United Kingdom
Joined: June 11, 2003
KitMaker: 17,582 posts
AeroScale: 12,795 posts
Posted: Tuesday, August 02, 2016 - 12:28 AM UTC
Hi Marc
That does look gorgeous!
I totally get your point about fragile decals - sometimes they are almost bullet-proof when sealed over a gloss base, but it's not worth the risk on something like this.
One thing that might be worth suggesting with sharp brown pencil or very fine brush is the zig-zag joins in the planks.
All the best
Rowan
BEWARE OF THE FEW...
As I grow older, I regret to say that a detestable habit of thinking seems to be getting a hold of me. - H. Rider Haggard
New Jersey, United States
Joined: June 02, 2006
KitMaker: 1,212 posts
AeroScale: 468 posts
Posted: Tuesday, August 02, 2016 - 12:57 AM UTC
Thanks Rowan. And I completely forgot about the finger joints. I meant to paint a few of the boards a darker color with the finger joints since they would show through the translucent decals. I may try the pencil lines in an inconspicuous spot to see how it looks.
Or, I can simply say they are all under the white and black bands
New Jersey, United States
Joined: June 02, 2006
KitMaker: 1,212 posts
AeroScale: 468 posts
Posted: Monday, August 22, 2016 - 03:43 AM UTC
#424
Queensland, Australia
Joined: April 23, 2015
KitMaker: 4,648 posts
AeroScale: 1,938 posts
Posted: Monday, August 22, 2016 - 04:04 AM UTC
Marc,
I know you can't see it, but I'm giving you a standing ovation.
Thank you for sharing,
Gaz
"Artillery adds dignity, to what would otherwise be an ugly brawl."
Frederick The Great
New Jersey, United States
Joined: June 02, 2006
KitMaker: 1,212 posts
AeroScale: 468 posts
Posted: Monday, August 22, 2016 - 05:31 AM UTC
Haha, Thanks Gaz. I'll have to take your word for it
England - East Midlands, United Kingdom
Joined: November 06, 2005
KitMaker: 753 posts
AeroScale: 311 posts
Posted: Monday, August 22, 2016 - 02:26 PM UTC
Marc - Just fabulous in all respects and one of 'the' very best WNW finished models I have ever seen.....and I have seen a lot.
Gary
New Jersey, United States
Joined: June 02, 2006
KitMaker: 1,212 posts
AeroScale: 468 posts
Posted: Monday, August 22, 2016 - 04:47 PM UTC
Gary, thank you doesn't seem to be enough for such a compliment.