Folland Gnat T.1 Red Arrows - Aifix 1/48
Germany
Joined: September 07, 2005
KitMaker: 5,609 posts
AeroScale: 5,231 posts
Posted: Wednesday, April 27, 2016 - 11:01 PM UTC
Hi again,
this is kind of a fun project for inbetween. Not sure how serious I will take it as I have a million other things in mind..
 Airfix kitCMK Wheel bayCMK control surfacesCMK Bang seatsCMK Instrument panelsEduard Masks
all the best
Steffen
DULCE ET DECORUM EST PRO HOBBY MORI
Germany
Joined: September 07, 2005
KitMaker: 5,609 posts
AeroScale: 5,231 posts
Posted: Wednesday, April 27, 2016 - 11:04 PM UTC
As I wrote ..
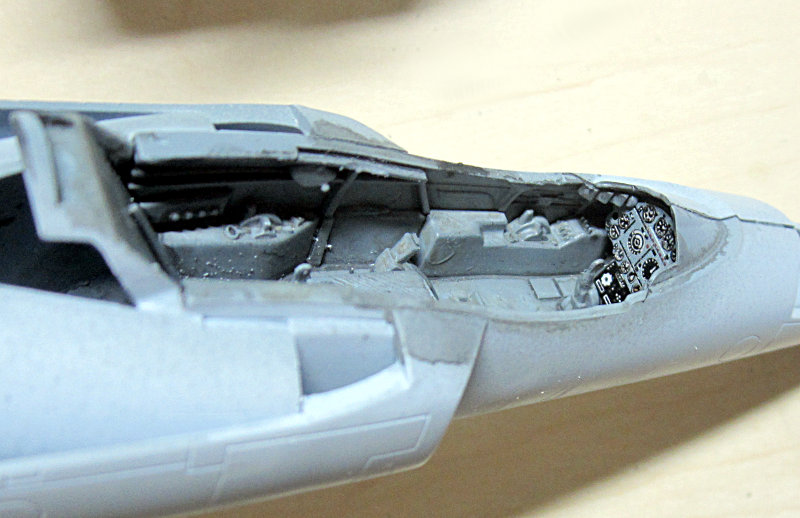
fun project so not much in progress pix. This is what I got done this evening:

Fit is good, the kit itself as well as the aftermarket parts.
cheers
Steffen
DULCE ET DECORUM EST PRO HOBBY MORI
Nordrhein-Westfalen, Germany
Joined: March 22, 2015
KitMaker: 671 posts
AeroScale: 614 posts
Posted: Friday, April 29, 2016 - 02:06 AM UTC
Steffen, Your velocity of building fine kits is just amazing! I will follow this one, too!
Oliver

On the desk: Probably a Panzer III.
Noord-Holland, Netherlands
Joined: January 28, 2007
KitMaker: 1,945 posts
AeroScale: 388 posts
Posted: Friday, April 29, 2016 - 02:25 PM UTC
Impressive load of add-ons for a fun in between project. You already made a nice start. I will follow this with interest.
Jelger
On the workbench:
- Tamiya P-47D 1/48
- Eduard Mig21 1/144
Germany
Joined: September 07, 2005
KitMaker: 5,609 posts
AeroScale: 5,231 posts
Posted: Friday, April 29, 2016 - 02:53 PM UTC
Thank you Oliver and Jelger,
well, this is just to get some model building time. I waited for some Eduad Bf 109G-6 overtress for a G-4 kitbash (actually two) so I started this. It is a small aircraft and the addons do not require major surgery on the kit.
I airbrushed the cockpit today with a lightened Neutral grey I am not after total accuracy but just want to make it look o.k. Still I need to find a picture of the original pit to detail paint the side panels.
BUT I can learn something new here .. glossy finish without making it look like a toy. Not sure I can cope with that
all the best
Steffen
P.S. @Oliver: I am a slow builder but I like to "build" models, painting (and decalling) always costs me some effort to start (mostly cockpit but also whole camo or deco scheme) so I start a lot more than I finsh .. ask Rowan about this disease

DULCE ET DECORUM EST PRO HOBBY MORI
Noord-Holland, Netherlands
Joined: January 28, 2007
KitMaker: 1,945 posts
AeroScale: 388 posts
Posted: Saturday, April 30, 2016 - 01:12 AM UTC
Dear Steffen,
For the finish you may check the car building forums for any help. I have a Airfix RAF benevolent fund bae Hawk in 1/72 scale and I am looking for something similar, but then black.
Jelger
On the workbench:
- Tamiya P-47D 1/48
- Eduard Mig21 1/144
Germany
Joined: September 07, 2005
KitMaker: 5,609 posts
AeroScale: 5,231 posts
Posted: Saturday, April 30, 2016 - 01:23 AM UTC
Cheers Jelger,
I already have some paint from Hiroboy in my hobby desk, but I have never tried it so far. I think fo starters I will just try the 1K Clear cote .. but I also have the 2K stuff (which is actually 3 or 4 components).
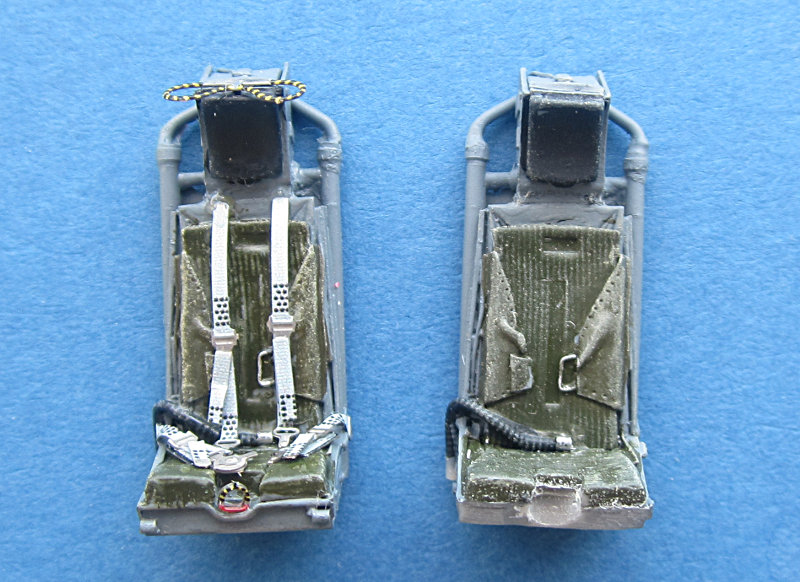
Tomorrow I will post some more pix. As I wrote in my initial post I focus on building it and not taking photos. The pit turned out o.k. and the instrument panels are really nice. Still working on the ejection seats, but I just have to add the seat belts now.
all the best
Steffen
DULCE ET DECORUM EST PRO HOBBY MORI
Germany
Joined: September 07, 2005
KitMaker: 5,609 posts
AeroScale: 5,231 posts
Posted: Saturday, April 30, 2016 - 03:36 PM UTC
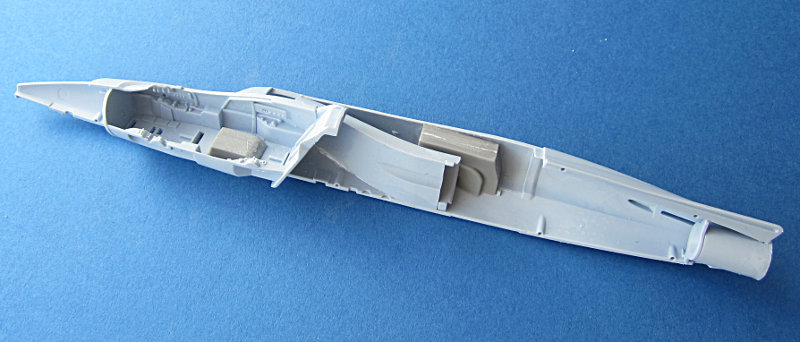
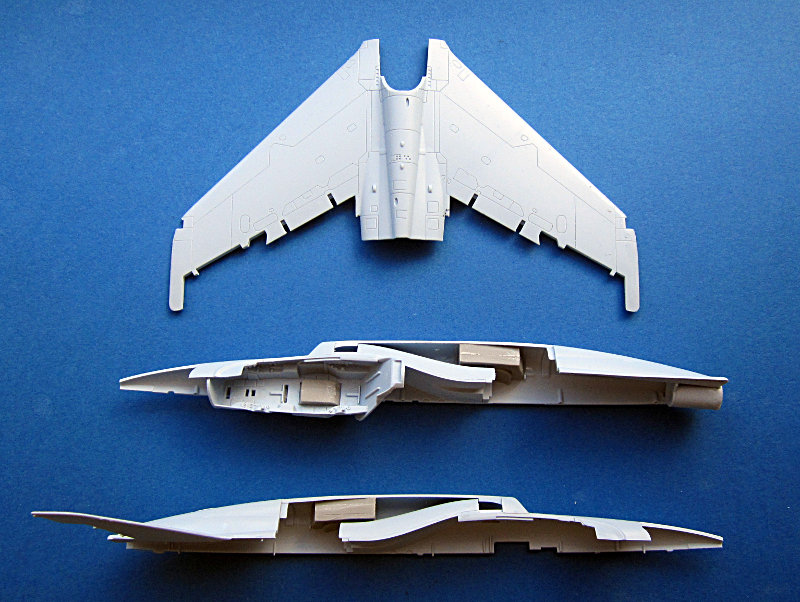
Here are the promised pictures:
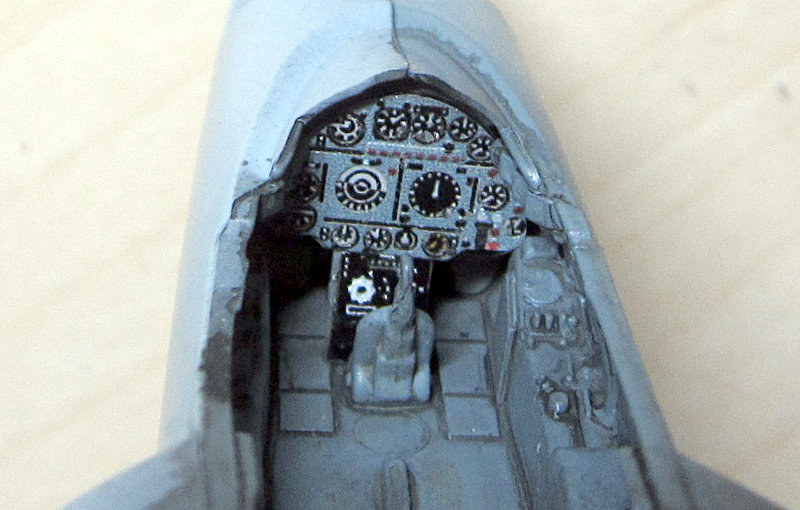
I have added a few black and silver details, but the Gnat cockpit seems to be rather dull with very little colour in it. I did add some red spots though. In the end you will see very little of it especially as I keep the canopy closed.

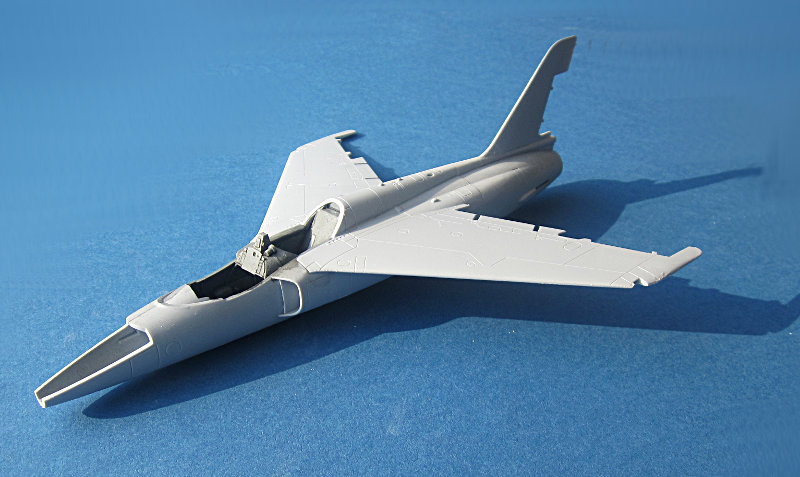
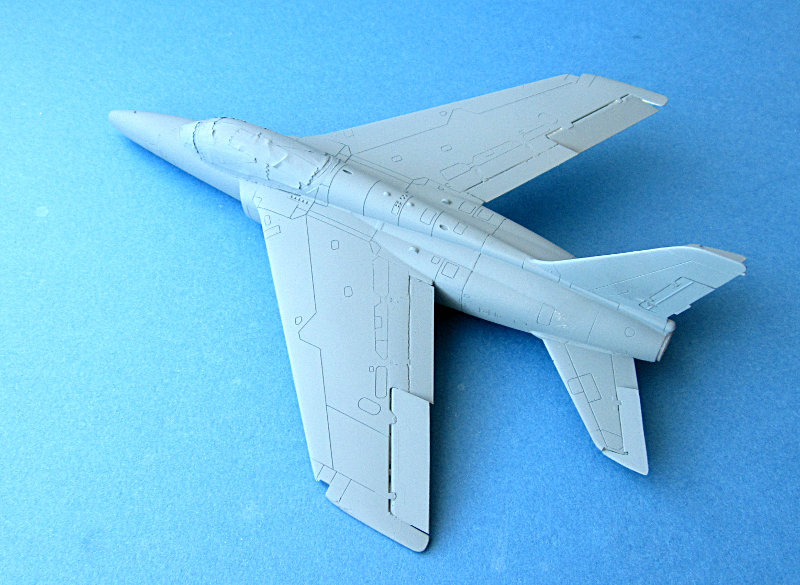
As you can see I glued wings and fuselage together and started to work on the seams. The bow compartement will get some lead shot and will also be closed.
all the best
Steffen
DULCE ET DECORUM EST PRO HOBBY MORI
Germany
Joined: September 07, 2005
KitMaker: 5,609 posts
AeroScale: 5,231 posts
Posted: Wednesday, May 04, 2016 - 03:51 PM UTC
Hi again,
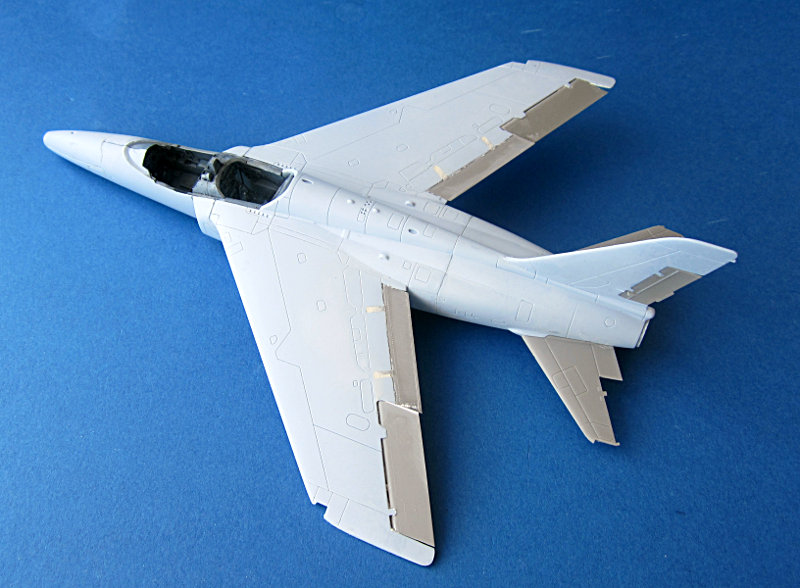
I have put in the lead shot and closed the nose. Some sanding was required but all in all the fit was good. Then I moved on to the controls. The flaps are designed for down position so I had to do some adjustments (still not fully happy with it), the ailerons were o.k and I really like the sharp rear edge. Same with the rudder. And finally I added the elevator fins. Fit was perfect here an I hope the steering surfaces will fit equally good.
And then I proceeded with the seats. the rear needed some sanding to fit into the pit. Probably a bit of misalignement when I added the stick to the front wheel bay upper side (no aligment help here). Finally I started to add the seat belts. Front seat is done and it looks the part .. just a dark wash and it can be put in...
all the best
Steffen
DULCE ET DECORUM EST PRO HOBBY MORI
Nordrhein-Westfalen, Germany
Joined: March 22, 2015
KitMaker: 671 posts
AeroScale: 614 posts
Posted: Wednesday, May 04, 2016 - 07:51 PM UTC
Quoted Text
P.S. @Oliver: I am a slow builder but I like "build" models, painting (and decalling) always costs me some effort to start (mostly cockpit but also whole camo or deco scheme) so I start a lot more than I finsh .. ask Rowan about this disease
Hi Steffen,
I won´t call it a disease. I can only build one model at a time, hence my disease is "serial-building" of kits. No multi-tasking ability

.
I like the progress on Your Arrow very much. Looking forward to see more of this!
Oliver
On the desk: Probably a Panzer III.
Germany
Joined: September 07, 2005
KitMaker: 5,609 posts
AeroScale: 5,231 posts
Posted: Wednesday, May 04, 2016 - 11:11 PM UTC
Cheers Oliver,
well, suum cuique .. in the end it is all about having fun. I do not want to get stuck with a project and having nothing to build .. thus some projects are delayed or procrastinated, but IF I want to do something I have a project that I can start or proceed at any stage of the build.
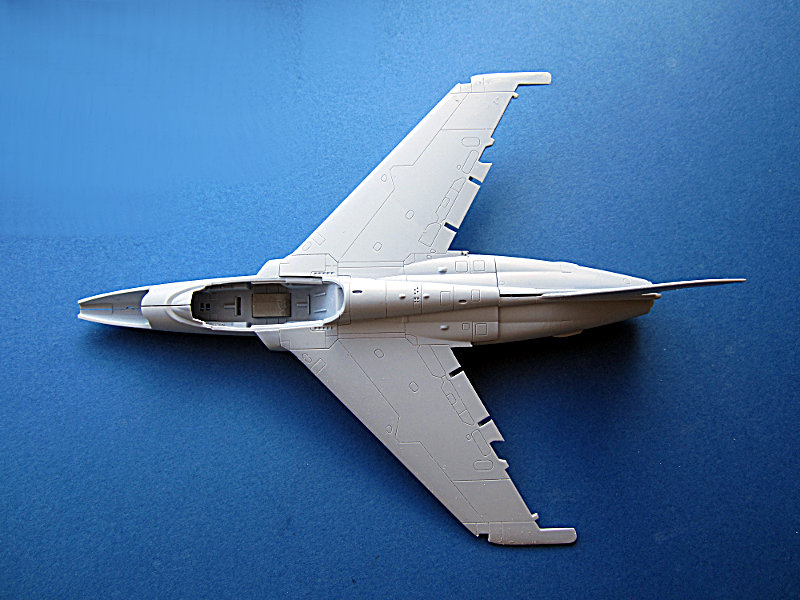
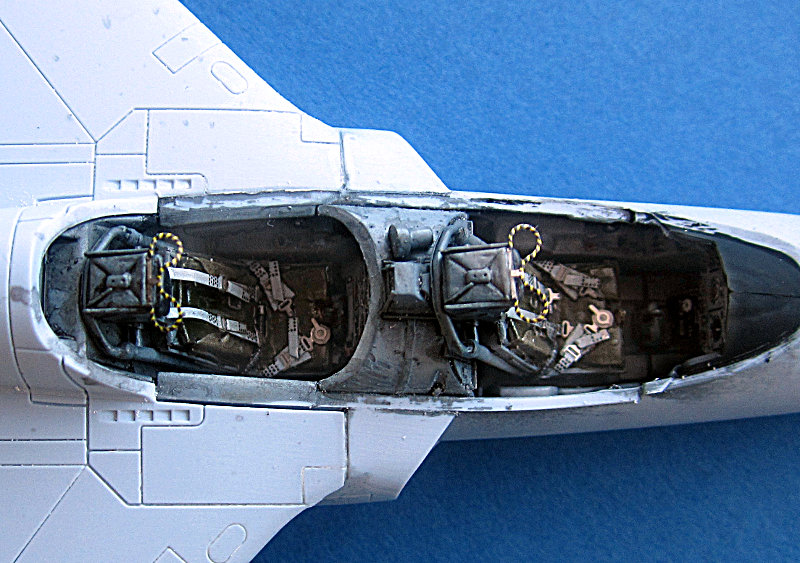
Here is the pit with the seats installed. next are the clear parts and i have to sand a bit here and there
all the best
Steffen
DULCE ET DECORUM EST PRO HOBBY MORI
Scotland, United Kingdom
Joined: May 11, 2015
KitMaker: 768 posts
AeroScale: 656 posts
Posted: Thursday, May 05, 2016 - 02:50 AM UTC
The pit looks great Steffen, those seatbelts and eject handles are really eye-catching. I don't envy you the task of getting a high gloss red though. Are you painting gloss or thinking of a gloss clear coat?
Pax & Pallets: Revell 1/48 Dakota
Terrible Teens : Revell 1/48 F15E Strike Eagle
Airfix IV : Airfix 1.72 Vulcan
Germany
Joined: September 07, 2005
KitMaker: 5,609 posts
AeroScale: 5,231 posts
Posted: Thursday, May 05, 2016 - 06:25 PM UTC
Thanks Paul!
I will paint it grey (cockpit), white base cote, red and the gloss finish. I may have to polish the last and add another layer .. but I will see.
Slow progress. I wanted to be this far yesterday: Canopy closed, all resin parts attached (except u/c)


Some spots had to be filled and sanded. Probably a bit more work when the primer is on.
all the best
Steffen
DULCE ET DECORUM EST PRO HOBBY MORI
Nordrhein-Westfalen, Germany
Joined: March 22, 2015
KitMaker: 671 posts
AeroScale: 614 posts
Posted: Thursday, May 05, 2016 - 11:22 PM UTC
Hello Steffen,
ita est
. Your pit looks great and the canopy glass seems to be chrystal shining, so most of the lovely detail will be visible after closing.
Oliver
On the desk: Probably a Panzer III.
Germany
Joined: September 07, 2005
KitMaker: 5,609 posts
AeroScale: 5,231 posts
Posted: Friday, May 06, 2016 - 07:14 PM UTC
Well, we'll see Oliver.
I masked the canopy and added a bit of filler ... hope this did not harm the clear canopy. A bit of sanding - respraying - sanding - respraying - sand... you get the picture. Now it has the Neutral grey primimg coat on and looks quite good.
I will add several antenas now as thes will be red and difficult to add later when the paint would have clogged their mounting holes. I expect some of them to break but we will see.
all the best
Steffen
DULCE ET DECORUM EST PRO HOBBY MORI
Merlin
 Senior Editor
#017
United Kingdom
Joined: June 11, 2003
KitMaker: 17,582 posts
AeroScale: 12,795 posts
Posted: Saturday, May 07, 2016 - 01:14 AM UTC
Nice one Steffen
It's looking great! I used Airfix's recommended Humbrol enamel, and it was probably the gloopiest paint I've ever encountered. It was OK once it was thinned massively, but it was so thick in the pot I could hardly stir it!

All the best
Rowan

BEWARE OF THE FEW...
As I grow older, I regret to say that a detestable habit of thinking seems to be getting a hold of me. - H. Rider Haggard
Germany
Joined: September 07, 2005
KitMaker: 5,609 posts
AeroScale: 5,231 posts
Posted: Saturday, May 07, 2016 - 10:39 AM UTC
Cheers Rowan,
well, you know I prefer acrylics so I will definitely use something different. First try will be AKAN Red .. I got plenty of this in several sets and it is a rather warm red tone so it should fit. If I do not like it there is still Revell Ferrari red... but thanks for the heads up!
all the best
Steffen
DULCE ET DECORUM EST PRO HOBBY MORI
Germany
Joined: September 07, 2005
KitMaker: 5,609 posts
AeroScale: 5,231 posts
Posted: Sunday, May 08, 2016 - 02:12 AM UTC
So the white primer is on.
I used Hiroboy paint which sprayed very well, but was a bit too smooth for the following red layer to bite, so I had to spray that twice (no pic yet)

all the best
Steffen
DULCE ET DECORUM EST PRO HOBBY MORI
Germany
Joined: September 07, 2005
KitMaker: 5,609 posts
AeroScale: 5,231 posts
Posted: Sunday, May 08, 2016 - 10:58 PM UTC
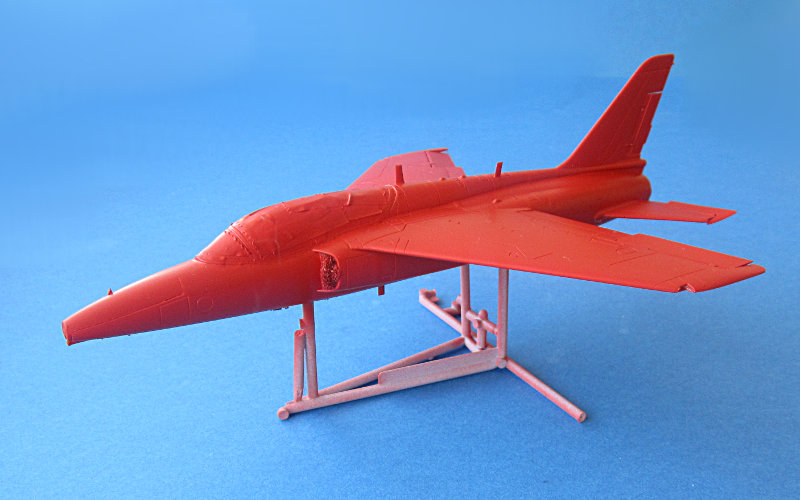
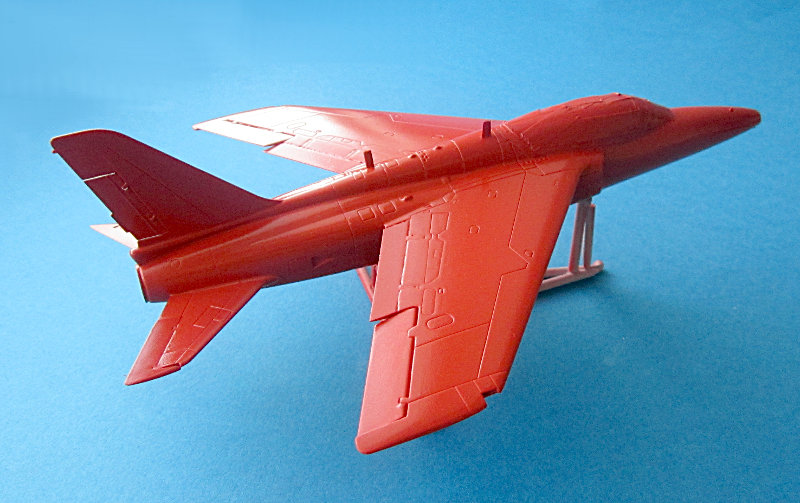
It is RED
cheers
Steffen
DULCE ET DECORUM EST PRO HOBBY MORI
Merlin
Senior Editor #017
United Kingdom
Joined: June 11, 2003
KitMaker: 17,582 posts
AeroScale: 12,795 posts
Posted: Monday, May 09, 2016 - 12:47 AM UTC
Quoted Text
It is RED
cheers
Steffen
Hi Steffen
It certainly is!

I like the neat paint stand you've built from sprue - very nifty. I'll nick that idea.
All the best
Rowan
BEWARE OF THE FEW...
As I grow older, I regret to say that a detestable habit of thinking seems to be getting a hold of me. - H. Rider Haggard
Germany
Joined: September 07, 2005
KitMaker: 5,609 posts
AeroScale: 5,231 posts
Posted: Monday, May 09, 2016 - 10:26 PM UTC
Hi Rowan,
well, I would not call it paint stand. It is more or less a rest where I can put the model, especially as the wheel bays are filled with plastic foam (the packing material from Eduards Brassin kits). The kit rests well, but you cannot spray e.g. the wings as the wheel base is too narrow for a safe stand...
all the best
Steffen
DULCE ET DECORUM EST PRO HOBBY MORI
Germany
Joined: September 07, 2005
KitMaker: 5,609 posts
AeroScale: 5,231 posts
Posted: Wednesday, May 11, 2016 - 12:25 AM UTC
I have gloss coated the model today in preparation for the decals. I just used Klear
won't be before the weekend that I can proceed..
all the best
Steffen
DULCE ET DECORUM EST PRO HOBBY MORI
Germany
Joined: September 07, 2005
KitMaker: 5,609 posts
AeroScale: 5,231 posts
Posted: Saturday, May 14, 2016 - 02:35 PM UTC
Hi again
Yesterday I started to apply decals. There are not that many of these but I have to be very careful not to ruin one when applying the next.
So I only do a few at one session and let it dry afterwards plus avoiding to to those close to each other (e.g. other side of the wing) at one day .. thus it takes a while
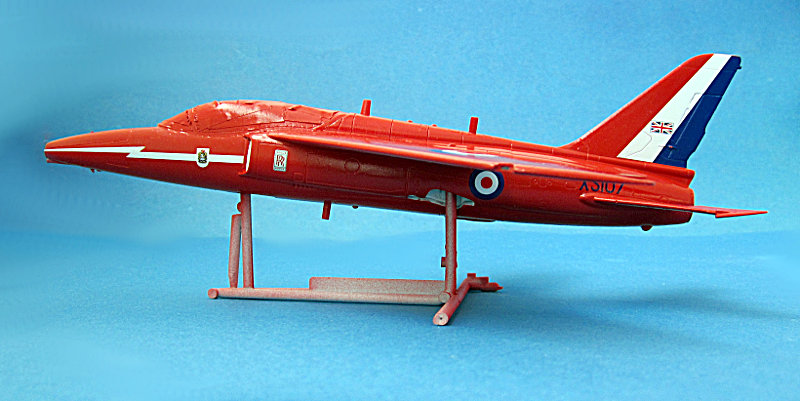
as in most cases I started with the larger markings. Some touch ups will be necessary which will be interesting on the "violet" (fin flash).
all the best
Steffen
DULCE ET DECORUM EST PRO HOBBY MORI
Joel_W
Associate Editor New York, United States
Joined: December 04, 2010
KitMaker: 11,666 posts
AeroScale: 7,410 posts
Posted: Sunday, May 15, 2016 - 06:48 PM UTC
Steffen,
I've been more off then on the forums as of late, and missed the start of this build blog. I must say that you're really "flying" through this build. A little more then 2 wks time from start to paint and decaling stages. It takes me that long just to get started on some build projects.
I really like how your duel seat pit turned out. those seats with the pull handles, shoulder harnesses, and lap belts, really make a huge difference.
Joel
On my Workbench:
Monogram 1/24 scale 427 Shelby Cobra
Just Completed:
Beemax 1/24 scale BMW M3 E30 1992 Evolution II
Germany
Joined: September 07, 2005
KitMaker: 5,609 posts
AeroScale: 5,231 posts
Posted: Sunday, May 15, 2016 - 08:27 PM UTC
Thanks Joel!
Well, faster is always possible, but i do not want to ruin it, even if it is only a fun build. I take my time with the decals and add only a few at a time. No progress picture as the kit is really not that much different fronm last picture.
all the best
Steffen
DULCE ET DECORUM EST PRO HOBBY MORI


