_GOTOBOTTOM
World War II: USA
Aircraft of the United States in WWII.
Hosted by Rowan Baylis
Airfix 1/72 scale Curtiss Hawk AVG
Holdfast
Staff MemberPresident
IPMS-UK KITMAKER BRANCH
#056
_VISITCOMMUNITY
England - South West, United Kingdom
Joined: September 30, 2002
KitMaker: 8,581 posts
AeroScale: 4,913 posts
Posted: Wednesday, June 29, 2016 - 03:51 PM UTC
I am building the Airfix 1/72 scale Curtiss Hawk. As I used it to confirm the fit of my camouflage masks it seems wrong not to finish the model, particularly as its so nice
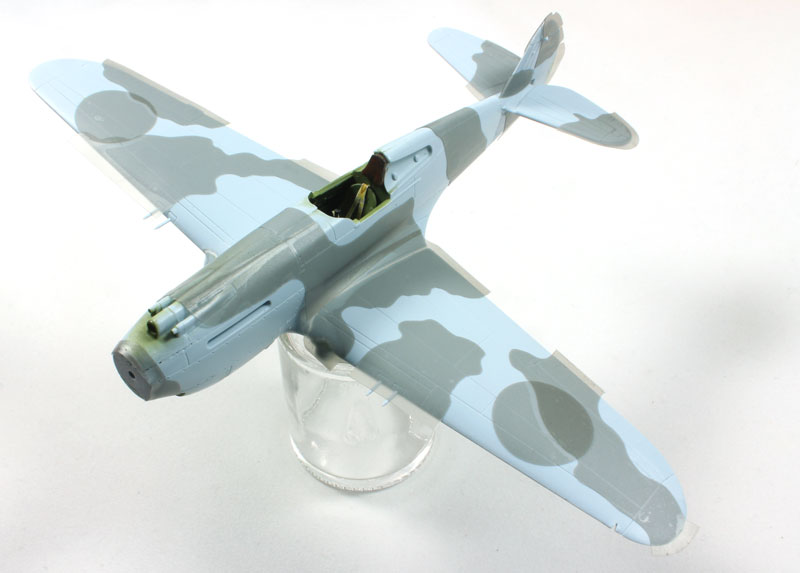
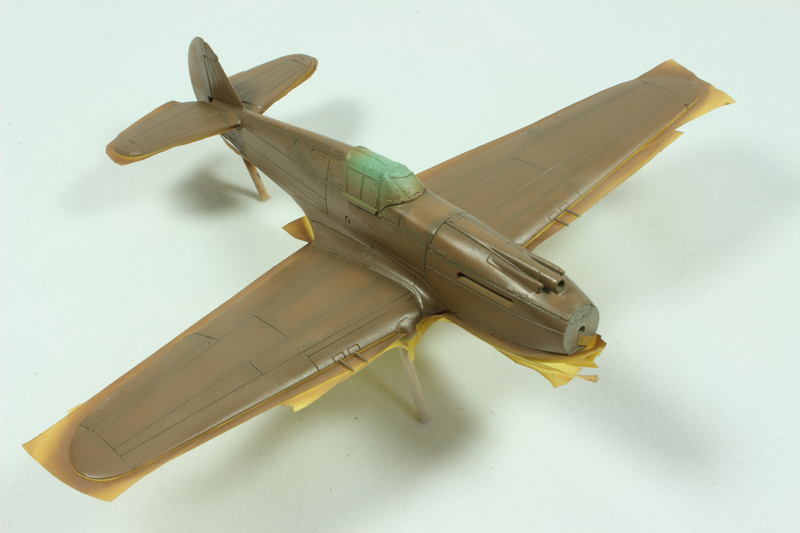
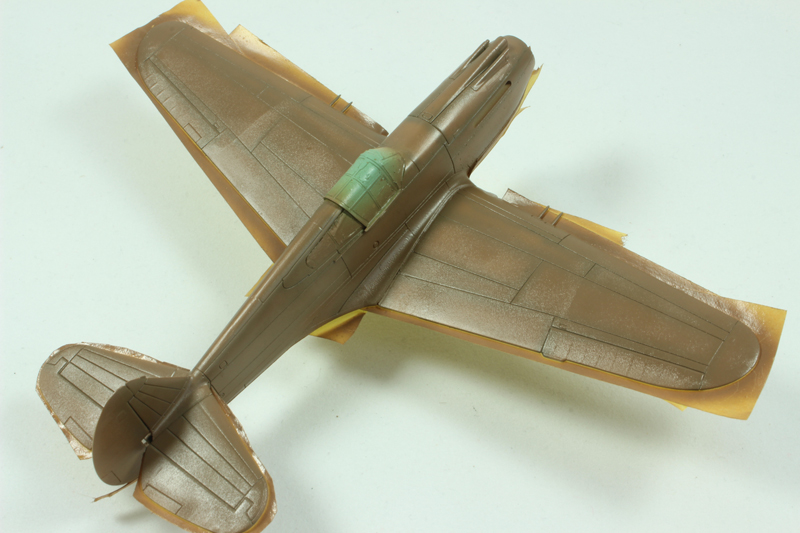
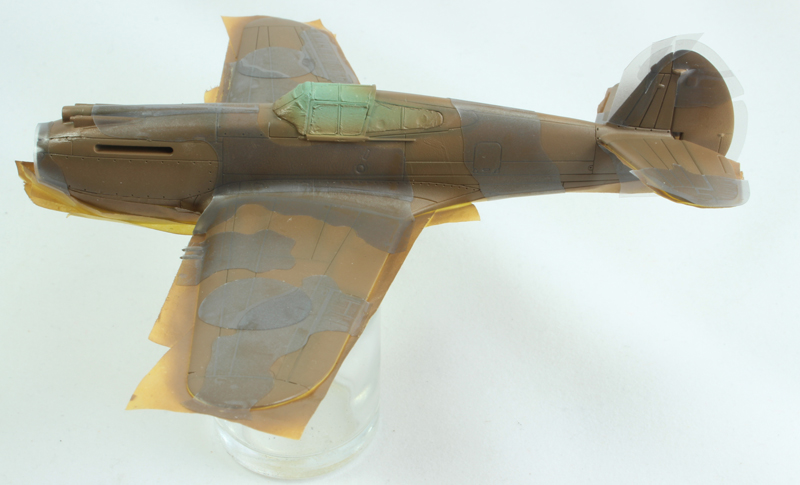
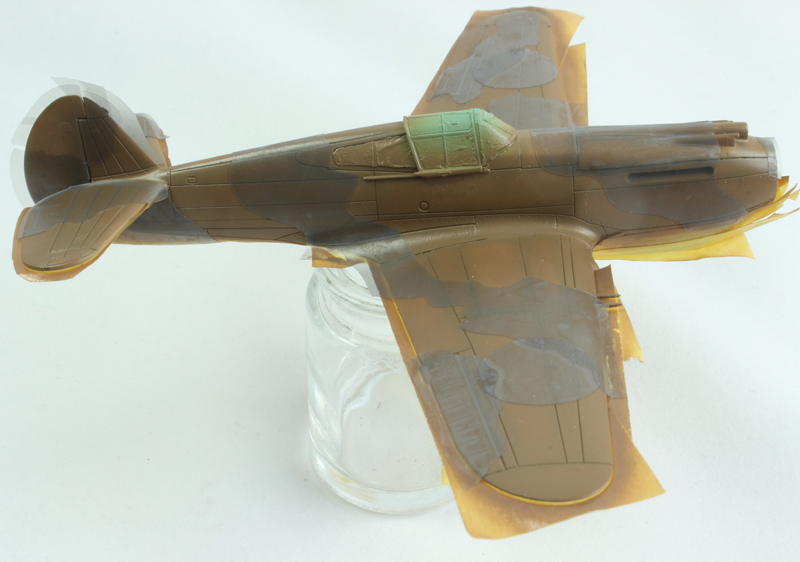
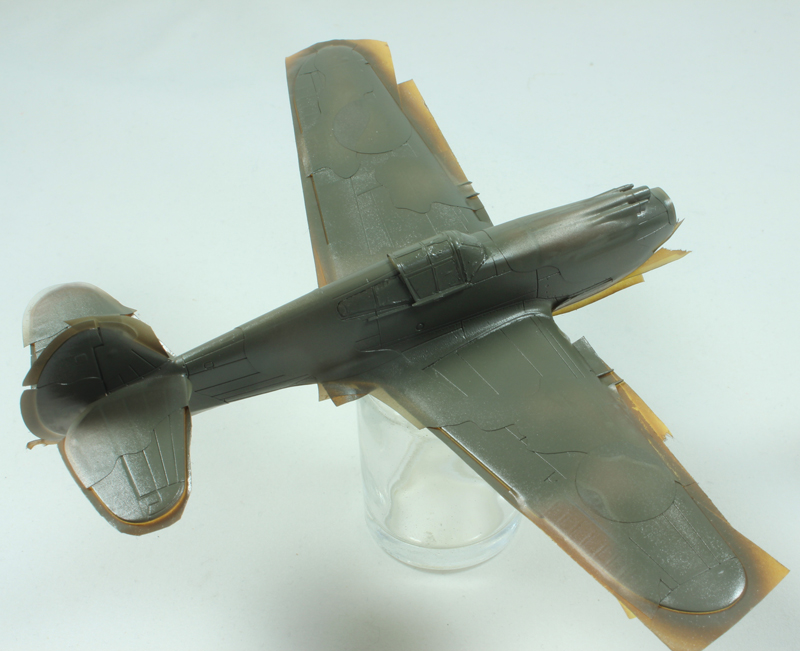
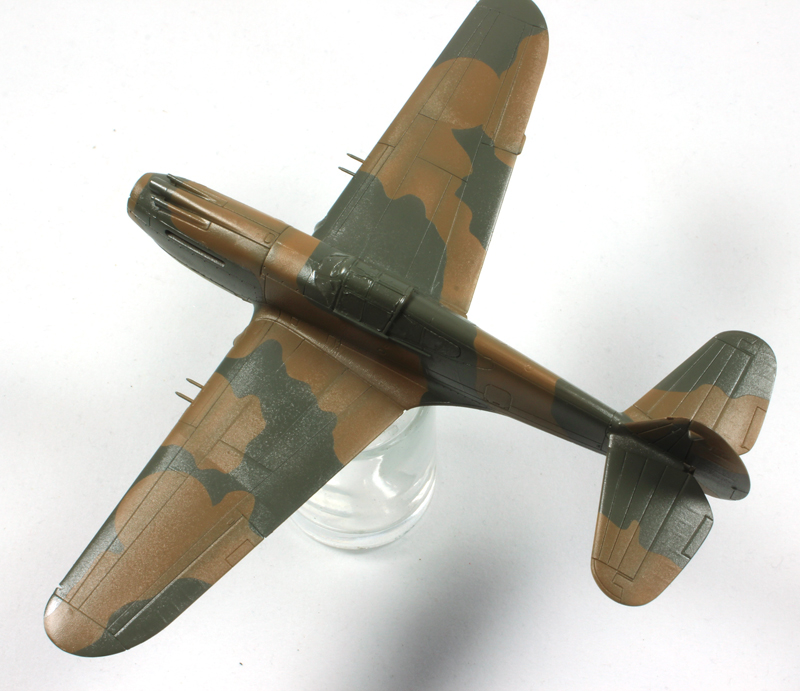
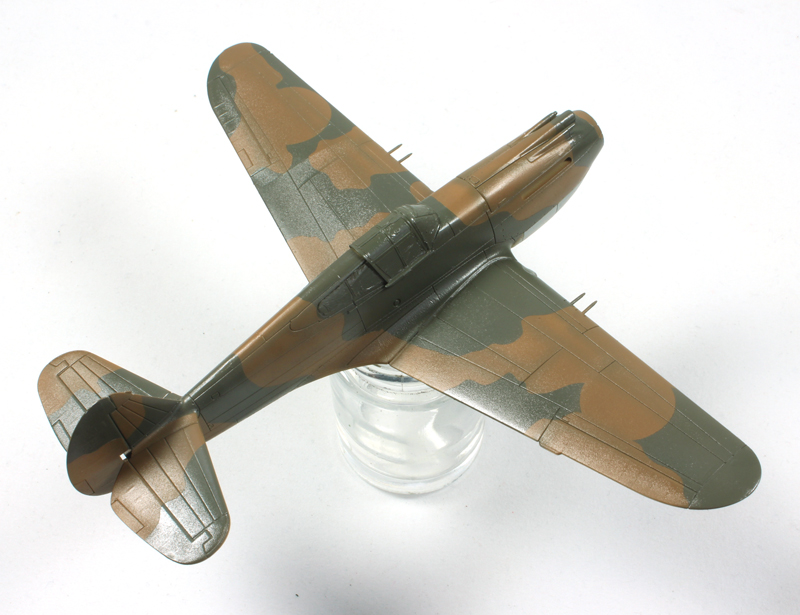
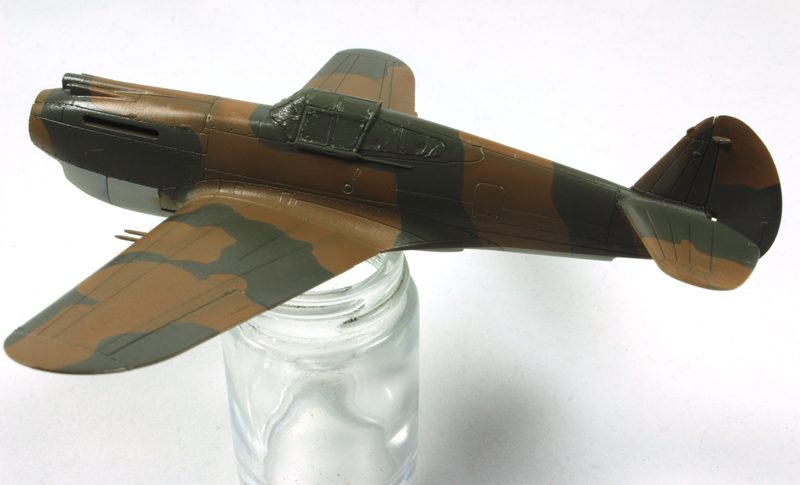
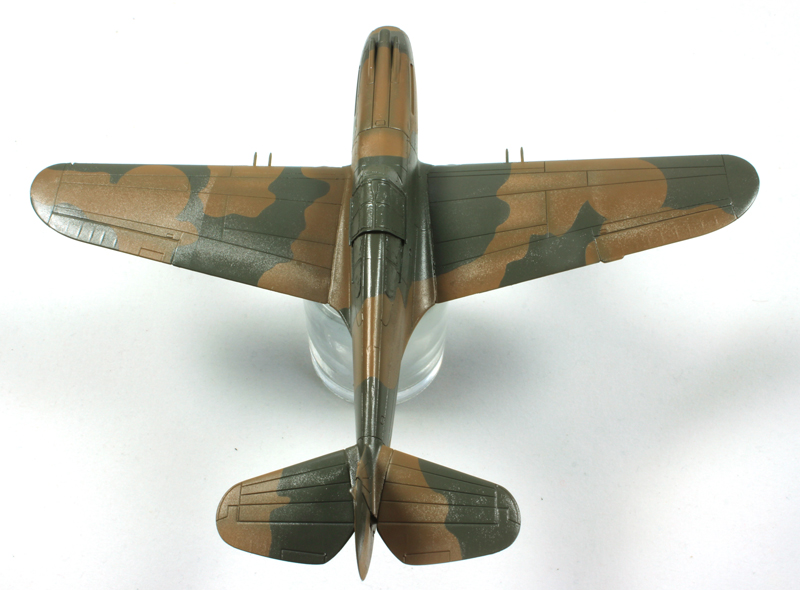
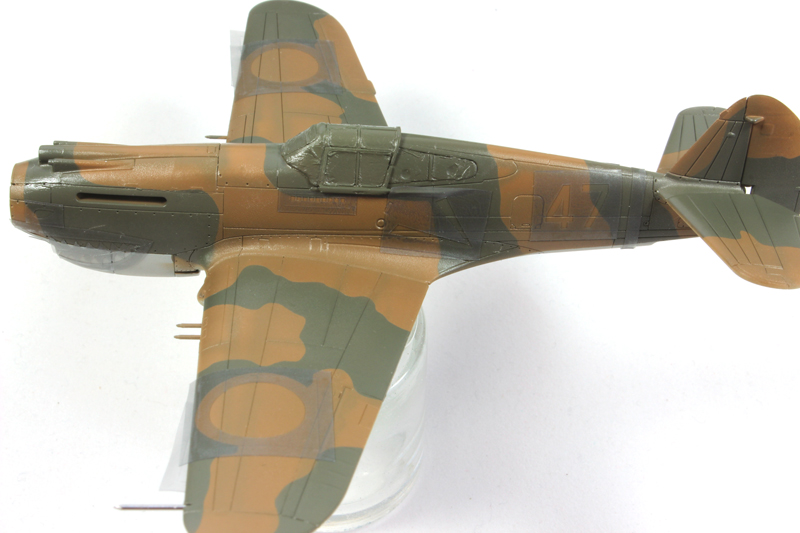
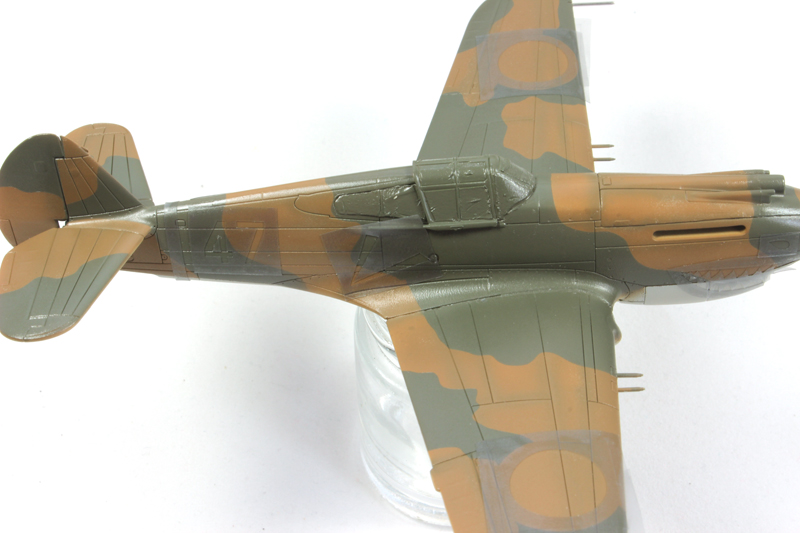
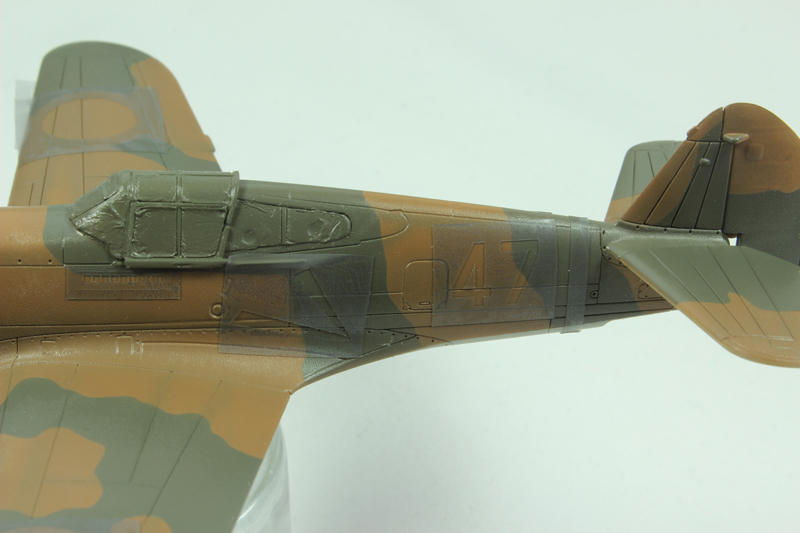
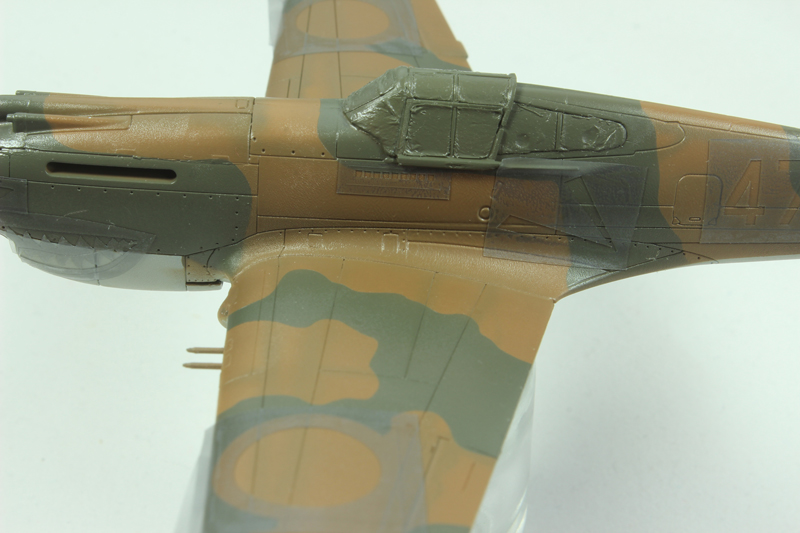
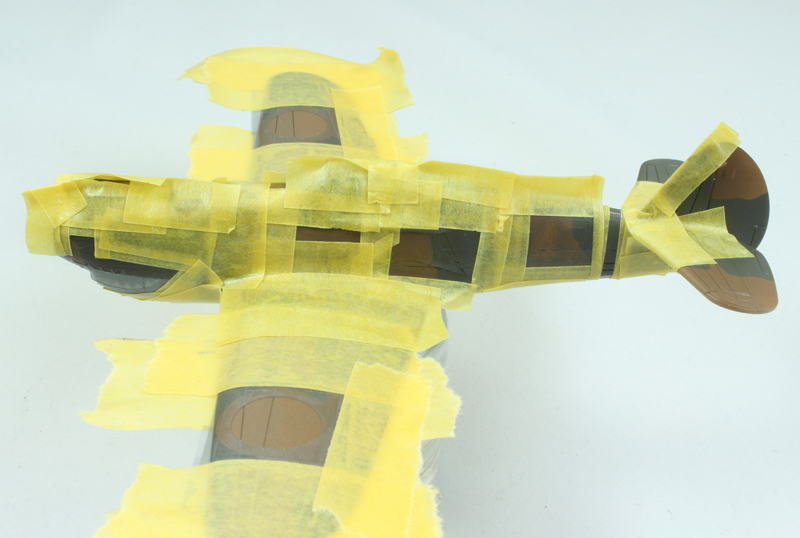
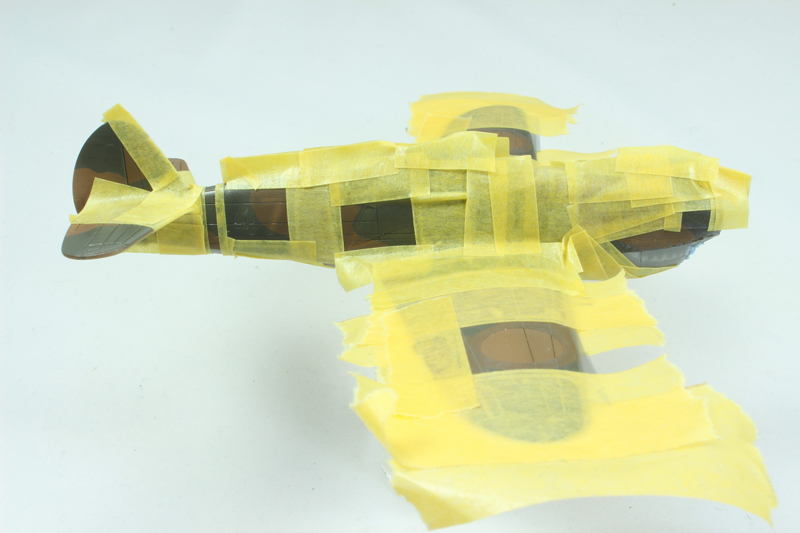
The unpainted photos show the test fitting of the masks. The rest are the sequence and the result. The under surface was painted and masked off, then the upper surface was painted in dark earth (MR Paint). This is over a white primer pre-shded in black. The masks were applied and then dark green (MR Paint) was applied, then the masks were removed. I am building ship "47" of the AVG and the camo on the tails of these machines seems to be slightly different depending on the air frame. The mask set includes masks that can be applied or left off to replicate this but they don't cover all instances. To that end there is a small blank piece of material. I used this to produce the tail pattern for this aircraft. The set also includes blanks to mask out where the RAF roundels were painted out.


KelticKnot
_VISITCOMMUNITY
Scotland, United Kingdom
Joined: May 11, 2015
KitMaker: 768 posts
AeroScale: 656 posts
Posted: Wednesday, June 29, 2016 - 08:08 PM UTC
Your masks certainly result in a neat job! I look forward to seeing your roundels and other markings go down.
flypaper
Joined: May 21, 2007
KitMaker: 51 posts
AeroScale: 49 posts
Posted: Wednesday, June 29, 2016 - 10:51 PM UTC
RAF roundels were not painted out, they were large peel and stick decals that were shipped with the aircraft and discarded. The circle area on the wings were masked that way in Buffalo where the a/c were built.
Holdfast
Staff MemberPresident
IPMS-UK KITMAKER BRANCH
#056
_VISITCOMMUNITY
England - South West, United Kingdom
Joined: September 30, 2002
KitMaker: 8,581 posts
AeroScale: 4,913 posts
Posted: Thursday, June 30, 2016 - 11:18 AM UTC

Quoted Text

Your masks certainly result in a neat job! I look forward to seeing your roundels and other markings go down.


Thanks Paul, so do I!


Quoted Text

RAF roundels were not painted out, they were large peel and stick decals that were shipped with the aircraft and discarded. The circle area on the wings were masked that way in Buffalo where the a/c were built.


Interesting, I would be very interested if you could point me to a reference for that?
flypaper
Joined: May 21, 2007
KitMaker: 51 posts
AeroScale: 49 posts
Posted: Thursday, June 30, 2016 - 08:51 PM UTC

Quoted Text


Quoted Text

Your masks certainly result in a neat job! I look forward to seeing your roundels and other markings go down.


Thanks Paul, so do I!


Quoted Text

RAF roundels were not painted out, they were large peel and stick decals that were shipped with the aircraft and discarded. The circle area on the wings were masked that way in Buffalo where the a/c were built.


Interesting, I would be very interested if you could point me to a reference for that?


Several of MR. D.Bell articles on camo and markings mention it
Holdfast
Staff MemberPresident
IPMS-UK KITMAKER BRANCH
#056
_VISITCOMMUNITY
England - South West, United Kingdom
Joined: September 30, 2002
KitMaker: 8,581 posts
AeroScale: 4,913 posts
Posted: Friday, July 01, 2016 - 10:33 AM UTC

Quoted Text

Several of MR. D.Bell articles on camo and markings mention it


OK, thanks for that, can you give me a specific reference for the Curtiss Hawk, that Mr D Bell has written please, as searches haven't come up with anything? When I change my instructions I will need to quote the reference, thank you
Joel_W
Staff MemberAssociate Editor
AUTOMODELER
_VISITCOMMUNITY
New York, United States
Joined: December 04, 2010
KitMaker: 11,666 posts
AeroScale: 7,410 posts
Posted: Saturday, July 02, 2016 - 03:52 AM UTC
Mal,
Now that's an impressive 1/72 camo paint scheme. Not a single error from where I'm sitting. Could have easily passed for a 1/48 scale build if you didn't mention the scale.
Joel
Holdfast
Staff MemberPresident
IPMS-UK KITMAKER BRANCH
#056
_VISITCOMMUNITY
England - South West, United Kingdom
Joined: September 30, 2002
KitMaker: 8,581 posts
AeroScale: 4,913 posts
Posted: Saturday, July 02, 2016 - 11:38 AM UTC
Thanks Joel, very easy to do when using Miracle Paint Masks

There are a couple of places that need touching up, the cowling to wing line has a little over spray, no sweat and the very tips of the undercarriage bay forward bulges need a bit of neatening up, again no biggy. The wings are too thin on their leading edge to mask a line, so I masked the underside flat and then used the forward curve of the wing to do the masking for me. If I had sprayed to the very tip of the bulge I would have risked getting over spray on the wing edge.
I'm just finishing off masking around the Miracle Masks which I have applied for the markings. I will update assuming that the painting of them goes well!
Holdfast
Staff MemberPresident
IPMS-UK KITMAKER BRANCH
#056
_VISITCOMMUNITY
England - South West, United Kingdom
Joined: September 30, 2002
KitMaker: 8,581 posts
AeroScale: 4,913 posts
Posted: Tuesday, July 05, 2016 - 11:30 AM UTC
Painting the markings:
Masking for the markings is pretty easy (I use Miracle Paint Masks exclusively ) The Chinese roundels on the upper and lower wings and the mask for the 10 kill markings are 2 part masks (more on that later). The first part is transferred to the model, including the positioning box. The "47" is a conventional mask and is transferred and when in position it is weeded, making sure that the centre of the "4" is left behind. The chevron mask is transferred without the use of transfer tape. For the red tail band a scale 6" strip of masking material is positioned around the correct position at the tail. When the Miracle Masks are in position it is then a simple case of masking around them, to prevent over spray. I use "Kip" tape. For the complicated shape of the extreme underside of the nose I used Blue Tack. Next up painting the white


The Miracle Masks are masked around to prevent over spray. Thin strips of tape are positioned alongside the tail band mask then the mask is removed, leaving the area ready for paint.


Joel_W
Staff MemberAssociate Editor
AUTOMODELER
_VISITCOMMUNITY
New York, United States
Joined: December 04, 2010
KitMaker: 11,666 posts
AeroScale: 7,410 posts
Posted: Friday, July 08, 2016 - 02:14 AM UTC
Mal,
What an impressive set of masks, especially the Shark Mouth.
Joel
DanaBell
_VISITCOMMUNITY
Virginia, United States
Joined: December 07, 2015
KitMaker: 9 posts
AeroScale: 9 posts
Posted: Friday, July 08, 2016 - 06:10 PM UTC
OK, thanks for that, can you give me a specific reference for the Curtiss Hawk, that Mr D Bell has written please, as searches haven't come up with anything? When I change my instructions I will need to quote the reference, thank you [/quote]

Hi Holdfast,

The reference to decals comes from the Curtiss factory painting drawings for the P-40E-1. On that aircraft there was a question of who the end-user would be - if there was no clear answer, both US and RAF insignia decals were to be placed in the shipping box, with the appropriate markings applied once the aircraft was erected.

Chinese P-40E-1s could be shipped with the sunburst decals of Curtiss Blue and white.

The earlier Tomahawks may have gone by the same rules, but I've no firm evidence of this - since all Tomahawks were planned for RAF use, they may have all received RAF markings, with the AVG aircraft overpainting the markings in theater. However, the difficulty of finding exactly the same Dark Earth paint would suggest that we should see a slightly different brown where any insignia were overpainted. While I don't see that, you can be the final judge.

Cheers,


Dana
Holdfast
Staff MemberPresident
IPMS-UK KITMAKER BRANCH
#056
_VISITCOMMUNITY
England - South West, United Kingdom
Joined: September 30, 2002
KitMaker: 8,581 posts
AeroScale: 4,913 posts
Posted: Saturday, July 09, 2016 - 11:35 AM UTC
Thanks Joel

Many thanks for replying Dana and that makes very interesting reading. Do any of your books carry the camo pattern diagram? I agree, it would be unlikely that decals were painted over. Do you have the FS number for the "Curtiss Blue"?
Merlin
Staff MemberSenior Editor
AEROSCALE
#017
_VISITCOMMUNITY
United Kingdom
Joined: June 11, 2003
KitMaker: 17,582 posts
AeroScale: 12,795 posts
Posted: Sunday, July 10, 2016 - 02:16 AM UTC
Hi Mal

Nice job as always. Looking at period photos, I reckon the fuselage roundel positions were masked off at the factory too - on one often reproduced AVG colour photo you can see the patchy ghost of the fuselage roundel. As Dana states, it's unlikely that ground crews could have matched the factory finish, so it opens the possibility of it being the remains of a sticker applied and then removed.

All the best

Rowan
Holdfast
Staff MemberPresident
IPMS-UK KITMAKER BRANCH
#056
_VISITCOMMUNITY
England - South West, United Kingdom
Joined: September 30, 2002
KitMaker: 8,581 posts
AeroScale: 4,913 posts
Posted: Sunday, July 10, 2016 - 11:55 AM UTC

Quoted Text

Nice job as always. Looking at period photos, I reckon the fuselage roundel positions were masked off at the factory too - on one often reproduced AVG colour photo you can see the patchy ghost of the fuselage roundel. As Dana states, it's unlikely that ground crews could have matched the factory finish, so it opens the possibility of it being the remains of a sticker applied and then removed.

All the best


Thanks Rowan, I'll try and get the results of the painting posted. Its far easier to post on Face Book, I can post on 5 different pages in minutes!Yep totally agree about matching the colour, but if they were decals (does that mean stickers?)then they would have been removed, rather than being painted over; as doing so that would have given a less than tenuous adhesion of the paint. So the paint under the decals would have, if anything, been a little lighter (possibly) as than the rest of the paint, due to it being protected from any weathering. I guess that there wouldn't be much if any difference?
I'm really glad that Dana was good enough to post as it will enable me to make my instructions even more accurate It gives me a headache fitting the info into the instructions but I am more than happy to
 _GOTOTOP